|
|
Post by wbill76 on Aug 7, 2017 9:22:40 GMT -5
Dierk, just so long as you can tolerate the ohms in the process you should be fine no matter the voltage!  Leon Leon, finish line is definitely in sight now...won't be long! 
|
|
joelsmith
Full Member
  
Member since: July 2012
There no winners in war, only survivors.
Posts: 1,404
Jul 5, 2012 22:33:58 GMT -5
Jul 5, 2012 22:33:58 GMT -5
|
Post by joelsmith on Aug 7, 2017 18:00:27 GMT -5
It's always the last few items that take the most time!
|
|
|
|
Post by wbill76 on Aug 7, 2017 19:20:30 GMT -5
Very true Joel! Today was no different.  More details checked off the to-do list today! I assembled the Arado 196 floatplane and that itself was a little bit of a challenge. The kit provides the entire plane as a clear sprue with the bottom half as a single piece that includes the tail but the top half is further split into two parts. Getting all three to line up and play nice took some work especially since it's not very big, to begin with. I had to check all the join lines with gray paint first and sand/trim/adjust accordingly to get it all in place. Once that was done, I hand painted the plane's scheme using MM enamel RLM 80 Olivgrun and a lighter green mix that I had sitting around on the bench that was close enough for the splinter pattern. The undersides received a coat of MM enamel flat Light Gray. I used a regular brush to apply some Future, added the decals using Solvaset, and a second coat of Future to seal them in. A dose of Lusterless Flat knocked back the gloss. I hand-brushed Future on the canopy insert as well and then hand-painted the frames with Olivgrun, cleaning up excess where needed with a pointed brush and thinner to tighten it all up. I also built up the rest of the catapult with the plane cradle. Interestingly enough, the Trumpeter kit doesn't include an easy way to install the floatplane onto the catapult and the instructions conveniently ignore this as well...there isn't a diagram that ever shows the plane's installation nor does it appear on the final step illustration or on the finishing guide. Still, they did include the plane, so that's something! Fortunately, the Eduard set addresses this perfectly with the cradle. 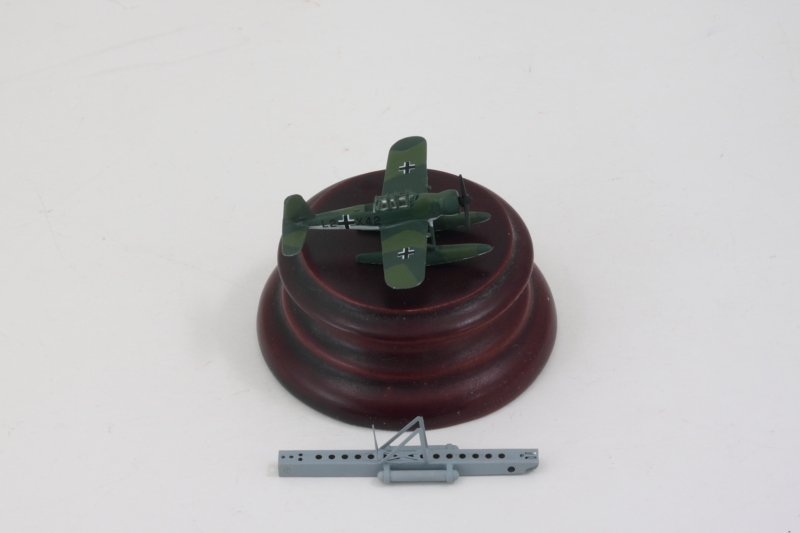 I attached the floatplane to the cradle using CA gel so I could be sure to get it in the right position over the catapult. Once that had set, I used Gator Grip Thin Blend to attach the combined plane and catapult to the superstructure mount. 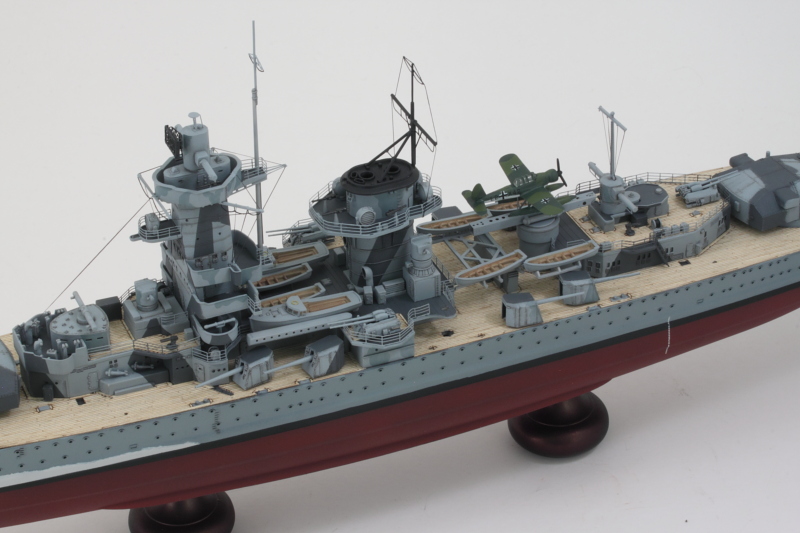 Next up were the two main cranes. These were a bear to get together mostly because the molding on the two halves for the support post portion was less than perfect. I had to use clips to get the halves together and follow that up with sanding and putty to deal with gaps in more than one spot. I added the Eduard PE details for the suspension arm as well as the operator's cage platform. The crane arms snap into place but are very loose and won't hold their position on their own. I used one crane to test fit the correct height/angle in relation to the floatplane and boats and then applied liquid glue to the hinge pins to set it in the right position. The second crane mirrored the first one so that they would form a matching pair. 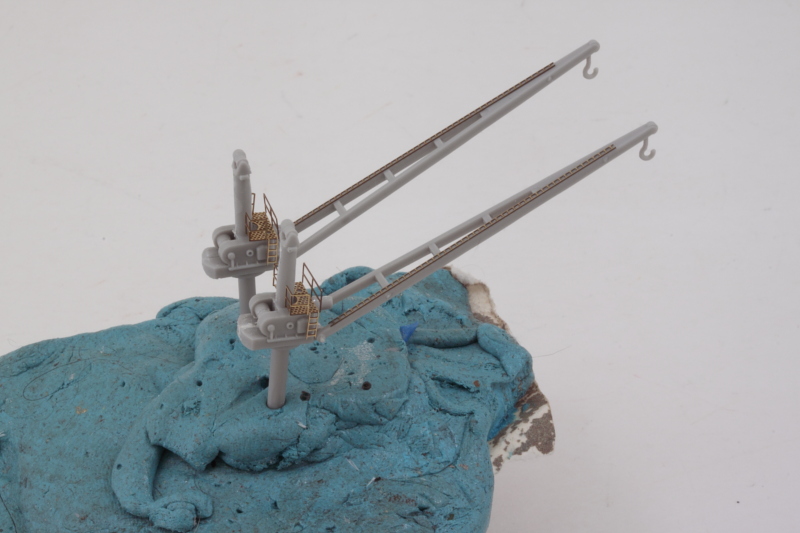 The cranes themselves have different paint patterns depending on which side of the hull they mount to, so I hand painted them accordingly with the Light Ghost Gray and Gunship Gray disruptive pattern. EZ Line provided the suspension cables as well for added detail. 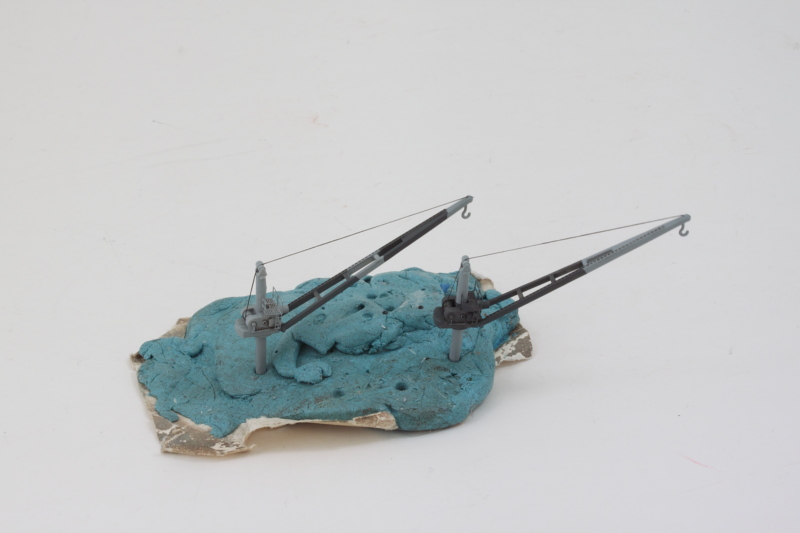 With that done, the cranes took their place alongside the other midship details. They are still movable in the event that I need some room/flexibility when it comes time soon to add the main deck railings in this area. 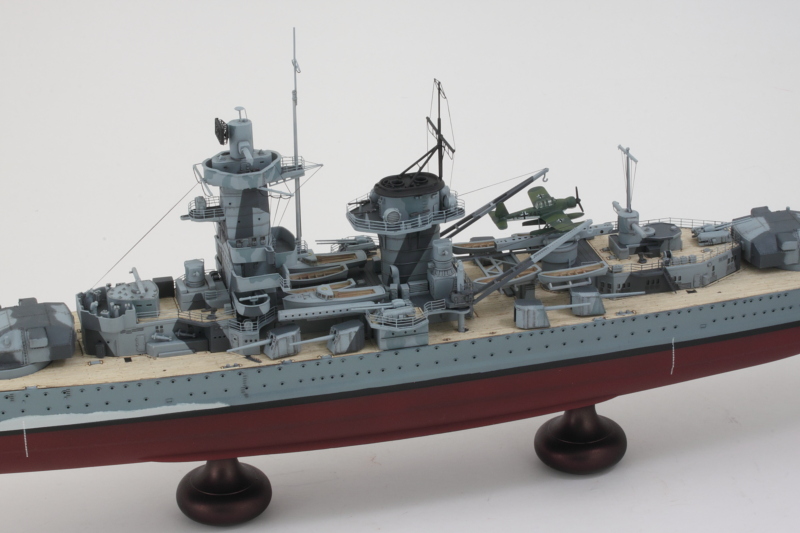 Checklist is getting a lot shorter! |
|
|
|
Post by panzerjager2 on Aug 7, 2017 19:43:46 GMT -5
Awesome work as always..... I just have one question, BUT this question has been haunting my every waking moment..... What do you use as a back drop for you photo's.... as we all know I can't take a good picture if my fricking life depended on it    
PJ2
|
|
|
|
Post by wbill76 on Aug 7, 2017 19:49:05 GMT -5
Thanks PJ! I use a collapsible light tent and the background is just a sheet of white poster board to provide the seamless look behind the model. HTH answer your question!  |
|
|
|
Post by Leon on Aug 8, 2017 4:32:23 GMT -5
Nice work on the plane and cranes Bill!  |
|
|
|
Post by dierk on Aug 8, 2017 4:35:38 GMT -5
Looking good Bill! Points deducted for not making the cranes workable, though  |
|
|
|
Post by wbill76 on Aug 8, 2017 6:38:26 GMT -5
Leon, thanks as always for the comments! Dierk, I admit to being tempted but the whole winch crank issue in this scale proved to be a deal breaker. 
|
|
|
|
Post by wbill76 on Aug 8, 2017 20:01:14 GMT -5
Crossed off some more details today at both the bow and stern. First up, I installed the anchor chains using the fine chain supplied in the Pontos deck set along with the capstans for the bow. I used small amounts of CA to tack down one end of the chain and then stretched it tight, clipping the link where needed with sprue cutters to get the right length for each chain. Another small dot of CA secured the loose end to get the full chain in place. With the chains set, I added the breakwater using regular glue and finger pressure to get it seated properly against the wood deck cut out edges. I also added the small guns around the bow area, a pair of hose reels, and the small secondary breakwaters near the first 6-inch turrets to round things out in this area. 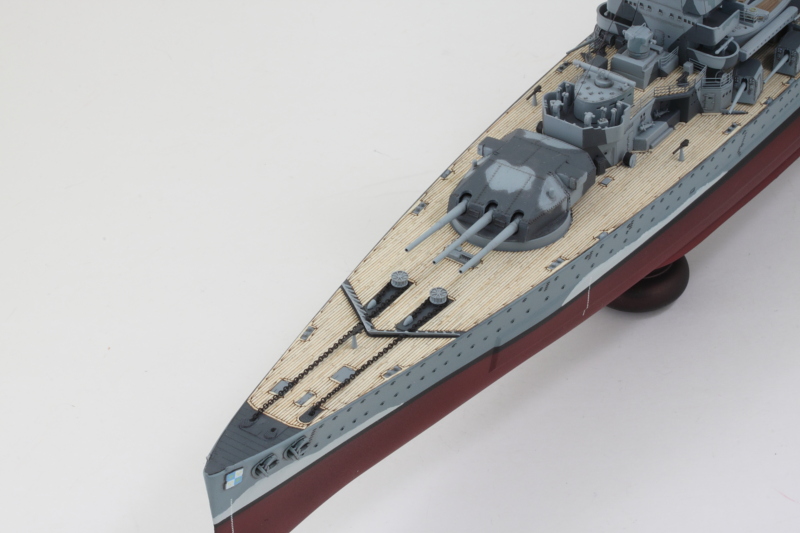 For the stern area, I used the kit-supplied PE eagle emblem. This is a double-thick piece of PE so annealing was a must to be able to curve it properly around the stern. I ended up annealing it more than once in a couple of spots in fact. This had a bonus effect of dulling/aging the shiny PE into a nice bronze-like finish, so no need to paint it. The anchor chain was added using the same process as the bow chains and the stern flagstaff structure was also assembled and installed in place. A pair of hose reels and a small gun rounded things out here as well. 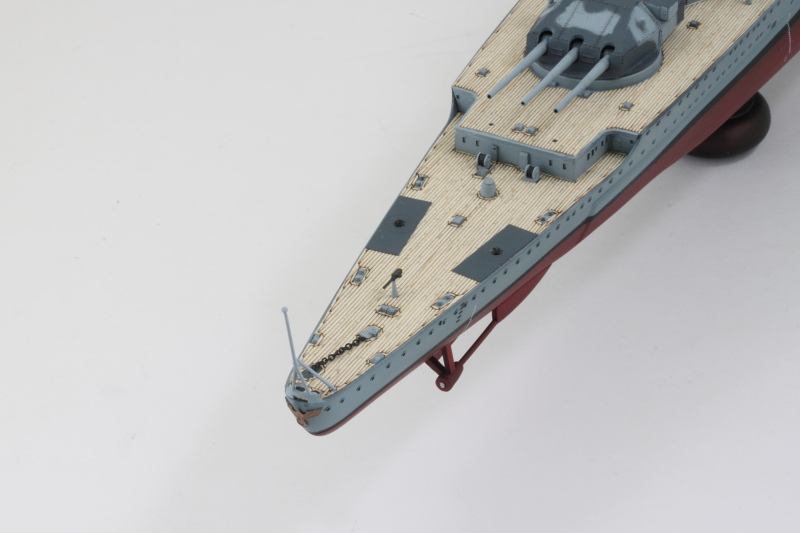 Now it's time to start in on the main deck railing sections and get those squared away as the march to the finish line continues! |
|
M1Carbine
Senior Member
    November '23 Showcased Model Awarded
Member since: November 2012
Posts: 1,730
Nov 16, 2012 2:49:11 GMT -5
Nov 16, 2012 2:49:11 GMT -5
|
Post by M1Carbine on Aug 8, 2017 20:10:29 GMT -5
Looks fanfreakingtastic Bill
Bob
|
|
|
|
Post by wbill76 on Aug 8, 2017 20:15:21 GMT -5
Thanks Bob! It's been a fun summer project for sure!
|
|
|
|
Post by dierk on Aug 9, 2017 3:03:40 GMT -5
Shiptastic! But I stick to my guns: rather you than me  |
|
|
|
Post by wbill76 on Aug 9, 2017 7:18:49 GMT -5
Thanks Dierk, I suppose I will have to accept defeat in trying to convert you to the saltwater for now!  |
|
|
|
Post by wbill76 on Aug 11, 2017 20:51:42 GMT -5
Final lap for the Graf Spee today so this update is substantial! It was finally time to tackle the main deck railings and the Eduard set is superior to the railings that Trumpeter provides in that they are designed to fit specific areas vs just being generic runs that are all the same. The Eduard railings do require some splicing together to make the long forward runs as well as towards the stern to meet up with the curved end deck section above the torpedo deck at the stern. Even with that minor consideration, they were easy to work with in general. I painted up each of the runs separately and then installed them with CA in strategic spots, using the pointed edge of a #11 in some spots to slide in the glue so that they could be gently curved where needed. At the bow, the kit didn't provide a jack staff. The Eduard set includes a PE item for this but is, as you would expect, not 3D, so I used it as a template to create a suitable staff out of styrene rod. I used a heated knife tip to flatten one end of the rod then cut it to the required height. 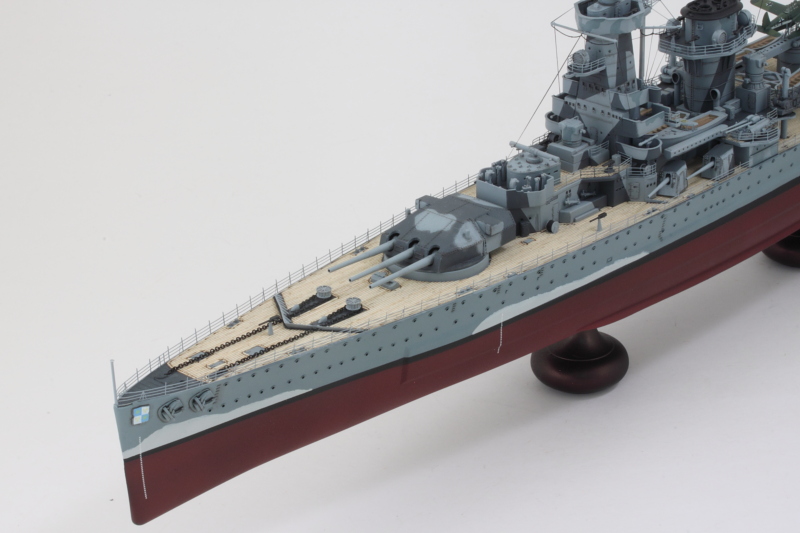 The midships section received its railings along with a pair of small guns once the railings were in place. I'm glad I built in some elevation in the aft 11-inch turret as the barrels were just the right height to clear those installed guns. The cranes were also permanently fixed in position at this stage since I no longer needed to be able to move them around to install stuff. 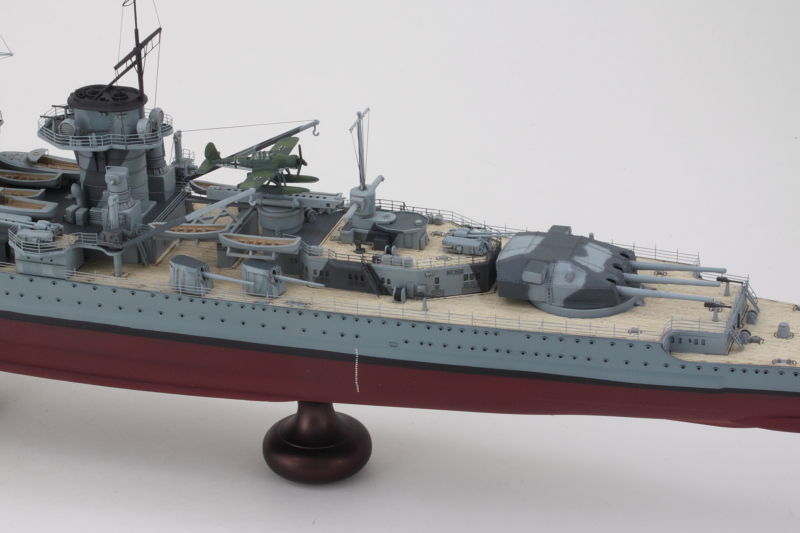 Rounding things out at the stern, I added the torpedo tubes but kept them as a friction fit so I could make small adjustments as needed to allow the railing sections to align properly. The tolerances here are very small, so it was a good thing I did that as both tube mounts needed slightly different amounts of adjustments to line up with the railings. I detailed the propeller shafts with MM Nonbuffing Metalizer Steel and the propellers themselves with Nonbuffing Metalizer Brass and installed the propellers along with the rudder. 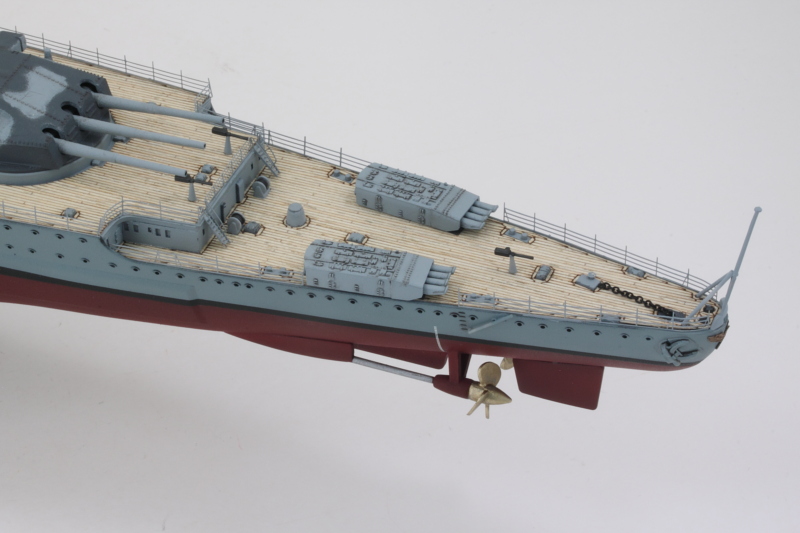 Returning back to the midships section, I had the final tricky task of installing the last two lifeboats and their suspension davits. The kit provides two options, one for the stowed position and one for an extended as if the boats were being launched. I opted for the stowed position davit arms and what made the installation tricky was the delicate attachment points involved along with the very tight space with the railing already in place. I ended up trimming off the first 4 raised post heads on the railing section so that the boat could sit level and allow the davits to install cleanly. Last, but not least, I used the EZ Line and CA combination to run the last pair of rigging lines now that the snag risk had been dealt with. 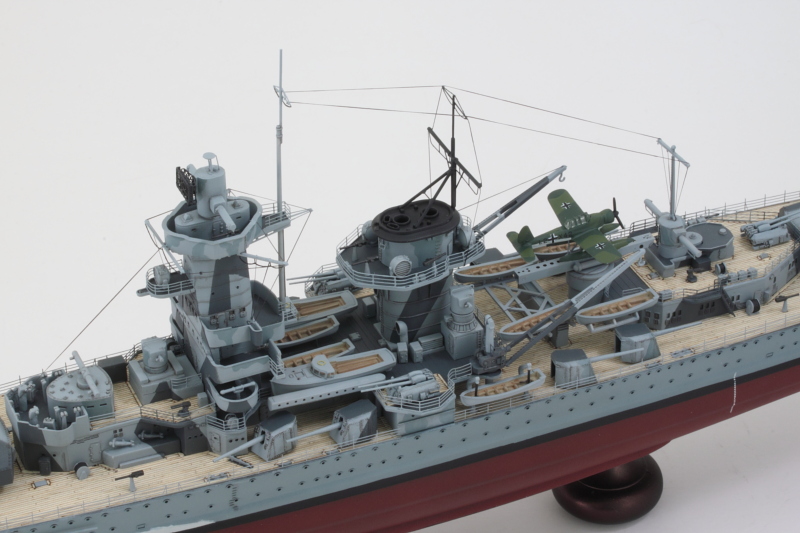 I did an inspection round from stem to stern checking for spots that needed touch-up or showed some gloss/reflection from the CA glue. These were painted if needed and then dulled using Testors Dullcote Lacquer in the bottle and a pointed spotter brush. With that done, I think this one's ready to cruise the high seas looking for easy prey! 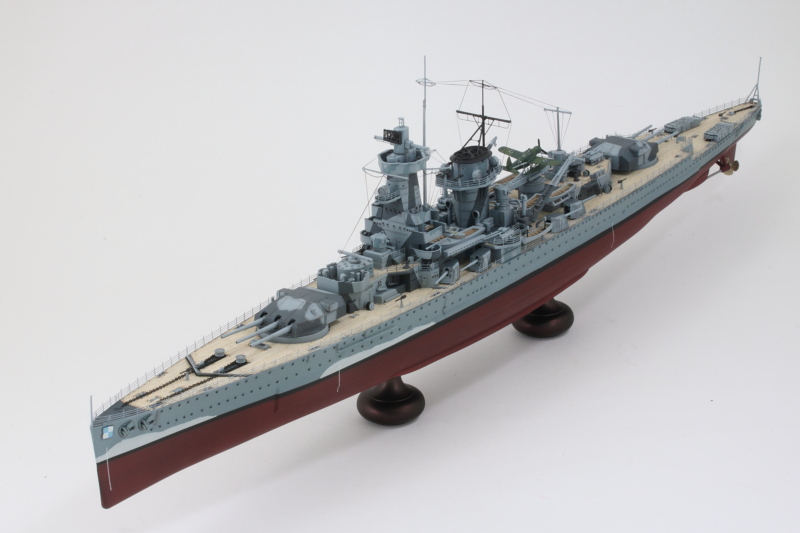 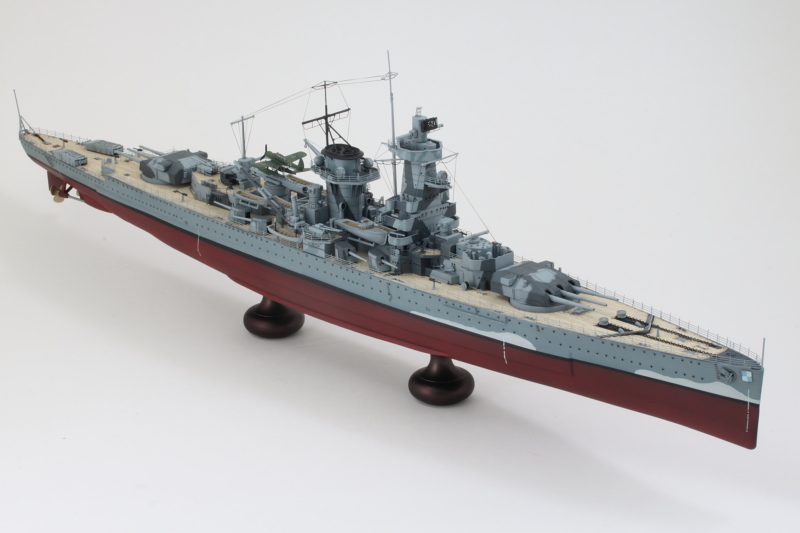 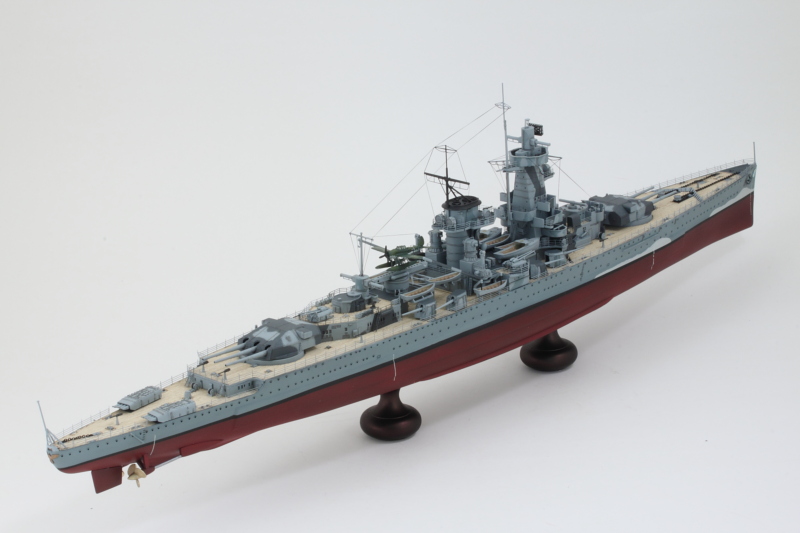 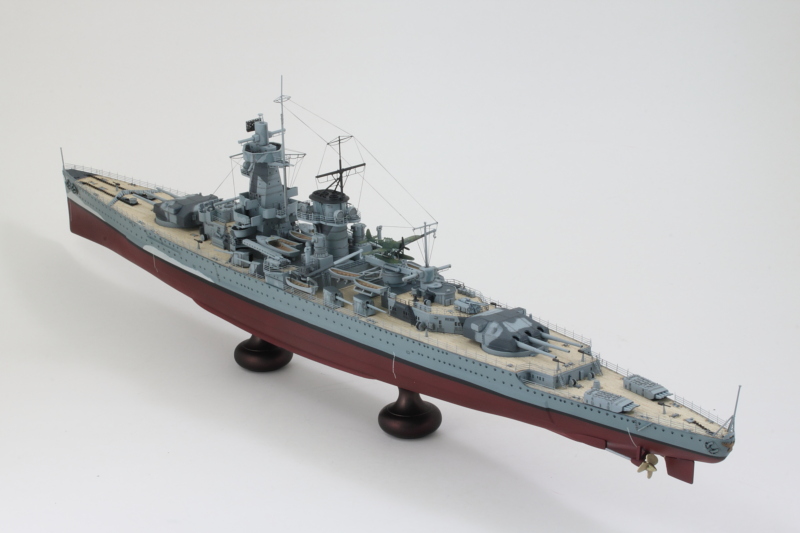 |
|
joelsmith
Full Member
  
Member since: July 2012
There no winners in war, only survivors.
Posts: 1,404
Jul 5, 2012 22:33:58 GMT -5
Jul 5, 2012 22:33:58 GMT -5
|
Post by joelsmith on Aug 11, 2017 23:04:32 GMT -5
Cast off all lines, we are off to cause havoc on the high seas!
|
|
delta
Full Member
  
Member since: January 2015
Posts: 365 
|
Post by delta on Aug 11, 2017 23:22:54 GMT -5
PHENOMENAL!!!
|
|
|
|
Post by dierk on Aug 12, 2017 4:14:22 GMT -5
Terrific result Bill!
|
|
|
|
Post by Leon on Aug 12, 2017 5:33:17 GMT -5
Outstanding finish Bill! She's a real beauty.  |
|
bbrowniii
Full Member
  
Member since: March 2012
If you are not part of the solution, you are part of the precipitate.
Posts: 1,238
Mar 25, 2012 22:08:04 GMT -5
Mar 25, 2012 22:08:04 GMT -5
|
Post by bbrowniii on Aug 12, 2017 8:34:14 GMT -5
Fantastic, Bill!
She came out great.
|
|
|
|
Post by wbill76 on Aug 12, 2017 9:07:39 GMT -5
Joel, definitely lived fast and died young!  Delta Delta, Dierk, Leon, and Boyd, appreciate the comments and for following along! Now it's time to shut down the bench until Christmas. I feel like one of those Spirit Halloween pop-up stores... 
|
|
|
|
Post by Leon on Aug 12, 2017 9:33:50 GMT -5
Gives you plenty of time to plan your next project Bill!  Great overall job as usual Bill!  |
|
mrversatile
Full Member
   July '23 Showcased Build Awarded
Member since: January 2013
Posts: 681
Jan 20, 2013 10:52:24 GMT -5
Jan 20, 2013 10:52:24 GMT -5
|
Post by mrversatile on Aug 12, 2017 10:44:47 GMT -5
Nice clean build.
|
|
|
|
Post by dupes on Aug 12, 2017 11:29:44 GMT -5
Shut down until CHRISTMAS? Whaaaaaat??
|
|
|
|
Post by wbill76 on Aug 12, 2017 12:00:56 GMT -5
Leon, that's true, although the reality is that I probably will just pull something out of the stash barring something really unusual happening. You never know...  Gil Gil, thanks for the comments! Dupes, that's the life of a public school teacher I'm afraid. I was reassigned from teaching 6th grade to 8th grade for this year and 8th grade is when they take the state's standardized test, so it's more pressure as a result. There will be little to no time available for model building until the Christmas break based on my last year's experience! That might change next year if I keep the same grade assignment as I should already have a good foundation of lessons and stuff built up, but for this year I'm essentially starting from scratch as the last time I taught 8th grade was in 2001. 
|
|
|
|
Post by Tojo72 on Aug 12, 2017 12:53:16 GMT -5
Fantastic finish,hopefully it will be a magazine feature.
|
|
|
|
Post by wbill76 on Aug 12, 2017 13:07:16 GMT -5
Thanks Anthony! There's been some interest expressed but you never know!  |
|
|
|
Post by wing_nut on Aug 12, 2017 15:51:56 GMT -5
A total SCHWING!
|
|
|
|
Post by wbill76 on Aug 12, 2017 17:25:47 GMT -5
Thanks Marc, can always count on your golf contribution!  |
|
afvfan
Senior Member
   
Member since: December 2012
Bob
Posts: 1,772
Dec 10, 2012 17:32:38 GMT -5
Dec 10, 2012 17:32:38 GMT -5
|
Post by afvfan on Aug 13, 2017 22:46:48 GMT -5
Fine work, Bill. That turned out great. Now that you've knocked out the "before", when can we expect the "after"?  |
|
|
|
Post by wbill76 on Aug 14, 2017 8:51:48 GMT -5
Thanks Bob! The 'after' would be a much more elaborate exercise...for that, I'd have to get Rob's help I think!  |
|