|
|
Post by 406 Silverado on Jul 11, 2023 12:57:47 GMT -5
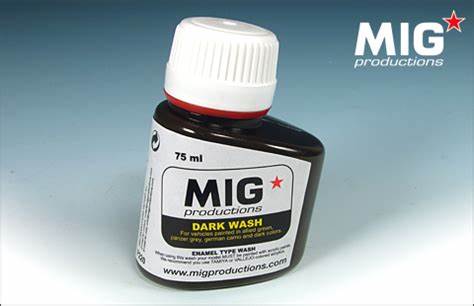
Those pencils do the trick nicely and the way you've got the engine cover detailed out is no exception to that rule. Beautiful work in the engine bay and on the rotors.  A black wash would do those rotors up juuust right bud. I think I might use watered-down acrylic paint for the wash… I find Tamiya Panel Liner sometimes stains photo etch. This stuff works WONDERS on bare metal like those rotors.  |
|
70 STING
Full Member
  
Member since: April 2023
Posts: 544
Apr 10, 2023 11:44:31 GMT -5
Apr 10, 2023 11:44:31 GMT -5
|
Post by 70 STING on Jul 13, 2023 7:53:42 GMT -5
I think I might use watered-down acrylic paint for the wash… I find Tamiya Panel Liner sometimes stains photo etch. If you have any Future try tinting it with some black acrylic paint. Mix a dab in a small bottle (I use an old Tamyia thin bottle) until opaque and then just brush it on. The self leveling of the Future will make it fill in the voids while leaving the rotor face almost unchanged. Dull down with a flat coat if to shiny. Thanks tcoat…read your post a little too late. I’m going to keep tinted Future in my back pocket for next time. I ended up going with Tamiya Panel Liner after all, as the PE rotors looked too shiny behind the rims. I used the side of the applicator brush to apply an even coat across the entire surface. |
|
70 STING
Full Member
  
Member since: April 2023
Posts: 544
Apr 10, 2023 11:44:31 GMT -5
Apr 10, 2023 11:44:31 GMT -5
|
Post by 70 STING on Jul 13, 2023 7:59:49 GMT -5
I think I might use watered-down acrylic paint for the wash… I find Tamiya Panel Liner sometimes stains photo etch. This stuff works WONDERS on bare metal like those rotors.  MIG Wash is enamel based like Tamiya Panel Liner. How do they compare in use? |
|
|
|
Post by 406 Silverado on Jul 13, 2023 9:44:15 GMT -5
This stuff works WONDERS on bare metal like those rotors.  MIG Wash is enamel based like Tamiya Panel Liner. How do they compare in use? Dunno about that one. I've never used the Tamiya Panel Liner before, however, I've never had an issue with Mig washes as long as it's used on an acrylic finish or bare metal like these rotors. |
|
|
|
Post by keavdog on Jul 13, 2023 17:59:44 GMT -5
Things are moving along. Engine bay is done about as far as I'm gonna take it. Played around a bit with Prismacolor pencils (thanks Joe :^) Wheels are done too. I used the P.E. rotors for a little more accuracy. Might still put a little black wash or panel liner over them.   Looking great. The Tamiya kit didn't have any representation of an engine. Your bay looks fantastic. |
|
70 STING
Full Member
  
Member since: April 2023
Posts: 544
Apr 10, 2023 11:44:31 GMT -5
Apr 10, 2023 11:44:31 GMT -5
|
Post by 70 STING on Jul 14, 2023 16:50:50 GMT -5
Things are moving along. Engine bay is done about as far as I'm gonna take it. Played around a bit with Prismacolor pencils (thanks Joe :^) Wheels are done too. I used the P.E. rotors for a little more accuracy. Might still put a little black wash or panel liner over them.   Looking great. The Tamiya kit didn't have any representation of an engine. Your bay looks fantastic. Thanks keavdog. The Revell has an engine but it’s completely hidden by the engine cover and only slightly visible from underneath. |
|
|
|
Post by dupes on Jul 14, 2023 19:26:23 GMT -5
I had my doubts about that green at the beginning...but that looks stellar!
|
|
70 STING
Full Member
  
Member since: April 2023
Posts: 544
Apr 10, 2023 11:44:31 GMT -5
Apr 10, 2023 11:44:31 GMT -5
|
Post by 70 STING on Jul 19, 2023 16:40:32 GMT -5
I had my doubts about that green at the beginning...but that looks stellar! Zero Paints are supposed to be fairly accurate, however, I think the colour looks better on the 1:1 car. |
|
70 STING
Full Member
  
Member since: April 2023
Posts: 544
Apr 10, 2023 11:44:31 GMT -5
Apr 10, 2023 11:44:31 GMT -5
|
Post by 70 STING on Jul 19, 2023 17:01:04 GMT -5
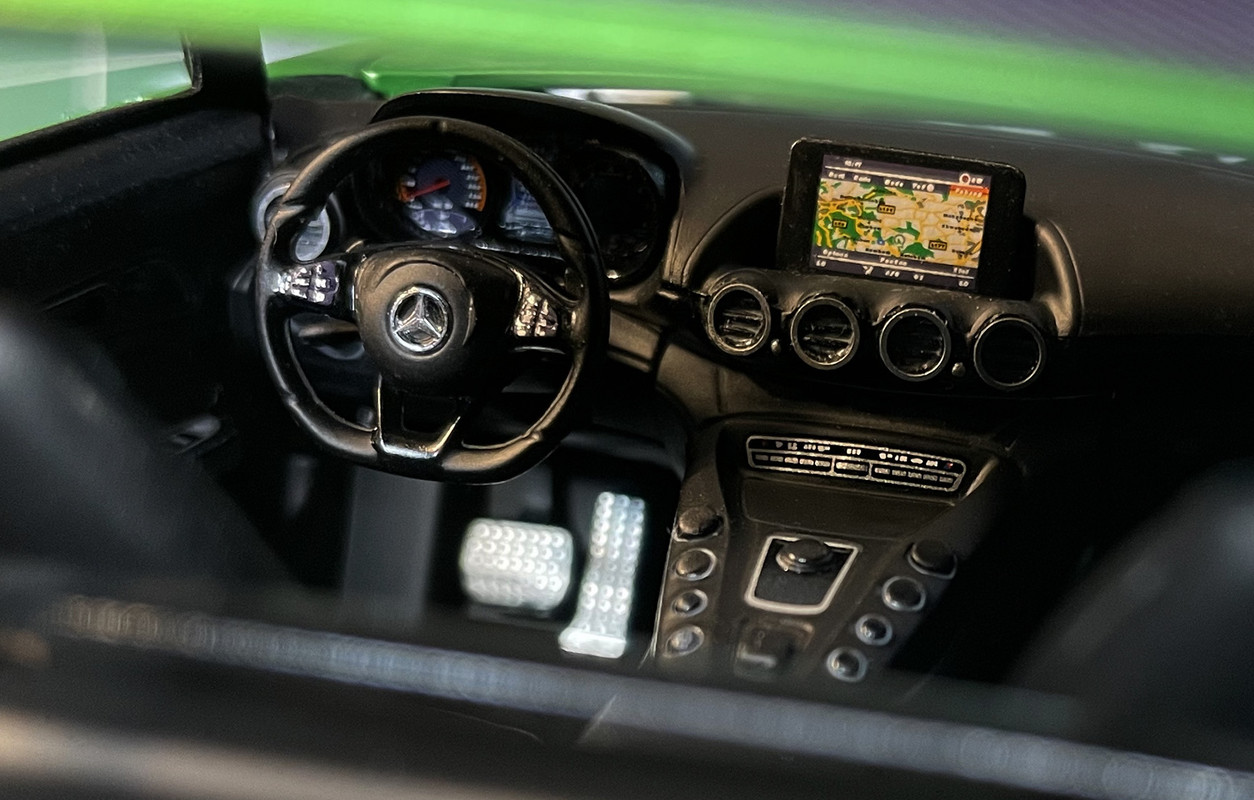
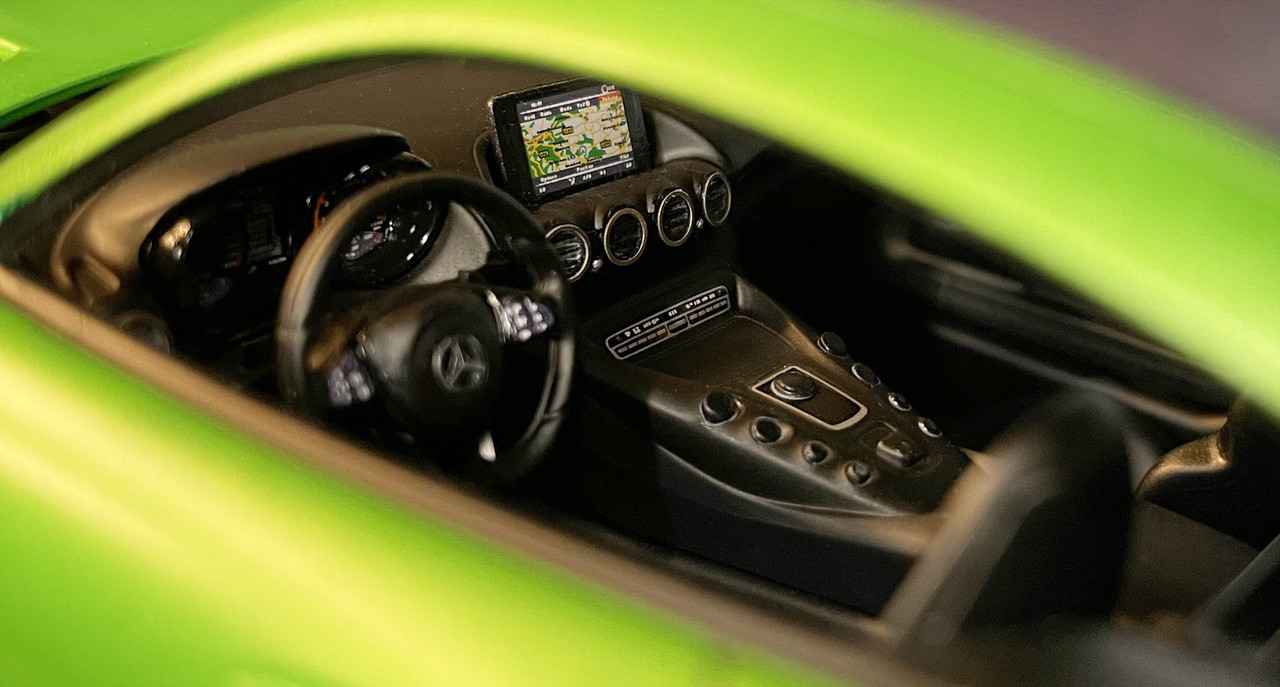
Moving along quickly here. The interior is done. I was going for a 2 tone black scheme but the second shade turned out a bit darker than I intended.   Spent way too much time on the P.E. vent grills. The 2 side units mounted well enough with black CA glue, though the teeny, tiny mounting tabs were quite delicate and did not like being bent more than once. I had to add some black material (Gaffer's Tape) behind each one because you could see right through the body to the other side - even with the interior and chassis installed!  The hood vents gave me fits! The P.E. tabs are designed to be bent twice into an 'L' shape and secondary P.E. parts are meant to fit within them to provide less visibility into the engine compartment. Those tabs did not last very long and there was no way to attache the parts. I tried making my own outta screen mesh, but I didi't have any with a tight enough pattern. Figured I'd double it up but this didn't allow for enough clearance over the engine bay. Finally took a bit of an easy way out and used Gaffer's Tape applied from the bottom and coated with Testors Dull Cote. It's passable.  |
|
transammike
Junior Member
 
Member since: February 2023
Posts: 31
Feb 27, 2023 15:11:15 GMT -5
Feb 27, 2023 15:11:15 GMT -5
|
Post by transammike on Jul 19, 2023 18:39:04 GMT -5
Ok, please enlighten me...what are and how do you use prismacolor pencils??  |
|
|
|
Post by deafpanzer on Jul 19, 2023 19:23:26 GMT -5
Ssssooooo green and I am loving it! The vents look pretty good to me.
|
|
70 STING
Full Member
  
Member since: April 2023
Posts: 544
Apr 10, 2023 11:44:31 GMT -5
Apr 10, 2023 11:44:31 GMT -5
|
Post by 70 STING on Jul 19, 2023 19:29:50 GMT -5
Ok, please enlighten me...what are and how do you use prismacolor pencils??  They were new to me as well. This link might explain them better: tinyurl.com/4ntfujfhI'll be using them going forward for smaller details. :^) |
|
|
|
Post by 406 Silverado on Jul 20, 2023 6:21:16 GMT -5
Sounds like the PE on this one gave you plenty of fits (no pun intended) putting it all together. You've managed to pull everything off very well and I like the PE vents in the interior. I feel your pain on the hood vents. I've done stuff like this numerous times expecting one outcome and then .......having to do something totally different because things just didn't work out. VERY good progress update and fantastic results thus far. transammike Prismacolor pencils are available at Hobby Lobby and I use the silver lead one to do all my raised level silver details on engines and interiors. They work like a charm. Check out the link that Sting sent you and get some. You won't be sorry. |
|
70 STING
Full Member
  
Member since: April 2023
Posts: 544
Apr 10, 2023 11:44:31 GMT -5
Apr 10, 2023 11:44:31 GMT -5
|
Post by 70 STING on Jul 20, 2023 9:25:35 GMT -5
Sounds like the PE on this one gave you plenty of fits (no pun intended) putting it all together. You've managed to pull everything off very well and I like the PE vents in the interior. I feel your pain on the hood vents. I've done stuff like this numerous times expecting one outcome and then .......having to do something totally different because things just didn't work out. VERY good progress update and fantastic results thus far. transammike Prismacolor pencils are available at Hobby Lobby and I use the silver lead one to do all my raised level silver details on engines and interiors. They work like a charm. Check out the link that Sting sent you and get some. You won't be sorry. Ha very funny Joe.  BTW, the black CA glue is becoming a favourite of mine. It seems to work well on photo etch parts because it maintains a little flexibility. I've also used it on parts of the body that may flex during final assembly. This kit will be a good test if the YouTube videos I've seen are any indication. |
|
|
|
Post by 406 Silverado on Jul 20, 2023 11:52:02 GMT -5
Sounds like the PE on this one gave you plenty of fits (no pun intended) putting it all together. You've managed to pull everything off very well and I like the PE vents in the interior. I feel your pain on the hood vents. I've done stuff like this numerous times expecting one outcome and then .......having to do something totally different because things just didn't work out. VERY good progress update and fantastic results thus far. transammike Prismacolor pencils are available at Hobby Lobby and I use the silver lead one to do all my raised level silver details on engines and interiors. They work like a charm. Check out the link that Sting sent you and get some. You won't be sorry. Ha very funny Joe.  BTW, the black CA glue is becoming a favourite of mine. It seems to work well on photo etch parts because it maintains a little flexibility. I've also used it on parts of the body that may flex during final assembly. This kit will be a good test if the YouTube videos I've seen are any indication. I picked up some of that black CA glue and you're right. Pretty easy stuff to work with....expecially for PE. Thanks for the heads up on that. |
|
|
|
Post by robbo on Jul 20, 2023 16:14:52 GMT -5
Now that is very nice painting that engine looks real
|
|
70 STING
Full Member
  
Member since: April 2023
Posts: 544
Apr 10, 2023 11:44:31 GMT -5
Apr 10, 2023 11:44:31 GMT -5
|
Post by 70 STING on Jul 24, 2023 11:15:20 GMT -5
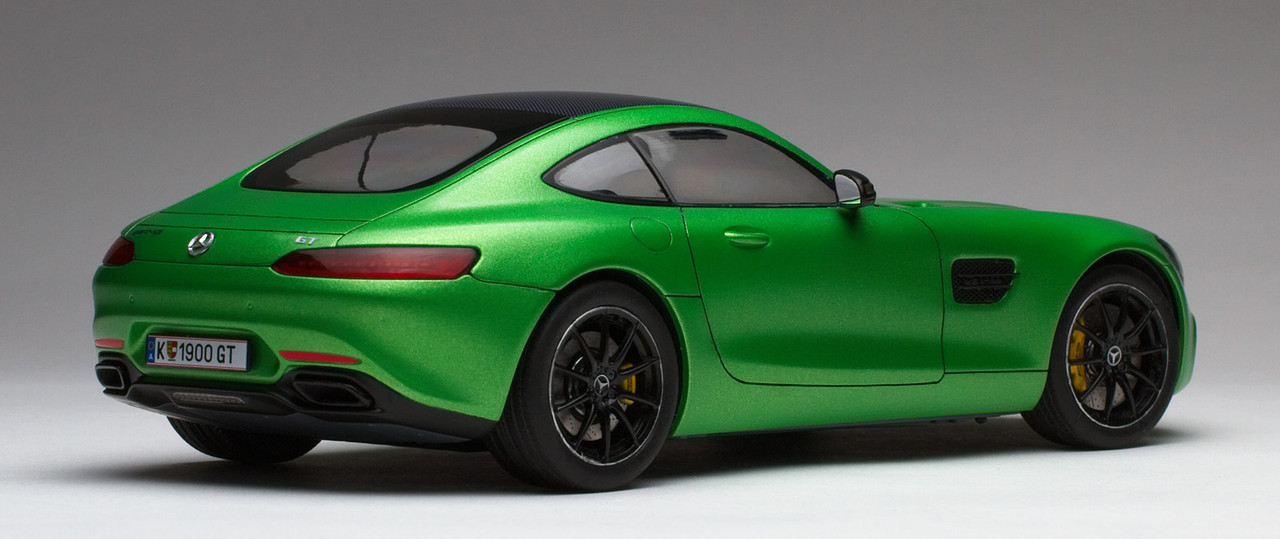
Stick a fork in it, she's done: What I learned from this build 1. The panel lines were very shallow on this kit. As a result I got plenty of practice filling in all the little slips with various putties. 2. Zero Designs pre cut window masks were not an accurate match to the frosted areas marked on the glass. Plus the glue left residue behind. 3. I used Alclad Aqua Gloss to simulate piano black on various parts in the interior. This was easy enough to brush paint over previously painted semi gloss black. 4. I cheated a bit with interior detailing by using grey panel liner to fill in details. I did this before discovering... 5. Prisma Color Pencils. I will be using these going forward for many finer details. Thanks again @406 Silverado 6. I'm not sure I like the carbon fibre roof. If I were to build one again I'd stick with body colour. 7. Photo Etch parts can certainly be a pain in the butt to work with. Black CA glue is a real help here. Besides, no one says you have to use all the parts. 8. The front wheel wells did not fit flush with the body because of modifications required to add the the trans kit front end and PE parts. I had to Dremel off a couple millimetres of material from the headlight assemblies to raise the wheel wells/chassis. In the end, it probably could have been dropped another millimetre or so. Overall it was an enjoyable kit to build and a good experience participating in the Red Hot & Rolling Group Build.       |
|
|
|
Post by keavdog on Jul 24, 2023 11:24:43 GMT -5
What a beauty! I always root for these during the GT races
|
|
|
|
Post by 406 Silverado on Jul 24, 2023 19:28:37 GMT -5
I've been waiting to comment on this build ALL day. The color fits this car VERY well and the finish is right up there with the best I've seen. Detail is well done as is the stance and wheel/ tire position relative to the wheel openings. I'd also like to point out the fact that the photography is every bit as equal as the turn out of the build. What photo program do you use? Photo shop? Thank you for participating in the first automotive group build that this forum has seen to date bud. I most certainly appreciate you taking part in it. BTW....you going for #2 build in it? Just askin'.  |
|
70 STING
Full Member
  
Member since: April 2023
Posts: 544
Apr 10, 2023 11:44:31 GMT -5
Apr 10, 2023 11:44:31 GMT -5
|
Post by 70 STING on Jul 25, 2023 10:57:01 GMT -5
What a beauty! I always root for these during the GT races Never got much into racing (open wheel & nascar). I much prefer cars that resemble street vehicles or those in the 24 hours of Le Mans. As a newbie to car racing, which circuit or events would you recommend? |
|
70 STING
Full Member
  
Member since: April 2023
Posts: 544
Apr 10, 2023 11:44:31 GMT -5
Apr 10, 2023 11:44:31 GMT -5
|
Post by 70 STING on Jul 25, 2023 11:29:07 GMT -5
I've been waiting to comment on this build ALL day. The color fits this car VERY well and the finish is right up there with the best I've seen. Detail is well done as is the stance and wheel/ tire position relative to the wheel openings. I'd also like to point out the fact that the photography is every bit as equal as the turn out of the build. What photo program do you use? Photo shop? Thank you for participating in the first automotive group build that this forum has seen to date bud. I most certainly appreciate you taking part in it. BTW....you going for #2 build in it? Just askin'.  You're too kind Joe. This style of photography is very forgiving... plus it reminds me of those supercar posters from the 80's. I use a program called 'ON1 Photo Raw' for editing raw files off the camera and Photoshop to remove dust spots and cropping/image sizing. ON1 Photo Raw used to be offered as a stand-alone program, however I think they've switched to subscription-based like all Adobe products (sadly). I feel honoured to be among the Group Build pioneers. A 2nd build you say...  |
|
|
|
Post by 406 Silverado on Jul 25, 2023 11:40:25 GMT -5
I've been waiting to comment on this build ALL day. The color fits this car VERY well and the finish is right up there with the best I've seen. Detail is well done as is the stance and wheel/ tire position relative to the wheel openings. I'd also like to point out the fact that the photography is every bit as equal as the turn out of the build. What photo program do you use? Photo shop? Thank you for participating in the first automotive group build that this forum has seen to date bud. I most certainly appreciate you taking part in it. BTW....you going for #2 build in it? Just askin'.  You're too kind Joe. This style of photography is very forgiving... plus it reminds me of those supercar posters from the 80's. I use a program called 'ON1 Photo Raw' for editing raw files off the camera and Photoshop to remove dust spots and cropping/image sizing. ON1 Photo Raw used to be offered as a stand-alone program, however I think they've switched to subscription-based like all Adobe products (sadly). I feel honoured to be among the Group Build pioneers. A 2nd build you say...  I may have check into that software or something similar as these shots turned out really good. If you’re like me you have always have something buildwise lined up.  |
|
|
|
Post by keavdog on Jul 25, 2023 12:01:05 GMT -5
What a beauty! I always root for these during the GT races Never got much into racing (open wheel & nascar). I much prefer cars that resemble street vehicles or those in the 24 hours of Le Mans. As a newbie to car racing, which circuit or events would you recommend? Anything GT or Trans Am would fit the bill. Here's a GT site to browse around www.gt-world-challenge-america.com/ |
|
70 STING
Full Member
  
Member since: April 2023
Posts: 544
Apr 10, 2023 11:44:31 GMT -5
Apr 10, 2023 11:44:31 GMT -5
|
Post by 70 STING on Jul 25, 2023 12:45:44 GMT -5
You're too kind Joe. This style of photography is very forgiving... plus it reminds me of those supercar posters from the 80's. I use a program called 'ON1 Photo Raw' for editing raw files off the camera and Photoshop to remove dust spots and cropping/image sizing. ON1 Photo Raw used to be offered as a stand-alone program, however I think they've switched to subscription-based like all Adobe products (sadly). I feel honoured to be among the Group Build pioneers. A 2nd build you say...  I may have check into that software or something similar as these shots turned out really good. If you’re like me you have always have something buildwise lined up.  I highly recommend shooting in RAW format as there is for more dynamic range than JPEG. The camera does a nice job creating JPEGs but to get the most detail in the highlights and shadows, RAW format is the way to go. Pretty sure I have a tiny stash compared to most modellers, but I get the sweats every time I look at it.  |
|
70 STING
Full Member
  
Member since: April 2023
Posts: 544
Apr 10, 2023 11:44:31 GMT -5
Apr 10, 2023 11:44:31 GMT -5
|
Post by 70 STING on Jul 25, 2023 12:47:44 GMT -5
Never got much into racing (open wheel & nascar). I much prefer cars that resemble street vehicles or those in the 24 hours of Le Mans. As a newbie to car racing, which circuit or events would you recommend? Anything GT or Trans Am would fit the bill. Here's a GT site to browse around www.gt-world-challenge-america.com/Thanks keavdog. They have a Fan Guide at the top of the page… will check it out. :^) |
|
kyledehart5
Forum Moderator      Dec '23 Showcased Model Awarded
Member since: July 2023
Posts: 7,088
Member is Online
MSC Staff
|
Post by kyledehart5 on Jul 31, 2023 5:19:45 GMT -5
A great result!! Nice color on this one.
|
|
Joe Rix
Forum Moderator     
Member since: January 2023
Posts: 1,524 
MSC Staff
|
Post by Joe Rix on Jul 31, 2023 6:59:23 GMT -5
I'm a bit late to this endeavor but, I'm on it now as this is absolutely choice. You have got some really sweet progress going here and it looks sharp. Glad to see you hanging with it as you did a fine job on recovering the roof decal. It's all in the recovery my friend. The best part is that you are pushing forward to our shear delight. Love the color as well as the application. Just looks boss.
|
|
70 STING
Full Member
  
Member since: April 2023
Posts: 544
Apr 10, 2023 11:44:31 GMT -5
Apr 10, 2023 11:44:31 GMT -5
|
Post by 70 STING on Aug 1, 2023 11:01:31 GMT -5
I'm a bit late to this endeavor but, I'm on it now as this is absolutely choice. You have got some really sweet progress going here and it looks sharp. Glad to see you hanging with it as you did a fine job on recovering the roof decal. It's all in the recovery my friend. The best part is that you are pushing forward to our shear delight. Love the color as well as the application. Just looks boss. Thanks for the kind words Joe. Now, if only I can reduce the number of mistakes… |
|
|
|
Post by deafpanzer on Aug 1, 2023 14:31:38 GMT -5
I really love the color and it will probably be my first choice if I ever be that rich to own one! You did a great job!
|
|
mrversatile
Full Member
   July '23 Showcased Build Awarded
Member since: January 2013
Posts: 682
Jan 20, 2013 10:52:24 GMT -5
Jan 20, 2013 10:52:24 GMT -5
|
Post by mrversatile on Aug 3, 2023 21:48:52 GMT -5
Very clean build. I like your style. Thanks for sharing
|
|