Green KreationZ
Full Member
   Feb '24 Showcased Model Awarded---------Oct '24 Model of the Month Winner
Member since: November 2023
Posts: 860
Nov 19, 2023 19:13:09 GMT -5
Nov 19, 2023 19:13:09 GMT -5
|
Post by Green KreationZ on Nov 21, 2023 11:00:04 GMT -5
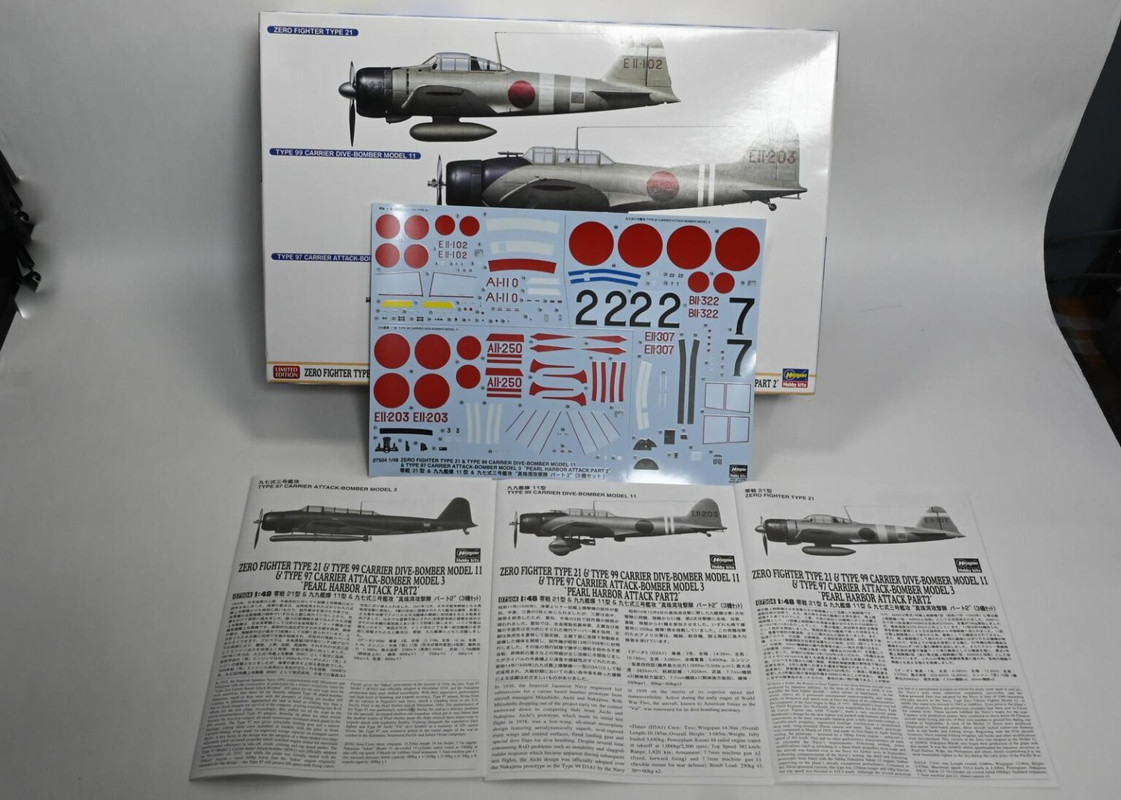
This will be the build log for the Hasegawa D3A1 Val in 1/48. This D3A1 was included in a 3 plane kit released by Hasegawa a few years ago. The other two planes are B5N2 Kate (finished) and a A6M2 Zero.  Along with the kit, I also have Eduard detail set, seat belts, and mask. Onto the build! It appears there is some controversy on what color this aircraft actually was. Based on info I can find; it is grey-green or light grey. I have most Tamiya paints on hand so could go with either XF-76 IJN Grey-Green or with XF-91 IJN Grey. The XF-76 Grey-Green seems more interesting and accurate to me so I will be going with that. I recently purchased some new rivet tools and thought this was a good opportunity to test them out. My lines are not as straight as I would like, but that’s something that will hopefully get better with practice.   |
|
|
|
Post by Steve Zuleski on Nov 21, 2023 11:12:14 GMT -5
Them lines look mighty fine to me, Ruck On!
|
|
|
|
D3A1 Val
Nov 21, 2023 16:58:34 GMT -5
via mobile
Post by kyledehart5 on Nov 21, 2023 16:58:34 GMT -5
As an enjoyer of Japanese aircraft I look forward to watching this come together.
|
|
Green KreationZ
Full Member
   Feb '24 Showcased Model Awarded---------Oct '24 Model of the Month Winner
Member since: November 2023
Posts: 860
Nov 19, 2023 19:13:09 GMT -5
Nov 19, 2023 19:13:09 GMT -5
|
Post by Green KreationZ on Nov 22, 2023 15:19:25 GMT -5
As an enjoyer of Japanese aircraft I look forward to watching this come together. I am really enjoying the Japanese planes at the moment. Currently I have this build going plus the following in my stash - the A6M2 zero that was included in this kit, an Eduard A6M2 Rufe + Eduard Big Sin, and I’m eyeballing a Hasegawa F1M2 |
|
|
|
Post by tcoat on Nov 22, 2023 19:42:51 GMT -5
I have never heard of this set before!  |
|
|
|
Post by 406 Silverado on Nov 22, 2023 19:49:13 GMT -5
I bought Hasegawa Val kit soon after it came out in the late 90's / early 2000's I believe. I even had the Maru Mechanic magazine on this airframe and may still have it. Sadly, I let go of the kit a few years ago to someone that would actually build it. Looking forward to seeing this one built up in your skillful way.
|
|
TJ
Senior Member
    June '23 Showcased Model Awarded
Member since: May 2023
Posts: 2,178
May 14, 2023 18:18:36 GMT -5
May 14, 2023 18:18:36 GMT -5
|
Post by TJ on Nov 23, 2023 6:34:41 GMT -5
I've built an earlier release of this kit. Thoroughly enjoyable.
|
|
Green KreationZ
Full Member
   Feb '24 Showcased Model Awarded---------Oct '24 Model of the Month Winner
Member since: November 2023
Posts: 860
Nov 19, 2023 19:13:09 GMT -5
Nov 19, 2023 19:13:09 GMT -5
|
Post by Green KreationZ on Nov 23, 2023 9:08:32 GMT -5
|
|
|
|
Post by 406 Silverado on Nov 23, 2023 9:16:35 GMT -5
|
|
|
|
Post by tcoat on Nov 23, 2023 10:03:06 GMT -5
The article says that a lot of the difference in the colours may be due to the weathering. I always struggle with the colour in pictures of very old or restored equipment as there is very little chance of them being what they looked like originally. Drawings can be even worse as they are just somebody's interpretation of what they think it was. Of course they may have done a pile of research on the subject but it still depends upon their data source.  |
|
Green KreationZ
Full Member
   Feb '24 Showcased Model Awarded---------Oct '24 Model of the Month Winner
Member since: November 2023
Posts: 860
Nov 19, 2023 19:13:09 GMT -5
Nov 19, 2023 19:13:09 GMT -5
|
Post by Green KreationZ on Nov 23, 2023 10:13:38 GMT -5
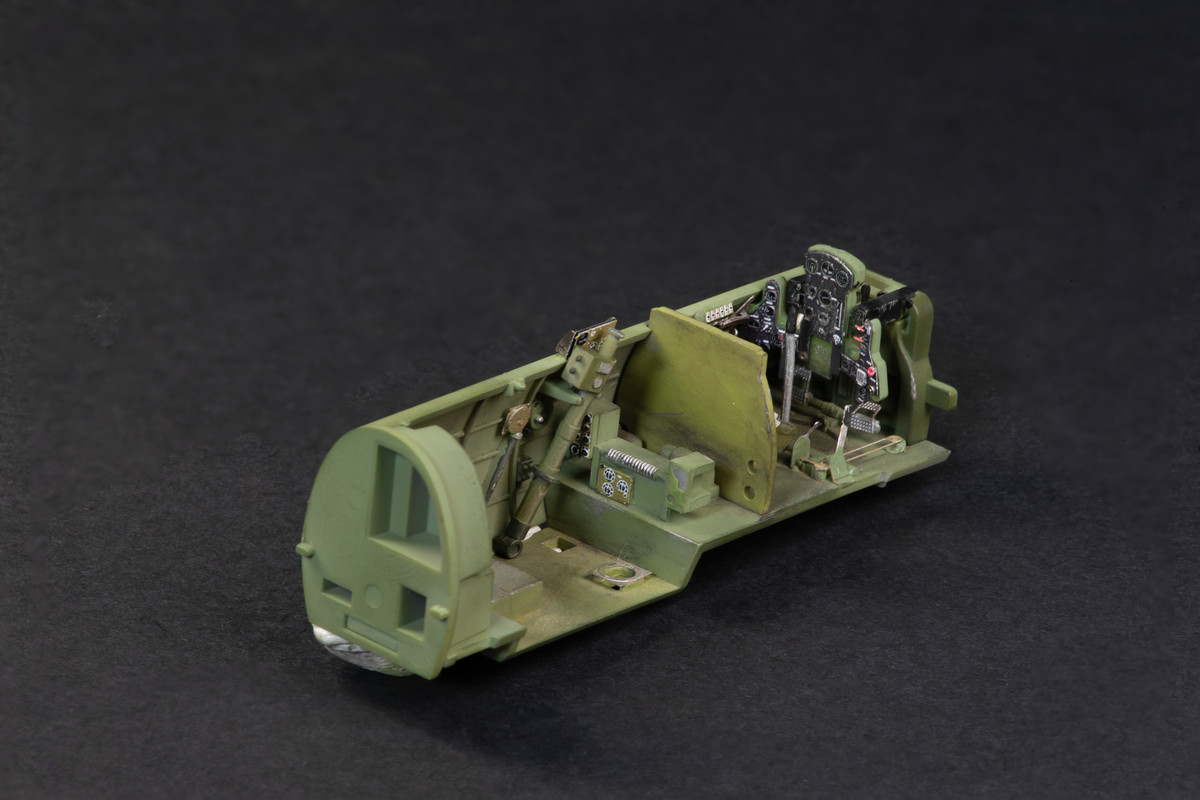
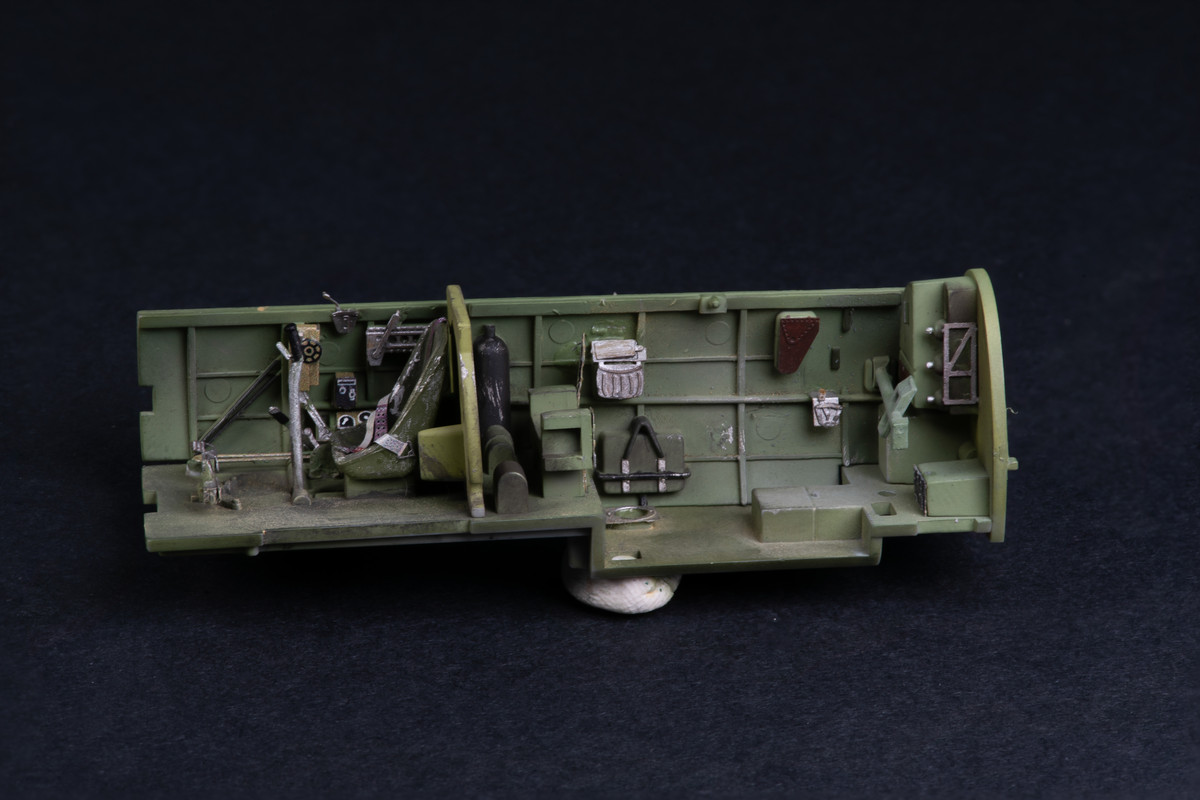
Haha yeah. Reading about IJN colors gives me a headache. Once you think you found the definitive answer, someone says it’s all wrong. After the war, Japan did a fantastic job at destroying as much evidence as possible. Nonetheless; I have painted the interior and primarily went with IJN Interior Green from Tamiya. I did a few darker control surfaces in a mix of IJN green and Olive drab as well as a few with a bit of yellow mixed into the IJN green.    After 24h of curing, I’ll add the Eduard PE parts and paint in details with a brush. |
|
|
|
Post by tcoat on Nov 23, 2023 10:42:00 GMT -5
Haha yeah. Reading about IJN colors gives me a headache. Once you think you found the definitive answer, someone says it’s all wrong. After the war, Japan did a fantastic job at destroying as much evidence as possible. The Allies did a pretty good job of destroying most of their equipment well before they had to do it themselves. The IJN colour stuff changed dramatically over the years. They started out the war in 1937 (yes they were at war before they tackled the USA) when they had resources pouring into the country. By the end of the war they had absolutely nothing coming in. Perfect and consistent paint jobs ended around 1944. Anything after that would be hit and miss at best since prime ingredients were no longer available to them. Add the differences in wear and tear on planes based islands that consisted mostly of coral dust to carrier or main island ones that hardly ever even saw dirt and the variance in colours and weathering could be significant. I am of the "anything other than purple with pick polka dots is close enough" camp unless some WW2 Japanese pilot comes and tells me I am wrong. |
|
Joe Rix
Forum Moderator     
Member since: January 2023
Posts: 1,534  Member is Online
MSC Staff
|
Post by Joe Rix on Nov 23, 2023 11:37:59 GMT -5
Excellent start on your Val TS. The riveting looks awesome to me. I'm a big IJN aircraft fan also and after reading the many iterations on IJN colors I just paint what I feel is suitable for me.
|
|
jeaton01
Full Member
   Sept '23 Showcased Model Awarded
Member since: October 2013
Posts: 1,290 
|
Post by jeaton01 on Nov 23, 2023 14:46:10 GMT -5
I built the B5N and D3A as separate kits but as PH attack aircraft. It's disappointing how little is visible of the nice interiors once they are done, the cockpit openings on both the Val and the Kate are very small.  |
|
Green KreationZ
Full Member
   Feb '24 Showcased Model Awarded---------Oct '24 Model of the Month Winner
Member since: November 2023
Posts: 860
Nov 19, 2023 19:13:09 GMT -5
Nov 19, 2023 19:13:09 GMT -5
|
Post by Green KreationZ on Nov 25, 2023 14:04:57 GMT -5
I built the B5N and D3A as separate kits but as PH attack aircraft. It's disappointing how little is visible of the nice interiors once they are done, the cockpit openings on both the Val and the Kate are very small.  Yeah the interior of my Kate is almost non visible. |
|
Green KreationZ
Full Member
   Feb '24 Showcased Model Awarded---------Oct '24 Model of the Month Winner
Member since: November 2023
Posts: 860
Nov 19, 2023 19:13:09 GMT -5
Nov 19, 2023 19:13:09 GMT -5
|
Post by Green KreationZ on Nov 25, 2023 14:06:47 GMT -5
Got the finishing details done on the interior minus the gun magazines. Next up will be joining the fuselage.    As mentioned earlier - I went with 3-4 shades of green in an attempt to add depth and subtle weathering. |
|
|
|
Post by kyledehart5 on Nov 26, 2023 6:35:10 GMT -5
I've mentioned this before, but I actually quit building my two Zeros because I got overwhelmed trying to figure out how to paint them. I have since realized that it doesn't matter at all because almost everyone is just guessing and wishing they were the smartest person on the internet. I'll get back to them sometime soon and paint them completely wrong just however I want. Really nice work on this so far. I really like the color modulation. Definitely adds a lot of life to the cockpit.
|
|
mz3
Full Member
   March '24 Showcased Build Awarded
Member since: October 2012
Posts: 651
Oct 14, 2012 21:09:43 GMT -5
Oct 14, 2012 21:09:43 GMT -5
|
Post by mz3 on Nov 26, 2023 11:13:37 GMT -5
Well, I've seen a grainy, out of focus, black and white picture taken from a bad angle in 1943, scanned and turned into a jpeg in 1998. Your green is the wrong shade! FIGHT ME!!!
|
|
|
|
Post by deafpanzer on Nov 26, 2023 11:16:40 GMT -5
The cockpit looks great! Have fun joining the fuselage...
|
|
Green KreationZ
Full Member
   Feb '24 Showcased Model Awarded---------Oct '24 Model of the Month Winner
Member since: November 2023
Posts: 860
Nov 19, 2023 19:13:09 GMT -5
Nov 19, 2023 19:13:09 GMT -5
|
Post by Green KreationZ on Nov 26, 2023 11:17:06 GMT -5
Yikes…  About to go on a Tamiya putty adventure. |
|
handiabled
Administrator      Apr '23 Showcased Build Awarded
Member since: February 2023
Posts: 4,438 
MSC Staff
|
Post by handiabled on Nov 26, 2023 11:43:30 GMT -5
The color variation in the cockpit looks great along with the detail in it. That is one massive gap in the wing root. Is the wing dihedral correct?
|
|
Green KreationZ
Full Member
   Feb '24 Showcased Model Awarded---------Oct '24 Model of the Month Winner
Member since: November 2023
Posts: 860
Nov 19, 2023 19:13:09 GMT -5
Nov 19, 2023 19:13:09 GMT -5
|
Post by Green KreationZ on Nov 26, 2023 13:33:56 GMT -5
The color variation in the cockpit looks great along with the detail in it. That is one massive gap in the wing root. Is the wing dihedral correct? Thank you! I was thinking the same thing when dry fitting, but it seemed correct as everything else lined up perfectly. |
|
Green KreationZ
Full Member
   Feb '24 Showcased Model Awarded---------Oct '24 Model of the Month Winner
Member since: November 2023
Posts: 860
Nov 19, 2023 19:13:09 GMT -5
Nov 19, 2023 19:13:09 GMT -5
|
Post by Green KreationZ on Nov 26, 2023 20:35:50 GMT -5
The color variation in the cockpit looks great along with the detail in it. That is one massive gap in the wing root. Is the wing dihedral correct? This should hopefully remedy the issue without me needing to add putty.  |
|
|
|
Post by kyledehart5 on Nov 27, 2023 7:09:49 GMT -5
Good grief. That is one impressive canyon of a gap! That 4 E's shaker makes an outstanding weight!
|
|
Green KreationZ
Full Member
   Feb '24 Showcased Model Awarded---------Oct '24 Model of the Month Winner
Member since: November 2023
Posts: 860
Nov 19, 2023 19:13:09 GMT -5
Nov 19, 2023 19:13:09 GMT -5
|
Post by Green KreationZ on Nov 28, 2023 0:43:22 GMT -5
Seam lines all sanded down. Added a bit of Vallejo putty where needed. Otherwise pretty satisfied.   Next up will be restoring panel lines and adding more rivets. |
|
Joe Rix
Forum Moderator     
Member since: January 2023
Posts: 1,534  Member is Online
MSC Staff
|
Post by Joe Rix on Nov 28, 2023 0:56:27 GMT -5
You did a stellar job on painting and detailing the cockpit. It looks great. Good to see that you were able to deal with immense gap in the wing root. Excellent progress over all.
|
|
TJ
Senior Member
    June '23 Showcased Model Awarded
Member since: May 2023
Posts: 2,178
May 14, 2023 18:18:36 GMT -5
May 14, 2023 18:18:36 GMT -5
|
Post by TJ on Nov 28, 2023 5:04:35 GMT -5
This is awesome. Can't wait for the exterior paint
|
|
|
|
Post by kyledehart5 on Nov 28, 2023 6:50:21 GMT -5
Nice work dealing with the Grand canyon there. Can't even tell.
|
|
Green KreationZ
Full Member
   Feb '24 Showcased Model Awarded---------Oct '24 Model of the Month Winner
Member since: November 2023
Posts: 860
Nov 19, 2023 19:13:09 GMT -5
Nov 19, 2023 19:13:09 GMT -5
|
Post by Green KreationZ on Dec 3, 2023 2:18:39 GMT -5
A few more items completed for the D3A1 Val. Won’t be much longer until I have this build in the paint booth. The kit has two available options for bomb ordinance. A single larger bomb, or two smaller bombs. As far as I can tell, the single larger bomb was appropriate for the attack on Pearl Harbor.   I did have the Eduard detail set which included some engine PE. After putting in the Eduard additions, they just didn’t stand out. They were way too small compared to reference pictures. I decided to cut out the Eduard parts in favor of lead wiring.   |
|
|
|
Post by deafpanzer on Dec 3, 2023 13:32:02 GMT -5
Nice work on the large bomb... I'd opt for the same thing too. Engine is looking good by the way.
|
|