70 STING
Full Member
  
Member since: April 2023
Posts: 544
Apr 10, 2023 11:44:31 GMT -5
Apr 10, 2023 11:44:31 GMT -5
|
Post by 70 STING on Jan 2, 2024 13:03:56 GMT -5
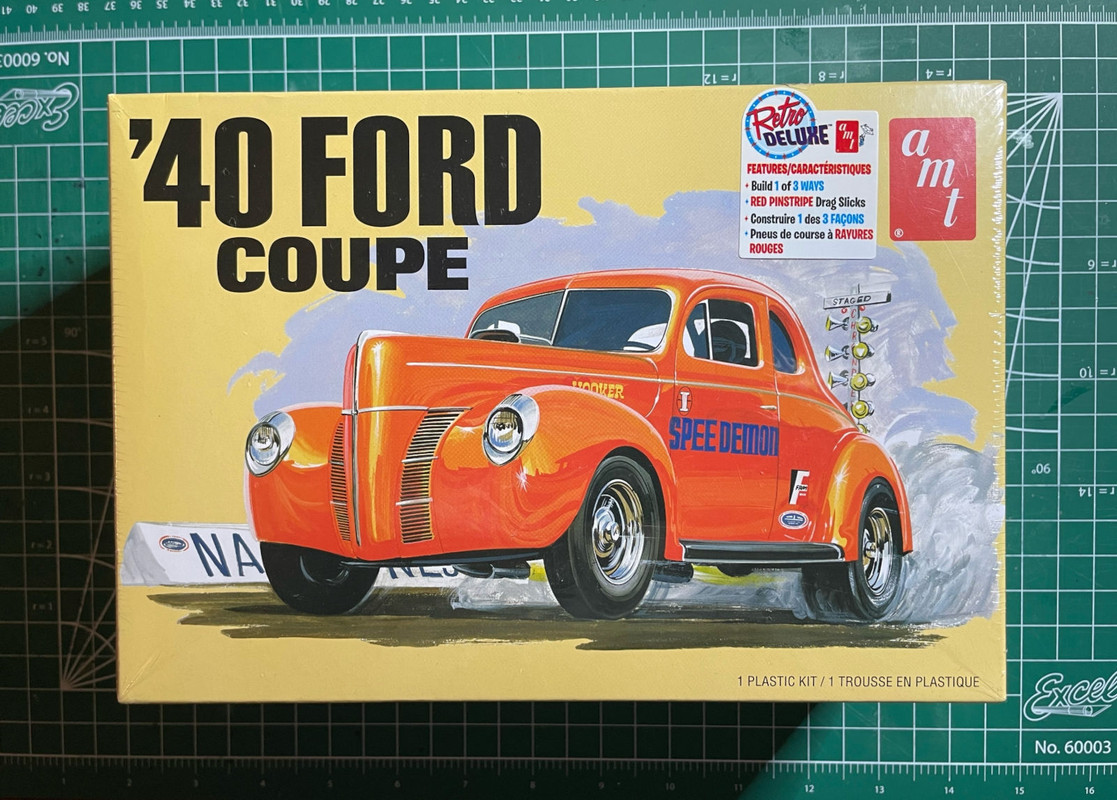
Starting off 2024 with a golden oldie.  I've decided to build this 3in1 kit as something between drag and street. Will be removing the drip rails and side mouldings as well as the front and rear bumpers.  The hood was 'scored' or 'pre-scribed' from underneath which made opening it up for the scoop a piece of cake. It looks a little on the large size, but hopefully a little detailing and paint will help.   Also going to try adding magnets to the hood and engine bay... probably going to be a bit of a pain with alignment. :^|
 Bought these off Amazon:  |
|
|
|
Post by kyledehart5 on Jan 2, 2024 13:43:03 GMT -5
Excellent!! I love me some 40 Fords. This’ll be great
|
|
|
|
Post by project510 on Jan 2, 2024 14:59:08 GMT -5
Sounds like a great plan! I've never seen the magnet idea for the hood. Super creative. Looking forward to seeing that!
|
|
rondriaan
Full Member
   Aug '24 Showcased Build Awarded
Member since: March 2012
Posts: 650
Mar 27, 2012 2:07:40 GMT -5
Mar 27, 2012 2:07:40 GMT -5
|
Post by rondriaan on Jan 6, 2024 16:23:45 GMT -5
Nice car I build the delivery version.
|
|
|
|
Post by deafpanzer on Jan 6, 2024 18:56:53 GMT -5
Looking real good. I always liked the look of those cars.
|
|
70 STING
Full Member
  
Member since: April 2023
Posts: 544
Apr 10, 2023 11:44:31 GMT -5
Apr 10, 2023 11:44:31 GMT -5
|
Post by 70 STING on Jan 8, 2024 16:28:04 GMT -5
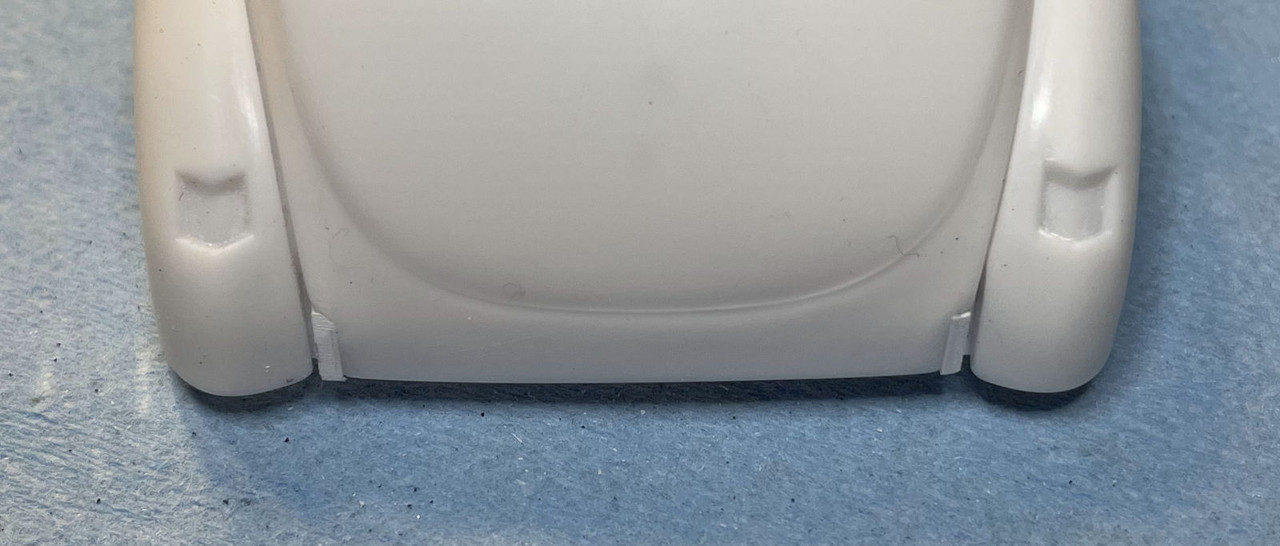
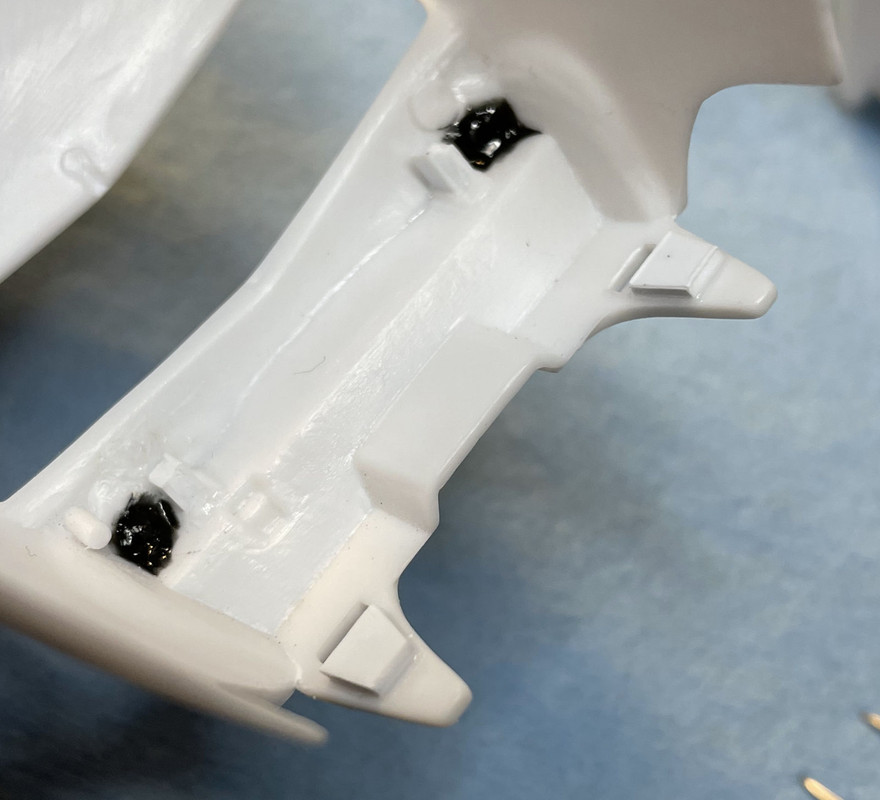
Progress is underway. I started filling in the holes in the trunk where the rear bumper mounts were removed from the chassis. Additional styrene, putty and sanding to come...  There are sizeable gaps between the rear fenders and upper body/trunk. To close the gaps I cut the rear cross member, sanded the halves down a bit and re-glued them.  The front bumper mounts were also removed, so similar repairs like the rear will be needed.  The firewall has 4 mounting holes for the hood and interior tub. These will be filled in with styrene and putty.  Added a couple new mounting points on the firewall for the interior tub - as the original tub tabs will no longer connect with the firewall.  And lastly, the magnets seem to be a success!   |
|
jeaton01
Full Member
   Sept '23 Showcased Model Awarded
Member since: October 2013
Posts: 1,279 
|
Post by jeaton01 on Jan 8, 2024 18:46:33 GMT -5
Cool!
|
|
|
|
Post by 406 Silverado on Jan 8, 2024 21:31:47 GMT -5
Starting off 2024 with a golden oldie. Bought these off Amazon:  Now THAT.....be cool right there!!  You're performing LOTS of eyecandy-worthy tricks on this one. Keep 'er comin bud.  |
|
|
|
Post by kyledehart5 on Jan 8, 2024 21:42:29 GMT -5
I’ve used those little magnets a couple times. They’re awesome for things like this. Great work
|
|
70 STING
Full Member
  
Member since: April 2023
Posts: 544
Apr 10, 2023 11:44:31 GMT -5
Apr 10, 2023 11:44:31 GMT -5
|
Post by 70 STING on Jan 8, 2024 23:33:49 GMT -5
Starting off 2024 with a golden oldie. Bought these off Amazon:  Now THAT.....be cool right there!!  You're performing LOTS of eyecandy-worthy tricks on this one. Keep 'er comin bud.  Well, if I try or learn something new each time, I’ll call that a win. 8^) |
|
70 STING
Full Member
  
Member since: April 2023
Posts: 544
Apr 10, 2023 11:44:31 GMT -5
Apr 10, 2023 11:44:31 GMT -5
|
Post by 70 STING on Jan 8, 2024 23:36:43 GMT -5
I’ve used those little magnets a couple times. They’re awesome for things like this. Great work I imagine they would be pretty handy when making workable doors with scratch built hinges. Or even on a Countach or Aventador to keep the doors in place. |
|
70 STING
Full Member
  
Member since: April 2023
Posts: 544
Apr 10, 2023 11:44:31 GMT -5
Apr 10, 2023 11:44:31 GMT -5
|
Post by 70 STING on Jan 15, 2024 20:11:12 GMT -5
Update: After removing the drip rails I wasn't left with much or any door panel lines across the top and A pillar seams. The passenger side had a little more to offer so I tried to scribe it as best I could and use it as a template for the driver side with masking tape and 2mm Tape for Curves. They look okay on the bare plastic, however, a coat of primer will surely show what a mess I made. :^(   I've decided to go with dual exhaust pipes supplied in the kit as opposed to the mould-in single exhaust. I figured the best way to do this was to remove a couple sections of the floor pan and the moulded exhaust/tail pipe.  Two sections removed and styrene fitted inside the frame from on top:  Next up I'm gonna carve out the dash gauges and replace them with the supplied top mounted gauges. 
Thats's it for now. |
|
|
|
Post by kyledehart5 on Jan 16, 2024 0:03:09 GMT -5
Man you’ve got a lot going on here!! Really like the direction you’re headed with this. Great job taking care of the molded in exhaust.
|
|
|
|
Post by 406 Silverado on Jan 16, 2024 4:53:45 GMT -5
You've got all KINDS of surgery going on with that chassis and dash!! I'm looking forward to seeing what you're going to come up with on both counts.  |
|
70 STING
Full Member
  
Member since: April 2023
Posts: 544
Apr 10, 2023 11:44:31 GMT -5
Apr 10, 2023 11:44:31 GMT -5
|
Post by 70 STING on Jan 16, 2024 19:02:38 GMT -5
kyledehart5 and 406 Silverado Thanks fellas. Certainly the most body work I've attempted to date. 
|
|
|
|
Post by 406 Silverado on Jan 27, 2024 10:04:16 GMT -5
kyledehart5 and 406 Silverado Thanks fellas. Certainly the most body work I've attempted to date.  Yeah, stuff like that can be pretty nerve racking alright.  |
|
brandonk
Full Member
   Jan '24 Showcased Model Awarded
Member since: May 2023
Posts: 1,268
May 14, 2023 13:45:45 GMT -5
May 14, 2023 13:45:45 GMT -5
|
Post by brandonk on Jan 27, 2024 10:42:57 GMT -5
What a cool project. I bought those exact magnets for that same reason. I just haven't used them on anything yet. Glad to see you are willing to grind out so much work on this one. These older kits were sure soft on details. Can't wait to see more of this one.
|
|
lyle
Forum Moderator     
Member since: May 2013
On the sunny side of the dirt
Posts: 1,645 
MSC Staff
|
Post by lyle on Jan 27, 2024 11:54:43 GMT -5
That is a basketful of “boy, howdy!” Righty there.!
|
|
handiabled
Administrator      Apr '23 Showcased Build Awarded
Member since: February 2023
Posts: 4,400 
MSC Staff
|
Post by handiabled on Jan 27, 2024 11:59:32 GMT -5
I just caught up with this! Impressive amount of slicing and dicing you are doing!
|
|
70 STING
Full Member
  
Member since: April 2023
Posts: 544
Apr 10, 2023 11:44:31 GMT -5
Apr 10, 2023 11:44:31 GMT -5
|
Post by 70 STING on Jan 28, 2024 22:02:49 GMT -5
What a cool project. I bought those exact magnets for that same reason. I just haven't used them on anything yet. Glad to see you are willing to grind out so much work on this one. These older kits were sure soft on details. Can't wait to see more of this one. I may have gotten lucky with this kit as the magnets lined up well. Magnets would be helpful to keep the doors closed firmly on Lamborghini Countach kits. Pretty sure it would be more challenging to line those up. |
|
70 STING
Full Member
  
Member since: April 2023
Posts: 544
Apr 10, 2023 11:44:31 GMT -5
Apr 10, 2023 11:44:31 GMT -5
|
Post by 70 STING on Jan 28, 2024 22:03:56 GMT -5
That is a basketful of “boy, howdy!” Righty there.! Had to look this one up… never heard that expression before. :^) |
|
70 STING
Full Member
  
Member since: April 2023
Posts: 544
Apr 10, 2023 11:44:31 GMT -5
Apr 10, 2023 11:44:31 GMT -5
|
Post by 70 STING on Jan 28, 2024 22:06:17 GMT -5
I just caught up with this! Impressive amount of slicing and dicing you are doing! Having minor regrets because I suck at body work with putty > sanding > primer > putty > sanding > primer > putty > sanding… |
|
|
|
Post by kyledehart5 on Jan 28, 2024 22:38:32 GMT -5
I feel the same way. Stick with it! I feel like I learned a bunch with my Pete Brock Datsun after having to fill/sand/primer that stupid thing 423 times before I was sort of happy. Lol
|
|
moparman18064
Full Member
   Oct '24 Showcased Model Awarded
Member since: January 2024
Posts: 555
Jan 5, 2024 20:28:50 GMT -5
Jan 5, 2024 20:28:50 GMT -5
|
Post by moparman18064 on Jan 29, 2024 7:39:50 GMT -5
I’ve used those little magnets a couple times. They’re awesome for things like this. Great work I imagine they would be pretty handy when making workable doors with scratch built hinges. Or even on a Countach or Aventador to keep the doors in place. I find this intriguing, I was wondering how to use them in my Demon build, loving it |
|
70 STING
Full Member
  
Member since: April 2023
Posts: 544
Apr 10, 2023 11:44:31 GMT -5
Apr 10, 2023 11:44:31 GMT -5
|
Post by 70 STING on Jan 29, 2024 9:21:35 GMT -5
I feel the same way. Stick with it! I feel like I learned a bunch with my Pete Brock Datsun after having to fill/sand/primer that stupid thing 423 times before I was sort of happy. Lol Well, that doesn’t sound very encouraging. 
Not sure which I dislike the most: fill/sand/primer scribing panel lines working with glass parts |
|
70 STING
Full Member
  
Member since: April 2023
Posts: 544
Apr 10, 2023 11:44:31 GMT -5
Apr 10, 2023 11:44:31 GMT -5
|
Post by 70 STING on Jan 29, 2024 9:26:31 GMT -5
I imagine they would be pretty handy when making workable doors with scratch built hinges. Or even on a Countach or Aventador to keep the doors in place. I find this intriguing, I was wondering how to use them in my Demon build, loving it Hmm, I don’t like the prospect of drilling resin parts. Seems like they might chip rather yield a smooth hole. I suppose you could always putty/fill any uneven edges or allow the CA glue to fill the gaps.  |
|
moparman18064
Full Member
   Oct '24 Showcased Model Awarded
Member since: January 2024
Posts: 555
Jan 5, 2024 20:28:50 GMT -5
Jan 5, 2024 20:28:50 GMT -5
|
Post by moparman18064 on Jan 29, 2024 10:29:38 GMT -5
I find this intriguing, I was wondering how to use them in my Demon build, loving it Hmm, I don’t like the prospect of drilling resin parts. Seems like they might chip rather yield a smooth hole. I suppose you could always putty/fill any uneven edges or allow the CA glue to fill the gaps.  I guess I will try the drilling thing on the hood when opening for the snorkel scoop, maybe drill through tape. Sorry, not trying to hijack thread. |
|
|
|
Post by kyledehart5 on Jan 29, 2024 19:18:49 GMT -5
Hmm, I don’t like the prospect of drilling resin parts. Seems like they might chip rather yield a smooth hole. I suppose you could always putty/fill any uneven edges or allow the CA glue to fill the gaps.  I guess I will try the drilling thing on the hood when opening for the snorkel scoop, maybe drill through tape. Sorry, not trying to hijack thread. Results may vary but I drill into my resin Indycar bodies all the time with no chipping issues. However, I’m sure everyone’s resin is a bit different. |
|
|
|
Post by kyledehart5 on Jan 29, 2024 19:19:49 GMT -5
I feel the same way. Stick with it! I feel like I learned a bunch with my Pete Brock Datsun after having to fill/sand/primer that stupid thing 423 times before I was sort of happy. Lol Well, that doesn’t sound very encouraging. 
Not sure which I dislike the most: fill/sand/primer scribing panel lines working with glass parts I don’t particularly care for any of those things. 😂 |
|
70 STING
Full Member
  
Member since: April 2023
Posts: 544
Apr 10, 2023 11:44:31 GMT -5
Apr 10, 2023 11:44:31 GMT -5
|
Post by 70 STING on Jan 30, 2024 12:00:36 GMT -5
Hmm, I don’t like the prospect of drilling resin parts. Seems like they might chip rather yield a smooth hole. I suppose you could always putty/fill any uneven edges or allow the CA glue to fill the gaps.  I guess I will try the drilling thing on the hood when opening for the snorkel scoop, maybe drill through tape. Sorry, not trying to hijack thread. Not at all. Sharing information is the beauty of the Forum. Before the internet, how would anyone learn so many technique in such a short time? |
|