406 Silverado
Global Administrator     
Member since: November 2011
Posts: 10,201
Member is Online
MSC Staff
|
Post by 406 Silverado on Jun 26, 2024 14:04:15 GMT -5
I can definitely relate the heat down here in South Tx where the humidity is currently at 68% with a temp of 93 degrees. Man it's hot.
Sorry to hear about the fit issues that you are having with this Ozzie but you seem to have it all under control bud.
|
|
|
|
Post by keavdog on Jun 26, 2024 14:37:07 GMT -5
I was in San Marcos a couple weeks ago visiting my Granddaughters and it was a different kind of hot than here in AZ. I prefer the AZ heat to the humidity. And man those cicadas won't stop!
|
|
ossie262
Full Member
   July '24 Showcased Build Awarded
Member since: January 2015
Posts: 319
Jan 3, 2015 15:31:27 GMT -5
Jan 3, 2015 15:31:27 GMT -5
|
Post by ossie262 on Jun 30, 2024 12:27:02 GMT -5
Hi all Has promised I got the model out got some model making done Ok so having modified the back of the gun by removing the spent case basket. I added the gunners seat and gun sight. Started to add the detail to the rear part of the tank, engine decks loose currently till add the etch brass to the rear decks and clamps once the rear deck detail is done. Need to decide what to do about spare wheels add to side of stowage frame etc . Hope you like it so far. Ossie 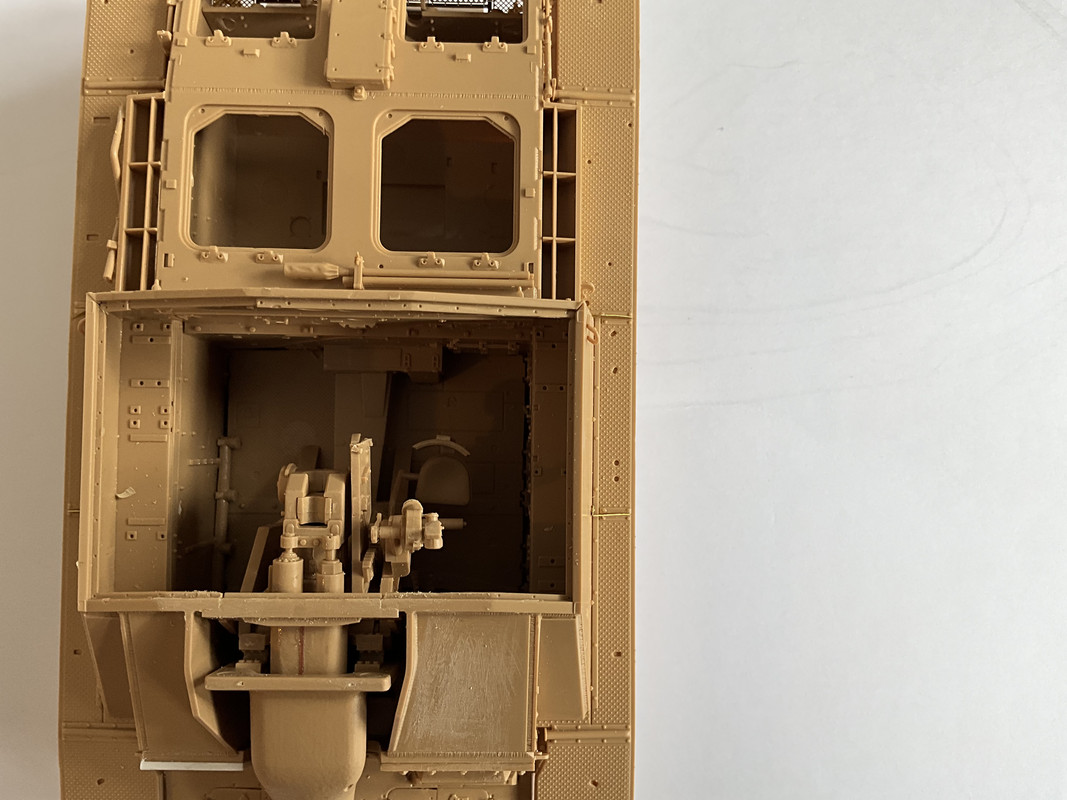      |
|
|
|
Post by deafpanzer on Jul 1, 2024 7:58:41 GMT -5
Looking real good! I have been inside a StuG at German tank museum and I was surprised how tight it was inside!!! 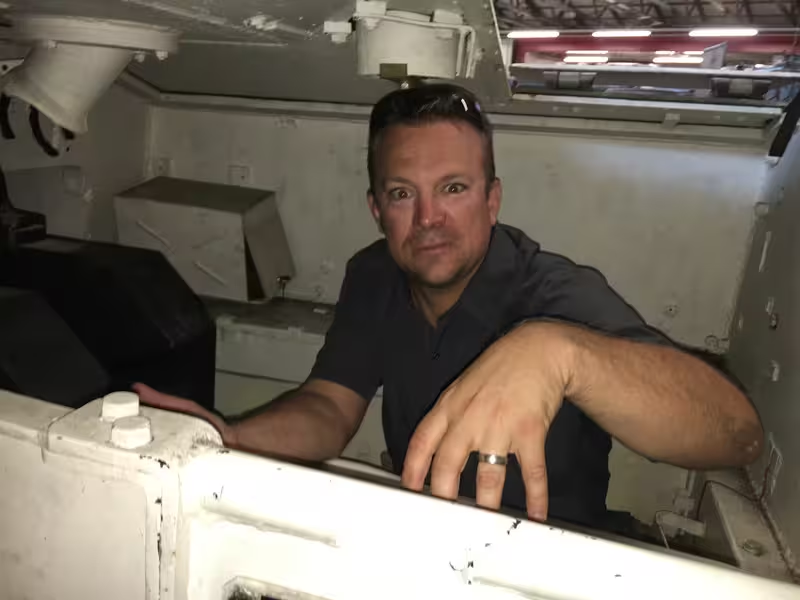 I took several pictures of the interior and exterior during the visit. That museum is definitely one of three best museums I have been to. |
|
handiabled
Administrator      Apr '23 Showcased Build Awarded
Member since: February 2023
Posts: 4,384 
MSC Staff
|
Post by handiabled on Jul 1, 2024 8:00:01 GMT -5
Looks great so far I'll be watching for more!
|
|
ossie262
Full Member
   July '24 Showcased Build Awarded
Member since: January 2015
Posts: 319
Jan 3, 2015 15:31:27 GMT -5
Jan 3, 2015 15:31:27 GMT -5
|
Post by ossie262 on Jul 1, 2024 11:57:08 GMT -5
Hi Deafpanzer
is this the Stug at Koblenz great museum .
i be interested in any pictures thank you
ossie
|
|
stikpusher
Forum Moderator      May '23 Showcased Model Awarded
Member since: April 2023
Living The Dream
Posts: 4,113 
MSC Staff
|
Post by stikpusher on Jul 1, 2024 13:37:58 GMT -5
Looking real good! I have been inside a StuG at German tank museum and I was surprised how tight it was inside!!!  I took several pictures of the interior and exterior during the visit. That museum is definitely one of three best museums I have been to. Most AFVs are pretty snug inside. Especially when they are loaded up as they are supposed to be, and fully crewed. |
|
ossie262
Full Member
   July '24 Showcased Build Awarded
Member since: January 2015
Posts: 319
Jan 3, 2015 15:31:27 GMT -5
Jan 3, 2015 15:31:27 GMT -5
|
Post by ossie262 on Aug 29, 2024 11:38:21 GMT -5
Hi everyone First of all sorry for not doing any model making but life just seems to overtake you. Right back to the model So added the etch brass to the engine deck, did not used kit mess has this is wrong type for my model. 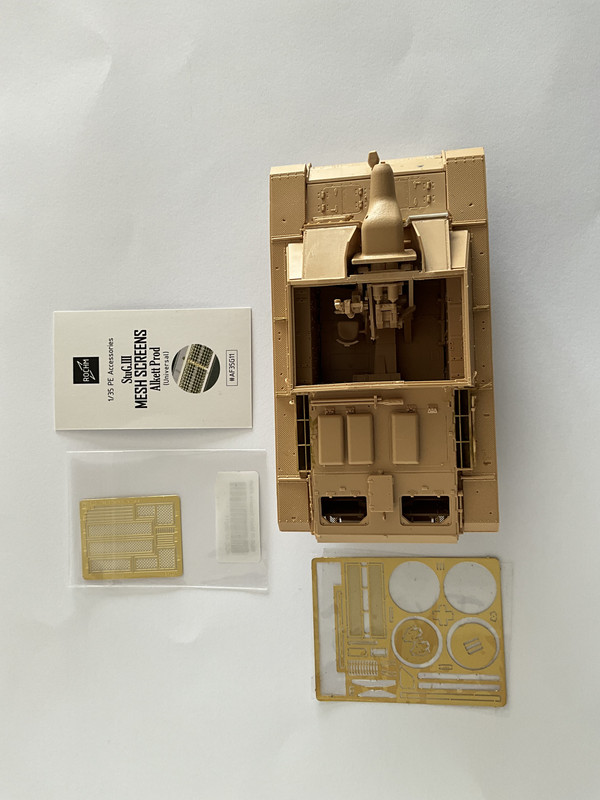 Now once this is all done I then had to think about all those retaining nuts on those mesh. So I decided rather than use the ones that came with the etch. I would use an old trick of mine. I’ve not done this for a long time. There’s a lot of spares within the kit and on the two spare sides there is lots of rivets so I would use an old trick of mine. I’ve not done a long time. There’s a lot of spares within the kit and on the two spare sides there is lots of rivets so I carefully sliced them off with the razor blade and then dipping super glue Where I wanted the actual nuts to go I gently placed them on top therefore creating a nut that was visible. I have used varnish instead of glue before to hold little nuts in place.  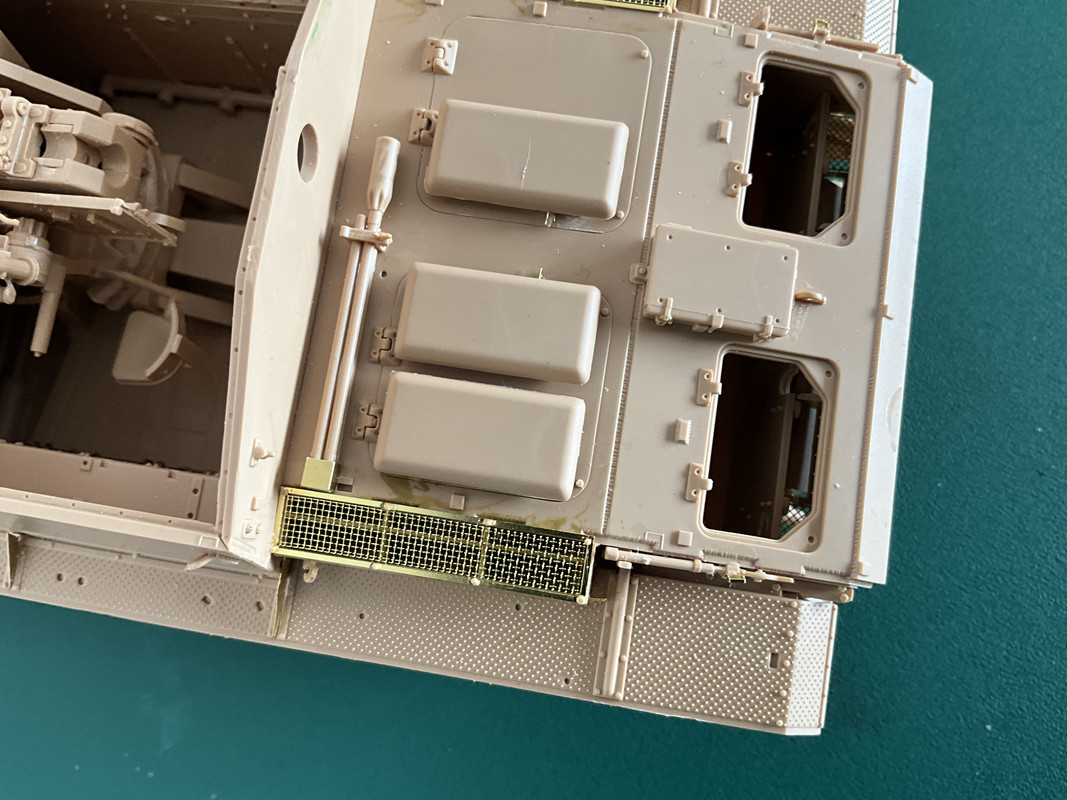 Finally I finished off the rear engine deck covers so spare wheel mounting bracket holes filled in, but I did not add the spare wheel retainers as these will be going on the side of the actual frame. I’m not building it as per the kit. I’m doing some artistic license. Shall we say with the model.  Hope to add some more soon Ossie |
|
|
|
Post by kyledehart5 on Aug 29, 2024 14:52:20 GMT -5
Life surely does get in the way and no need to apologize. Happens to us all. Always nice to see an update!!
|
|
ossie262
Full Member
   July '24 Showcased Build Awarded
Member since: January 2015
Posts: 319
Jan 3, 2015 15:31:27 GMT -5
Jan 3, 2015 15:31:27 GMT -5
|
Post by ossie262 on Aug 29, 2024 16:25:14 GMT -5
Thanks kyle
|
|
|
|
Post by kyledehart5 on Aug 29, 2024 23:04:18 GMT -5
You’re welcome!! Looking forward to seeing more!!
|
|
handiabled
Administrator      Apr '23 Showcased Build Awarded
Member since: February 2023
Posts: 4,384 
MSC Staff
|
Post by handiabled on Aug 30, 2024 1:48:43 GMT -5
Fantastic having you back! Shaving the rivet detail and using them is a great idea and they look fantastic!
|
|
ossie262
Full Member
   July '24 Showcased Build Awarded
Member since: January 2015
Posts: 319
Jan 3, 2015 15:31:27 GMT -5
Jan 3, 2015 15:31:27 GMT -5
|
Post by ossie262 on Sept 5, 2024 6:16:31 GMT -5
Hi everyone Quick update So I messed up cleaned off the wrong bit . So decided to fit just the coax gun tube only have removed its mount. Opps!!! Not happy with light on the front may remove it and make a new bracket. Research required for next bit need to start thinking about how I want the look of the model . Hope do some more tomorrow with a clear mind how I want it to look.    Ossie |
|
handiabled
Administrator      Apr '23 Showcased Build Awarded
Member since: February 2023
Posts: 4,384 
MSC Staff
|
Post by handiabled on Sept 5, 2024 9:10:13 GMT -5
No doubt you will beat this into submission!
|
|
|
|
Post by tcoat on Sept 5, 2024 9:25:09 GMT -5
Looking real good! I have been inside a StuG at German tank museum and I was surprised how tight it was inside!!!  I took several pictures of the interior and exterior during the visit. That museum is definitely one of three best museums I have been to. The look on your face would appear to indicate that it was so tight you sat on something and got a surprise! |
|
ossie262
Full Member
   July '24 Showcased Build Awarded
Member since: January 2015
Posts: 319
Jan 3, 2015 15:31:27 GMT -5
Jan 3, 2015 15:31:27 GMT -5
|
Post by ossie262 on Sept 6, 2024 12:58:47 GMT -5
Hi all So as promised I done some more and completed part 29. I put the track links on but was not happy with them so removed them and cleaned up the back wall. Just so every one knows. The build is based on the Stug 3 G at fort benning Still in its original colours and was from stu. Art. Brig 261 so this is the bases of the vehicle . Built Dec 44 . It was surrendered in Austria in running condition. So my model will either be in that compound being looked at by some US soildiers or with track broken along side a road with same idea being examined. . Ossie 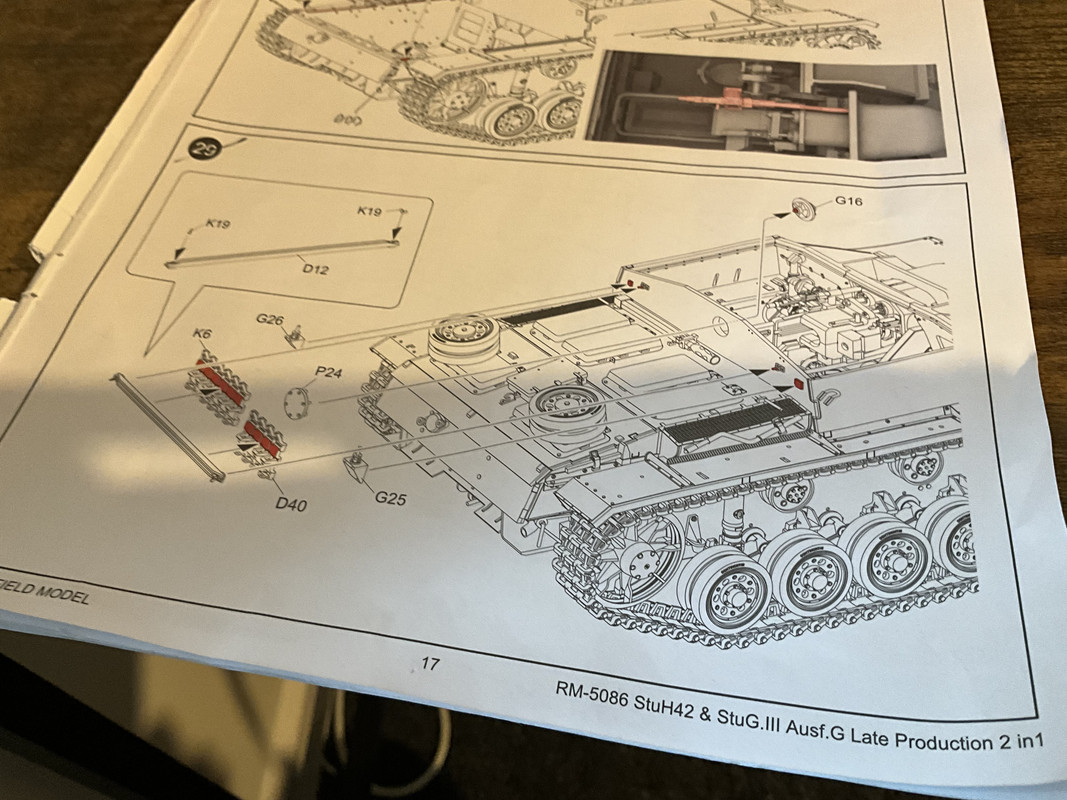  |
|
406 Silverado
Global Administrator     
Member since: November 2011
Posts: 10,201
Member is Online
MSC Staff
|
Post by 406 Silverado on Sept 6, 2024 13:07:36 GMT -5
This is coming together very nicely so far Ossie. Better safe now than sorry later with the back wall clean up buddy. An ounce of prevention...........
|
|
ossie262
Full Member
   July '24 Showcased Build Awarded
Member since: January 2015
Posts: 319
Jan 3, 2015 15:31:27 GMT -5
Jan 3, 2015 15:31:27 GMT -5
|
Post by ossie262 on Sept 15, 2024 12:54:29 GMT -5
Hi all Disaster struck oh I hate etch brass the bar came apart and could not level it up , and it broke and I broke the headlight and bracket off the front .  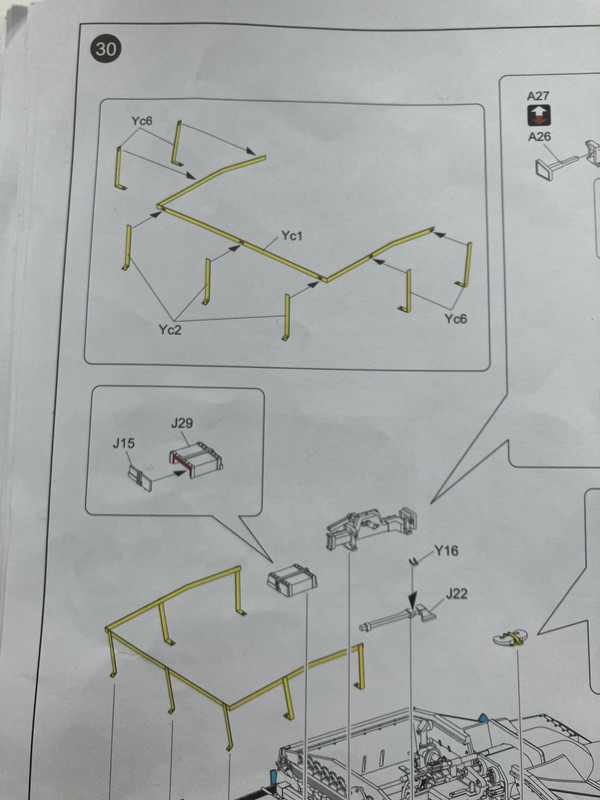 So will have to get the plastic card bucket out with all my plastic strip etc and make it out of plastic and the wheel mounts. Might make the stowage box at same time . Ossie |
|
moparmadness
Full Member
  
Member since: May 2023
Posts: 926
May 11, 2023 20:39:35 GMT -5
May 11, 2023 20:39:35 GMT -5
|
Post by moparmadness on Sept 15, 2024 13:28:36 GMT -5
Oh man, if it can happen it will, when it comes to PE.
|
|
ossie262
Full Member
   July '24 Showcased Build Awarded
Member since: January 2015
Posts: 319
Jan 3, 2015 15:31:27 GMT -5
Jan 3, 2015 15:31:27 GMT -5
|
Post by ossie262 on Sept 15, 2024 14:09:39 GMT -5
Oh yes it does lol
|
|
stikpusher
Forum Moderator      May '23 Showcased Model Awarded
Member since: April 2023
Living The Dream
Posts: 4,113 
MSC Staff
|
Post by stikpusher on Sept 15, 2024 15:35:04 GMT -5
And that is why I prefer to work with styrene instead of PE. Styrene breaks like that can easily be fixed or replaced with some strip.
|
|
handiabled
Administrator      Apr '23 Showcased Build Awarded
Member since: February 2023
Posts: 4,384 
MSC Staff
|
Post by handiabled on Sept 17, 2024 3:00:35 GMT -5
I'll be watching for your fix to the pe issue. I hate it when assemblies like this refuse to go together.
|
|
406 Silverado
Global Administrator     
Member since: November 2011
Posts: 10,201
Member is Online
MSC Staff
|
Post by 406 Silverado on Sept 17, 2024 9:50:03 GMT -5
Sorry to hear the luck with the PE Ossie. Will be looking forward to seeing the recovery efforts.
|
|
ossie262
Full Member
   July '24 Showcased Build Awarded
Member since: January 2015
Posts: 319
Jan 3, 2015 15:31:27 GMT -5
Jan 3, 2015 15:31:27 GMT -5
|
Post by ossie262 on Sept 19, 2024 12:14:33 GMT -5
Hi everyone So raided the plastic strip box  Damm only one strip of 15 thou by 40 right walk down to the model shop get some more lol. So the base ones are 15 thou by 60 and vertical posts and rail all done in 15 thou by 40. Add the spare wheel brackets one the side. Reason I have added them there models is loosely based on the Fort Benning late Stug g Re added the stowage next stage is to add the stowage then gun and side skirts and paint . Got to build stowage box for the rear deck . Hope you like it so far Ossie 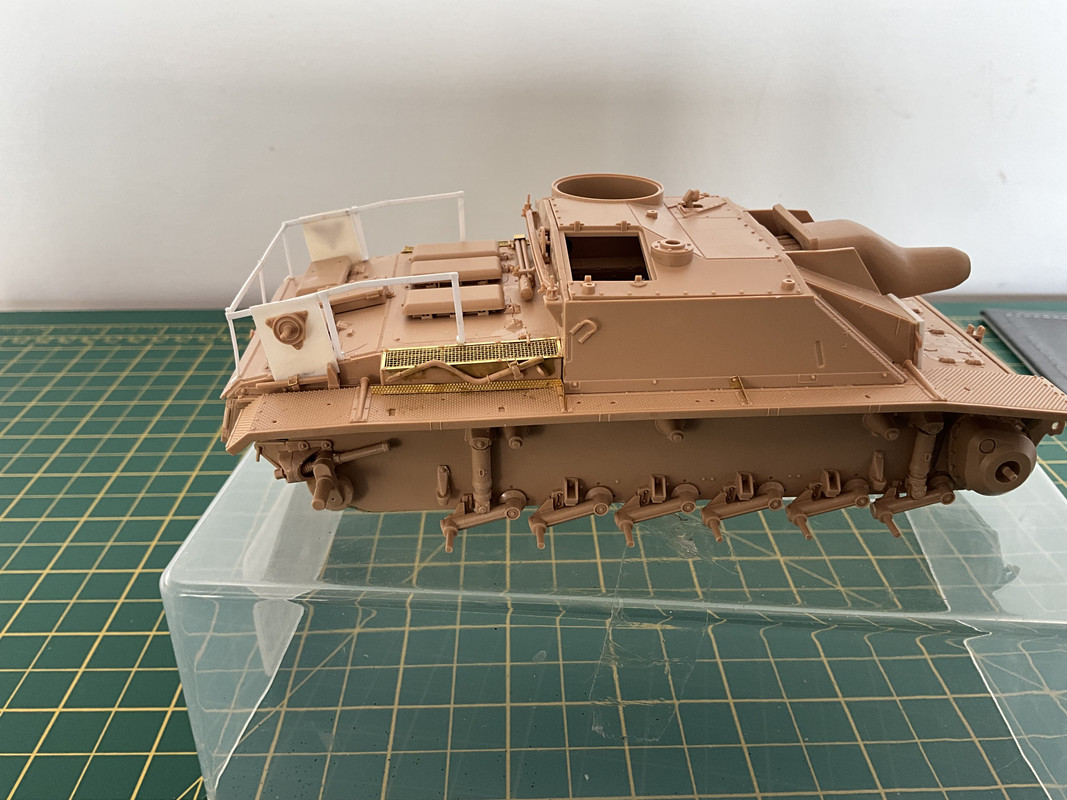    |
|
|
|
Post by kyledehart5 on Sept 20, 2024 4:12:07 GMT -5
Great work!! Railing looks great.
|
|
handiabled
Administrator      Apr '23 Showcased Build Awarded
Member since: February 2023
Posts: 4,384 
MSC Staff
|
Post by handiabled on Sept 20, 2024 4:15:39 GMT -5
Nicely scratched replacement for the pe that refused to cooperate.
|
|
ossie262
Full Member
   July '24 Showcased Build Awarded
Member since: January 2015
Posts: 319
Jan 3, 2015 15:31:27 GMT -5
Jan 3, 2015 15:31:27 GMT -5
|
Post by ossie262 on Sept 20, 2024 11:06:42 GMT -5
Thank you for the nice compliments gents
|
|
stikpusher
Forum Moderator      May '23 Showcased Model Awarded
Member since: April 2023
Living The Dream
Posts: 4,113 
MSC Staff
|
Post by stikpusher on Sept 20, 2024 13:29:49 GMT -5
God bless the folks at Evergreen styrene  They get us modelers out of all sorts of jams. |
|
ossie262
Full Member
   July '24 Showcased Build Awarded
Member since: January 2015
Posts: 319
Jan 3, 2015 15:31:27 GMT -5
Jan 3, 2015 15:31:27 GMT -5
|
Post by ossie262 on Sept 22, 2024 11:49:43 GMT -5
Hi all Just a couple of hrs work today. Couple things I did to tidy up the frame. Added some micro rod to act like weld seam and added a bolt to each hull mounting point. Started on the stowage and slowly but surely getting the model finished . Hope you like it Ossie  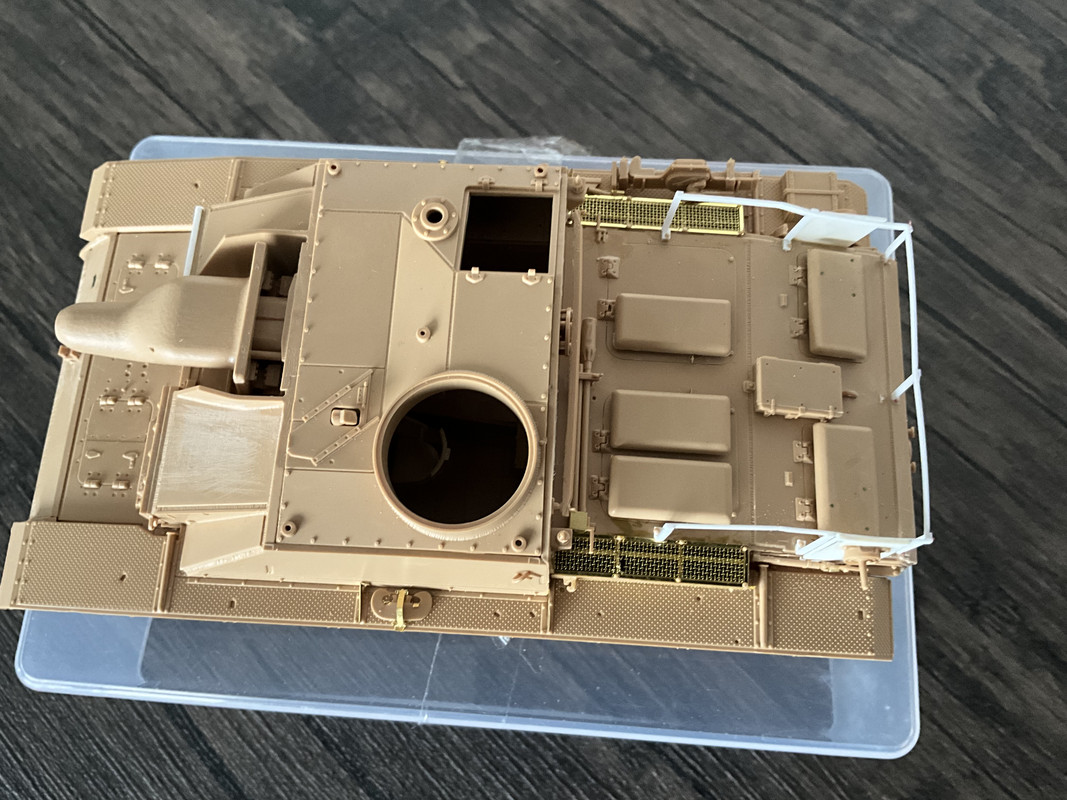  |
|
handiabled
Administrator      Apr '23 Showcased Build Awarded
Member since: February 2023
Posts: 4,384 
MSC Staff
|
Post by handiabled on Sept 23, 2024 3:50:27 GMT -5
Some extra minute detail you added that pe would never have substituted for.
|
|