|
|
Post by wing_nut on Oct 4, 2012 7:59:33 GMT -5
|
|
406 Silverado
Global Administrator     
Member since: November 2011
Posts: 10,236
Member is Online
MSC Staff
|
Post by 406 Silverado on Oct 4, 2012 8:04:37 GMT -5
Cool we have a blog from Marc. Nice start so far. Love the added screens. Can't wait to see your painting and weathering.
|
|
|
|
Post by robbo on Oct 4, 2012 9:35:25 GMT -5
Making a good job of this Marc
|
|
|
|
Post by spud on Oct 4, 2012 11:59:40 GMT -5
Very nice
|
|
|
|
Post by TRM on Oct 4, 2012 12:15:38 GMT -5
Nice looking kitty you have there Marc!!! nice work on the screens too!!  |
|
|
|
Post by tobias5555 on Oct 4, 2012 12:21:25 GMT -5
Pretty good build so far.
|
|
|
|
Post by wbill76 on Oct 5, 2012 14:33:37 GMT -5
After your naked HT PE marathon, I'm sure this one's going to be a walk in the park Marc! Nice job on spiffing up the tow hooks and creating your own screens.
|
|
|
|
Post by bbd468 on Oct 6, 2012 19:06:35 GMT -5
Very nice build Marc! Im really diggin' the 1/48scale. Ill be watchin' close.  Gary |
|
Deleted
Member since: January 1970
Posts: 0
Nov 26, 2024 8:54:12 GMT -5
Nov 26, 2024 8:54:12 GMT -5
|
Post by Deleted on Oct 7, 2012 3:29:34 GMT -5
Nice improvements to this little kitty!
|
|
danb.
Reviews member     March 2013 MoM Winner
Member since: November 2011
Posts: 2,808
Nov 17, 2011 9:22:52 GMT -5
Nov 17, 2011 9:22:52 GMT -5
|
Post by danb. on Oct 7, 2012 3:44:07 GMT -5
Awesome start on the Panther Marc them little details make a lot of difference to the kit well done.
Dan B
|
|
|
|
Post by wing_nut on Oct 7, 2012 8:47:51 GMT -5
Thanks for all the comments folks. I will have an update later today with some of the paper zim added. An interesting product to say the least.
|
|
|
|
Post by wing_nut on Oct 8, 2012 11:18:14 GMT -5
Dunno how you guys in this forum react to long winded posts but a reckon I am about to find out  I worked on the paper zim over the weekend so here’s a WP update and a product review/opinion. Having seen and example of what can be done with this product at AMPS East I had to give it a try. Especially since it looked so nice in 1/48. (Hmmm? That sounded awfully familiar. I am guessing I’ve said that already in another post somewhere.) There is a lot of potential with this product but I think it takes, at least for me, a couple of tries at it to get used to the properties and application techniques. The sheet that comes with the laser cut card stock has he pieces labeled and recommendations for methods of attaching the zim to the model.  The preferred method is to use thinned white glue over a primed surface. This does work as can be seen on the turret. There is a long(ish) time for the glue to absorb and stick and I still had some problems with corners peeling up. The wetter the paper gets to more susceptible to damage while you’re working it into place. I ended up using some CA to get them to stay down. I switched over to slow acting CA gel for the hull pieces. Still time to move it around and accelerator can be brushed on the paper to get it to set. It does not affect the texture. I found this also help with trimming since with the white glue the edges where soft and even with a new scalpel blade there was to fraying of the edges. There are also recommendations as to the order in which some pieces should be applied due to the way the edge overlap. Fit of the pieces was pretty good overall. My issues with the product are with the overall and how the materials blend at the corners. The paper is thick(ish) There is a learning curve for this part I guess. My biggest complaint is the pieces for the upper hull. The sheet says that a slot can be cut to accommodate for the rail. Since this is a standard piece on the side of the tank I wonder why they didn’t cut the pieces separately. The small size and delicate nature of the piece due to the various holes made this difficult. The area at the rear broke easily so it had to be patched so now there is a seam and I am not sure how to handle that so it is not apparent. I am thinking this will end up being a chipped/damaged area of the zim as a cheat. The seams on the mantlet where tough to deal with and I am not going to see how that looks until it gets a coat of primer. With resin zim sets this piece is usually cast with the zim on it and this would be a big improvement to the set. Are the problems I had of my own doing being the 1st time I am trying paper zim? Maybe. I will say though that my 1st time using resin zim went smooth as glass.  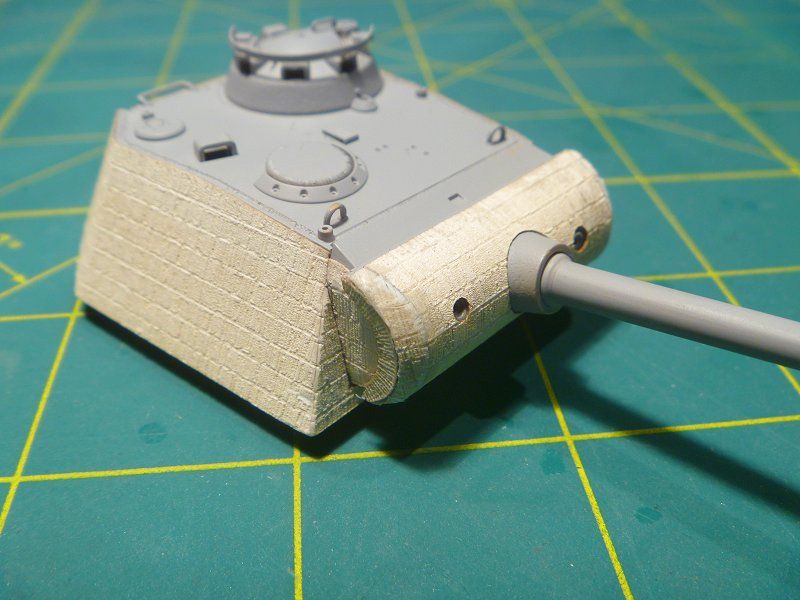 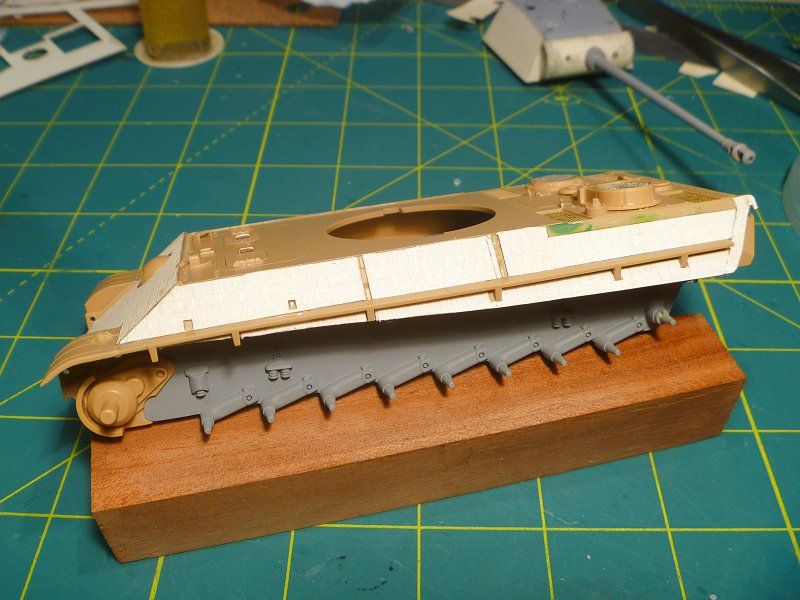 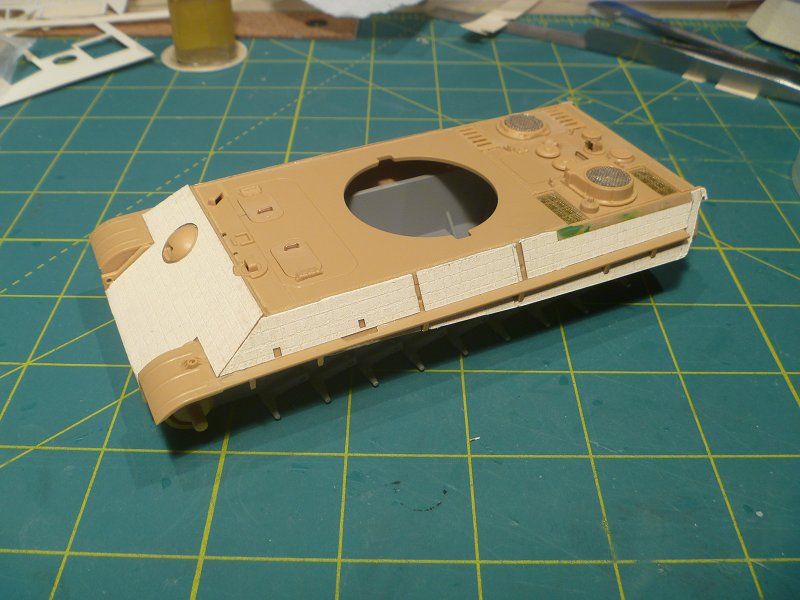 |
|
|
|
Post by TRM on Oct 8, 2012 11:30:43 GMT -5
Nothing wrong with the "Long" posts at all, especially when they are informative!! The paper does look like it has the potential! Was looking at this at the recent AMPS show. It great getting to see this in action! We might have to grab some pics from this after your done and make a nice little SBS for the MSCer's Library! Thanks for posting your updates!!  |
|
|
|
Post by bullardino on Oct 8, 2012 11:47:53 GMT -5
Nice idea the ca gel, but I think you'll have to put some whithe glue anyway. I think it works also to stiffen the paper and to make it absorb less paint. As T said, it looks quite promising (and it should be less dangerous to health to deal with). Good job  |
|
|
|
Post by spud on Oct 8, 2012 12:05:43 GMT -5
Very nice, be interesting to see how that paper Zim paints up
|
|
|
|
Post by wbill76 on Oct 8, 2012 14:42:53 GMT -5
First time I've seen/read of the paper zim in actual use, so it's informative to hear of your issues Marc. Like the others, it will be interesting to see how it responds to painting and if it becomes a "sponge" or not. Keep at it, looking forward to the next update!
|
|
martyncrowther.
Full Member
  
Member since: December 2011
Not Jaymes
Posts: 699
Dec 27, 2011 14:40:09 GMT -5
Dec 27, 2011 14:40:09 GMT -5
|
Post by martyncrowther. on Oct 8, 2012 14:48:31 GMT -5
Nice start Marc, I love these quarter scale kits as they look cute  martyn |
|
Deleted
Member since: January 1970
Posts: 0
Nov 26, 2024 8:54:12 GMT -5
Nov 26, 2024 8:54:12 GMT -5
|
Post by Deleted on Oct 8, 2012 15:33:20 GMT -5
Really interesting blog WN, paper zim looks very good in this scale. These 1/48th kits look better and better, especially with the mods your putting in  |
|
|
|
Post by robbo on Oct 8, 2012 16:42:06 GMT -5
That's looking well nice Marc, keep it up mate
|
|
|
|
Post by wing_nut on Oct 8, 2012 17:37:29 GMT -5
Thanks guys. Appreciate the comments. I didn't mention above but another test of the edge blending will be coming up. The little thing in the lower right corner with the wedge shapes is for the front MG blister. That should cause a few hairs to fall out.  Since this was posted I did an experiment with some thin CA. I cover one die of the hull to get the zim "wet" with the CA. as it soaked into the paper there was enough time to roll a cotton swap over it to sop up the excess. It cure real hard to protect the surface from handling damage and didn't effect the texture. I'll get some pics with i do the rest. |
|
johnt
Full Member
   Feb 2012 MoM and 2012 Model of the Year Winner
Member since: November 2011
Posts: 1,174
Nov 15, 2011 5:38:32 GMT -5
Nov 15, 2011 5:38:32 GMT -5
|
Post by johnt on Oct 8, 2012 17:58:25 GMT -5
Hi Marc, the zim looks very good, a nice fine texture and in scale I reckon. Great job so far!
|
|
406 Silverado
Global Administrator     
Member since: November 2011
Posts: 10,236
Member is Online
MSC Staff
|
Post by 406 Silverado on Oct 8, 2012 18:04:23 GMT -5
Looks good Marc, especially when it's made out of paper. Look forward to seeing the round thing with CA.
Good idea T. steel the pics for the library...LOL
|
|
|
|
Post by bbd468 on Oct 10, 2012 0:10:27 GMT -5
I think the Zimm looks awesome in that scale. Your build is nice all together. Looking forward to see how it paints over.  Gary |
|
|
|
Post by dupes on Oct 10, 2012 8:55:01 GMT -5
Mr. Nut! You'll be sad to hear that my hot pepper crop didn't fare nearly as well as last year...not a single habanero to be had.
Nice work on the Panther so far...when did you get into 1/48 armor? :0
|
|
|
|
Post by wing_nut on Oct 10, 2012 12:26:17 GMT -5
Thanks for all the comments guys. YO DUPES! My 1st 1/48 scale armor really more to try out the paper zim. But I do like this scale so I may do more. Last update before painting begins. YIPPIE!!! One of the problems with the paper zim is that fact that it’s paper. Sanding and “chipping” leaves a frayed edge. Just like when you tear a piece of paper. I soaked the paper with thin CA and dabbing off the excess with a q-tip before it sets. A little fuzzy but you get the idea. 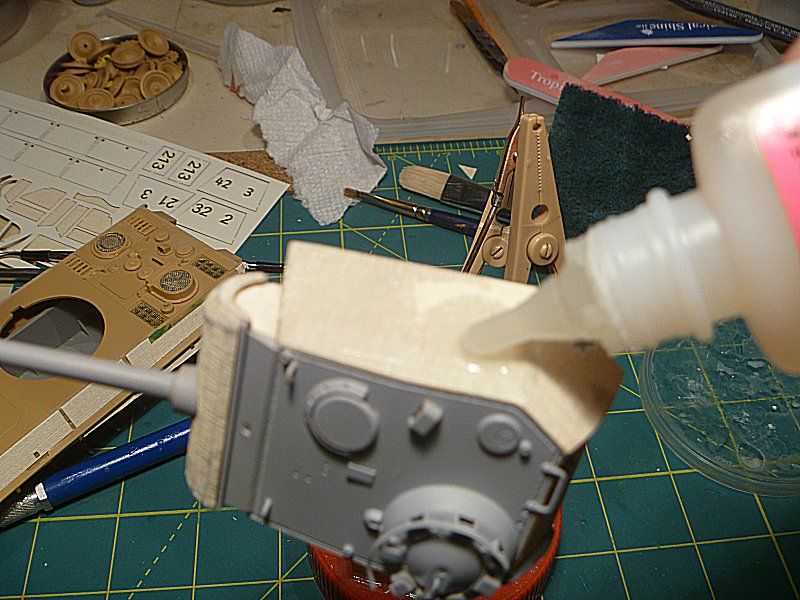  I only did the CA on one side and it does not affect the surface at all. But is does make it a bit more durable. With CA 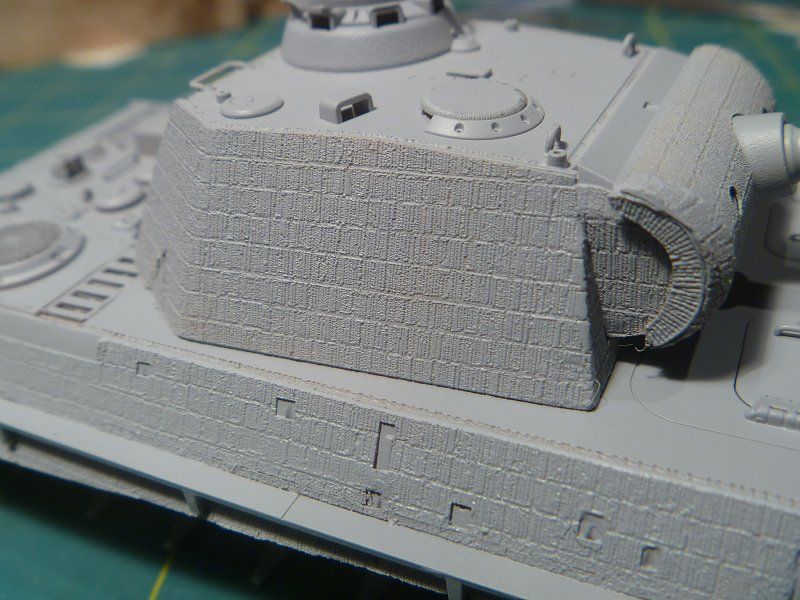 Without CA 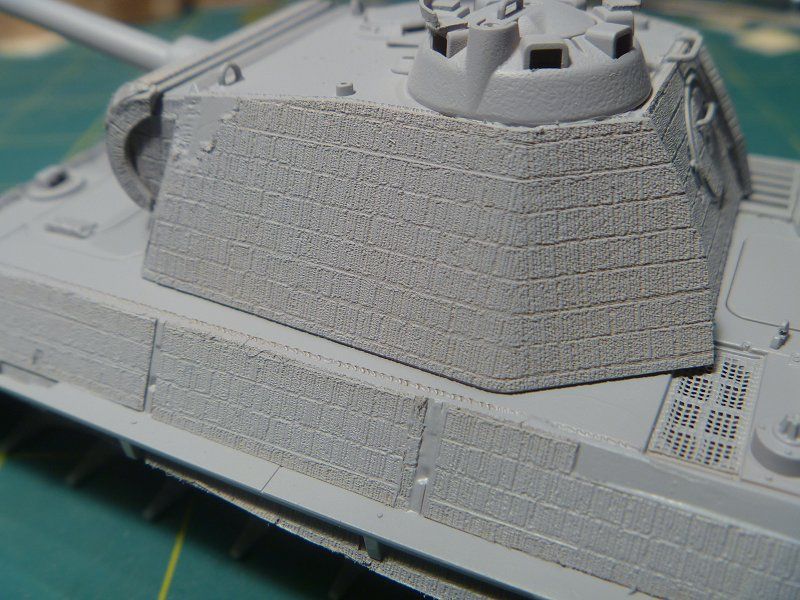 The gun blister was a nightmare and in the end didn’t work at all. The piece with the cut segment did not fit. I couldn’t get all the gaps to close. Needing more work time I used the white glue instead of the gel CA and the segments got pretty soaked and were tearing off as i tried to work them together. I think the seams would have looked mad anyway. They give you round disk to wet and, in their woods, “stretch” over the bulge. Wet paper doesn’t stretch… it tears. So that was a bust. I ended up softening the plastic with liquid glue and tried to replicate the pattern. Not great but it is what it is. A couple of pics of how I shaped the zim before putting it on in the event someone else tries this stuff and gets it to work better than I did.   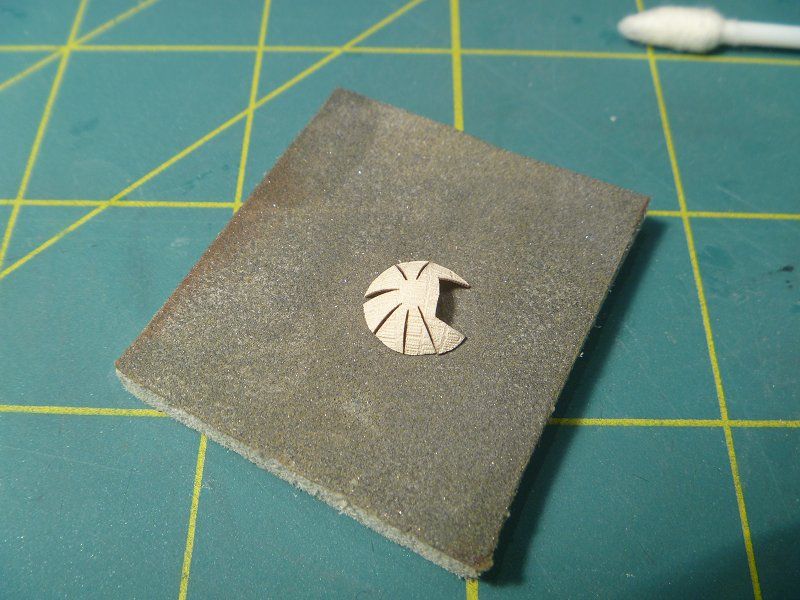 You can sort of see them blister here. 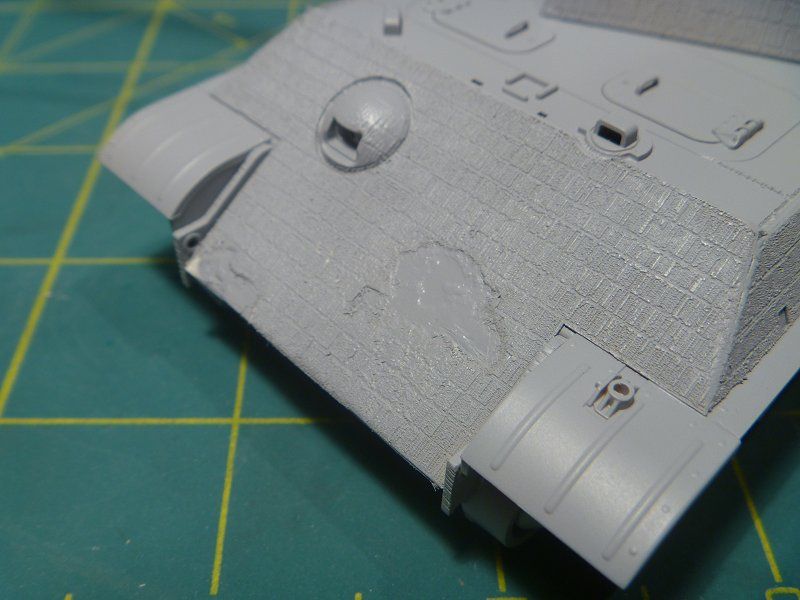 The bit of raised plastic on the side of the hull that is supposed to be the rack for the extra tread was chiseled off to make room for the paper ones from the zim set. I don’t plan to put any treads on the hull and use these to hang on the turret. The Tread where separated so they could be linked. The thing with the 2 bends is a strip I cut off the paper sheet to test soaking it in thin CA to make it stiff. One end with bent then soaked and the other was soaked, cured and then bent. The latter actually cracked so when making the rack I went with bend first. Make some pins from wire. The cable loop is there for a test fit since I will attach one end of the cable on the bracket. 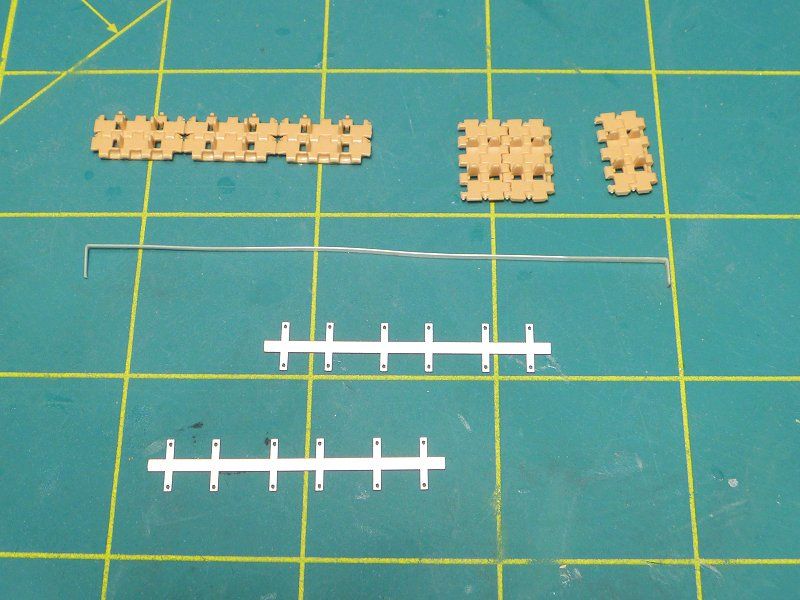 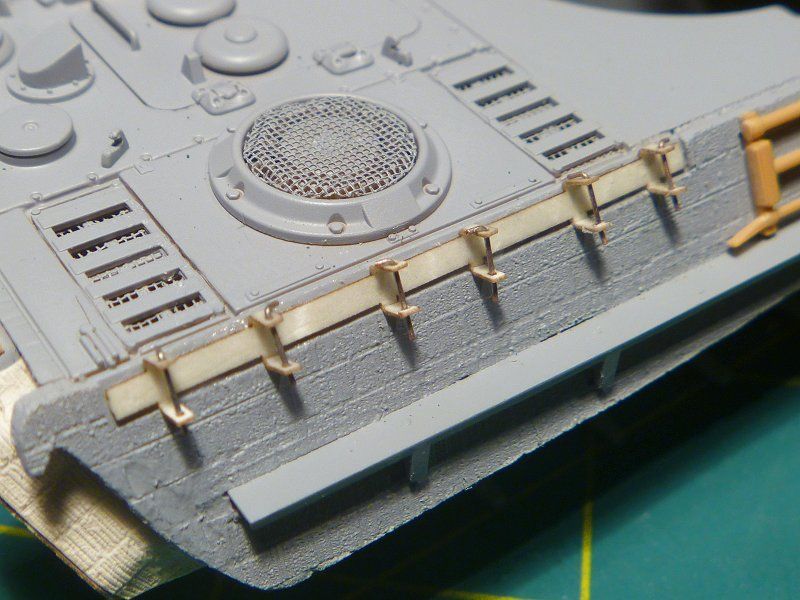 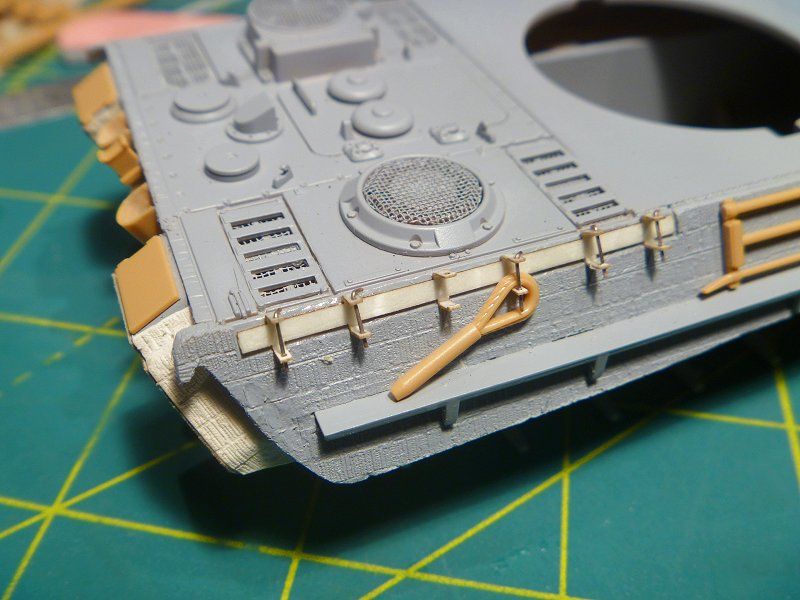 Not sure the function of that piece by the fan but it is on a 1/35 “G” I have so I made one.  |
|
|
|
Post by wing_nut on Oct 10, 2012 17:55:45 GMT -5
You like the wrong stuff? Oh man do i have plenty of that  And thanks or the comments Dicky. |
|
406 Silverado
Global Administrator     
Member since: November 2011
Posts: 10,236
Member is Online
MSC Staff
|
Post by 406 Silverado on Oct 10, 2012 18:07:02 GMT -5
Wrong ways and right ways, all I know is this is a great blog...as jackwagon has said. Looking forward to the best part...
|
|
|
|
Post by TRM on Oct 10, 2012 18:20:03 GMT -5
Another fine update!!! Nothing wrong with this at all!!!
|
|
|
|
Post by wbill76 on Oct 10, 2012 20:33:22 GMT -5
I wondered how the set would tackle the ball MG mount and I can see how it would be frustrating! Nice save with your own pattern and the added detail to the engine deck. I believe that butterfly shutter is for controlling the airflow to the crew compartment heater but not 100% sure.
|
|
|
|
Post by wing_nut on Oct 11, 2012 13:40:35 GMT -5
Just a quick thank you too all for your comments and a couple of base coat pics. Heading to Chicago for a wedding. I plan to start drinking at the airport. ;D  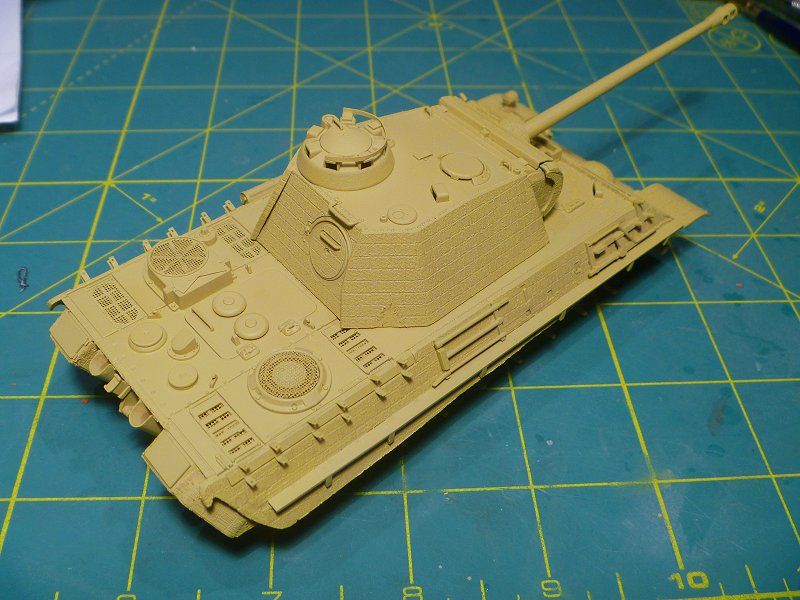 |
|