danb.
Reviews member     March 2013 MoM Winner
Member since: November 2011
Posts: 2,808
Nov 17, 2011 9:22:52 GMT -5
Nov 17, 2011 9:22:52 GMT -5
|
Post by danb. on Oct 18, 2012 17:37:09 GMT -5
Right fellow MSCers here is build no 7 for me i picked up a DML 1/35 Panther G at a recent show it was 2nd hand and the kit had been started with a few missing pieces, i have wanted to make a Berlin street bunker for a while progress so far i scratched a engine compartment to match up with my reference pics upper and lower hull have been attached and have been filling and sanding parts pictures for reference only...... This the Panther i am basing my model on Late production Panther G from the Daimler benz factory one of the last Panthers found in Berlin 1945  The bunker in which i will get inspiration from  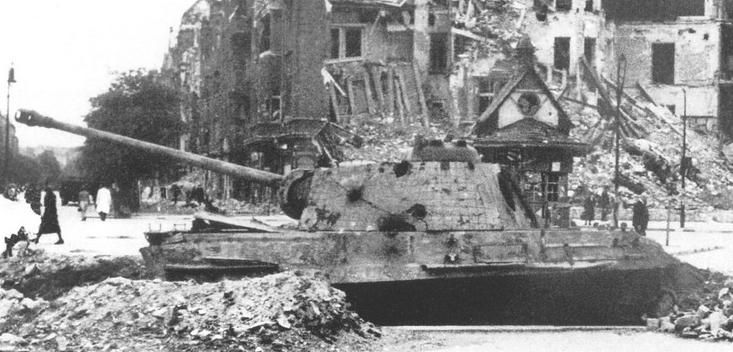 The kit 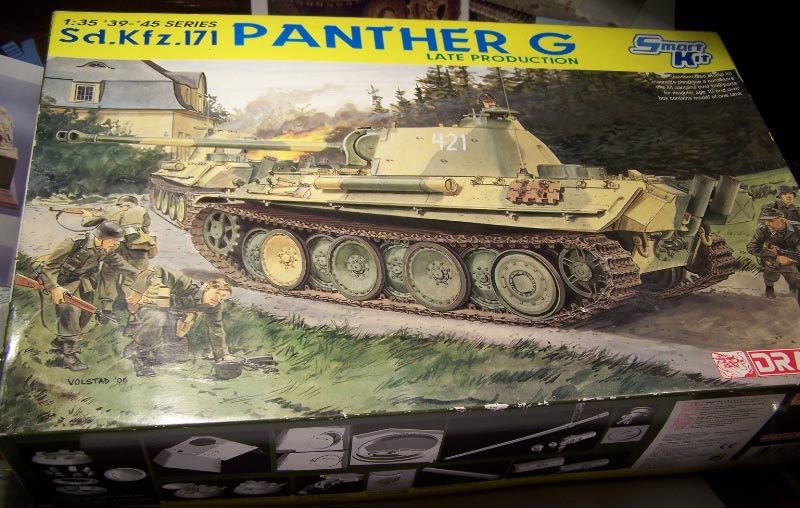 My progress so far still alot to do on the engine compartment before i can start work on the hull and turret please excuse the shoddy paintwork its from the previous owner !!!!! 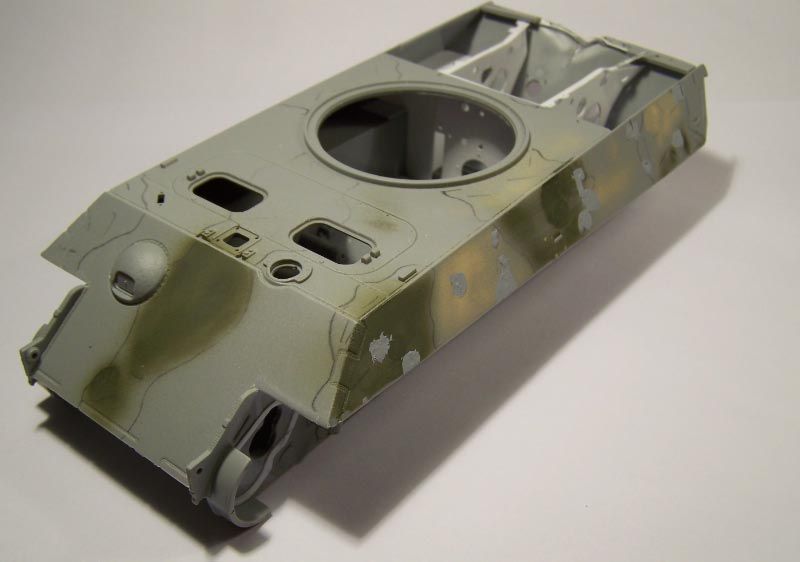 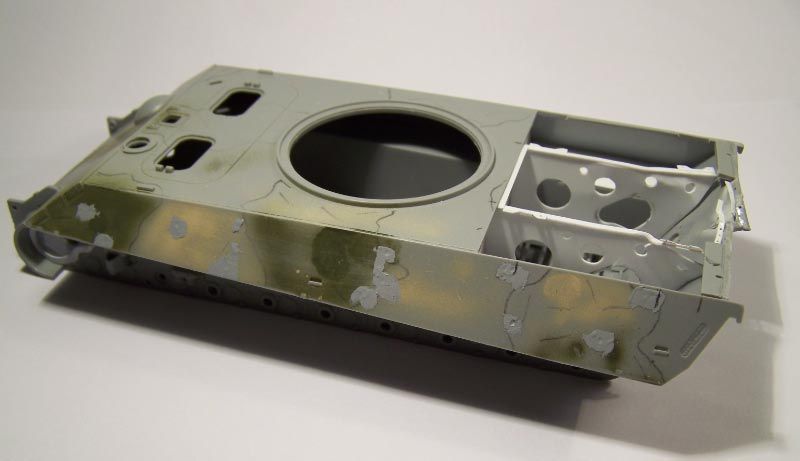 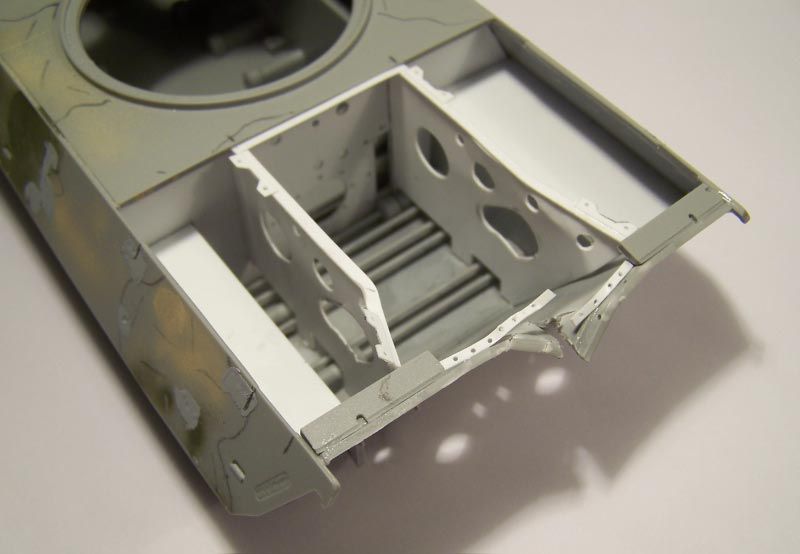 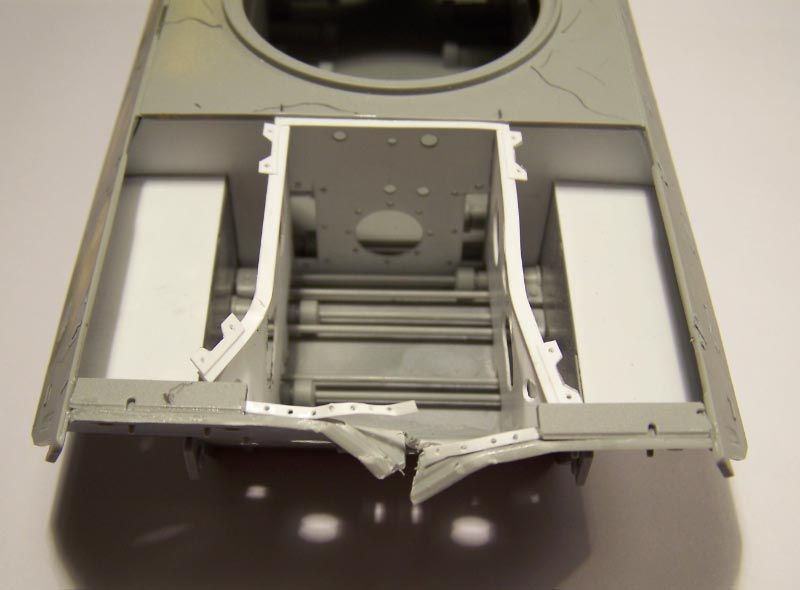  Dan B |
|
|
|
Post by TRM on Oct 18, 2012 17:44:40 GMT -5
Very slick project Dan!!! Can't wait to see this unfold!!!
|
|
|
|
Post by spud on Oct 18, 2012 17:59:49 GMT -5
oh Very Cool Dan
|
|
|
|
Post by 406 Silverado on Oct 18, 2012 19:46:56 GMT -5
ah very cool Dan.
I've had these pics for a few years but never got around to building this one. Looking forward to see this one get blogged. Count me in.
|
|
bigjohn
Reviews member    
Member since: December 2011
John Hale
Posts: 3,438
Dec 21, 2011 2:17:45 GMT -5
Dec 21, 2011 2:17:45 GMT -5
|
Post by bigjohn on Oct 18, 2012 20:19:54 GMT -5
Neat idea Dan, and what a nice way to save an abused kit!!
|
|
|
|
Post by bbd468 on Oct 18, 2012 21:24:30 GMT -5
Sweet! This will be fun to watch Dan!  Gary |
|
danb.
Reviews member     March 2013 MoM Winner
Member since: November 2011
Posts: 2,808
Nov 17, 2011 9:22:52 GMT -5
Nov 17, 2011 9:22:52 GMT -5
|
Post by danb. on Oct 19, 2012 1:20:22 GMT -5
Thanks fellas glad you all approve
Dan B
|
|
Deleted
Member since: January 1970
Posts: 0
Nov 22, 2024 19:04:44 GMT -5
Nov 22, 2024 19:04:44 GMT -5
|
Post by Deleted on Oct 19, 2012 2:37:15 GMT -5
nice idea and nice work so far should look the biz!
|
|
|
|
Post by wing_nut on Oct 19, 2012 7:58:03 GMT -5
Cool project and a nice start. A good looking crack in that butt.
|
|
|
|
Post by wbill76 on Oct 19, 2012 20:35:46 GMT -5
If you wanted to go really crazy you'd add this one to your barricade base that you originally were going to use for the Jagdpanther project.  Looking forward to seeing what you do with it Dan! |
|
danb.
Reviews member     March 2013 MoM Winner
Member since: November 2011
Posts: 2,808
Nov 17, 2011 9:22:52 GMT -5
Nov 17, 2011 9:22:52 GMT -5
|
Post by danb. on Oct 20, 2012 2:26:49 GMT -5
Thanks fellas for all the comments Bill : i have been thinking of using them for this project the only problem is that these bunkers were used at a place like crossroads where you would have good view for oncoming attacks so i will have to see how it looks On with the next update construction is nearly complete the only bits left to do before paint is add some texturing to the turret and add all the detail parts to both the hull and turret then some battle scars!!!!!! 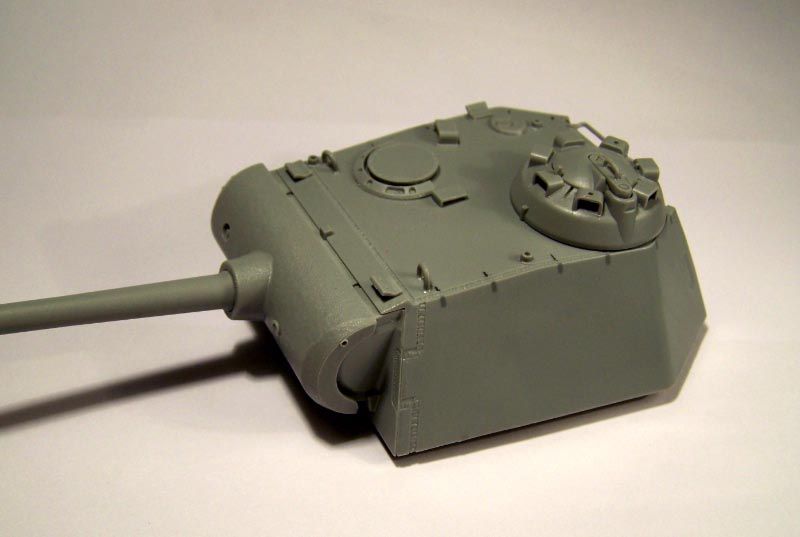  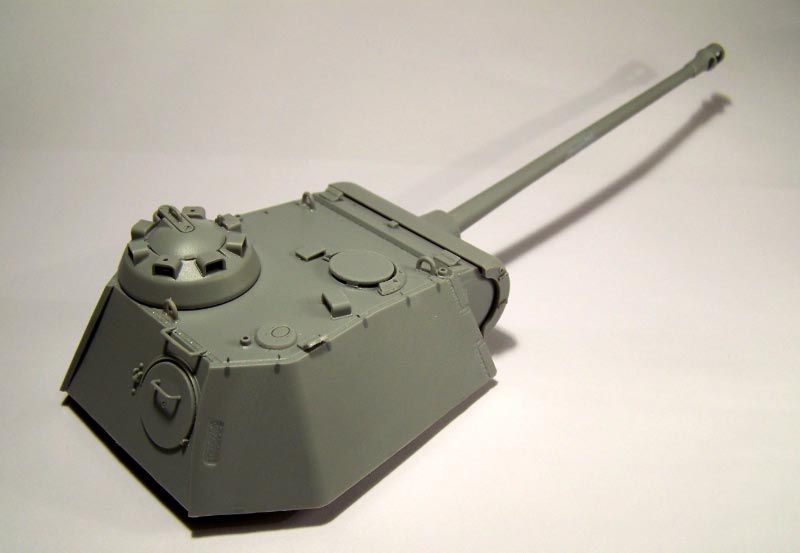  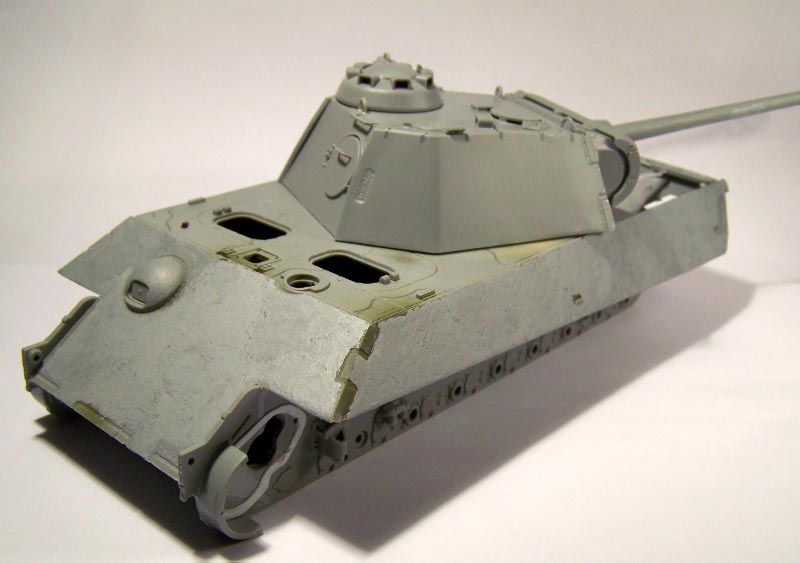  Dan B |
|
|
|
Post by bullardino on Oct 20, 2012 5:30:56 GMT -5
Sweet, I love this project  |
|
|
|
Post by tonylee-Rest In Peace on Oct 20, 2012 15:53:18 GMT -5
OH BROTHER, WOW
This is going to be KILLER
Tony
|
|
danb.
Reviews member     March 2013 MoM Winner
Member since: November 2011
Posts: 2,808
Nov 17, 2011 9:22:52 GMT -5
Nov 17, 2011 9:22:52 GMT -5
|
Post by danb. on Oct 20, 2012 15:57:37 GMT -5
Thanks for the positive comments chaps much appreciated Dicky i am giving the street barricades a thought once the base is made i will sit them on there and see what they look like
Dan B
|
|
Momcha
Full Member
  
Member since: February 2012
http://momcha.blogspot.com/
Posts: 241
Feb 16, 2012 9:53:39 GMT -5
Feb 16, 2012 9:53:39 GMT -5
|
Post by Momcha on Oct 20, 2012 16:13:23 GMT -5
I like this late war vehicles. Nice work so far.
Momcha
|
|
|
|
Post by wbill76 on Oct 20, 2012 19:31:32 GMT -5
Coming along nicely Dan, whatever you decide to do with it in the end it will be a killer display, I have no doubt of that.  |
|
danb.
Reviews member     March 2013 MoM Winner
Member since: November 2011
Posts: 2,808
Nov 17, 2011 9:22:52 GMT -5
Nov 17, 2011 9:22:52 GMT -5
|
Post by danb. on Oct 21, 2012 15:49:07 GMT -5
|
|
|
|
Post by TRM on Oct 21, 2012 15:55:21 GMT -5
Very nice Dan!! Making some great progress!!! Only one thing better than one of these big girls....is one knocked around!!! Keep it coming!
|
|
|
|
Post by wbill76 on Oct 21, 2012 17:01:39 GMT -5
I like the cable idea Dan, nice touch!
|
|
|
|
Post by 406 Silverado on Oct 21, 2012 17:09:22 GMT -5
Very nice Dan. I agree with Bill, nice touch with the cable.
|
|
|
|
Post by wing_nut on Oct 21, 2012 17:44:50 GMT -5
Wasting no time with this. Looks really nice..
I was looking at the hangers for the tracks on the turret since I am getting ready to exactly that on my Panther. Are those a factory or filed addition? And the stock they were made from flat or round... or was it just what was on hand?
|
|
|
|
Post by bbd468 on Oct 21, 2012 20:29:09 GMT -5
Lookin' great Dan! Ageed...nice touch with the cable.  Gary |
|
danb.
Reviews member     March 2013 MoM Winner
Member since: November 2011
Posts: 2,808
Nov 17, 2011 9:22:52 GMT -5
Nov 17, 2011 9:22:52 GMT -5
|
Post by danb. on Oct 22, 2012 1:42:20 GMT -5
Thanks for all the comments chaps
Wing nut : the hangers are from the kit i had to use a few plastic ones as the numpty who owned this kit before me must of lost a few of the metal hooks you have a option in the kit to use metal or plastic hangers.
Dan B
|
|
Deleted
Member since: January 1970
Posts: 0
Nov 22, 2024 19:04:44 GMT -5
Nov 22, 2024 19:04:44 GMT -5
|
Post by Deleted on Oct 22, 2012 2:22:21 GMT -5
nice work indeed very tidy build
|
|
|
|
Post by armorguy on Oct 22, 2012 4:19:59 GMT -5
Impressive and a good idea ! In your hands this will become a masterpiece !
|
|
|
|
Post by wouter on Oct 22, 2012 9:58:55 GMT -5
wow, the Panthy looks neat 'n wrecked allready! Love the idea btw
Cheers
|
|
|
|
Post by spud on Oct 22, 2012 12:52:59 GMT -5
Very nice Dan
|
|
danb.
Reviews member     March 2013 MoM Winner
Member since: November 2011
Posts: 2,808
Nov 17, 2011 9:22:52 GMT -5
Nov 17, 2011 9:22:52 GMT -5
|
Post by danb. on Oct 22, 2012 13:18:26 GMT -5
Thanks brothers much appreciated started the base tonight will update with a few pics when i have spread some cheap ol fix and grout !!!!!  Dan B |
|
danb.
Reviews member     March 2013 MoM Winner
Member since: November 2011
Posts: 2,808
Nov 17, 2011 9:22:52 GMT -5
Nov 17, 2011 9:22:52 GMT -5
|
Post by danb. on Oct 24, 2012 13:55:08 GMT -5
Right chaps sorry for the delay in some sort of update the last few bench sessions have seen the start of the base firstly i found a suitable sized rustic effect wood picture frame then i cut a block of styrofoam to the inside of the frame, to cover the rough foam edge i used some plasticard this was stuck on using a solvent free construction adhesive. Once i was happy with this stage i gave the foam a coat of pva glue to seal the foam while this was drying i mixed up some fix and grout then i added some tea leaves,cat litter and fine model ballast this was then mixed with some PVA glue this mixture was then spread all over the base Then it was time to make some street furniture i used 2mm plasticard for some paving slabs these will recieve some texturing using Tamiya putty thinned with liquid poly while i was studying my ref photos i saw a set of concrete based road signs wrapped in barbed wire so this was my next task i cut the base circles out of styrofoam then some plasticard for the signs i will be using Abers pe barbed wire to finish it off. to get a feel for how the base will end up i added some brass shell casing and ammo crates im happy with how it looks so i will be ordering more casings and Verlindens ammo crate set.  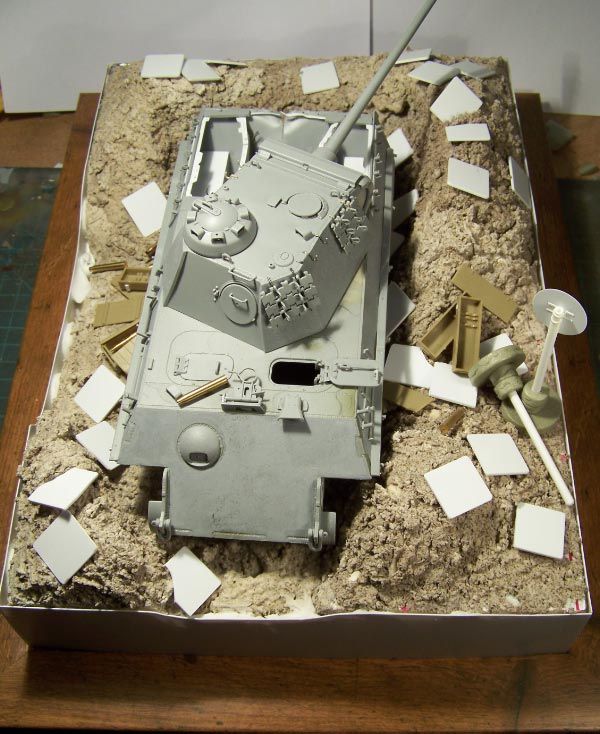   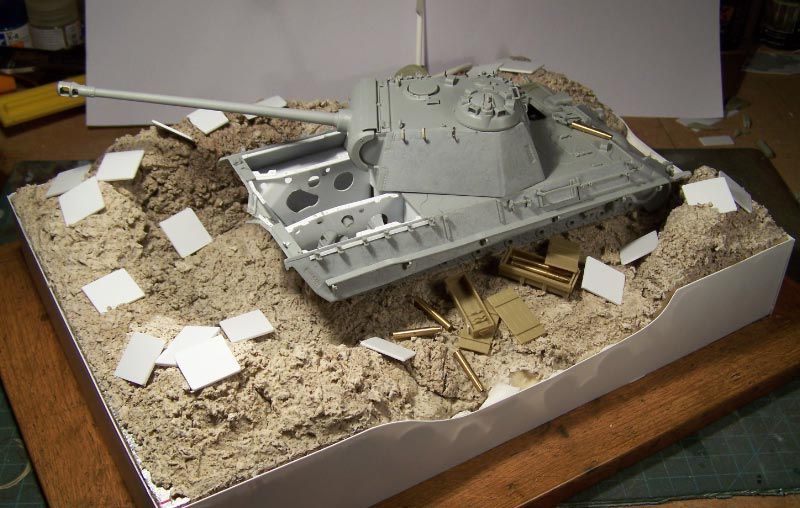 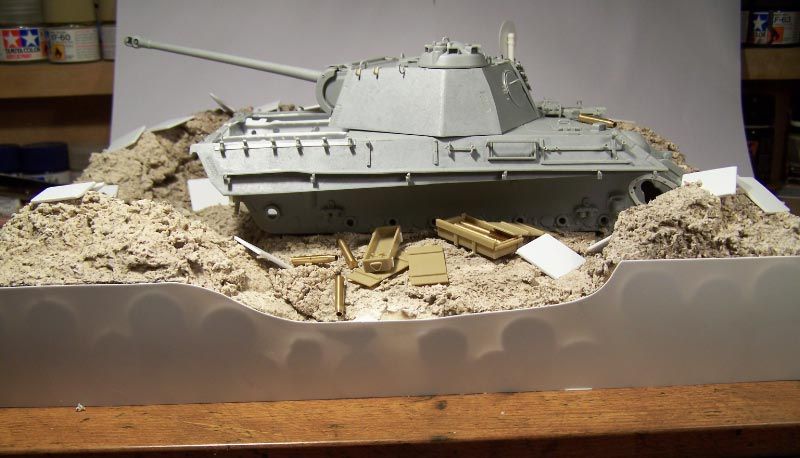  Dan B |
|
Deleted
Member since: January 1970
Posts: 0
Nov 22, 2024 19:04:44 GMT -5
Nov 22, 2024 19:04:44 GMT -5
|
Post by Deleted on Oct 24, 2012 14:04:46 GMT -5
Great project Dan, love the scratch work in the engine bay. It just shows that you should never give up on a kit as there's always someway or someone who can make something of it. Great stuff!  |
|