|
|
Post by robbo on Dec 17, 2011 12:59:18 GMT -5
Top notch painting there Guy, it's looking very nice mate, you efforts shall be rewarded mate
|
|
Paul P.
Senior Member
    May 2012 MoM Winner
Member since: November 2011
Posts: 1,686
Nov 15, 2011 17:14:40 GMT -5
Nov 15, 2011 17:14:40 GMT -5
|
Post by Paul P. on Dec 17, 2011 13:16:30 GMT -5
looking ace Guy  |
|
|
|
Post by armorguy on Dec 17, 2011 20:33:33 GMT -5
Robbo, paul, thank you, still a lot to do on the driver's compartiment but it's going well I think. The seats were given several semi transparent layers of acrylics, then these were washed with dirty transparent oil paint mixtures to finish them. This is the effect I was looking for : Only for reference purposes !!! 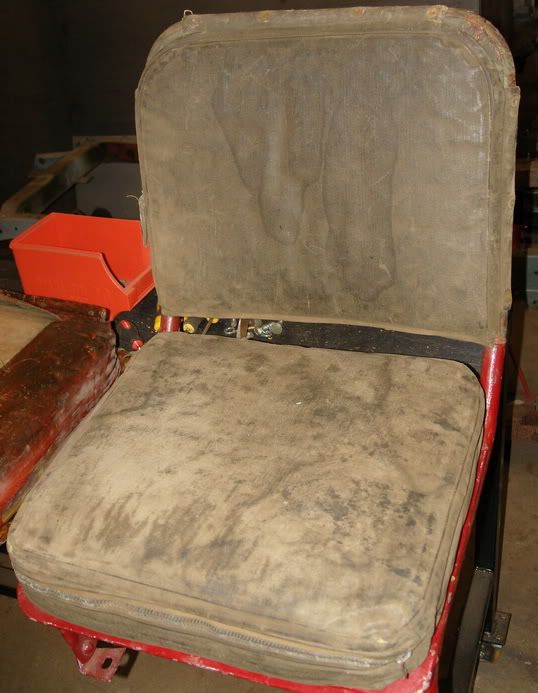 Soon pics ! Best regards ! |
|
|
|
Post by armorguy on Dec 20, 2011 6:38:44 GMT -5
A quick update friends, photo taken in the middle of rust/dust treatment. 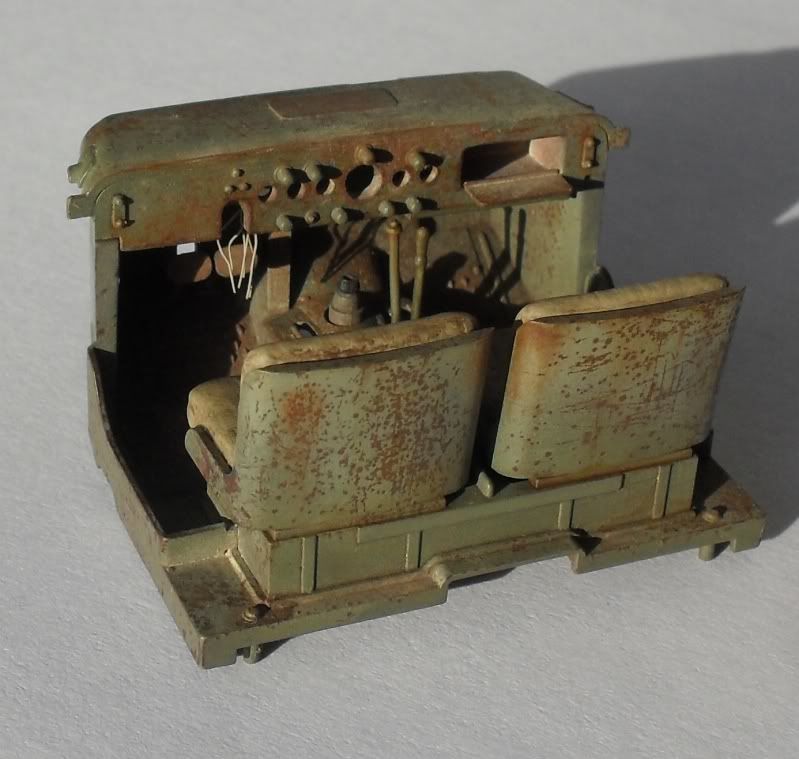 Decal problem was solved ! A lot more to do... Best regards ! G. |
|
|
|
Post by wouter on Dec 20, 2011 15:46:56 GMT -5
very nice work Guy, as usual. Hard to say original things about your work really, it's always top notch ;D
btw: really love the last photo: nice fully in focus. Something which I find hard to obtain...which camera do you use?
Cheers
|
|
johnt
Full Member
   Feb 2012 MoM and 2012 Model of the Year Winner
Member since: November 2011
Posts: 1,174
Nov 15, 2011 5:38:32 GMT -5
Nov 15, 2011 5:38:32 GMT -5
|
Post by johnt on Dec 20, 2011 16:47:59 GMT -5
Hi G, them seats and dash look real good!! keep up the good work!
Cheers
JT
|
|
|
|
Post by 406 Silverado on Dec 20, 2011 18:24:13 GMT -5
prob solved, cool
|
|
bigjohn
Reviews member    
Member since: December 2011
John Hale
Posts: 3,438
Dec 21, 2011 2:17:45 GMT -5
Dec 21, 2011 2:17:45 GMT -5
|
Post by bigjohn on Dec 22, 2011 7:10:14 GMT -5
Fantastic work Guy, The weathering looks so real! I’m stuck on this one until the end!
|
|
|
|
Post by armorguy on Dec 23, 2011 14:59:36 GMT -5
ChrisS, thank you mate, I'm more satisfied with this second attempt. I won't give it a third shot ! Enough is enough LOL ! The dec solution was quite drastic, a reference pic made me do it. It's a wreck after all... Chriss67, thank you ! I still have to touch up things here and there after final assembly of the elements. The seats are completed now, they look damaged (tomorrow photos, had to go working). Wouter, I have a very cheap camera, costed me only 80 euro, it works good (Samsung ES10). Thanks man ! DickyF, yes, my style too, a man's got to decide and act ! Johnt, thank you, it was fun to go for the canva dirty seats, oil washes did the job. Rob, glad I did it, didn"t want to wait and order decals. I just want to paint rust and destruction ! Tomorrow I will try the pigment trick to create real rusty and crusty paint layers on the mud guards ! bigjohn, I'm having the modelling time of my life on this one ! To me it's a learning process, I can't wait to start my second rust bucket (Bigshot 6X6 Dodge, in faded greens, US Army). Nick, thank you, you're most welcome ! I must say I'm flattered ! By the way fellas, the driver's compartiment was glued on the chassis so I won't terrorize you any longer    Update follows shortly ! Merry Christmas to you all ! Best regards ! G. |
|
|
|
Post by wouter on Dec 24, 2011 3:45:56 GMT -5
quite jalous about the shots your camera makes mate. The one I use is a Sony Cybershot from my girlfriend (a pink one ;D) but I can't get fully in focus shots in macro setting...bummer...
waitin' for the update, and minwhile: Merry Christmas back at ya ^^
Cheers
|
|
|
|
Post by armorguy on Dec 24, 2011 7:10:19 GMT -5
Sometimes I just HATE micro shots Wouter !!! Makes me think what a crappy modeler I am... Still so much to do...it's going so sloooooooooowly, the family keeps me busy these days ! Anyway, here's the photo of the cabine attached to the chassis, with the completed seats. 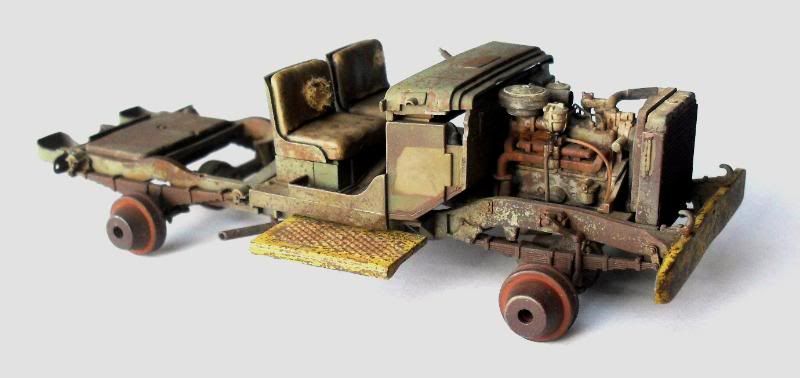 yes, made of sanitary napkin ! Best regards ! G. |
|
|
|
Post by TRM on Dec 24, 2011 7:41:54 GMT -5
Saaa-weet!! Nice job so far G!  I think if you stare at something too close for too long you get a bit bug-eyed and critical of your own work my friend!! I know....because I do this!! ;D Slow is no problem...ever! 2 things to remember.... There is no running in Golf, there is no rushing in modeling!!!  Looking top dog there sir! Keep up great work!  |
|
bigjohn
Reviews member    
Member since: December 2011
John Hale
Posts: 3,438
Dec 21, 2011 2:17:45 GMT -5
Dec 21, 2011 2:17:45 GMT -5
|
Post by bigjohn on Dec 24, 2011 8:03:13 GMT -5
Thats not crappy, Thats Brilliant.
|
|
|
|
Post by robbo on Dec 24, 2011 8:04:06 GMT -5
This is gonna be a stunning model when you've finished Guy
|
|
|
|
Post by armorguy on Dec 24, 2011 8:26:44 GMT -5
T, that makes sense. Bug eyed...know what you mean, it can take away all the fun of modelling.
ChrisS, I had to find a translation for it, I know it sounds silly, "sanitary napkin"...
bigjohn, thanks man, you can't imagine how crappy I feel about my work sometimes !
robbo, glad you like it until now, this wont be my last rust bucket.
|
|
johnt
Full Member
   Feb 2012 MoM and 2012 Model of the Year Winner
Member since: November 2011
Posts: 1,174
Nov 15, 2011 5:38:32 GMT -5
Nov 15, 2011 5:38:32 GMT -5
|
Post by johnt on Dec 24, 2011 9:18:16 GMT -5
Wow!!
G that's looking real sweet!!! Love the chipping and rusting, really really good!!
What else can I say? Did I mention how much I like this? keep up the good work!
Cheers
JT
|
|
|
|
Post by armorguy on Dec 24, 2011 16:48:44 GMT -5
johnt I'm convinced mate ! Next to do are the side panels of the motor compartiment.
|
|
zlikovac
Full Member
  
Member since: November 2011
Posts: 278
Nov 15, 2011 8:22:13 GMT -5
Nov 15, 2011 8:22:13 GMT -5
|
Post by zlikovac on Dec 24, 2011 17:53:42 GMT -5
Now, dont stop, till the end. Dont look back.
Great for now, and wait for more!
|
|
|
|
Post by armorguy on Dec 25, 2011 4:02:13 GMT -5
Thanks Dicky !
Zlicovac thank you !
I will finish it and even today I can hardly wait to battle on.
|
|
|
|
Post by 406 Silverado on Dec 25, 2011 8:36:04 GMT -5
Hey G, didn't get to comment yesterday, had a bit of a PC prob.
Seeing the components together really makes a diff. The different types and shades of rust and chipped paint looks fantastic.
|
|
|
|
Post by spud on Dec 26, 2011 10:49:09 GMT -5
just rab trough the topic and WOW its epic
|
|
|
|
Post by armorguy on Dec 29, 2011 9:23:05 GMT -5
Robmeister, thank you, I want to apply different rust methods to achieve a whole range of effects as seen on wrecks. spud, thank you ! Small update ! I've followed Rob's instructions on creating chipped paint and blotchy rust effects, I'm very satisfied with the result and in fact it wasn't that hard to do... I've done the mud guards and this is the result (don't mention the head lights, not yet taken care of) : 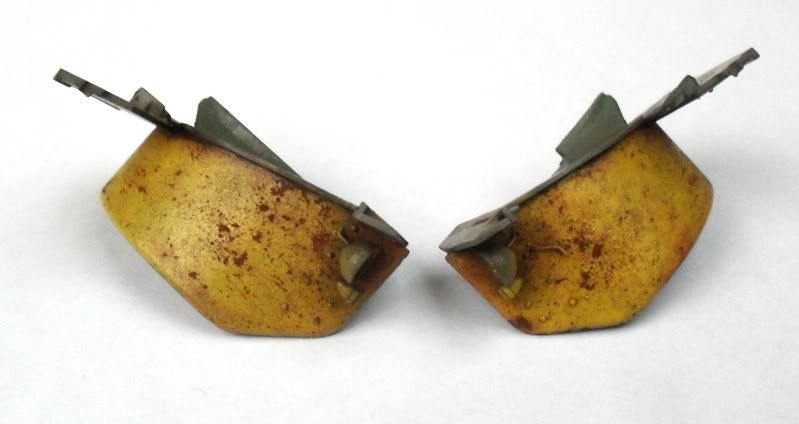 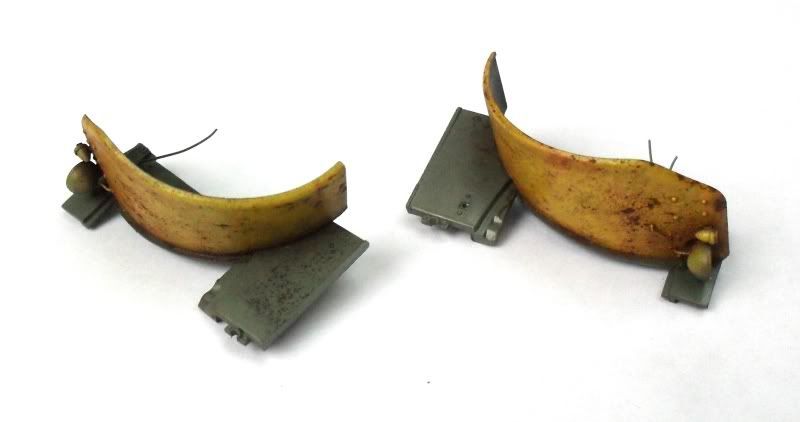 Best regards ! G. |
|
|
|
Post by 406 Silverado on Dec 29, 2011 9:25:48 GMT -5
Hey G, they look great bro. Told you it was easy. Simple and yet very effective eh. I'm looking forward to seeing all the combined effects on this one. Keep up the awesome work Guy.
|
|
|
|
Post by TRM on Dec 29, 2011 9:34:50 GMT -5
Nice looking fenders G!!! Keep it coming!!
|
|
|
|
Post by spud on Dec 29, 2011 9:59:30 GMT -5
oh ya looking really good
|
|
paulh.
Senior Member
   
Member since: November 2011
build, fail, learn, succeed - ENJOY
Posts: 2,389
Nov 15, 2011 15:54:51 GMT -5
Nov 15, 2011 15:54:51 GMT -5
|
Post by paulh. on Dec 29, 2011 11:37:03 GMT -5
 I think I'll just give up and take up train spotting 
|
|
AndyArgent.
Senior Member
    Aug 2013 MoM Winner
Member since: November 2011
Andy Bodge Argent - Aug 2013 MoM Winner
Posts: 1,746
Nov 17, 2011 17:09:43 GMT -5
Nov 17, 2011 17:09:43 GMT -5
|
Post by AndyArgent. on Dec 29, 2011 11:59:01 GMT -5
Jaw dropping stuff. I really like this its superb stuff,Andy.
|
|
|
|
Post by `Boots` on Dec 29, 2011 15:07:07 GMT -5
Sorry Guy...........just catching up with this one!!!
That is a real eye-catching beaut fella, love all the tricks ya`v used on this one...................simply superb ;D
|
|
|
|
Post by armorguy on Dec 29, 2011 19:18:16 GMT -5
Thank you guys, your comments are most appreciated ! The method was new to me but it felt easy to do. Important is not to make the pigment layer wet while spraying on the acrylic paint, it's better to go for more fine mists on low air pressure and not disturb the powders. Before I started to rubb and pick away the yellow paint I've applied a thin dirty oil paint wash to create more interesting tones. It's great to see the "rusty" spots appear in a natural way.
Tomorrow I want to glue on the mud guards on the main component.
Best regards ! G.
|
|
|
|
Post by wouter on Dec 30, 2011 15:10:38 GMT -5
this is jawdropping indeed Guy, it just keeps getting better and better. Those mudguards look superb mate. I'm jalous, this is truly a masterpiece in the make (and I really mean that!). Keep it up mate, keep the candy comin' ^^
Cheers
|
|