|
|
Post by armorguy on Dec 8, 2011 7:29:35 GMT -5
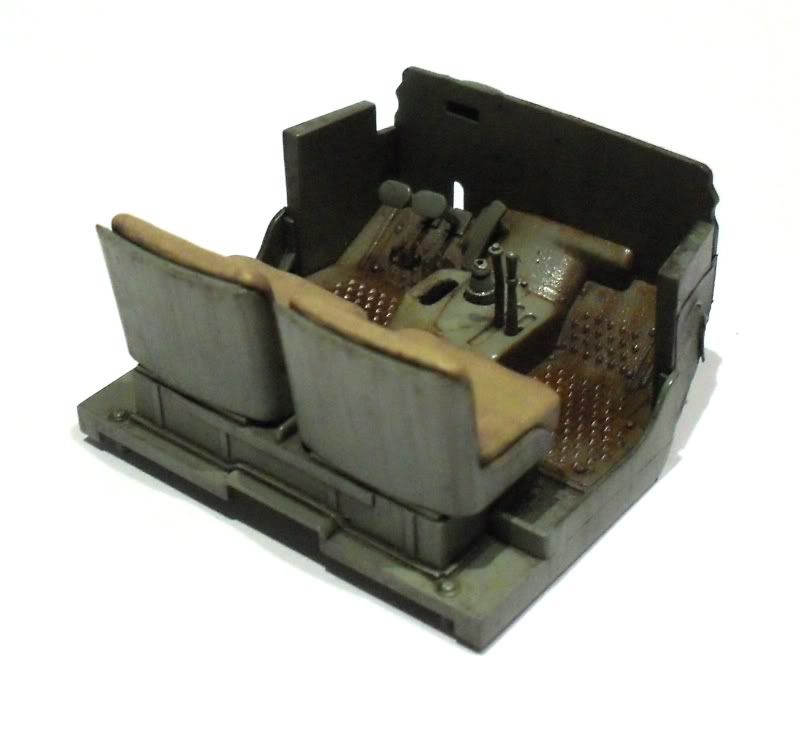
Thanks again my friends, I have decided to paint the interior in its regular army color, olive drab but sunbleached and faded. The primer's on and I hope to succeed this time in choosing the right tones of green ! I did the engine two times, as well as the chassis, if I continue like this I go nuts !!!  |
|
|
|
Post by 406 Silverado on Dec 8, 2011 8:22:19 GMT -5
Not a bad idea Chris......buy one kit, paint it a few times and you save money on new kits....
G the interior looks good bro. The seat cushion with the hole looks great but when it's painted and the filling put in there....watch out.
|
|
|
|
Post by wouter on Dec 8, 2011 13:09:44 GMT -5
Love the seats Guy, it's a nice addition to the build. Would love to see it weathered ^^
Cheers
|
|
|
|
Post by armorguy on Dec 9, 2011 16:00:29 GMT -5
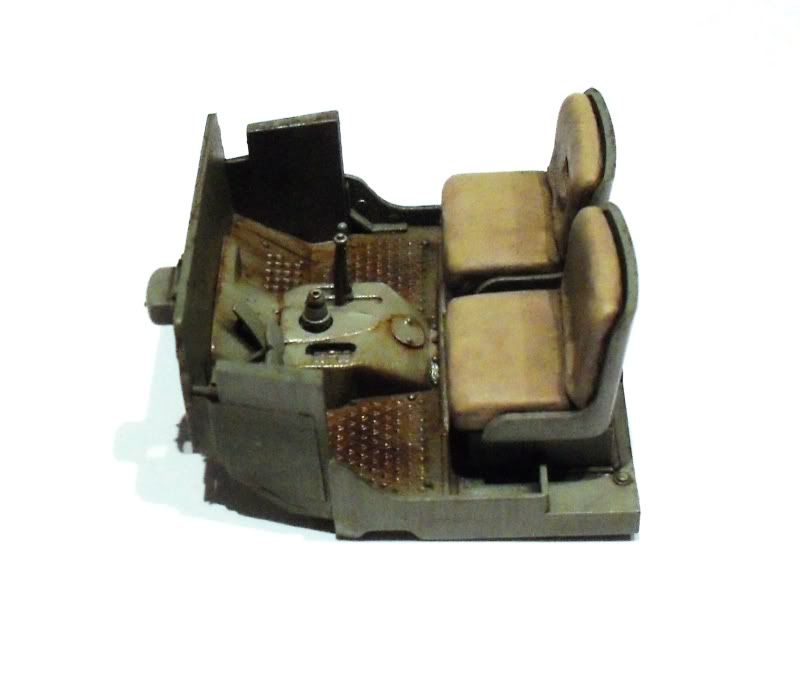
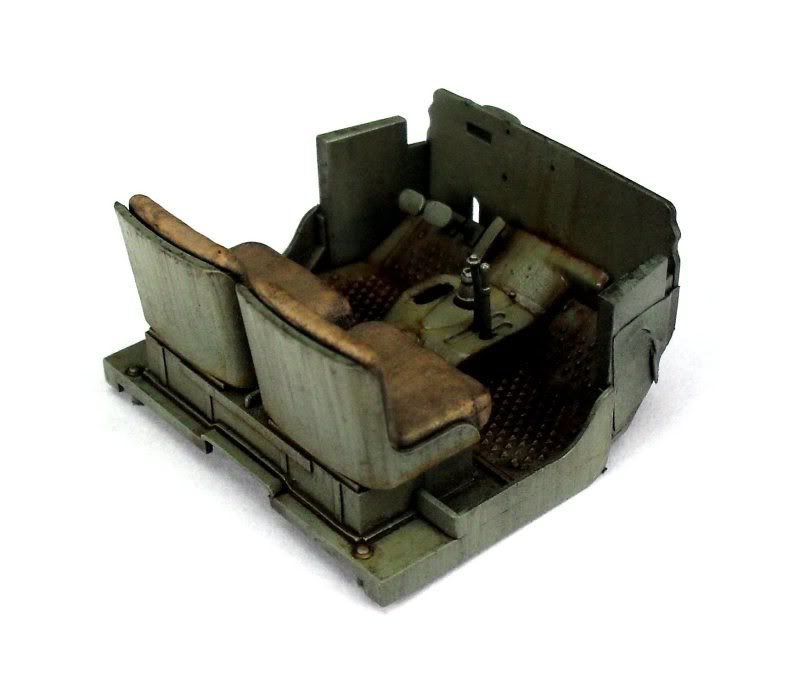
We keep Dodging around fellas ! Painting of the driver's compartiment has started Wout. I keep this part of the car in faded olive drab, to refer to the truck's WWII background. Paint was sprayed on from dark tones to brighter ones. Acrylics. Canvas seats were painted in different sandy tones. Acrylics. Seats were then given a layer of satin varnish to avoid the washes from being absorbed too much. Oil paint washes : overall raw umber wash, followed by a pinwash. Basic rust effects were brushed on using burnt sienna and burnt umber. Paint's still wet in places.   Next to do are seat painting/finishing, more rust and dust, ... Hope you like it... Best regards ! G. |
|
|
|
Post by 406 Silverado on Dec 10, 2011 0:49:48 GMT -5
Sorry Guy, forgot to post my comment earlier bro. The interior is looking fantastic so far Amazing what a few washes can do eh. The seats will look the cats meow once the Richard (K4) technique for the stuffing is in place .
Keep at it bro, she's a beauty so far.
|
|
|
|
Post by armorguy on Dec 10, 2011 11:44:27 GMT -5
ChrisS, I like oils for they usually give a first impression of the aging effects, they're a perfect base for pigments ! DickyF, well let's say it's a start...the fun is on now ! No problem Rob, yeah washes are so cool to brush on, easy en much effect if done properly and with care. The seats were washed again today to make them dirtier. I also gave the compartiment a couple of thin washes of light rust (AK). More concentrated in certain areas... I still have to do a lot of work but drying times need to be respected for optimal results. I have also to tone down the heavy wash behind the seats (see pic).  Best regards ! G. |
|
|
|
Post by 406 Silverado on Dec 10, 2011 17:11:17 GMT -5
oh yeah, that's lookin much better. I played with some of the AK stuff at the club meeting.
|
|
Paul P.
Senior Member
    May 2012 MoM Winner
Member since: November 2011
Posts: 1,686
Nov 15, 2011 17:14:40 GMT -5
Nov 15, 2011 17:14:40 GMT -5
|
Post by Paul P. on Dec 10, 2011 19:22:12 GMT -5
That looks awesome Guy ;D
|
|
|
|
Post by TRM on Dec 10, 2011 19:26:42 GMT -5
Definitely first rate my friend!!! Looking sweet!!!
|
|
|
|
Post by armorguy on Dec 14, 2011 11:00:04 GMT -5
Thanks my friends, it's getting quite boring I'm sure...you don't know what I've done today !
Of course you know !
...
I stripped the whole driver's compartiment !
Primer's on again, there's a couple of rust layers sprayed on...
No pics of the "progress" now (LOL), tomorrow I'll shoot some.
The title of my topic says CRUSTY", well it just didn't look crusty enough ! I know I can be very hard in deciding to start all over again but it's the result that does matter to me.
Engine - chassis - driver's compartiment X 2 = completely gaga...but I'm having so much fun on this very first rust project !
Don't be mad at me...
Best regards ! Guy, rust rookie !
|
|
|
|
Post by 406 Silverado on Dec 14, 2011 11:15:27 GMT -5
|
|
|
|
Post by armorguy on Dec 14, 2011 11:31:40 GMT -5
Wow that's one awesome method you've explained, thank you very much Rob, I appreciate this you know ! I will try and practice on this technique on test plastic sheets as it doesn't sound like an easy thing to do. I won't risk the driver's compartiment now (starting again three times is too much even for me neurotic nitwit I am !). I go for the salt and H/S. I will use the method you've described on the fenders, hood...if I can master the technique of course ! I start checking your swamp KV now ! Thanks mate, for sharing this !
|
|
|
|
Post by 406 Silverado on Dec 14, 2011 11:45:36 GMT -5
No problem Guy. The technique is very easy. You don't have to be careful unless you only want it in the nooks which actually is also easy. Just apply a thick oil wash, dump pings onto it, let dry then paint. The thick pigs and oils work similar to the HS and salt tech.
|
|
|
|
Post by 406 Silverado on Dec 14, 2011 11:47:42 GMT -5
oh yeah, that T-55 and green T-34 were done the same way. You can see the texture from the pics. That T-34 I was able to still chip some areas two years later.
|
|
|
|
Post by 406 Silverado on Dec 14, 2011 11:59:46 GMT -5
You can also not chip the paint yet, and do some weathering first...then go back and chip away. easy peasy
|
|
|
|
Post by armorguy on Dec 14, 2011 12:00:19 GMT -5
I check them too, I believe I've seen a Sherman of your hand done this way too ?
Incredible stuff !
|
|
|
|
Post by 406 Silverado on Dec 14, 2011 12:42:57 GMT -5
Hey Giy, I'm doing a small SBS on that tech right now using the ISU 152 spare tracks. I'll have this up in an hour or so. I just have to chip the paint right now. I need to run out but will be back soon to chip the paint and get the SBS up in the techniques category.
|
|
|
|
Post by armorguy on Dec 14, 2011 13:51:01 GMT -5
Take the time you need Rob, I won't continue until tomorrow, but thanks in advance !
|
|
|
|
Post by 406 Silverado on Dec 14, 2011 14:09:32 GMT -5
No prob Guy...it's up already bro. the pics are big so you can see what's going on.
|
|
|
|
Post by `Boots` on Dec 14, 2011 14:41:06 GMT -5
|
|
|
|
Post by armorguy on Dec 15, 2011 14:14:50 GMT -5
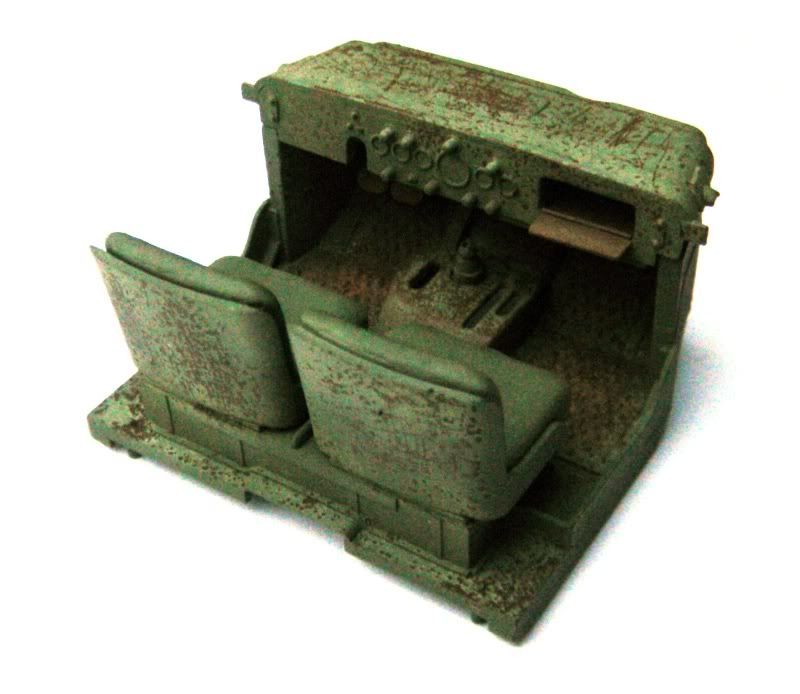
Thanks guys !!! It surprises me you stay tuned ! Isn't it getting boring, all the restarts on the components ? I smack this bad quality pic in this topic to show what I've been doing today. This pleases me more than the first attempt, I believe this result has more junkyard vibes...  This is where I will start from (more rust, washes, dust...). Best regards ! G. |
|
|
|
Post by 406 Silverado on Dec 15, 2011 14:30:37 GMT -5
I'm with jackwagon. Enjoying the hell out of this double build. Like I said, as long as your having fun is all that matters.
|
|
|
|
Post by `Boots` on Dec 15, 2011 14:35:14 GMT -5
Yeah me too Guy ;D, that looks stonkin` as well fella  |
|
paulh.
Senior Member
   
Member since: November 2011
build, fail, learn, succeed - ENJOY
Posts: 2,389
Nov 15, 2011 15:54:51 GMT -5
Nov 15, 2011 15:54:51 GMT -5
|
Post by paulh. on Dec 15, 2011 15:48:01 GMT -5
Beautiful job Guy. Keep in comming!
|
|
|
|
Post by TRM on Dec 15, 2011 17:16:03 GMT -5
Twice the enjoyment G!!! Seeing the paint fly over...then over again!!! ;D Still looking sweet brotha'!!! Keep up the great work!!  |
|
|
|
Post by armorguy on Dec 16, 2011 4:23:34 GMT -5
DickyF, painting and finishing arusty model is not as easy as finishing it the usual way. It's all new to me so this is a study project and I've never enjoyed studying more ! Watch the trunk, probably I go for it four times  Hell yeah Rob, that's what it is, a double build ! No people it's not a group build ! ;D I can hardly wait to switch over to the mud guards, I hope I can do your "crust"trick then ! Boots, thank you man, I can appreciate your encouraging words, this way of finishing requires experience.  Paulh, thanks mate, believe me, I keep'em coming ! TRM, the postman always rings twice ! And I'm not even a postman ;D ChrisS, the topic title says CRUSTY so I have to deliver what I wrote down.  In Belgium the weather is totally not ideal for modelling, I prefer daylight but it's 100% cloudy, 200% raining !!! I try to do something today... Best regards ! G. |
|
|
|
Post by armorguy on Dec 16, 2011 4:43:22 GMT -5
Really Chris, I just feel soooo depressed if I don't see bright daylight...less modelling, less quality if I try...bah ! Time to prepare another shot of cafeine, shaken, not stirred ! Cheers bro !
|
|
|
|
Post by armorguy on Dec 16, 2011 10:34:19 GMT -5
D*mn missing instrument panel decals !
|
|
|
|
Post by Mence on Dec 16, 2011 10:42:05 GMT -5
Ahhh, coming to life nicely, looking great!
|
|
|
|
Post by armorguy on Dec 16, 2011 12:50:54 GMT -5
I've checked my spare decal box Chris...swastika's, stars, numbers, name it, but no instrument panel dec's. I will have to buy Archer's.
|
|