Hinksy
Full Member
  
Member since: June 2012
THE ENGLISH LIONHEART - HINKSY!
Posts: 1,016
Jun 22, 2012 16:46:21 GMT -5
Jun 22, 2012 16:46:21 GMT -5
|
Post by Hinksy on Dec 22, 2012 12:54:18 GMT -5
Hi guys, Having just finished the Dragon Tiger I Ausf. E that I built for the 'Steel Cats' GB on FSM that turned out so well I'm having a 'chill weekend' and will probably watch some DVD's, read Modelling magazines and do some research for my next build which I'll go into a bit here! So, I know I'm getting that scrummy Panther G Late for Christmas (I had to erm, check it out when it arrived to make sure all the sprues were intact etc etc). I was going to enter it into the Steel Cats GB as my second entry but I didn't want to build another cat - I wanted to build a stomping great Elefant! These newer Dragon kits with the moulded on Zim really appeal to me. I love a Zimmed build and although this Elefant already has moulded on Zim, the next Zimmed build I do will have putty zim or ATAK type Zim as that looks really crisp. I've wanted to build a Ferdy or a 'Fant for ages now and when I found this kit I knew this was the one. I've looked at the Cammo schemes and am choosing between the two 1944 Polish builds - the first scheme is a squiggly tri-tonal jobbie (Rotbraun and Olivgrun over DY) or the second and my possible favourite is a DY basecoat with Olivgrun squares (well, sort of squares). The kit has some nice PE, the plastic barrel is a two-piece HORROR that wouldn't look out of place on a 1970's Tamiya kit BUT Dragon kindly supply a great turned Aluminium barrel and a really well moulded muzzle brake assembly so that is sorted. They supply DS one piece tracks but I'll upgrade them with Friuls It's obvious that this kit has a mish-mash of old and new sprues - some are marked Ferdinand, some Elefant and some Elefant c/w Zim! There isn't much in the way of tools, just a bar and a Sledgehammer. 'U' tow hooks are supplied in metal with metal bolts and for the pistol-ports chain is supplied but is a bit overscale so I'll replace that with Tank Workshop blackened chain (46 Links Per Inch). This one is going on a base with scenery - either the MDF jobbie shown in the photos below or I might buy a smaller plinth type base www.allwoodsdirect.co.uk/shop/products_detail.asp?prod=43 for it. I've got the materials fot it and filler for the ground material. I really want a figure for this build to give a sense of scale so I'll be asking Andy Deafpanzer for some help when I get to that stage. I'll probably get an Alpine one in suitable attire for 1944 Poland but that won't get touched until I get plenty of practice in on my figures in the spares tub - a mix of Tamiya and Dragon. I'd like to make a start on New Years Day to make it an 'official 2013 build' but I only have three days off over Christmas so I'll do a bit on Boxing Day then I'll really get stuck in on New Years Day.
I'm going to post some sprue shots below and if anyone has links to their own Elefant builds/photos/info then I'd be very grateful:
Box art:

Sprue Shots and Zim effects:


The extra Zimmed parts Sprue:

Here you can see where the different sprues are from - a right old mixture (check out that horrid original barrel on the middle sprue):

Dragons PE and Metal Stuf (check out the replacement metal barrel, Shakles and chain for pistol port plugs):


Instruction Sheet - a bit more 'basic' than the usual Dragon instruction sheet for this build but it looks fine:


I've got to decide between these two markings - note the DS Tracks:

I thinks this should make for a really good build! I've always liked the Ferdinands/Elefants and a pre-zimmed Elefant is perfect. I hope to start off 2013 with a seriously good build!
Like I say, if anyone can assist with Elefant info, photos, blog links etc I'd be very grateful
Take care guys,
Ben  |
|
|
|
Post by deafpanzer on Dec 22, 2012 13:43:48 GMT -5
Hell yeah count me in! Have same kit in stash and I forgot it comes loaded! Wish it comes with Magic Tracks instead of DS Tracks. Wondering if my extra Tiger Magic Tracks will fit?
It should be a good quick build this time.
|
|
Hinksy
Full Member
  
Member since: June 2012
THE ENGLISH LIONHEART - HINKSY!
Posts: 1,016
Jun 22, 2012 16:46:21 GMT -5
Jun 22, 2012 16:46:21 GMT -5
|
Post by Hinksy on Dec 22, 2012 13:50:54 GMT -5
Hi Andy,
You have it too? We should have a large animal GB!
The tracks are very different unfortunately Andy - I have 2 sets of spare Dragon DS Tiger tracks too!
Friuls all the way! The metal kit barrel looks great so that will be a saving.
I'm really looking forward to this one!
Ben
|
|
modelfreak72
Full Member
  
Member since: January 2012
Why worry, each of us is wearing an unlicensed nuclear accelerator on his back.
Posts: 1,479
Jan 28, 2012 23:21:46 GMT -5
Jan 28, 2012 23:21:46 GMT -5
|
Post by modelfreak72 on Dec 22, 2012 14:29:15 GMT -5
I'm liking the looks of this! Count me in!
|
|
|
|
Post by richardcraig-Email Not Valid on Dec 22, 2012 22:25:09 GMT -5
Hi hinksy..You are going to love this kit ..I built it this year and had hardly any problems with it ..I did cut the tracks by two links because I thought they were too long but I was wrong .Try them at full lenght and test fit them before doing anything ..I swear they looked way too long at first but I ended up buying a set of Friuls because of my mistake ..Of course the Dragon instructions might have you guessing at a few things but if you take your time you'll do fine. 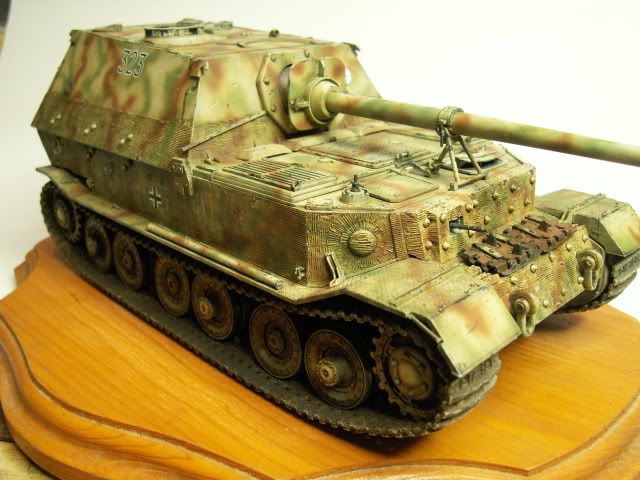 Rick |
|
Tojo72
Forum Moderator      Sept '24 Showcased Model Awarded
Member since: November 2012
Posts: 5,314
Member is Online
MSC Staff
|
Post by Tojo72 on Dec 22, 2012 22:56:05 GMT -5
A very enjoyable build a couple of years ago Ben,have fun and I will enjoy following along.  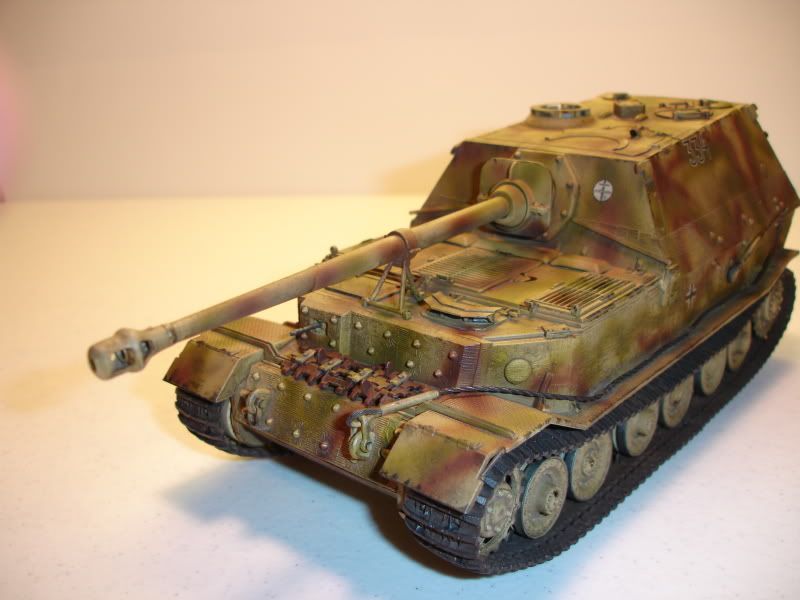 |
|
|
|
Post by bbd468 on Dec 22, 2012 23:23:46 GMT -5
SWEET kit man! This will be a great build right here. Bring it on Ben!  Gary |
|
|
|
Post by 406 Silverado on Dec 23, 2012 11:49:47 GMT -5
Looking forward to this one Ben. Have fun.
|
|
Hinksy
Full Member
  
Member since: June 2012
THE ENGLISH LIONHEART - HINKSY!
Posts: 1,016
Jun 22, 2012 16:46:21 GMT -5
Jun 22, 2012 16:46:21 GMT -5
|
Post by Hinksy on Dec 23, 2012 12:14:32 GMT -5
Cheers guys, Great builds Rick & Tojo  I'll be using Friuls on this one. I would really like to be able to paint a decent figure to go with this though. It's obviously a BIG machine and I feel that some form of scenery is essential to give that sense of scale. A figure would finish it off perfectly but I am a total newbie with them and need a LOT of practice! In the UK in March there is a really good model show that is held in a town called Hinckley - it is just up the road from my house. We always have a club table there and I remember 'Just Bases' being there last year with a good selection on their trade stand. I might look for a Mini Art street scene too or a Mig Resin base. I'm definately looking forward to the build. Goold old Wouter built this very kit not so long ago and did a great job of it too - he has kindly pm'd me a link to the blog he put together over on MilMod and it's a really good, in-depth Blog so that will help me no end  Anyway, I'm going to do a bit on Boxing Day then I'll really make a start on New Years Day. Should be good  Ben  |
|
|
|
Post by wbill76 on Dec 23, 2012 14:59:00 GMT -5
Looks like the perfect way to kick off 2013 Ben! Have fun with this one.
|
|
|
|
Post by spud on Dec 23, 2012 19:53:58 GMT -5
aww i taught you were going to do the Pz Iv in w/w this will be nice all teh same  |
|
danb.
Reviews member     March 2013 MoM Winner
Member since: November 2011
Posts: 2,808
Nov 17, 2011 9:22:52 GMT -5
Nov 17, 2011 9:22:52 GMT -5
|
Post by danb. on Dec 24, 2012 12:32:52 GMT -5
Looking forward to 2013 now Hinksy you cant go wrong with a heavyweight like a Elephant great looking tank bring it on buddy  Dan B |
|
bbrowniii
Full Member
  
Member since: March 2012
If you are not part of the solution, you are part of the precipitate.
Posts: 1,238
Mar 25, 2012 22:08:04 GMT -5
Mar 25, 2012 22:08:04 GMT -5
|
Post by bbrowniii on Dec 24, 2012 13:29:03 GMT -5
Ben
You know, I've never really been a big fan of the Elephant, but those newer Dragon kits have really caught my eye for some reason. I'll definately be keeping track of your progress on this one. Might just light a fire under me to branch out!
|
|
Hinksy
Full Member
  
Member since: June 2012
THE ENGLISH LIONHEART - HINKSY!
Posts: 1,016
Jun 22, 2012 16:46:21 GMT -5
Jun 22, 2012 16:46:21 GMT -5
|
Post by Hinksy on Dec 26, 2012 12:22:13 GMT -5
Ben You know, I've never really been a big fan of the Elephant, but those newer Dragon kits have really caught my eye for some reason. I'll definately be keeping track of your progress on this one. Might just light a fire under me to branch out! I was originally a big fan of the the early war Pz. I, II's & III's and wasn't massively interested in building huge JPs, Panthers and Tigers. As my interest in the Eastern front arena grew so did my interest in the monsters used there! The Elefant just looks superb and I've always wanted to build one  I am really into them now though - particularly the Tigers. I've got Dragon's Flakpanzer I A Premium kit in the stash which I might build pretty soon as I want to build another teeny tiny Panzer again! Well, I did say I was going to start my Elefant today but it didn't happen. I'm feeling pretty lazy today tbh and will start on Saturday now as I'm back to work tomorrow!  Cheers guys, Ben  |
|
Hinksy
Full Member
  
Member since: June 2012
THE ENGLISH LIONHEART - HINKSY!
Posts: 1,016
Jun 22, 2012 16:46:21 GMT -5
Jun 22, 2012 16:46:21 GMT -5
|
Post by Hinksy on Dec 29, 2012 15:18:14 GMT -5
Hi fellas, Saturday update! I started this afternoon and, as usual, took to the instructions with my trusty Highlighter pen and biro marking what parts to leave off until later and also marking an aim point where I wanted to get to with todays session. A leisurely 3 (and a bit) hours modelling has got the basic suspension assembly out of the way and the rear panel assembly completed. As I'm going with Friuls I think they come with Sprockets (not sure how many or what type) so I'll wait until the Friuls arrive before I think about fitting sprockets. I'm going to leave off the Jack Block to fit after basecoat painting as the kit PE comes with all the detailing to make the Block a lot better looking with carry handles etc. I'm working from home tomorrow but hopefully it should be quiet enough to enable me to do the part I want to get done tomorrow which is the frontal armour and bow MG etc. I've only got New Years Day off so I intend to get a fair bit done then. Photos:  No te: the instructions look like they want you to stick the suspension arms together but the when they are fitted it looks like one of the 2 wheels on each suspension unit will be sitting up so I haven't glued the suspension arms in the hope that the weight of the Friuls might make all the road wheels sit flat?  Note: Note: There is some PE in use already! The part on the back (Intake/outake?) has an optional PE grill cover. Nasty gap there - that'll need sorting!  I'm glad this is underway now - I've been feeling lazy since Christmas and it's nice to have a fresh build on the bench! I know it's not a lot to show but every build starts somewhere. I'm going to enjoy this one! Cheers guys, Ben  |
|
|
|
Post by deafpanzer on Dec 29, 2012 17:01:44 GMT -5
Nice update! Noticed the Zimm is thinner for this kit?
|
|
|
|
Post by wing_nut on Dec 29, 2012 18:39:20 GMT -5
Good looking start. If this goes together as nicely as the Ferdinand did, you are in for a heck f a good time.
Andy, I noticed that too. I have always thought the kits that come out with zim had over done... too deep. This looks very restrained and I really like the look of it.
|
|
Hinksy
Full Member
  
Member since: June 2012
THE ENGLISH LIONHEART - HINKSY!
Posts: 1,016
Jun 22, 2012 16:46:21 GMT -5
Jun 22, 2012 16:46:21 GMT -5
|
Post by Hinksy on Dec 29, 2012 19:28:55 GMT -5
Hi Andy and Wingy, Not sure why? It's a 2009 dated box so it's newer than the my last Tiger I which had deep Zim so not sure. The hull and casemate has very shallow Zim but the extra Zim sprues have really nice, crisp, well defined Zim but again, not too deep. These bits are on the new sprue with the Zim parts - you can just see the edge of the bottom of the Casemate here, too:  I'll just have to go VERY easy with the primer and use thin pases with the ab when painting her so the Zim effect doesn't get blurred. She looks like a seriously sweet kit with some interesting assembly work to come  For the finish I'm thinking along the lines of a fairly battered old tub with plenty of streaking effects and shell hits (non-penetrating). These make for a good opportunity to add splashes of colour - still not 100% on the cammo but either squiggly Olivgrun and Rotbraun over a DY base or the 'green cobweb' pattern over DY? I'll do some more tomorrow - assembly shouldn't take too long  Take care, Ben  |
|
|
|
Post by TRM on Dec 29, 2012 20:04:58 GMT -5
Looking good there Ben!! Not going to try and help you with the camo thoughts as I have some woes here all on my own!!  Think the Zim difference might be if DML try to revamp the kit mixing old tooling and new maybe!! Still looks sharp just the same!! Keep it coming!!!  |
|
Hinksy
Full Member
  
Member since: June 2012
THE ENGLISH LIONHEART - HINKSY!
Posts: 1,016
Jun 22, 2012 16:46:21 GMT -5
Jun 22, 2012 16:46:21 GMT -5
|
Post by Hinksy on Dec 30, 2012 17:03:45 GMT -5
Hi guys, Quick build update: I've worked from home this afternoon so in between phone calls I have been tackling what turned out to be a VERY fiddly assembly of the front section. Several panels make it up and after half an hour dry-fitting I still had to settle for a bit of a gap between the lower panels but they are on the underside and will fill very easily. The bow MG is on and moveable (I haven't assembled it fully as it won't be seen) as are the four little 90 degree Photo-Etch bits that the vague instructions look like they want you to put them on a particular area ina particular position so I did! I've since looked at some blogs and can see that some modellers have put them on how I have and others have left a piece sticking up but they aren't coming off again now and will be covered by spare links, Fender mounting arms and maybe stowage too! These instructions are very vaque, not poor - just vague. If I'm unsure of how a piece fits I'll usually look ahead a few steps to see how it looks but on these instructions they don't show detail of parts after the step where you fit them so I've been left guessing on a couple of bits. The fitment of the these front panels aren't great either - I'm hoping for a bit better later on!   Sorry there's not much to show you but I'm where I need to be to make good progress on my New Years Day bench session. The next steps will see me assembling the gun, fitting the Fenders and starting on the Casemate build. So far - not too bad The instructions are a let-down but what's remaining is a simple enough assembly  Thanks guys, Ben  |
|
Hinksy
Full Member
  
Member since: June 2012
THE ENGLISH LIONHEART - HINKSY!
Posts: 1,016
Jun 22, 2012 16:46:21 GMT -5
Jun 22, 2012 16:46:21 GMT -5
|
Post by Hinksy on Jan 1, 2013 15:34:07 GMT -5
Hi guys, I'm making good progress and wanted to get up to a certain point on the instruction sheet so when I came to my weekend build-athon I'd be be starting afresh on a new sub-assembly: in this case the Casemate and Gun mount/barrel assembly. So Fenders are on along with the mountings etc. They stick up on the underside of the lower hull and fit just fine. Two small mounting arms are needed at the rear, two up near the front on the sloping part of the fender and two longer ones that sit right up front on the front of the fenders. I know a few of you have this kit and are following this blog for pointers so I'll start with mentioning the four pieces of PE that you are asked to put up front. Don't fit them until you want the two Fender support arms on that go right up the front - also, I'd say don't fit them to the tank, bend them and fit them to the arms where the arms sit on the zim under the Bow MG. Bend them and fit one at the front of the arm and one at the back with the other bent half sitting underneath the arm. The idea is to give the impression that ech arm is sitting between to upright pieces As I previously mentioned the instruction are not clear re these PE parts so leave them until you fit the fenders. Mine were trashed now so I just cut four PE pices and bodged them on so they looked like they were installed properly. Apart from getting the Fenders on I fitted the round tube thingy? Barrel cleaning rod storage? There is simple optional PE mounting brackets so I used them - I'm trying to use more PE now as it's obvious that a good build benefits from good PE work! Photos:
Below - note the part of the fender arms that sit on the Zimmed area; that's where you need to put the PE. The rear of the left hand fender showing the mounting bracket: The rear of the left hand fender showing the mounting bracket: The Tube on the RHS Fender:  Finally, note the Fender spring: Not very detailed so when it comes to detailing up near the end of construction and adding metal grab handles ets I'll wrap some very fine fuse wire around some rod to replace these kit 'springs':  So, progress being made! Instructions still suck big time but are ok. Just dry fit and dry fit again! This weekend I'll get the Casemate and gun assembly sorted. Happy New Year my friends  Ben  |
|
Hinksy
Full Member
  
Member since: June 2012
THE ENGLISH LIONHEART - HINKSY!
Posts: 1,016
Jun 22, 2012 16:46:21 GMT -5
Jun 22, 2012 16:46:21 GMT -5
|
Post by Hinksy on Jan 5, 2013 16:22:57 GMT -5
Hi guys, A quick Saturday update! The lower hull is all sorted (apart from the running gear) so today it's Casemate time. I'm going to be VERY quick as I haven't had tea yet and there is a VERY good film on soon, too  The gun breech assembly is in place awaiting the barrel which needs to be fitted later on in the build. All the hatches are on and the crazy model-in-a-model Cupola is done too. Remember I'm still testing myself with PE so had to have a crack at the PE parts supplied for the Cupola i.e. 8 x square parts that go between the Periscopes and the round PE ring - it turned out ok. A couple are a bit wonky so I'm going to change them (a few spares are supplied). I could have taken the easy option and left off the Brass as there is a plastic part to use instead of the round piece and who would notice them eight tiny squares? I did it - I'm well proud! Unfortunately my entire free weekend came clattering to a halt yesterday when I was told that I'd have to cover the 2pm-10pm shift tomorrow but if I aim to complete the rear section of the Cupola that should be within my time limit if it isn't too busy! Oh, I haven't fitted the square barrel guard thing (name?) on the ball mount incase I need to move things around when fitting the barrel. Also, the single Periscope at the front is pretty poor in looks and has been moulded with no detail BUT I know I have a new one in the spares box with lens detail - this has nothing. I'll pop that on later as I will do with the wheels, tracks, tools and Jack etc - I want them to be fitted after the main paint has been applied. The same with the wheels and tracks so I can weather behind them properly before fitting. Here's the Breech Assembly: The Casemate and more crazy instructions - the Cupola was not as easy as it looks in the diagram: The Casemate and more crazy instructions - the Cupola was not as easy as it looks in the diagram:    What's up next for the build: What's up next for the build: I hope you like her so far guys, Cheers fellas, Ben  |
|
Tojo72
Forum Moderator      Sept '24 Showcased Model Awarded
Member since: November 2012
Posts: 5,314
Member is Online
MSC Staff
|
Post by Tojo72 on Jan 5, 2013 17:20:00 GMT -5
Looking good,a nice smooth job so far.
|
|
|
|
Post by deafpanzer on Jan 5, 2013 17:22:27 GMT -5
Whoa! Missed your last post... it is really looking good. You are handling PE very well especially the cupola! It really looks good... far better than the styrene piece!
Keep it coming buddy!
|
|
Hinksy
Full Member
  
Member since: June 2012
THE ENGLISH LIONHEART - HINKSY!
Posts: 1,016
Jun 22, 2012 16:46:21 GMT -5
Jun 22, 2012 16:46:21 GMT -5
|
Post by Hinksy on Jan 5, 2013 17:34:53 GMT -5
Cheers fellas, Thanks for 'PE Appreciation' Andy! That means a lot coming from you old chum. I've got another choice to make on the Drivers hatch Periscope cover - there are plastic and PE options for that too! Update tomorrow! Ben  |
|
ogrejohn
Full Member
   Oct '23 Showcased Model Awarded
Member since: June 2012
Go away or I shall taunt you a second time!
Posts: 1,302
Jun 1, 2012 17:33:59 GMT -5
Jun 1, 2012 17:33:59 GMT -5
|
Post by ogrejohn on Jan 5, 2013 18:13:52 GMT -5
Making nice progress there Ben!
|
|
Hinksy
Full Member
  
Member since: June 2012
THE ENGLISH LIONHEART - HINKSY!
Posts: 1,016
Jun 22, 2012 16:46:21 GMT -5
Jun 22, 2012 16:46:21 GMT -5
|
Post by Hinksy on Jan 6, 2013 15:38:00 GMT -5
Hi guys, Cheers Ogre! Making great progress - although I've been working from home this afternoon covering the emergency phone it's been dead so I've really rattled through the remaining parts of the build - I now have 3 nice sub assemblies ready to go! Next weekend I've got some little jobs to do and I'll be able to fit it all together. I've got to sort the remaining hatches on the front deck, PE Jack Block Mount, Sledgehammer Mount and clasp, tow cable mounts, spare tracks, wheels and Friuls - plus there's the matter of the Friuls which I'll order tomorrow. I reckon I'll be basecoating this in another couple of weekends time depending on work. One thing I'm REALLY pleased with is the Fender flap srings up front. They were supplied as moulded plastic with hardly any spring detail so I decided to use some thin Brass Rod and wrap 5 amp fuse wire around it - they look much better. PROBLEM - I tried to test fit the replacement Aluminium barrel that came with the kit. I also assembled the kit barrel. In the ball mount there are two lugs that the plastic kit barrel locate into and slide into the grooves either side of the barrel - the Aluminium one will not push in far enough and looks like it is going to be too small in diameter. With the plastic barrel located it seems that the Aluminium one sticks out nearly 10mm too much! The lugs stop it pushing in far enough? Do I have to do anything to make this metal barrel fit - it's not looking great at the minute as if I was to manage to get it pushed in to the correct depth it's going to be waaay too small in diameter?
Can anyone help? How did you sort this out if you have built this kit?
Here are some photos - I'm loving this build!
Sub-Assemblies: Dry Fitted to test: Dry Fitted to test:  My new springs: My new springs:  Thanks for looking guys - I hope you like her so far! Thanks for looking guys - I hope you like her so far!
If anyone can assist with the barrel I'd be very grateful!
Have a good week chaps,
Ben  |
|
|
|
Post by deafpanzer on Jan 6, 2013 18:35:09 GMT -5
Nice touch with the springs for the flaps. Did you make 'em or it came with the kit? Looking real good and clean so far!
|
|
Hinksy
Full Member
  
Member since: June 2012
THE ENGLISH LIONHEART - HINKSY!
Posts: 1,016
Jun 22, 2012 16:46:21 GMT -5
Jun 22, 2012 16:46:21 GMT -5
|
Post by Hinksy on Jan 6, 2013 18:54:20 GMT -5
Blimey Andy, You must be the worst person ever for not reading blogs - you just like the colourful pictures dontcha! ;D  I made them myself dude - 5 amp fuse wire wrapped around 0.5mm diameter Brass Rod. I'm well chuffed with them! ;D I also raised a comment regarding the fact that I couldn't fit the replacement Aluminium barrel. I looked at the instructions again and noticed a key part that had to be removed - Dragon use small print to bring this to your attention! I should know better now!  Cheers buddy - I'll be painting soon! Friuls are ordered too  This kit just fell together even though the instructions suck! Have a good week old friend, Ben  |
|
|
|
Post by wbill76 on Jan 6, 2013 21:05:50 GMT -5
Glad you got the barrel issue resolved Ben! Those fender springs are some top-notch work as well, you're definitely expanding your skill abilities with this build!  |
|


