Tony Thunder
Full Member
  
Member since: January 2012
Posts: 591
Jan 30, 2012 18:22:10 GMT -5
Jan 30, 2012 18:22:10 GMT -5
|
Post by Tony Thunder on Mar 30, 2013 7:51:43 GMT -5
Chaps, Another British soft skin, another KFS kit This time the venerable Bedford MK in service from the early 60's and I believe some are still in service with the Territorial Army today. The Bedford 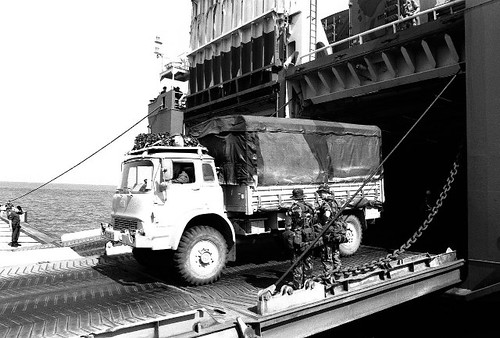 Bedford_MK_4x4_truck Bedford_MK_4x4_truck by TonyThunder, on Flickr The kit I am not going to go into much detail here; suffice to say that this is typical KFS kit with regard to quality, detail and accuracy. 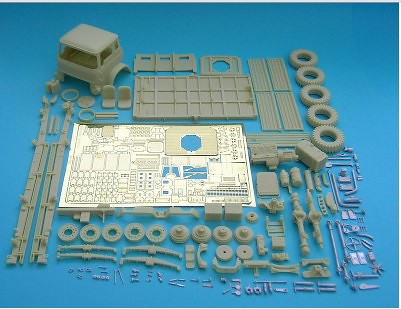 Bedford Kit Parts Bedford Kit Parts by TonyThunder, on Flickr I have already started putting the chassis together - What do you think? |
|
|
|
Post by Leon on Mar 30, 2013 7:57:32 GMT -5
Go for it Tony.Always good to see something with wheels.  |
|
|
|
Post by dupes on Mar 30, 2013 8:02:15 GMT -5
YES!
|
|
|
|
Post by bullardino on Mar 30, 2013 8:29:09 GMT -5
Please, do... I love all your works and I have already bookmarked this thread  |
|
|
|
Post by wbill76 on Mar 30, 2013 15:51:50 GMT -5
Go for it! Can't have too many softskins getting blogged I say!  |
|
Tony Thunder
Full Member
  
Member since: January 2012
Posts: 591
Jan 30, 2012 18:22:10 GMT -5
Jan 30, 2012 18:22:10 GMT -5
|
Post by Tony Thunder on Mar 31, 2013 9:13:57 GMT -5
A Blog it is then! I said earlier that these were in service from the early sixties, well I was wrong they were first issued circa 1970 and a due to be completely out of service by 2014! which will be 44 year of sterling service. There are too many variants to name and this one will be a GS version probably BAOR colours but that is not set in stone. To the build! As I said I have already started the chassis.............. 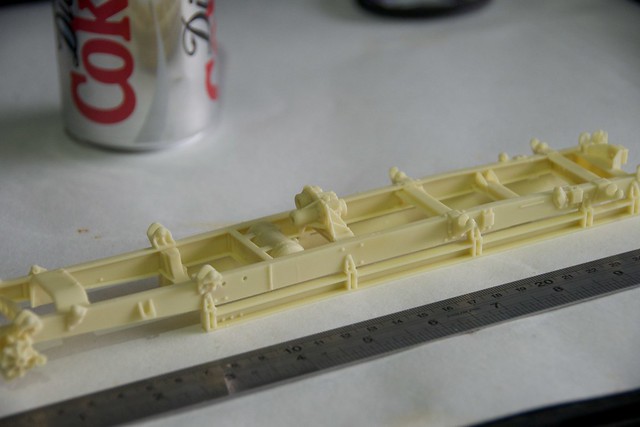 DSC_2200 DSC_2200 by TonyThunder, on Flickr 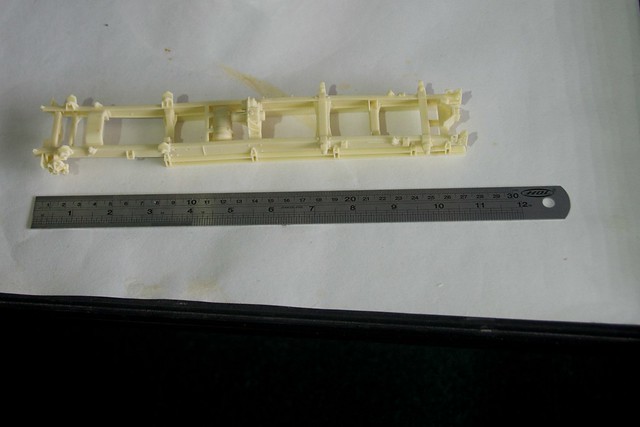 DSC_2199 DSC_2199 by TonyThunder, on Flickr It consists of two long rails and 11 parts make up the various braces/cross sections. All squared away and glued with CA gel. Next up is the springs and axles etc. 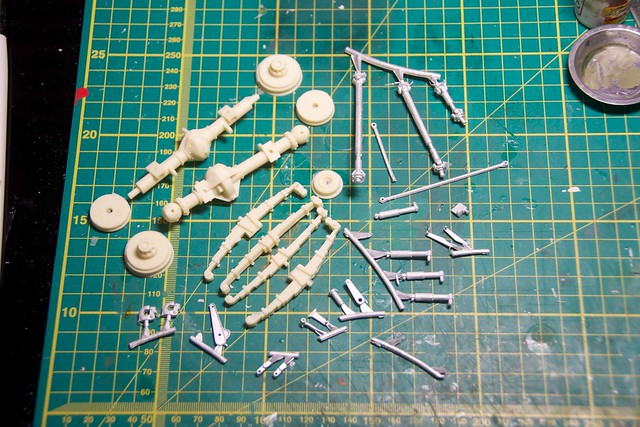 DSC_2203 DSC_2203 by TonyThunder, on Flickr More to follow Tony |
|
|
|
Post by Leon on Mar 31, 2013 9:25:37 GMT -5
Off to a good start Tony.
|
|
|
|
Post by TRM on Mar 31, 2013 9:29:21 GMT -5
I'm in! Looks like an interesting kit!! Off to a nice start there!!
|
|
Deleted
Member since: January 1970
Posts: 0
Dec 2, 2024 2:50:31 GMT -5
Dec 2, 2024 2:50:31 GMT -5
|
Post by Deleted on Mar 31, 2013 9:32:53 GMT -5
hey,Mr T....I'm really glad you went with a build of this venerable old work horse mate!!!
For the uninitiated,this ole gal was the mainstay logistics vehicle for the British Army,for it's entire life,in various guises.Served with distinction,wherever it was deployed!!!!
|
|
|
|
Post by robbo on Mar 31, 2013 10:03:41 GMT -5
Blog it, that's what we're here for  |
|
|
|
Post by wbill76 on Mar 31, 2013 19:52:59 GMT -5
Some nice detail work there Tony, off and running!
|
|
|
|
Post by bullardino on Apr 1, 2013 3:49:29 GMT -5
Lots of crisp details, these kits are great  And you make them even better, very nice start Tony  |
|
Tony Thunder
Full Member
  
Member since: January 2012
Posts: 591
Jan 30, 2012 18:22:10 GMT -5
Jan 30, 2012 18:22:10 GMT -5
|
Post by Tony Thunder on Apr 1, 2013 13:04:08 GMT -5
Front and rear chassis/axle assemblies installed, I'll let the pics speak for them selves: Rear Axle 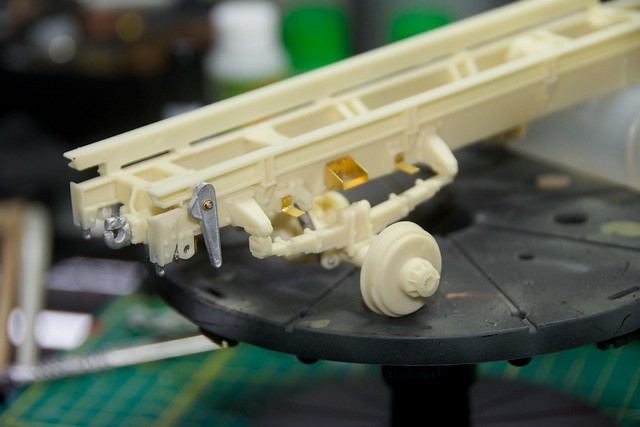 DSC_2278 DSC_2278 by TonyThunder, on Flickr 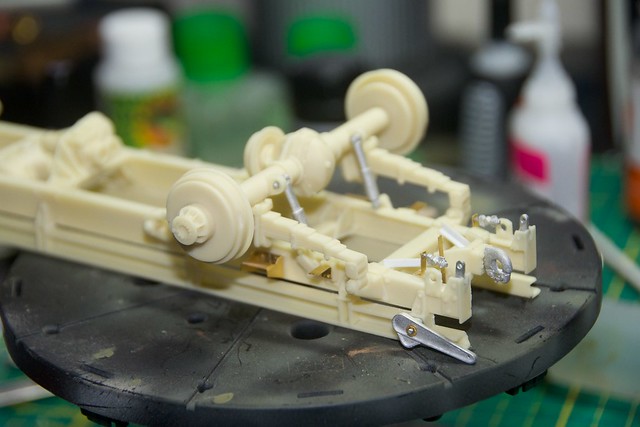 DSC_2279 DSC_2279 by TonyThunder, on Flickr 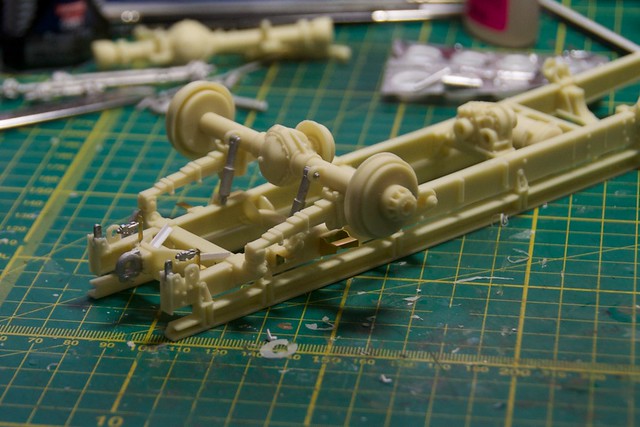 DSC_2271 DSC_2271 by TonyThunder, on Flickr Front Axle 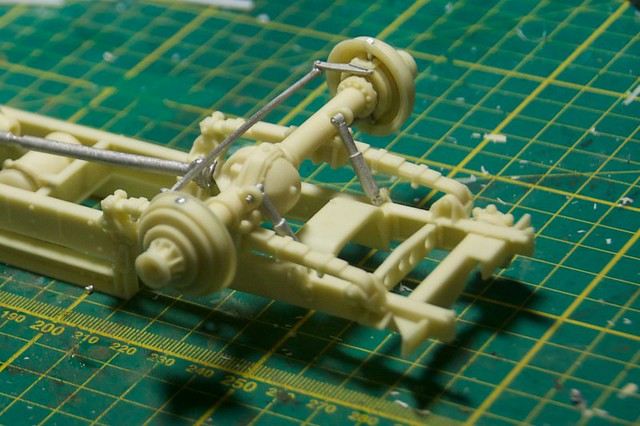 DSC_2290 DSC_2290 by TonyThunder, on Flickr 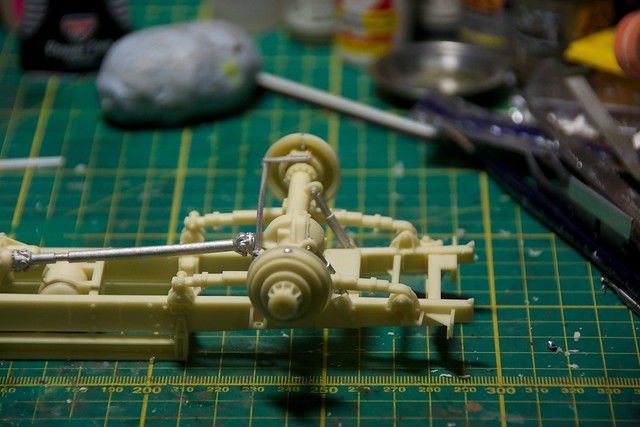 DSC_2291 DSC_2291 by TonyThunder, on Flickr Chassis complete  DSC_2289 DSC_2289 by TonyThunder, on Flickr Fuel tank 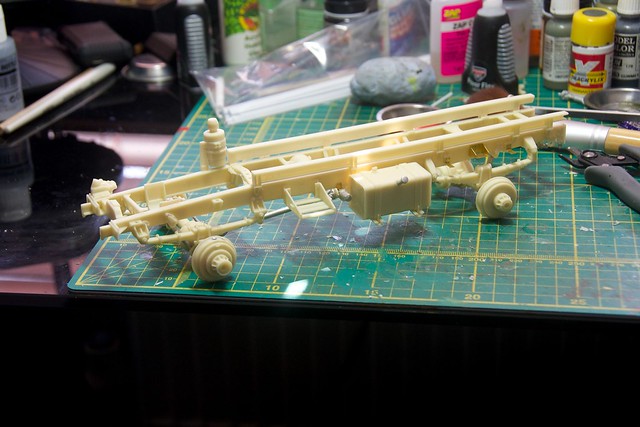 DSC_2302 DSC_2302 by TonyThunder, on Flickr Battery box ftted 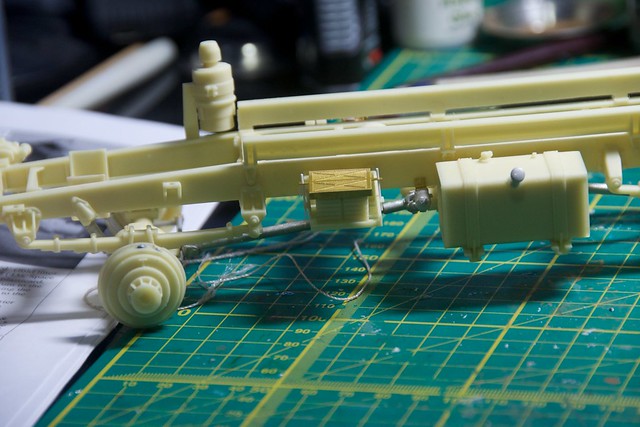 DSC_2320 DSC_2320 by TonyThunder, on Flickr Spare wheel housing components (I had already stated to bend some of the etch) 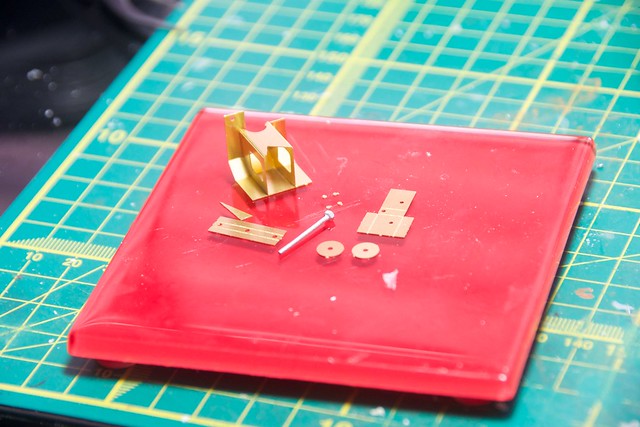 DSC_2308 DSC_2308 by TonyThunder, on Flickr Completed 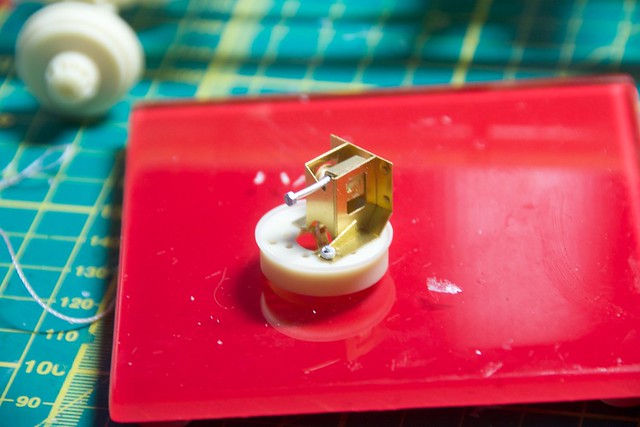 DSC_2313 DSC_2313 by TonyThunder, on Flickr 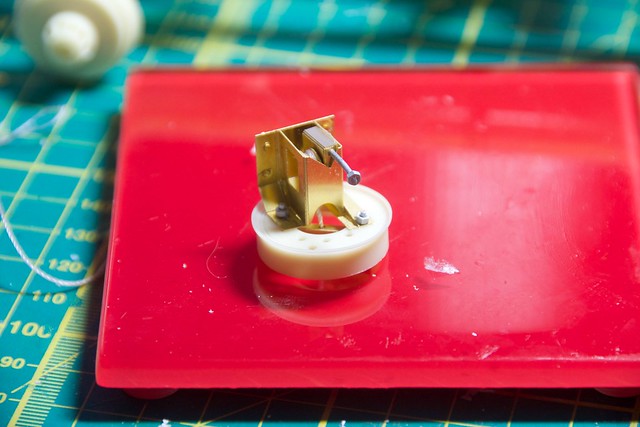 DSC_2312 DSC_2312 by TonyThunder, on Flickr And temporarily attached (will not be permanently installed until after paint) 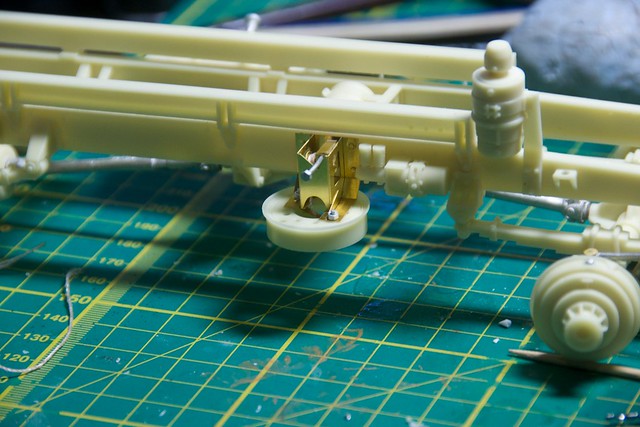 DSC_2318 DSC_2318 by TonyThunder, on Flickr I could n't resist taking a peek! 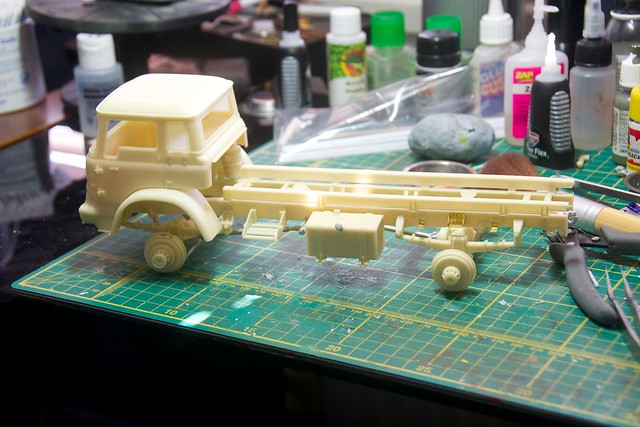 DSC_2296 DSC_2296 by TonyThunder, on Flickr 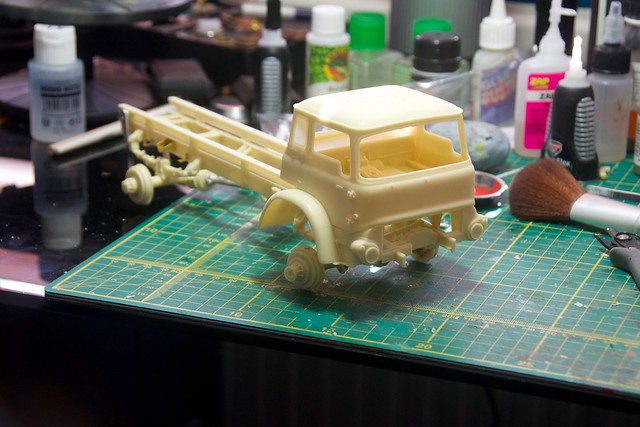 DSC_2298 DSC_2298 by TonyThunder, on Flickr As ever all comments welcome Till next time! Tony |
|
|
|
Post by robbo on Apr 1, 2013 13:08:01 GMT -5
I've seen one of these kits started before but never finished so it'll be good to see what you do with it
|
|
|
|
Post by bbd468 on Apr 1, 2013 13:17:04 GMT -5
Well i was gonna say BLOG!!! But since ya are ill say SWEET!!! Great start and looks to be a nice kit as well. IM IN!!!   Gary |
|
|
|
Post by wbill76 on Apr 1, 2013 19:54:41 GMT -5
Very clean etch and detail work Tony. Since this one's 1/24, I bet that makes life a touch easier when it comes to working with the details like those on the suspension.
|
|
Tony Thunder
Full Member
  
Member since: January 2012
Posts: 591
Jan 30, 2012 18:22:10 GMT -5
Jan 30, 2012 18:22:10 GMT -5
|
Post by Tony Thunder on Apr 7, 2013 9:42:26 GMT -5
After getting the chassis assembled I moved on to the cab. The one part of this build has been causing a certain amount of nervousness is the fact that I had to cut a 23mm hole in the roof to accept the observers hatch ring. Here is a pic of the cab and hatch ring prior to surgery. I had to centre the ring and measure 5mm back from the roof strakes (or so I thought) and using the hatch ring as a guide cut the 23mm hole.  DSC_2326 DSC_2326 by TonyThunder, on Flickr So I cut the hole and fitted the hatch ring. 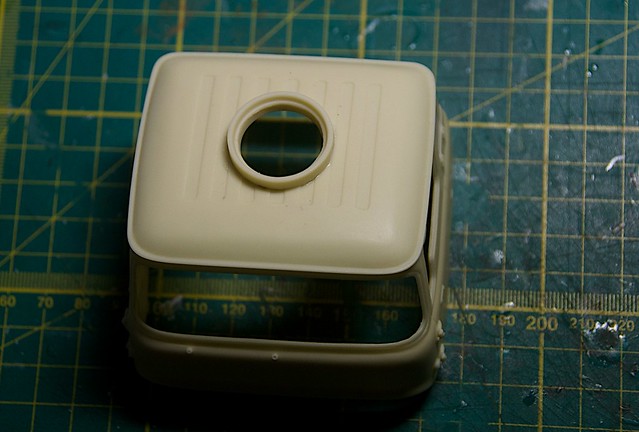 DSC_2329 DSC_2329 by TonyThunder, on Flickr Job done went quite well and hatch glued in. It was at this point the problem revealed it self...................... I laid the roof platform over the cab and lined it up using the hatch but when aligned correctly the platform was way too far back and if put forward it partially covered the hatch. So I checked my measurements matched the instructions as read (notice I put "as read" there). It was on the third time of rereading the instruction I saw one of these "." in front of 5mm! Yep I had cut the hatch ring 4.5mm too far back! There was a time when at this point the kit might have been consigned to the shelf of Shame but no longer! but I did down tools and left it overnight. The following day I used my trusty CA glue buster and removed the hatch ring. I then made the CORReCT measurement for the front of the hatch ring and using it as a template marked the front edge. I then made the cut and moved the hatch ring to where it should be and back filled the gap with Milliput and this is where I am now. 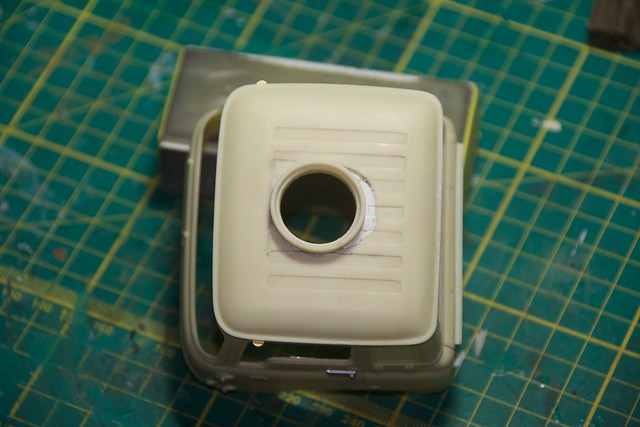 DSC_2366 DSC_2366 by TonyThunder, on Flickr 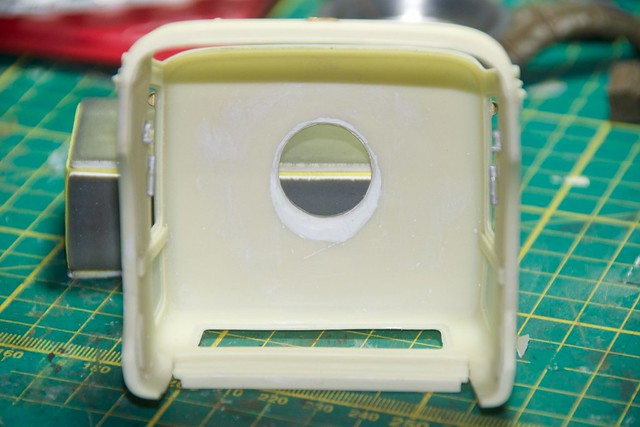 DSC_2364 DSC_2364 by TonyThunder, on Flickr A bit of final sanding and it won't show (plus the fact that much of the surgery will be covered by the platform. I have also added some detail to the cab 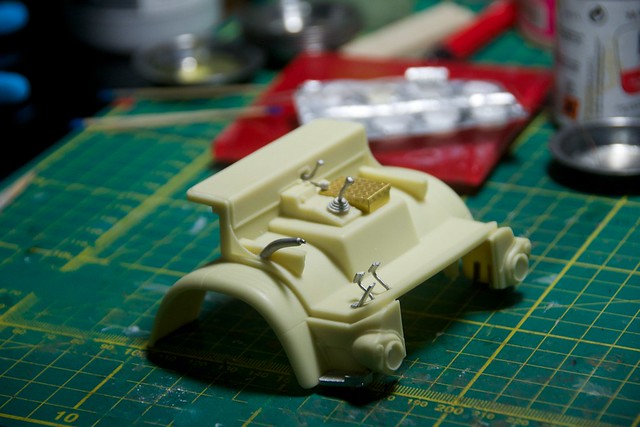 DSC_2372 DSC_2372 by TonyThunder, on Flickr 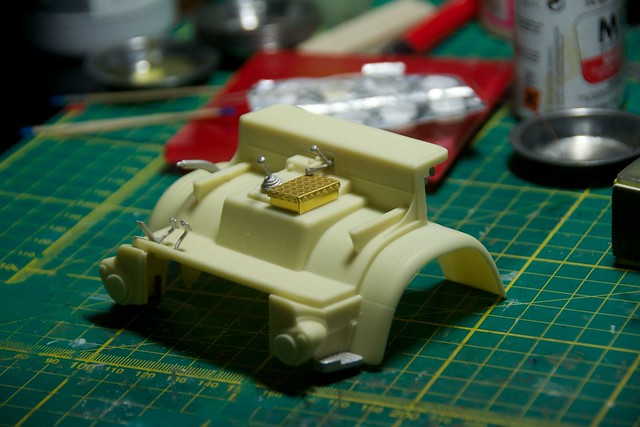 DSC_2369 DSC_2369 by TonyThunder, on Flickr 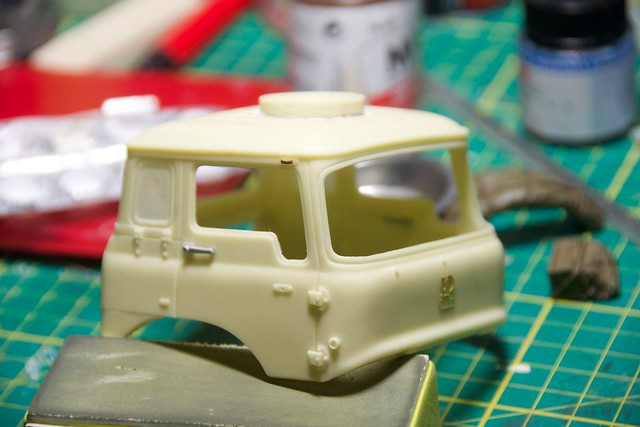 DSC_2362 DSC_2362 by TonyThunder, on Flickr 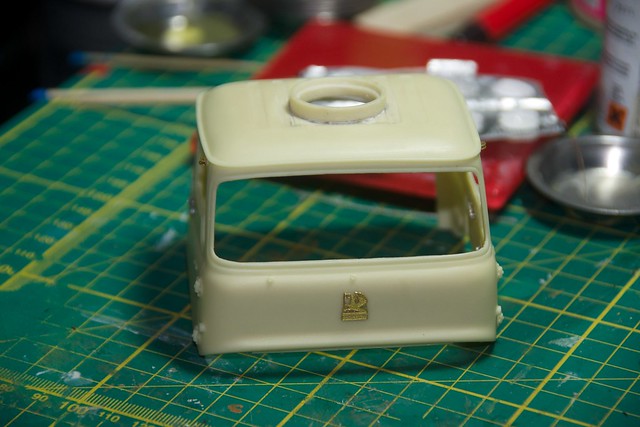 DSC_2359 DSC_2359 by TonyThunder, on Flickr |
|
|
|
Post by Leon on Apr 7, 2013 9:52:41 GMT -5
Tony that is coming a long nicely.Nice save on the hatch ring.  |
|
|
|
Post by bullardino on Apr 7, 2013 13:16:45 GMT -5
Gosh, I suddenly realized how much small resin and PE parts you're assembling. They look so realistic I tend to forget their size... What an awesome job  |
|
Deleted
Member since: January 1970
Posts: 0
Dec 2, 2024 2:50:31 GMT -5
Dec 2, 2024 2:50:31 GMT -5
|
Post by Deleted on Apr 7, 2013 13:28:01 GMT -5
Hey Tony....when I saw the Update title,I thought "What the ferk has he done now???"...but it was only what you told me and Neems about yesterday!  .As we said yesterday,good save on the top cover hatch mate,and like I said,that tread plate is optional,depending on what year you're planning on? |
|
|
|
Post by Mence on Apr 7, 2013 13:33:20 GMT -5
Great progress Tony, all looking rather splendid!
|
|
|
|
Post by wbill76 on Apr 7, 2013 19:21:35 GMT -5
Glad to see you didn't let the setback defeat you Tony! Nice save and rework on the hatch ring. Little bit of paint and no one will ever be the wiser.  |
|
Tony Thunder
Full Member
  
Member since: January 2012
Posts: 591
Jan 30, 2012 18:22:10 GMT -5
Jan 30, 2012 18:22:10 GMT -5
|
Post by Tony Thunder on Apr 9, 2013 9:03:46 GMT -5
The continuing saga of the cab roof. I bent the etch roof platform around its resin former and than glued it in place. I then attached the feet which would attach to the cab roof with tacky wax and once correctly positioned with all four feet sitting in the rain gutter I glued them in place. DSC_2374 by TonyThunder, on Flickr The platform is temporarily placed on the roof, it will be installed after paint when the platform feet will have additional clamps installed. |
|
jsteinman
Full Member
  
Member since: March 2013
Posts: 735
Mar 24, 2013 9:29:10 GMT -5
Mar 24, 2013 9:29:10 GMT -5
|
Post by jsteinman on Apr 9, 2013 9:04:58 GMT -5
|
|
|
|
Post by bullardino on Apr 9, 2013 9:22:14 GMT -5
Great progress, the amount of details is so huge it looks the real one...
|
|
|
|
Post by wbill76 on Apr 9, 2013 19:17:14 GMT -5
Platform looks very nice Tony, I can see why your heart stopped a beat with the previous issue!  |
|
|
|
Post by Leon on Apr 10, 2013 3:37:27 GMT -5
Have to agree with Luigi Tony.That is looking really good.  |
|
|
|
Post by TRM on Apr 10, 2013 5:40:56 GMT -5
Sweet building Tony!!! Love all the detail coming out on this!!
|
|
Tony Thunder
Full Member
  
Member since: January 2012
Posts: 591
Jan 30, 2012 18:22:10 GMT -5
Jan 30, 2012 18:22:10 GMT -5
|
Post by Tony Thunder on Apr 10, 2013 16:53:09 GMT -5
|
|
|
|
Post by Leon on Apr 10, 2013 16:56:34 GMT -5
Tony nice work on the pe.I'm really liking the looks of this.  |
|