|
|
Post by Mence on Sept 11, 2013 5:50:37 GMT -5
Hey Keith.
Although your clear coat looks pretty flawless, I'm guessing there might be the odd bump or blemish in the clear coat?
If there is, what do you do to address those 'bumps'?
|
|
Keith Christie
Full Member
  
Member since: June 2012
Posts: 292 
|
Post by Keith Christie on Sept 11, 2013 10:26:54 GMT -5
Hi Mence,
Generally the Zero 2K clear coat goes on very well without pooling or running, as long as your prep is flawless then the finished result will be as well.
I always flat down the primer stages with damp 4000 grade micro mesh and a block. Once I am happy that everything is flat I then add two thin coats of colour, I allow this to dry for thirty minutes then spray the 2 K clear coat.
I first spray a very thin coat and allow it to flash for 5 mins, next I spray 2 further medium weight coats allowing them to flash for 5 minutes between coats. I then leave the parts in a plastic box for 72 hours to cure.
Next I get 4000 grade micro mesh and lightly polish the surface to an opaque finish, this will show any blemishes and high spots, these are polished out using the micro mesh. Once flat I give the piece a further 2 coats of clear as described above. After 72 hours I polish and seal using automotive compound and a paint sealant.
I hope this answers your question.
Best Regards
Keith.
|
|
|
|
Post by Mence on Sept 11, 2013 11:44:36 GMT -5
Nice one Keith, thanks for that. Mine is going on quite well considering my less than ideal spraying environment but I can see a couple of small blemishes I would like to address.
I have some 6000 Micromesh but nowt else, time for an online order methinks.
|
|
Keith Christie
Full Member
  
Member since: June 2012
Posts: 292 
|
Post by Keith Christie on Sept 11, 2013 12:01:46 GMT -5
Mence,
6000 will be ok, but you will have to polish for longer as obviously this is not as abrasive as 4000. Give it a go before you spend your cash.
Best Regards
Keith.
|
|
|
|
Post by Mence on Sept 11, 2013 13:37:05 GMT -5
Cheers buddy, noted...
|
|
Keith Christie
Full Member
  
Member since: June 2012
Posts: 292 
|
Post by Keith Christie on Sept 12, 2013 9:44:42 GMT -5
Good Afternoon Gentlemen, After a little pressure from jackwagon,  Here is another update. I have been working on the doors and although there is not really much to show build wise there has been a lot of prep and paint to produce these parts. The first photo shows the door skin and mirror after clear coat and the first polish. ( the whitish spots and marks you can see are the metallic particles in the paint reflecting the lighting) 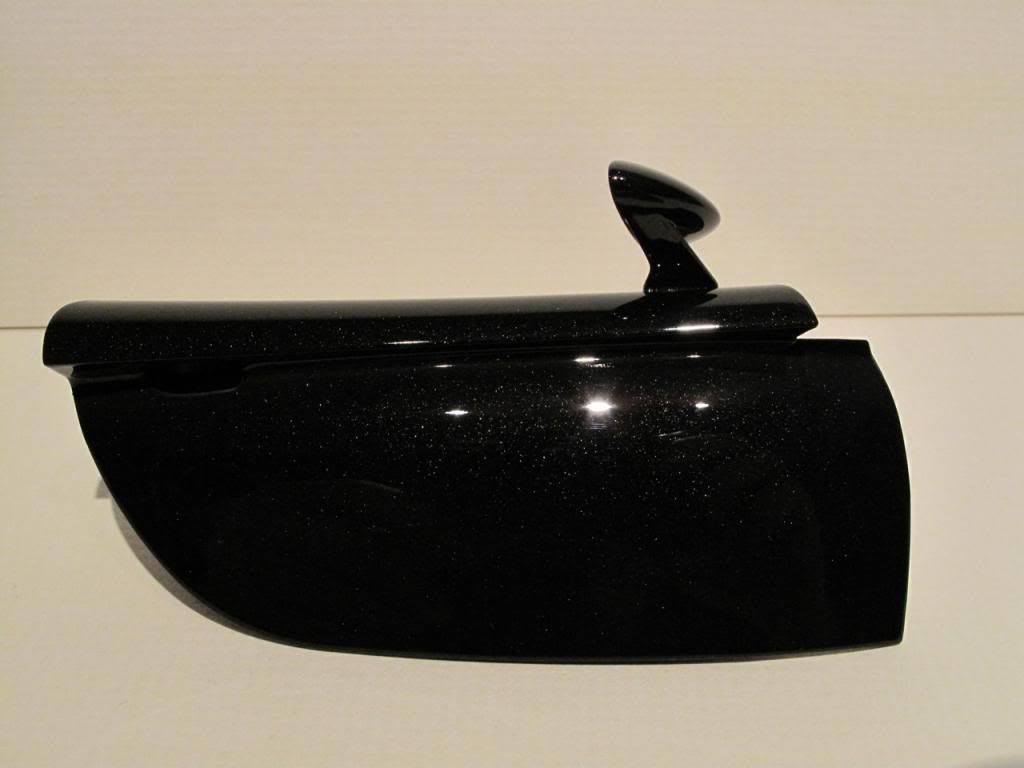 This second photo shows the interior of the door and how it integrates with the rest of the interior. 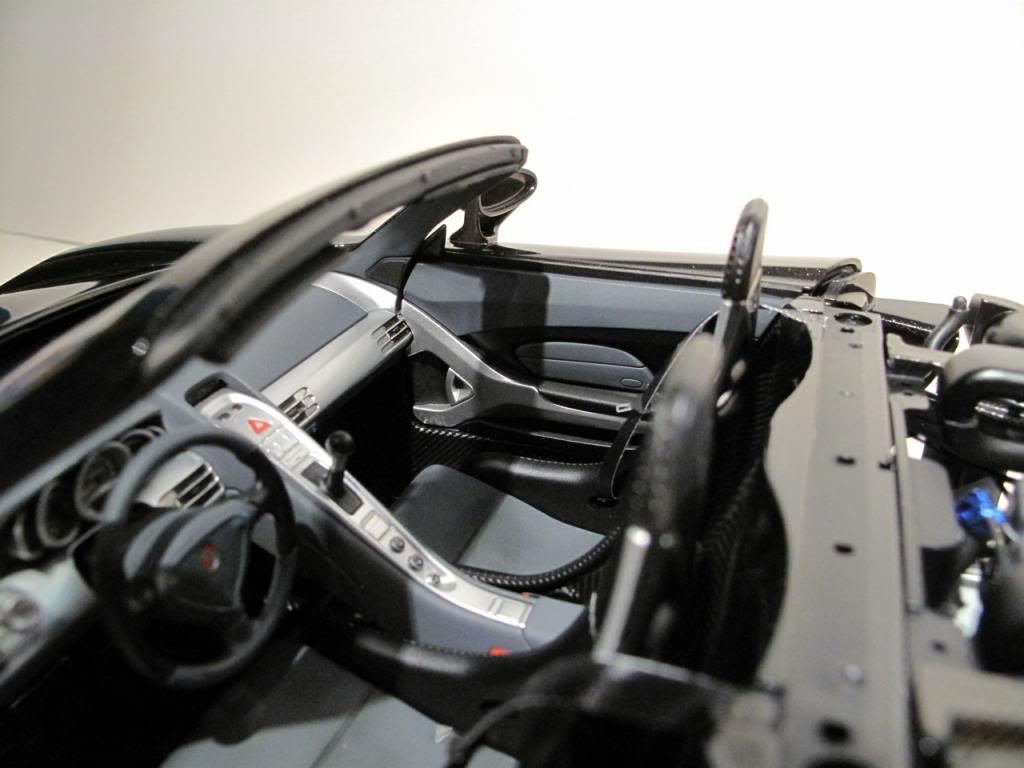 The third photo shows the door skin dry fitted to the door card, you can see from this just how good the fit of the Tamiya parts are in this kit, the shut line is nye on perfect.  These last two photo's show the door in the open position. 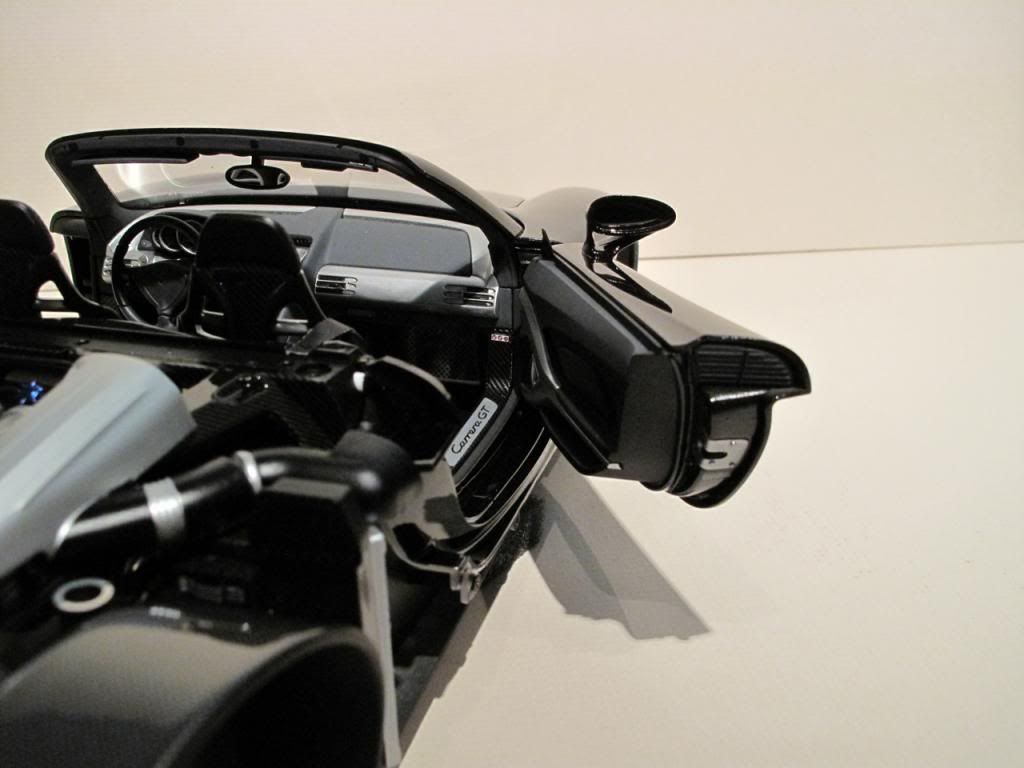 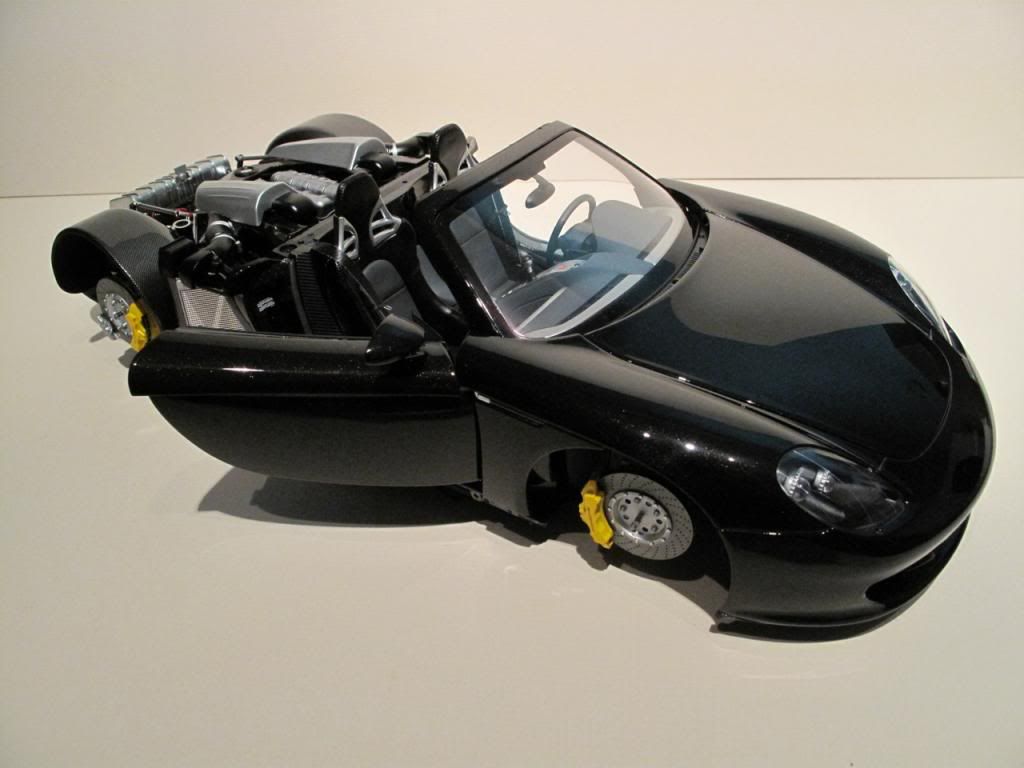 Next up will be to finish off the other door then final installation and polish of the door parts. More soon, As always all comments questions and criticisms welcome. Best Regards Keith |
|
|
|
Post by Mence on Sept 12, 2013 13:12:29 GMT -5
Truly brilliant finish on the doors Keith, I'm sure Porsche don't get it as good as this!
|
|
Deleted
Member since: January 1970
Posts: 0
Dec 4, 2024 19:01:25 GMT -5
Dec 4, 2024 19:01:25 GMT -5
|
Post by Deleted on Sept 12, 2013 14:10:40 GMT -5
Truly brilliant finish on the doors Keith, I'm sure Porsche don't get it as good as this! I reckon Prof's right there Keith!...I've NEVER seen this sort of finish on a modern Porsche.  |
|
Deleted
Member since: January 1970
Posts: 0
Dec 4, 2024 19:01:25 GMT -5
Dec 4, 2024 19:01:25 GMT -5
|
Post by Deleted on Sept 12, 2013 15:16:59 GMT -5
Superb paintwork as ever Kieth, WWI string bag or autobahn stormer it doesn't seem to matter, first class finish every time  |
|
|
|
Post by wbill76 on Sept 12, 2013 18:41:02 GMT -5
Very nice progress Keith, got to love the fit and look of the doors on this baby.
|
|
|
|
Post by deafpanzer on Sept 12, 2013 18:46:43 GMT -5
Looking GRRRRREAT!!! Paint looks awesome!
|
|
Keith Christie
Full Member
  
Member since: June 2012
Posts: 292 
|
Post by Keith Christie on Sept 13, 2013 11:32:24 GMT -5
Good Evening Gentlemen,
Mence, thanks very much mate, I've seen a program about the Porsche factory in Stuttgart, and the 911 cars are painted by a Robot and Human work force, I guess they don't have as much time to paint each car to get a flawless finish due to production numbers.
Chris, thanks mate, my brother had a Porsche 911 carrera 4 for a while and the paint was very good, but did not have the depth of shine that is achieved in the modelling world or perhaps on a Rolls Royce. I'm looking forward to seeing you all again at Euro.
Steve, thanks very much for the kind words. I guess when you are enjoying a hobby this shines through in the work you produce?
Bill, Thanks very much, yes the fit of everything is top drawer, I have had to make hardly any adjustments to make everything fit perfectly. I've just test fitted the engine covers and straight out of the box they are perfect.
More soon,
Best Regards
Keith.
|
|
Keith Christie
Full Member
  
Member since: June 2012
Posts: 292 
|
Post by Keith Christie on Sept 13, 2013 11:37:42 GMT -5
Andy, thanks very much for looking in again.
Mark, thanks very much mate, I have to agree about the Clear coat, this is my favourite part of the process, when it goes on smooth and without blemishes it is a really good feeling and you can see the true colour shine through a deep gloss finish.
I have been working on the second door today and the side panels, these should be completed tomorrow all being well, so there should be another update after that.
Best Regards
Keith.
|
|
Keith Christie
Full Member
  
Member since: June 2012
Posts: 292 
|
Post by Keith Christie on Sept 14, 2013 9:36:06 GMT -5
Good afternoon Gentlemen, Here is another update for you. not to much to show but an update none the less. I have now fitted the drivers side door and the two side panel skirts that make up the rear cooling duct for the radiators  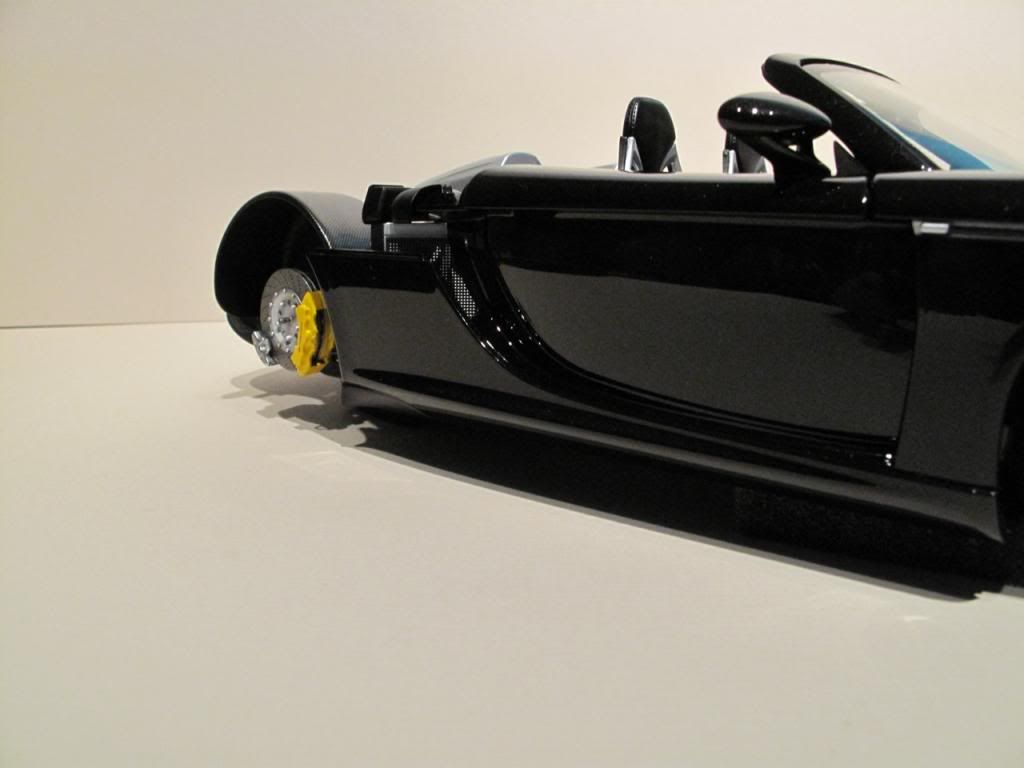  The next three photo's show a test fit of the rear cowling and engine cover. this is straight off the sprue, I have just cut the nodules off to see how it fits. 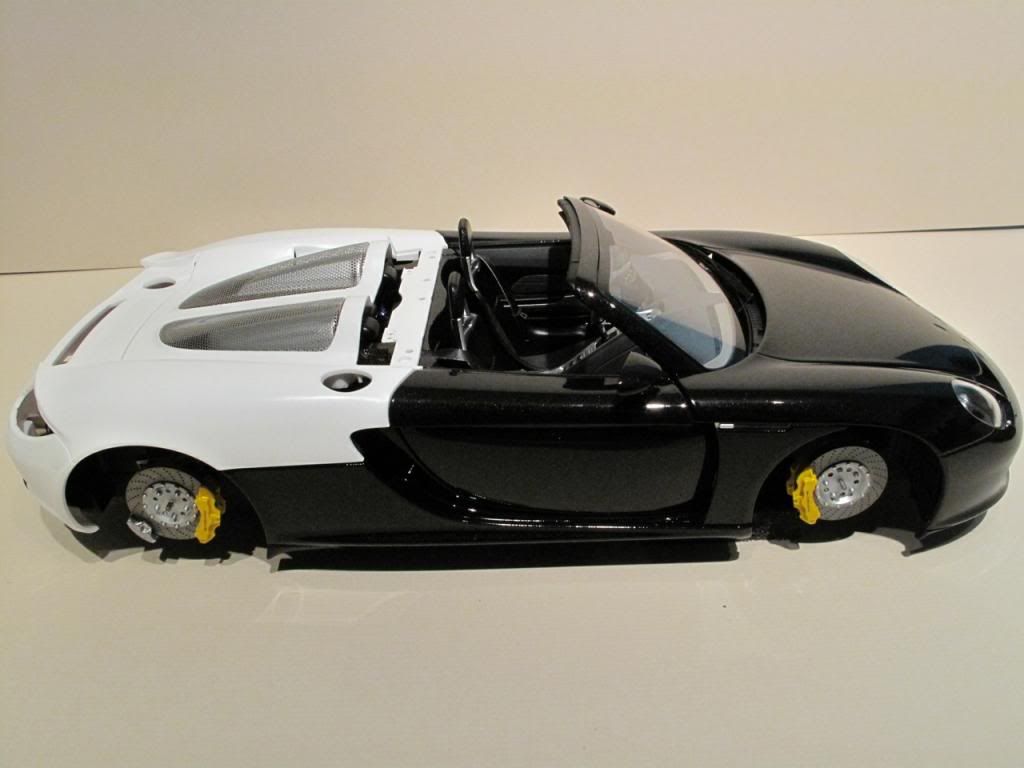 The Photo etch supplied for the engine cover screen is a work of art and fits perfectly. 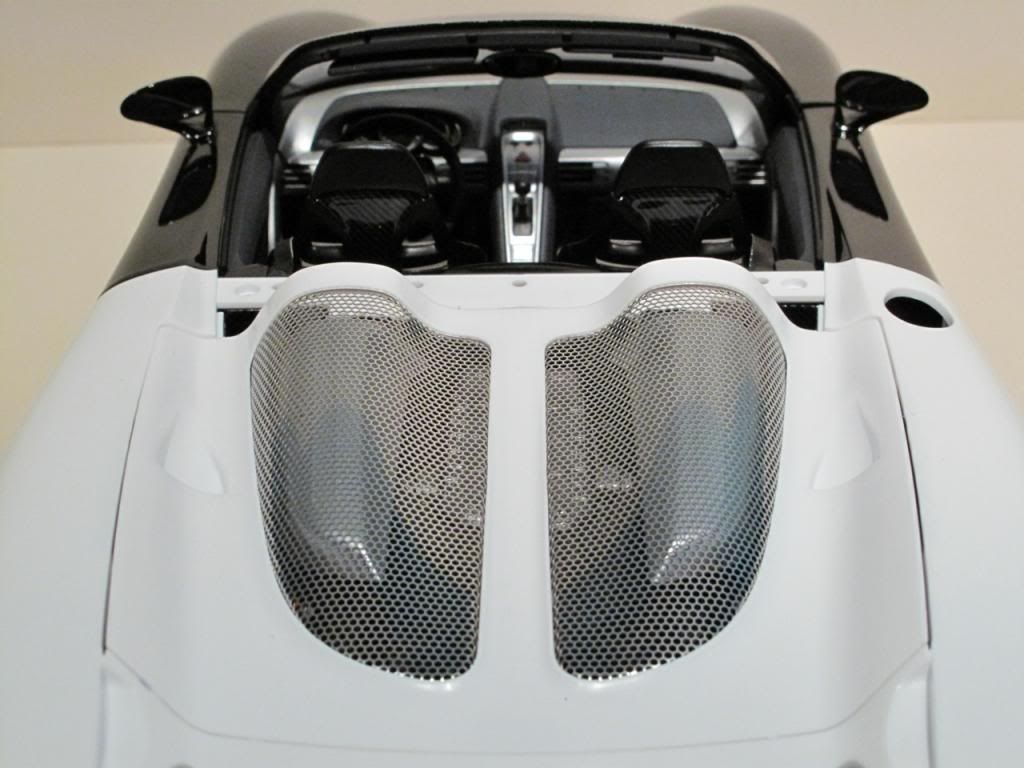  I will now start the process of assembling and painting the rear cowling, this has quite a lot of work to be done on it as it includes the mechanism for raising and lowering the rear spoiler, which is operated by pushing the licence plate! More soon Best Regards Keith |
|
|
|
Post by wbill76 on Sept 14, 2013 13:05:01 GMT -5
Now that's what I'm talking about! The PE and rear cover are virtually a glove-fit. The white-to-black contrast also provides an interesting before/after look too, imagine if you left it like that?  |
|
|
|
Post by Mence on Sept 15, 2013 1:37:07 GMT -5
Gotta love Tamiya when you see quality like this and a perfect fit as well, really nice to see a 'raw' piece of styrene against what you have already done, just serves to show how much fine work you have put into this.
Keep it coming....
|
|
Keith Christie
Full Member
  
Member since: June 2012
Posts: 292 
|
Post by Keith Christie on Sept 15, 2013 8:04:08 GMT -5
Mark , thanks very much mate, I was amazed by the PE screens, and REALLY glad I didn't have to form them to that shape. Bill, thanks very much fella, the PE fit is perfect to the engine cover and holds in place without any glue, so rather than run the risk of glue contamination, I think I may just clip them in once the cover is painted. I did think about the white to black contrast when I took the pictures, I think it is a bit too striking to work as a colour scheme though, I certainly wouldn't buy it, having said that though I own a VW Golf GTI that is Tornado red, that is also very striking.  Mence, Thanks very much mate, the fit of all the parts in this kit so far have been perfect except for the engine crank case, for some reason this was more like the Tamiya kits from the 70's I have now started the prep work on the rear cowling, more progress soon. Best Regards Keith. |
|
Keith Christie
Full Member
  
Member since: June 2012
Posts: 292 
|
Post by Keith Christie on Sept 17, 2013 4:12:32 GMT -5
Good Morning Gentlemen, I managed to spend a little time on this yesterday so I have a short update for you, I have sanded the rear cowling to remove some very feint mould lines, then I went to work on the interior, mocking up the panel work around the aperture and adding the grill surround The black part held by tape, in the middle of the photo is the mount for the spoiler raising mechanism, care must be taken to correctly align this part other wise the spoiler will not operate correctly. Here is a photo of the progress so far. 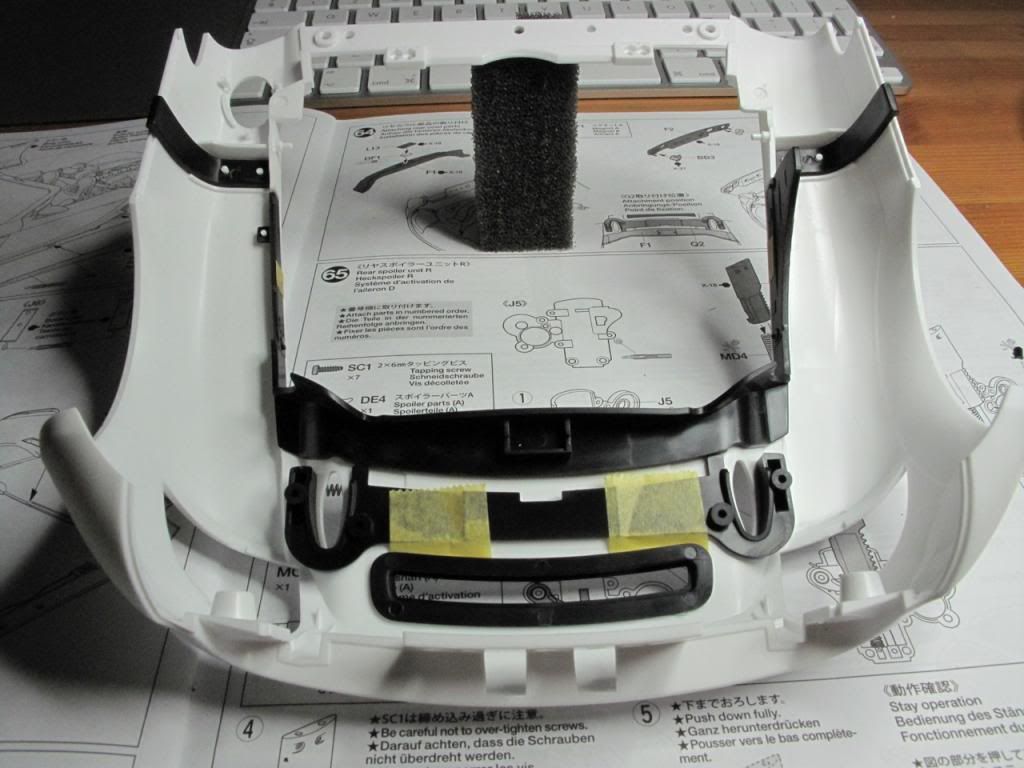 Next up will be a coat of primer to check the body lines Best Regards Keith |
|
|
|
Post by Leon on Sept 17, 2013 4:50:30 GMT -5
WOW,that looks fantastic Keith :oLooks like the assembly line is moving smoothly.Looking forward to your next update.   |
|
|
|
Post by Mence on Sept 17, 2013 8:08:01 GMT -5
Eye wateringly cool, love it.
|
|
Keith Christie
Full Member
  
Member since: June 2012
Posts: 292 
|
Post by Keith Christie on Sept 18, 2013 7:32:22 GMT -5
Leon, Mence, thanks very much fella's.
Mark, you won't be disappointed with this kit, I think I have to say that it's the best kit I've ever built so far, fit and engineering is superb. It definitely warrants the high price tag.
I have primed the rear engine cover today, so should have another update for you all soon.
Best Regards
Keith
|
|
|
|
Post by wbill76 on Sept 18, 2013 13:40:24 GMT -5
Nice work Keith, I'm going over to my hobby info to add this kit to the wish list. I've made a promise to myself to buy my whole wish listed items by the years end. Wish I could do the same but my list keeps growing!  |
|
Deleted
Member since: January 1970
Posts: 0
Dec 4, 2024 19:01:25 GMT -5
Dec 4, 2024 19:01:25 GMT -5
|
Post by Deleted on Sept 18, 2013 13:46:55 GMT -5
Very nice indeed Keith  Moveable spoiler too, does it operate through a painted area? Just asking as I wondered if paint build-up may be an issue? |
|
Keith Christie
Full Member
  
Member since: June 2012
Posts: 292 
|
Post by Keith Christie on Sept 19, 2013 3:35:12 GMT -5
Bill, THanks for looking in.
Steve, Thanks very much, the spoiler does operate through the engine cowling, I have already done a test fit without paint and the tolerances are very good. the paint and clear coat should not interfere with the operation, although I will be paying attention not to lay too much clear coat in these areas.
More soon.
Best Regards
Keith
|
|
Deleted
Member since: January 1970
Posts: 0
Dec 4, 2024 19:01:25 GMT -5
Dec 4, 2024 19:01:25 GMT -5
|
Post by Deleted on Sept 20, 2013 7:20:44 GMT -5
Awesome!
|
|
|
|
Post by `Boots` on Sept 20, 2013 13:03:31 GMT -5
A work of art Keith...........the finish you have so far on the body colour is outta this world, also those mesh intakes are superb, fantastic work fella  |
|
Keith Christie
Full Member
  
Member since: June 2012
Posts: 292 
|
Post by Keith Christie on Sept 21, 2013 3:36:48 GMT -5
Mark, you won't be disappointed with this kit, I think I have to say that it's the best kit I've ever built so far, fit and engineering is superb. It definitely warrants the high price tag. That really is a recommendation there Keith because you've made some amazing stuff. Mark Thank you very much, I think we could say the same about you though, couldn't we Mate? Bruce, Thanks for looking in. Mark, thanks very much fella, glad you're liking it so far. I'm painting the engine cowling today, then off to Euro tomorrow so I should have an update for you on Monday all being well. Best Regards Keith |
|
Keith Christie
Full Member
  
Member since: June 2012
Posts: 292 
|
Post by Keith Christie on Sept 21, 2013 9:08:58 GMT -5
Good Afternoon Gentlemen, Here is a quick update for you, I have primed the rear Engine cowling, this was allowed to harden for 24 hours and then polished using 4000 grade micro mesh to a flat polished finish. i then applied the base colour coat in 3 thin layers. this was allowed to dry for 30 mins and then the 2K clear coat was applied first a mist coat then two further medium wet coats allowing 5 minutes between each. Something to note is that once the 2K clear is mixed, you only have 20 minutes to use it, as after this time it starts it's reaction to harden and no longer levels out correctly. Here is a photo of the engine cowling with the base colour on.  The cowling is now in a plastic box so that the clear coat can harden dust free. (apologies for the poor photo, the box is opaque) 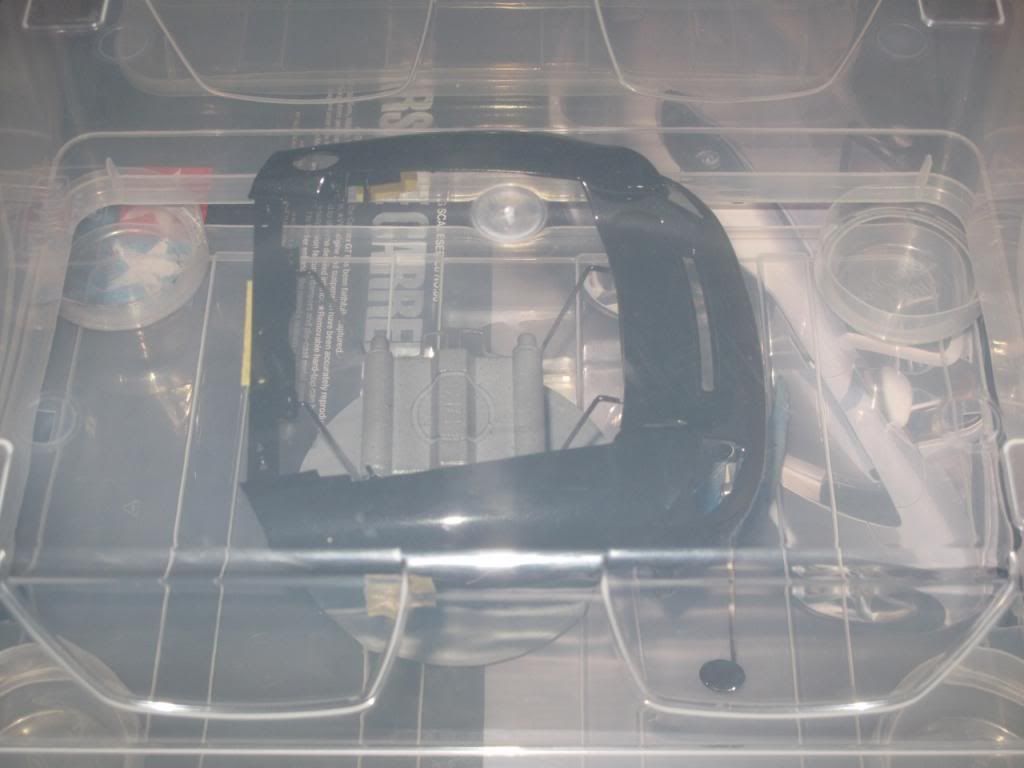 More soon, As always all comments,questions and criticisms welcome. Best Regards Keith |
|
Deleted
Member since: January 1970
Posts: 0
Dec 4, 2024 19:01:25 GMT -5
Dec 4, 2024 19:01:25 GMT -5
|
Post by Deleted on Sept 21, 2013 9:20:59 GMT -5
Base coat has an impeccable surface Keith, you must be an expert with that micromesh  |
|
|
|
Post by Mence on Sept 21, 2013 12:09:22 GMT -5
Gorgeous Keith, I can easily see why these kits are so expensive. Mind you, the cost must be balanced by sheer modelling enjoyment!
|
|