|
|
Post by wbill76 on Nov 4, 2013 11:16:50 GMT -5
Andy, Leon, and Pete, thanks for the comments as always! Bob, still a lot more to do with it of course...details need to be added and more work done with the weathering to come. Your plan sounds like a good one, defense via nausea!  Thanks as well on the FSM note! Wouts, I used the box art for inspiration on this one so have to give some credit there! T, just blame it on the time change! It's a convenient excuse available every 6 months, why not?  Glad you like the progress. Phil, that's the spirit! 
|
|
|
|
Post by bullardino on Nov 4, 2013 11:41:54 GMT -5
Lovely camo job  |
|
|
|
Post by wbill76 on Nov 4, 2013 14:36:16 GMT -5
Thanks Luigi! Just don't stare at it too long, some users have reported issues with their vision after prolonged exposure!  |
|
|
|
Post by wbill76 on Nov 5, 2013 12:06:52 GMT -5
My pleasure Sean! Hopefully this will help you when the time comes to avoid some of the usual 'Dragon snares' along the way!  |
|
|
|
Post by Deano on Nov 5, 2013 14:12:09 GMT -5
Blinding Camo Bill, very skillful AB work!
Deano
|
|
Deleted
Member since: January 1970
Posts: 0
Dec 2, 2024 13:43:48 GMT -5
Dec 2, 2024 13:43:48 GMT -5
|
Post by Deleted on Nov 5, 2013 14:20:54 GMT -5
Lookin gooood!
|
|
Keith Christie
Full Member
  
Member since: June 2012
Posts: 292 
|
Post by Keith Christie on Nov 5, 2013 16:17:58 GMT -5
Really nice progress Bill,
I like the choice of scheme, this will look great with the washes and fading added.
Best Regards
Keith.
|
|
|
|
Post by wbill76 on Nov 5, 2013 16:24:10 GMT -5
Deano, Bruce, and Keith, appreciate the comments gents! 
|
|
ogrejohn
Full Member
   Oct '23 Showcased Model Awarded
Member since: June 2012
Go away or I shall taunt you a second time!
Posts: 1,303
Jun 1, 2012 17:33:59 GMT -5
Jun 1, 2012 17:33:59 GMT -5
|
Post by ogrejohn on Nov 5, 2013 17:49:40 GMT -5
Dang Bill, I've totally missed out on this one! Sorry! Love the camo work. Where did you get the Atak zimm?
|
|
|
|
Post by wbill76 on Nov 5, 2013 21:10:54 GMT -5
Thanks Dicky! Wasn't sure if I was going to be able to pull it off but am pleased with the results! OJ, glad to have you on board as well. I've found the best place to get Atak is straight from the source (or as close to it as possible) in Poland via Jadar Hobbies. This link should take you straight to what they have available. www.jadarhobby.pl/armor-135-c-18_1351.html?filter_id=86 just make sure to set your currency to USD and not Polish Zlotys!  Sets run about $20 USD or so and their shipping to the US is very reasonable and timely. |
|
|
|
Post by bbd468 on Nov 5, 2013 21:32:18 GMT -5
Excellent paint Bill, love the camo pattern!  What AB do you use? |
|
Deleted
Member since: January 1970
Posts: 0
Dec 2, 2024 13:43:48 GMT -5
Dec 2, 2024 13:43:48 GMT -5
|
Post by Deleted on Nov 5, 2013 22:01:46 GMT -5
Yes , yes , yes !!!
I likes it .
Exactly what I needed to see .
A seldom seen approach to a Tiger 1 camo pattern .
|
|
|
|
Post by wing_nut on Nov 5, 2013 22:06:17 GMT -5
Holy Craplakistan! really liking that one.
|
|
|
|
Post by wbill76 on Nov 6, 2013 11:41:17 GMT -5
Gary, I use an Aztek (the one with the metal body) and swap out the nozzles as needed for different tasks. In this case I used the ultra-fine tan nozzle for the pattern work. Carl, glad to see you are as enthusiastic about this one as I was!  Marc Marc, add another word to the MSC dictionary! 
|
|
|
|
Post by fightnjoe on Nov 6, 2013 23:15:44 GMT -5
wow bill. that scheme would need some kind of 3d glasses me thinks.
very nice. very tight lines. my omni doesnt seem to get that tight of a line no matter what i try.
joe
|
|
|
|
Post by robbo on Nov 7, 2013 6:07:20 GMT -5
Nice paint job, seems a shame to cover up that zimm but hey ho, it does look great mate
|
|
|
|
Post by wbill76 on Nov 7, 2013 12:12:49 GMT -5
Joe, that's what a disruptive pattern is all about, break up the vehicle's outlines! It's the Tiger's version of a Jedi mind-trick.  Ian Ian, thanks as well! Don't worry about the zim, it will be coming back out in the course of the weathering process, never fear! 
|
|
Tobi
Forum Moderator      Feb & May'23 Showcased Model Awarded
Member since: March 2013
Posts: 2,319
Member is Online
MSC Staff
|
Post by Tobi on Nov 7, 2013 12:26:21 GMT -5
Dude! Sweet! Dude!  Cheers, Tobi |
|
|
|
Post by wbill76 on Nov 7, 2013 21:24:25 GMT -5
Dude! Sweet! Dude!  Cheers, Tobi Dude! Thanks for the comments!  |
|
|
|
Post by bbd468 on Nov 7, 2013 22:12:53 GMT -5
 Really! How long you been using it? Have you ever tried another? Your the only other person i ever known who uses or has tried an Aztek. Ive never heard anything very positive about that AB, but there is no arguing whatsoever the results you get, which are AMAZING!!!!  |
|
|
|
Post by wbill76 on Nov 8, 2013 11:26:14 GMT -5
 Really! How long you been using it? Have you ever tried another? Your the only other person i ever known who uses or has tried an Aztek. Ive never heard anything very positive about that AB, but there is no arguing whatsoever the results you get, which are AMAZING!!!!  It's the only airbrush I've ever used Gary for the last 10 years. Prior to that I did have a 'traditional' all metal body airbrush that I used off and on but that was it, don't even recall the name or type. Some people don't like the Aztek for a variety of reasons but I love mine. It's the third one I've owned, the previous two were the plastic body type and I'm very happy with the metal body version. The first of the plastic body types met an unfortunate demise through no fault of its own...I used to paint in the garage and it somehow got displaced from the little paint bench I had there and was run over by accident! The second plastic body one lasted several years before an internal seal gave out...leading to its replacement after many, many uses! I've yet to experience any major issues with it other than the nozzles needing to be periodically replaced but that's to be expected and the nozzles are inexpensive by themselves. I love the adjustable needle and double-action characteristics, the ease of cleaning and maintenance, and the ability to quickly swap out nozzles to go from broad to fine or anything in between. The fact that I work strictly in enamels may be a factor as well as that's primarily what it's designed for vs. spraying acrylics (even though they do offer separate nozzles for acrylics, I've never used them for obvious reasons). |
|
|
|
Post by bbd468 on Nov 8, 2013 11:39:43 GMT -5
The first of the plastic body types met an unfortunate demise through no fault of its own...I used to paint in the garage and it somehow got displaced from the little paint bench I had there and was run over by accident! Damn pesky Gremlins!   I didnt know that it was designed for Enamels Bill and that may explain some issues with the other user who used Acrylics and eventually scrapped the Aztek for an Iwata. No doubt ya got the Aztek mastered Bill, it shows in every model ya do!  |
|
|
|
Post by deafpanzer on Nov 8, 2013 23:42:06 GMT -5
When I took airbrush classes at Hobby Lobby in the classroom, we used Aztek ABs... I thought they were good. Just little pain in arse cleaning. I broke mine twice and I had to pay for replacements as part of agreement that any time students break the teacher's ABs they pay for it. You should have seen my teacher's artwork using Azrek... amazing! I couldn't master it until I got my Iwata. I guess its all about personal preferences.
|
|
|
|
Post by wbill76 on Nov 9, 2013 11:15:44 GMT -5
When I took airbrush classes at Hobby Lobby in the classroom, we used Aztek ABs... I thought they were good. Just little pain in arse cleaning. I broke mine twice and I had to pay for replacements as part of agreement that any time students break the teacher's ABs they pay for it. You should have seen my teacher's artwork using Azrek... amazing! I couldn't master it until I got my Iwata. I guess its all about personal preferences. In the end the AB is a tool and you need to be comfortable with the tool to get the most out of it. Otherwise all the brands would be identical in what they offered!  Azteks are used in all sorts of applications...I've even seen one in use at a beauty salon for doing work on finger nails if you can believe it! |
|
|
|
Post by deafpanzer on Nov 9, 2013 12:53:23 GMT -5
No way!!! You do nails too? Ok when can I stop by to have my nail done? I am fan of panzer collar piping color...
|
|
|
|
Post by wbill76 on Nov 9, 2013 17:33:46 GMT -5
No way!!! You do nails too? Ok when can I stop by to have my nail done? I am fan of panzer collar piping color... As soon as you finish your DUKW!  |
|
pantherf..-Email Not Valid
Full Member
  
Member since: July 2013
"Best Job I've Ever Had"
Posts: 1,253 
|
Post by pantherf..-Email Not Valid on Nov 9, 2013 17:56:20 GMT -5
I had a couple of small details to attend to on the build before paint work could begin. Those details involved the spare tracks. The 7 links that mount to the turret were missing their individual pin details so I used some 0.8mm diameter styrene rod to recreate the pins on each link. I also drilled out the exposed end of each link to show the empty pin hole at the top that's exposed once they are mounted in their holders. 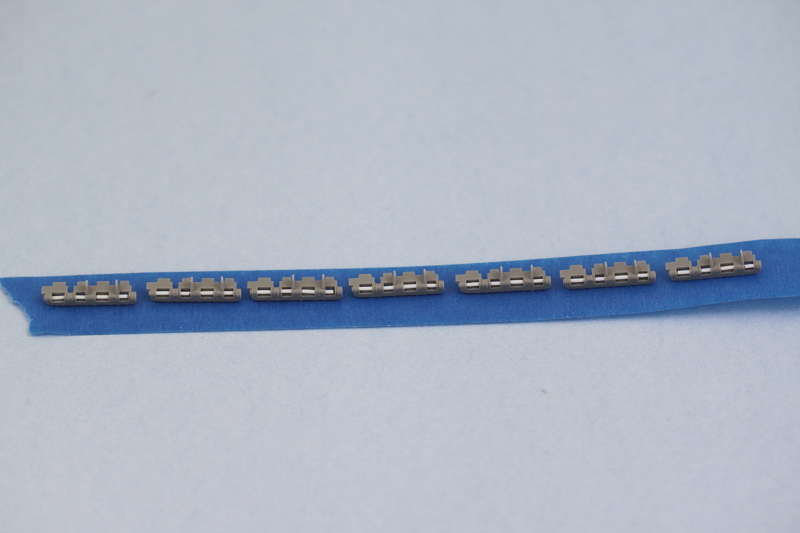 For the front spare track run, I used the remaining links I had from the MK set for the 12 links required there. There weren't enough links left over in the MK set to do this and the turret links and since the workables are better suited here, that's where they got used. The instructions for this little addition are in Step 12 but they parts callout for the support bar is wrong, it should be K3 and not C15. 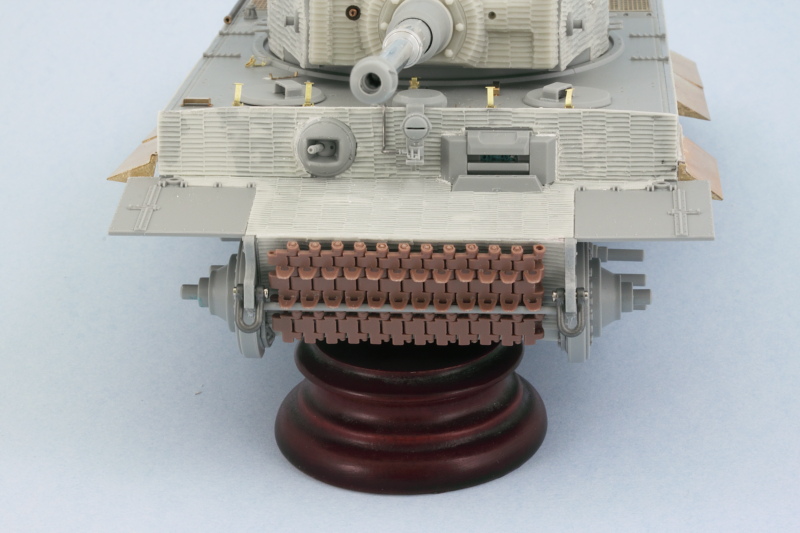 With that done, I prepped the vehicle for painting by masking off all the suspension arm mount points with blue-tack to prevent paint build-up from causing an issue with the wheel fit later on. I also mounted all the wheels, sprockets, and idlers on toothpicks with blue tack to make it easier to deal with them, fitted a temporary handle to the turret in the form of a cardboard toilet-paper cylinder cut down to size and let the paint fly. First up was an overall primer treatment using MM enamel Italian Dark Brown. The zimmed surfaces exponentially increase the surface area so more paint than usual was required to get complete coverage. 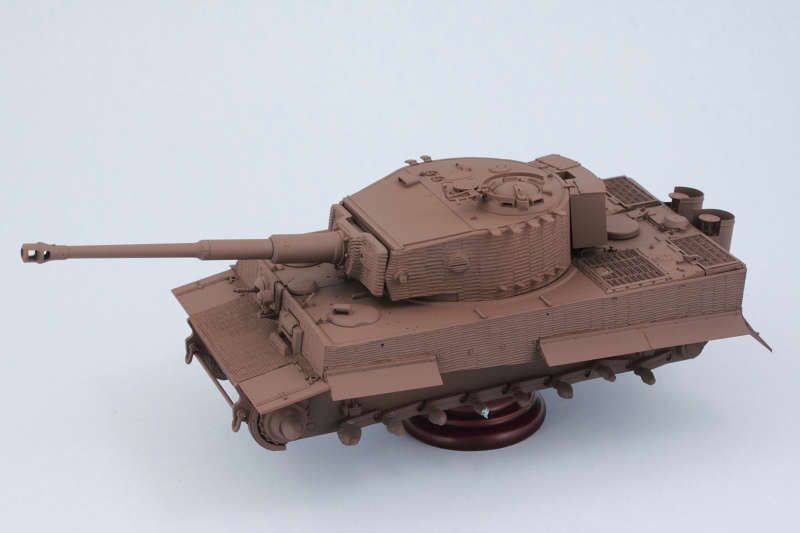 Next came the base coat using a custom mix of 50/50 MM enamel Panzer Dunkelgelb and enamel Light Gray.  Same treatment was applied to the road wheels, sprockets, and idlers. Since everything's all steel wheels, that sped up the process here a little bit but I still have to paint and detail the contact surfaces for them before they are fully detailed. 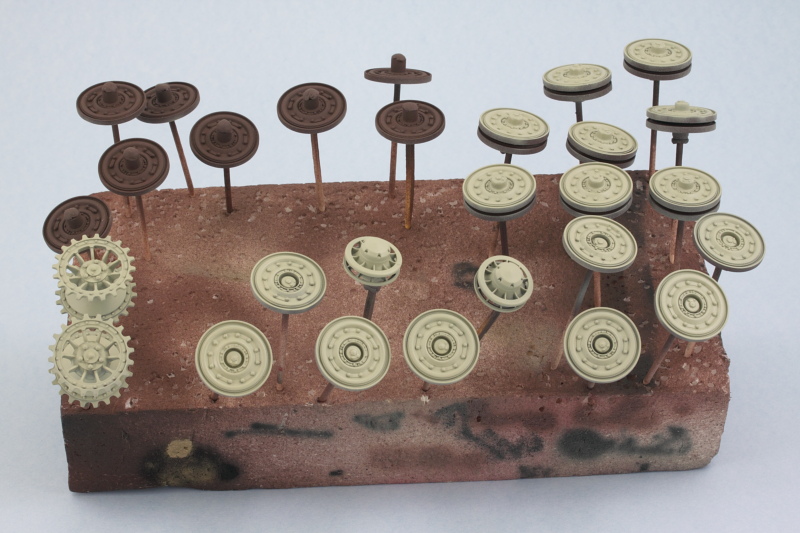 Then the real fun began with the application of the camo pattern. First I applied the rot-braun elements using a custom mix of 50/50 MM enamel Military Brown and Leather and then the olivgrun elements using MM enamel Khaki. Final step involved spraying a mist coat/filter of the original base coat highly thinned from a distance of about 12 inches to help tie everything together. 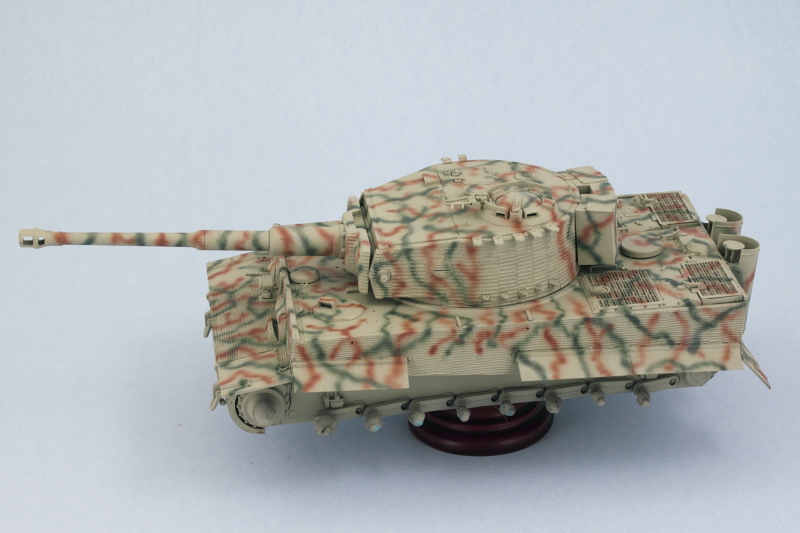 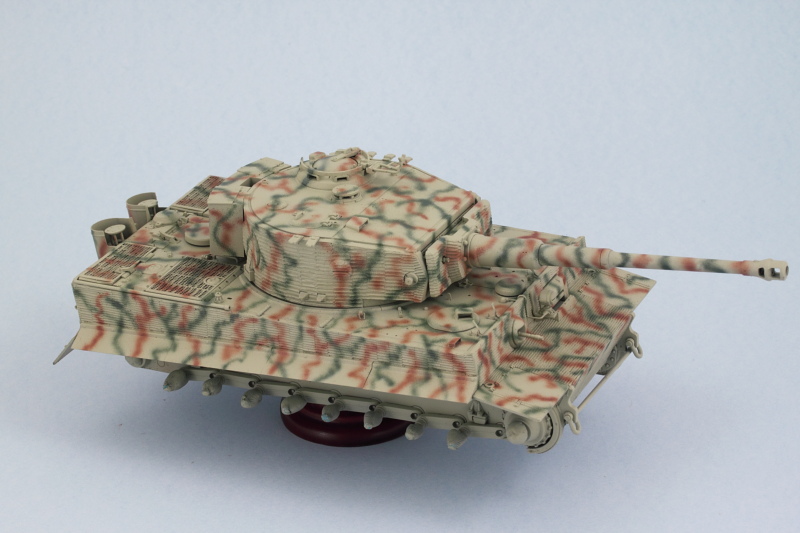 Top down view shows what it would've looked like from the air. 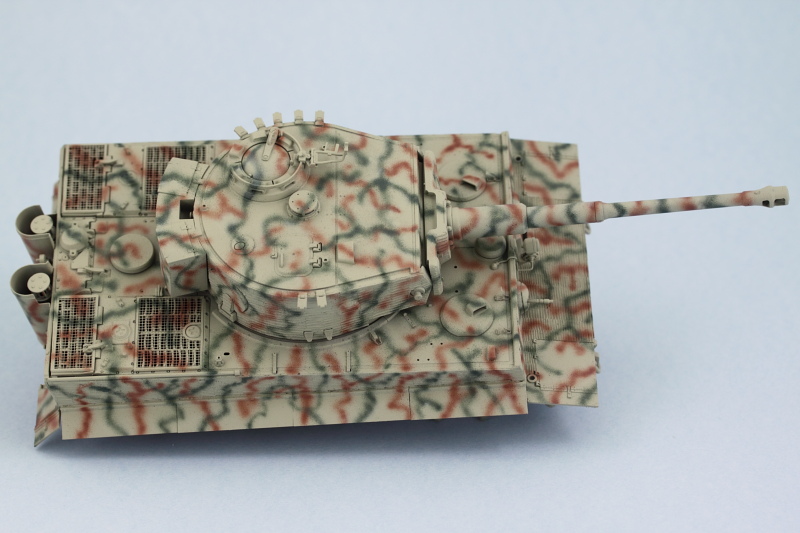 This will get a chance to sit and cure up thoroughly before moving on to the next phases. Still a lot of work to do in the details department as well with the tools and suspension. I just hope that holding onto this DA paasche pays off and I get results like this! NEVER painted with an AB yet.  Jeff |
|
|
|
Post by wbill76 on Nov 9, 2013 18:02:11 GMT -5
Don't sweat it Jeff, just takes a little practice as each AB has its own quirks.  In the end it's usually all down to finding just the right combination of thinned paint and air pressure along with your nozzle/needle diameter. That and you might have to get really really close to the surface you're painting!  |
|
reserve
Senior Member
   
Member since: July 2012
Si vis pacem para bellum
Posts: 2,373
Jul 11, 2012 9:11:45 GMT -5
Jul 11, 2012 9:11:45 GMT -5
|
Post by reserve on Nov 9, 2013 20:05:31 GMT -5
Up to your usual shenanigans I see and I notice you're doing it right the first time unlike myself with that Cyberhobby Tiger I did awhile ago. I'm not surprised to see that it's lookin mighty fine
Regards,
Mark
|
|
|
|
Post by wbill76 on Nov 9, 2013 20:49:15 GMT -5
Glad to have you pop in Mark! Thanks for the comments, it's moving right along!
|
|