DeskJockey
Junior Member
 
Member since: September 2013
Posts: 66 
|
Post by DeskJockey on Oct 26, 2013 11:11:21 GMT -5
I finally finished detailing the turret, although I still need to build the commander's cupola and the gunner's sight. Once I do that, I'll start painting. Tools will be added after painting is done because of the complex camo pattern, and the wheels will be painted, then built, because they have a lip that makes it hard to paint them after they are assembled. Here's what the turret looks like now. 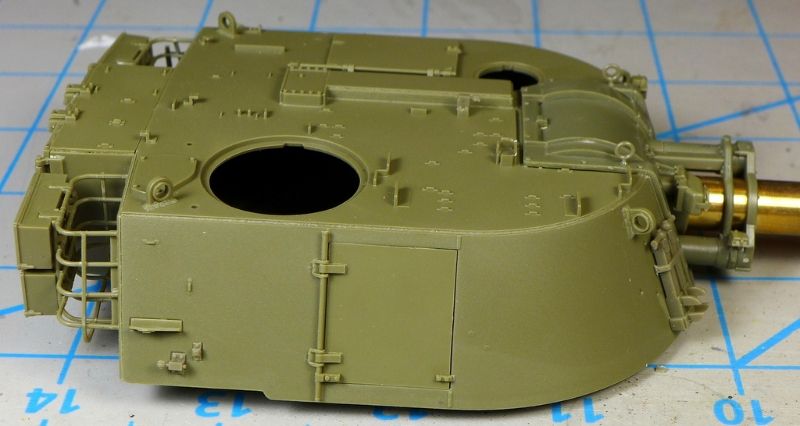 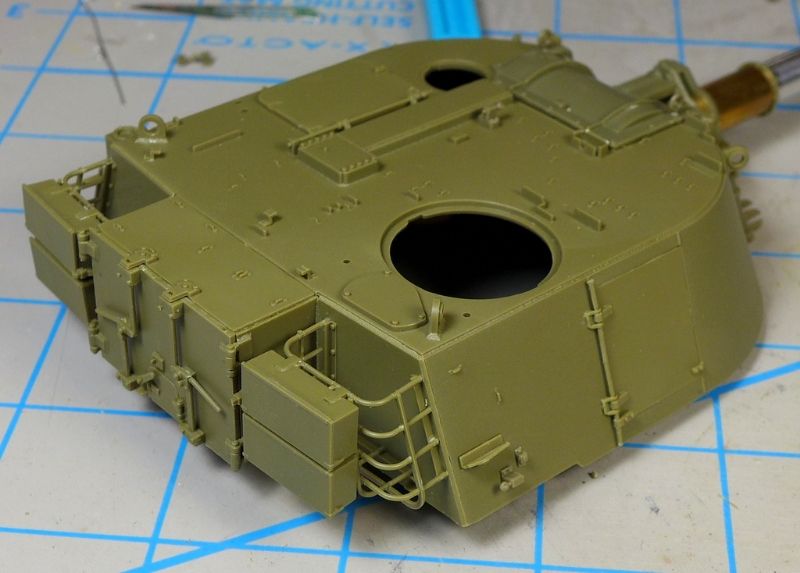 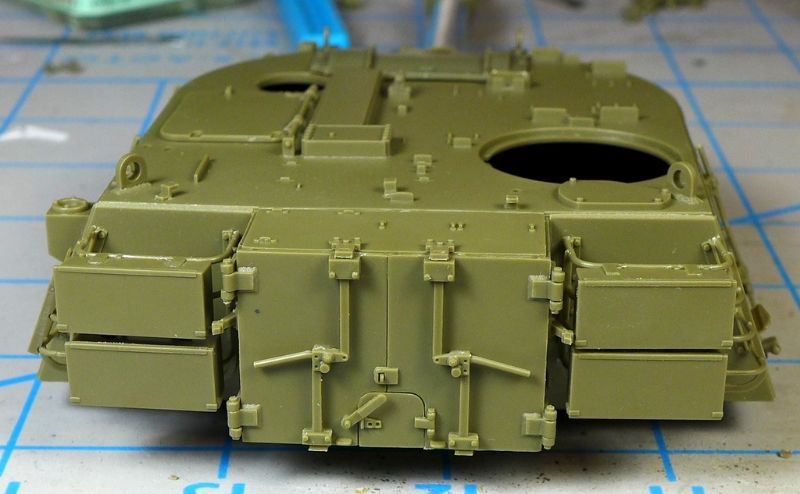 I screwed up the basket on the left side of the turret--I spaced out when putting the horizontal pieces in placed and flipped two of the three, so the vertical bars don't align and boxes are slightly out of alignment. You can see it in the last picture above and in this one below: 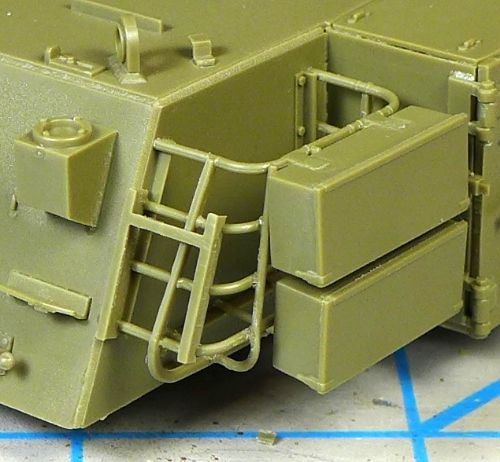 It's not horrible--I can live with it, but I'm still kicking myself for such a rookie mistake. I only realized what I had done the day after I built it, when I started on the other basket. By then, it was too late to pry it apart and correct the misalignment. I tried pushing the horizontal bar that sticks out too much in toward the back of the boxes (with very little success), and I cut off the mounting tab for the box that was visible, but that's all I could do. Here's what the other basket looks like up close. 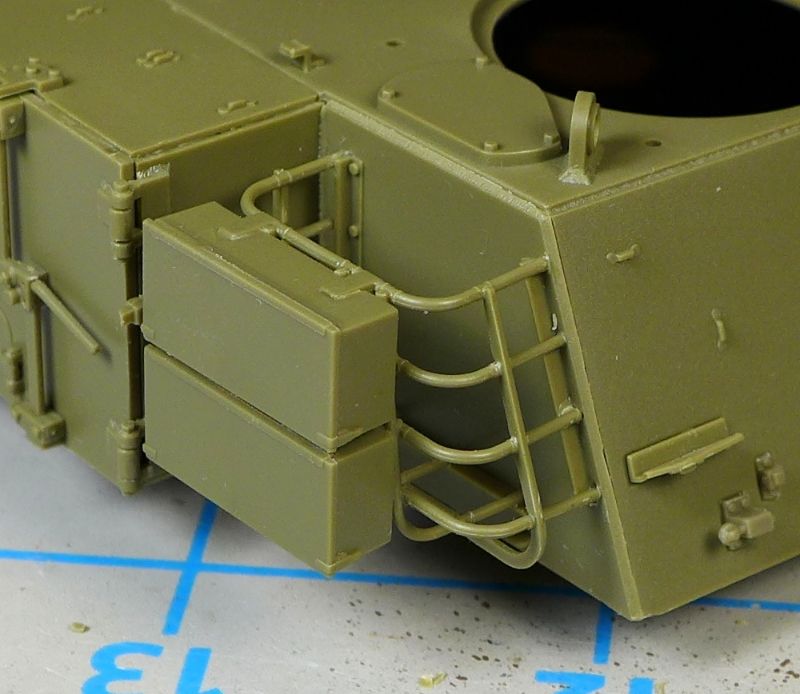 That's all for now, folks. Let me know what you think. |
|
|
|
Post by deafpanzer on Oct 26, 2013 12:48:52 GMT -5
Looking real good... it has nice details!
|
|
Deleted
Member since: January 1970
Posts: 0
Dec 2, 2024 2:54:25 GMT -5
Dec 2, 2024 2:54:25 GMT -5
|
Post by Deleted on Oct 27, 2013 15:10:48 GMT -5
Nice details no probs with the stowage basket just drape some netting etc over it
|
|
|
|
Post by wbill76 on Oct 27, 2013 19:42:31 GMT -5
Nice progress on the turret details. Pete's idea is a good one, wouldn't be hard to incorporate a little bit of stowage there and some netting to blend it in.
|
|
DeskJockey
Junior Member
 
Member since: September 2013
Posts: 66 
|
Post by DeskJockey on Oct 29, 2013 6:30:08 GMT -5
Thanks, guys. Yes, I think some stowage will help cover it up.
|
|
|
|
Post by Leon on Oct 29, 2013 7:41:44 GMT -5
Looking really good DJ.Love the look of the 109's  |
|
DeskJockey
Junior Member
 
Member since: September 2013
Posts: 66 
|
Post by DeskJockey on Oct 31, 2013 5:35:42 GMT -5
No pics for today's update, but I've finished construction (save for the roadwheels) and will now start the painting phase. I'll paint the roadwheels before assembly because of the lip they have on the inside.
Oh, I forgot to mention that I'm leaving the gun travel lock separate for ease of painting.
|
|
heico
Full Member
  
Member since: November 2013
Posts: 246 
|
Post by heico on Nov 8, 2013 6:10:12 GMT -5
Looking nice! I've done the Kinetic but by the looks of it this one is better detailled! Also like the big metal big gun  |
|
DeskJockey
Junior Member
 
Member since: September 2013
Posts: 66 
|
Post by DeskJockey on Nov 21, 2013 21:38:06 GMT -5
Sorry for the lack of updates, but I went on vacation to Australia a couple of weeks ago, then on a business trip right after that. I'm finally back, and slammed with work. I did squeeze in one painting session, but, to my dismay, the paint I had chosen for the Sand color (FS30277)--Tamiya XF-49 Khaki, which was a good match, per the various references available on the web--turned out to be way too dark, almost as dark as Field Drab. I went ahead and ordered a bottle of Testors MM Armor Sand, which looks much lighter. It should be arriving by tomorrow, so I'll be able to paint this weekend. I did get some Field Drab paint laid down on the running gear and some unattached parts, so all was not lost.
|
|
|
|
Post by bbd468 on Nov 21, 2013 21:51:52 GMT -5
Hiya DJ, just found this thread. Great build ya got goin on, love the M109! Ill be around from here on out fella.....lookin good!!  |
|
DeskJockey
Junior Member
 
Member since: September 2013
Posts: 66 
|
Post by DeskJockey on Dec 14, 2013 21:50:41 GMT -5
OK, it has been a while since my last update, but I've been busy with work and family (and some modeling, too!). We took the kids to Disney World after Thanksgiving, which went well and left us exhausted (and needing a vacation from our vacation), but I've managed to squeeze in several painting sessions over the past several weeks. Here's proof! I've done the two minor colors and one of the two major ones (the MM Armor Sand), and will tackle the final cammo color--Field Drab--this week, if all goes well. The base color on the model is Field Drab, so that makes it pretty easy. Once I've masked the Sand areas, all I'll have to do is spray over any areas that got errant overspray in the other colors. Here are some pics of what the turret looks like right now. I haven't masked off the Sand areas yet. 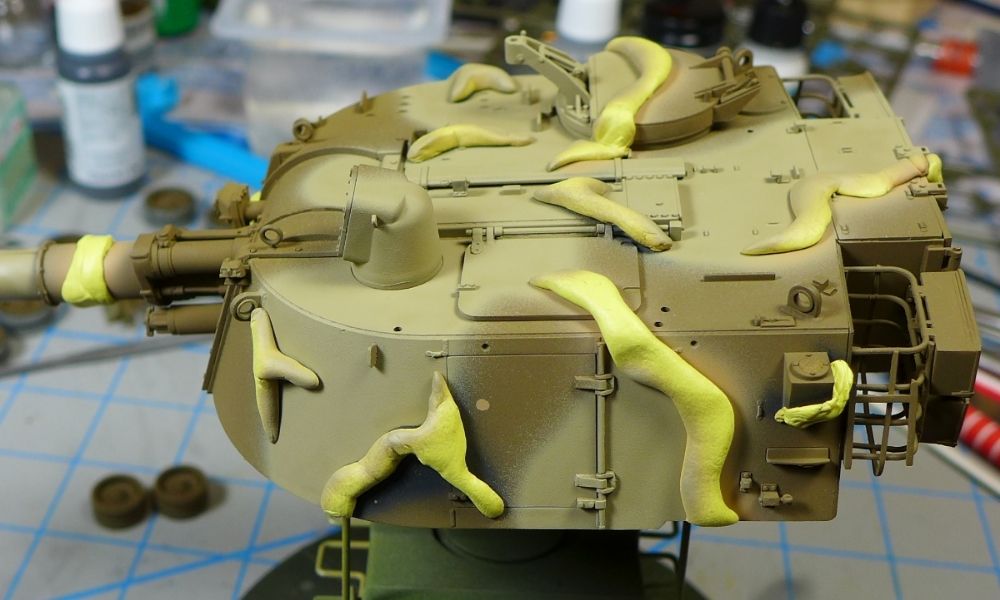 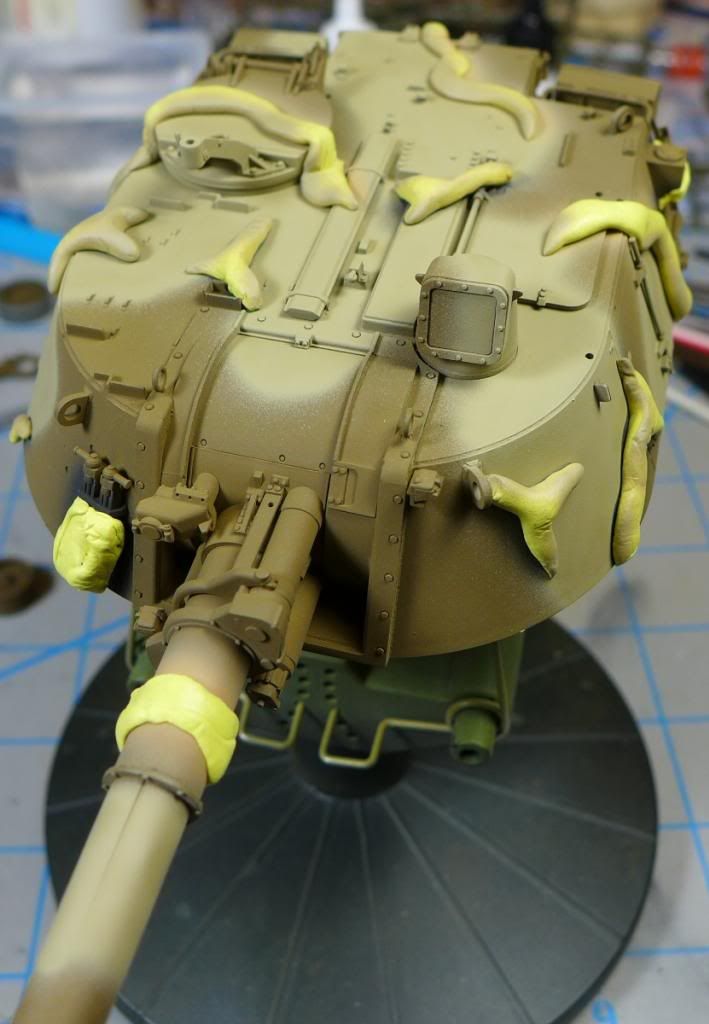 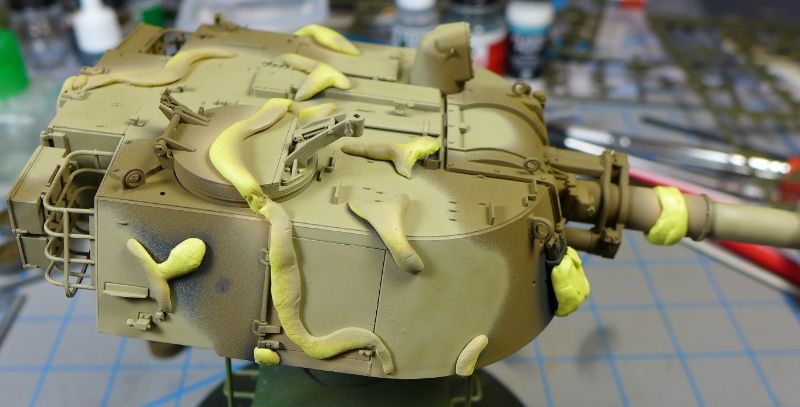 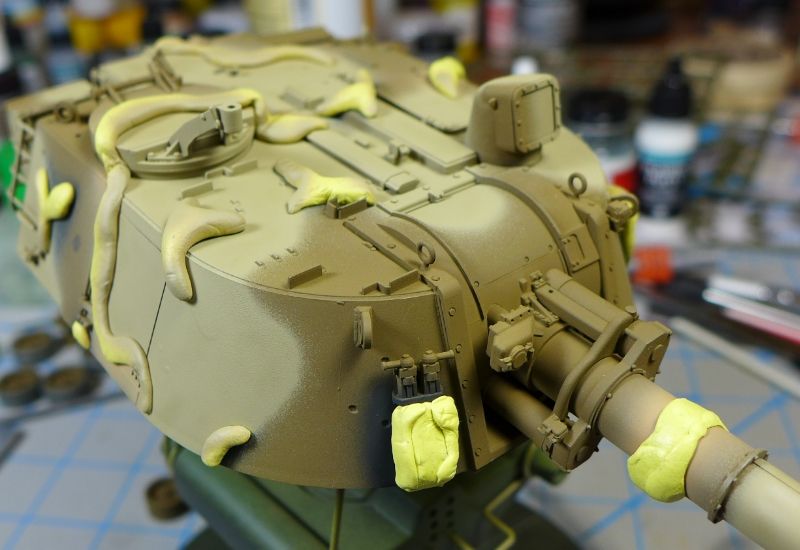 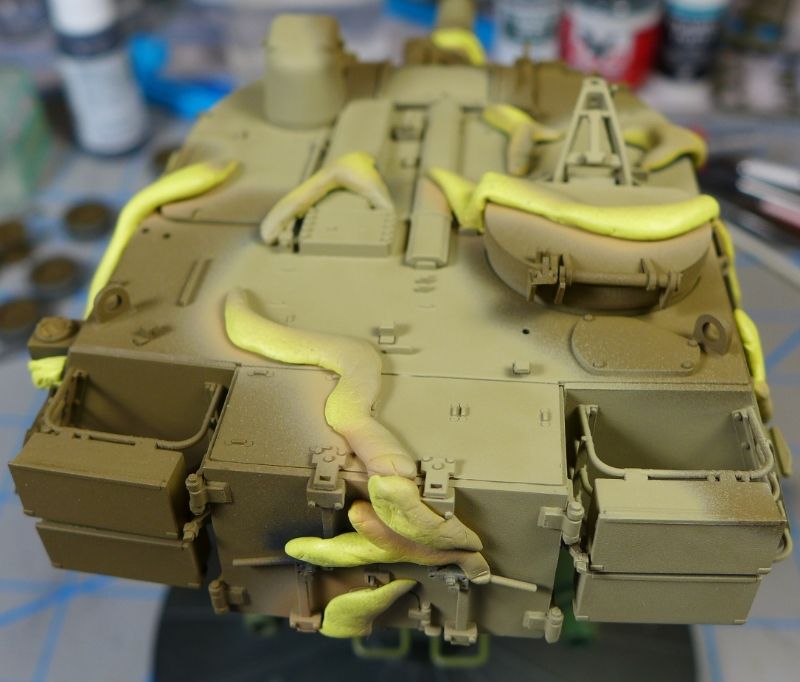 I didn't have time to take pictures of the hull, unfortunately (I'm typing this as the wife is telling me that it's time to turn in for the night). Let me know what you think. |
|
|
|
Post by Leon on Dec 14, 2013 22:26:21 GMT -5
Nice start on the camo DJ.Looking forward to seeing this all come together.   |
|
|
|
Post by bullardino on Dec 15, 2013 3:44:10 GMT -5
Glad you had the time to post these pics, as Leon said nice start on the camo  |
|
DeskJockey
Junior Member
 
Member since: September 2013
Posts: 66 
|
Post by DeskJockey on Dec 15, 2013 12:43:58 GMT -5
Thanks, guys!
|
|
|
|
Post by bbd468 on Dec 15, 2013 12:56:01 GMT -5
Great to see an update DJ, camo is gonna be sweet!! Keep it comin fella.  |
|
|
|
Post by deafpanzer on Dec 15, 2013 12:58:22 GMT -5
Can't wait to see when the putty comes off... camo looking good!
|
|
Deleted
Member since: January 1970
Posts: 0
Dec 2, 2024 2:54:25 GMT -5
Dec 2, 2024 2:54:25 GMT -5
|
Post by Deleted on Dec 15, 2013 13:58:42 GMT -5
oh camo nice one!
|
|
|
|
Post by wbill76 on Dec 15, 2013 14:04:09 GMT -5
Off to a good start with the camo pattern, looking forward to more on this one.
|
|
DeskJockey
Junior Member
 
Member since: September 2013
Posts: 66 
|
Post by DeskJockey on Dec 20, 2013 6:39:03 GMT -5
As I get nearer to the end of the painting stage, I'm starting to think about markings for the howitzer. In talking to my friend, he said he didn't remember the specific markings on the vehicles, but he thought they might have been something along the lines of:
3/3 CAV (on one side)
HOW XX (on the other, with each gun having a number)
Can folks help me verify this info or correct it? He was in the howitzer battery of the 3rd Squadron, 3rd Armored Cavalry Regiment in the early 80s at Ft. Bliss, if that helps, since I know marking conventions vary among units and over time.
|
|
DeskJockey
Junior Member
 
Member since: September 2013
Posts: 66 
|
Post by DeskJockey on Dec 21, 2013 21:36:22 GMT -5
|
|
|
|
Post by bbd468 on Dec 21, 2013 23:29:34 GMT -5
Lookin mighty fine DJ, great job on the camo.  |
|
Deleted
Member since: January 1970
Posts: 0
Dec 2, 2024 2:54:25 GMT -5
Dec 2, 2024 2:54:25 GMT -5
|
Post by Deleted on Dec 22, 2013 1:07:03 GMT -5
Looks like what I remember. I never saw the "red desert" pattern only this one.
These were mostly brush painted in real life, so touch her up with a fine brush. They were not perfect. Repainting a M109 in a MERDC pattern was punishment, not something you wanted to do. If you've never seen the paper pattern for this treat yourself and google it. Now think of chalk lines on a large dark green vehicle every one with a different color called out.
My advice would be to spray the two main colors, in this case sand and field drab, with hard edges. Go in afterwards and brush paint the earth yellow and black.
G
|
|
Deleted
Member since: January 1970
Posts: 0
Dec 2, 2024 2:54:25 GMT -5
Dec 2, 2024 2:54:25 GMT -5
|
Post by Deleted on Dec 22, 2013 2:45:16 GMT -5
personally i would go back over the model and hand paint the black just to tidy up the edges, the rest looks fine
|
|
|
|
Post by wbill76 on Dec 22, 2013 12:24:36 GMT -5
Little bit of touch-up here and there should do the trick to correct the underspray. Otherwise the pattern looks good!
|
|
DeskJockey
Junior Member
 
Member since: September 2013
Posts: 66 
|
Post by DeskJockey on Dec 22, 2013 20:19:37 GMT -5
|
|
|
|
Post by Leon on Dec 22, 2013 20:26:56 GMT -5
DJ,looks like you nailed this one.  |
|
|
|
Post by wbill76 on Dec 23, 2013 11:59:34 GMT -5
Very nice, with some light weathering to go over it, will blend together perfectly.
|
|
Deleted
Member since: January 1970
Posts: 0
Dec 2, 2024 2:54:25 GMT -5
Dec 2, 2024 2:54:25 GMT -5
|
Post by Deleted on Dec 25, 2013 13:30:25 GMT -5
Nailed it.
G
|
|
|
|
Post by deafpanzer on Dec 30, 2013 0:11:40 GMT -5
Crowfeet camo?!?!? I loved it! Just spray heavily thinned base coat to make the camo blend together.
|
|
DeskJockey
Junior Member
 
Member since: September 2013
Posts: 66 
|
Post by DeskJockey on Dec 30, 2013 7:58:17 GMT -5
Thanks, guys. I'm now working on the tracks and stowage. As I started painting the stowage, I found AFV Club's painting instructions for one particular part rather odd. The part in question is part #26, which is a collection of rods that goes on top of the turret (I'm not sure what they are, exactly, but they may be cleaning staffs for the howitzer tube). The instructions call for most of the part to be wood-colored, except for the tips of the rods, which should be steel. I'm not sure this is correct--if they are cleaning staffs, I suspect they should be metal, not wood. Any ideas? Here's a picture of the part in question, which I have already started to paint per the instructions:  |
|