paulh.
Senior Member
   
Member since: November 2011
build, fail, learn, succeed - ENJOY
Posts: 2,389
Nov 15, 2011 15:54:51 GMT -5
Nov 15, 2011 15:54:51 GMT -5
|
Post by paulh. on Feb 1, 2014 16:47:02 GMT -5
Meant to say: to tracks are incredible!
P
|
|
|
|
Post by Mence on Feb 2, 2014 3:59:44 GMT -5
Very nice work, liking those tracks...a lot.
|
|
|
|
Post by wbill76 on Feb 2, 2014 11:52:05 GMT -5
Tracks look brilliant, very nice progress here DJ, very nice indeed.
|
|
|
|
Post by ceresvesta. on Feb 2, 2014 13:24:25 GMT -5
Thanks for the info DJ! Really apreciated.
|
|
|
|
Post by bullardino on Feb 3, 2014 13:09:16 GMT -5
Great looking 109 there, DJ. Those tracks look real, thumbs up  |
|
DeskJockey
Junior Member
 
Member since: September 2013
Posts: 66 
|
Post by DeskJockey on Feb 9, 2014 21:20:21 GMT -5
Thanks, guys! Well, I continue to plug along slowly but surely on this kit. In the past two weeks I've finished the stowage and started the weathering. For the stowage, after talking to my friend I settled on the duffel bag, the rolled-up tarp, and a camo net. I had a couple of camo nets in my drawer, so I took them out to see if they would do the trick. One was Echelon's Barracuda camo net in brown and green (it looks like a decal and is just as fragile), and the other was a Pegasus green camo net made out of gauze-like material. This is what the Echelon net looks like once unpacked: 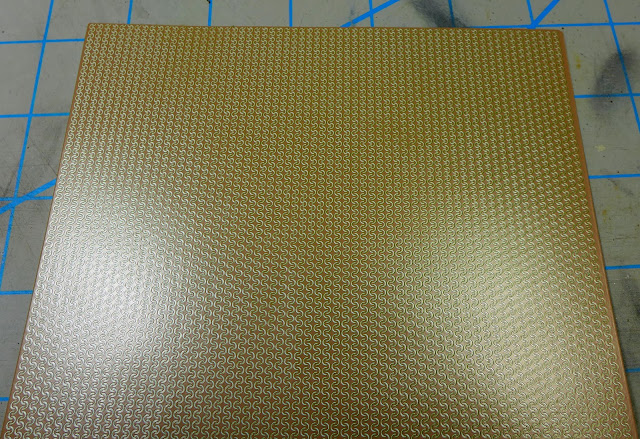 And here are part of the instructions--you basically treat it like a huge decal:  And this is what the Pegasus net looked like:  I first tried using the Echelon net, since it looks the best. I succeeded in separating it from the carrier sheet, per the instructions, without any damage, but when I tried to roll it or fold it, it just shattered into hundreds of tiny flakes. Scratch that. The Pegasus net could be easily rolled up, but it just looked like rolled-up green gauze. I finally decided to combine the two, since the Echelon net has an adhesive side. Right after removing the Echelon net from its backing, I laid down a piece of Pegasus net over it, tamped it down with a soft towel to make sure it stuck properly, and set it out to dry. Once dry, I tried rolling the combo net. I had better luck than with just the Echelon net, but it still shattered and tore in many, many places. I had wanted to display the net with the Echelon side out, but that was clearly not going to happen. I opted to instead display it with the Pegasus net facing out. I then used Vallejo's Dark Green Wash to darken the color of the visible parts of the Pegasus net once I put the rolled-up net in the turret basket, as the Pegasus green was way too light. The combo net still looks better than just having a roll of gauze, since Barracuda nets have a mesh woven into one side, but I'm disappointed with the results. Oh well, it will have to do. Here's what the combo net looks like:  I have also been busy with the weathering. First, I used MIG's rain marks to subtly stain the surface of the whole vehicle. It's barely visible, but it helps break up the surface and give it some depth.  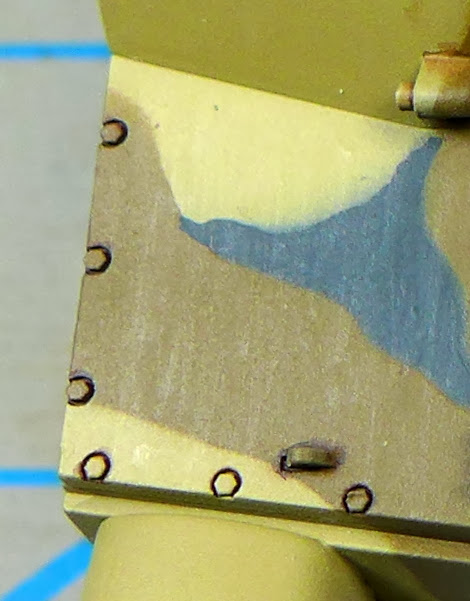 Next, I airbrushed some AK Africa Dust Effects on the lower areas of the hull and immediatelly stumped it with a flat brush to create dust streaking. 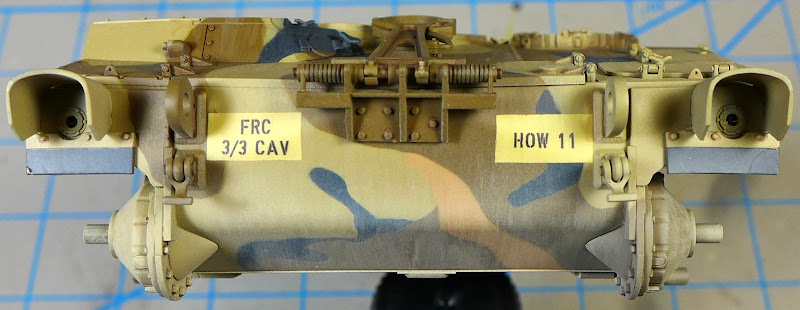 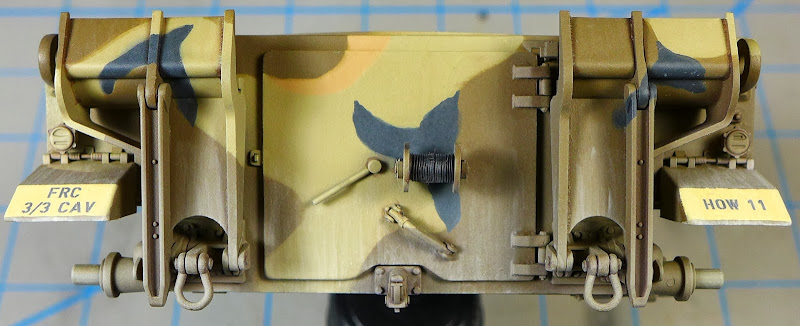 Finally, I used AK's Rainmarks for NATO Tanks to create rain marks/dust streaks on both the hull and the turret: 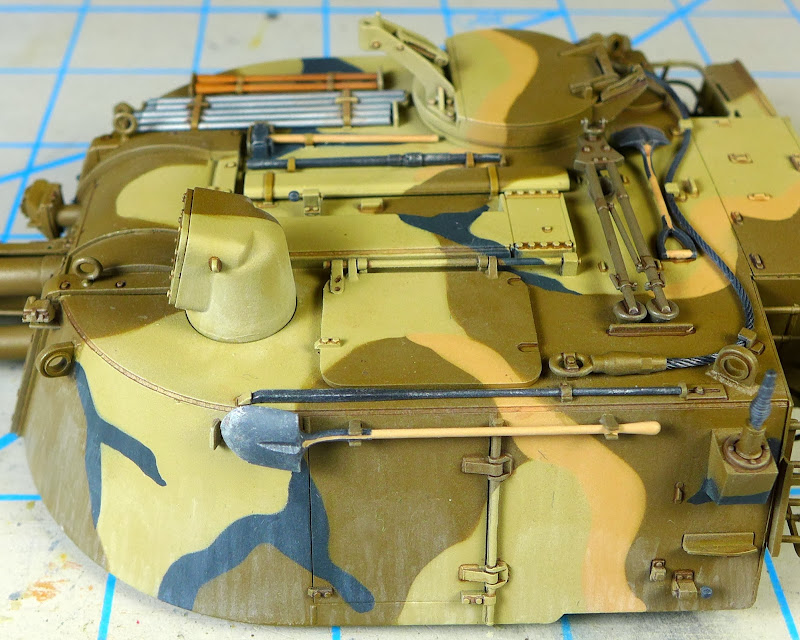 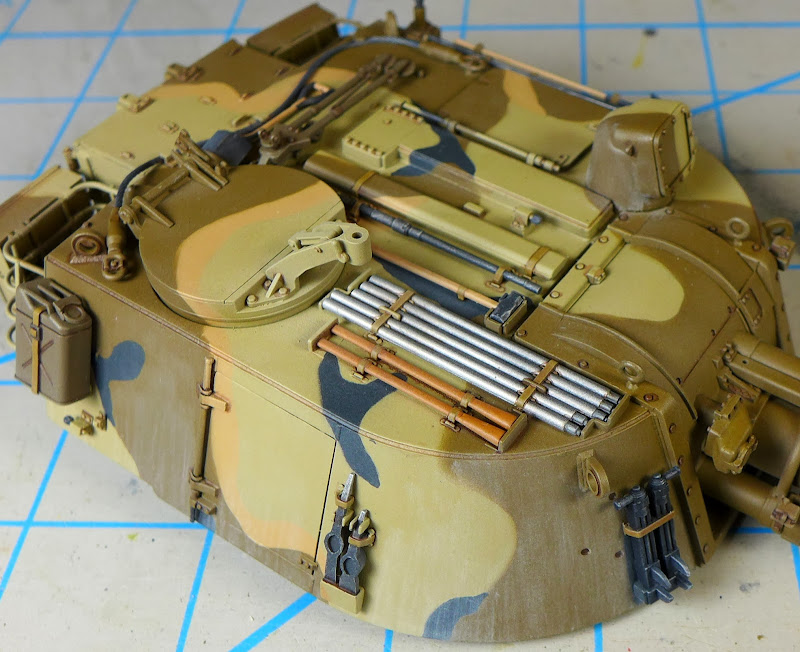 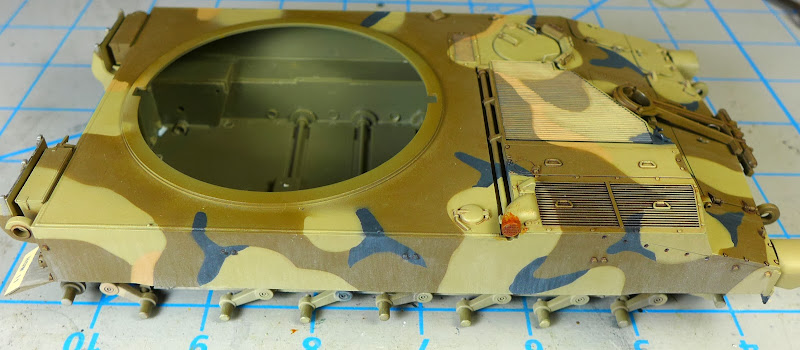  On the spades, I drybrushed Testors Steel to simulate the worn edges where the spades dig into the ground for firing. 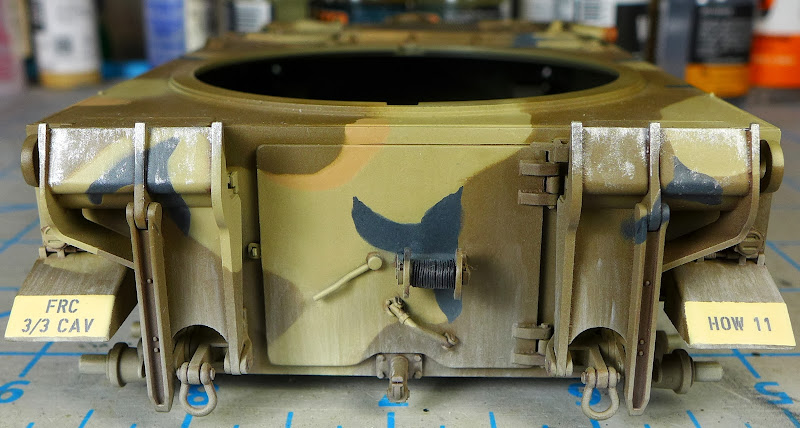 On the turret (and on a few other areas of the hull, such as handles, I used a graphite pencil along edges to create worn areas. I kept this effect very restrained, as I did not want to go overboard: 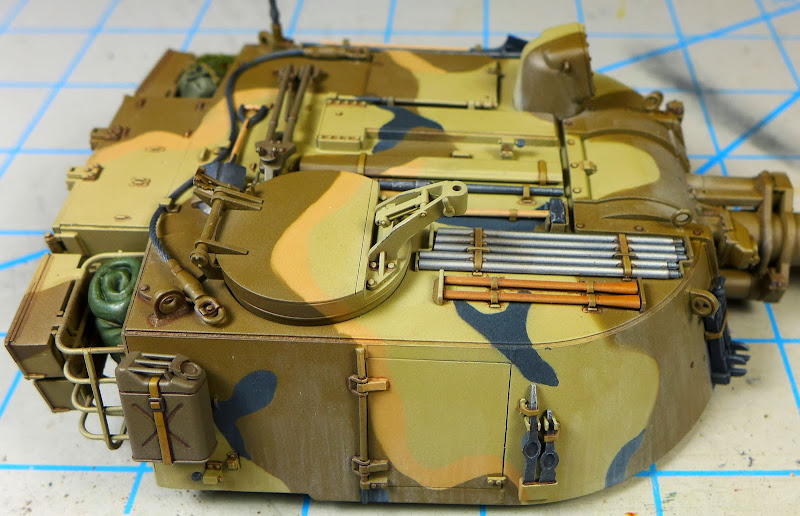  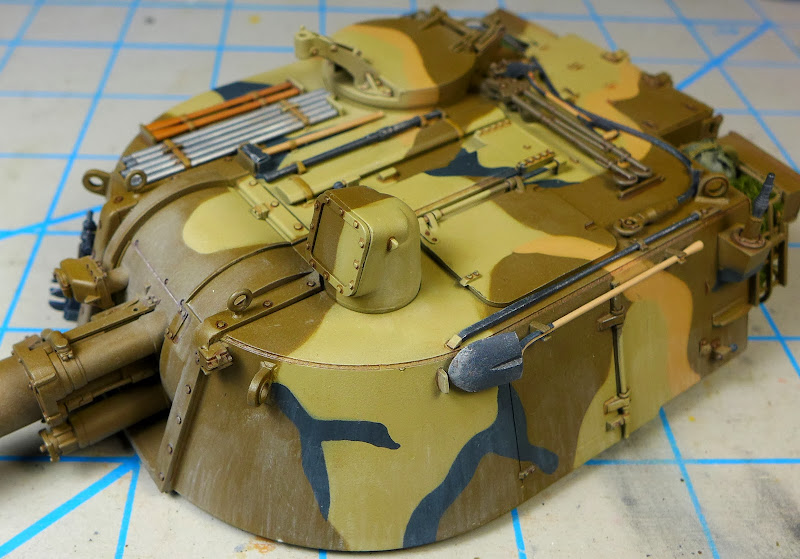 If you look carefully at some of the hull shots, you will see I also painted some rust around the exhaust and that the paint on the front mudguards is chipping. It turns out that the vinyl parts in this kit (the front mudguards and the cloth cover for the mantlet) will simply not hold paint, no matter what. I tried several different painting methods, including priming with Alclad primer, but the paint always chips or flakes off at the slightest provocation. That's why I'm not using the mantlet cover--every time I tried to put it in place, it shed paint like crazy. Even if I had managed to get it on and repainted it, moving the gun would have caused the paint to come off again. The next step will be dust buildup on the rear of the hull and mudguards, then I will mount the running gear, fix the hull and turret to the base, and add pigments. Once that's done, I will call this build done! Let me know what you think. |
|
|
|
Post by wbill76 on Feb 9, 2014 21:50:05 GMT -5
I like the subtle weathering effects you've achieved so far, nice!
|
|
|
|
Post by deafpanzer on Feb 9, 2014 21:53:04 GMT -5
Agree with Bill... nice work on the dust streaks!
|
|
|
|
Post by bbd468 on Feb 9, 2014 21:59:16 GMT -5
Lookin real nice DJm just love that camo fella!  |
|
|
|
Post by Leon on Feb 9, 2014 21:59:19 GMT -5
Nice work on the weathering effects DJ,Looking good.  |
|
|
|
Post by bullardino on Feb 10, 2014 3:47:58 GMT -5
Outstandig jod, DJ. Dig the camo netting, I really think you nailed it.
|
|
|
|
Post by ceresvesta. on Feb 11, 2014 9:27:05 GMT -5
As alway DJ: Brilliant work, weathering is really giving life to this build.
|
|
|
|
Post by rbaer on Feb 12, 2014 16:36:08 GMT -5
This one is looking really nice.
|
|
DeskJockey
Junior Member
 
Member since: September 2013
Posts: 66 
|
Post by DeskJockey on Feb 14, 2014 21:30:55 GMT -5
Thanks, guys! Well, I've nearly reached the finish line. We were snowed in on Thursday, so I got extra time to work on the model. I weathered the exhaust with black pigments, splattered some dried mud on the rear of the hull, put on the wheels and tracks, chipped the paint lightly, added straps to the stowage on the top of the turret (thanks, Paul!) and dusted the horizontal surfaces of hull and turret. Oh, and I added a carbon fiber antenna from Accurate Armor. Now all that remains is to attach the M109 to the base and present it to my friend! Here's a shot of the tracks while they are being glued down. I placed superglue on the top of the roadwheels and pressed the track down on them to make sure it would stay firmly in place. I used foam earplugs to keep the track in the correct position while the glue set.  In these shots, you can see the straps I added to the stowage using lead foil.     For the exhaust, I masked the area around it, then put on black pigments and fixed them with Tamiya X-20 thinner. I then added an oily stain running down below it using AK's Engine Grime. Here's what it looks like.  I couldn't resist putting the hull and turret together for pictures, so here are the first ones of the whole howitzer put together: 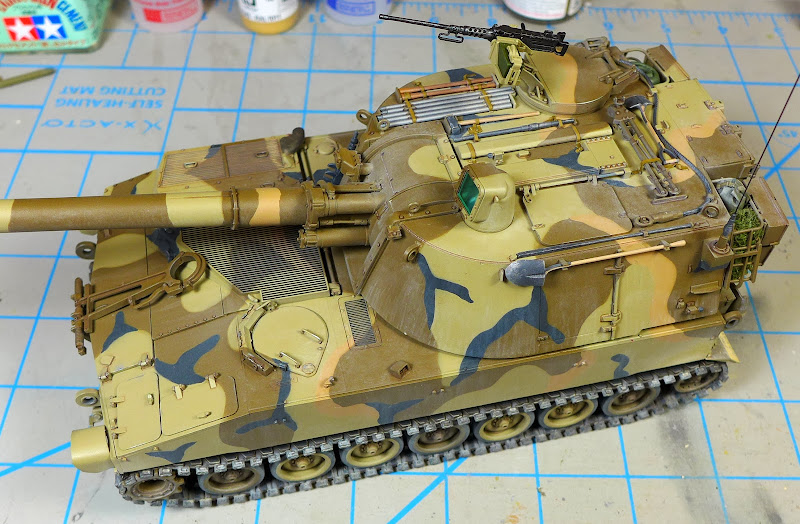   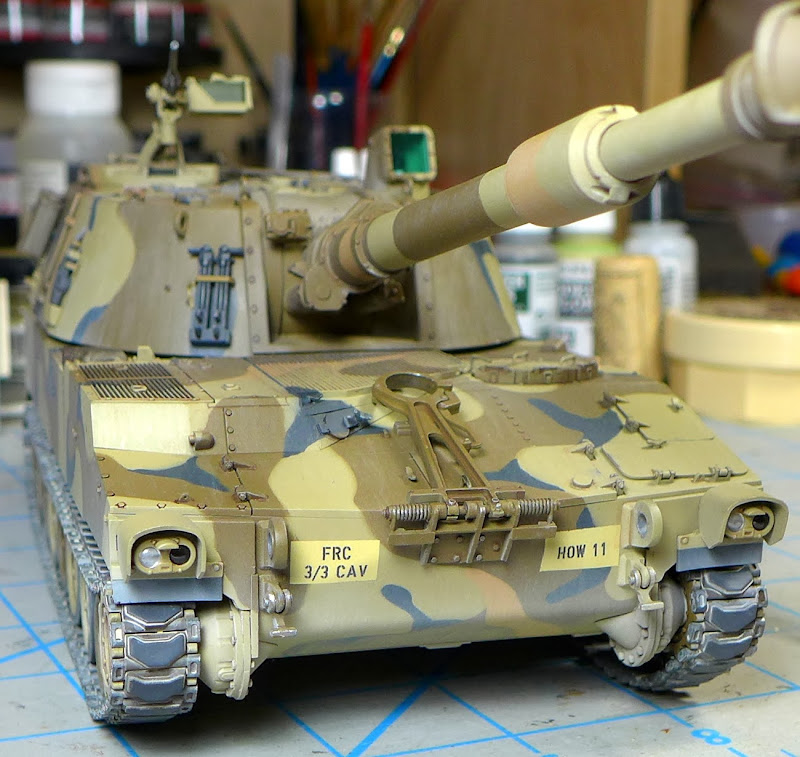  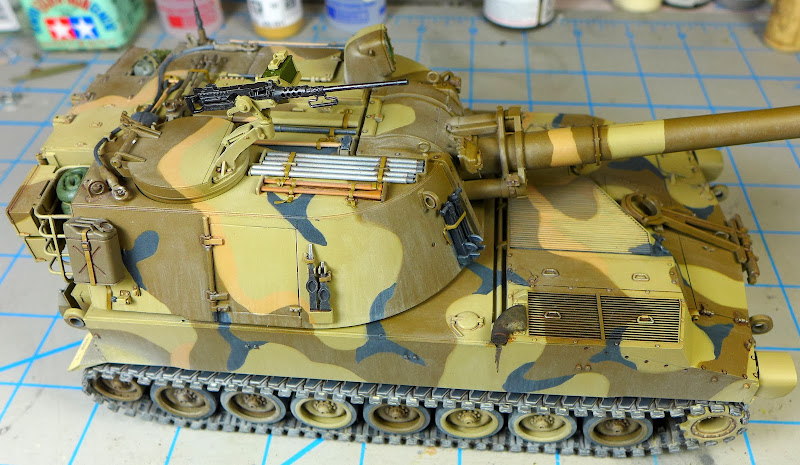 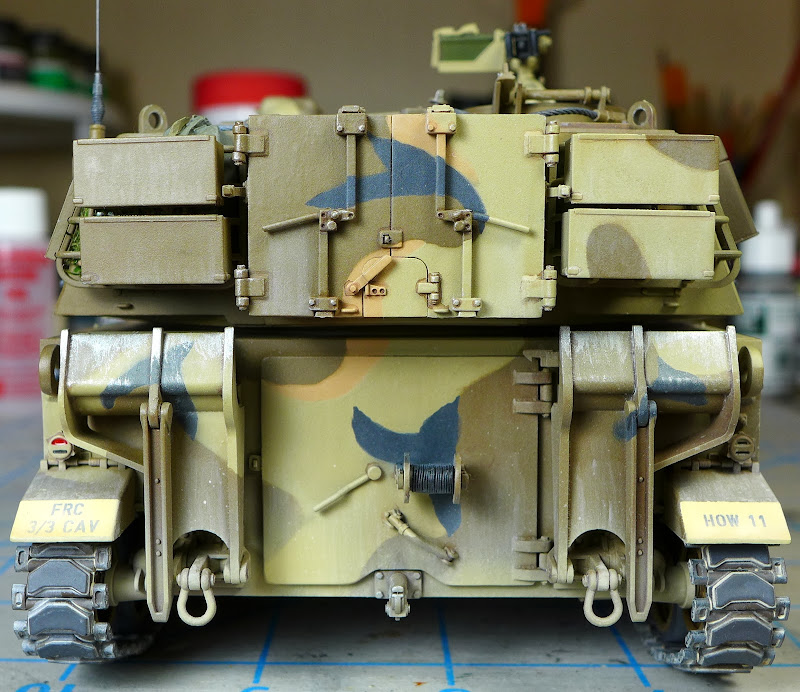 I'll take more pictures with a neutral background later tonight and post them tomorrow. Let me know what you think! |
|
|
|
Post by bullardino on Feb 15, 2014 3:49:26 GMT -5
What I think? It's a fantastic job DJ. Thumbs up
|
|
|
|
Post by Leon on Feb 15, 2014 4:35:34 GMT -5
Fantastic finish DJ,Very nicely done.
|
|
DeskJockey
Junior Member
 
Member since: September 2013
Posts: 66 
|
Post by DeskJockey on Feb 15, 2014 17:40:19 GMT -5
|
|
|
|
Post by deafpanzer on Feb 15, 2014 18:23:05 GMT -5
DJ, this is one serious great looking gun! Love the dusty look especially the dust steaks. You did GREAT!!!
|
|
|
|
Post by wbill76 on Feb 15, 2014 21:14:38 GMT -5
Very nice work on this one DJ. I'm sure your friend will be very pleased to have this one on his shelf!
|
|
|
|
Post by Leon on Feb 15, 2014 21:40:44 GMT -5
Excellent finish DJ  ,one you and your friend should be proud of.  |
|
|
|
Post by ceresvesta. on Feb 16, 2014 9:13:40 GMT -5
AWESOME! Congrats on this superb build DJ! Really tought that the ear plug was a carrot for a second....  |
|
pantherf..-Email Not Valid
Full Member
  
Member since: July 2013
"Best Job I've Ever Had"
Posts: 1,253 
|
Post by pantherf..-Email Not Valid on Feb 16, 2014 9:18:52 GMT -5
Awesome work as I really like the dusting effect!
Jeff
|
|
Deleted
Member since: January 1970
Posts: 0
Dec 2, 2024 2:56:57 GMT -5
Dec 2, 2024 2:56:57 GMT -5
|
Post by Deleted on Feb 16, 2014 11:35:38 GMT -5
Nicely done!
G
|
|
|
|
Post by bullardino on Feb 16, 2014 15:45:52 GMT -5
Great looking big gun  |
|
DeskJockey
Junior Member
 
Member since: September 2013
Posts: 66 
|
Post by DeskJockey on Feb 17, 2014 7:13:12 GMT -5
Thanks, guys!
|
|