Rick
Full Member
  
Member since: March 2013
what to build, what to build . . . Ok THAT one!
Posts: 854 
|
Post by Rick on Sept 25, 2014 21:30:55 GMT -5
Thanks guys. I'm pleased with it. I'm hoping the massive engine and air filter assembly all come together as well.
|
|
|
|
Post by fightnjoe on Sept 25, 2014 21:51:34 GMT -5
What a massive aircraft. Looking forward to what you do with her.
Joe
|
|
|
|
Post by wing_nut on Sept 26, 2014 7:56:36 GMT -5
YIKES! It's like building a 1:1 bird. Looks great. It is a shame though that in this day and age you have to deal with molding quality as you describe.
|
|
|
|
Post by mrt51 on Sept 26, 2014 13:06:52 GMT -5
Outstanding cockpit!
Terry
|
|
Rick
Full Member
  
Member since: March 2013
what to build, what to build . . . Ok THAT one!
Posts: 854 
|
Post by Rick on Sept 26, 2014 14:07:43 GMT -5
Thanks all. Hmmmm. Now as i look at the cockpit after setting it aside for a couple days I spy a glaring issue in the photos. The throttle assembly on the left is just sitting there on the top framing tube with no wiring or cables to connect it to the rest of the aircraft. This shouldn't be to difficult to create a small bundle of wiring and run it up under the front panel. Must checkout some photo sources this weekend and do some erk work to address this.
Rick.
|
|
|
|
Post by wbill76 on Sept 26, 2014 16:59:45 GMT -5
It's like feast/famine on this build Rick in terms of the details vs. the clean-up. You get to enjoy the fabulous end result but have to go through the extra work to get there. That IP and office arrangement are pretty stunning though I must say! Keep up the good fight on this one.  |
|
Rick
Full Member
  
Member since: March 2013
what to build, what to build . . . Ok THAT one!
Posts: 854 
|
Post by Rick on Oct 1, 2014 21:19:01 GMT -5
Thanks guys for the kind words. I'm pleased with the cockpit and panels. Been working in the engine parts getting cleaned up and dry fitting. About ready for paint then assembly. The whole front end has to be built with the end in mind. There are many parts that cannot be added if the panels are in place. They would prevent the panels from fitting. I'm wanting to add the port side panels and around the air filter on the bottom. The top and starboard side I want to leave open. The instructions have no text and images are detailed but close cropped. This makes some parts difficult to determine which side they are on until you study very closely. Like most of us it is tempting to jump around to different stages of the build. Can't do that with the engine. Must plumb it in order so one pipe or hose or wire doesn't block another's location. Going slow, test fit often, then glue only if sure that's where it goes. Hope to update with engine pics soon.
Rick
|
|
Rick
Full Member
  
Member since: March 2013
what to build, what to build . . . Ok THAT one!
Posts: 854 
|
Post by Rick on Oct 12, 2014 21:37:19 GMT -5
Update 10-12-2014 Spent most of my bench time last two weeks cleaning parts and getting them ready for paint or assembly. Again, all parts needed to have seam lines removed and sanded smooth. "Whew...! I've also been sorting and working on a few sub assemblies along the way. This process has resulted in: A pretty significant Bone Yard: 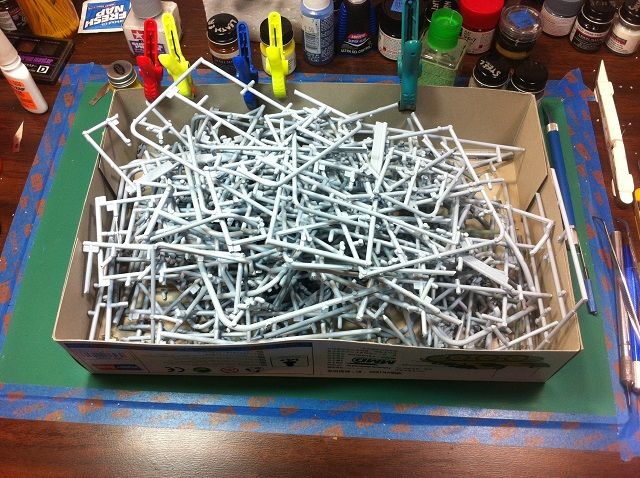 First off, the motoring has begun with the engine block assembled and painted semi gloss black. The plumbing has also been given a base of semi gloss black. Some parts will next receive Alclad dull aluminum. Once assembled, the engine will be weathered. 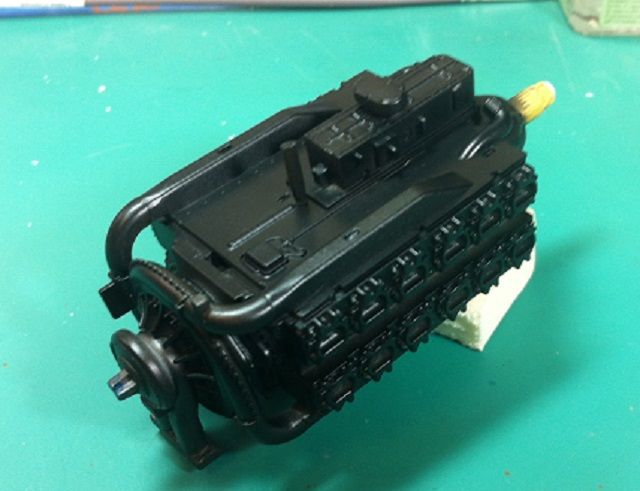 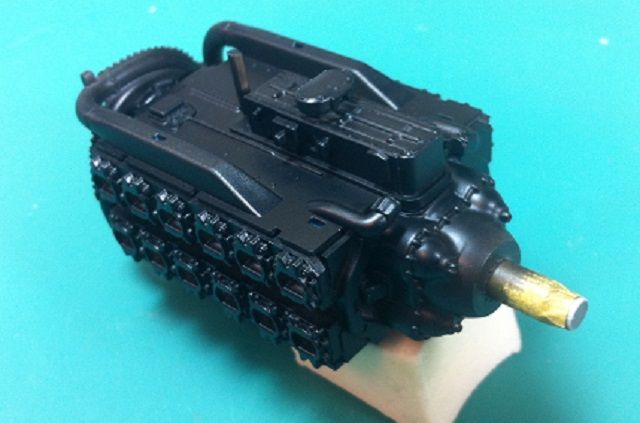 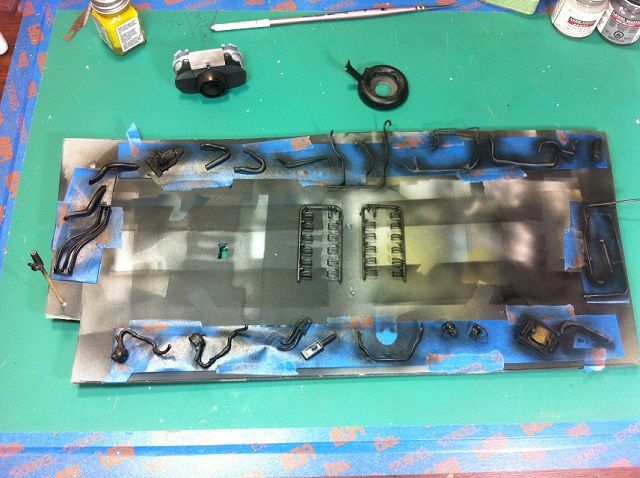 And test fitted to the airframe: 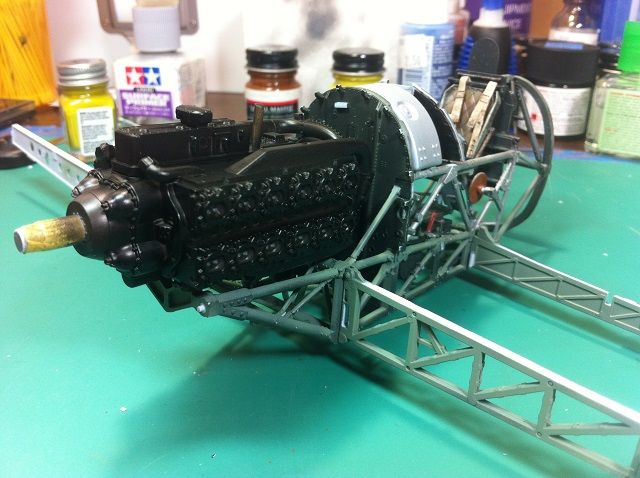 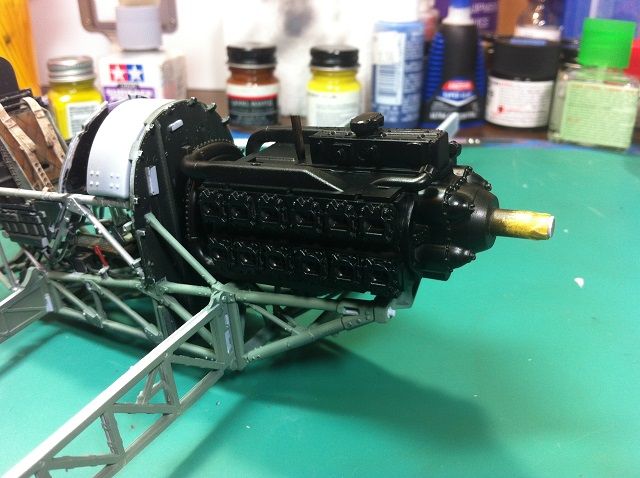 While the paint is curing, I spent some time with the tail and wings: Flaps were cleaned up and ailerons were assembled. There is a choice of tails, the original small tail or the slightly larger tail developed for the Tempest. The larger tail improved stability issues though tail flutter was never completely solved in the Typhoon. I am going to fit the original tail surfaces used on the earlier version aircraft I am planning to build: 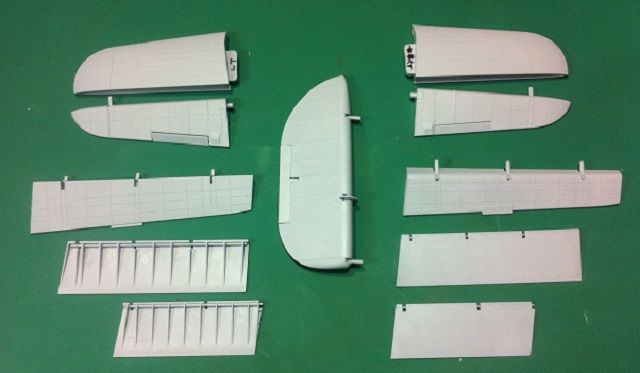 The cannon bays can be left open or closed. I am building the port wing closed up. The kit provides a choice of panels. The closed panel lacks the hinge of the open panels. 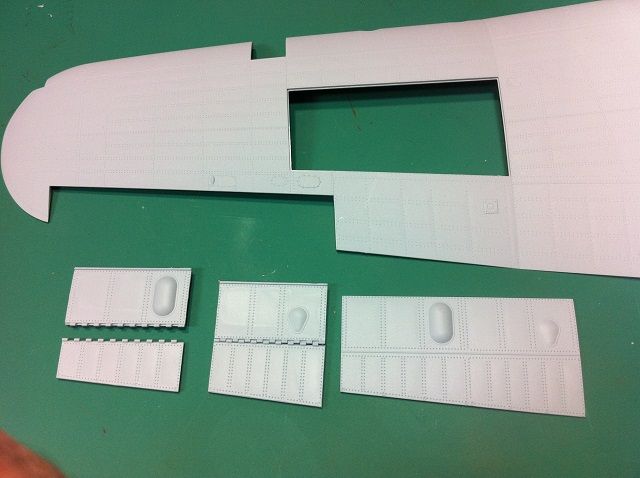 I have decided to adapt the open position panels to fit the closed position. This was fairly straightforward. There is a lip on the front for positioning the panel in the open position. This was removed and the front and bottom edges were sanded until the panels fit. I will hold off on cementing into place until the wings are assembled. I suspect more adjustments will be required due to a cross member that will split the cannon bay in half. 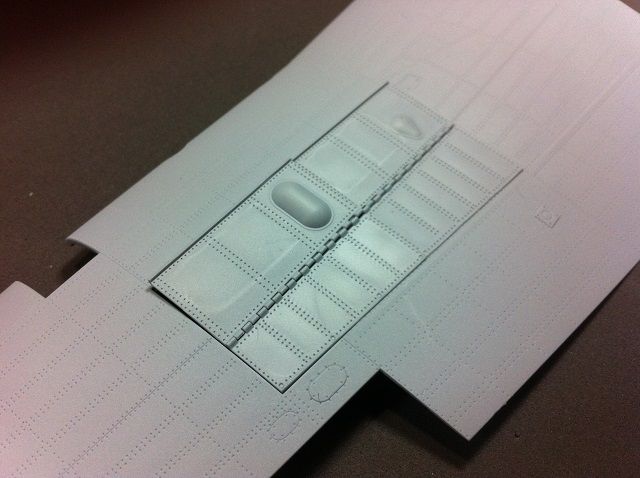 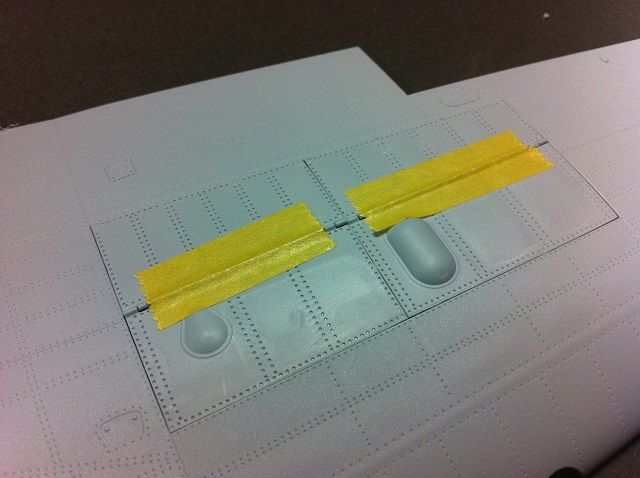 That's it for this installment. I'll update again once the engine is plumbed and painting is complete. Thanks for looking in. As always, comments, suggestions, recommendations, gripes, and all other input is welcome. Rick |
|
|
|
Post by Leon on Oct 13, 2014 3:47:09 GMT -5
Making good progress Rick!Nice work on the engine.
|
|
|
|
Post by deafpanzer on Oct 13, 2014 10:56:25 GMT -5
Rest of your build should be a breeze if you have cut and sanded all parts... have to say the rivets look stunning in the pictures!
|
|
|
|
Post by wbill76 on Oct 13, 2014 17:57:53 GMT -5
At least you have plenty of sacrificial sprue to appease the model gods there Rick! Typhoon is looking good with the progress on the power plant and other areas for sure.
|
|
|
|
Post by JimD on Oct 19, 2014 13:53:13 GMT -5
I almost bought this kit yesterday but I really am trying to resist the scale for continuity reasons. But darn man this thing is impressive. Shame about all the cleanup but this is already looking to be a stunning build. Can't wait for more!
|
|
Rick
Full Member
  
Member since: March 2013
what to build, what to build . . . Ok THAT one!
Posts: 854 
|
Post by Rick on Nov 2, 2014 1:16:14 GMT -5
Andy, many parts are cleaned and painted but, I don't think a breeze is how I'd call it.  A lot of interruptions the past few weeks but have made some meaningful progress. Gonna pick up where the last set of pics left off. The engine block had been mounted. Next comes the accessorization. The plumbing and many of the other parts were cleaned up and sprayed semi-gloss black. Next Alclad Dull Aluminum was applied to the appropriate parts. Then, various fittings and flexible piping received several coats of Alclad pale burnt metal to highlight them. This included the plug wires on the wiring harnesses. These parts took several hours to clean up. Seam lines due to mold alignment and flash degraded the overall appearance of these prominent pieces. AK Dark Brown wash was applied to pick out details and help hide some of the clean up efforts. iPhone pics don't show this very well but I am a bit disappointed in the final outcome of the harnesses due to the clean-up damage. Airfix has done a great job in the design and alignment of the parts and plumbing, the molds just let them down. 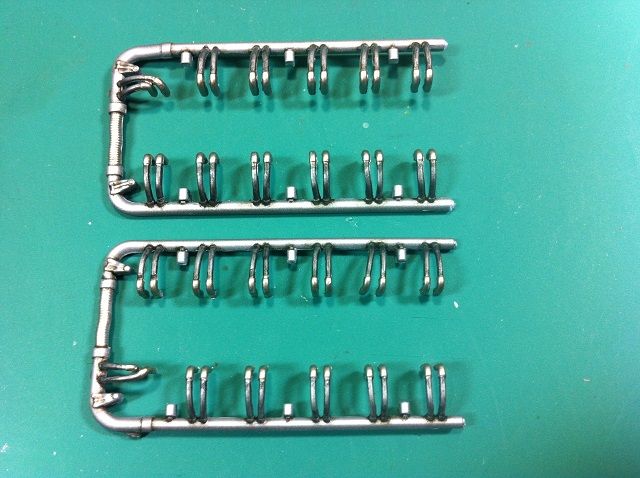 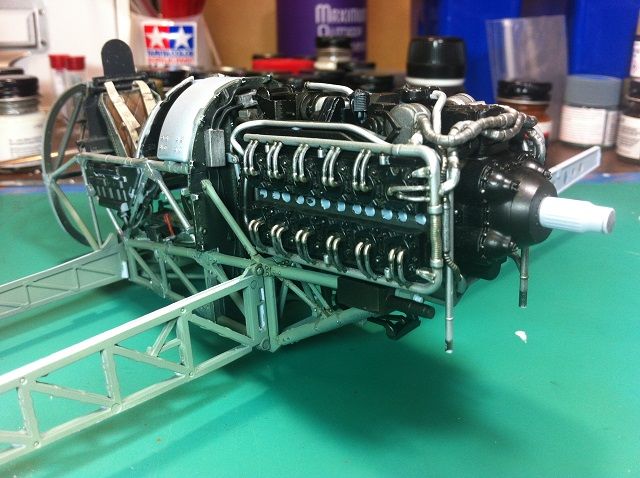 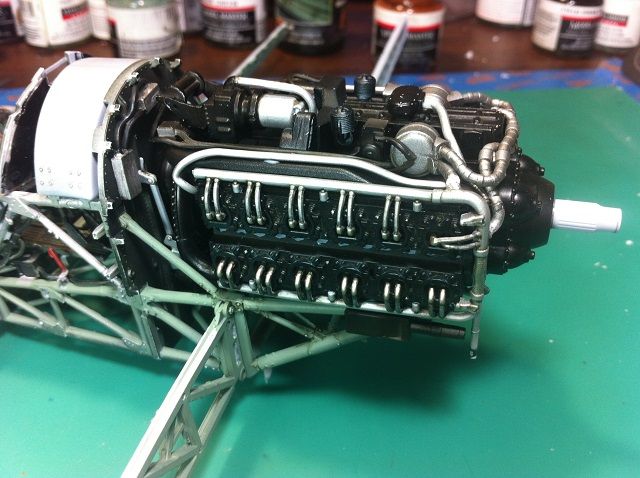 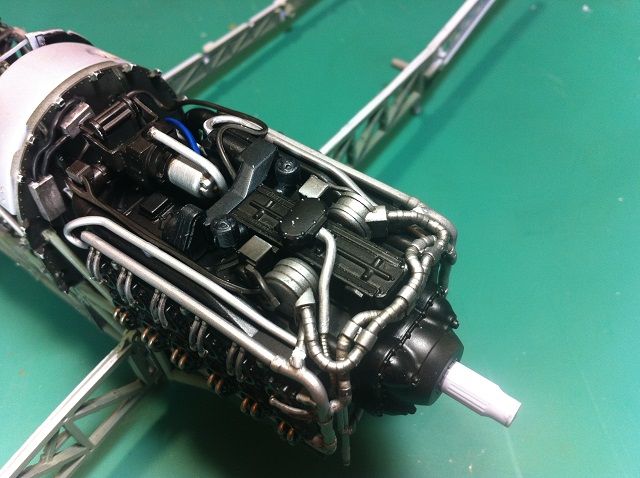 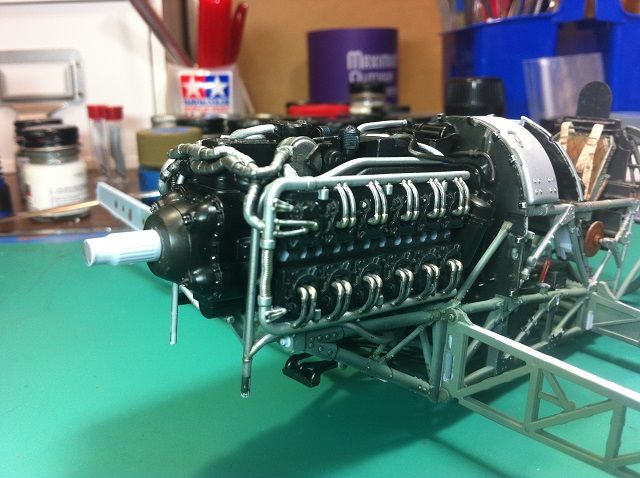 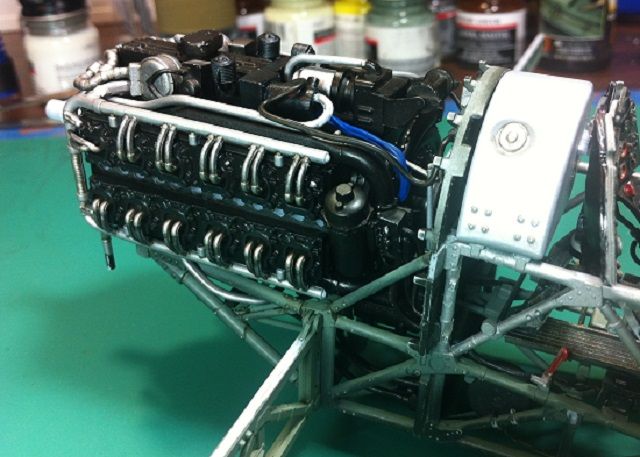 Just a call out to those building this kit. The engineering of the kit is great. The instructions leave something to be desired. Close attention must be given to location of attachment points and preparing for glue. Test fit every part to be sure you are trying to install it in the correct location. Follow the step by step. Getting out of order will mean parts locations will be blocked by parts added out of sequence. The firewall proved quite interesting. Several fittings or brackets attached behind the engine AFTER it had already been mounted. It was a real buggar. I am planning to close up the underside so several fittings were not added. 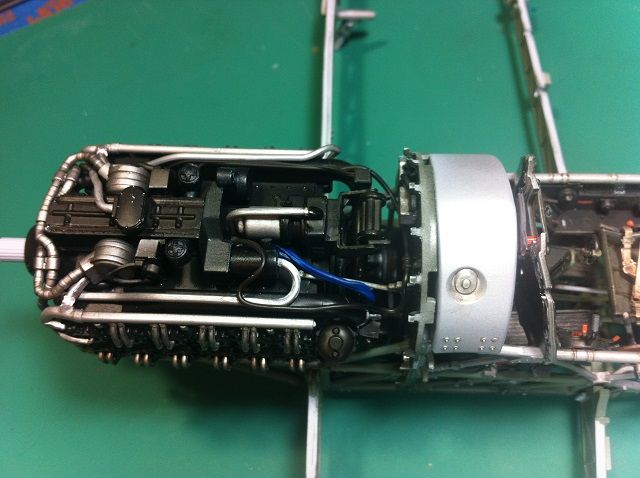 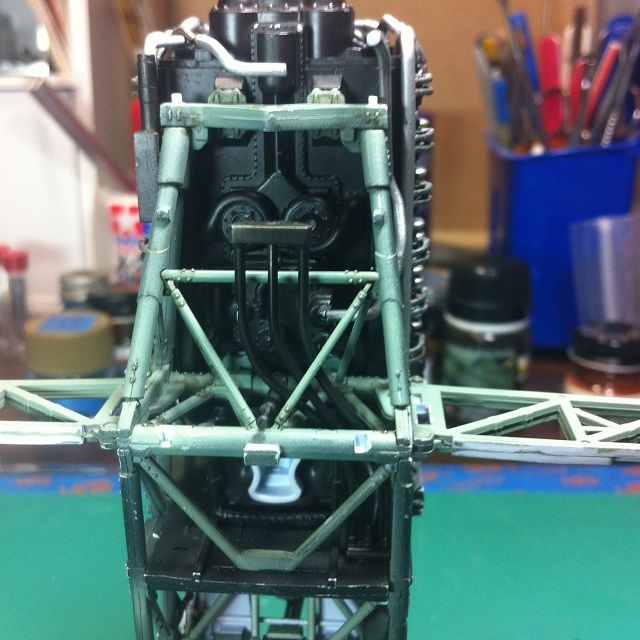 The air intake and filter came next. Alignment of the coolant tank on the front of the engine is super critical. Otherwise the prop and spinner will have gaps. I am hoping I got it right. Test fitting the engine panels seemed to support this but I will not know for sure until the fuselage halves are joined and I can give it a good test fit. 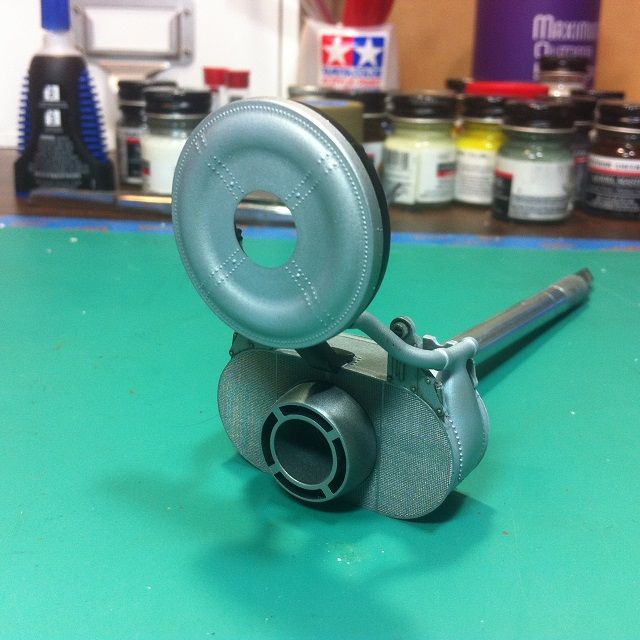 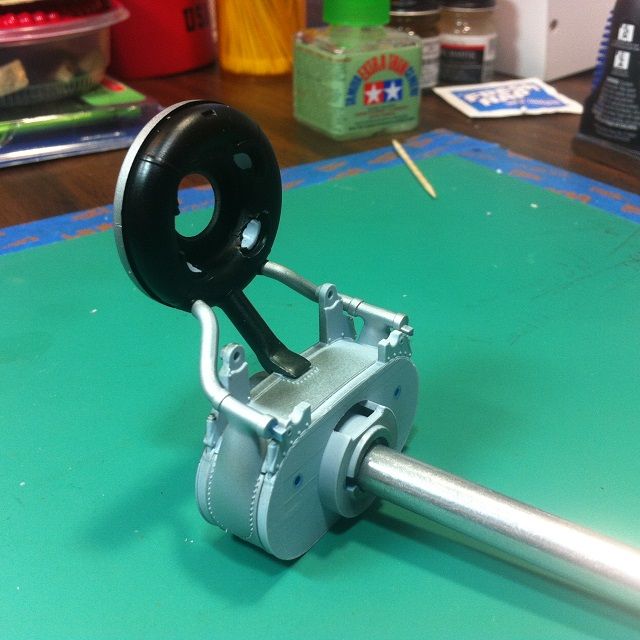 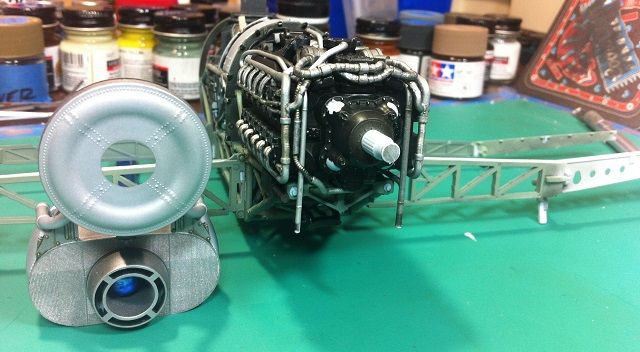 A little sidetrack. The inside of the cannon bay covers are reported to have leather mounted on them. Not sure the purpose but I was curious how I was going to detail this on the open cannon bay doors. I decided to give them the overall aluminum interior color then used Tamiya tape to mask the framing around the the leather recessed panels. I sprayed Model Master Leather then after curing several days masked the leather and re-sprayed the aluminum. Still have yet to clear coat and apply washes and some level of grime. I figure this area was paid close attention by the armorers to ensure the cannon did their job so grime will kept to a minimum. 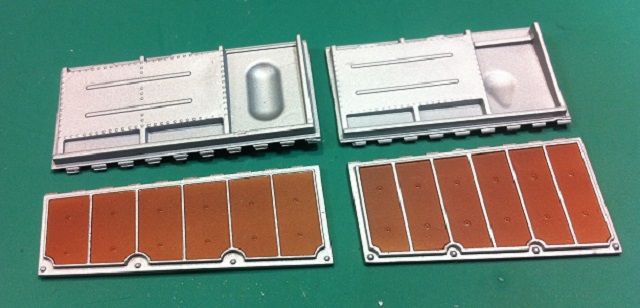 OK, back to the next task at hand. The engine is as done as I want at this point. The exhaust and possibly a few other bits will be added once the fuselage is added. On the port side that will be mostly closed up, it may be necessary to remove some motoring parts to ensure the panels fit properly. That comes much later. With that, a major milestone has been reached. My Tiffie is sprouting her wings! Getting the lower wing in the correct alignment is the next critical step. As you can see, clamping it helps align this properly. I did have a small gap in the bottom where the wing meets the radiator that will require some filling later. I'm hoping the panel under the radiator is slightly out of place and not the wing. 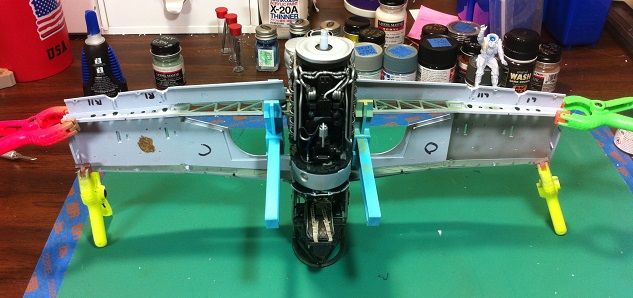 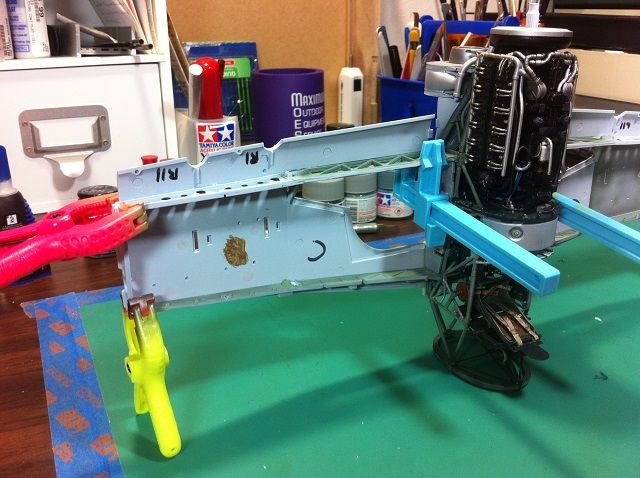 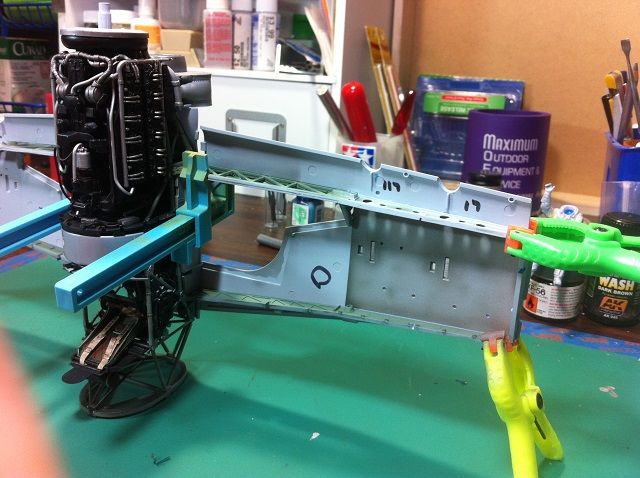 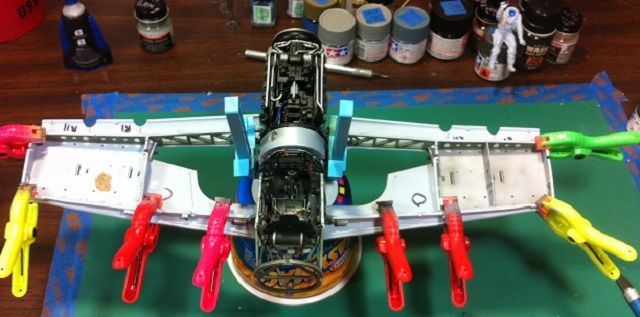 Once the wing was secured to the spars, the interior of the wing build-up begins. Here the interior spars are in place forming the landing gear bay in the port wing. The framing for the cannon bays is also in place. This will be closed up and not visible so only the cannon will be installed. 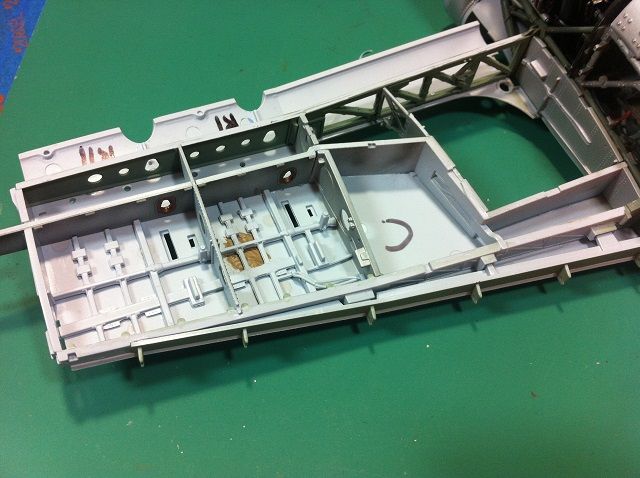 The starboard side cannon bay will be open so it will get the full treatment. the inner aluminum skin was masked and sprayed earlier. the framing for the cannon bay was finished in flat zinc chromate and waiting to be installed. Leading edge fuel tanks and a second fuel tank behind the wheel well are yet to be painted and installed. They will be slightly visible through the spars from the gear bay. Several debates on other sites are ongoing as to what color. Aluminum or a reddish orangish self sealing coating. I'm going to mix the self sealing color mainly because it will add a small bit of color and interest. I had to mix the same color for the 1/24 Mosquito I finished last year. I hope I wrote the mix formula down... 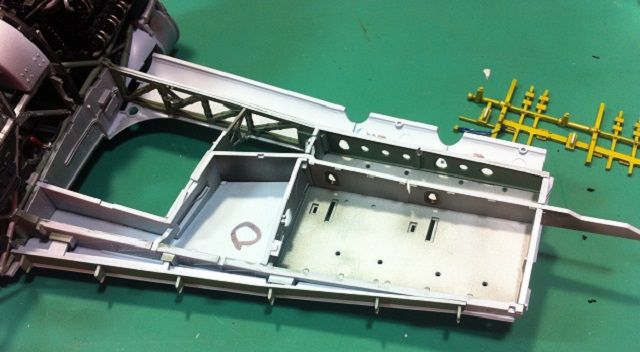 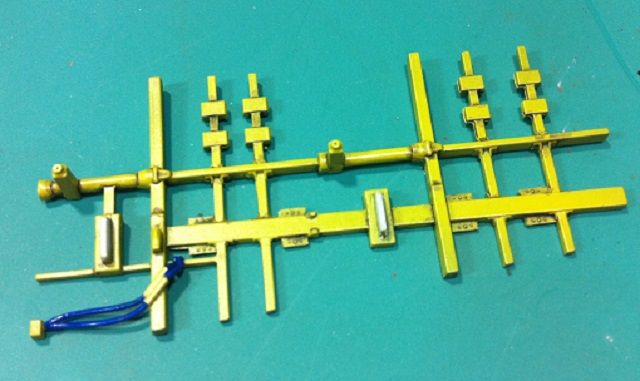 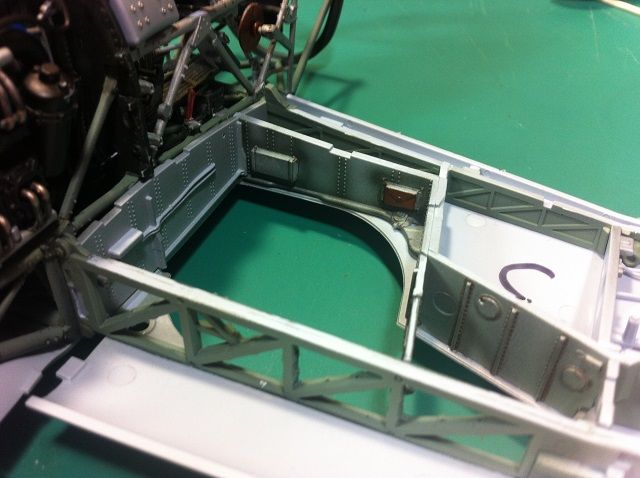 So, to recap, Engine plumbing, Air intake, lower wing attached and interior spars added to create cannon bays and landing gear bays. Once the wing went on, the pace began to move much quicker. Planning to have the wing interiors done and top wings in place. The landing gear bays look like the next big challenge with various hydraulic and air lines to install. 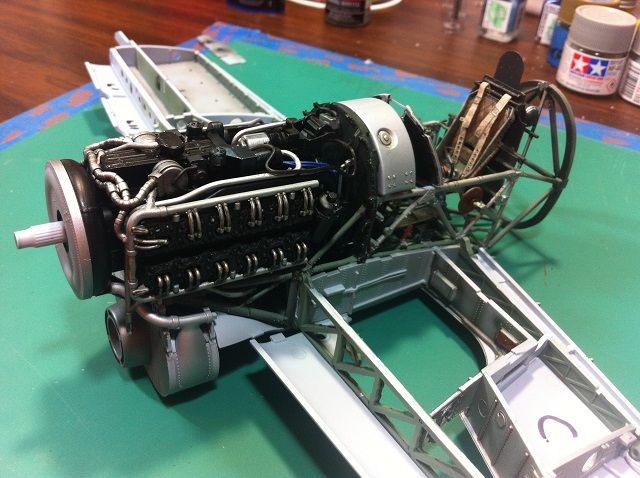 Thanks for checking in. As always, suggestions, recommendations, comments, and derisive laughter are always welcomed. Rick |
|
|
|
Post by Leon on Nov 2, 2014 4:44:25 GMT -5
Really making good progress Rick,despite the cleanup issues.
|
|
|
|
Post by dupes on Nov 2, 2014 7:13:11 GMT -5
Looks great, Rick! That last pic - you never really think about how close the pilot is sitting to the MASSIVE engine when flying a single prop.  |
|
wetsellery
Full Member
  
Member since: June 2013
Posts: 130 
|
Post by wetsellery on Nov 2, 2014 8:55:23 GMT -5
WOW, that looks like a great kit !
Very nice progress.
|
|
|
|
Post by deafpanzer on Nov 2, 2014 9:19:51 GMT -5
Damn, the engine looks great!!! Can't wait to see more... please! LOL
|
|
|
|
Post by wbill76 on Nov 2, 2014 11:46:35 GMT -5
Doing this one proud Rick! Looking good.
|
|
Rick
Full Member
  
Member since: March 2013
what to build, what to build . . . Ok THAT one!
Posts: 854 
|
Post by Rick on Nov 5, 2014 23:22:28 GMT -5
Thanks guys. I appreciate the kind words. Especially tonight. I'm at a point in this build where, to be honest, I'm struggling just a bit. A big part of this one is planning a couple steps or sub-assemblies down the road. This is where alignment issues will rear their ugly head depending on what steps I do now. Paint this, glue that, prep those. There's several options to work on but it seems every step is dependent on another that's not quite there yet. I'm sure we've all hit that brick wall where we know what and how to do "it" but just not feeling "it". Seen a few other sites with typhoon builds where there are struggles with panel alignments and other call outs. It's making me think about if I'm doing mine right.
I can see myself over thunkiin' this thing and that's when the mistakes start happening.
I've decided to back away a few days and quit staring at parts and instructions for the next couple days. I gonna stay off other build sites and get my head back around my build and re-focus on my own sequences so I can get the details back aligned so they support the next sequence. Gonna take care of a little medical distraction too. I do appreciate everyone on the site. So many inspirations and always great support for each other. Be back soon. Just need to clear my brain a bit.
Rick
|
|
venom1
Full Member
  
Member since: October 2012
Posts: 1,369
Oct 10, 2012 2:40:03 GMT -5
Oct 10, 2012 2:40:03 GMT -5
|
Post by venom1 on Nov 6, 2014 0:29:37 GMT -5
Superlative work so far Rick! Looks like you've got a pretty good handle on this whole modelling lark!!  Cheers, Sam  |
|
Rick
Full Member
  
Member since: March 2013
what to build, what to build . . . Ok THAT one!
Posts: 854 
|
Post by Rick on Dec 1, 2014 11:20:33 GMT -5
December 1st Update #1 - Wings! Hello everyone. Sorry it's taken so long away. Been focusing on some fit details but have made some significant strides. We're finally looking like a Typhoon. Picking up were I left off, after attaching the all important lower wing section, attention turned to the interior of the wing: Starting with the fuel tanks. Some sources say aluminum, others stated a reddish-orange coating was applied as an outer self sealing coat until later machines had internal self sealing liners. Since my version is an early aircraft converted from a car door Tiffie, both have been painted with reddish-orange. Adds bit of color I think. Very little of the tanks will actually be visible when all is buttoned up. The framing for the cannon bay has also been added. 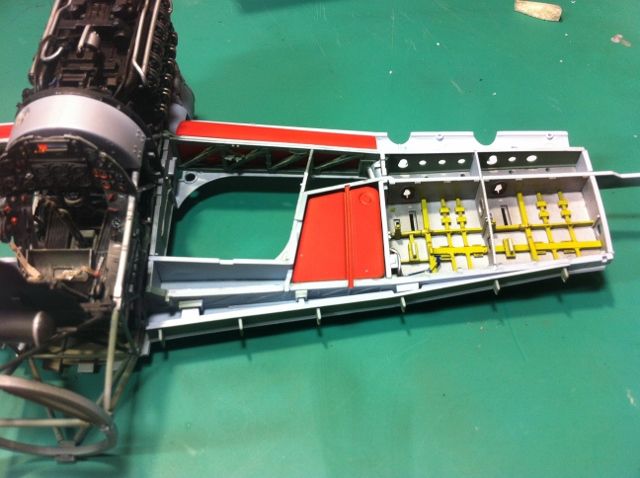 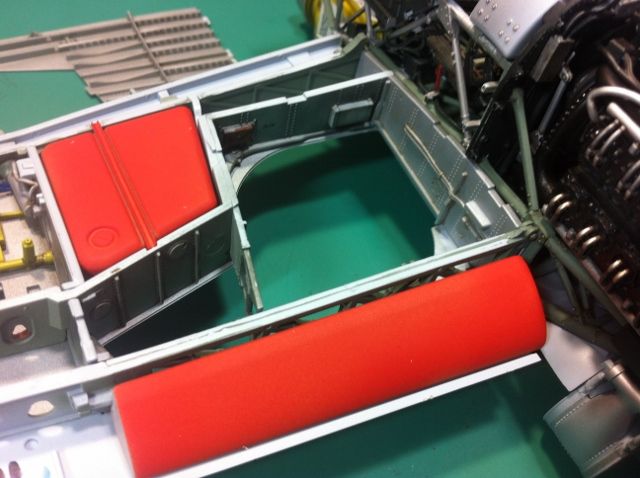 I've begun installing components of the landing gear bays. You can see how limited fuel tank visibility really is. 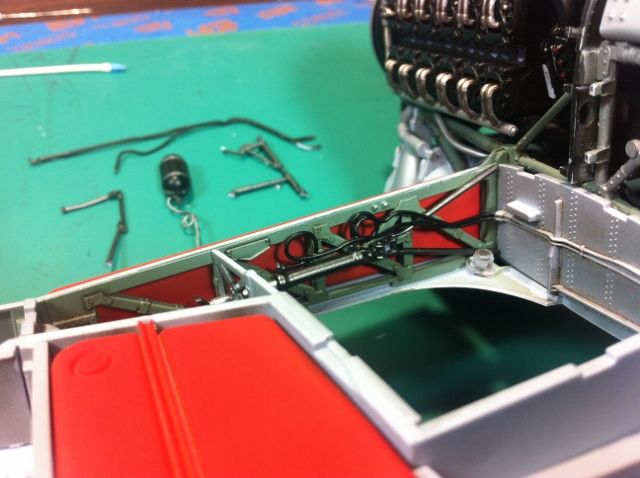 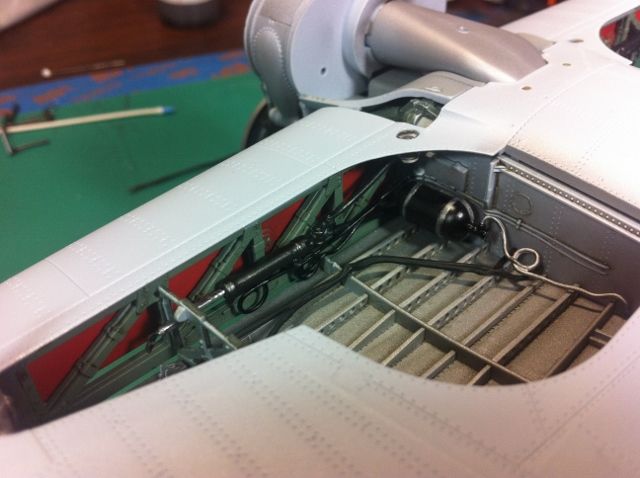 The outer lower wing sections have been added and the cannon bay on the starboard wing has been filled out. Port wing will be closed up so only the cannon were mounted. The cannon fit is very tight and very precise. The barrels must be flexed and slid through the forward spars after a bit of sanding to enlarge the openings a tad. With the barrels now protruding, they are just ripe for breaking them right off. 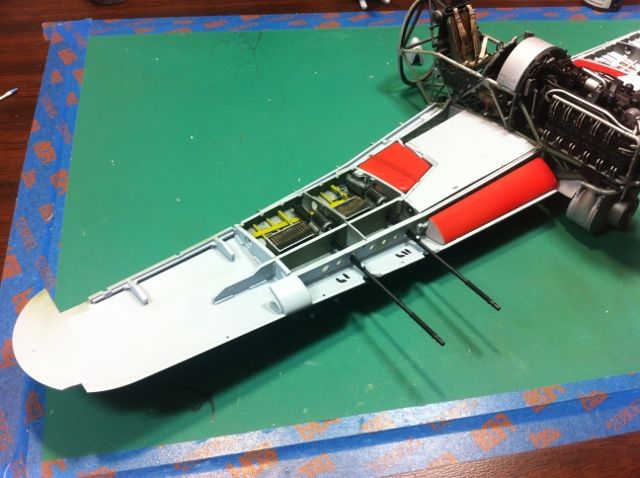 Note the landing gear bay cover fitted over the wheel well. Very important this panel fits flush. If not, the upper wing panel fit is affected. Spent considerable time fixing this problem. Was not a kit issue, strictly a builder issue  . 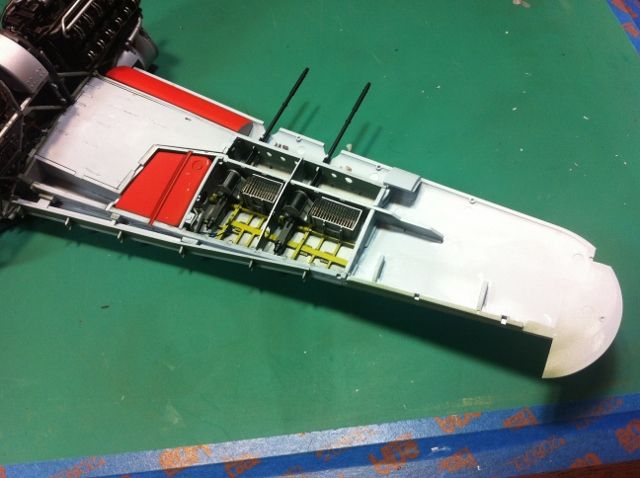 And of course, it is very important to site the cannon to ensure accurate aiming. Thanks, headless Bob. 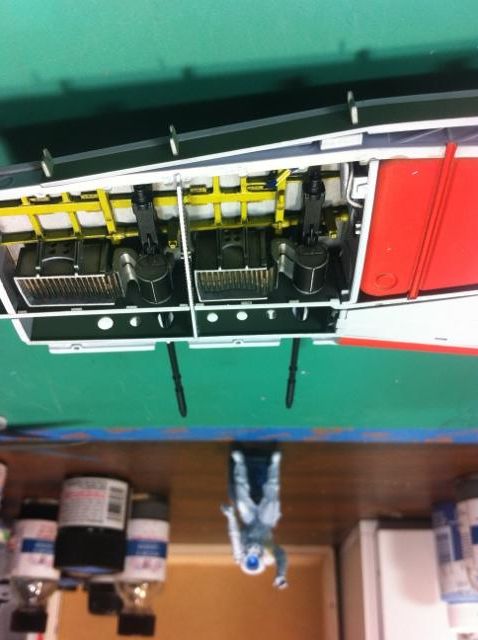 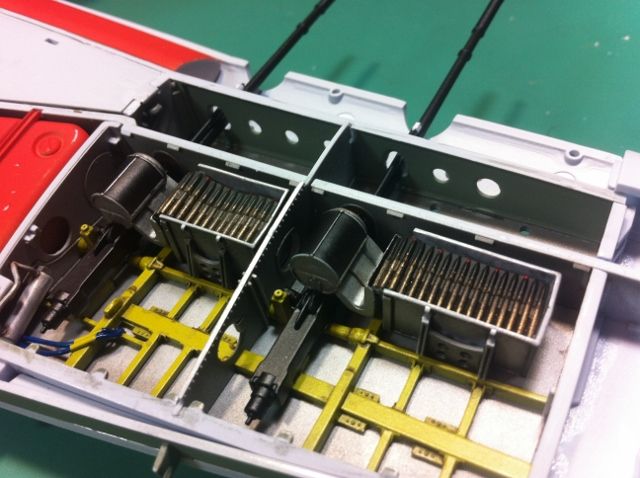 Next big step was to get the upper wings in place. 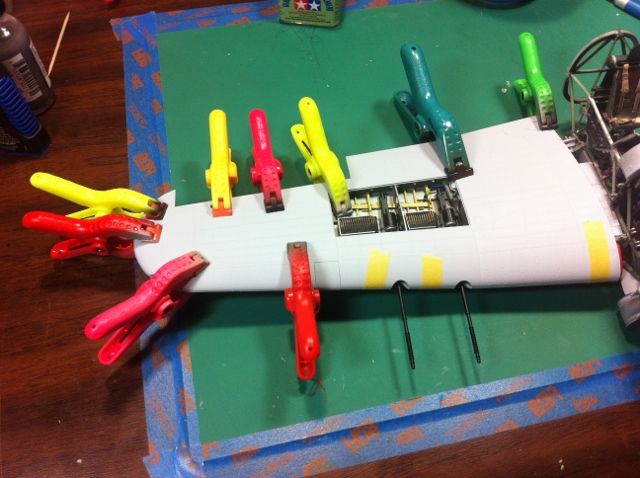 With the lower wing outer panel in place, here is the view into the cannon bay: 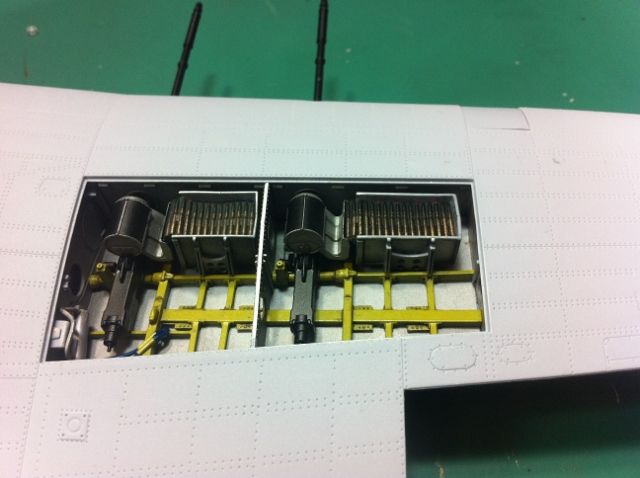 Gonna leave it here for the moment. More to come. Rick |
|
|
|
Post by mrt51 on Dec 1, 2014 11:28:36 GMT -5
This is just great!
Terry
|
|
petros
Full Member
  
Member since: February 2014
Posts: 361 
|
Post by petros on Dec 1, 2014 11:55:37 GMT -5
That looks like a very cool bird! I'll be watching! As for 36 months old modelers as discussed on the first page, I was the one  I started with just below 3 years old, with the supervision of my grandpa who was also a modeller  1/72 Mi-1 kit from some soviet manufacturer was built. I used scissors to cut the parts out, and modeling glue to stick all together, no paint or so. In the end it even looked like a chopper  Started my interest in modeling and I never stopped, for over 30 years now...  |
|
|
|
Post by JimD on Dec 1, 2014 12:02:37 GMT -5
Wow. Excellent update. This kit is really impressive looking. I'd love to see something similar in 1/32  Can't wait for more! |
|
|
|
Post by deafpanzer on Dec 1, 2014 12:13:50 GMT -5
Man, they look fantastic... you are kicking arse on this!!!
|
|
|
|
Post by dupes on Dec 1, 2014 12:15:32 GMT -5
Wow, man...looking wonderful!
|
|
Rick
Full Member
  
Member since: March 2013
what to build, what to build . . . Ok THAT one!
Posts: 854 
|
Post by Rick on Dec 1, 2014 13:23:32 GMT -5
Petros, so you're the guy Airfix was talking about and had to add their age restriction recommendation! Well, I'm glad you stuck with the hobby all these years. When I started, I just twisted the parts until they came of the sprue. No wonder nothing ever fit right.
Appreciate the rest of you guys for following along since the beginning.
Rick
|
|
petros
Full Member
  
Member since: February 2014
Posts: 361 
|
Post by petros on Dec 1, 2014 14:27:22 GMT -5
Petros, so you're the guy Airfix was talking about and had to add their age restriction recommendation! Well, I'm glad you stuck with the hobby all these years. When I started, I just twisted the parts until they came of the sprue. No wonder nothing ever fit right. Appreciate the rest of you guys for following along since the beginning. Rick Hehe, twisting parts off was my way too in those early years  And sanding with my grandmother's nail file. However I doubt Airfix knew me - there were no western kits in soviet union, only the soviet ones. |
|
Rick
Full Member
  
Member since: March 2013
what to build, what to build . . . Ok THAT one!
Posts: 854 
|
Post by Rick on Dec 1, 2014 14:46:19 GMT -5
December 1st Update #2 - Fuselage OK, the upper wings are in place. A lot of clean-up and sanding to get the edges smooth. Due to the size, the liquid cement would evaporate before getting all the way around the wing so I started with the leading edge and got the front together and cured. Then I aligned the trailing edge and glued and clamped the daylights out of it. 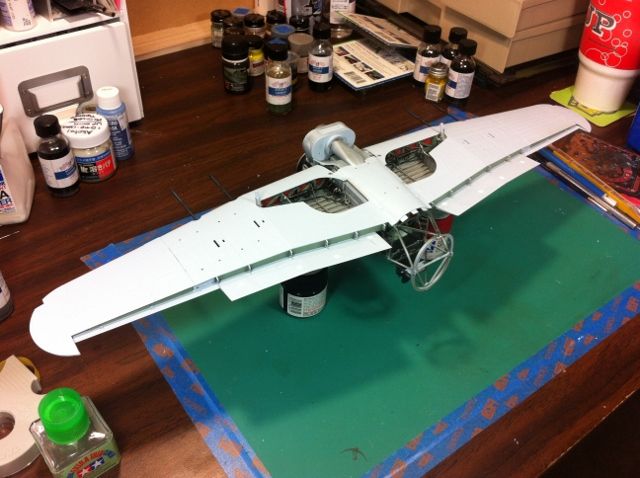 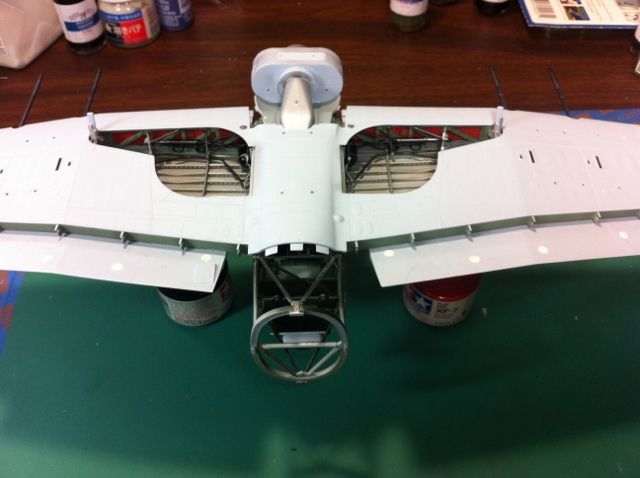 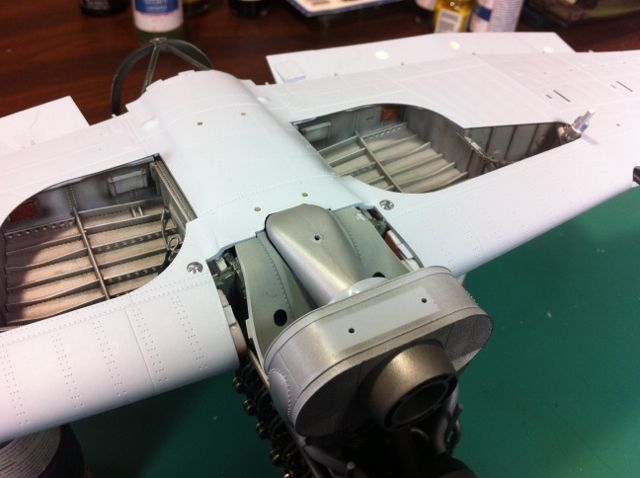 Once the wings were together and cured, I deviated from the instructions and addressed the 20mm cannon protruding way out there in "please break me off" zone. I wasn't to sure about Airfix's engineering on these but I was very pleasantly surprised. The barrels fit precisely into their protective sheaths which slipped into the wings perfectly. They also helped to align the barrels to ensure they were properly pointed in the correct direction! 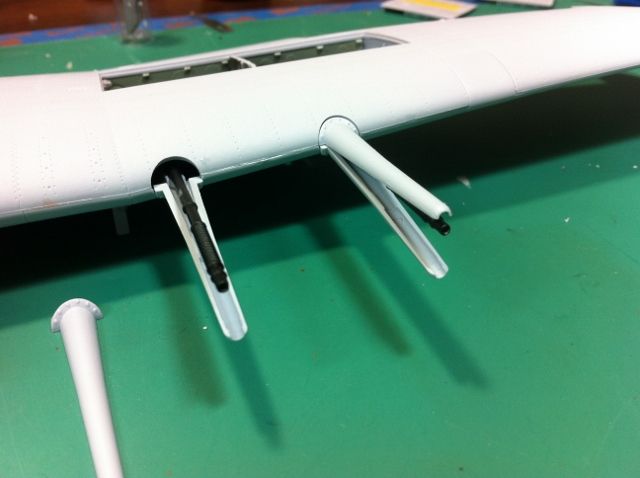 (Had I not enclosed the barrels when I did, I would have broken all four of them off by now!) And the full length of the main wing assembly: 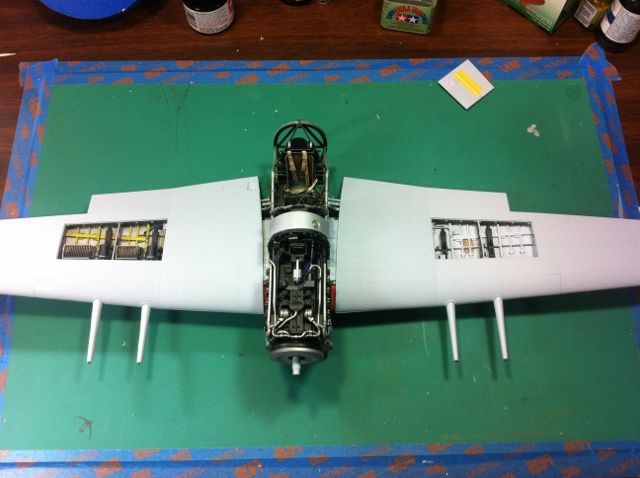 Headless Bob even approves: 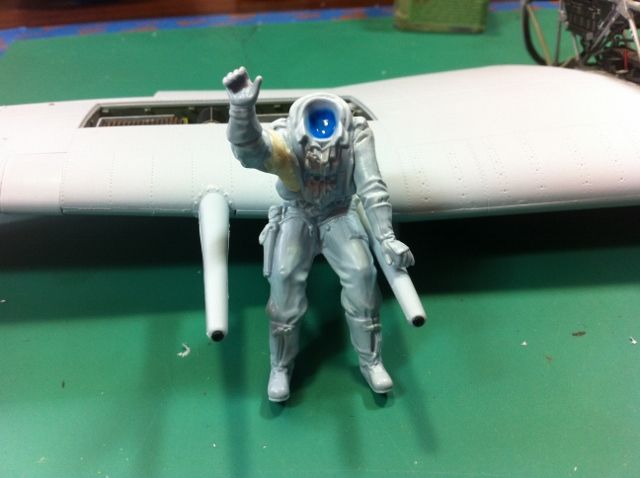 The kit provides a single piece panel for the gun bay if it is to be covered. Since the open bay doors include the hinge, it didn't seem right to use the one piece hingeless panel. I elected to trim and fit the four separate panels into the opening to match up with starboard side which uses the same four panels. 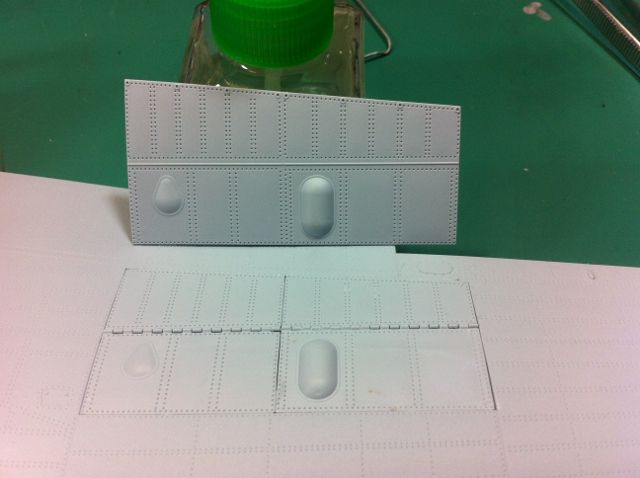 Now, that I had a full wing, I wanted to gauge the aircraft size with a commonly recognized example: 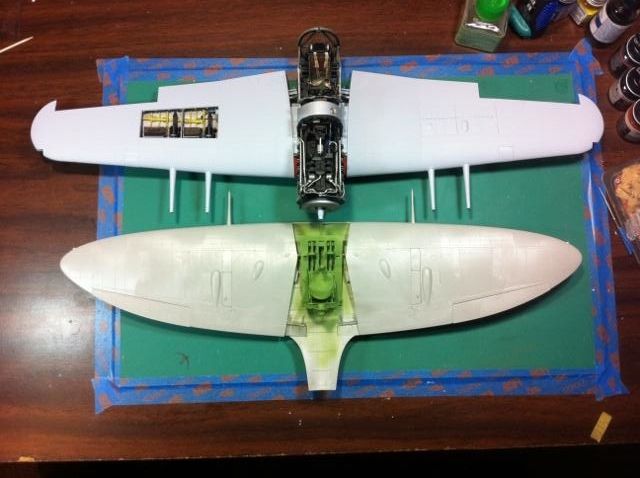 My 1/24 Spitfire has been living in it's box for at least 7-8 years now. Several inches longer and much thicker wing, the Typhoon is a much heftier aircraft by all means. While, all this gluing, clamping, cursing, and waiting to cure was going on, to prevent me from Typhoon madness, I pulled out Airfix's 1/72 Hurricane and threw it together: 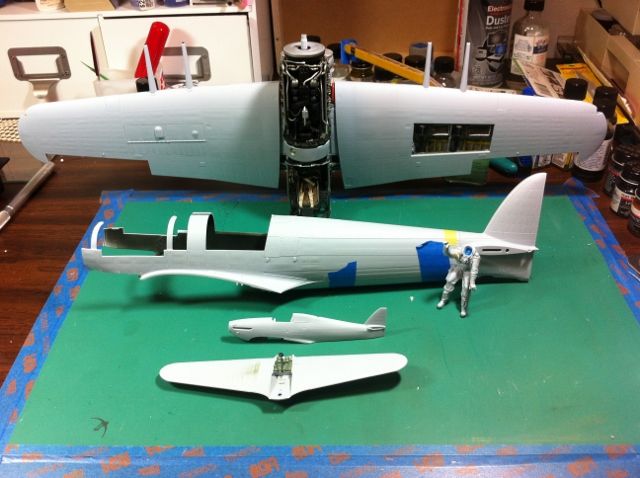 Needed those distractions just to get ready for the next phase - Fuselage The fuselage consists of the two halves and the belly section behind the trailing edge to the tail. The vertical stabilizer was separate. The kit gave the option of the smaller original tail surfaces or the later Tempest tail that was added in the successful hopes of improving stability. Never did completely fix it, but it did improve it. Since I am building an early version, I am using the smaller original tail. (I can't seem much difference between the two) The tail sections were added to the fuselage halves which where then taped together and fitted over the wings and cockpit. 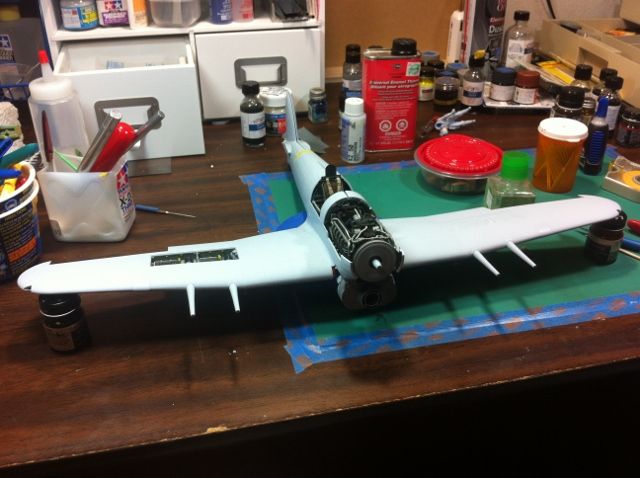 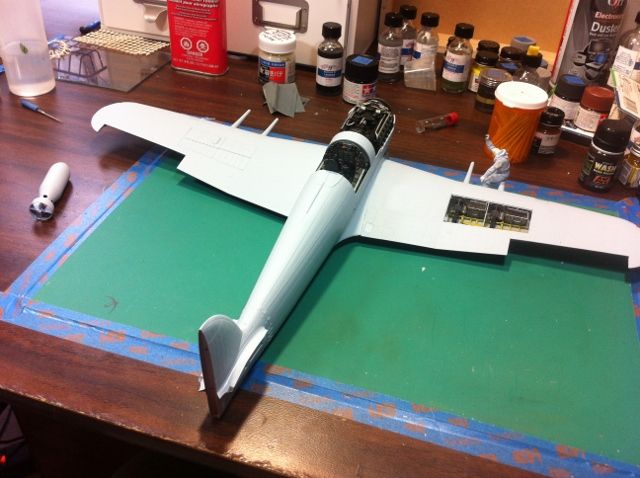 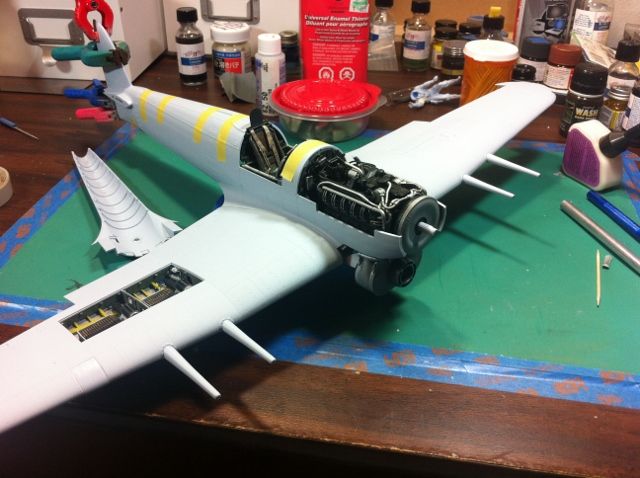 The wing root fit was not the greatest. Starboard side was decent, the port side had a noticable misalignment. I had to end up prying up the trailing edge wear it met the aft spar where the landing flaps will attach in order to get the wing to align. Rather a slight gap underneath that will be hidden by the lowered flap than at the wing root on top. I should have done a better job of taking pictures of it but I was so ticked off with it, I just kept working it to get it to fit. Once the wing root problem was fixed, the next problem was the forward fuselage surrounding the engine. The port side was warped. 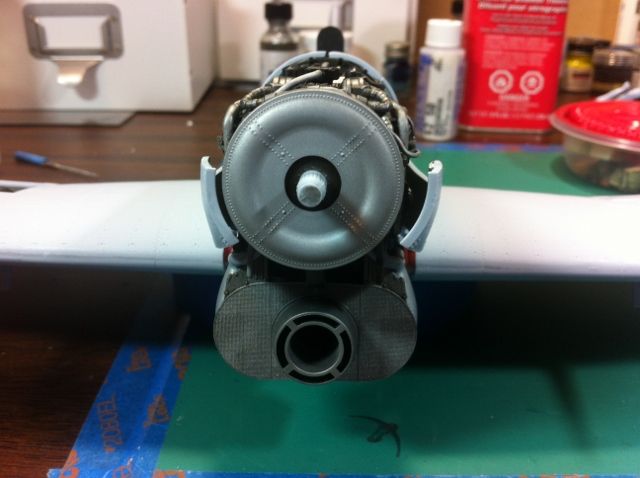 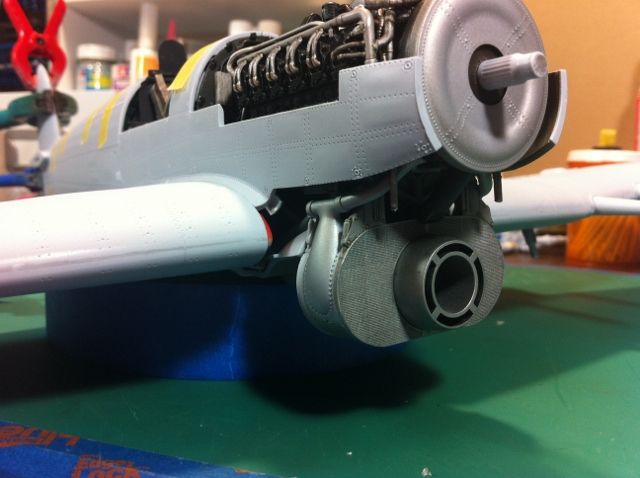 In order for everything to fit right and line up correctly, multiple panels meet and must wrap around the forward bulkhead that mates up with the spinner. This works IF everything so far is in perfect alignment. Well the warped fuselage didn't help. The engine appears to be about a half millimeter to far forward despite having a snug mount to the frame and firewall. The front bulkhead (or whatever it's called!) is mounted to the glycol tank which fit rather squirrely to the front of the engine. Oh, it also is mount to the giant air filter that Typhoons are famous for. What to do??? To fix the alignment, I fought with it for about four days before breaking loose the glycol tank and wallering out the four indented mounting points on the tank so it would fit closer to the engine block then re-mounting it to the engine. Had to shorten to mount to the air filter slightly as well to get it to fit square. Once all this was done, I still had to sand and scrape to thin the lip that the panels attached around the forward bulkhead. (All while still attached to the model) Then superglue and HOLD the warped panel in place until the glue dried enough to hold it in place. I taped it overnight and walked away. 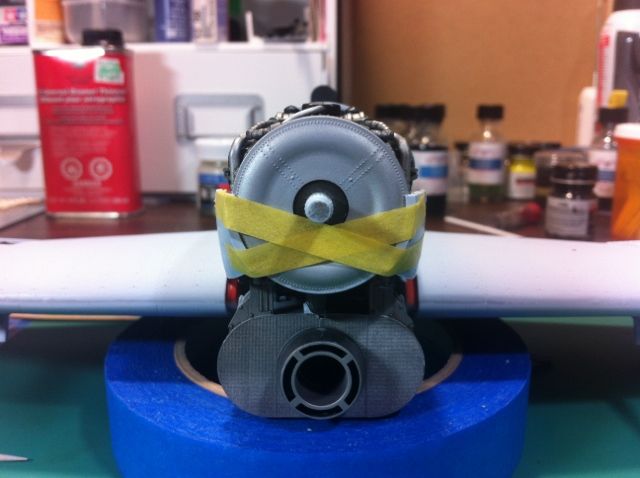 Thinking that fun was behind me, I added the engine cowl panel above the exhaust - after sanding and thinning it down and a shim at the back end of it to eliminate the gap there and finding out engine parts were interfering with the fit of the panel. Some strategic surgery to thin the ignition harness and more superglue gel to bond it in place The next piece of fun was getting the 6 piece cowling around the air filter. I thought I would be smart and paint it before attaching it since painting it later will not be a lot of fun. Waste of time. More surgery to take out some piping, lot's of sanding, and multiple shims to fill the gaps later, the Typhoon has his chin. 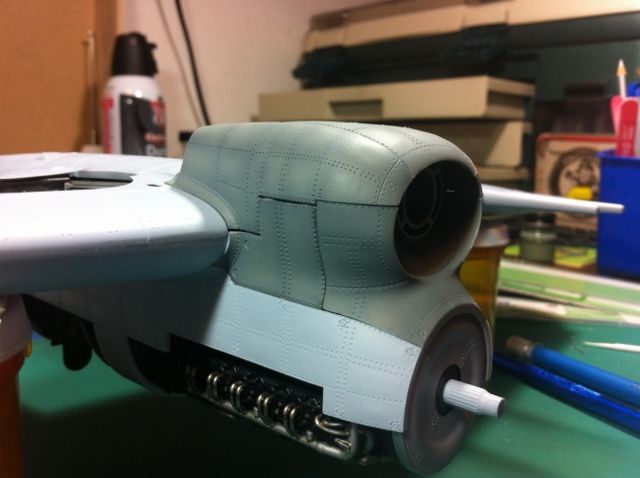 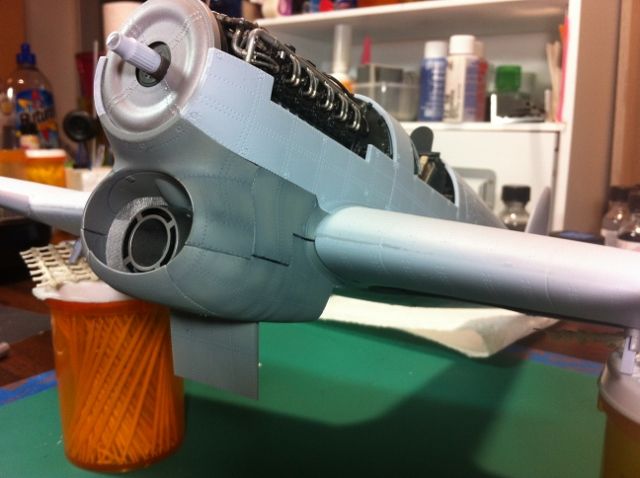 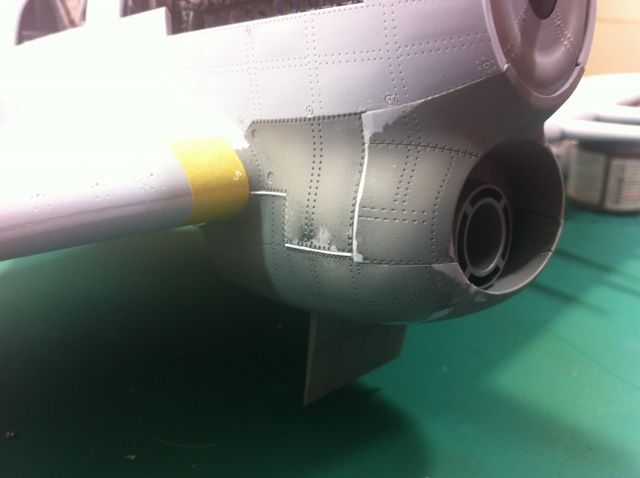 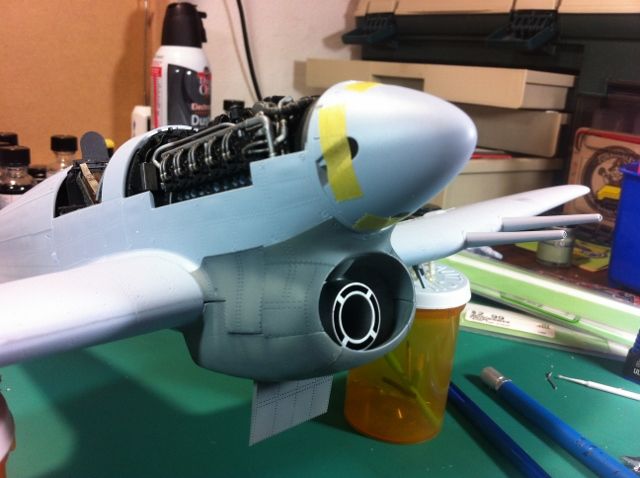 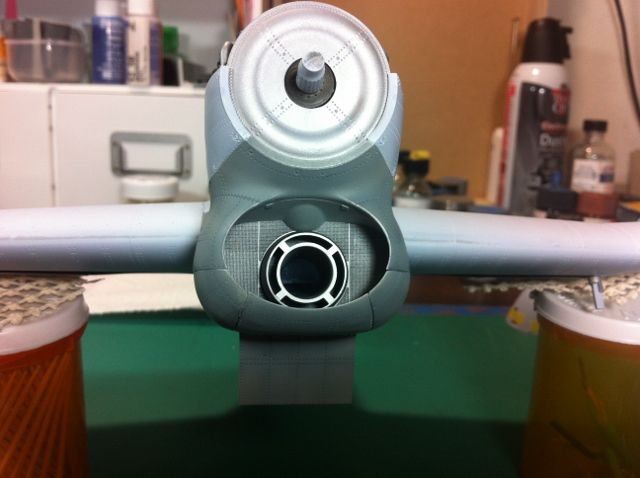 A lot of sanding to smooth some edge alignment. The spinner fits flush with the cobbled together front end panels. Hopefully, a fresh coat of paint will improve the look of the panel alignment. Now it's on to filling minor seam lines in the fuselage joins and more work on the wing leading edges. Thanks for looking in. Rick |
|
|
|
Post by richardcraig-Email Not Valid on Dec 1, 2014 16:08:49 GMT -5
whoa!! Man that looks like a lot of work .. I'm glad I'm an armor guy .. Great work and keep up the awesome job..
Rick
|
|