|
|
Post by wbill76 on Dec 1, 2014 17:53:33 GMT -5
Hard work is paying off on this one Rick despite the fight it's giving you along the way. Keep at it buddy!  |
|
Marcel du Long
Full Member
  
Member since: August 2013
Posts: 331
Aug 22, 2013 13:25:03 GMT -5
Aug 22, 2013 13:25:03 GMT -5
|
Post by Marcel du Long on Dec 1, 2014 17:59:54 GMT -5
What an unbelievable kit this is.
Nice to see someone build this one here.
Sweet SBS & thnx for sharing!
Marcel
|
|
|
|
Post by Leon on Dec 1, 2014 18:00:53 GMT -5
Rick! your doing a fantastic job despite the fit issues.Looking really good so far.   |
|
|
|
Post by wing_nut on Dec 1, 2014 23:25:32 GMT -5
Really looking great Rick.
|
|
4bogreen
Full Member
  
Member since: January 2014
On the bench; Yak-1B, T-30, T-34 model 1940
Posts: 568 
|
Post by 4bogreen on Dec 2, 2014 4:23:51 GMT -5
Amazing build Rick!
|
|
|
|
Post by dupes on Dec 2, 2014 12:54:05 GMT -5
I'm surprised at the fit (or lack thereof!) around the intake section there. What up, Airfix?
|
|
Rick
Full Member
  
Member since: March 2013
what to build, what to build . . . Ok THAT one!
Posts: 854 
|
Post by Rick on Dec 3, 2014 13:36:24 GMT -5
Thanks guys for your comments. They give encouragement to keep pushing on.
Dupes, I can't say for sure the fit issues all are on Airfix. Engineering is so precise on this bird that proper alignment and fully seated glue points are critical in the wing, engine to firewall, and the air filter. Some plumbing pieces have to be removed for panel on builds. These are called out in the instructions. I was planning to enclose the port side and open the starboard. The instructions show several variations of which my choice is not one of. In my build, I was not sure what would be visible or not so I built up everything and planned to remove parts once I determined the visibility and interference of said parts. Then I changed my plan and enclosed the starboard side panels over the air filter.
So, all that being said, some of the fit issues may be of my own hand.
I would also say I wish Airfix provided optional parts for the side and lower cover. This would have allowed choices in how to finish the front end. 6 separate panels is cool but a real pain for those wanting to enclose. I wonder how well the real thing went together with all those odd shaped panels ...
Rick
Oh, I do believe the four engine mounts on the bottom frame are about .5 mm to far forward which led to the poor fit on the front bulkhead that backs the spinner
|
|
|
|
Post by dupes on Dec 3, 2014 13:39:47 GMT -5
SIX separate panels? With no option to enclose without putting those six together? Odd choice. I was hoping for a one-piece front end!
|
|
Rick
Full Member
  
Member since: March 2013
what to build, what to build . . . Ok THAT one!
Posts: 854 
|
Post by Rick on Dec 3, 2014 13:49:18 GMT -5
Yeah Dupes, that would have certainly simplified the nose construction. Not sure a one piece could fit around Tiffie's curves. I think it could have been pulled off with the lower five and a separate one above the filter. Any aftermarket folks listening out there?
Rick
|
|
|
|
Post by mrt51 on Dec 4, 2014 10:06:09 GMT -5
Outstanding!
Terry
|
|
Rick
Full Member
  
Member since: March 2013
what to build, what to build . . . Ok THAT one!
Posts: 854 
|
Post by Rick on Jan 6, 2015 23:42:32 GMT -5
Thanks all for looking in. Sorry it's been some time since an update. I haven't backed off this build. Computer issues have prevented me from posting pics. I hope to get those resolved sometime soon. Till then I'm limited by my iPhone. Just a quick progress report and I'll catch up with Pics soon as possible.
The Tiffie is mostly built. Lacking finished undercarriage until invasion stripes are painted. Waiting on Hannants to deliver replacement metal rockets and canopy masks. A few other details are all that's left. Paint has flowed. Gray lower and upper surfaces as well as About 90% of the green. Rest will finish this week. Invasion stripes follow then Decals and weathering starts.
Short update with no pics. Will try to get them on site ASAP. Hope all had a safe and happy New Years.
Rick
|
|
|
|
Post by Leon on Jan 7, 2015 3:45:23 GMT -5
Sounds like your making great progress Rick!  Looking forward to seeing the pics when you can get them up.  |
|
Rick
Full Member
  
Member since: March 2013
what to build, what to build . . . Ok THAT one!
Posts: 854 
|
Post by Rick on Jan 18, 2015 20:25:22 GMT -5
Jan 18 Update - Paint! Finally hope to have my PC issues resolved so I'll start bringing up to date with the Typhoon's progress. Starts out with getting the fuselage and flight surfaces all attached. Things got much easier once the nose fit issues were resolved. 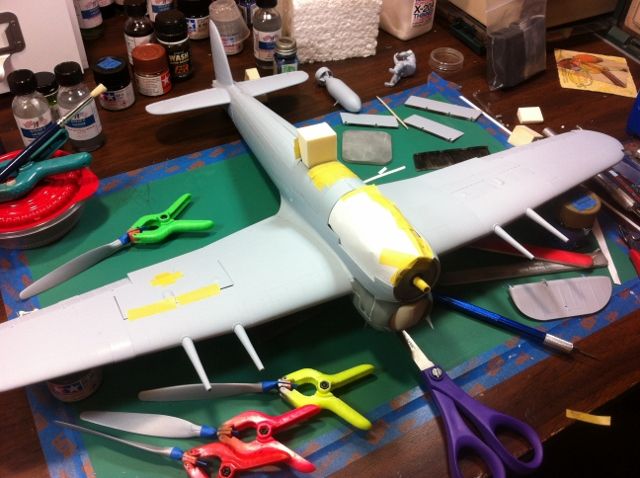 Starts off with Pre-shading the various panel lines top and bottom: 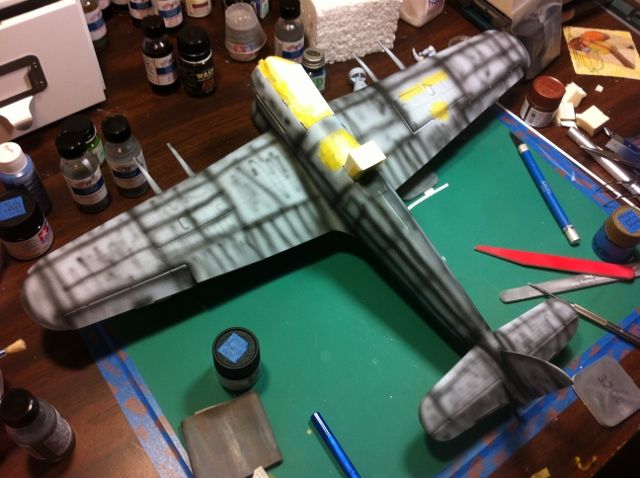 Paint starts flowing with the yellow leading edge recognition bands. 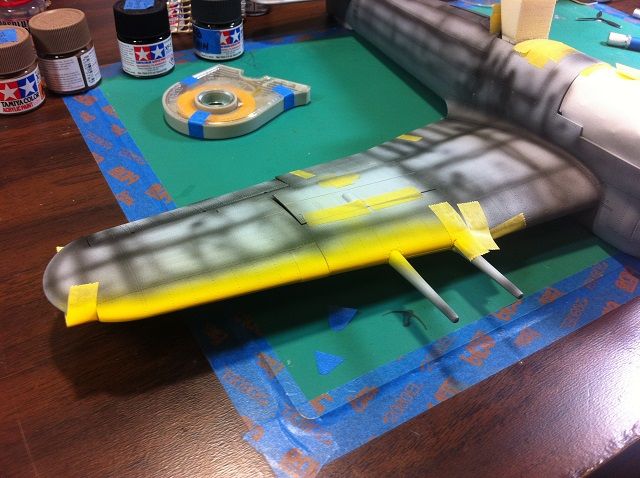 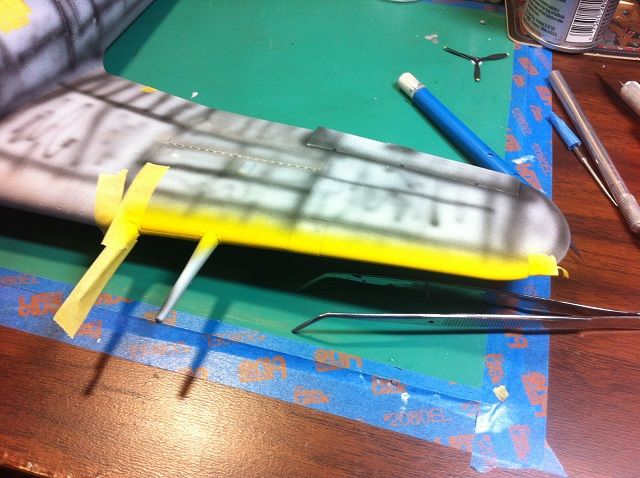 Paints used are Tamiya thinned with Tamiya lacquer thinner. To me it seems the finish is much smoother than the regular Tamiya thinner. The belly gets several coats of Medium Sea Grey. The area with very thin coverage was left thin so the invasion striping would benefit from the pre-shading. Changed my mind later and filled it in. 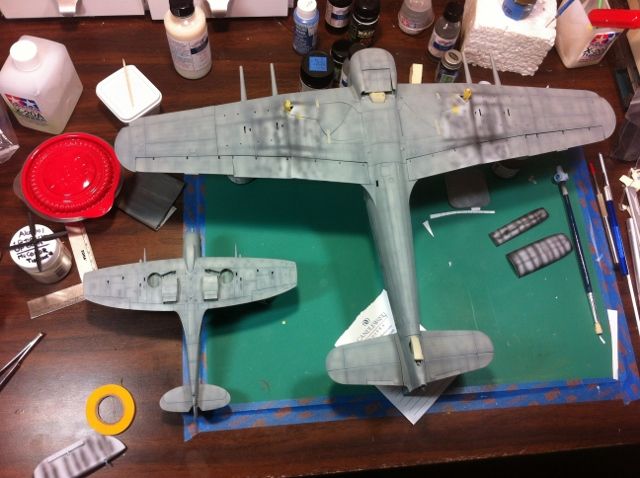 I thinned to much paint so I pulled out my 1/48 Hasegawa Spit IXe and used up the remaining paint. Gives a good size comparison as to the size of the Tiffie. After curing, time to go with some some Dark Ocean Grey upper surface base coat. 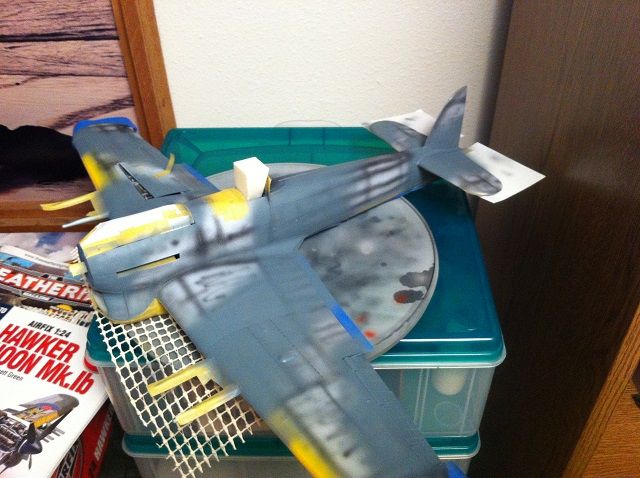 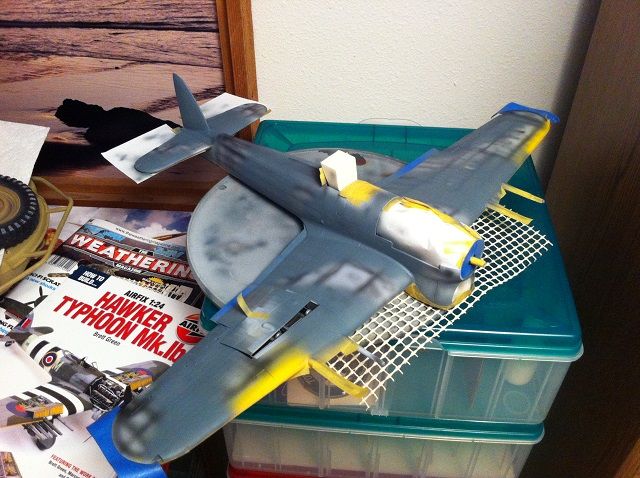 Then comes masking for the camo and RAF Dark Green. The line drawings were enlarged to 360% and printed on card stock. Cut out and using generic poster tac from Hobby Lobby rolled into thin strips, the masks were positioned in the normal manner. Mask on: 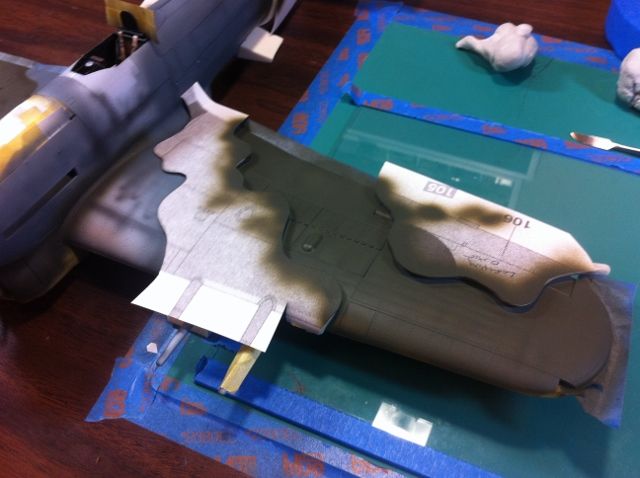 Mask off: 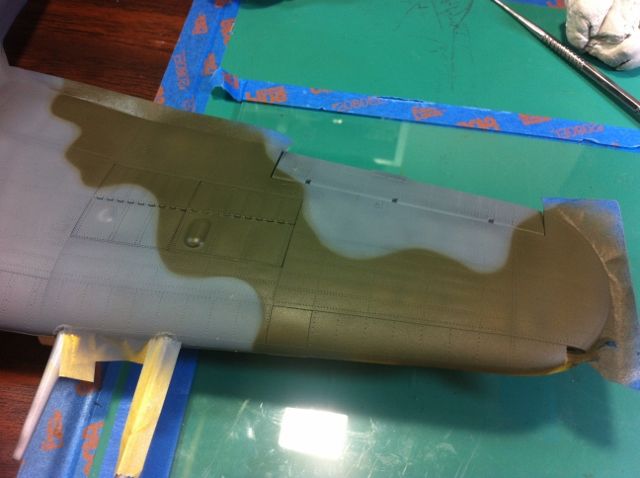 Mask on: 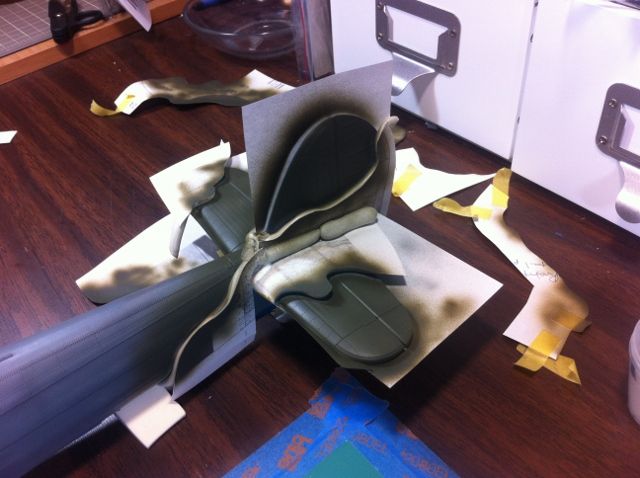 Mask off: 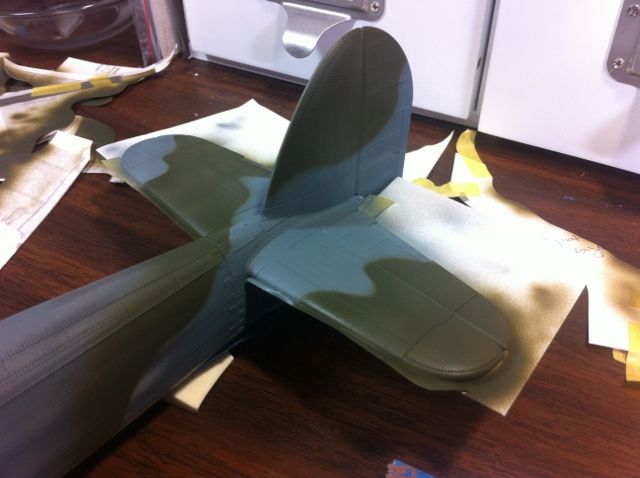 And so on until the camo is all in place: 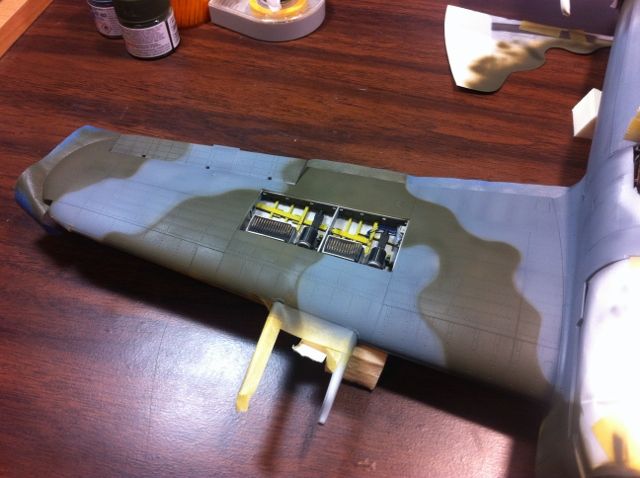 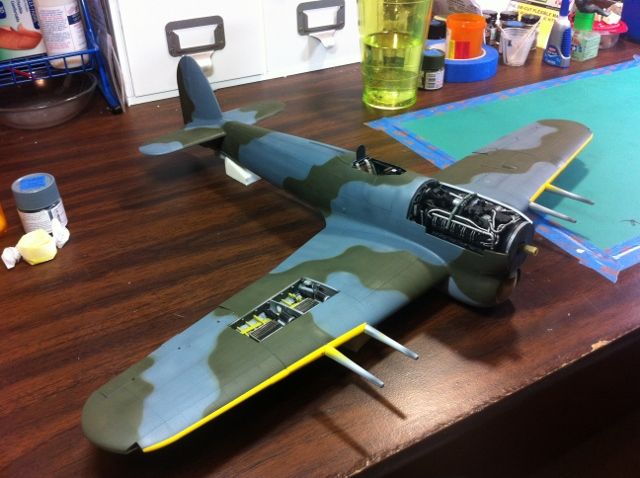 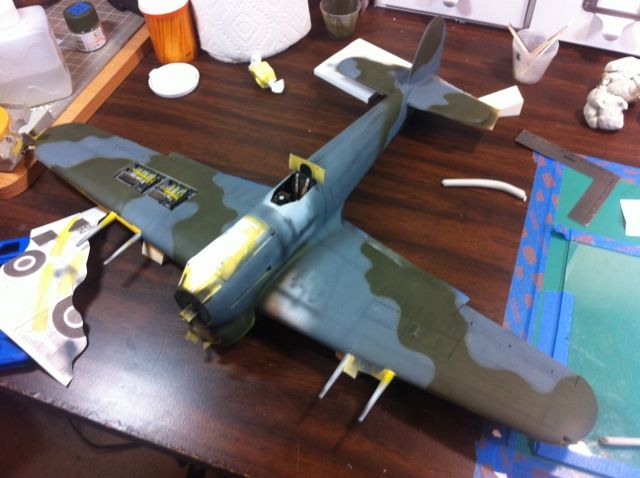 More to come. |
|
|
|
Post by Leon on Jan 18, 2015 20:49:56 GMT -5
WOW!!!! Nice work on the base coat and camo Rick.   |
|
Rick
Full Member
  
Member since: March 2013
what to build, what to build . . . Ok THAT one!
Posts: 854 
|
Post by Rick on Jan 18, 2015 20:59:07 GMT -5
Jan 18 Update 2 - Stripes Waited a couple days for the base and camo to cure then moved on to the D-Day recognition stripes. I wanted to portray the invasion stripes in a manner that accurately re-created the various methods the actual stripes were applied. The reality was the stripes were added very hastily the day and night prior to the invasion. Ground crews applied the paint in the best way possible, in many cases using rags, mops, and brushes. Sprayed stripes were a rarity. The normal method many modelers use is to add tape and paint to get nice straight even lines. This works great for small scale, but in 1/24 scale, those pretty straight edges would, in my opinion, look very inaccurate. I wanted to avoid brushing the stripes as I am sure it would have been a disaster. The method I settled on involved placing Tamiya tape on a piece of glass and tearing the tape in half using a straight edge to guide the tear. The torn edge with the frayed edge gave the softness I was looking for. When weathering dirties up the belly, I am hoping this will add to the worn and well used look I am hoping to achieve. 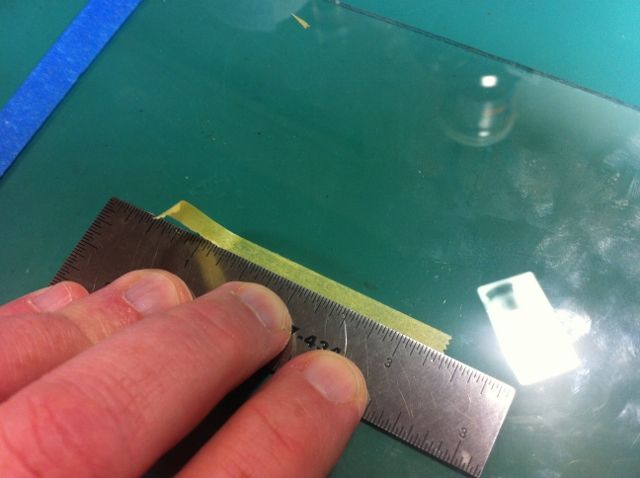 With the stripes measured out at 19mm each, the masking is in place followed by White: 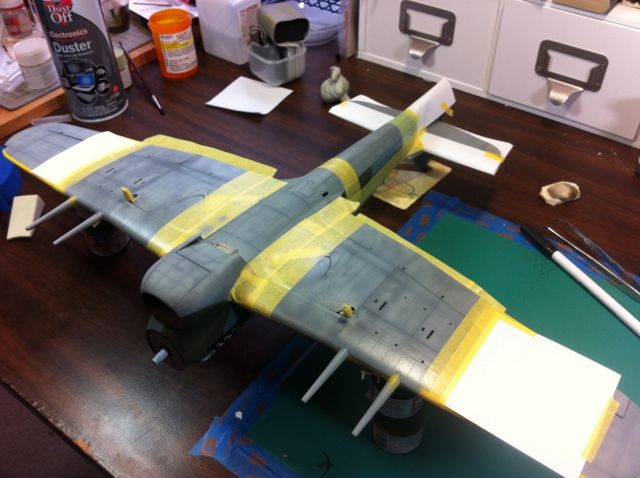 Followed by Nato Black to help give a bit more faded appearance: 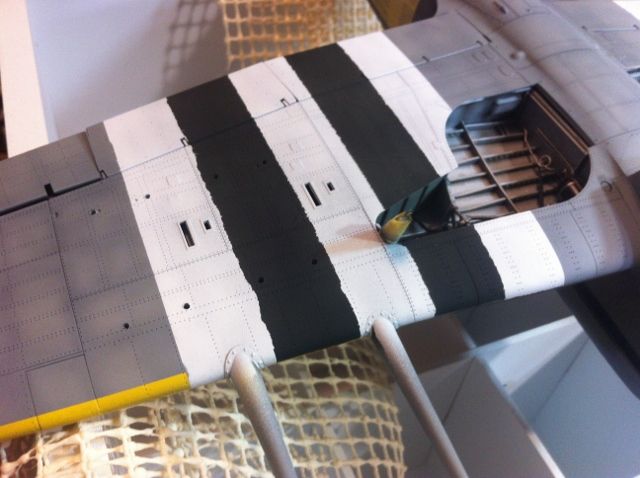 Masks off: 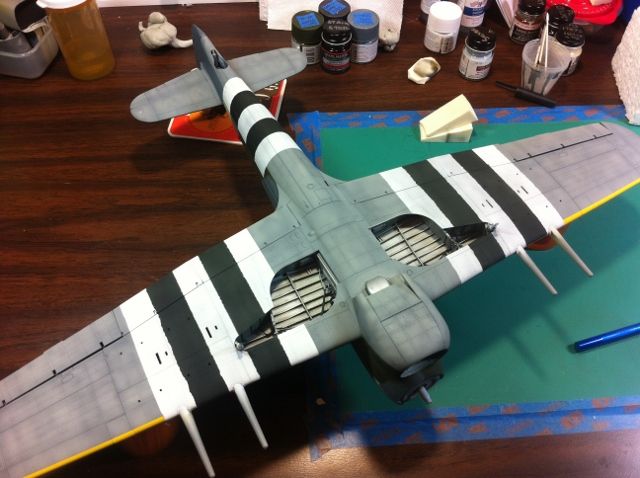 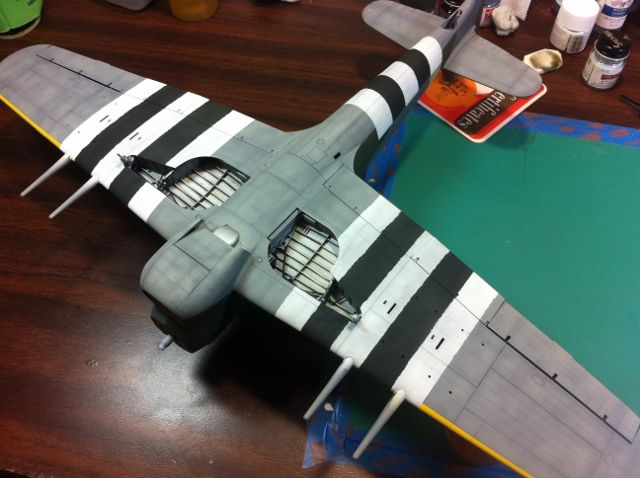 Finally, all the tape comes off and Tiffie has new look: 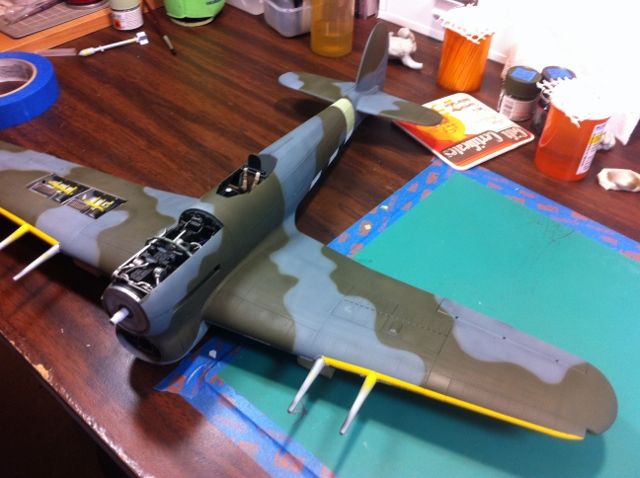 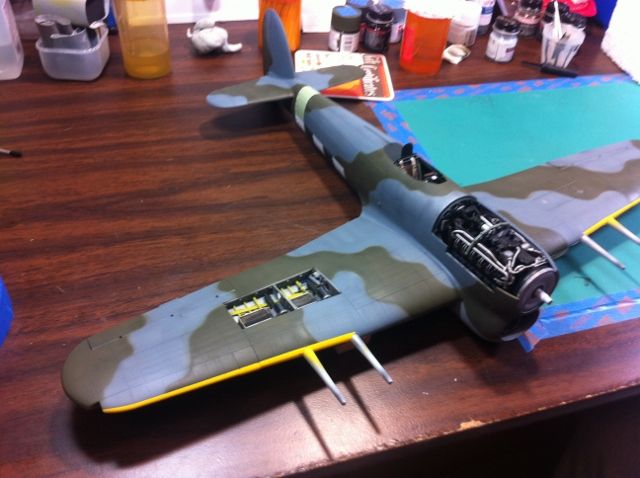 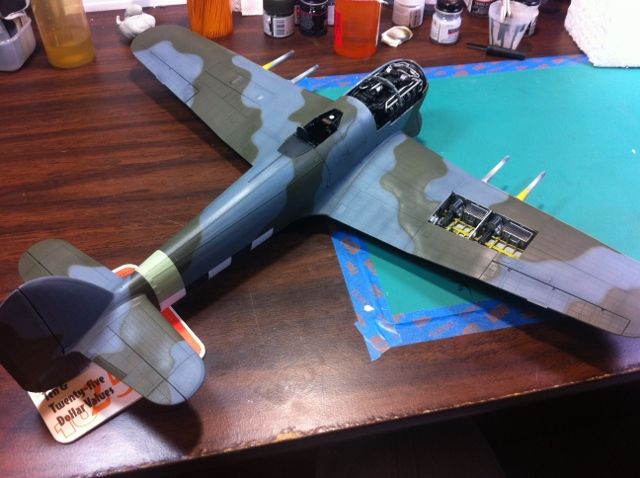 My plan all along was to include chipping along the leading edge using Mig's chipping fluid. I scrubbed and scrubbed and couldn't get hardly anything to come off. I'm wondering if using the Tamiya lacquer thinner may have had something to do with it. Anyone, with experience with this, please jump in if you like. Plan be will be chipping the old fashioned way adding them later in the process. Touch ups, over sprays, and a view more parts have been touched as well. Most of the construction is complete, the rest primarily being the completion of the undercarriage and underwing stores. Appreciate those looking in. Hopefully, my updates will be more timely as I move into the markings and weathering phase. The flight line is looking much closer! Rick |
|
Rick
Full Member
  
Member since: March 2013
what to build, what to build . . . Ok THAT one!
Posts: 854 
|
Post by Rick on Jan 18, 2015 21:00:35 GMT -5
Thanks Leon. You slide that one in while I had to take a break to water the doggies.  |
|
|
|
Post by deafpanzer on Jan 18, 2015 21:05:04 GMT -5
Lovely work on the D-Day invasion stripes!!!
|
|
|
|
Post by TRM on Jan 18, 2015 22:53:47 GMT -5
One hell of a paint job Rick!! Great work on the camo and digging the accurate painting on the stripes...top notch!!
|
|
|
|
Post by wbill76 on Jan 19, 2015 18:20:14 GMT -5
Looking sharp with the paint on Rick, very nice!
|
|
|
|
Post by wing_nut on Jan 19, 2015 19:20:25 GMT -5
Yeah Baby that's what I'm talkin' about SCHWING!
|
|
|
|
Post by Leon on Jan 19, 2015 19:34:33 GMT -5
Rick! all of the above.Fantastic work on the stripes.
|
|
|
|
Post by JimD on Jan 20, 2015 1:22:27 GMT -5
Freaking lovely. I especially like the guts it took to paint the stripes the way you did too. Picture evidence all over the place shows they were haphazard a lot of times yet I've never seen anyone have the guts to do it. Kudos.
About the chipping fluid: I had a very similar experience with the AK stuff and I'm almost positive lacqure thinner was the culprit. I used the Gunze self leveling stuff myself. But yeah...I think that's it.
|
|
sturmbird
Full Member
  
Member since: June 2012
Posts: 1,406
Jun 21, 2012 13:51:45 GMT -5
Jun 21, 2012 13:51:45 GMT -5
|
Post by sturmbird on Jan 21, 2015 17:19:33 GMT -5
first of all, I never realized how big it could be. Like what I see, but also a lot hard work to get there. Looks great to my eyes!
gary
|
|
Rick
Full Member
  
Member since: March 2013
what to build, what to build . . . Ok THAT one!
Posts: 854 
|
Post by Rick on Jan 22, 2015 6:13:18 GMT -5
Many thanks guys. Appreciate the encouragement. Jimmy, I debated for quite a while about the stripes so I do appreciate your comments. Gary, yes this beast is indeed large. Nothing dainty about it. Can't tell how many times I've whacked the wing tips on the table, light, forehead when turning it over or around. Still a bit of touch up on some overspray to do but overall I think I'm fairly happy. I really like using the Tamiya lacquer thinner better than the X20 thinner. (Except for the planned chipping. Thanks Jimmy for confirming) Paint laid down so much smoother. I've learned I need to get the masks still closer to the surface to cut down overspray. Still had much less than with big Mossie but none the less, still a bit aggravating.
I've since added some chipping and next up will be decals. Be back when that bridge has been crossed. Again, many thanks.
Rick
|
|
|
|
Post by JimD on Jan 22, 2015 9:40:45 GMT -5
Nothing beats lacquer thinner. I agree completely. Though, I've read elsewhere that you can use Mr. Color with the chipping fluid...which itself is a lacquer paint and thus would have to be thinned with lacquer. So I really don't know...maybe the other variable is how long its left on. On my tests I chipped immediately. For the final layer it sat a couple days.
|
|
Rick
Full Member
  
Member since: March 2013
what to build, what to build . . . Ok THAT one!
Posts: 854 
|
Post by Rick on Feb 28, 2015 18:49:28 GMT -5
Feb 28,2015 - Decals Sorry so long in getting progress updated but here goes: A quick paint update: I decided to skip the decal and paint the no slip walkway on the wings. I used the decal as a guide: 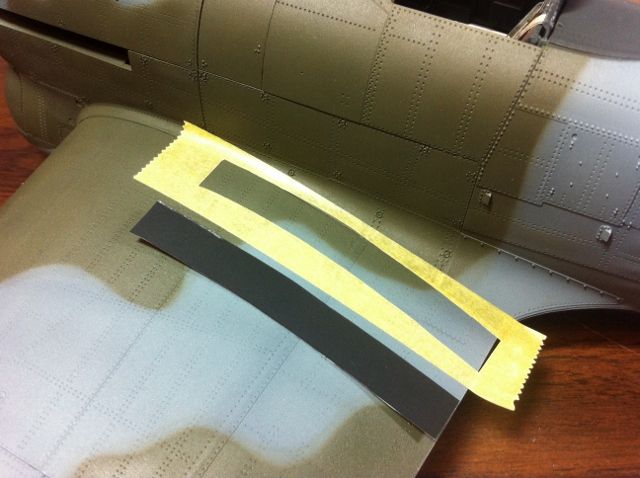 Before painting, I randomly applied micro mask to help weather the walkway. Would have preferred hairspray but found that painting with Tamiya lacquer thinner hairspray does not work well. 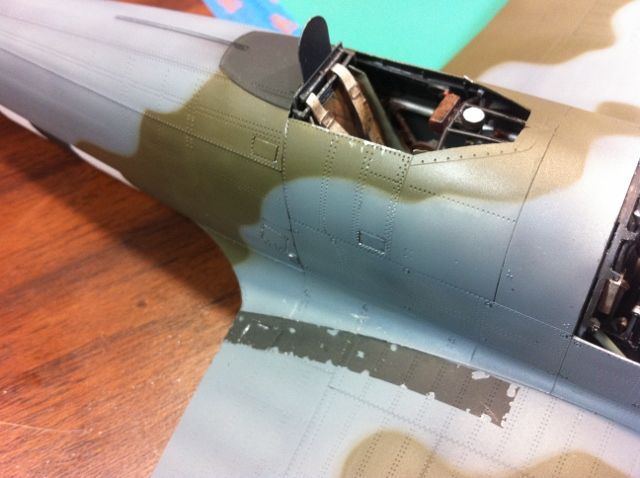 Later I applied chipping, dirt, washes to improve the wear. Decals are next step. Word to the wise, if you can paint markings - DO IT! Had multiple problems with tearing. One reason was the raised rivets on the fuselage. I ended up sanding them down about half height and this helped. I ended up tearing four of the decals but managed to salvage all but one roundel. Luckily, there were extras on the decal sheet. 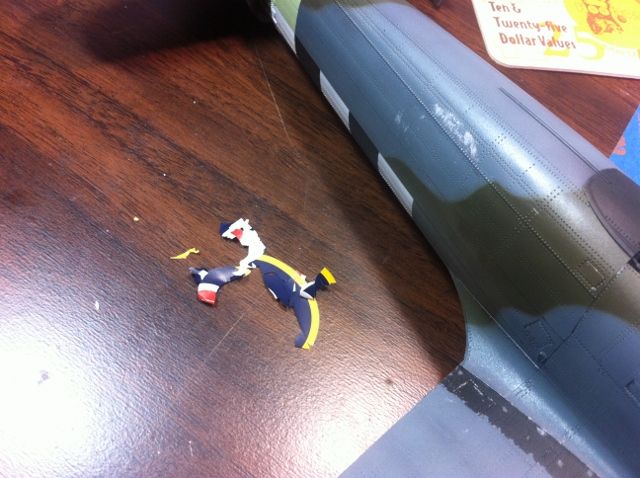 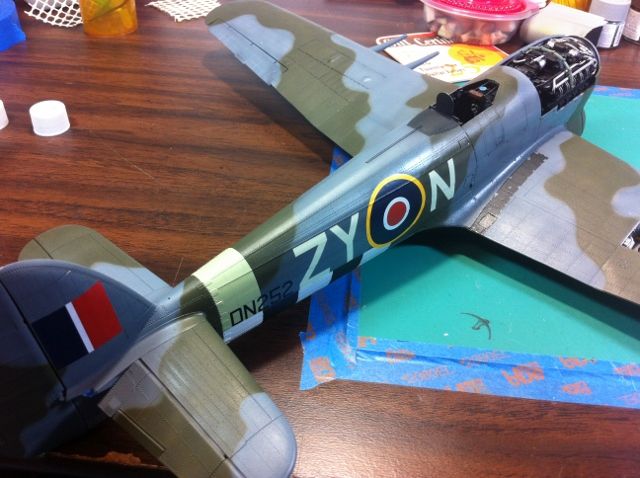 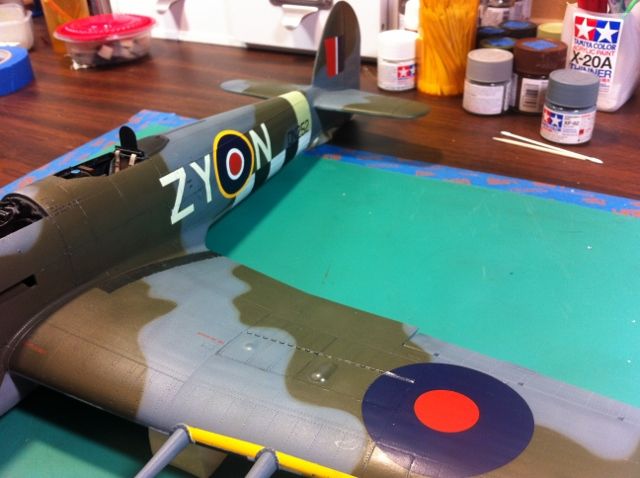 I had to cut the roundel on the starboard wing to fit the open cannon bay. I used the closed panel as a guide to make the cuts. 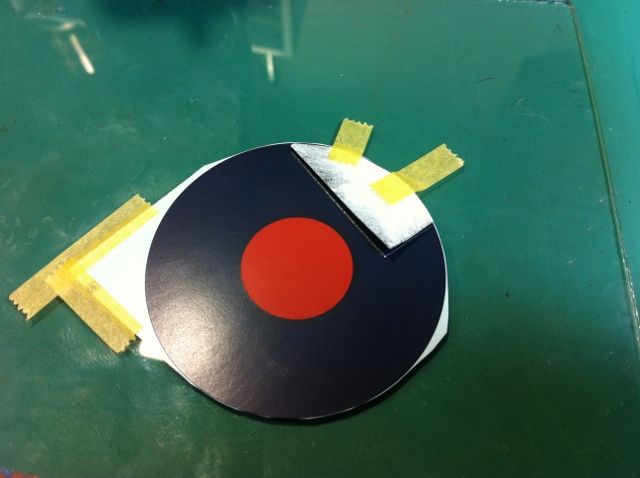 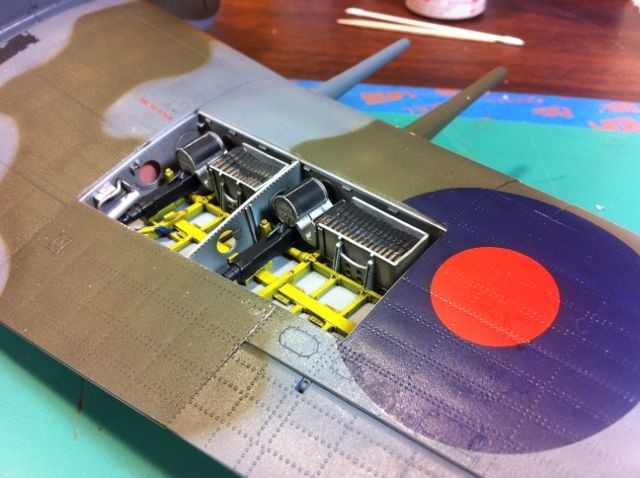 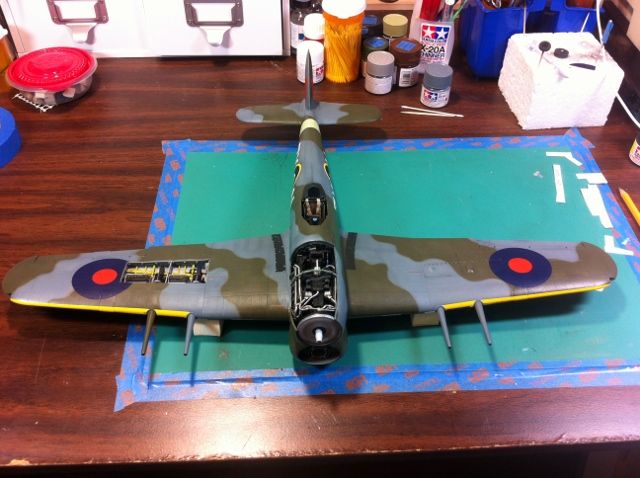 So, that's it for the moment. Next steps are weathering. Be back with that update shortly. Rick |
|
|
|
Post by dupes on Feb 28, 2015 19:12:17 GMT -5
Whoaaaaah...looking good Rick!
|
|
|
|
Post by Leon on Feb 28, 2015 19:58:25 GMT -5
WOW!!!!! Really doing an awesome job Rick,Bring on the weathering.   |
|
Rick
Full Member
  
Member since: March 2013
what to build, what to build . . . Ok THAT one!
Posts: 854 
|
Post by Rick on Feb 28, 2015 21:31:24 GMT -5
Feb 28, 2015: 2nd Update - Dirty Bird and Rockets Catching up some more with updates. With paint and decals sealed under a protective coat of gloss, it's time to start making this beast look like a real warbird. The intent is to place this aircraft on a base with turf. The aircraft is from 247 squadron and following D-Day, it operated from forward bases in France and Belgium. Flying from grass fields and within miles of the front meant little in the way of TLC. This will probably be the most weathered aircraft I've done so far so I'm a bit nervous of potentially really messing this one up big time. First weathering consists of chips and scratches. This is plan B already. I was planning to using hairspray and scrub it strategically. That plan failed since I used Tamiya lacquer instead of X22 to thin the paint for the AB. No scrubbing could get through the paint. Plan B involved a tedious time with aluminum paint and a very fine brush. Second weathering comes from dot oil washes. For these, I apply in the normal manner then work in the oils with a torn chunk of cosmetic sponge followed by a gentle brushing in the direction of airflow with a soft flat brush to blend and streak. Once this had cured several days and again protected under gloss, I came back with a panel line wash using AK dark brown. A few areas, I followed up with black for emphasis. Next the occasional streaking was applied and pulled in direction of airflow. Here, we are still nice and clean with just pre-shading to break up the base color.  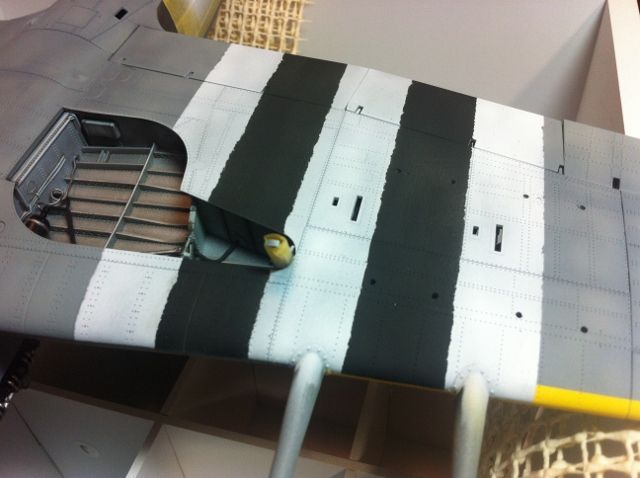 First layers of grunge: 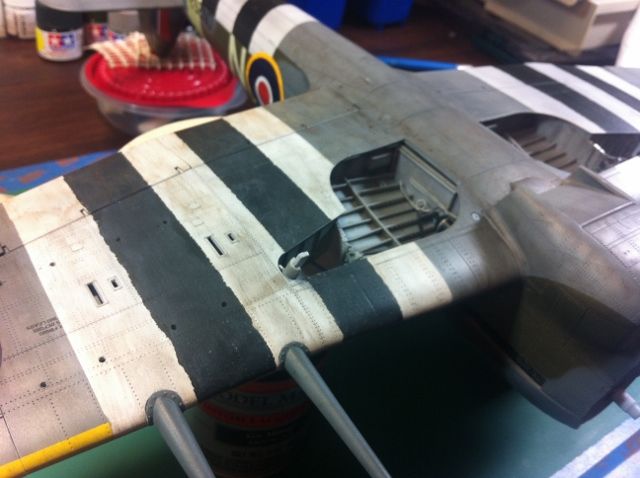 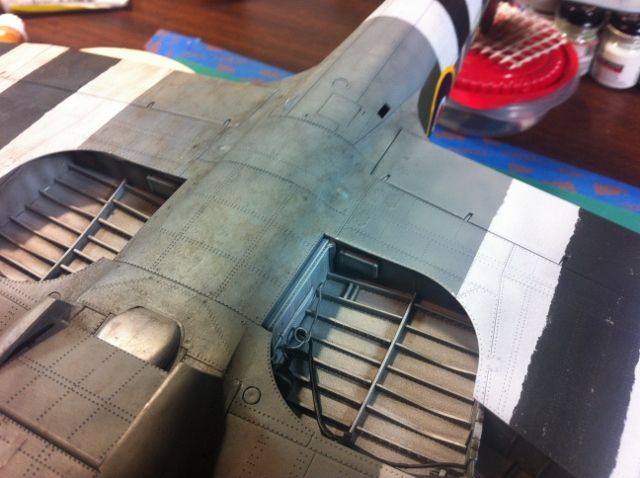 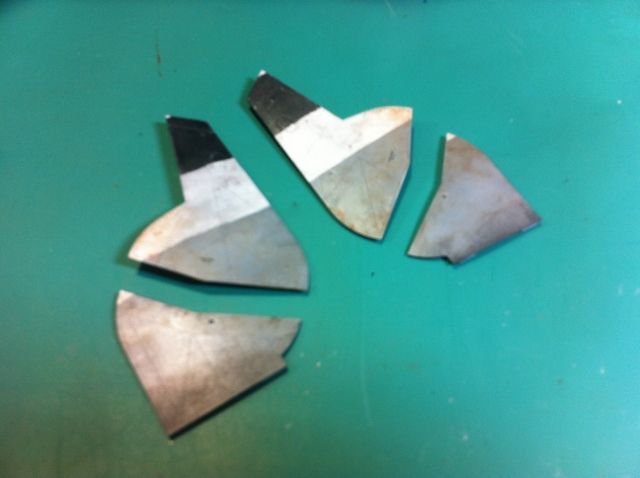 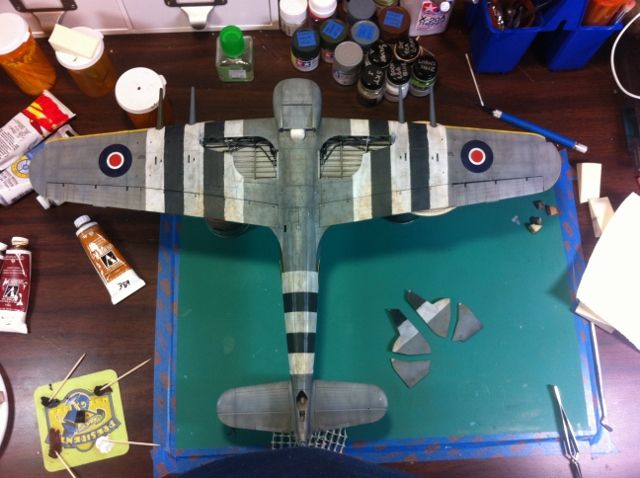 Hmmm...Somewhere I neglected to upload some of the underside and topside pics. I'll have to go back to find those and edit. In the meantime . . . Rockets! This is what the Typhoon was meant for. First of all, not the 2 piece plastic fantasy pieces that came with the kit. And not the Profimodeller set that took me 2 months to get only to find that they lack the saddles to mount them to the rails. We're talking the Master-Model completely awesome replacements. 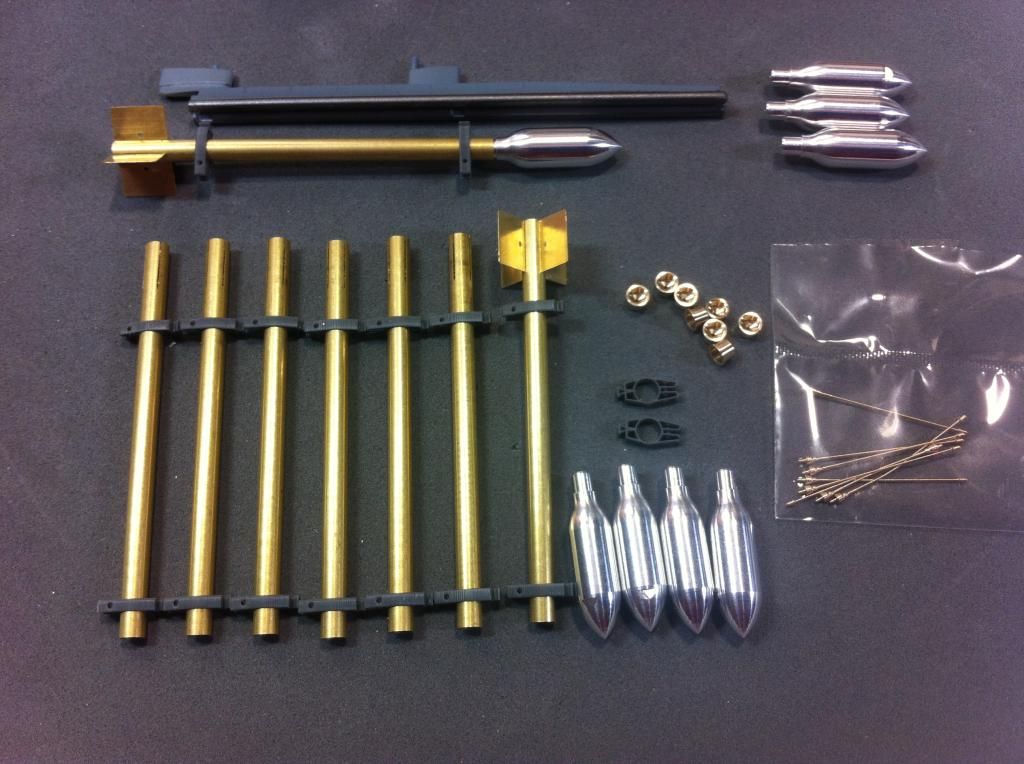 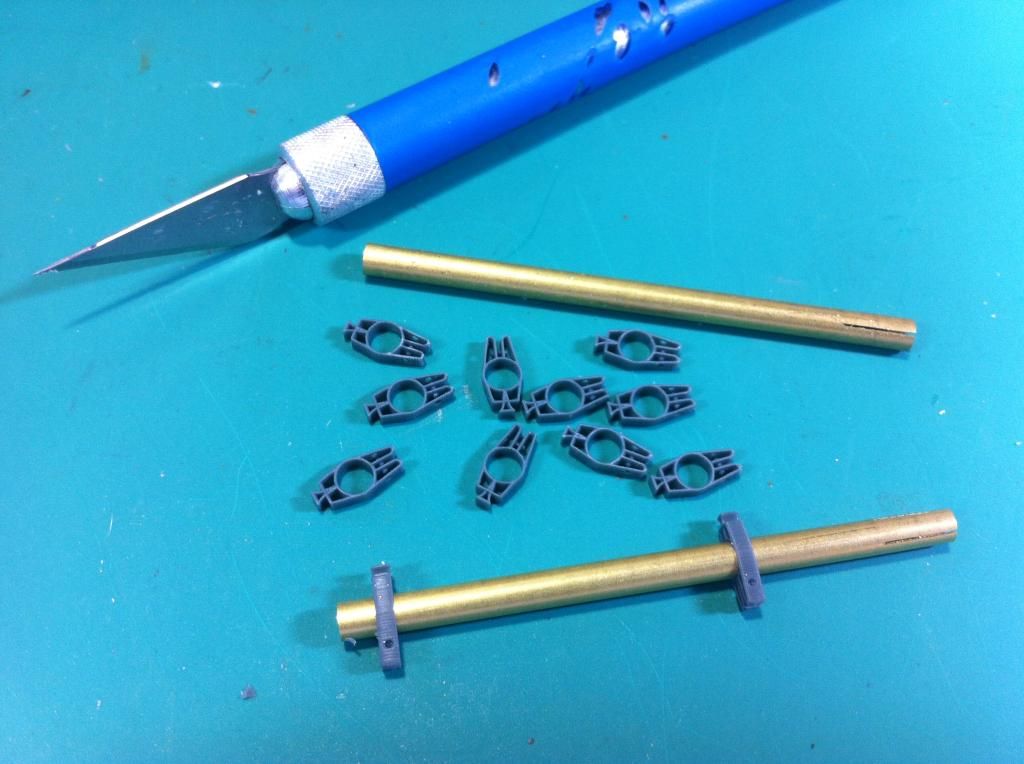 (Sorry, crappy photo but nice saddles to mount to the rails) A little paint work: 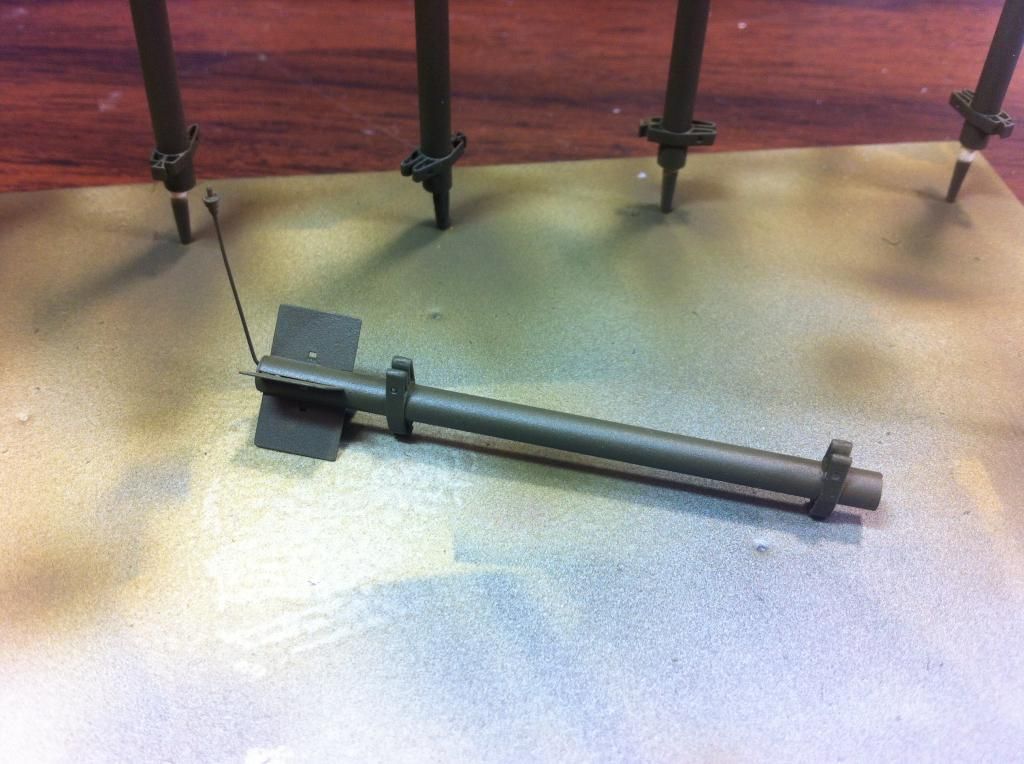 A little more paintwork and 8 hours just to get the incredibly fragile decals applied. When compared to the kit supplied rockets, there is no comparison. 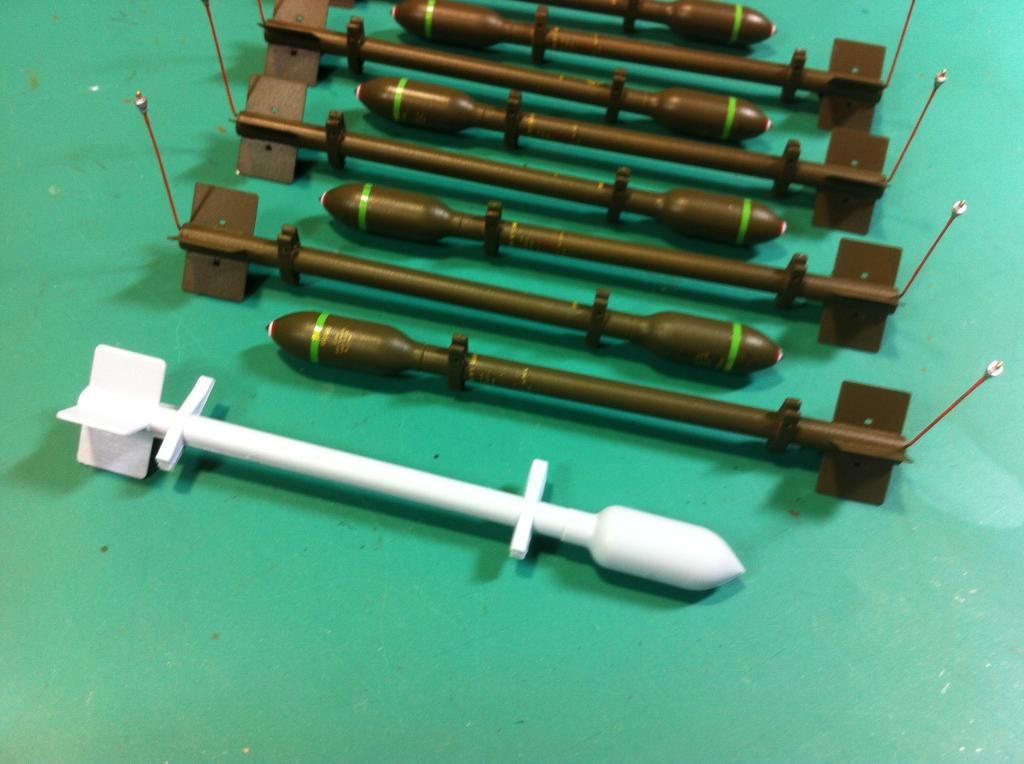 Note the pigtails pointing skyward. These actually will hang down when mounted. The electrical contacts were not known for their reliability and occasionally fire off across the airfields. Common practice became to leave the plugs until after taxiing to the take off point. 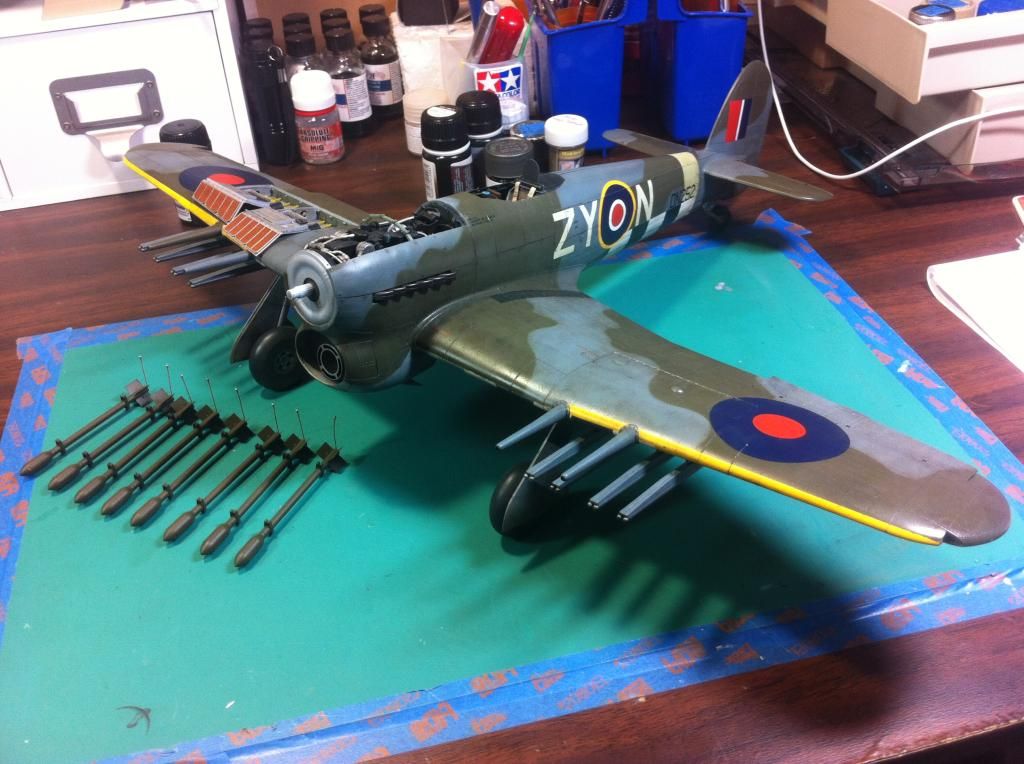 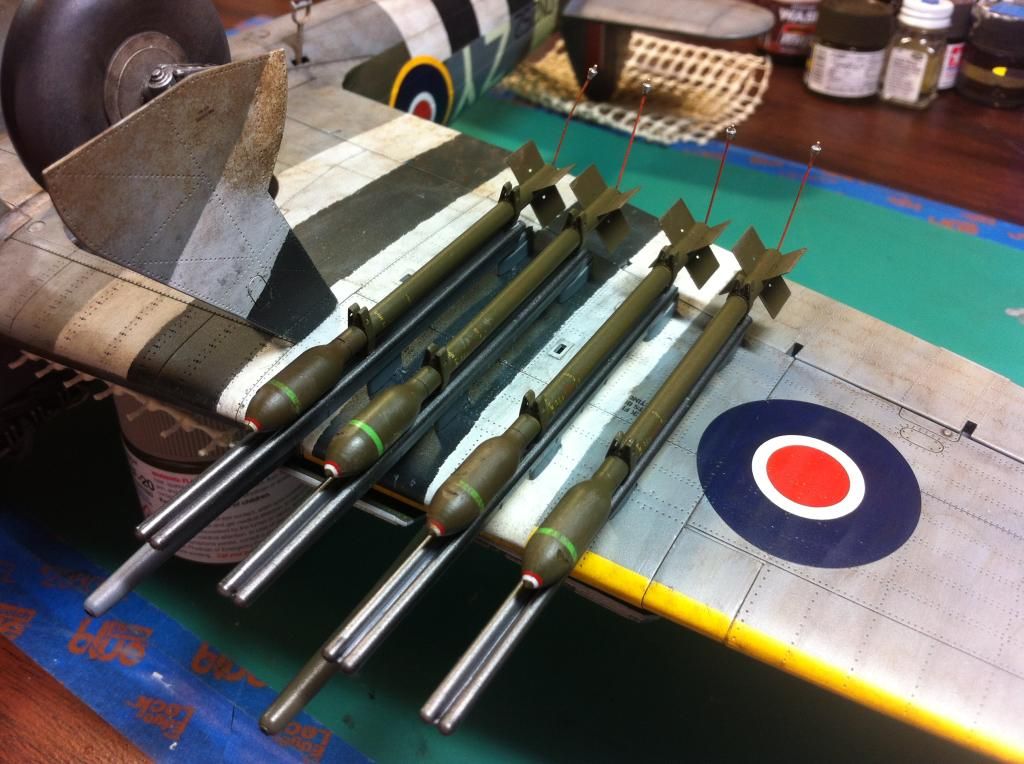 A quick weathering of mud and dirt was applied to the rockets and attached to the rails. Rockets were assembled on the field and it was quite common in pictures to see them all kinds of dirty. 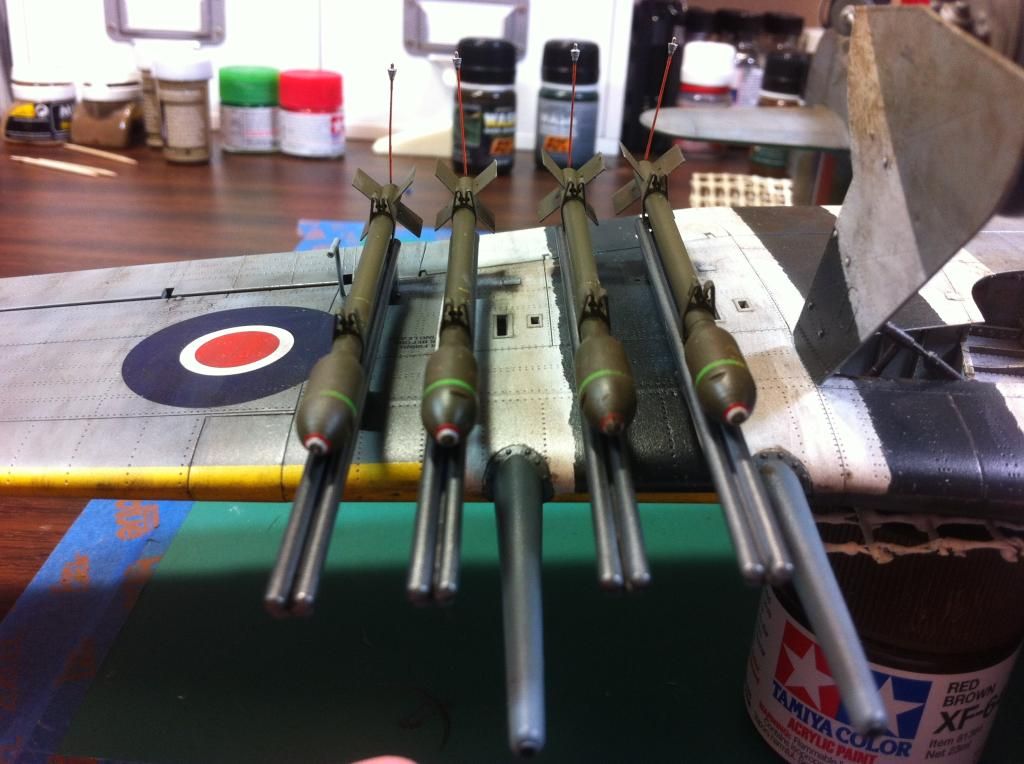 And Finally, Tiffie is standing on her own with a full load of fly away boom booms. Almost ready for the flight line. 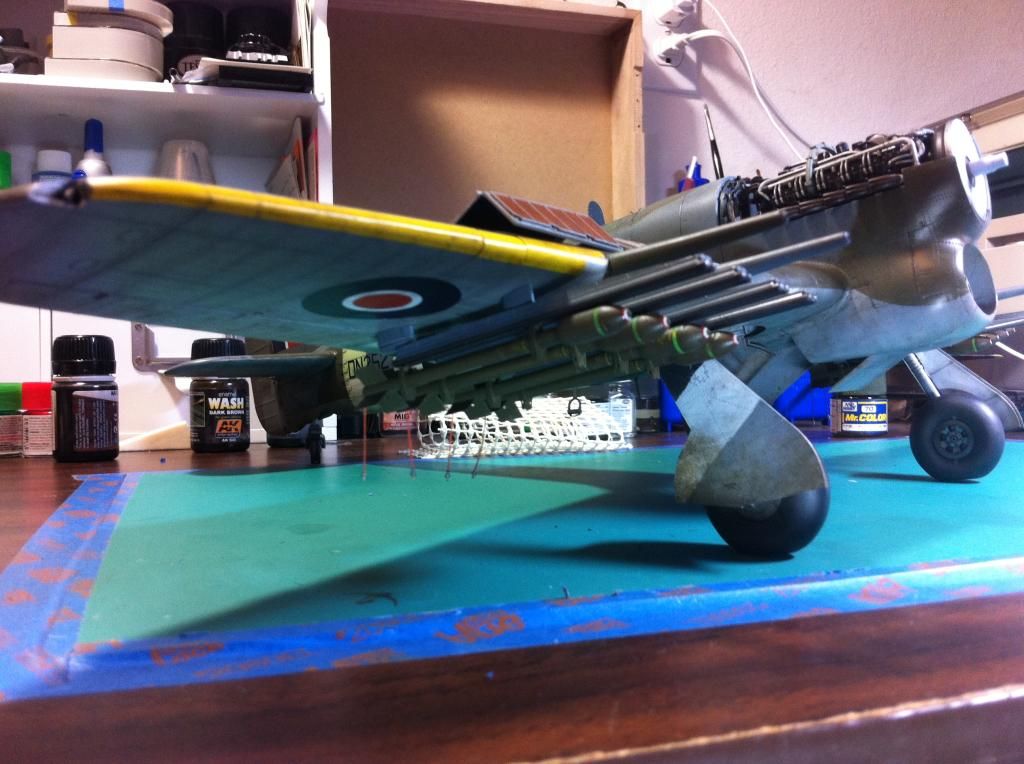 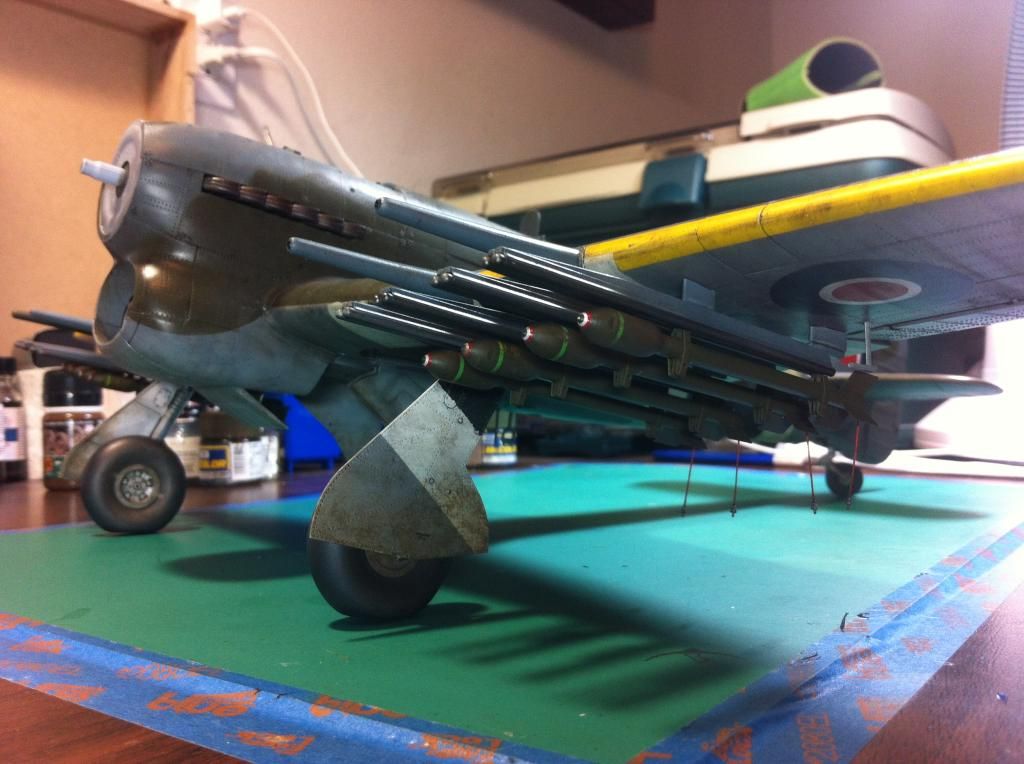 That brings this one very close to completion. Prop, Canopy, and antenna are all that is left to add. a final weathering of stains and grunginess and then ready for final portraits. Next update will happen as soon as I can get her portraits taken. Appreciate the patience and everyone that looked in along this journey that started way back on Sept 1 of last year. Next stop - the flight line. Rick |
|
|
|
Post by Leon on Feb 28, 2015 21:39:34 GMT -5
Awesome looking rockets Rick!  They really give this bad boy an attitude.Flight line is in site now.  |
|