|
|
Post by Tojo72 on Nov 14, 2014 16:19:55 GMT -5
Really moving along quickly.That PE is very impressive but mind boggling to me.
|
|
|
|
Post by wbill76 on Nov 14, 2014 17:06:36 GMT -5
Nice clean work on the PE for those elevators Todd, impressive!
|
|
M1Carbine
Senior Member
    November '23 Showcased Model Awarded
Member since: November 2012
Posts: 1,730
Nov 16, 2012 2:49:11 GMT -5
Nov 16, 2012 2:49:11 GMT -5
|
Post by M1Carbine on Nov 14, 2014 17:29:51 GMT -5
Holy Crap! T, the PE looks freaking awesome!
Bob
|
|
|
|
Post by TRM on Nov 14, 2014 21:26:45 GMT -5
Thank you Anthony! Sometimes mind-boggling to the rest of us too!!  Thanks Bill!! I am working my way up to your clean status my friend!!  Let's hope it stays this way...LOL!! Thanks a bunch Bob! Most appreciated!!  |
|
DeafStuG
Full Member
  
Member since: May 2013
..
Posts: 1,283 
|
Post by DeafStuG on Nov 15, 2014 20:38:54 GMT -5
Great under construction.
|
|
|
|
Post by eastrock on Nov 18, 2014 10:07:07 GMT -5
Have done a nice job on the PE,buddy!!! very intricate  |
|
|
|
Post by TRM on Nov 25, 2014 21:20:17 GMT -5
Thanks Jeremy!!!  Thank you ER!!  On the fly here! Seems to be a lot of things on the move at the moment...LOL!! Nothing different there though!! Anyway, here is where thing lie: With all the tiny plastic stuff installed on the upper hull section...hangar deck to flight deck, it was time to break out some of the shiny stuff. First off the block was bending up a bunch of stuff that gets installed arounf the perimeter of the hull.   The side crane was one of these parts...I decided to go the soldering route to keep things nice and tight:   After the PE fun I needed to add a little bit of color to the inside as I am leaving the two large hanger doors open. I checked to see how much would actually be seen...not much but I still decided to add a small amount of details near the openings.....  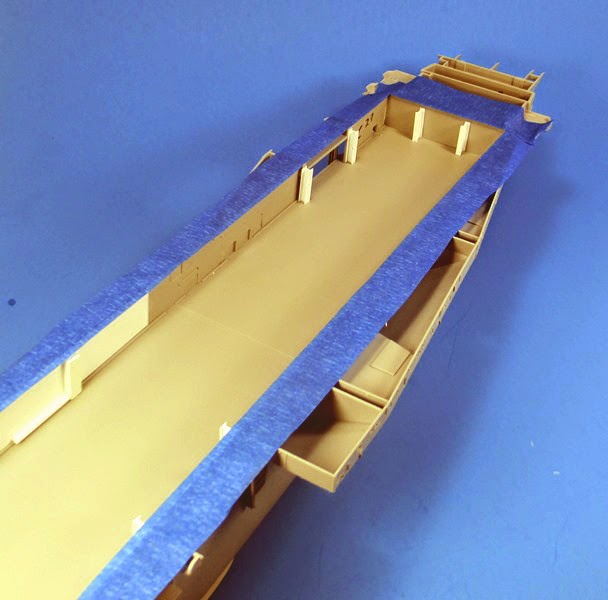 This of course is not accurate but as I said, you can't see very much in there and even less after the elevators go in. A quick priming was laid down using both Vallejo's Grey and Black.  Everything was followed up with a little white on the walls and ceiling. 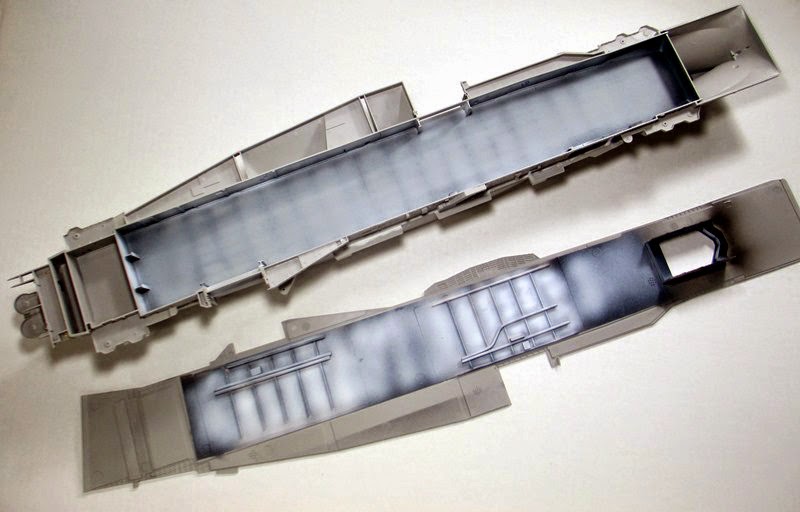  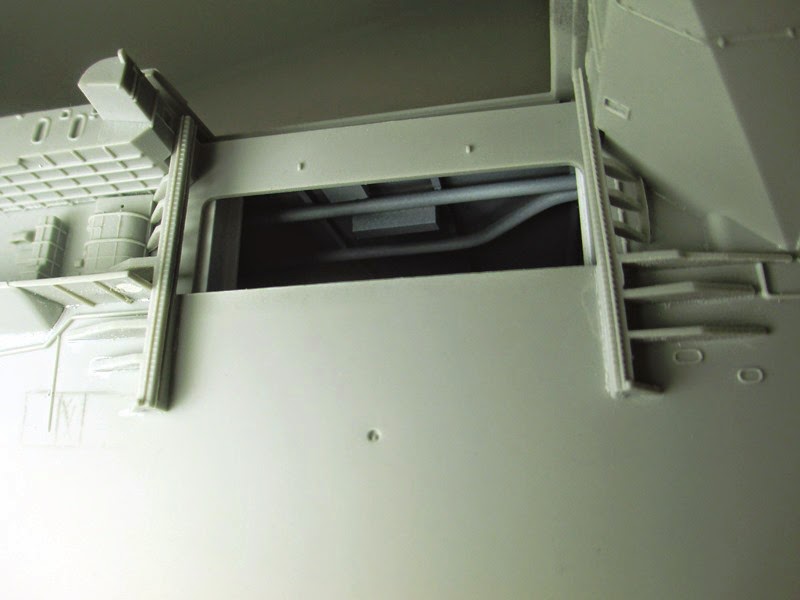 See, now imagine a large elevator sitting right in the way...LOL!! Well, it is time to glue the deck down I think so I can move forward! Once glued the pile of shiny stuff will get installed around the outer edge! As always...thanks for taking the time to drop in for a spell!! |
|
|
|
Post by eastrock on Nov 26, 2014 11:41:37 GMT -5
intricate work on the PE and awesome work on the interior, looks like I'm gonna lose to Andy lol
Cheers!!!
|
|
|
|
Post by deafpanzer on Nov 26, 2014 14:19:20 GMT -5
Beautiful PE work!!! It just gets better and better everytime...
|
|
|
|
Post by TRM on Nov 26, 2014 14:26:40 GMT -5
Thanks ER and Andy!! I plan on sticking the top down this afternoon...maybe a little bonding with the shiny stuff after that! Move this along!!  |
|
|
|
Post by Leon on Nov 26, 2014 17:53:26 GMT -5
Todd! The added detail looks great as does the PE work.  |
|
|
|
Post by dupes on Nov 26, 2014 19:29:55 GMT -5
Banging out some good sized chunks on this one!  |
|
|
|
Post by TRM on Nov 26, 2014 19:55:50 GMT -5
Thanks Leon and Dupes! Things are moving along just fine I think. The 38 GB seemed to trip me up the past 24 but should be back on track soon!!  |
|
|
|
Post by wbill76 on Nov 28, 2014 17:41:54 GMT -5
Nice work filling out that hangar deck T! That crane and the rest of the PE will look sharp as well for sure.
|
|
fhvn4d
Full Member
  
Member since: October 2012
Posts: 439
Oct 1, 2012 6:30:09 GMT -5
Oct 1, 2012 6:30:09 GMT -5
|
Post by fhvn4d on Nov 28, 2014 21:36:09 GMT -5
Making my eyes hurt just lookin at those tiny pieces!! its amazing!!!
|
|
|
|
Post by TRM on Jan 22, 2015 20:23:01 GMT -5
WOW...been a while on this one...Ooops! Sorry for missing your posts Bill & Brian!  I appreciate you taking the time to check things out way, way, way back at the end of November!!  ....  Well this is not going to be anything in the way of an earth shattering update, but it something just the same! After picking up the pices from the holidays and a few other things going on, this one makes it back to the bench. There are several detail pieces getting attached at this point; mostly catwalks and platforms but there is some PE in the mix as well.  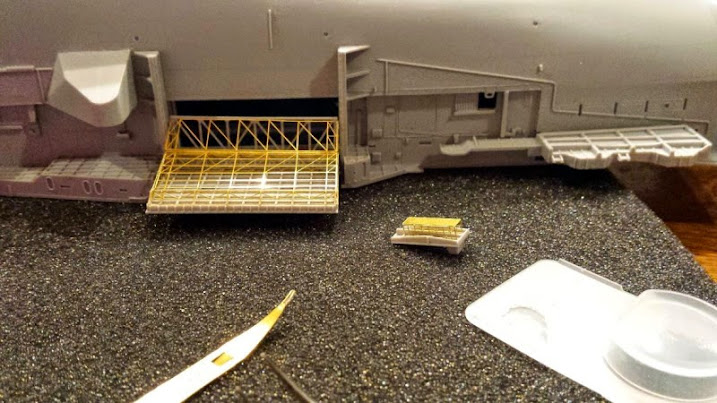 There are a few of these little fiddly parts to get installed but things start to fill in nicely. One little criticism I have about this kit is definitely the EPM's. They seem to be riddled through out the lower half of all the platforms. I think it's probably best to try and punch out a bunch of 2 and 3mm disks from 0.0010 styrene and glue them in versus filling followed by some cah-razy sanding!! But I digress... 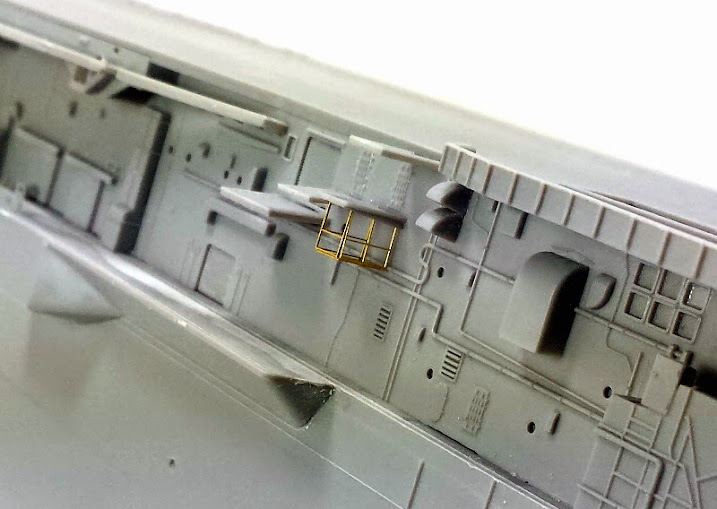 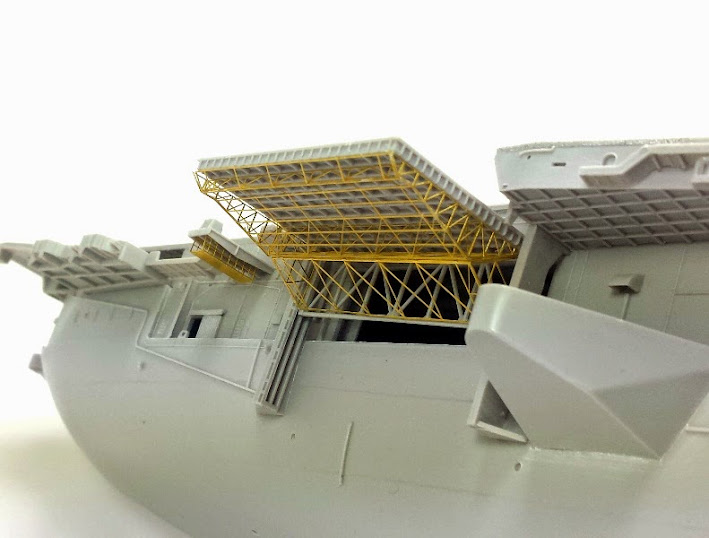 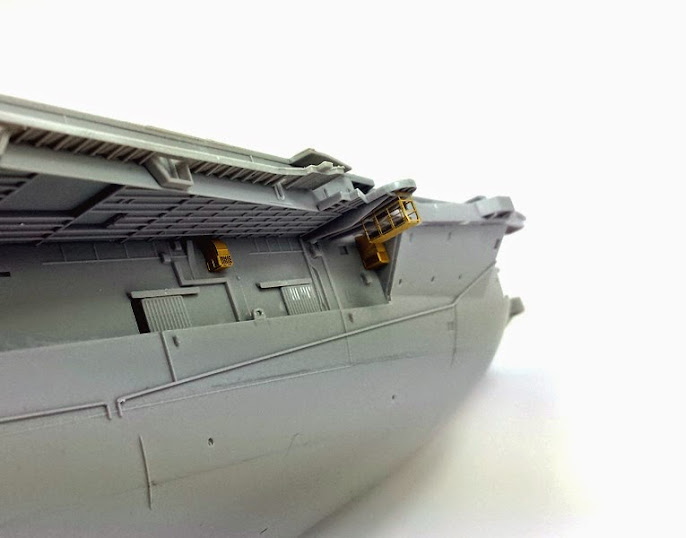 Yeah the elevator does look a little wonky in the shot above. Both elevators are designed to be able to move if you want. With the constant maneuvering of this big girl from her back to her front and back again, it's been going up and down!!  The next order of business will be a few more bits of plastic, a few dozen angle brackets out of PE to hold up all the catwalks and then I can start to rip on the Island!! As always, thanks for swing in!!  |
|
|
|
Post by Leon on Jan 22, 2015 21:22:00 GMT -5
Todd! Nice to see this back on the bench  .The elevators and catwalks look fantastic.  |
|
|
|
Post by TRM on Jan 22, 2015 22:22:31 GMT -5
Thank you Leon! It had to make its way back a some point!  The PE is decent to work with on this one, there are just a few plastic hurtles to overcome here and there!  |
|
|
|
Post by deafpanzer on Jan 23, 2015 1:35:29 GMT -5
Fantastic PE work... it will make it look great at the end for sure!
|
|
|
|
Post by Tojo72 on Jan 23, 2015 8:16:36 GMT -5
Oh man,that is looking good.
|
|
|
|
Post by eastrock on Jan 23, 2015 13:04:12 GMT -5
Got some nice PE Updates, buddy!!! your on the roll!!
|
|
M1Carbine
Senior Member
    November '23 Showcased Model Awarded
Member since: November 2012
Posts: 1,730
Nov 16, 2012 2:49:11 GMT -5
Nov 16, 2012 2:49:11 GMT -5
|
Post by M1Carbine on Jan 23, 2015 13:23:42 GMT -5
Todd - WOW! PE work is stunning buddy.
Bob
|
|
|
|
Post by wbill76 on Jan 23, 2015 15:45:15 GMT -5
Good to see you coming back around to this one Todd. Looking good! on to the island!  |
|
|
|
Post by TRM on Jan 27, 2015 22:49:58 GMT -5
|
|
|
|
Post by eastrock on Jan 27, 2015 23:07:37 GMT -5
Great were getting over little by little! Metal works, spot on! Were on the same page with the island I think I need to get going too lol
|
|
|
|
Post by TRM on Jan 27, 2015 23:12:19 GMT -5
LOL...thanks ER!! Yeah, we both are moving forward hitting the "islands"!! Wishing it was the warm islands near you my friend!!  |
|
delta
Full Member
  
Member since: January 2015
Posts: 365 
|
Post by delta on Jan 28, 2015 2:33:15 GMT -5
This is just 101 different kinds of awesome! I'm new to PE work and the precision and care necessary to form the bits at all is at my utmost limits. To manage them as cleanly as you have here is jaw dropping to me, and in the amounts you're doing it all the more so.
If I may ask a novice question, what are the "EPM's" you mentioned as a criticism? I couldn't find that abbreviation. Are they those dots on the main deck? The Essex model I'm working with has a regular "polka dot" pattern of pits on its deck and I've been wondering what those are for, I see yours has them too.
But regardless, this is amazing to watch. I can't wait to see how the tower progresses!
|
|
|
|
Post by wing_nut on Jan 28, 2015 4:46:29 GMT -5
HOLY ITSY BITSY BRASS PARTS BATMAN! Impressive work T. The external elevators area work of art. How do you like that gator glue? How's the bond?
|
|
afvfan
Senior Member
   
Member since: December 2012
Bob
Posts: 1,772
Dec 10, 2012 17:32:38 GMT -5
Dec 10, 2012 17:32:38 GMT -5
|
Post by afvfan on Jan 28, 2015 9:22:59 GMT -5
Delta, if I'm not mistaken "EPM" = ejection pin marks.
More fantastic mini metal stuff, T.
|
|
|
|
Post by TRM on Jan 28, 2015 10:03:24 GMT -5
Ari - Thank you very much my friend! Taking your time with removing the parts and handling is of course most of the battle to keep things clean...this not to say I don't have my moments as well...LOL!! Usually my biggest problem comes with knocking a piece off trying to move a model around to add more of take pictures. Bob is correct just above this post...EPM's are Ejector Pin Marks. Most likely the "polka-dot" appearance you are having on your Essex. Sadly most if not all models have them and while some kit makers at least try and put them where they will not be seen, others haven't a clue how to hide them at all.
Marc - Thank you sir! The elevators were not terribly difficult to assemble. The hardest part was getting the internal ribbing to stand up on it's own...this is where that Gator Glue helped some. It held the part in place, straighter than trying to hold the piece letting the CA go to work. The working time is excellent as you would figure, the same as traditional PVA and the parts are secured very well once dry...which is only a few minutes really. There are the two different types of glue (if you didn't know); thick and thin. Both dry clear and stron and the thin flows a bit when applied but not like thin CA.
Bob - Thank you buddy!! There is a fine line between working on one carrier in 1/350 and 3 Panthers in 1/35 at the same time. It's a good thing I like to dabble in some floaty things now and then!!! LOL!!!
|
|