|
|
Post by wbill76 on Dec 4, 2014 13:31:47 GMT -5
Thanks T! I understand you've been a little distracted of late what with having to keep up with Dupes and Wing-Nut on the 38t challenge!  |
|
|
|
Post by wbill76 on Dec 4, 2014 17:36:07 GMT -5
After letting the paint cure on the torpedoes, I airbrushed some MM non-buffing Metalizer Steel for their bodies. Once again the paintbrush 'handles' proved their worth both during and after the paint application. Since the warheads don't have any specific alignment tabs beyond just the support rim on the bodies, I opted to use the mount arms to hold them in place so I could get them lined up the way I wanted and matched to both sides. Same thing with their propellers. They will be installed permanently after I've done the hull weathering. So without further ado...we have One Fish... 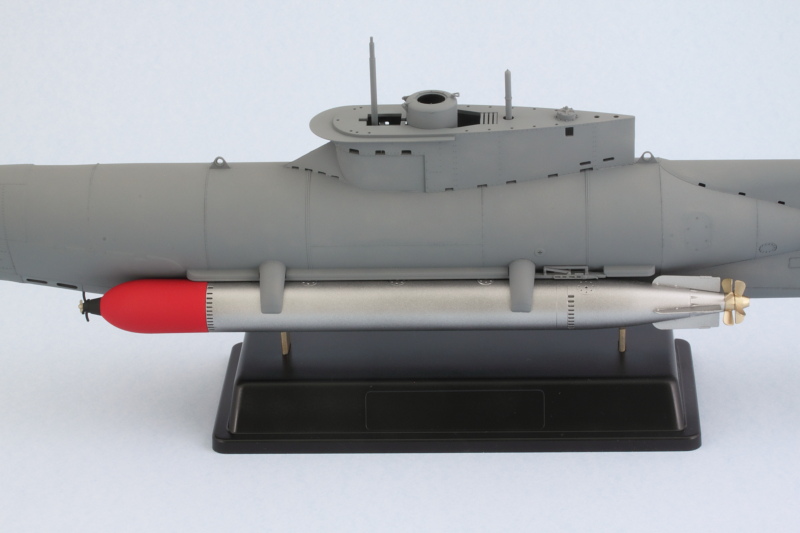 Two Fish... 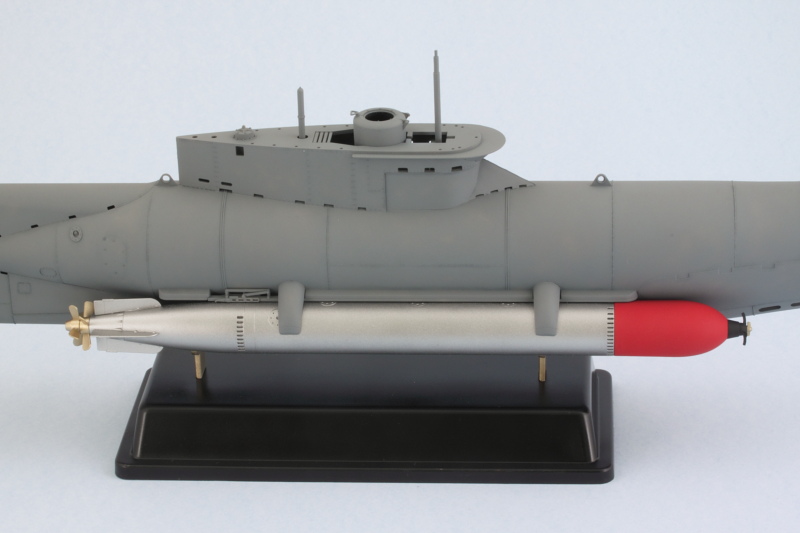 Red Fish, Red Fish! As you can see below, the Seehund was a pretty slim design with a double-barrel punch! 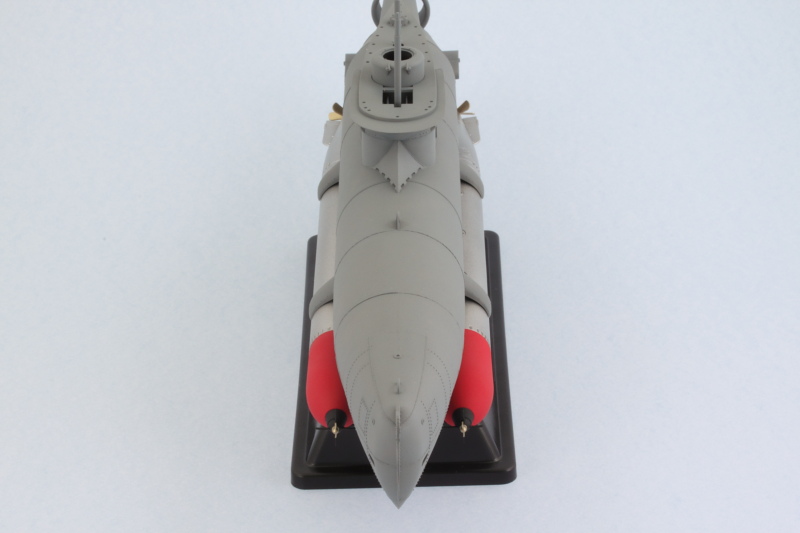 |
|
|
|
Post by 406 Silverado on Dec 4, 2014 19:13:26 GMT -5
Rob, well you know what they say about 'war-time expediency'!  LOL yep sure do. |
|
|
|
Post by Leon on Dec 4, 2014 19:21:08 GMT -5
Bill!The mini is looking mean with the fish on.  |
|
|
|
Post by deafpanzer on Dec 5, 2014 13:35:24 GMT -5
Love the red on the torpedoes... pretty eye catchy for sure!
|
|
|
|
Post by wbill76 on Dec 5, 2014 13:46:52 GMT -5
Thanks Leon! It's the equivalent of mounting the barrel on a tank I suppose, gives it some 'teeth'! Andy, I was tempted to paint one of the warheads blue just to complete the Dr. Seuss comparison but having them not match would've also driven me crazy every time I looked at it.  |
|
|
|
Post by wbill76 on Dec 5, 2014 21:21:35 GMT -5
I decided to take the plunge and go for the spotted camo pattern that Bronco indicates was used on boats operating in the English Channel or off the Netherlands coast from Jan-May 1945. Rather than use a uniform dot size or try to do it freehand, I opted instead for a template approach. I created two different types of template, one that was a 'pattern' template incorporating three different sized dots that I could manipulate on the front part of the hull and individual templates of each of the dot sizes that I could use elsewhere to create the same type of effect. Some simple sheet styrene and drill bits did the trick to create the templates. Since I used very thin sheet styrene to provide some flexibility, if the template cracked or gave out during the painting process, I just made a new one using the previous one as a pattern and kept on trucking. 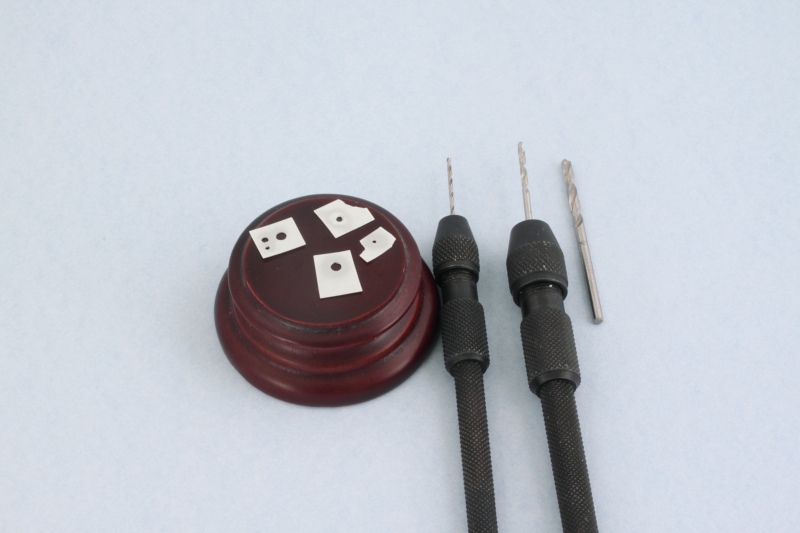 Although the instructions call for White for the dots, that seemed too stark for me so I used MM enamel flat Light Gray instead. I masked off the camo line with blue painter's tape so I had a guide to work with to avoid any drift as I moved bow to stern. After five hours of work with the airbrush, I'm definitely seeing spots! 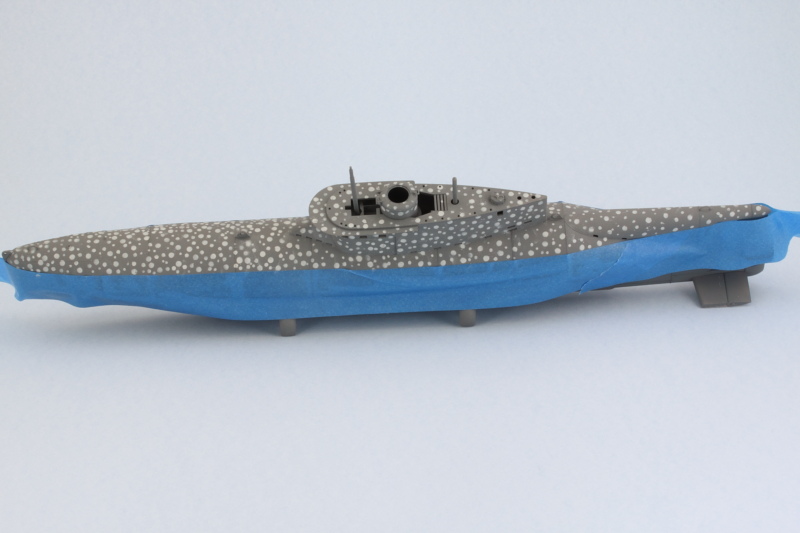 Took the tape off and put the fish back on to see how things look at this stage. 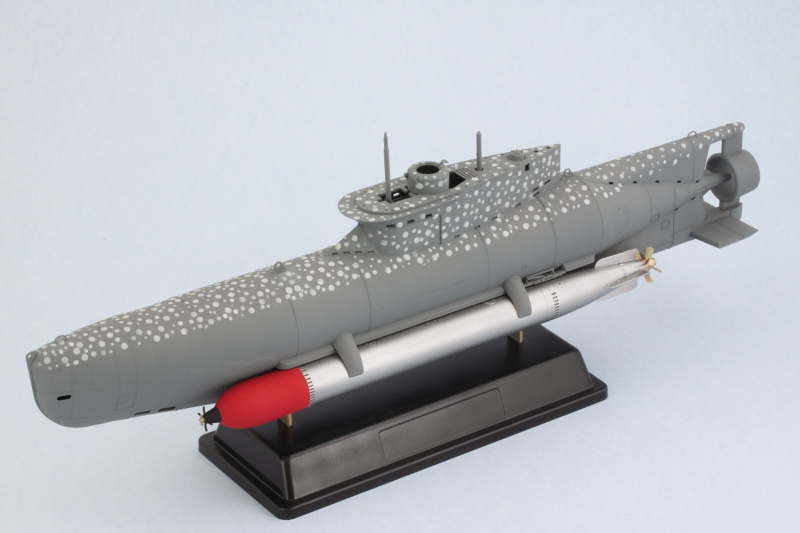 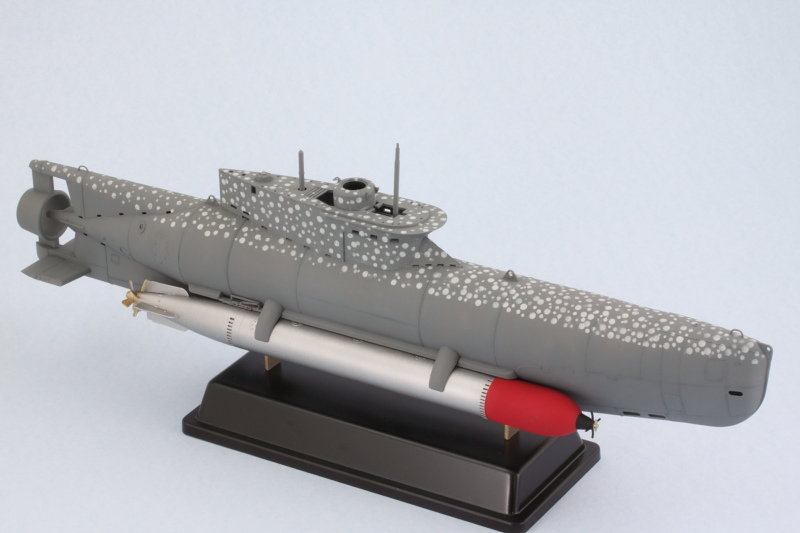 Will keep working on the finish as I've got some shading ideas for the rest of the gray that I want to apply first before starting the weathering. |
|
|
|
Post by Leon on Dec 5, 2014 23:15:01 GMT -5
Great job on the spotted camo Bill! Something you don't see very often.   |
|
4bogreen
Full Member
  
Member since: January 2014
On the bench; Yak-1B, T-30, T-34 model 1940
Posts: 568 
|
Post by 4bogreen on Dec 5, 2014 23:28:17 GMT -5
Awesome model, awesome build! I like it very much Bill!
|
|
|
|
Post by TRM on Dec 5, 2014 23:36:42 GMT -5
Great looking start to the camo Bill!! Love the templates!! Nicely played!!
|
|
|
|
Post by wbill76 on Dec 6, 2014 0:01:42 GMT -5
Thanks Leon! Felt a lot like a miniature version of Where's Waldo.  Remco Remco, glad you like where it's headed, more to come!  T T, took a few tries to get the templates right but well worth it. My original idea of using a larger section with multiple holes went out the window pretty quickly when I tried (and failed) to drill the different sizes out more than once...the styrene just couldn't handle the stress and kept cracking and splitting...but I needed the thin/flexible styrene to be able to work with all those compound curves. Catch 22!  |
|
|
|
Post by deafpanzer on Dec 6, 2014 12:01:46 GMT -5
I am serious I love those spots!!!
|
|
|
|
Post by wbill76 on Dec 6, 2014 13:13:37 GMT -5
I am serious I love those spots!!! You should, it's all your fault!  |
|
afvfan
Senior Member
   
Member since: December 2012
Bob
Posts: 1,772
Dec 10, 2012 17:32:38 GMT -5
Dec 10, 2012 17:32:38 GMT -5
|
Post by afvfan on Dec 6, 2014 19:27:13 GMT -5
Excellent work there Bill. Talk about "labor intensive"!
|
|
|
|
Post by wbill76 on Dec 6, 2014 20:40:37 GMT -5
Excellent work there Bill. Talk about "labor intensive"! No kidding Bob! Spent about another hour on it this morning with a fine spotter brush applying some more small dots by hand to close up some of the 'dead zones' that the templates couldn't get to easily. Well worth it for the end result though.  |
|
M1Carbine
Senior Member
    November '23 Showcased Model Awarded
Member since: November 2012
Posts: 1,730
Nov 16, 2012 2:49:11 GMT -5
Nov 16, 2012 2:49:11 GMT -5
|
Post by M1Carbine on Dec 6, 2014 21:16:28 GMT -5
Bill - camo really tied it up, looks awesome.
Bob
|
|
|
|
Post by dierk on Dec 7, 2014 6:28:42 GMT -5
Now I know how Dalmatian dogs got their spots lol
Very impressive work
|
|
|
|
Post by wbill76 on Dec 7, 2014 20:58:30 GMT -5
Thanks Bob! Dierk, I suppose that's one possibility!  Thanks for the comments as always.  |
|
|
|
Post by wbill76 on Dec 7, 2014 20:58:47 GMT -5
Made some more progress in the finishing department on the Seehund. The template/airbrush combo approach worked well but there were still some 'dead zones' where the template couldn't be used, so I used a small spotter brush to fill in those gaps and tighten up the pattern where needed. 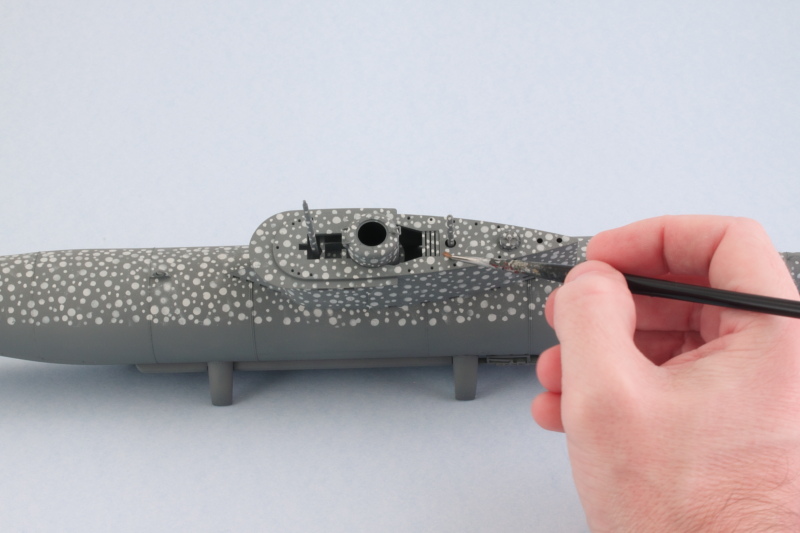 I masked off the spots and applied some post-shading using MM enamel IJN Sky Gray to provide some tonal variation to the previous base coat. 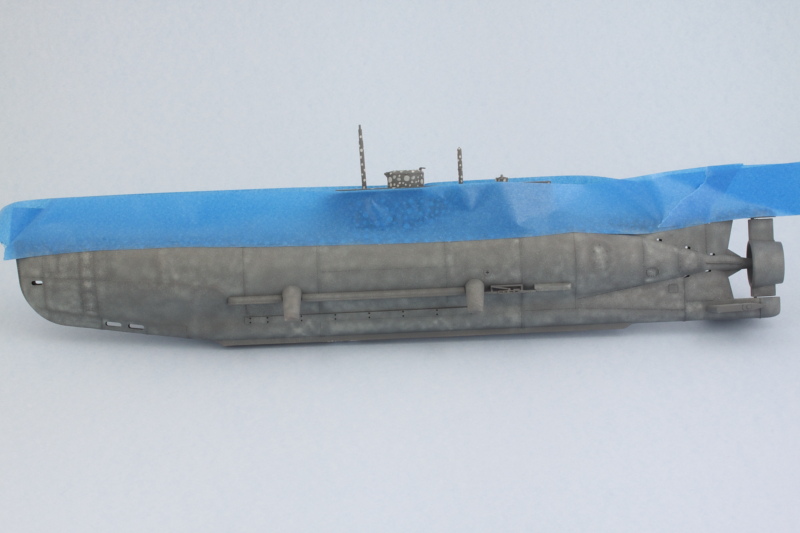 I removed the masking tape and carefully used more of the IJN Sky Gray to blend in the edge of the spot patterns. Once happy with that, I airbrushed small amounts of the base coat gray back over the hull once more. 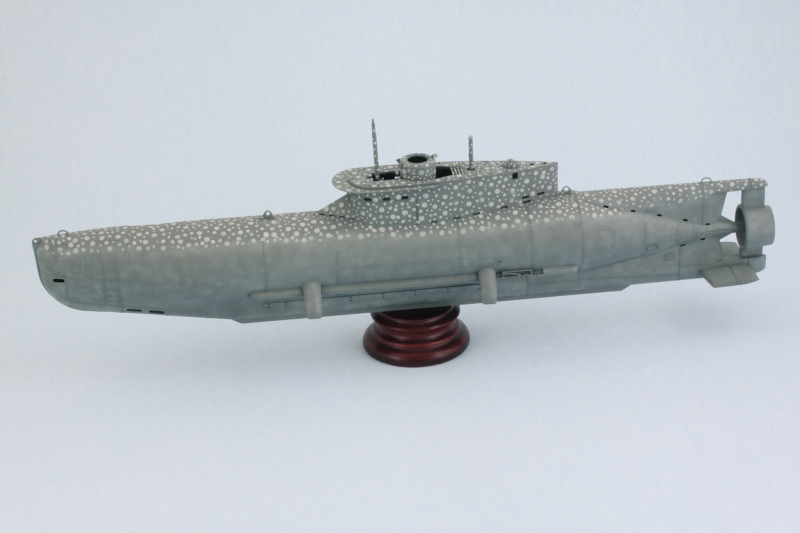 Using a very highly thinned mix of the base coat, I sprayed a mist coat from about 12 inches away over the entire hull to tie everything together and unify the finish. 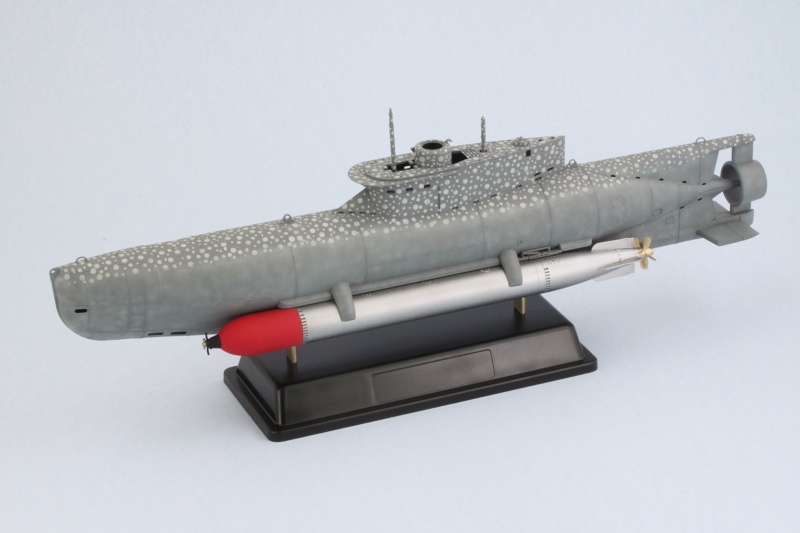 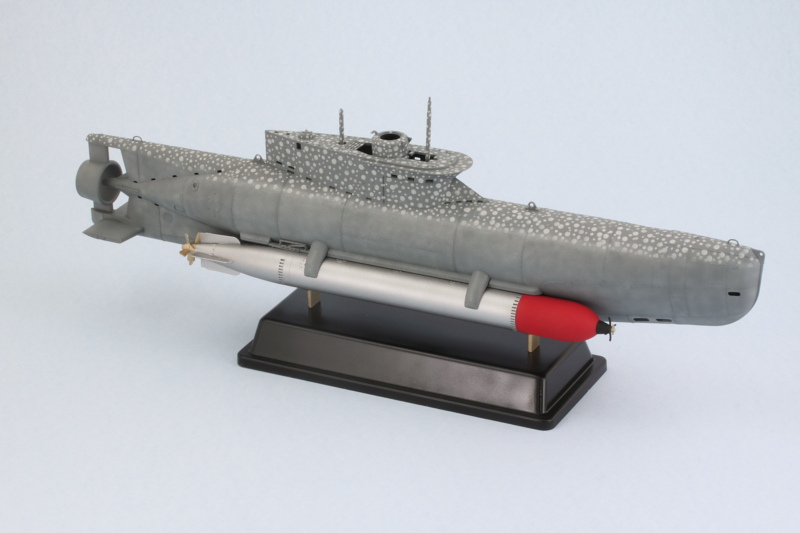 This should provide just the right foundation for the final weathering steps that are up next. |
|
|
|
Post by deafpanzer on Dec 8, 2014 1:40:07 GMT -5
Fantastic work!!! Really like the faded paint very much...
|
|
|
|
Post by dierk on Dec 8, 2014 6:39:18 GMT -5
What Andy said - and then some Thumbs Up!
|
|
|
|
Post by TRM on Dec 8, 2014 6:55:09 GMT -5
Well done adding the tonal shading Bill!! Really makes things pop!!
|
|
|
|
Post by wbill76 on Dec 8, 2014 14:14:50 GMT -5
Thanks Andy! The gray finish really provides for some interesting variations even though it might seem kind of plain. These things did spend most of their time tied-up dockside though so I figured I could have a little fun with them and still be in the realm of a realistic finish given their short operational history. Appreciate the kind words there Dierk!  T T, always fun when you start thinking in layers...just have to remember to do things in reverse order!  |
|
elco
Full Member
   July & Oct 2014 MoM Winner
Member since: May 2013
MOY 2014 Winner
Posts: 660 
|
Post by elco on Dec 8, 2014 15:16:06 GMT -5
Just spotted this one, nice work on the camo. It looks spot on  Realy like these tiny killers. |
|
|
|
Post by Tojo72 on Dec 8, 2014 16:14:04 GMT -5
Pretty cool technique, came out good.
|
|
|
|
Post by Leon on Dec 8, 2014 16:33:33 GMT -5
Bill!!!The tonal variations look great.  |
|
|
|
Post by wbill76 on Dec 8, 2014 17:06:33 GMT -5
Thanks Elco! The Seehund has always been a cool subject IMHO (along with all the other 'midget' sub designs for the period) and has been on my list to tackle for a while since it's got just the right balance in terms of size and scale. Anthony, and Leon, appreciate the kind words as always!  |
|
|
|
Post by wbill76 on Dec 9, 2014 19:43:33 GMT -5
Not a huge update but an important one nonetheless. I airbrushed a coat of Future to seal up the hull and torpedoes and then added the minimal markings for my particular boat. These consisted of the numbers for the sail and the depth lines which were treated with Solvaset to ensure they didn't silver. After the decals were set, a 2nd coat of Future sealed everything in for the weathering steps to come. 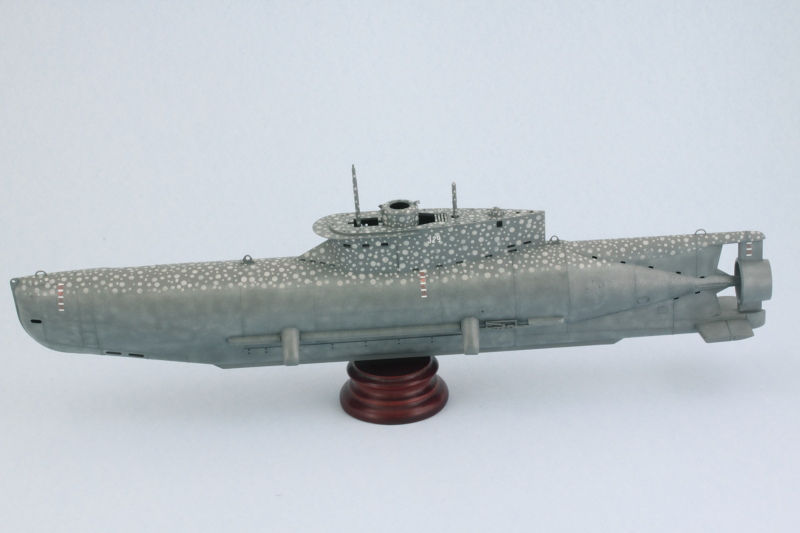 I started in first on the torpedoes. I had read that since these were carried externally they were given a coat of grease to protect them from the salt water, so I applied an overall wash of thinned enamel MM Raw Umber to create that effect. The wash was adjusted with clean thinner where needed to get it into the crevices and panel lines as well so it could do double-duty on that score. 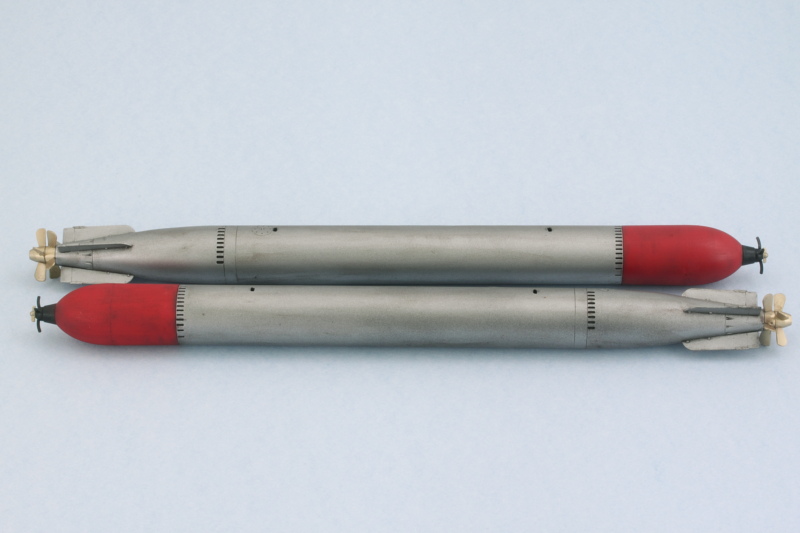 Next up will begin the work on the hull itself. |
|
|
|
Post by Leon on Dec 9, 2014 20:38:31 GMT -5
The fish look great with the wash Bill!Looking forward to seeing the hull done.  |
|
|
|
Post by TRM on Dec 9, 2014 20:51:25 GMT -5
Very nice Bill!!! Been enjoying following along so far!!
|
|