|
|
Post by wbill76 on Nov 26, 2014 13:40:18 GMT -5
This particular project is meant to be a relatively quick effort...the whole kit has less than 100 parts to it so it will build up in short order. The real fun will be in the painting and finishing department! 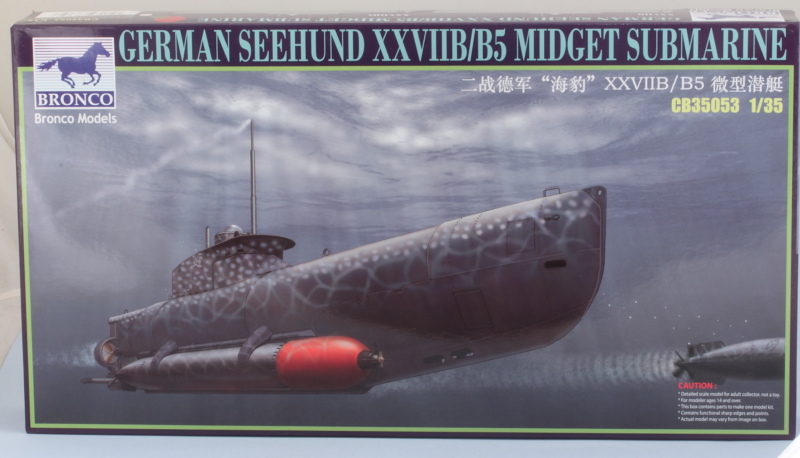 First order of business involves the 2 torpedoes that the Seehund carried externally. These together account for 52 parts and are nice little mini-kits in their own right as a result. I started in Step 1 with the assembly of the torpedo bodies. These are split-halves, so careful use of glue and some light sanding helped create a seamless join. The mount holes in the sides were opened up, taking care to do one torpedo with holes in B13 for the left side and in B3 for the right side since they are 'handed' to the external mounts. I also assembled the paired propellers. These are a little tricky to get together since they both have two blades molded on and two separate but a little patience and careful fitting gets them in shape. Last but not least I cleaned up the warhead portions of the torpedoes and assembled their front fuses complete with PE 'whiskers' (the fuses are only dry-fit for the photos). These are all left separate as three different components so it will be easier to paint and detail them prior to final assembly. 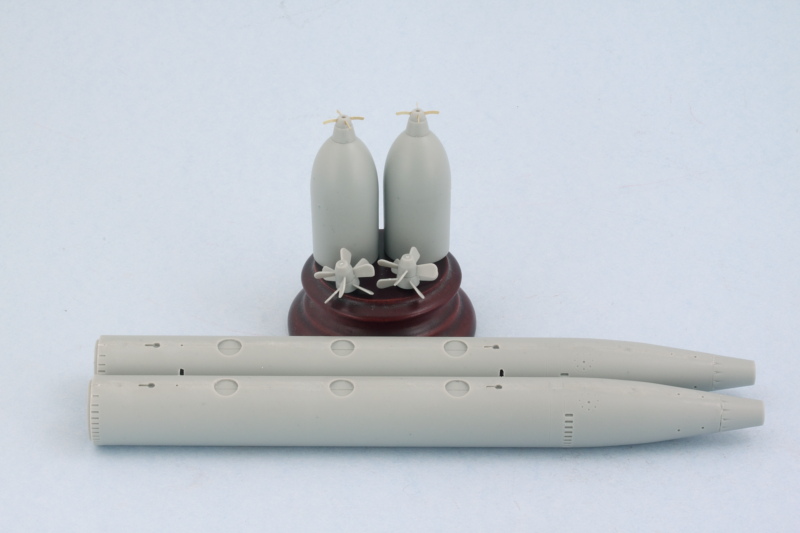 Step 2 adds all the circular access panels and other details including the fins. Using small amounts of blue-tack putty and a strategically placed bit of masking tape to hold it together, I checked the fit to see how the final 'fish' will look. 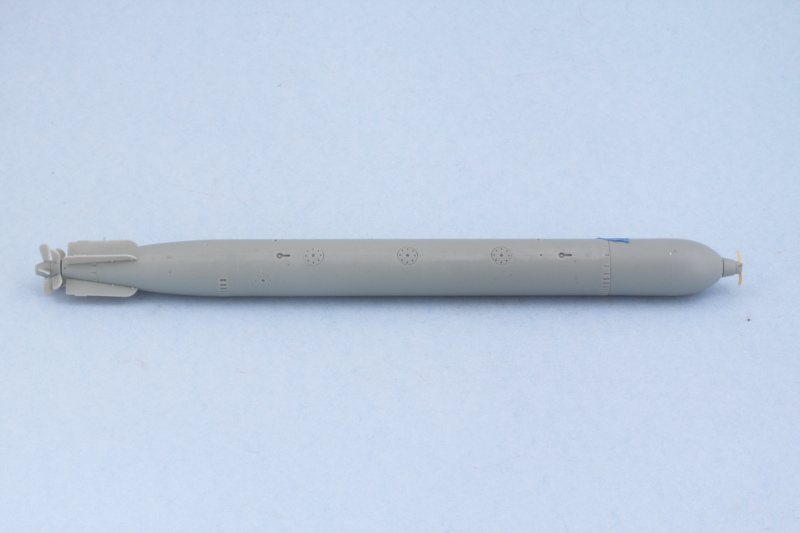 Next up will be working on getting the sub's hull together. I'll be building a straight XXVIIB vs. the B5 and that means paying some close attention to the instructions (and not opening up the holes in the hull for the 'saddle' tanks) to get the right set of features for that model. |
|
|
|
Post by TRM on Nov 26, 2014 14:05:30 GMT -5
WOW Bill! Nice choice! Count me in!! Nice work on the fish!! Looks like you have a nice Holiday weekend ahead of you!!  |
|
|
|
Post by deafpanzer on Nov 26, 2014 15:18:07 GMT -5
YAY! I am glad you are building this. Have you decided which scheme? Love several options it has to offer...
|
|
|
|
Post by Leon on Nov 26, 2014 16:14:18 GMT -5
Nice start on the fish Bill! I'll be following along.
|
|
|
|
Post by wbill76 on Nov 26, 2014 20:50:41 GMT -5
Thanks T, should be able to make the most of the available bench time with this 'little' sub!  Andy Andy, I'm probably going to do it neutral gray overall with the spots/wave camo pattern on the top half...not sure just yet. Leon, glad to have you along as well!  |
|
|
|
Post by deafpanzer on Nov 26, 2014 20:59:19 GMT -5
Yeah that's the one I really liked... spots/wave camo. It will be a killer!!!
|
|
|
|
Post by wbill76 on Nov 29, 2014 19:34:56 GMT -5
More progress on the Seehund to report! Continuing on from before, Step 3 deals with the main hull assembly and adds the rudder and propeller arrangement. Here's where the first choice between the B or B5 variant comes in, so you have to make sure you choose the right parts to get the proper configuration. It also determines which holes you open up at the stern to accept the rudder pins, with the further out holes meant for the B5. Not called out in the instructions is the need to open up holes in the hull sides if you're going to do the B5 with the extra fuel saddle tanks, so be aware of that as well. I carefully glued the hull together starting at the bow and working my way back, using liquid glue and finger pressure to get a good join in sections at a time to avoid any slight misalignments. The finely detailed bow eyes were a little damaged from shifting around inside the box on mine on one side, so I had to carefully repair it using a brass clip and small amounts of liquid glue. Once the glue had set, some light sanding along the join eliminated the seam 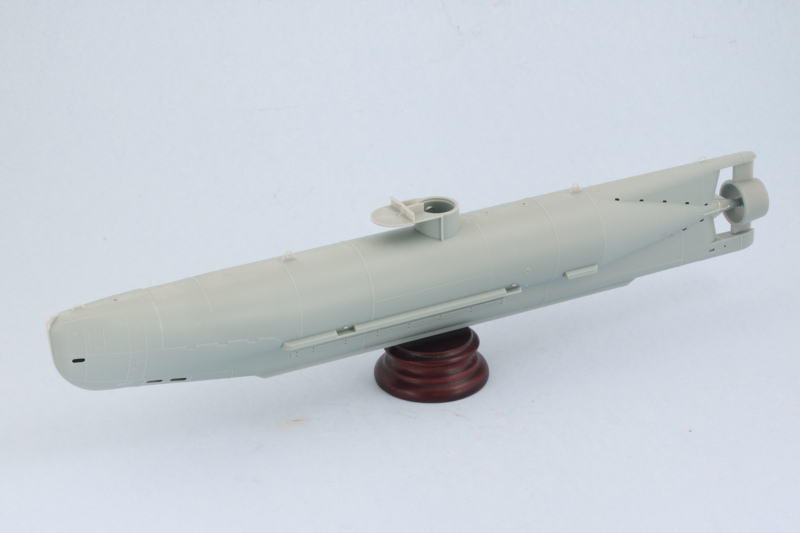 The only place where there were some minor fit issues was at the stern where the prop shaft cone mates up with the 'fins' on the hull. I used a little bit of putty to correct it and careful sanding with a sanding twig to correct it. 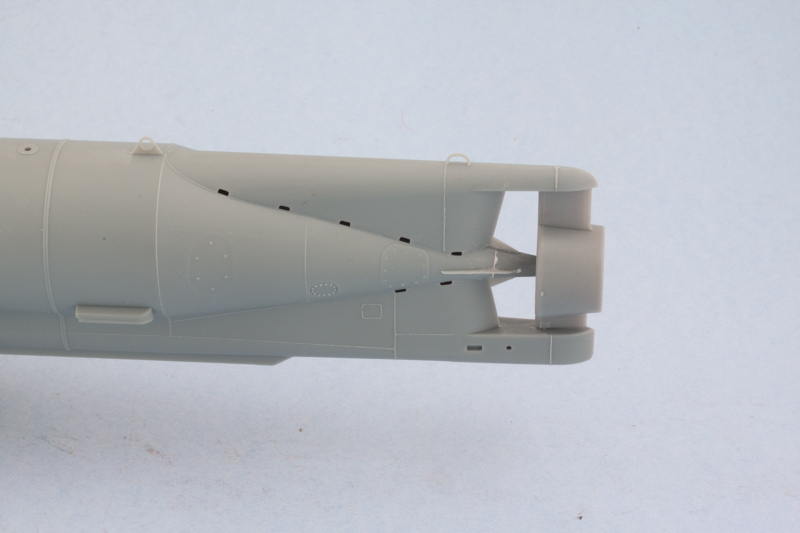 I was careful with the glue around the rudder posts so that it could stay movable. This is helpful to not only ensure it lines up properly but also sits at the correct height relative to the prop. The prop was temporarily placed with some poster blue tack to make sure everything played nice here. 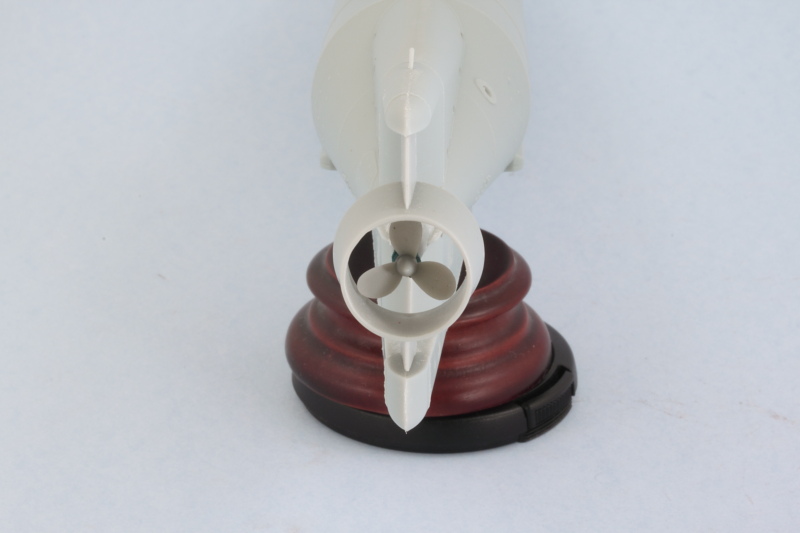 Step 4 adds all the top-side details as well as the side mounts for the torpedoes. The A9-A10-A-19-A21-A22 part combo (I don't know what the actual thing is called but looks like some kind of pressure valve/ballast device?) is the critical one to ensure the sail sits properly, so I cleaned up part A29 that's called out in Step 5 to make sure I didn't create any fit or alignment issues at this point. The instruction diagrams and steps lead you to believe that you can slip the sail on/off over the conning tower and the periscopes after they are installed but this is not really the case if you also install the top hatch, A6 onto the conning tower as called out in Step 4. If A6 is installed, the sail cannot fit over the hinges at the front of the tower hatch while still lining up with the other components. My original intent had been to use the sail as a fitting guide and then paint the interior since some of it is visible after installation before it was permanently added. Of course, I discovered what I just noted above regarding the top hatch after I had already installed it onto the conning tower and it had set up...so that went out the window. The sail can still slide up a little to allow for some access from the underside, so I'll have to see what can be managed from a painting angle before permanently attaching it and doing the rest of the painting as part of the regular process. 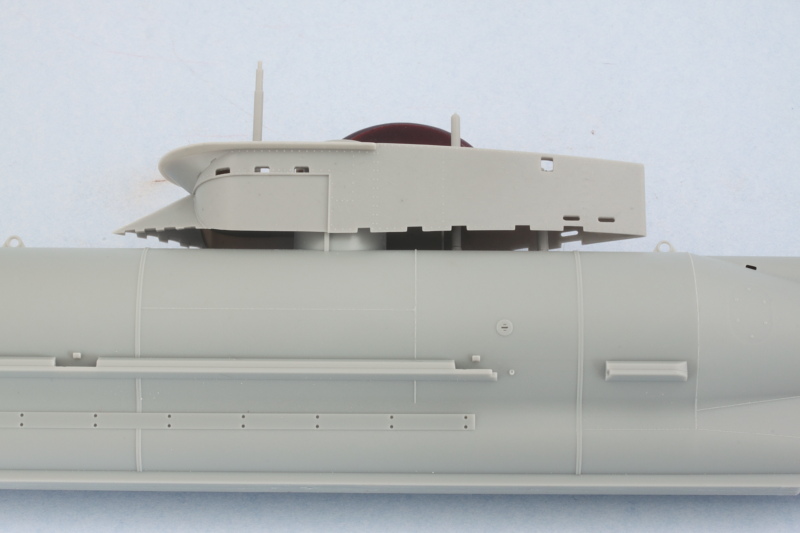 Despite that little quirk, the fit and alignment is pretty tight and Bronco did a great job in that area IMHO. The conning tower drum, part A3, had come loose off the sprue in my kit and had some small damage as a result on the top sides, so a little putty work was necessary to patch it up. I left off the clear 'bubble' for the hatch and will install that later after painting. 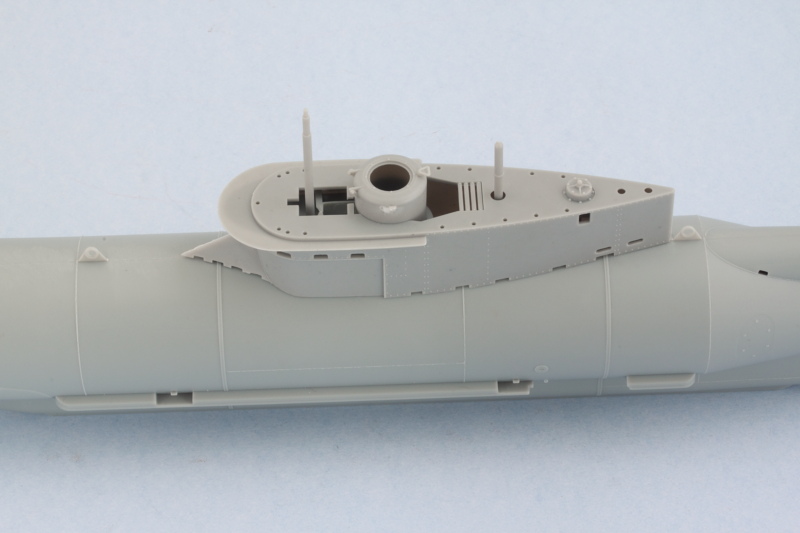 I still need to add some details to the lower hull including the torpedo mounts and the diving planes but should get this one into the painting stage here pretty quick. |
|
|
|
Post by wbill76 on Nov 30, 2014 18:06:41 GMT -5
Finished up the construction steps on this little sub today. I secured the sail in place permanently after doing some paint work on the interior spaces as best I could. Then the torpedo mount arms and other various hull details were added as called out in Steps 4 and 5 including the dive planes at the stern. 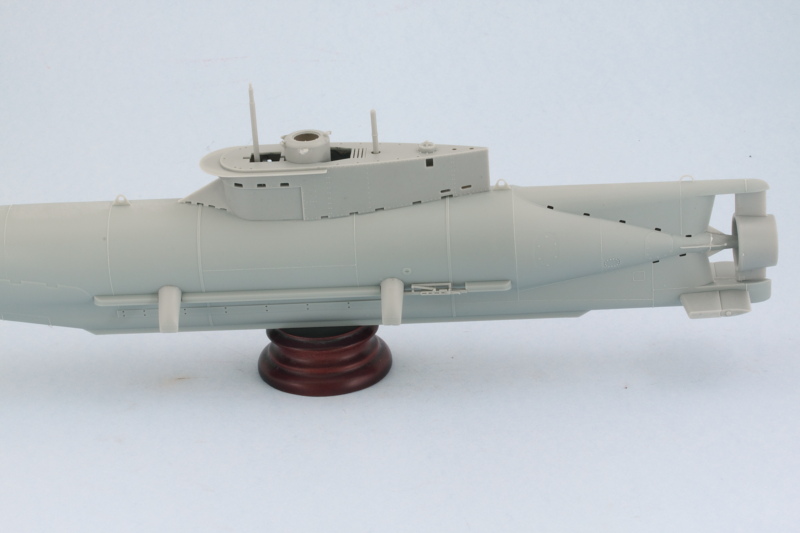 To ensure the torpedo arms set up in the right position, I used the torpedoes themselves to aid in that department. Plus it gives a pretty cool preview of how the whole thing will look once the fish are installed permanently. 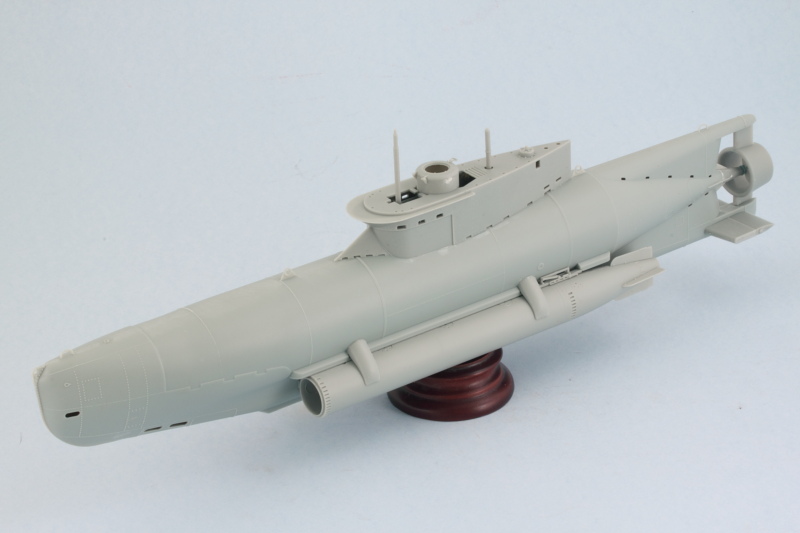 Now it's time for the paint work to commence! |
|
|
|
Post by Leon on Nov 30, 2014 18:18:04 GMT -5
Great update on the Seehund Bill!Looking really good.  |
|
|
|
Post by deafpanzer on Nov 30, 2014 22:08:15 GMT -5
Can't wait to see it painted... now I am tempted to start mine!!!
|
|
|
|
Post by dupes on Dec 1, 2014 10:07:33 GMT -5
Don't know if you mentioned it - what's the length of this thing in 1/35?
|
|
|
|
Post by 406 Silverado on Dec 1, 2014 10:56:33 GMT -5
Looks great Bill and good to see your back at a floaty thang....I mean sinkie thing. Can't wait for the painting part.
|
|
|
|
Post by wbill76 on Dec 1, 2014 13:48:24 GMT -5
Thanks Leon! Andy, go for it! It's a quick build, something you could easily squeeze in over the course of the next 6 months or so.  Dupes Dupes, it's about 12.5 inches in length. Just right for the scale IMHO. Rob, thanks! It's a mini-floaty-sinky-what'sit!  Looking forward to the next part myself as well. I was surprised at just how many of these the Germans actually built...285 were completed before war's end. |
|
|
|
Post by Deano on Dec 1, 2014 13:54:42 GMT -5
Cool subject Bill , I have a 1/72 kit waiting to see the light of day .... inspiration shall be taken from here !
|
|
|
|
Post by deafpanzer on Dec 1, 2014 15:02:27 GMT -5
Agree with you... will keep that in mind if I need a quick build if I don't want to do a figure bust. Keep it coming my friend!
|
|
|
|
Post by wbill76 on Dec 1, 2014 18:10:36 GMT -5
Thanks Deano! Hope to do it justice, a 1/72 kit would be fun too for this mini-hunter!  Andy Andy, I'm pretty impressed with the level of detail that Bronco provides. Even on a kit like this they are up to their usual detail tricks of providing parts/details for things that then get hidden away...but at least they are there!  |
|
|
|
Post by Tojo72 on Dec 2, 2014 2:42:34 GMT -5
Looking good Bill, showing your versatility.
|
|
|
|
Post by dierk on Dec 2, 2014 11:11:08 GMT -5
I can feel it in my water - some paint's about to fly...and I can't wait!
|
|
|
|
Post by wbill76 on Dec 2, 2014 13:15:52 GMT -5
Thanks Anthony! Have to change things up every now and then to avoid the burnout I guess.  Dierk Dierk, run silent, run deep!  |
|
|
|
Post by wbill76 on Dec 2, 2014 18:20:15 GMT -5
Spent a good deal of time with the airbrush today working on the Seehund. The torpedo bodies were given a base coat of MM enamel Gloss Black in preparation for their metallic finish. The warheads received a coat of MM enamel Insignia Red and the fuse caps were airbrushed MM enamel Flat Black. The main and arming propellers were airbrushed with MM non-buffing Metalizer Brass to round things out. I temporarily co-opted some paint brushes to use as handles by putting some large blobs of blue-tack poster putty on the ends and voila! Instant paint handles. The fuse caps and arming propellers were installed to the warheads to avoid potentially losing them between now and final installation. 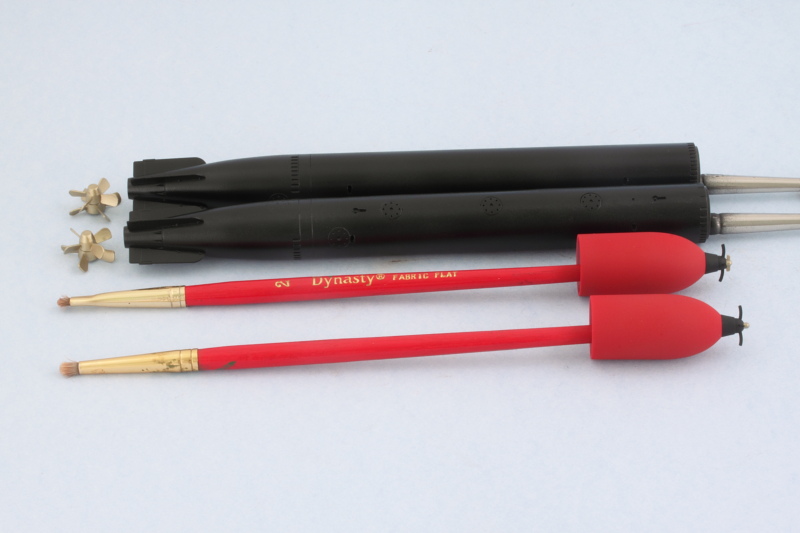 Attention turned to the hull next. A pre-shade was applied by airbrushing MM enamel Flat black to all the weld and rivet lines. Since there's no interior detail whatsoever for the conning tower, a healthy dose of Flat Black was airbrushed there as well. 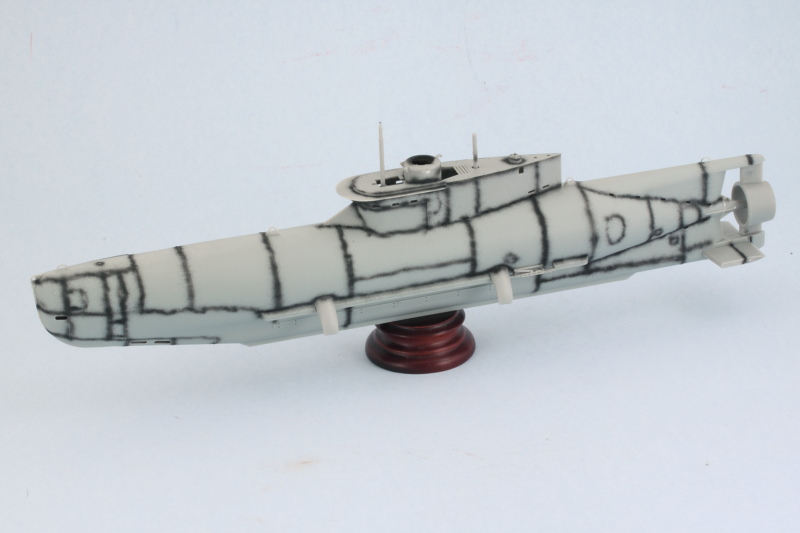 I originally was going to apply a lighter gray base coat to the hull in the form of MM enamel IJN Sky Gray since that's a color I've used for previous ship builds and had on hand. However once I started, I realized it was too light for what I was after as it was almost exactly the same color as the molded styrene so switched gears to a more medium gray. This was a custom mix of MM enamel Gunship Gray lightened with MM enamel Light Gray. I was much happier with this color choice even if it didn't preserve as much of the pre-shade due to the darker color. 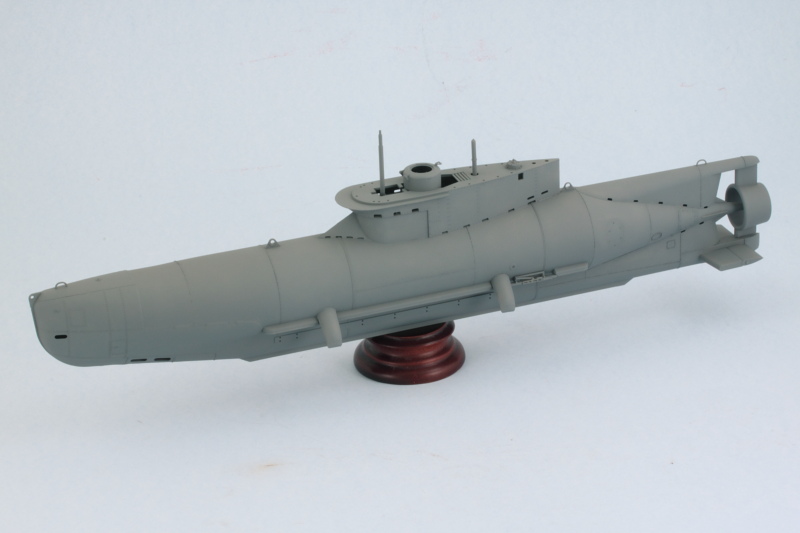 Since I was already airbrushing both the Gloss Black and the Brass, I also too advantage of the opportunity to paint the base and mount supports to round out the day's efforts. 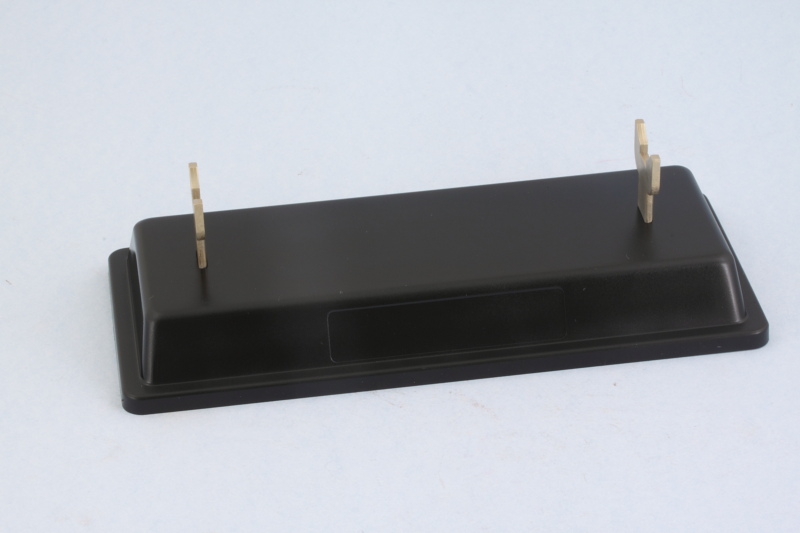 |
|
|
|
Post by Leon on Dec 2, 2014 19:22:14 GMT -5
Bill! fish and mini sub are looking good with some color on.   |
|
|
|
Post by wbill76 on Dec 2, 2014 20:54:43 GMT -5
Thanks Leon! Always good to get the airbrush work out of the way when the time is available!  |
|
|
|
Post by Deano on Dec 2, 2014 21:48:11 GMT -5
Smooth paint job Bill ! are you gonna weather it up or have it factory clean?
|
|
|
|
Post by 406 Silverado on Dec 2, 2014 22:05:18 GMT -5
Nice to see the paint on this one Bill, the fun part of course. Not sure if they used paint brush torpedo's back then !!
|
|
|
|
Post by wbill76 on Dec 3, 2014 11:15:56 GMT -5
Thanks Deano! It will get some weathering but not a heavy treatment since these weren't sea-going U-boats and only saw limited action as a result before war's end. Rob, well you know what they say about 'war-time expediency'!  |
|
|
|
Post by deafpanzer on Dec 3, 2014 13:23:16 GMT -5
Looking real good professor!!!
|
|
|
|
Post by wbill76 on Dec 3, 2014 13:38:57 GMT -5
Thanks Andy! I've been looking more closely at the box art and finishing guide and it looks like the artist added the 'wave' reflections as an artistic touch vs. something that was actually applied to the sub as a camo effect. There aren't a whole lot of reference photos out there of the Seehund but the ones I've found seem to show a universally 'plain' scheme. The Bronco finishing guide says the spotted camo was on a boat that saw active service in the English Channel from Jan-May 1945, so I may just go straight gray on this one...haven't decided just yet. Decisions, decisions!  |
|
|
|
Post by deafpanzer on Dec 3, 2014 14:32:32 GMT -5
Funny thing yesterday I was reading Scale Model Addict #2 and there was a great article about this mini-sub. The modeler did a beautiful job... do you have that issue? He said same thing about the water camo but he went for it anyway.
|
|
|
|
Post by wbill76 on Dec 3, 2014 18:04:51 GMT -5
Funny thing yesterday I was reading Scale Model Addict #2 and there was a great article about this mini-sub. The modeler did a beautiful job... do you have that issue? He said same thing about the water camo but he went for it anyway. Don't have that particular issue of SMA unfortunately but doesn't surprise me that someone would go for it, it's a very eye-catching pattern for sure! Still giving it some thought before I commit one way or the other...as it has downstream effects on how it would get weathered as well.  |
|
|
|
Post by TRM on Dec 3, 2014 18:33:06 GMT -5
Catching up Bill!!! I guess I am sleeping at the wheel!!  Great job on the little not-so-floaty!! Love seeing some color flying around!!! |
|