|
|
Post by wing_nut on Jan 6, 2015 15:02:50 GMT -5
I missed that too. I plan to put little balls of epoxy putty user the arms and press the fish up into that.
|
|
|
|
Post by wbill76 on Jan 6, 2015 15:25:06 GMT -5
I missed that too. I plan to put little balls of epoxy putty user the arms and press the fish up into that. That should work, the undersides of the arms are slightly hollow so if you trim off the mount tab and use the epoxy, it could 'hold' them in place, the real trick will be aligning the fish so they are symmetrical/balanced with each other while they dry but I'm sure you can support it/brace it properly to pull it off! |
|
bbrowniii
Full Member
  
Member since: March 2012
If you are not part of the solution, you are part of the precipitate.
Posts: 1,238
Mar 25, 2012 22:08:04 GMT -5
Mar 25, 2012 22:08:04 GMT -5
|
Post by bbrowniii on Jan 6, 2015 16:09:53 GMT -5
Hey guys! As if it wasn't good enough to get a build of one of the, now we get THREE! WHOOHOO!!!
Great work from both of you.
|
|
|
|
Post by Leon on Jan 6, 2015 16:47:46 GMT -5
WOW GUYS!!!! Your really doing great work  .Marc,I really like how the fish look.  |
|
|
|
Post by wing_nut on Jan 6, 2015 16:50:32 GMT -5
Thanks guys.
Bill, since you posted pics of the boat from both side I will be able to line up the fish no problem. I think they'l stick to the epoxy just fine too.
|
|
ogrejohn
Full Member
   Oct '23 Showcased Model Awarded
Member since: June 2012
Go away or I shall taunt you a second time!
Posts: 1,302
Jun 1, 2012 17:33:59 GMT -5
Jun 1, 2012 17:33:59 GMT -5
|
Post by ogrejohn on Jan 7, 2015 18:12:44 GMT -5
Fine looking work Marc and Andy!
|
|
|
|
Post by deafpanzer on Jan 7, 2015 21:34:42 GMT -5
Thanks guys... big update coming up. Can't believe the building stage is almost over after just three night sessions of building. No wonder Bill managed to finish two in a month. Not bad idea to do one every year... having so much fun with this already.
|
|
|
|
Post by deafpanzer on Jan 8, 2015 12:46:32 GMT -5
Bill & Marc- Like your idea of using epoxy putty... never tried one before. Which brand do you recommend? I can insert plastic rods into the torpedoes so they can be attached securely too. My Seehund is starting to look like a complete mini-sub now.  The building stage is now complete but I realize the kit is missing many details... you would be surprised to find plenty of great walk around photos of actual Seehunds when you google. It is missing lots of welding seams so I am going to add plenty.    Completed one side last night... hoping to do the other side. Used very thin styrene rod and old dentist tool to create the weld seams.  Of course I managed to knock one of loops out so I went ahead and replaced all loops with metal rods...  Love this tool...  Voila! That way it won't break later on especially at the model shows. LOL  There was a nasty line in a hard to reach place...  Covered with thin sheet of styrene sheet...  Hoping to make all corrections so I can have it primed and painted over the weekend!
|
|
DeafStuG
Full Member
  
Member since: May 2013
..
Posts: 1,283 
|
Post by DeafStuG on Jan 8, 2015 13:02:07 GMT -5
Marc - frecking awesome, looking great toooo shining so True torpedoes! Not dummy torpedoes! ;-)
Andy - Great neat work in progress so lucky man! How is quickly your work in progress? Maybe You got magic glue? HA HA. Hope catch my time for back my bench by tonight.
|
|
|
|
Post by deafpanzer on Jan 8, 2015 13:03:33 GMT -5
LOLOLOL! Its just my mojo and it is friggin' cold outside that we are not doing much except staying warm inside. Seehund kit has only 65 or 70 parts so it was fun quick build. I hope to finish the building part tonight if the wife lets me. LOL
|
|
DeafStuG
Full Member
  
Member since: May 2013
..
Posts: 1,283 
|
Post by DeafStuG on Jan 8, 2015 13:32:26 GMT -5
Andy - I thinking "Magic submarine" Lolololooo. Can you try make nice tea for your wife until she's happy then she will allow you back bench ;-) lol
|
|
|
|
Post by wbill76 on Jan 8, 2015 13:32:42 GMT -5
Some nice progress Andy! I debated adding the weld seams on mine but the proximity of the fine rivet detail in those areas deterred me. You found a nice solution and they look good. The metal loops at the bow and stern will save you some aggravation to. As for an epoxy recommendation, I usually use Aves epoxy sculpt for stuff like that as it dries rock hard but still has a good work time and can be cut/shaped as it cures and sanded after if needed. HTH!
|
|
|
|
Post by wing_nut on Jan 8, 2015 13:36:20 GMT -5
Holy crap Andy, Talk about great minds think alike. When I saw this... 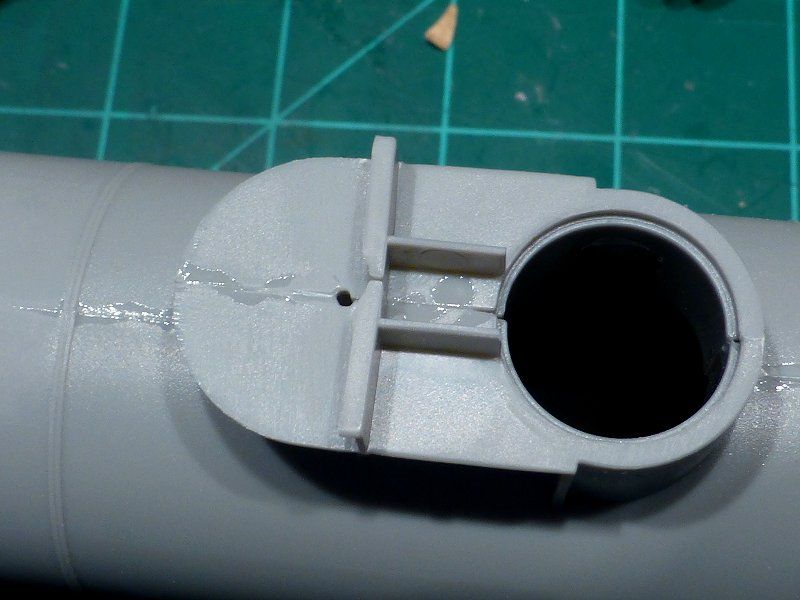 I too went with sheet plastic over putty and filing. Filled the gap in that cross piece too. 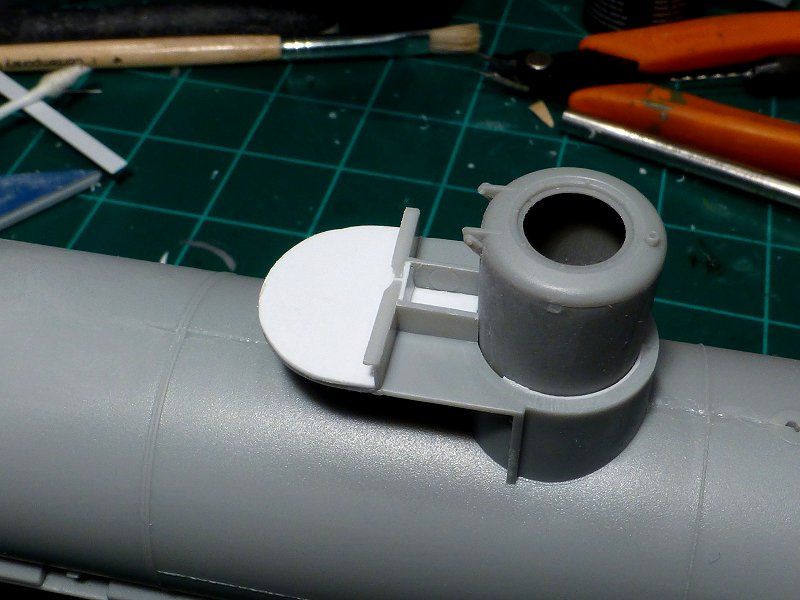 here's a puzzler. When the hull was glued together, the bow and stern were in perfect alignment. But the middle was off a touch. You can see the locating hole doesn't line up. So there was a gap at the back of the tower tube (part name ?) that would be visible so I had to shim the space. 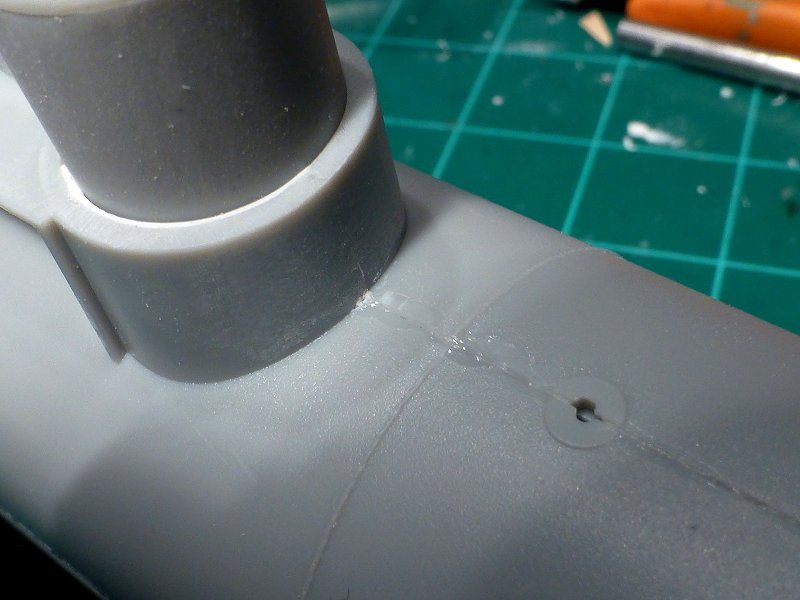 i have found some photos but not a lot of walkarounds. If ya got some links would love to see them. I have found a few fixes that you've found too. I use any epoxy putty the comes as a single, 2 color rod that you cut off a length and work it together. I'm picking some up today. Go more pics to post later. Stay tuned.  |
|
|
|
Post by deafpanzer on Jan 8, 2015 14:39:13 GMT -5
Jeremy- LOLOLOLOL I see you have read my joke on Facebook. I am surprised my wife hasn't killed me yet...  Professor Professor- Thanks for the tip about epoxy putty. Will look for it over the weekend. I am with you about those tiny rivets. Didn't want to ruin them I opted for very thin styrene rod instead of putty because you know that method will easily kill those beautiful rivets. It was funny looking at many walk around photos of Seehunds... some had very visible weld seams while others were very thin and fine. I guess it depends who was the welder we can say!!! Marc- LOL! Great minds think alike... you went for the WHOLE thing while I went for small thing. You being ambitious as usual! I should have done that... I plan to apply fine superglue to fix the seam at the other end. Here's the links to walkarounds... my favorite one is Russian I think. www.dishmodels.ru/wshow.htm?mode=P&vmode=T&p=2631&id=131816&tp=w&lng=EThat one has nice shots of the interior and weld seams too. www.reddevilsthiene.it/pagine/pag_seehund_monaco/pag_seehund_mon_1.htmlI like this one too... great pictures at closer ranges. www.fourfold.org/billm/Aviation/USSSalem/SeehundGermanMidgetSubmarine/pages/16SeehundConningTower.htmStill a long way to go... Bronco forgot to add handle bars at the top of the con too.
|
|
|
|
Post by deafpanzer on Jan 8, 2015 15:07:24 GMT -5
The only one thing I couldn't find... a clear shot of the top of con tower or hull. Do you have one? I bet it is missing some details too...
|
|
|
|
Post by wing_nut on Jan 8, 2015 16:00:56 GMT -5
I'll check those links when I get home and yes l do have a shot of the top of the tower. I'll send you the link when I get home
|
|
nicusi
Full Member
  
Member since: September 2013
Posts: 776 
|
Post by nicusi on Jan 8, 2015 16:11:19 GMT -5
I had a secret dream one day to start some similar projects. But until then, it's a really pleasure to see such beauties. Great work, Marc, keep it on! I'm very curious about the diorama you'll have in your mind.
Cheers,
Nicolae
|
|
|
|
Post by wing_nut on Jan 8, 2015 16:48:32 GMT -5
|
|
|
|
Post by Leon on Jan 8, 2015 17:03:37 GMT -5
Marc,Andy you guy are doing fantastic work  .Andy,nice work on the weld seams.  |
|
|
|
Post by wing_nut on Jan 8, 2015 18:24:51 GMT -5
Thanks Leon. Like Andy's... starting to look like a sub. Still need to attached the tower and add the welds along the hull 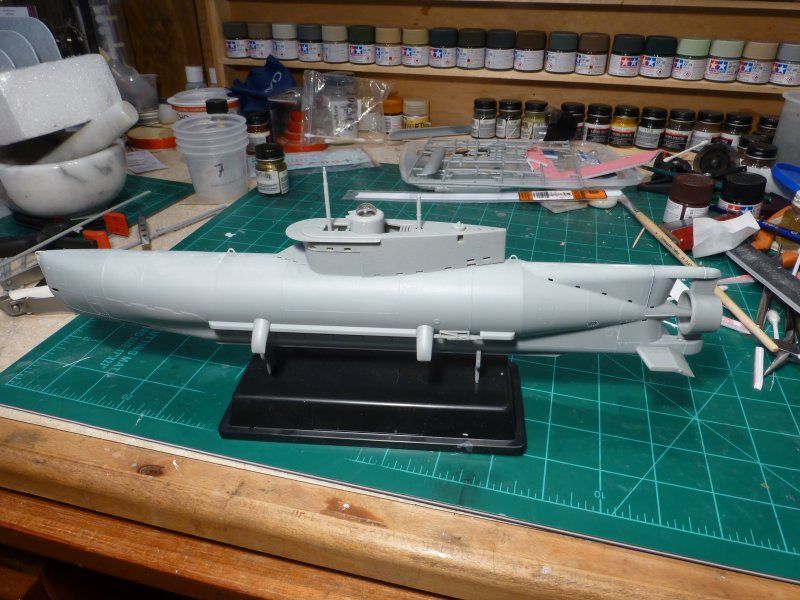 Going backwards here.... I figure'd it was going to be hard to fix the seam by the rudder once it's in place since it's captured by the hull halves. So I glued the hull. cut the pins off the rudder and drill holes. Plastic rid was inserted from top and bottom to grab the rudder and it was way easier to sand where the pins were. A couple of welds were replaced. One with plastic rod and the other with solder. Gotta see what they look like after the primer. 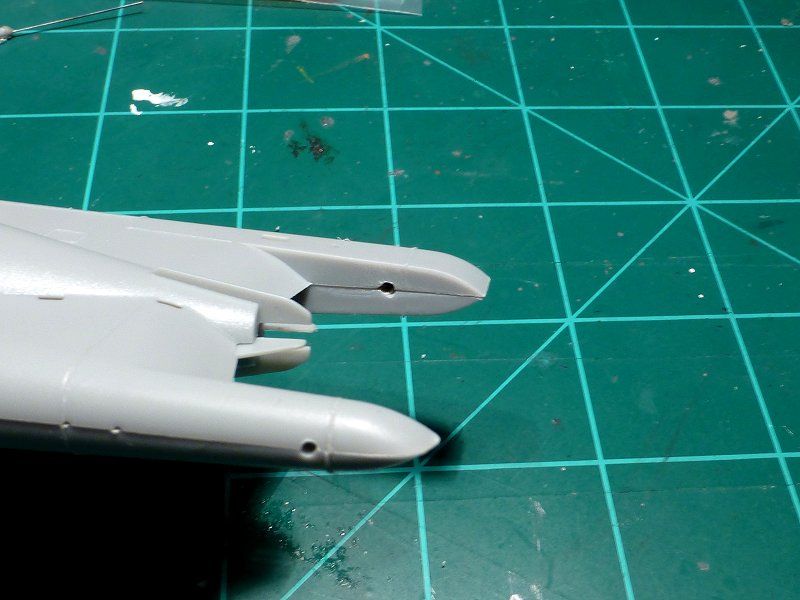 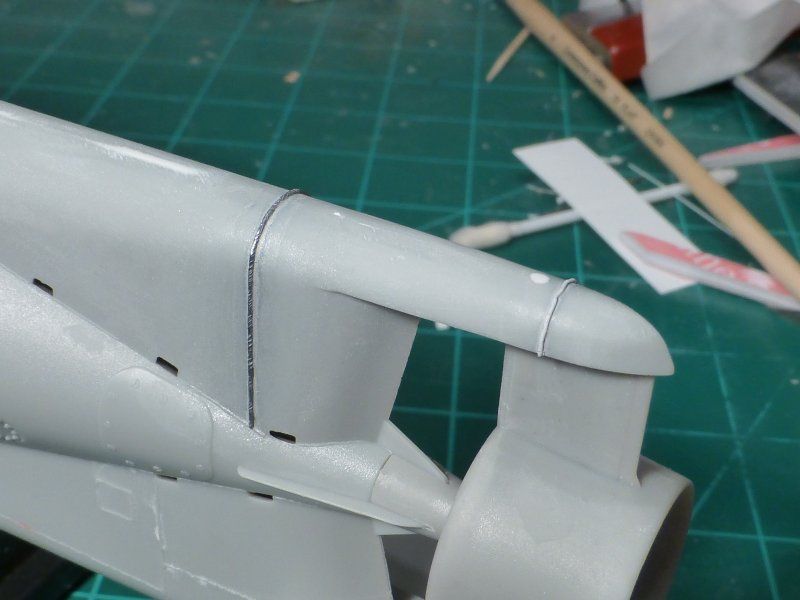 A shot of the tower before detailing. I ordered some Archer rivets so gotta wait for them. 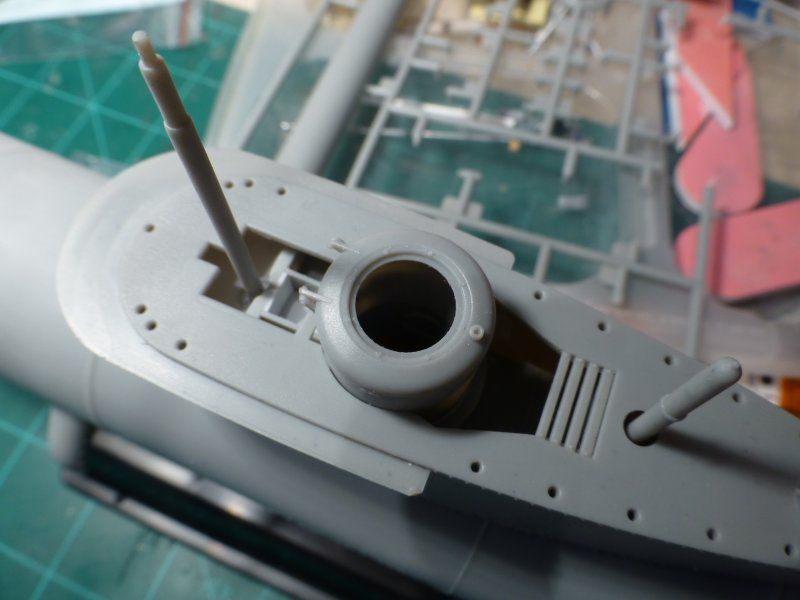 I did the fuses over on the fish. Didn't like the look of the brass and a guy posted a pic on a ship forum and the whiskers weren't usually brass anyway. 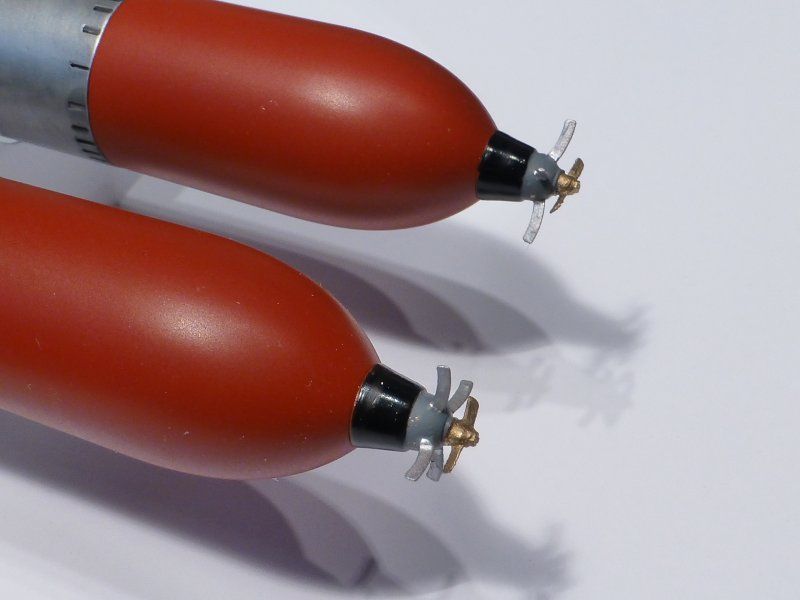 |
|
|
|
Post by Leon on Jan 8, 2015 18:37:27 GMT -5
Tower is looking good Marc  ! From your pic,i really like the looks of the solder for the weld.  |
|
vlpbruce
Full Member
  
Member since: March 2013
Posts: 1,463 
|
Post by vlpbruce on Jan 8, 2015 19:22:34 GMT -5
Looking great both of you.
|
|
|
|
Post by deafpanzer on Jan 9, 2015 14:35:55 GMT -5
Thanks guys for posting... appreciate your comments!
Marc- AWESOME! Those pics were perfect... THANK YOU! I agree about lacking some details and I felt that the top was too blank. I have seen other Seehund models built by others they added details and I thought they looked nice too. I am planning to add some rivets as I have some from Archer too.
Sorry about the seam... it was not bad on mine as I used very little putty only on the rear edge. Knowing you very well it will be an easy fix for you! LOL I didn't have much bench time last night but I managed to finish the weld seams on the other side.
No plans tonight so I am hoping to work on the topside so I can move to the next stage.
|
|
|
|
Post by wbill76 on Jan 9, 2015 14:47:32 GMT -5
Looking good gents! One thing to keep in mind when looking at preserved/museum pieces in terms of details to add or not add, many of them have post-war modifications added to them since they were captured as 'war prizes' and used by various navies (including the French) for a few years depending. It can be a little challenging to sort out what was or wasn't a war-time feature as a result...but lots of fun opportunities to add if you're so inclined.  |
|
|
|
Post by deafpanzer on Jan 9, 2015 15:19:45 GMT -5
Very true... I noticed in several walk around photos none of them looked alike. HA!! Never a dull moment in our modeling world we can say...
|
|
|
|
Post by wing_nut on Jan 9, 2015 15:35:58 GMT -5
Hey those details are all over the place. Like I said I m just gonna add some that look cool and all i have to do is say it's a what if. That way all reason are null and void and the "detail oriented" (rivet counters) will have to bite their tongues. Taking the wife and kids to dinner then tickets for Jim Gaffigan so probably nothing going to get done today.. Hmmm... I got an hour now... GOTTA GO! if you're so inclinedI prefer to think of myself as askew.  |
|
|
|
Post by TRM on Jan 9, 2015 16:07:51 GMT -5
Playing a little catchup here fellas! Both are well on your way....fine work!! Dig the paint work on the fish Marc!! Nice modifications too!! Similarly, great assembly Andy!! Clean building!!  Another fine build was Alex's from Uschi. I know he has pics of the completed model on the Uschi. Construction I think was over on SMA if I remember correctly. Either way....keep up the great work boys!! |
|
|
|
Post by wing_nut on Jan 9, 2015 17:25:18 GMT -5
I came across Alex's build a while back and she is a real beauty. Here's a couple of the details that I'm copying form other builds and photos. The panel at the back of the tower has some texture in some photos. One modeler used a pieces of the backing for pills in blister cards. I rolled a piece of sheet plastic under the knurled handle of a pin vise. I also made a tow shackle for the front... which has to be turned over so the seam of the ring is hidden.... new eyelet that I assume are also having something to do with towing and the same pieces Than Andy replaced. Difference is I broken them off on purpose so fix the hull seams. 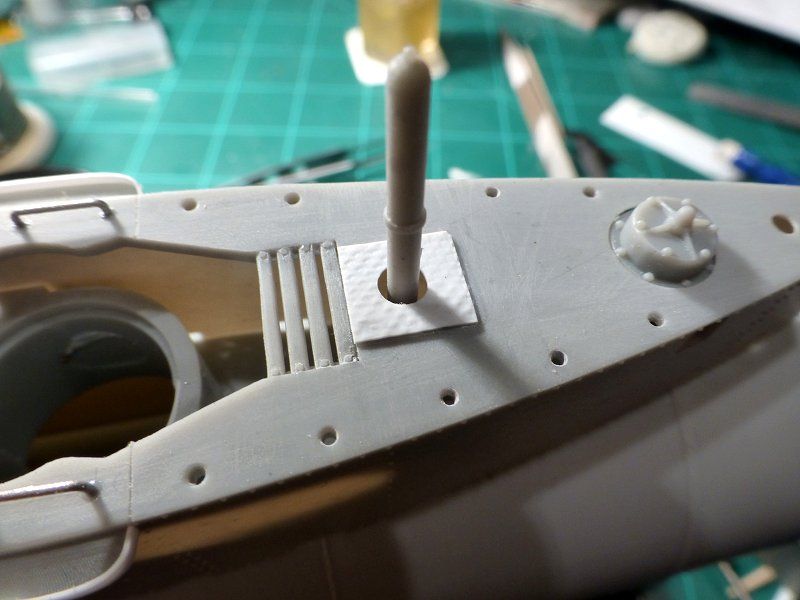 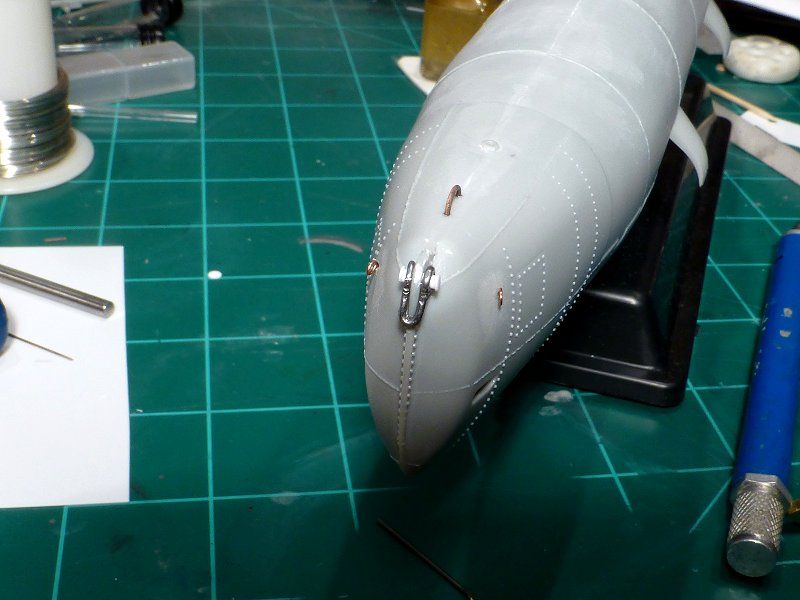 |
|
|
|
Post by deafpanzer on Jan 9, 2015 23:32:39 GMT -5
Another fine build was Alex's from Uschi. I know he has pics of the completed model on the Uschi. Construction I think was over on SMA if I remember correctly. I THINK I have that SMA issue... I absolutely agree with you about Alexander's work on his Seehund.  I THINK I know that old man... LOL  I love SMA issues... I need to order more as I only have first three issues. How many issues did SMA make so far? |
|
|
|
Post by deafpanzer on Jan 9, 2015 23:42:36 GMT -5
Marc- Fantastic work on the loops... I overlooked the two smaller ones on the side. Good catch there! Can't wait to see more...
|
|