|
|
Post by wbill76 on Feb 1, 2015 16:21:13 GMT -5
Looking sharp! Great details... Wondering if we will see an update today despite Super Bowl going on today. LOL Nope!  In addition to Super Bowl distractions, yesterday was a deadline for some of my students to submit mid-term papers, so I've been busy grading those in order to stay current for the week.  Should get back to it later in the week though, so stay tuned!  |
|
threadbear.
Full Member
  
Member since: December 2011
Recovering my modelling enthusiasm!!'
Posts: 138
Dec 18, 2011 8:31:37 GMT -5
Dec 18, 2011 8:31:37 GMT -5
|
Post by threadbear. on Feb 2, 2015 4:07:32 GMT -5
Yet another modeller here who thoroughly enjoyed the classic Tamiya kit about 30 years ago. I remember making a hash of the mesh in the turret hatches. The Hobbyboss kit looks amazing. Tempted. What astounds me is how technically advanced and sophisticated many of these German vehicles were at the time. But that made them time consuming to manufacturer. Well done. Good build.
|
|
|
|
Post by wbill76 on Feb 2, 2015 13:33:12 GMT -5
Thanks Grahame! You're right about the technical sophistication...the 222's mount for the 2.0cm was designed to be a dual-purpose for engaging both ground and air targets for example. This kit fortunately has PE for the screens on the turret vs. the Tamiya vinyl mesh approach so that's a plus for sure.  |
|
406 Silverado
Global Administrator     
Member since: November 2011
Posts: 10,214
Member is Online
MSC Staff
|
Post by 406 Silverado on Feb 3, 2015 11:11:20 GMT -5
Such a motivating build that I dug out my SdKfz 231 from AFVClub, might start on it as a wreck.
Keep up the awesome work brother Bill.
|
|
|
|
Post by wbill76 on Feb 3, 2015 11:22:52 GMT -5
Such a motivating build that I dug out my SdKfz 231 from AFVClub, might start on it as a wreck. Keep up the awesome work brother Bill. Armored car fever strikes!  Thanks Rob, look forward to seeing that wreck! |
|
reserve
Senior Member
   
Member since: July 2012
Si vis pacem para bellum
Posts: 2,372
Jul 11, 2012 9:11:45 GMT -5
Jul 11, 2012 9:11:45 GMT -5
|
Post by reserve on Feb 3, 2015 14:32:00 GMT -5
Good progress on a not so easy build. If I recall correctly, you'll want to watch the height of the engine bulkhead I recall I had to do some filing so the body halves would fit together correctly
Regards,
Mark
|
|
|
|
Post by wbill76 on Feb 3, 2015 16:23:41 GMT -5
Good progress on a not so easy build. If I recall correctly, you'll want to watch the height of the engine bulkhead I recall I had to do some filing so the body halves would fit together correctly Regards, Mark Thanks Mark! Will keep an eye out on the bulkhead when I get to that part. So far this one's definitely been a case of 'test fit everything!' before committing to glue. The chassis had gotten to the point where I needed to do some paint work with it before I could go any further. Since I hate to scrape paint and the contact surfaces for the chassis to the lower hull aren't that large, I masked off the necessary areas on the lower hull and chassis with blue painter's tape to get everything ready. The engine, transmission, and radiator were also suitably prepped before heading over to the paint booth. 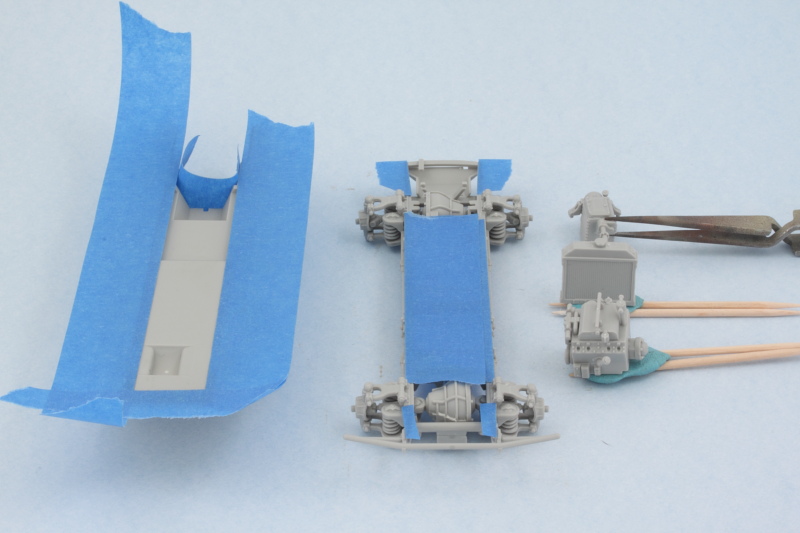 The only markings options in the kit are for DAK vehicles, so I opted to go the route for a vehicle with the 21st Panzer Division in Libya during May 1941. That means the vehicle would've originally been in panzer gray before being repainted in the field, so to reflect that the chassis and hull undersides were given a dose of Testor's Model Master enamel Panzer Schwarzgrau with the airbrush. The engine and radiator were airbrushed with a lighter gray primer mix that I keep on hand and the transmission got a green primer coat using MM enamel Khaki for a little variety. 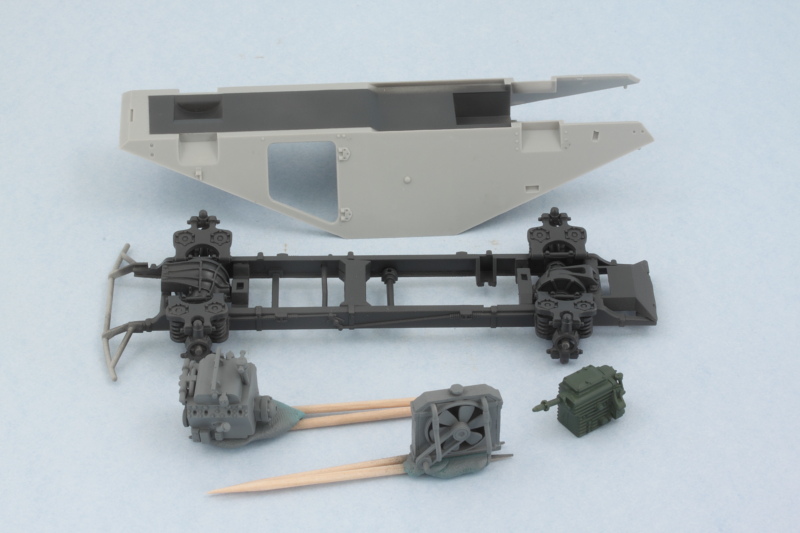 Later on when the chassis and lower hull are joined up there will need to be some small touch-ups to the Panzer Gray areas but that's not a huge deal. Much more important that the hull and chassis have a clean surface for gluing. Some of the area at the front will be painted over once it comes time to apply a Tropen scheme. Once the paint fully cures I can move on to the detail work for this little 'mini-kit' portion of the build. |
|
|
|
Post by Leon on Feb 3, 2015 16:30:01 GMT -5
Bill! Nice to see a little color go on.Looking good.  |
|
|
|
Post by bullardino on Feb 3, 2015 16:33:21 GMT -5
Interesting idea, nice to see some colour on  |
|
|
|
Post by wbill76 on Feb 3, 2015 20:01:54 GMT -5
Thanks Leon! Lui, let's see if it works...  Thanks for dropping by!  |
|
|
|
Post by TRM on Feb 3, 2015 21:26:38 GMT -5
Yay color!!!  Always a good thing!! Looking mighty fine as usual sir!! Even though I don't get into the whole footbal thing...as you know, it was quite an interesting turnaround. Made things exciting right to the end!! |
|
406 Silverado
Global Administrator     
Member since: November 2011
Posts: 10,214
Member is Online
MSC Staff
|
Post by 406 Silverado on Feb 3, 2015 21:45:16 GMT -5
hey we have some paint, awesome. Sometimes you have to stop building to paint those places that will be hard to reach later on. I know the SdKfz 231 will be the same as yours here Bill.
|
|
|
|
Post by wbill76 on Feb 3, 2015 21:59:31 GMT -5
T, sure made for an exciting game and finish, no doubt about that! Definitely not a repeat of the Broncos fiasco from last year.  Rob Rob, very true...no way the underside could be adequately painted later on...I still have to add the drive shafts and the steering linkages! Will be very similar on the 231, just with more wheels! 
|
|
406 Silverado
Global Administrator     
Member since: November 2011
Posts: 10,214
Member is Online
MSC Staff
|
Post by 406 Silverado on Feb 4, 2015 8:11:30 GMT -5
Bill....just saying lol. 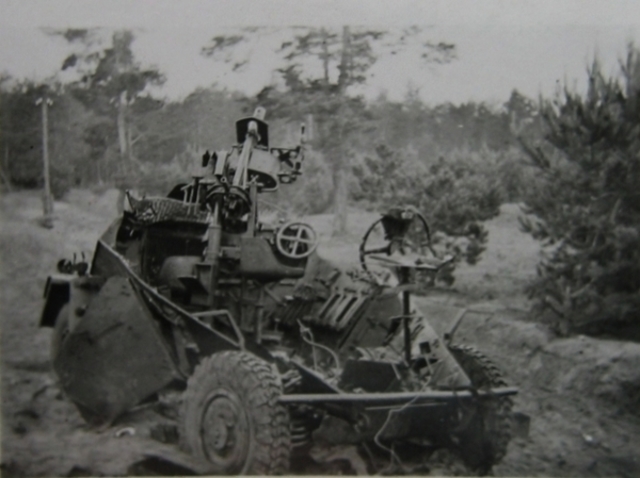 |
|
detailfreak
Full Member
  
Member since: July 2012
Crazy Swede
Posts: 371
Jul 28, 2012 15:12:35 GMT -5
Jul 28, 2012 15:12:35 GMT -5
|
Post by detailfreak on Feb 4, 2015 10:49:57 GMT -5
Great build so far Bill,been tinkerin with this same kit meself,along with about 4-6 others including that Whirblewind I purchased from ya. Picked up the Griffon P.E. for it,and let me say its extensive.Lookin forward to more on this.
|
|
|
|
Post by dierk on Feb 4, 2015 13:20:49 GMT -5
This almost makes me want to start doing German armour again - but my stash is too big already (poke): currently spread over three locations in two countries lol
|
|
|
|
Post by wbill76 on Feb 4, 2015 13:43:46 GMT -5
That's about as wrecked as you can get Rob!  Glad to have you along for the ride Greg! This kit's got plenty of room to tinker with for sure.  Dierk Dierk, that's quite a distribution/logistics challenge!  Hopefully you can get it centralized sooner rather than later. |
|
|
|
Post by dierk on Feb 5, 2015 8:17:42 GMT -5
Dierk, that's quite a distribution/logistics challenge!  Hopefully you can get it centralized sooner rather than later. It's not that bad, Bill - and has certain advantages: main one is that SWMBO is not fully aware of the extent of my addiction! And you know what they say (well, I do anyway): Order is for idiots, only the genius can control chaos lol |
|
madairbrush
Full Member
   November 2012 MoM Winner
Member since: May 2012
Cheers!! Matt
Posts: 488
May 30, 2012 14:22:05 GMT -5
May 30, 2012 14:22:05 GMT -5
|
Post by madairbrush on Feb 5, 2015 9:57:11 GMT -5
This model was on my to do list, too. But I first get my hands on another small vehicle - a Autoblinda. I can`t wait to see, how it comes out.
|
|
|
|
Post by wbill76 on Feb 5, 2015 11:30:18 GMT -5
This model was on my to do list, too. But I first get my hands on another small vehicle - a Autoblinda. I can`t wait to see, how it comes out. Thanks and glad to have you along for the ride!  |
|
DeafStuG
Full Member
  
Member since: May 2013
..
Posts: 1,283 
|
Post by DeafStuG on Feb 7, 2015 11:08:39 GMT -5
Looks good neat work - chassis and engine detail.
|
|
|
|
Post by wbill76 on Feb 7, 2015 12:29:26 GMT -5
Thanks Jeremy!
|
|
madairbrush
Full Member
   November 2012 MoM Winner
Member since: May 2012
Cheers!! Matt
Posts: 488
May 30, 2012 14:22:05 GMT -5
May 30, 2012 14:22:05 GMT -5
|
Post by madairbrush on Feb 8, 2015 9:25:54 GMT -5
I wanna see more, more, more...!!!  |
|
|
|
Post by wbill76 on Feb 8, 2015 12:41:12 GMT -5
I wanna see more, more, more...!!!  All in good time my dear sir!  This build will progress at a steady rate but not necessarily a rapid one...stay tuned!  |
|
|
|
Post by wbill76 on Feb 10, 2015 17:39:29 GMT -5
Work continued today on getting the drive-train components detailed and ready for installation. First up was getting some red oxide on the radiator mount and engine tray area. Most of this will get hidden away but enough is visible that it's worth detailing for visual interest at a minimum. 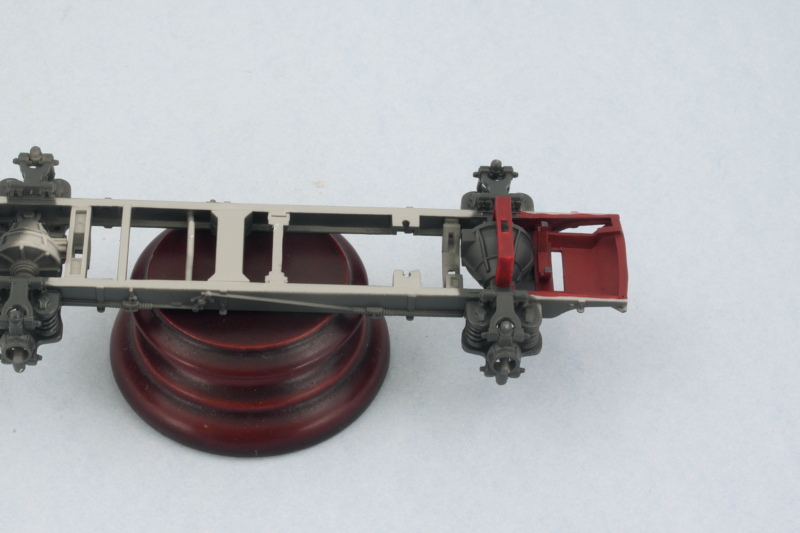 Building on the airbrush work from earlier, I hand detailed and weathered the transmission, radiator, and engine. At first I thought the kit had left out the coolant water return hose but for some reason they just waited to include it in Step 7 as part B39. There's no real reason I can see for doing that...a test fit of the hose in place still allows the hull body to be slid into position with no issues, so I went ahead and painted it up and got it ready. Maybe it was just easier to slip it in on Step 7 since the diagram was already aligned for that area to view...hard to say! 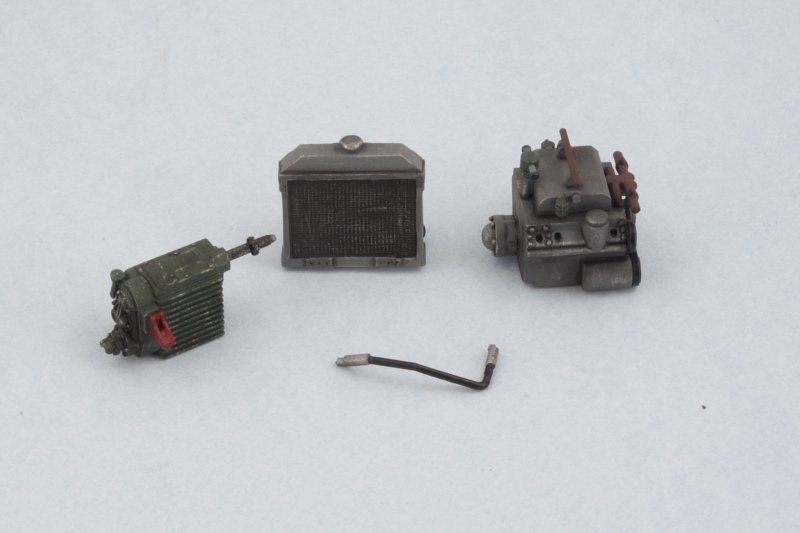 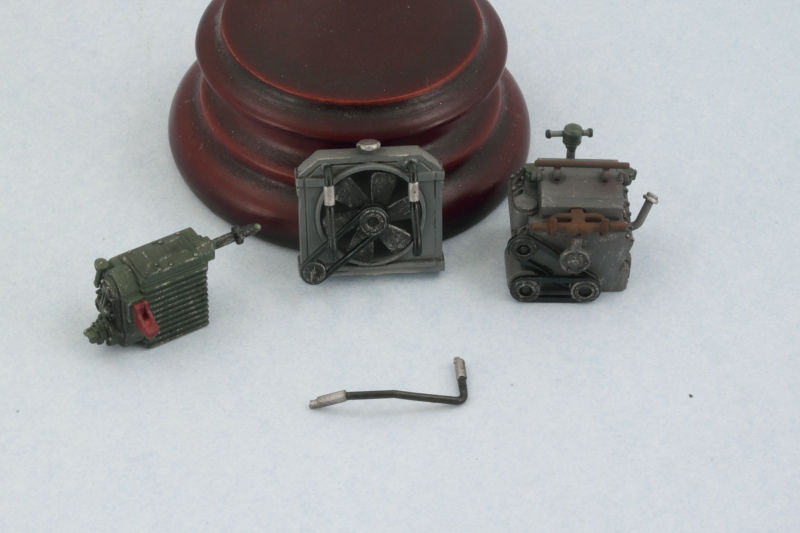 So with all the paint work out of the way, time to install. Transmission went in place first, followed by the radiator mount (the earlier shot only had it test fit), then the engine, and lastly the radiator itself and the return water hose. All of the connection points are kind of delicate or small, so it's essential to let the glue set and avoid anything shifting around in the process. 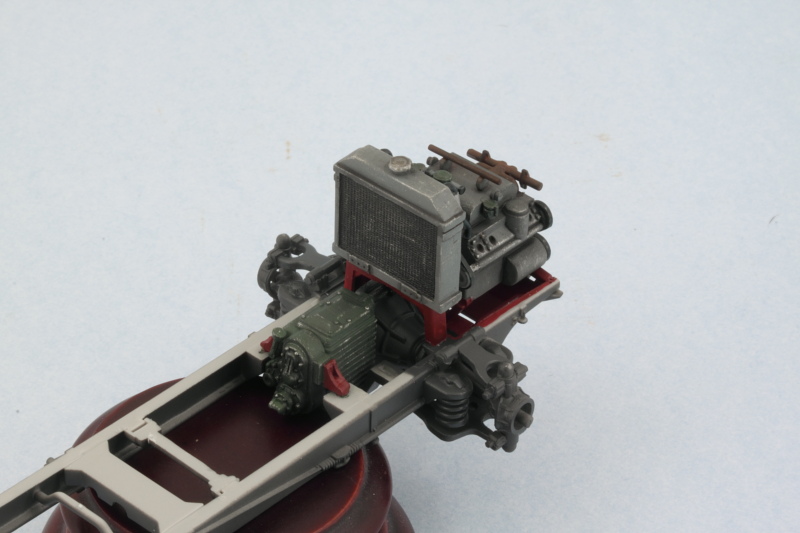 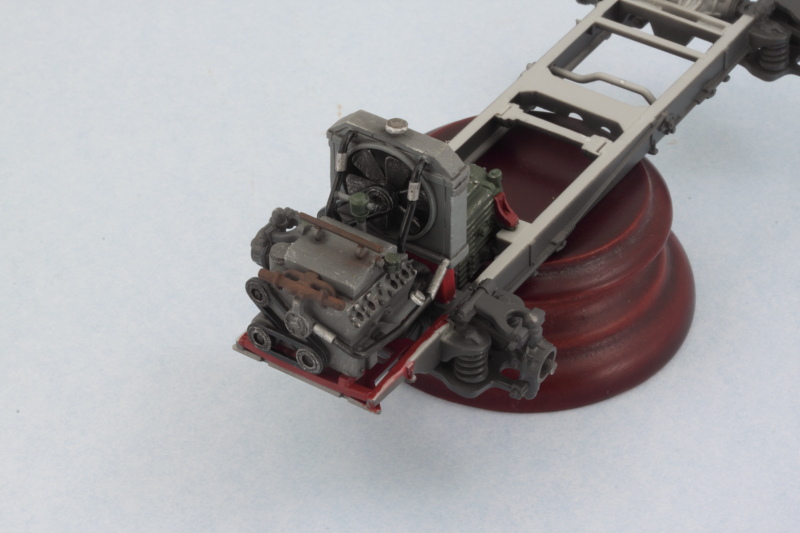 Speaking of that, I also cleaned up the main drive axle and did a test fit with the front of the chassis and the transmission. The length of the shaft part is just a little too long, so I had to sand it down slightly at the vehicle's front end so it would fit properly. It did cause the transmission to shift slightly while the glue was setting on the process mentioned above...so a quick recheck showed everything was still sitting properly and I'll leave the shaft dry-fit in place for now until the glue sets up fully overnight before adding the rest of the suspension components to the chassis. 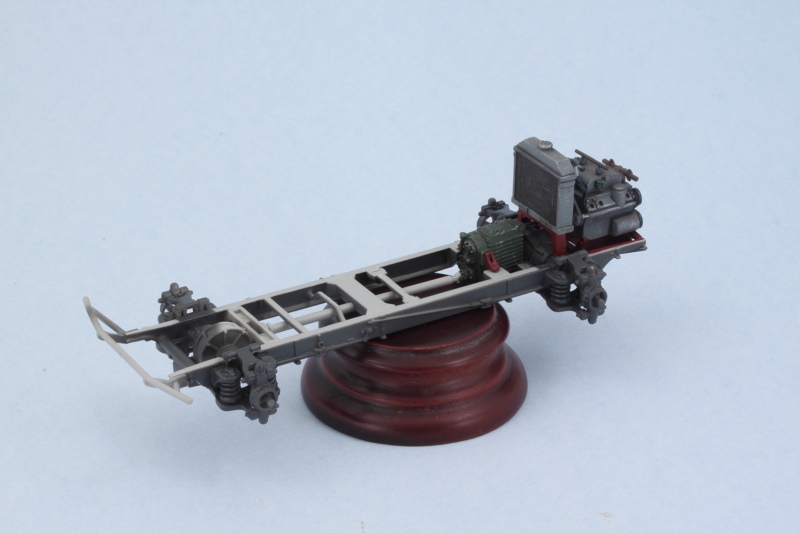 |
|
|
|
Post by deafpanzer on Feb 10, 2015 22:10:31 GMT -5
Superb detail painting!!!
|
|
|
|
Post by TRM on Feb 10, 2015 23:03:13 GMT -5
Looking sweet there Bill!! Nice bit of detail painting!! The engine just pops now!!  |
|
|
|
Post by wbill76 on Feb 11, 2015 11:47:33 GMT -5
Thanks Andy and Todd! Took about 4 hours with the Optivisor to get it all painted up, weathered, and then put together but worth it. HB did a good job with the level of detail they provided IMHO.  |
|
dupes
Head Moderator      Jan '16 MoM Winner
Member since: March 2012
Need to build 80 kits per year until I'm 100 to deplete my stash. Maybe I should sell a couple.
Posts: 7,186
Member is Online
MSC Staff
|
Post by dupes on Feb 11, 2015 12:13:25 GMT -5
Ooooh...really like how that engine came out! What are your base colors under the drybrushing?
|
|
|
|
Post by bullardino on Feb 11, 2015 13:34:09 GMT -5
Very nice progress Bill
|
|