|
|
Post by Deano on Feb 11, 2015 13:40:24 GMT -5
This is coming on a treat here Bill , nice machine work buddy !
|
|
|
|
Post by wbill76 on Feb 11, 2015 13:55:22 GMT -5
Thanks Luigi and Deano, appreciate the support as always!  Ooooh...really like how that engine came out! What are your base colors under the drybrushing? Thanks Dupes! I used different colors for the different components. The base color for the engine and radiator is a kind of ghost gray mix that I had left over from my Seehund adventure that I kept around as it's a nice neutral gray that will be useful for all sorts of things...like radios, engine blocks, etc. It's a custom mix using Testors MM enamel Light Gray, Panzer Schwarzgrau, and some actual Ghost Gray that I had left over in the bottle. Sorry I can't be more precise than that. The transmission's base coat is MM enamel Khaki. For the metal portions like the radiator screen, fan blades, and pulley wheels, the base coat is MM non-buffing Metalizer Gunmetal. HTH! |
|
dupes
Head Moderator      Jan '16 MoM Winner
Member since: March 2012
Need to build 80 kits per year until I'm 100 to deplete my stash. Maybe I should sell a couple.
Posts: 7,186
Member is Online
MSC Staff
|
Post by dupes on Feb 11, 2015 14:47:23 GMT -5
So a lot of non-metallic base colors. Cool. I'm always convinced that engine-y parts have to be metallic (more than likely due to Mr. Tamiya telling me so), but it is indeed NOT the case as evidenced here! Going to have to play around with this a bit.
|
|
|
|
Post by Tobi on Feb 11, 2015 16:24:52 GMT -5
Looking sweet! Great thing Hobby Boss included an engine. I still would like to have an AM engine for my old Tamiya kits. Maybe I need a HB 222, too!  |
|
|
|
Post by wbill76 on Feb 11, 2015 19:38:27 GMT -5
Dupes, for the most part WWII stuff generally got at least a primer coat of paint to give it more durability than say regular civilian use stuff. In the case of the Germans, tank and AFV engines were often given either a green or grey (and sometimes even red oxide) primer coat as a matter of course depending on what we're talking about and the time frame involved...especially if they were supplied in bulk from a different manufacturer from the hull and assembly plant for example. Definitely offers up some options when it comes to this kind of interior work! Tobi, not a bad idea in terms of sourcing engine stuff to beef up the Tamiya kit. I don't know how easily or not the HB parts would fit into the Tamiya kit by themselves, but if everything is the same hull wise in terms of dimensions I don't see why they wouldn't be a cross-fit! 
|
|
|
|
Post by armorguy on Feb 12, 2015 14:38:14 GMT -5
Beautiful paint job,great detail is poppin' !
|
|
406 Silverado
Global Administrator     
Member since: November 2011
Posts: 10,214
Member is Online
MSC Staff
|
Post by 406 Silverado on Feb 12, 2015 15:14:00 GMT -5
A pro at work. Nice painting Bill. makes me want to get moving on the 231.
|
|
|
|
Post by wbill76 on Feb 12, 2015 17:23:02 GMT -5
Thanks Guy! Rob, get moving on that 231! It won't wreck itself you know...  Thanks as always buddy! |
|
DeafStuG
Full Member
  
Member since: May 2013
..
Posts: 1,283 
|
Post by DeafStuG on Feb 12, 2015 17:43:46 GMT -5
Nice colourful inside..
|
|
|
|
Post by wbill76 on Feb 13, 2015 1:43:21 GMT -5
Thanks Jeremy! Still lots to do on the inside, this is just the first of many steps!  |
|
reserve
Senior Member
   
Member since: July 2012
Si vis pacem para bellum
Posts: 2,372
Jul 11, 2012 9:11:45 GMT -5
Jul 11, 2012 9:11:45 GMT -5
|
Post by reserve on Feb 14, 2015 11:18:20 GMT -5
Did I say great job on a complex and rather difficult build earlier? Probably but I still mean it
Regards,
Mark
|
|
|
|
Post by wbill76 on Feb 14, 2015 11:59:51 GMT -5
Did I say great job on a complex and rather difficult build earlier? Probably but I still mean it Regards, Mark Thanks Mark! No worries if a repetition, so much happens around here on a regular basis that it's easy to lose track. Appreciate it all the same...and you're right about this being a complex build. Still a whole lot more to tackle on this baby.  |
|
|
|
Post by wbill76 on Feb 15, 2015 18:32:22 GMT -5
Spent some more time on the chassis getting it all finished up today. First order of business involved airbrushing some MM enamel Afrika Grunbraun (RAL 8000) to the chassis sides, front bumper, and rear hull areas that would've gotten an over-paint treatment while leaving the rest of the underside in the original Panzer Gray. I used the previous Panzer Schwarzgrau base to allow for a little pre-shading as well and strips of blue painter's tape helped mostly keep the paint only to the areas I wanted it. 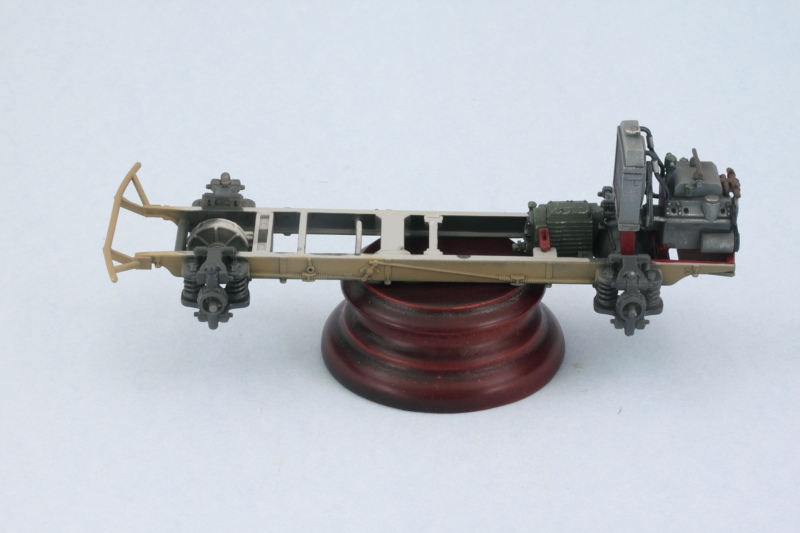 Next I worked on the suspension spring coils to pick them out and add a little more detail. While it's hard to pick up in the photos, in hand the effect is very similar to what I got on the engine block exhaust manifolds. I used a base of MM non-buffing Metalizer Gunmetal, lightly dry brushed some MM enamel Steel, then applied a wash of thinned MM enamel Leather and a light dusting of some rust colored artist pastels. 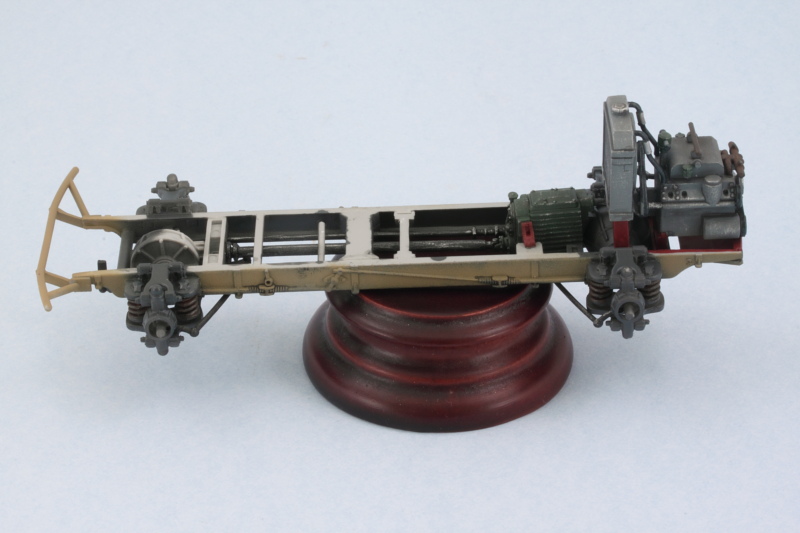 Getting the drive shaft and steering elements in place is a bit of an exercise. The instruction diagrams are a little vague in spots so it's necessary to study it a bit to get it all in place. These components were hand painted first and then installed to get it all together. Base of non-buffing Metalizer Gunmetal followed by some lightly dry brushed enamel Steel. 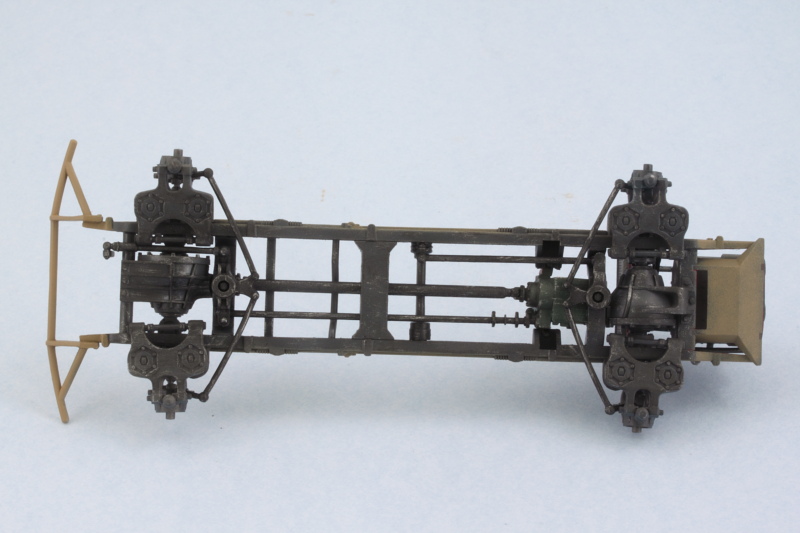 And just for fun, here's how it's all stacking up so far when dry-fitted to the lower hull. 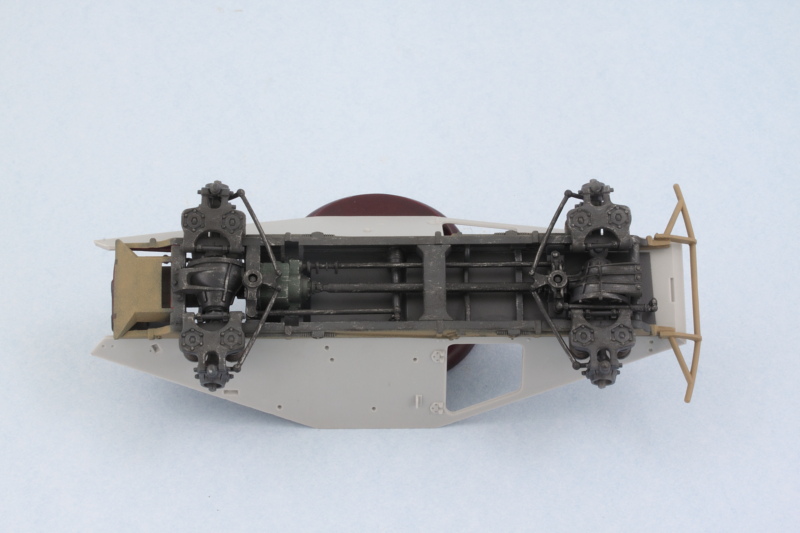 Onward and upward!  |
|
|
|
Post by wing_nut on Feb 15, 2015 19:17:15 GMT -5
Haven't checked in here in a while. I hope my room is still available. Looking very nice indeed my friend.
|
|
|
|
Post by wbill76 on Feb 15, 2015 19:55:28 GMT -5
Thanks Marc! Always room for you of course.  Glad you like how it's progressing. |
|
|
|
Post by Leon on Feb 15, 2015 20:03:08 GMT -5
Some more great Sunday progress Bill.  |
|
DeafStuG
Full Member
  
Member since: May 2013
..
Posts: 1,283 
|
Post by DeafStuG on Feb 15, 2015 20:04:21 GMT -5
Looks good.
|
|
|
|
Post by wbill76 on Feb 15, 2015 20:39:39 GMT -5
Thanks Leon and Jeremy!
|
|
desertrat
Full Member
  
Member since: October 2013
Posts: 934 
|
Post by desertrat on Feb 16, 2015 14:15:49 GMT -5
really taking shape now, looking great,
|
|
|
|
Post by wbill76 on Feb 16, 2015 17:09:37 GMT -5
Thanks DR! The chassis by itself is a virtual kit-within-a-kit but just about got it all squared away now. Just have to be sure the resin replacement wheels will play nice with the kit hubs and should be all set to move on to the hull as the next phase.
|
|
tommy1drop
Full Member
  
Member since: March 2012
Posts: 199
Mar 21, 2012 12:16:43 GMT -5
Mar 21, 2012 12:16:43 GMT -5
|
Post by tommy1drop on Feb 17, 2015 7:04:54 GMT -5
Coming along lovely.
|
|
|
|
Post by bullardino on Feb 17, 2015 7:06:52 GMT -5
Wow, it looks excellent as always your builds do.
|
|
|
|
Post by wbill76 on Feb 17, 2015 14:59:30 GMT -5
Thanks Tommy and Luigi! Appreciate the comments as always.
|
|
|
|
Post by wbill76 on Feb 17, 2015 17:36:17 GMT -5
Had some time today so I devoted some attention to the wheels. The True Details resin tires needed some clean-up to remove the interior circles from the casting process and their pour stubs removed of course as well. Test fits with the kit's wheel hubs showed that some additional fine trimming and sanding with a round needle file was necessary to further adjust the inner diameter to allow the hub halves to snap into position. Not quite a drop fit but not a huge effort required either to get everything to play nice. Just a case of lots of small adjustments back and forth with each one until the fit was just right. Of course, since I wasn't using the flexible vinyl tires, the hub halves need to be left separate and not joined together as called for in the instructions. Right now they are just dry fit in position (by not adding the little cap, part A20, it's possible to push the front hubs back out through the axle hole in the rear hub) and will be permanently installed once painted. The resin tires are slightly wider than the kit tires to allow both the inner and outer hubs to fit correctly flush up against the tire and of course don't have the vinyl seam down the middle. Since vehicles in N. Africa typically didn't have the triangular armored hub covers, I left those off for consistency with the vehicle I'm modeling. 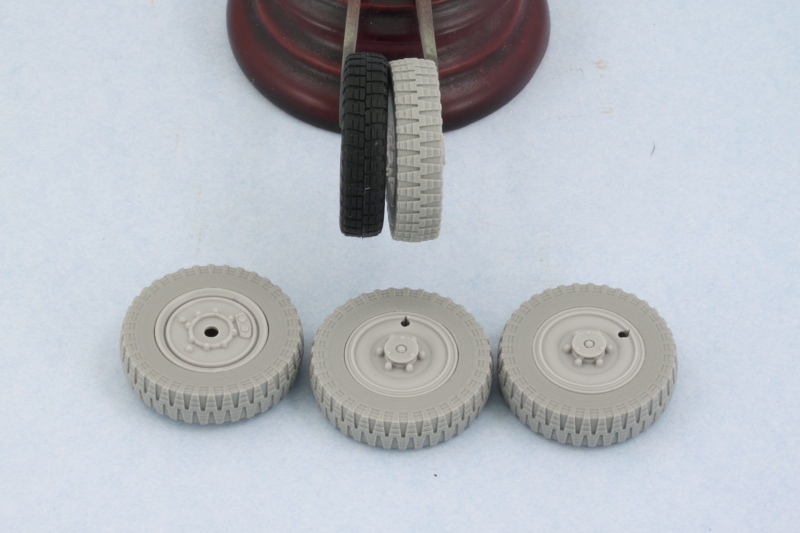 A quick test fit with the aid of some blue-tack poster putty shows everything's playing nice and sitting level, always a good sign! 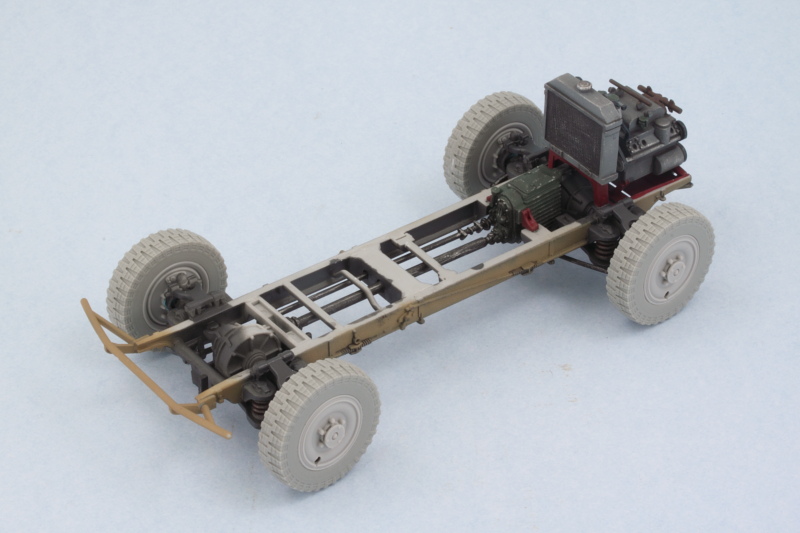 Next up will be getting some paint on those wheels and tires and then setting them off to the side. I don't want to install them permanently until after I've got the hull and chassis together to make sure I can make any minor adjustments needed down the road to ensure a level set to the whole vehicle. |
|
DeafStuG
Full Member
  
Member since: May 2013
..
Posts: 1,283 
|
Post by DeafStuG on Feb 18, 2015 21:14:52 GMT -5
Looks good.
|
|
|
|
Post by TRM on Feb 18, 2015 22:05:38 GMT -5
Had to catch up a bit on the..only a couple posts!  Great seeing the lower end together Bill!! New sneakers look sweet! Cleanup seems par for the course...at least form some of the vendors! Looking forward to seeing them in some color soon!!  |
|
afvfan
Senior Member
   
Member since: December 2012
Bob
Posts: 1,772
Dec 10, 2012 17:32:38 GMT -5
Dec 10, 2012 17:32:38 GMT -5
|
Post by afvfan on Feb 18, 2015 23:59:44 GMT -5
Throw a seat and some controls up front and you've got yourself a neat little dune buggy!
|
|
|
|
Post by wbill76 on Feb 19, 2015 13:53:33 GMT -5
Thanks Jeremy! T, I'm happy with the True Details tires, the clean-up wasn't that big of a chore, more a case of just patient fiddling to get the hubs to fit properly without creating yawning gaps in places around the edges!  Bob Bob, you're not wrong there. Without all the armor to weight it down, I bet this thing could really scoot with that 75HP 8-cylinder.  Even fully built out it had a top speed of 70 km/hr, not bad at all for the times and a combat load of 4.8 metric tons.  |
|
|
|
Post by deafpanzer on Feb 19, 2015 13:56:40 GMT -5
Don't we love aftermarket wheels??? Ordered one for my B-24 Liberator and I was amazed how difference the quality I see between the kit and aftermarket wheels!
|
|
|
|
Post by wbill76 on Feb 19, 2015 14:06:42 GMT -5
Don't we love aftermarket wheels??? Ordered one for my B-24 Liberator and I was amazed how difference the quality I see between the kit and aftermarket wheels! No kidding Andy! Vinyl is ok as far as it goes...but can't beat resin IMHO from a good AM supplier for the detail! |
|