|
|
Post by deafpanzer on Feb 20, 2015 11:22:05 GMT -5
Good! Get back to work you slacker! LOL
|
|
|
|
Post by JimD on Feb 20, 2015 11:25:43 GMT -5
Is this one done yet?  |
|
|
|
Post by wing_nut on Feb 20, 2015 12:22:11 GMT -5
Jeez guys! You're starting to sound like a certian Field Marshall  |
|
|
|
Post by wbill76 on Feb 20, 2015 14:44:43 GMT -5
Glad to hear you got the replacement you needed Marc. Now all you need is a few inches of snow...  |
|
Rick
Full Member
  
Member since: March 2013
what to build, what to build . . . Ok THAT one!
Posts: 854 
|
Post by Rick on Feb 21, 2015 2:17:57 GMT -5
Glad you got the canopy sorted out Marc. All those goodies , I'm sure you'll turn out another masterpiece. Like you said, there's been a number of great Corsairs lately and I got to thinking. Building for over 40 years and I don't think I've ever built a Corsair. Hmm.
Rick
|
|
|
|
Post by wing_nut on Feb 24, 2015 8:50:12 GMT -5
|
|
|
|
Post by JimD on Feb 24, 2015 9:01:23 GMT -5
That is some impressive stuff. I'm going to let you sort it out and if it doesn't give you headaches I will consider one when I do this kit....It's gonna have to fit perfect though. I don't think the kit engine is bad at all...but that's a nice little upgrade I think.
|
|
|
|
Post by deafpanzer on Feb 24, 2015 9:33:54 GMT -5
DAMN! This is sick... no way I will do that myself! LOL
|
|
|
|
Post by wing_nut on Feb 24, 2015 19:57:15 GMT -5
I agree Jimmy the kit engine inst bad at all. But I figured, what-the heck.
Andy, would love to see what you world do with one of these.
|
|
|
|
Post by Leon on Feb 24, 2015 20:16:42 GMT -5
WOW!! Alot of nice detail there Marc.
|
|
|
|
Post by JimD on Feb 24, 2015 20:18:17 GMT -5
I'd never fault anyone for wanting some added resin fun.  Yeah. We need to get Andy his Eagle Scout wingy thing merit badge! |
|
|
|
Post by TRM on Feb 24, 2015 22:05:34 GMT -5
I know what I would do with it...but it probably wouldn't be too pretty!!  Nice looking donkey Marc!! Looking forward to you making some dust on this thing!! Thought I was going nuts and missed a bunch of stuff back to the 4th...btw....sweet a$$ office!!  All caught up now!! Bring on the motor!! |
|
|
|
Post by wing_nut on Feb 28, 2015 7:55:16 GMT -5
The apst few dyas bench time has ben scarce. Not so much cuz I am busy but more cuz apparently I have not gotten the "no paying attention" that plaguesd me on the 109 build out of my system. A few days ago I set about removing the acsting block for th crack case. The fornt has a row of very fine bolts cast around the edge. But of course I only noticed then after I had semi-crushed some of them while sanding the back of the piece. (note to self... glue the front piece on first next time  ) Last night I felt it was time buck up and get back to it, but didn't get mich done. Long day and tired. The ingingation ring is extremely delicate but Vector was nice enough to cast in the smallest of dimples where the wires go. I drill then out with a #80 bit. 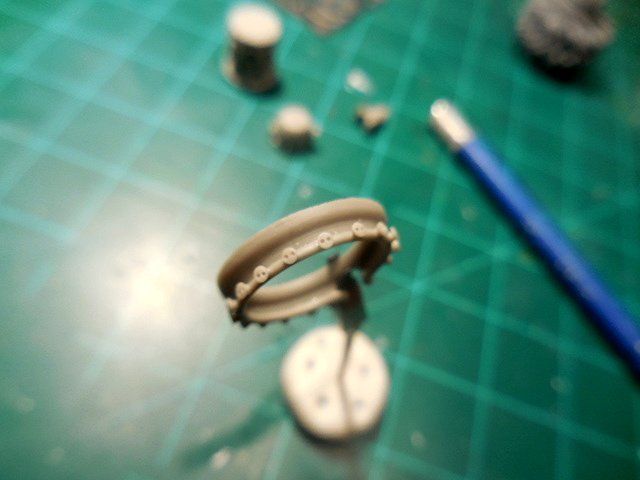 After gluing the font piece on so I didn't F'up more of the bolts (  ) |
|
|
|
Post by Leon on Feb 28, 2015 8:14:05 GMT -5
WOW!! Looking good Marc.  |
|
|
|
Post by wing_nut on Feb 28, 2015 12:56:09 GMT -5
Thanks Leon That was weird... my last post was there twice and when I deleted one it took half of he other one with it  Whatever. It wasn't much. All I did was drill holes where the mark on the crank case for the push rod tubes were located. the thinking is it will be easier to have a little wiggle room instead trying to cut 36 piece of wire to fit between the crank case and the rocker arm. I slapped the kit engine together as a guide sine the Vector instruction sheet is nothing more than a mall drawing on a 3x3" piece of paper. 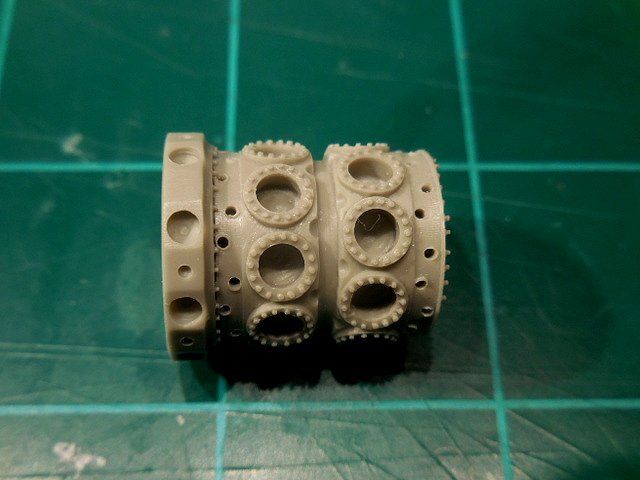 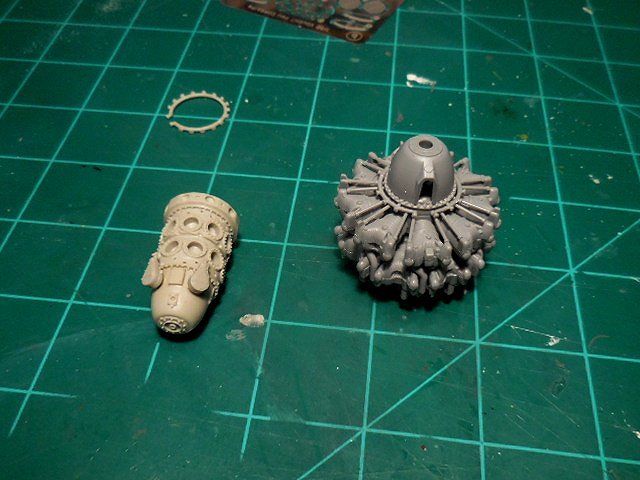 |
|
|
|
Post by deafpanzer on Feb 28, 2015 14:02:43 GMT -5
WOW! So many details... can't wait to see how it compares to the kit engine!
|
|
|
|
Post by JimD on Feb 28, 2015 14:23:14 GMT -5
Said it once, but that's some nice looking chunks of resin. Things are coming along nicely. Just remember it's not a race...so if you're not feeling it, don't force it. That's my motto....which is why I've slowed a bit the past couple of weeks...but I've learned nothing good can happen when I try to work with my mind wandering  |
|
bbrowniii
Full Member
  
Member since: March 2012
If you are not part of the solution, you are part of the precipitate.
Posts: 1,238
Mar 25, 2012 22:08:04 GMT -5
Mar 25, 2012 22:08:04 GMT -5
|
Post by bbrowniii on Feb 28, 2015 15:25:18 GMT -5
That is a sexy looking engine Marc. Glad to see this one back underway.
|
|
|
|
Post by wbill76 on Mar 1, 2015 19:11:22 GMT -5
Nice start to the engine...remember not to crush any more bolts!  |
|
|
|
Post by wing_nut on Mar 2, 2015 16:53:19 GMT -5
Work on the R2800 continues. Crack Case is painted and dry brushed. 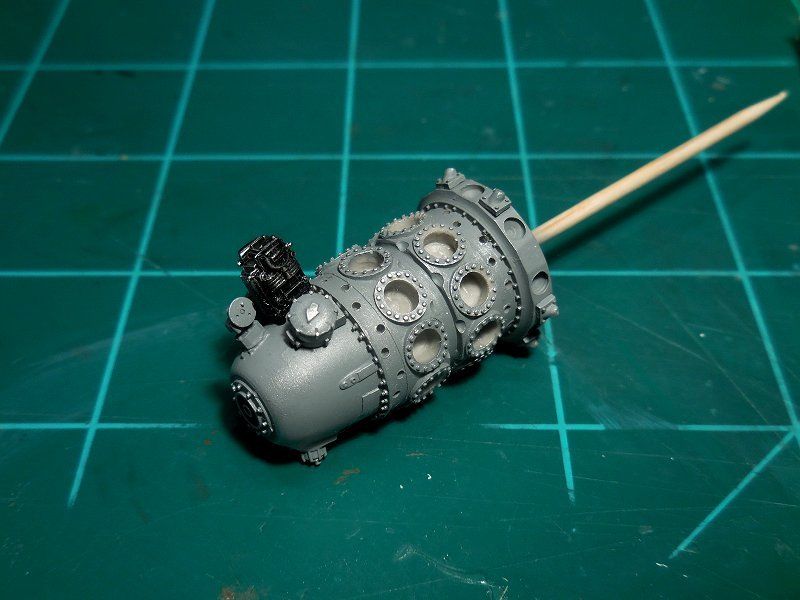 1st to do after that was drill 108 holes in the cylinders[  ]... 6 holes in ea. of 18 cylinders. 2 pilot holes for the spark plugs then drilling that out to the final size and then the holes for the little handles or guards or whatever they are. Next was to make 18 pieces of wire exactly the same and size. I made a quick jig with some sheet styrene. Push the wire into the depression, bend the sides down, trim and Bob's your uncles... a perfect match and fit. 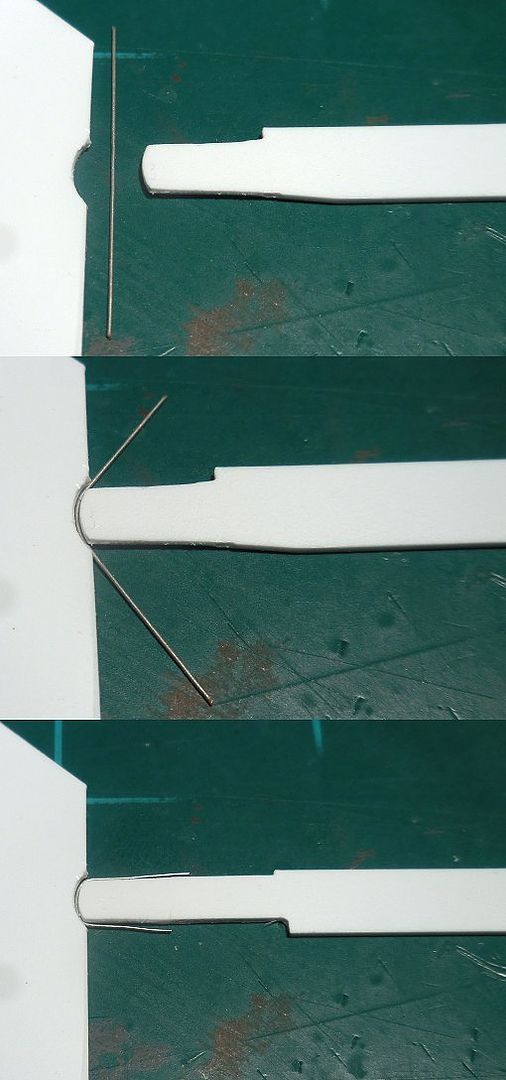 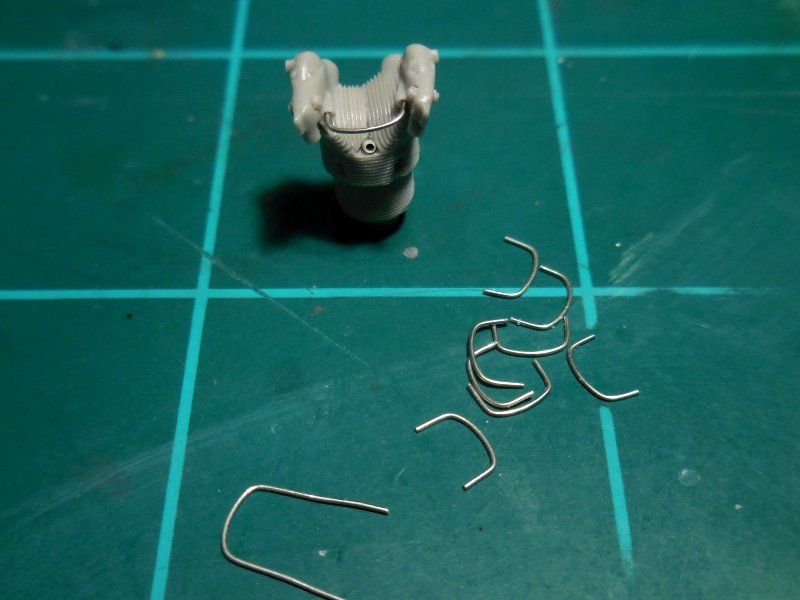 The cylinders were painted with aluminum Alclad and given a black oil wash on the cooling fins. Here where it is at the moment. I can't do the wiring yet since I have to wait for some tiny metal hex nuts from Scale Hardware. 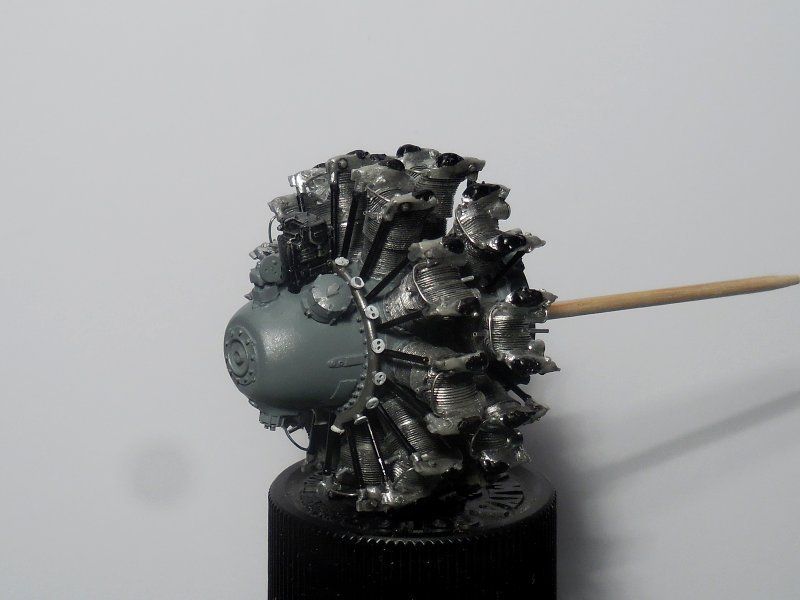 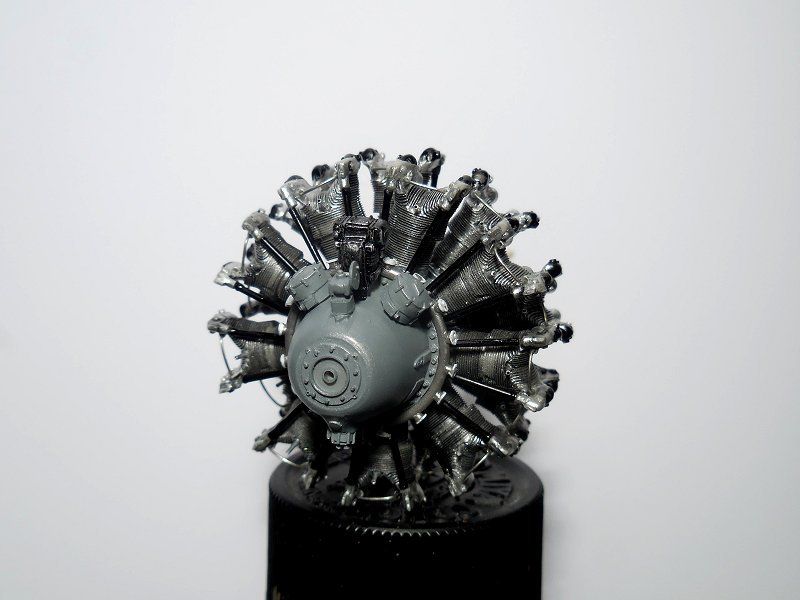 |
|
|
|
Post by wbill76 on Mar 2, 2015 17:03:57 GMT -5
Neat little trick on the jig for those wires...don't envy you those 108 holes, but at least that's out of the way. Fantastic work on the engine so far as usual.
|
|
|
|
Post by mrt51 on Mar 2, 2015 17:06:58 GMT -5
That jig is an inspiration. I learn something every day.
Thanks!
|
|
|
|
Post by wing_nut on Mar 2, 2015 17:10:08 GMT -5
Andy, Jimmy, Boyd, Bill... and Bill again  I cut and paste this from word and forgot to acknowledge your comments with hearty thank you. I've been careful Bill, don't worry  |
|
|
|
Post by JimD on Mar 2, 2015 17:16:46 GMT -5
That's a work of art. Wow. Seriously great stuff. I admire your patience with the dri but, boy did it pay off
|
|
|
|
Post by wing_nut on Mar 2, 2015 17:18:37 GMT -5
Thanks 51.  |
|
|
|
Post by wing_nut on Mar 3, 2015 12:34:07 GMT -5
Thanks Jimmy. we must have posted at the same time. I just hope the damn thing fits.
|
|
|
|
Post by JimD on Mar 3, 2015 13:10:00 GMT -5
Thanks Jimmy. we must have posted at the same time. I just hope the damn thing fits. I hope it does too.  The kit engine on the birdcage was snug for me, but it fit. Hopefully it doesn't give you too much trouble...are you planning to leave the cowling off or at least keep it removable? |
|
|
|
Post by wing_nut on Mar 6, 2015 17:05:16 GMT -5
Cutting a few dozen, 54 to be exact, of these little rings from aluminum tubing and finishing the wiring took most of my snow day yesterday. 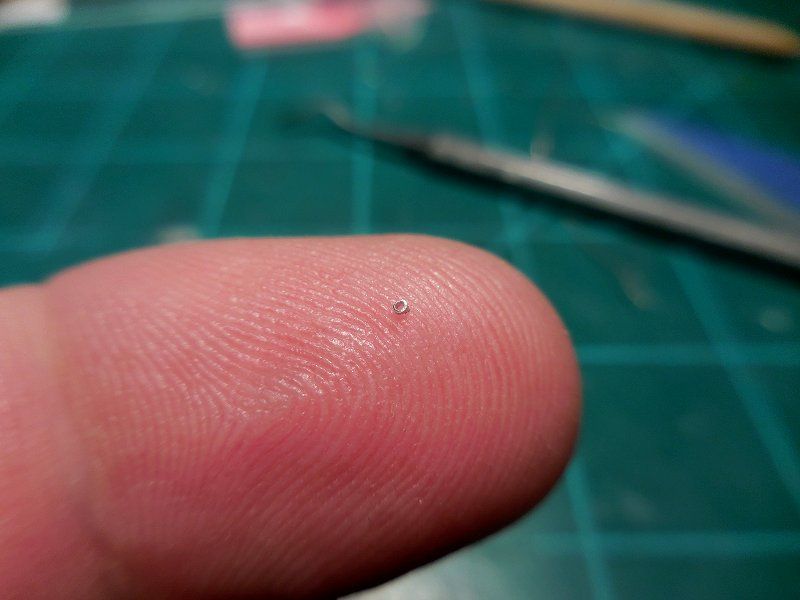 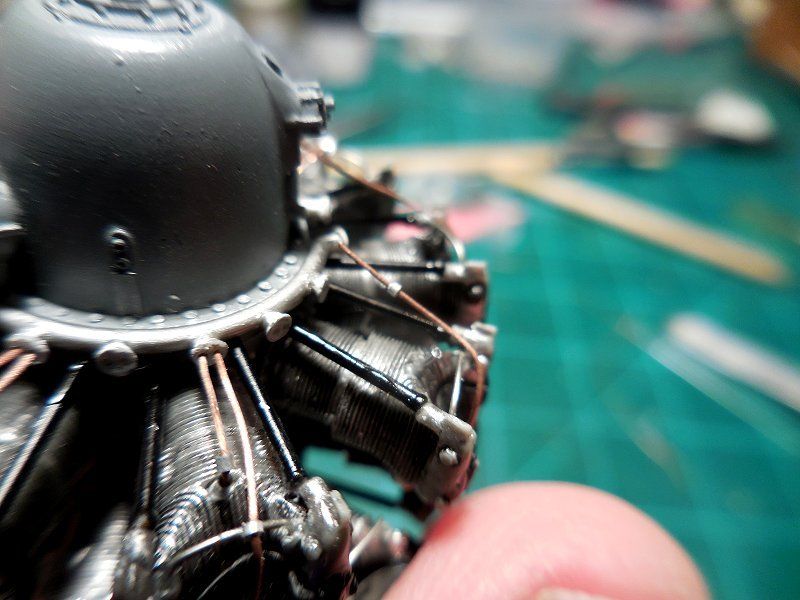 Here is the nearly completed engine. I still need to work out the exhaust pipes since there is a difference in the set up for the Vector engine from the kit engine. But I think the kit parts will meld into this well enough, with some modification, to be able to mount the engine to the firewall with what will essentially be following the kit instructions. Of the 78 resin parts in the bag, I've used 48 here. Total parts count after all the wiring, fittings, spark plugs, rocker arm oil lines etc. 221. I made the stand and base to display it, at least until it's time to install into the fuselage, since it is a completed model unto itself. 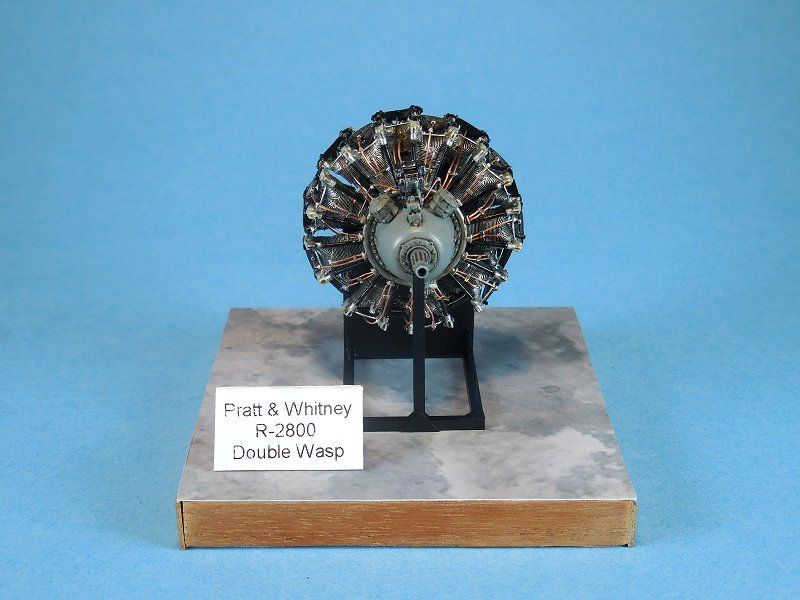 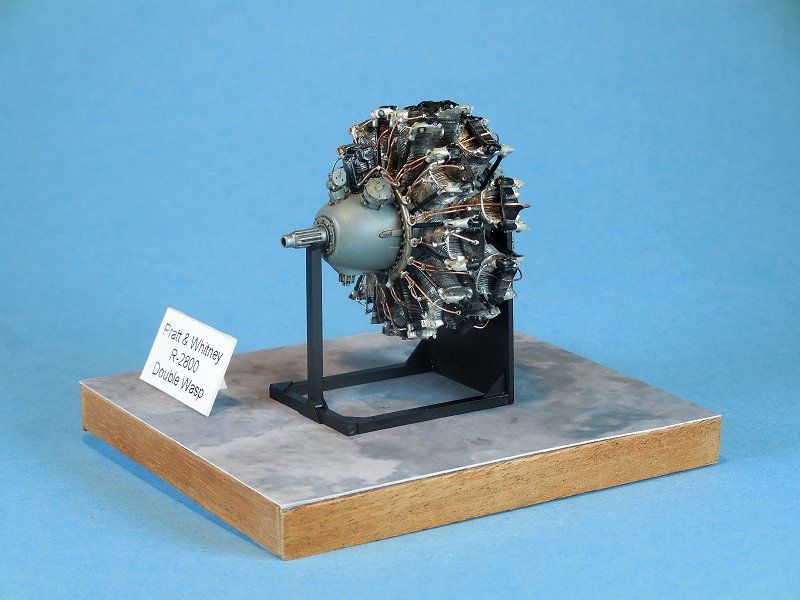 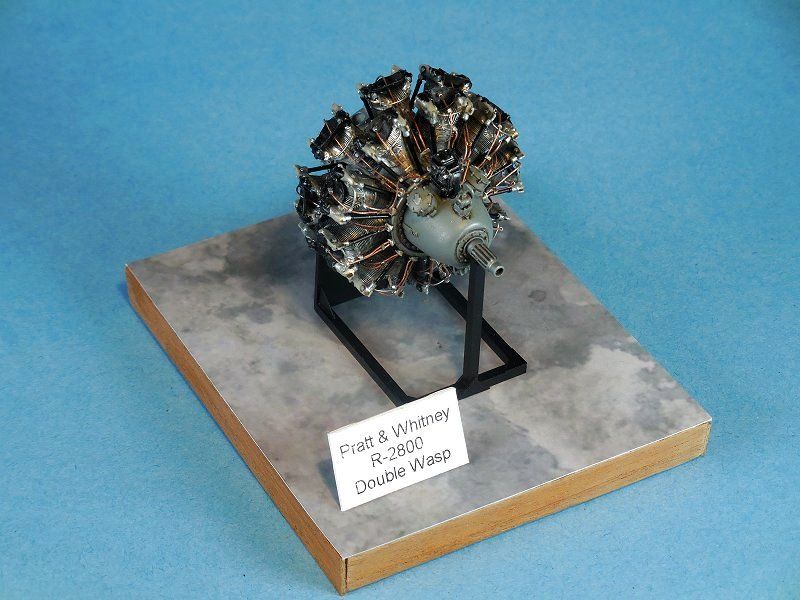 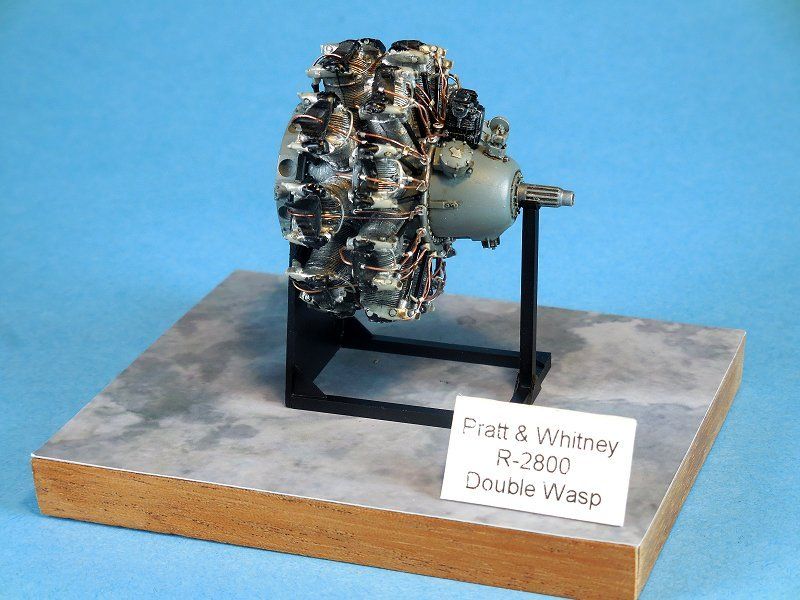 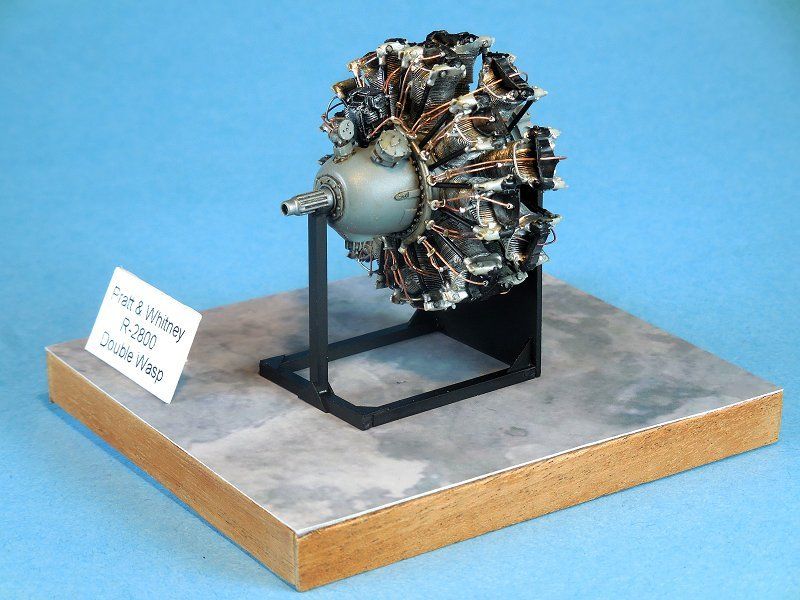 |
|
|
|
Post by Leon on Mar 6, 2015 17:15:12 GMT -5
WOW!!!  That is some awesome work Mark  .I applaud your patience on drilling all those holes.  |
|
|
|
Post by JimD on Mar 6, 2015 17:49:15 GMT -5
You can take your incredibly awesome engine and shove it right...up...um...your Corsair's cowl. Awesome job. Best I've ever seen. Congrats man...all that work was worth it.
|
|