|
|
Post by TRM on Mar 6, 2015 20:53:45 GMT -5
This is off the chain Marc!! Well done!! I caught the front half..missed all the stuff in the moddle and picked up on the end game!! What a great looking piece!! Well done!!
|
|
|
|
Post by Tojo72 on Mar 6, 2015 21:46:15 GMT -5
Absulutly stunning.
|
|
|
|
Post by wbill76 on Mar 7, 2015 17:40:08 GMT -5
Almost a shame to install it vs. leaving it as-is!  Beautiful work for sure Marc. |
|
|
|
Post by wing_nut on Mar 9, 2015 23:17:26 GMT -5
|
|
delta
Full Member
  
Member since: January 2015
Posts: 365 
|
Post by delta on Mar 9, 2015 23:44:37 GMT -5
I love the drip pan idea! Execution on that and the cockpit are of course, also amazing  |
|
|
|
Post by wing_nut on Mar 11, 2015 8:11:10 GMT -5
Thanks delta.
It looks like the engine is just short of fitting. Gotta do some figurin' to see if thinning the cowl will work or will I have to grind the bumps over the rocker arm covers.
|
|
|
|
Post by Tojo72 on Mar 11, 2015 8:17:05 GMT -5
Office looks real nice.
|
|
|
|
Post by wing_nut on Mar 11, 2015 9:55:04 GMT -5
Thanks Anthony
|
|
|
|
Post by wbill76 on Mar 11, 2015 12:40:28 GMT -5
Well now you've gone and done it Marc...you know once you give an engine a drip pan, it will never leave!  Nice progress on the pit and interior details. |
|
Rick
Full Member
  
Member since: March 2013
what to build, what to build . . . Ok THAT one!
Posts: 854 
|
Post by Rick on Mar 11, 2015 12:42:17 GMT -5
Great progress Marc. Fantastic office and damn fine motor skills
Rick
|
|
|
|
Post by deafpanzer on Mar 11, 2015 17:35:07 GMT -5
WHOA!!! Beautiful work on the pit... you nailed it!
|
|
|
|
Post by dupes on Mar 11, 2015 17:40:16 GMT -5
Wow, man. That cockpit is hot. Pretty sweet kit!
|
|
|
|
Post by Leon on Mar 11, 2015 18:34:05 GMT -5
Awesome work on the office and interior Marc  ! Looking really good.  |
|
bbrowniii
Full Member
  
Member since: March 2012
If you are not part of the solution, you are part of the precipitate.
Posts: 1,238
Mar 25, 2012 22:08:04 GMT -5
Mar 25, 2012 22:08:04 GMT -5
|
Post by bbrowniii on Mar 11, 2015 18:47:49 GMT -5
Your Corsair makes me all goose-pimply...
|
|
|
|
Post by wing_nut on Mar 12, 2015 4:52:23 GMT -5
Thanks for all the comments fellas. Glad you're enjoying it so far. Bill, it does seem a shame to waste a good drip pan but I don't think it will take much work to get the engine to fit. Marc, this kit is pretty sweet so far. As complex the pit and tail wheel assembly is the fuselage fit perfect. Don't recall a fuselage going together that well. Boyd, you know this brings our relationship to a whole new level  |
|
|
|
Post by wing_nut on Mar 12, 2015 11:16:59 GMT -5
Started working on the exhausts by drilling them out so the pipes walls were scaled to 3/8" thick. No putty needed and just a few wipes with a sanding stick was all that was needed for the fuselage. 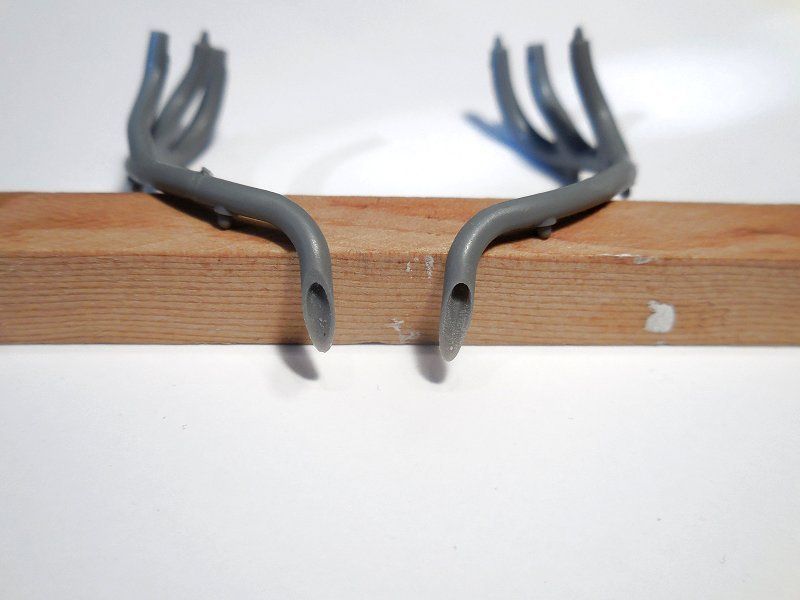 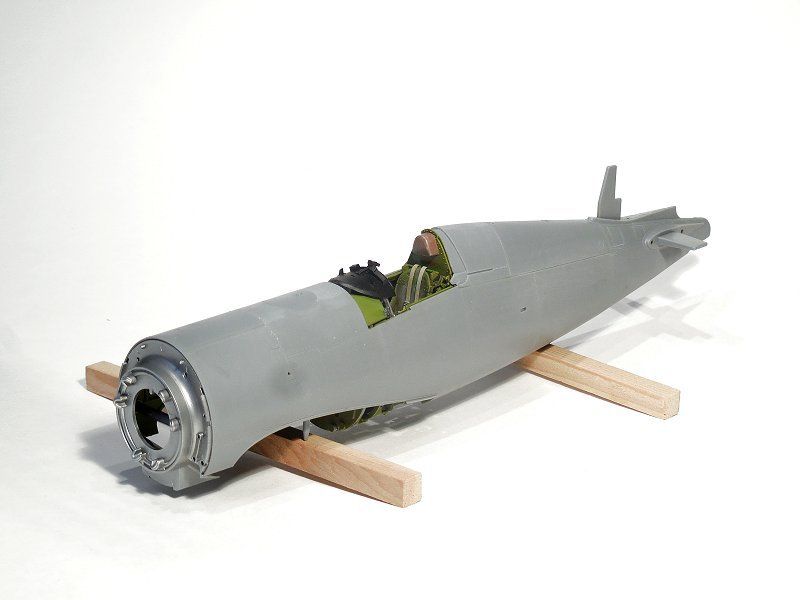 |
|
|
|
Post by JimD on Mar 12, 2015 11:36:24 GMT -5
Bringing back memories for me. It should almost be criminal how well everything fits together on this kit....ALMOST...makes building just about anything else somewhat of a letdown.  |
|
Wes
Full Member
  
Member since: November 2011
Posts: 686
Nov 16, 2011 9:34:50 GMT -5
Nov 16, 2011 9:34:50 GMT -5
|
Post by Wes on Mar 12, 2015 13:03:10 GMT -5
Marc your work is certainly out of the top drawer. Love seeing your updates.
|
|
|
|
Post by wing_nut on Mar 12, 2015 15:34:46 GMT -5
Jimmy, not the same as those "chemically' induced flashbacks  but I know what you mean. Thanks friend. Thanks Wes. Happy that you are enjoying them |
|
|
|
Post by Leon on Mar 12, 2015 17:44:30 GMT -5
Looking really clean Marc! Nice work on the exhaust and fuse.  |
|
Rick
Full Member
  
Member since: March 2013
what to build, what to build . . . Ok THAT one!
Posts: 854 
|
Post by Rick on Mar 12, 2015 19:57:33 GMT -5
Looks great Marc. Gonna be a real beauty.
Rick
|
|
|
|
Post by wing_nut on Mar 12, 2015 20:43:28 GMT -5
Leon, Rick.... thanks fellas
|
|
|
|
Post by wing_nut on Mar 14, 2015 12:09:46 GMT -5
Hello boys and girls. Finally at the point where I can see how the engine in going to go in this beast. Started with some resin upgrades. Molded in ribs inside the front cowl where removed, so far the hardest thing on this model, and replaced with resin ribs after with some Evergreen strips put in 1st as the bottom flange. The replacement cowl flaps had the internal pieces glued ready to mount. 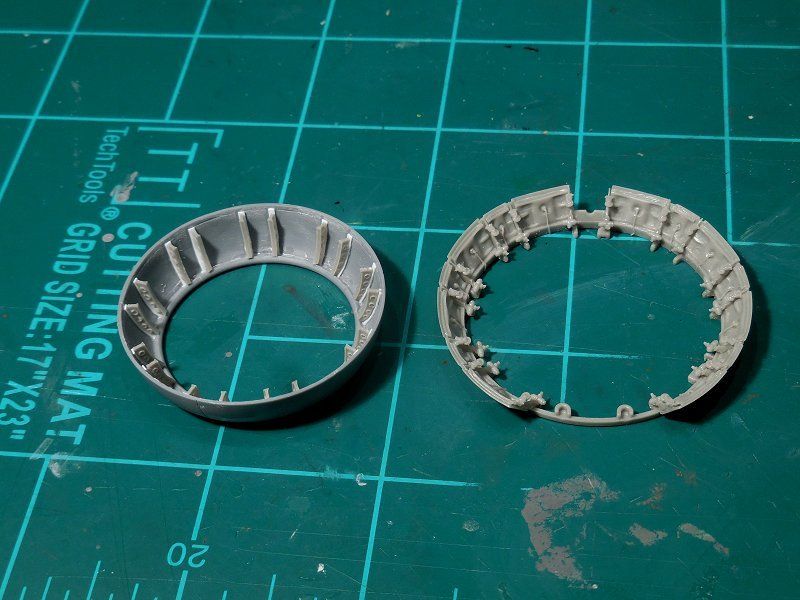 Once the exhaust pipes were installed I could put the kit engine in place to see the connections and spacing. I determined that back part of the Vector engine would need to be thinned so cutting it off and making a spacer was the easiest way to go. 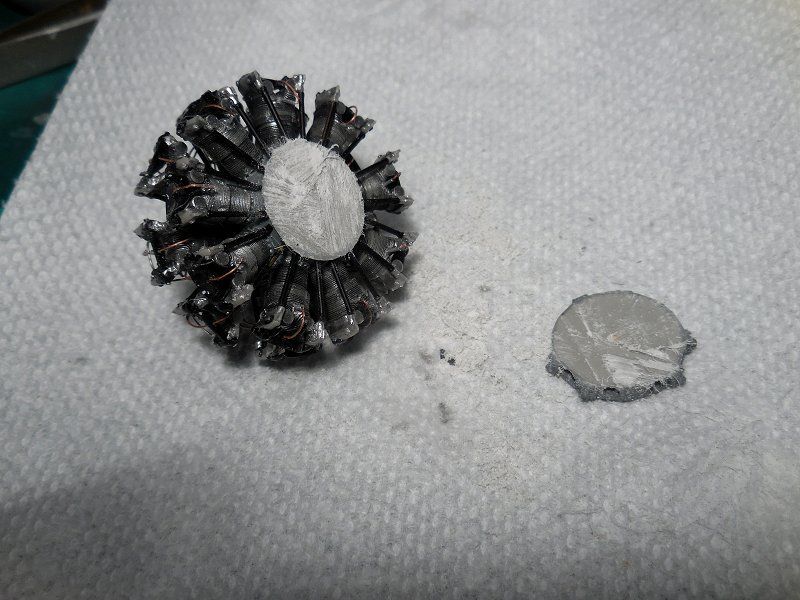 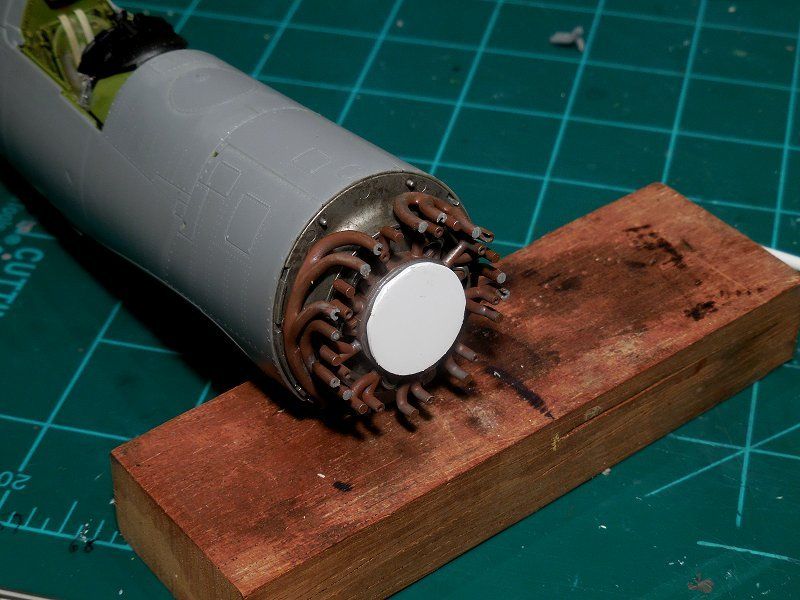 I made a quick jig with the kit engine to see how far it would extend once installed and used this to space the Vector engine. The kit pipes don't line up with the cylinders perfectly and there is a small gap. Some of the pipes will be seen under the cowl flaps but it doesn't look like it where they actually connect to the cylinders will be visible. The engine is just temporarily tacked in place with some fun tack. The parts that form the cowl directly over the head don't fit and are very thin already so it looks like adjusting the rocker arm covers is going to have to be done. 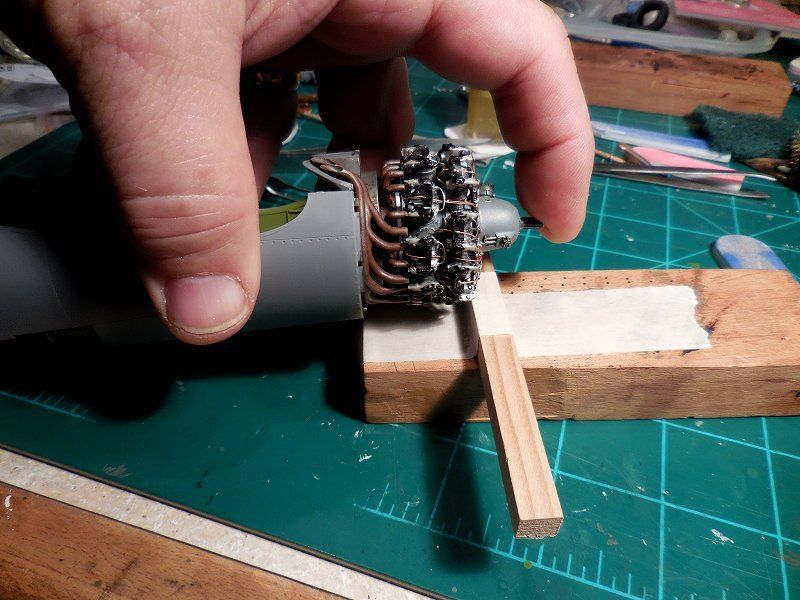 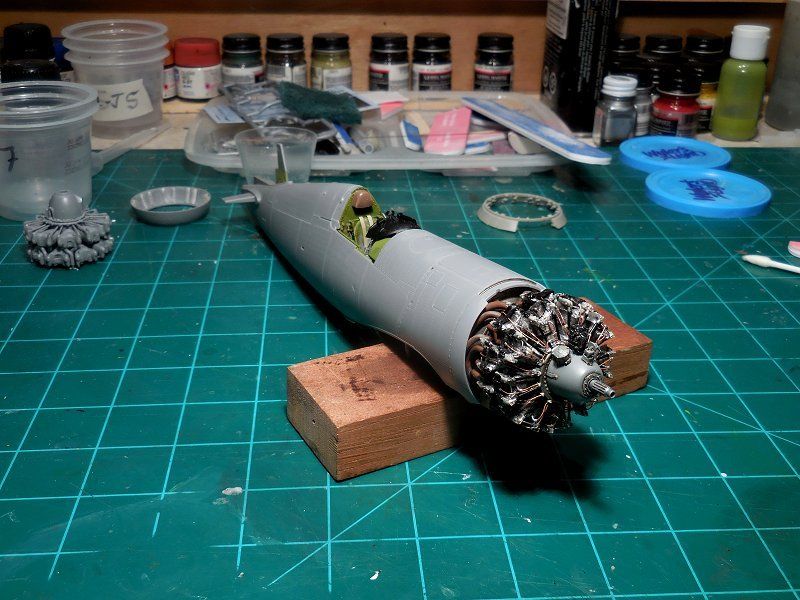 |
|
|
|
Post by JimD on Mar 14, 2015 12:17:45 GMT -5
I just can't get over how killer that engine looks, and now I have some ideas to steal if I decide to use one on my -1a build. Looks like you've got it well sorted out. It's totally going to be worth it. Just keep telling yourself that  |
|
|
|
Post by wbill76 on Mar 14, 2015 14:12:11 GMT -5
Looks like it's all going to come together without too much modification required Marc. Could be much more complicated for sure...but don't say that or you'll jinx it.  |
|
|
|
Post by Leon on Mar 14, 2015 17:08:48 GMT -5
Marc! The engine looks great test fit.  |
|
|
|
Post by wing_nut on Mar 14, 2015 19:33:11 GMT -5
It's worth it,It's worth it, It's worth it,...not working Jimmy.  Bill, having the cowl open to see the engine would be some work. Thanks Leon. |
|
|
|
Post by dupes on Mar 14, 2015 19:34:32 GMT -5
Hahaha...you said "mounting".  Question - you permanently attaching this prior to painting? Or can it pop off so you don't have to bother with masking all that fragile-looking wiring? |
|
|
|
Post by wing_nut on Mar 14, 2015 20:11:50 GMT -5
I am no where near figuring that one out. I will be tapping into 2 sources.... Doogs and Jim my... To see what they did. The front of the engine will be easy enough but those cowl flaps.... No way to show the chill that just ran up my spine  |
|
|
|
Post by JimD on Mar 14, 2015 22:05:49 GMT -5
I didn't cover that in my WIP but I just used some blue tape to wrap around the inside of the cowl. Everything was glued down. Of course I didn't have as much delicate wiring. I wired the harness but it was out of the way. I would be concerned about the wiring up at the heads with that method though. I guess it depends on how solid that is on your engine.
|
|