|
|
Post by dupes on Mar 14, 2015 19:37:55 GMT -5
Felt like doing something a little different (well, different than what's been on my bench lately, anyway) and I need to bloggerize something for the March MoM, so I decided to crack into the Orange Box Kommandowagen. For whatever reason I've been jonesing for a railcar-type thingy, and this fit the bill! Decided to work on the base first to see how well the "ground" pieces fit together. Came out better than I thought - with a bit of putty or superglue and judicious use of some ballast and/or pigments, I think I can make it look like a single piece. All of the railties are just set in place...want to be able to paint them separately. 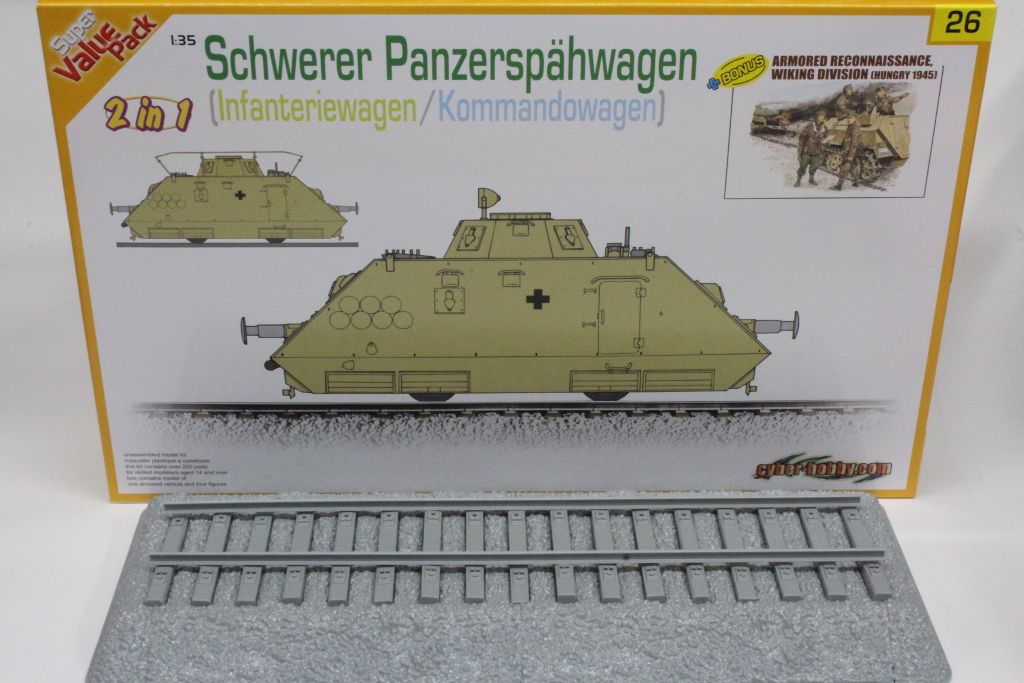 Onto the vehicle itself! |
|
delta
Full Member
  
Member since: January 2015
Posts: 365 
|
Post by delta on Mar 14, 2015 21:57:25 GMT -5
Nice! I look forward to seeing this one come together. May I ask which version you plan to make?
|
|
|
|
Post by TRM on Mar 14, 2015 22:19:54 GMT -5
Look at you go!! Nice one Dupes! Thinking this one might be done for the 29th maybe?  LOL!! Count me in, looks like fun! |
|
|
|
Post by JimD on Mar 15, 2015 0:36:34 GMT -5
Oh..nice stuff. I look forward to seeing what you do with it. Should be great. This one shouldn't take you too long either.
Are there any other color options or are you limited to the DY? Interesting weathering options either way!
|
|
|
|
Post by dupes on Mar 15, 2015 5:52:36 GMT -5
Hey guys! I'll be doing the Kommandowagen variant - it's the one with the huge radio antenna on top (the smaller pic on the box art). Unfortunately the color options aren't options! Dunkelgelb only. Markings are limited to two black crosses...so I'll just be painting those on so I can ignore the decal stage altogether. Todd - no reason this can't come on the 29th depending how it turns out!  |
|
|
|
Post by Leon on Mar 15, 2015 6:54:41 GMT -5
Count me in Dupes! Looks like a cool project.   |
|
|
|
Post by wbill76 on Mar 16, 2015 13:50:30 GMT -5
Looking forward to it Dupes, have at it!  |
|
|
|
Post by dupes on Mar 16, 2015 14:22:10 GMT -5
Been plugging away - short hiatus after my furnace decided to stop working some time Saturday night.  Update with pics this evening! |
|
|
|
Post by dupes on Mar 17, 2015 8:49:43 GMT -5
Fell asleep pretty early last night, so no update. Heh. Got one now, though! Steps 1-4 were very straightforward - construction of the lower hull and wheels. Fit very good here. 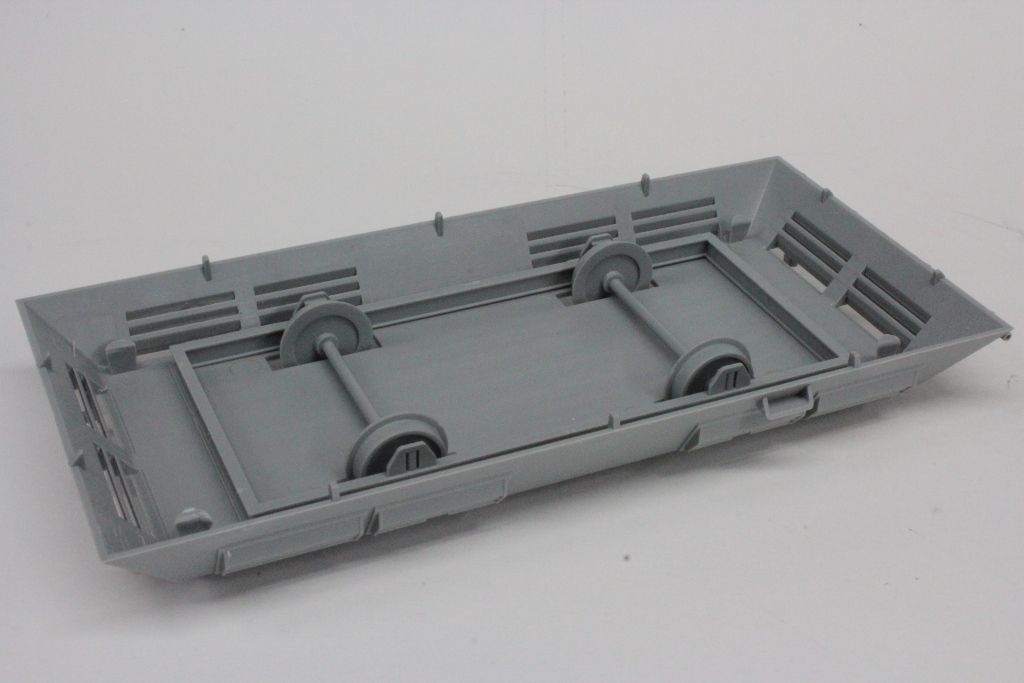 Once you move to the upper hull, things get a bit more complicated. There's one common sidewall piece that requires you to do a bit of drilling, sawing, filing and sanding to get the right look between right/left and kommandowagen/infanteriewagen. No biggie, just need to be careful you get all of it done before you seal things up! 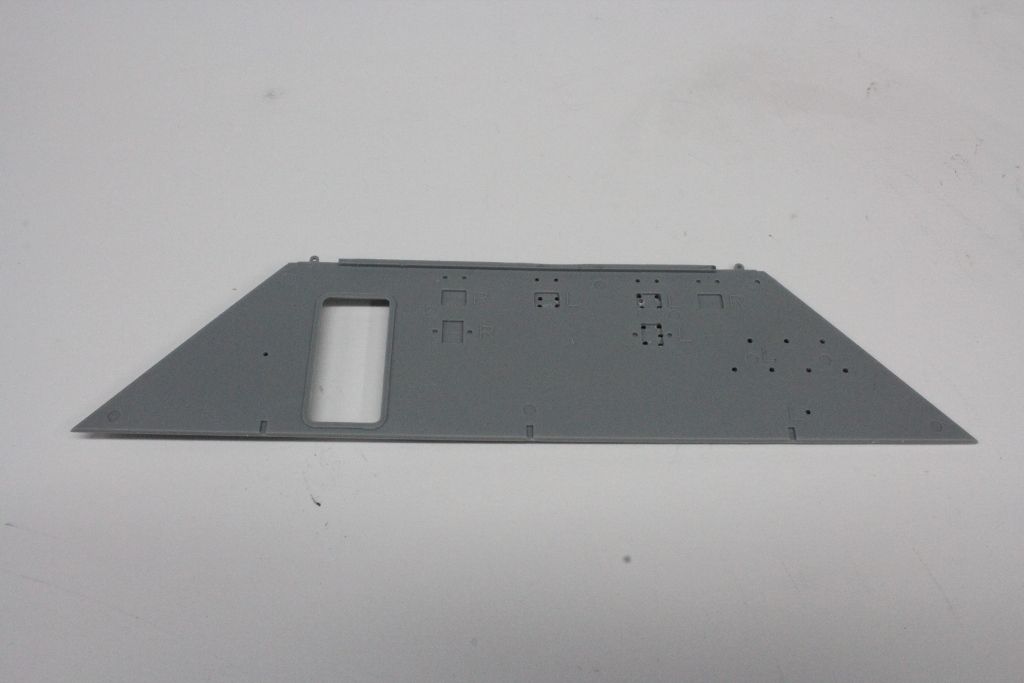 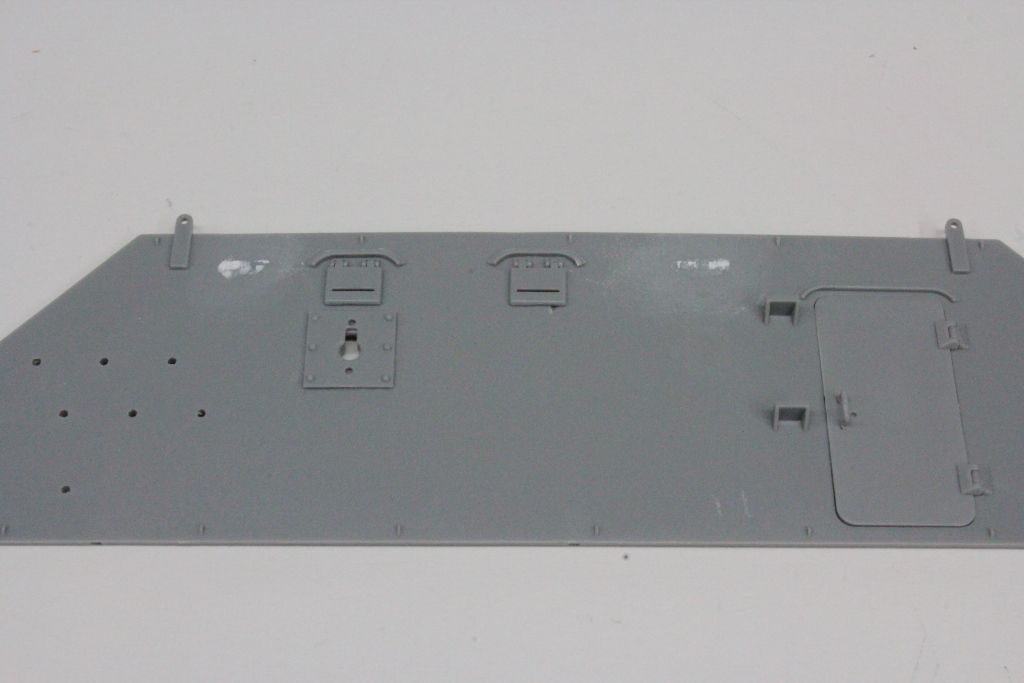 If one wanted to do a full interior, there would be a ton of cleanup to do...not so much for a sealed up build. The one tricky bit will be assembling all of the hull plates so that there are no gaps and that it fits well onto the lower bit. Not a lot in the way of fit tabs or anything like that, so some judicious taping may be in order. 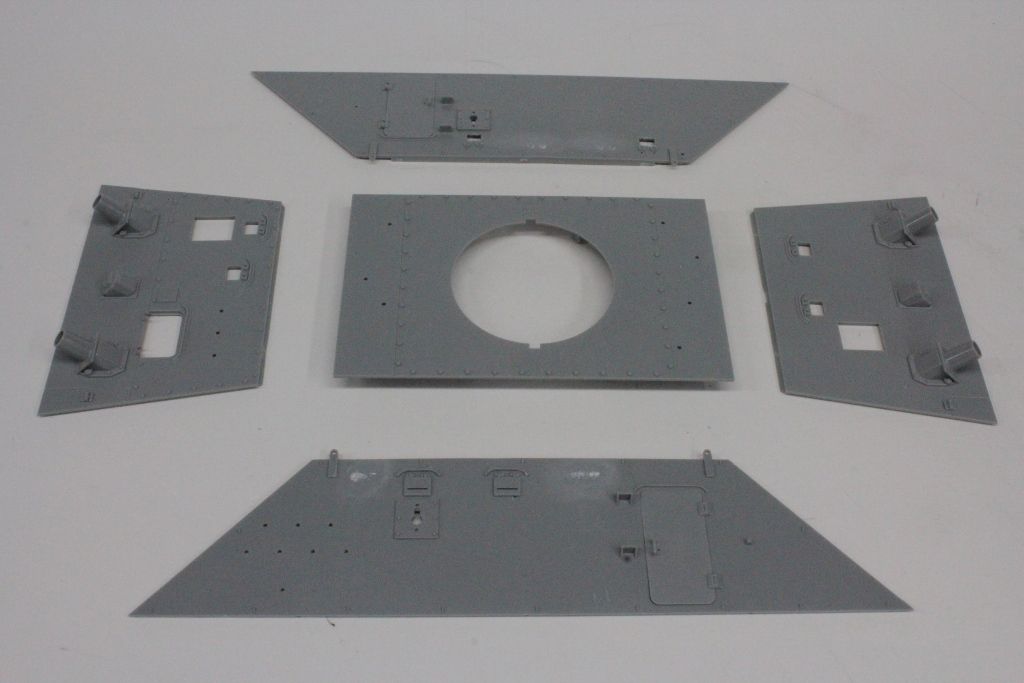 More soon! |
|
|
|
Post by wbill76 on Mar 17, 2015 14:19:18 GMT -5
Got to love the slab sided potential this represents but then it's also the area for the biggest potential fit issues. Looks like you've got it well in hand so far though Dupes. Make sure you properly threaten your furnace to avoid any further service issues.  |
|
|
|
Post by JimD on Mar 17, 2015 14:26:20 GMT -5
I'm shuddering at the thought of trying to line that all up, but I suspect you'll manage just fine  I take it there's no real interior on this one...? If that's the case I expect it done by the weekend  |
|
|
|
Post by dupes on Mar 17, 2015 16:32:47 GMT -5
Bill - haha...haven't gotten the bill yet, but believe me, the furnace has been threatened! Jimmy - nope, no interior. Too bad, this kinda cries out for one. As a result I should have it done shortly! Hope to be throwing paint at it by Friday or so? Tempted to add a figure if I can paint one up decent enough...that would certainly slow me down a bit.  |
|
|
|
Post by JimD on Mar 17, 2015 16:35:00 GMT -5
An interior would be kinda cool...but yeah...that'd probably put you in a time crunch. A fig to give this some scale wouldn't be a bad idea, but I know what you mean about having to paint them  |
|
detailfreak
Full Member
  
Member since: July 2012
Crazy Swede
Posts: 371
Jul 28, 2012 15:12:35 GMT -5
Jul 28, 2012 15:12:35 GMT -5
|
Post by detailfreak on Mar 18, 2015 0:11:05 GMT -5
WHAT no interior.....I wonder what the innards really look like.
|
|
Wes
Full Member
  
Member since: November 2011
Posts: 686
Nov 16, 2011 9:34:50 GMT -5
Nov 16, 2011 9:34:50 GMT -5
|
Post by Wes on Mar 18, 2015 2:49:47 GMT -5
Off to a cracking start Dupes. Looking forward to what you do to it weathering wise. Its going to be a beauty for sure.
|
|
|
|
Post by dupes on Mar 18, 2015 10:24:50 GMT -5
Thanks Wes!
DF - I have no idea what it's supposed to look like. Not sure that anyone does! There aren't any aftermarket sets that I know of, and I've never come across schematics or pics anywhere. Too bad because this would look neat all opened up.
|
|
|
|
Post by deafpanzer on Mar 18, 2015 10:40:36 GMT -5
Good luck putting those sides altogether! I would add styrene strips on each corner to reinforce the hold perhaps?
|
|
|
|
Post by dupes on Mar 18, 2015 11:45:40 GMT -5
Yeah, I'm going to have to do something. First order of business when I get home! I'm going to try to tape it together first to make sure that the join for the top plate and lower hull work...the sides themselves seem to fit pretty snugly with each other.
|
|
|
|
Post by dupes on Mar 19, 2015 13:04:04 GMT -5
Mid-afternoon update! Didn't feel like lugging all of this down to the photo booth, so you're getting the "upstairs bench" view (i.e., the one in front of the blu-ray player with Walking Dead in it). Ignore all of the P-51K parts - those aren't really there.  You'll notice I haven't attempted the slab installation yet. Been putting it off as long as possible. Not sure how sturdy it will be once together, so I wanted to make sure I had everything attached before I put glue to the walls/roof. All of the posts for the radio mount are just dry fit - that's going to be a complicated assembly. The slots they give you to glue are TINY. Hoping to do that last. There are six (!) MG42s in the kit - cleaned up and drilled out all of them, but I can't imagine that more than two or three of them will end up in the finished product. No idea how big the crew for this vehicle is anyway...? Tool cleanup and (potential) fig assembly to go, then we can think about paint! 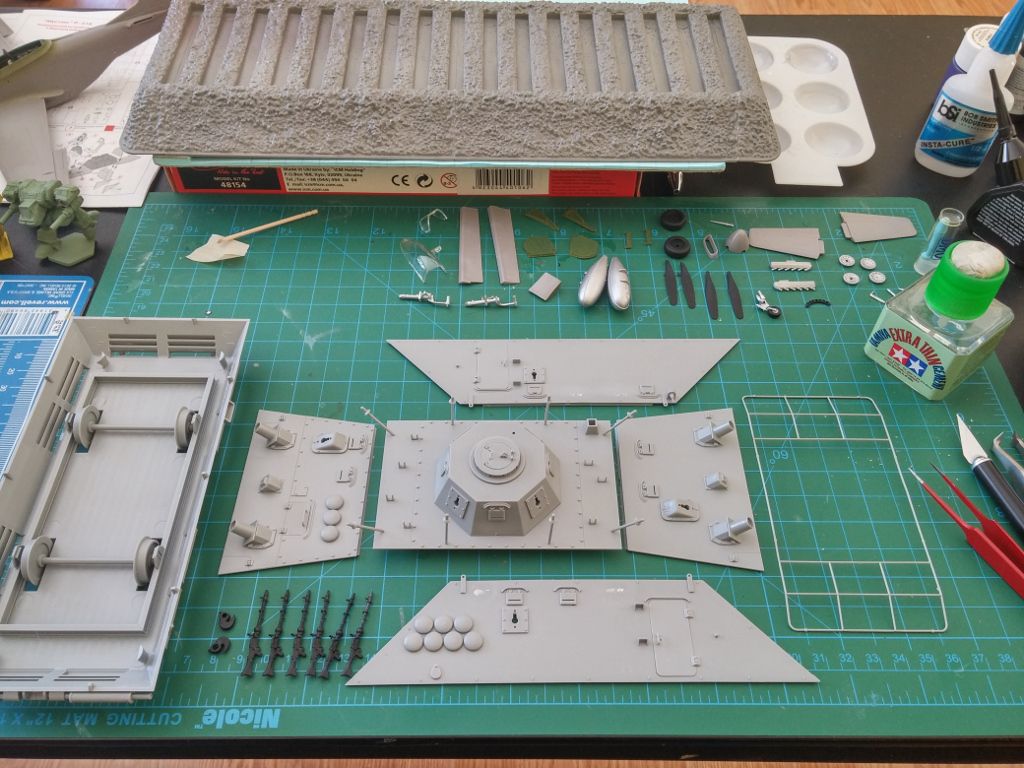 |
|
|
|
Post by JimD on Mar 19, 2015 13:15:23 GMT -5
Niiiceee....moving right along. Probably best to get all the stuff on the hull first. I'm going to ignore that P-51 body up in the corner...and I'll ignore the parts on the cutting mat...at least for a few days...but I'm expecting a completed thread soon  |
|
|
|
Post by wbill76 on Mar 19, 2015 15:43:11 GMT -5
Don't sweat it Jimmy, the mecha in the corner is keeping guard on the P-51!  Nice progress Marc, but you know you're going to have to face up to those panels sooner or later.   |
|
|
|
Post by dupes on Mar 19, 2015 16:50:50 GMT -5
Jimmy - that Mustang is just going to show up in the completed builds thread one of these days...no time for pictures with all of the builds I've got going on! Bill - indeed, sir. She'll be fully assembled tonight.  |
|
|
|
Post by Leon on Mar 19, 2015 19:46:22 GMT -5
Looking really good Dupes!  |
|
|
|
Post by dupes on Mar 19, 2015 21:58:45 GMT -5
Thanks Leon! Pushing on this evening - construction is nearly finished. Hull sides went together with a minimum of fuss after I decided to build them vertically on my cutting mat ensuring that the bottom edge (that needs to mate with the lower hull) stayed level. Tolerances there are so good that I think I can leave the upper and lower hulls separate for painting - and installing MGs - then join them afterwards. Not so with the aerial rack on top. Dry fitting was difficult at best...rather than wreck my paintjob later on (assuming that I would paint it separately and then glue after) I decided to attach it now and deal with the paint issues it will cause instead. Luckily, the turret is removable so that will help get to some difficult-to-reach places. No going back now! 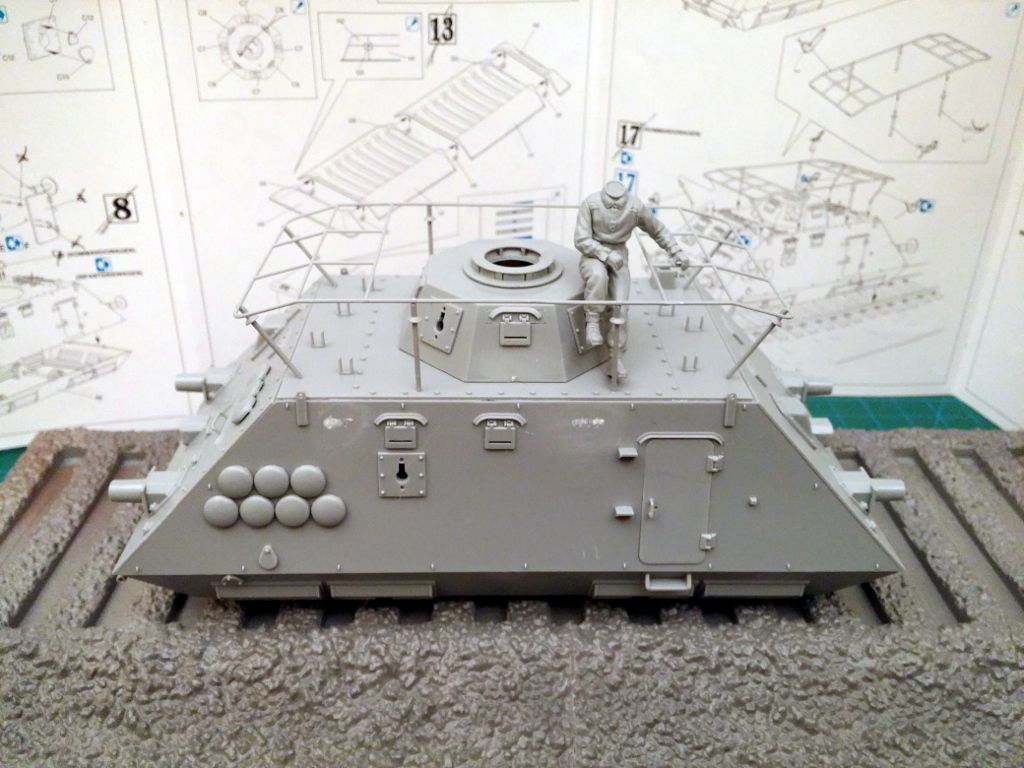 Started playing around with the included figs - the Commander guy should be fine in the top hatch, this fella was the only other one that appeared to fit the scene. Not sure if his pose/fit looks organic enough. He may get saved for later. Just need to decide which MG ports will be in use (vs closed) and then it's on to painting! |
|
|
|
Post by Deano on Mar 20, 2015 10:41:30 GMT -5
Well done mate , Dupes speed of course ! nice neat build and I look forward to the paint!
|
|
|
|
Post by wbill76 on Mar 20, 2015 12:14:31 GMT -5
Figure looks like he belongs from here. Nice work getting those sides together as well as that antenna!
|
|
|
|
Post by JimD on Mar 20, 2015 12:44:55 GMT -5
So then...paint tonight? Right? Ok...I approve. Keep at it...oh...and don't forget the Mustang.  |
|
|
|
Post by dupes on Mar 20, 2015 13:38:55 GMT -5
Paint tonight? Hmmmm...that may very well happen. If not, then tomorrow for sure. Still have to play around with the other fig(s) and the groundwork/railties.
|
|
|
|
Post by deafpanzer on Mar 21, 2015 13:20:14 GMT -5
It is looking real good... I always liked this kit but for some reason I always pass it at the shop or model shows. Maybe not next time...
|
|
|
|
Post by dupes on Mar 21, 2015 17:49:49 GMT -5
Dragon USA had these for 18 bucks each at one of the last sales...if you can't score one at a show, head directly to the source!
|
|