atomicholiday
Full Member
  
Member since: September 2023
Posts: 411
Sept 4, 2023 8:25:11 GMT -5
Sept 4, 2023 8:25:11 GMT -5
|
Post by atomicholiday on Jan 2, 2024 10:39:46 GMT -5
Here's my entry for the "Born in the USA" GB. The Revell '71 Plymouth GTX. I won't be doing the Dom version though. It will be closer to factory stock, and mostly box stock as well. I will however be using Keith Marks decals to spice it up a little, and will be attempting to run plug wires. 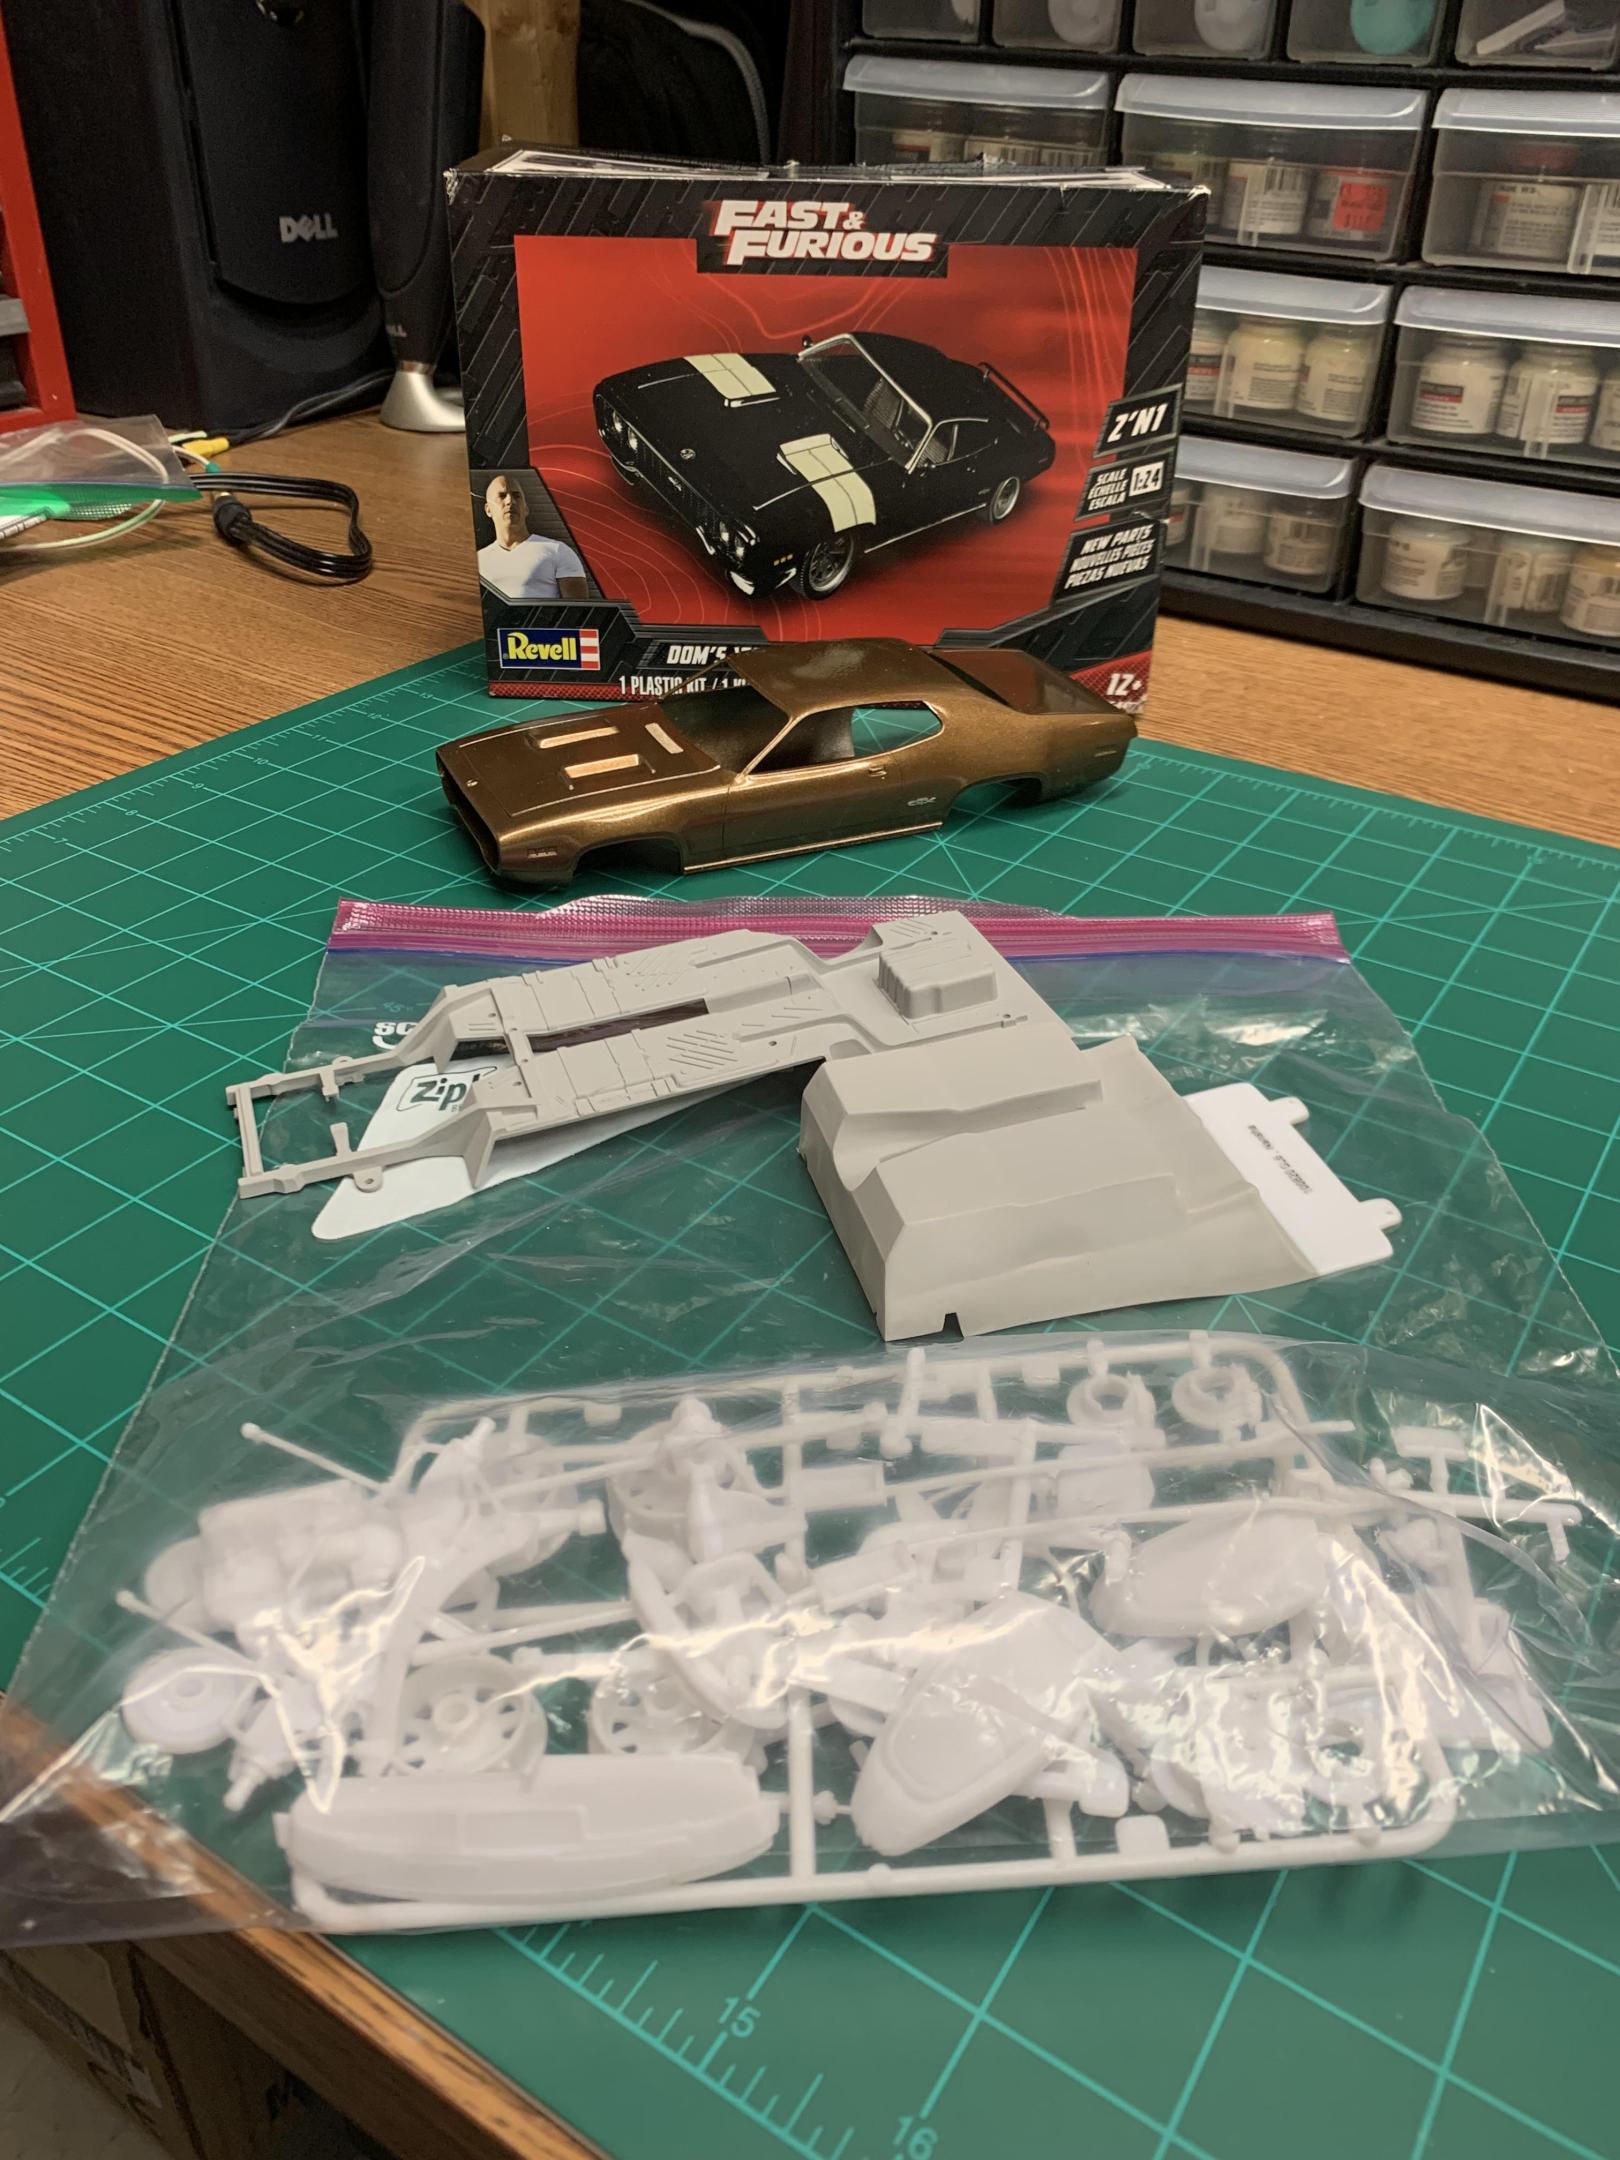 This kit was started in the fall of '23. As some of you know, I spent last summer trying to up my painting skills. I chose Testors Extreme Lacquer bronze for this one. Nice '70s color, even if it's not a factory shade. This was the last kit I shot before the weather turned. Color coats went on beautifully. They were allowed to cure for a couple of weeks. Then, clear coats were going really good too. But it was getting late in the evening and I was losing daylight, and the next day’s forecast was not good. This would be my last shot to get it done until next spring. You can see where this is going I’m sure. I went too heavy with the final coat. It was looking really good too, but in the morning the results were pretty bad orange peel on the roof and trunk lid. Haven’t touched it for a couple of months now, so I’m going to try to wet sand it out, and hopefully it didn’t affect the color coats. But if so, no big deal. We’ll be stripping it off and starting again. Wish me luck. 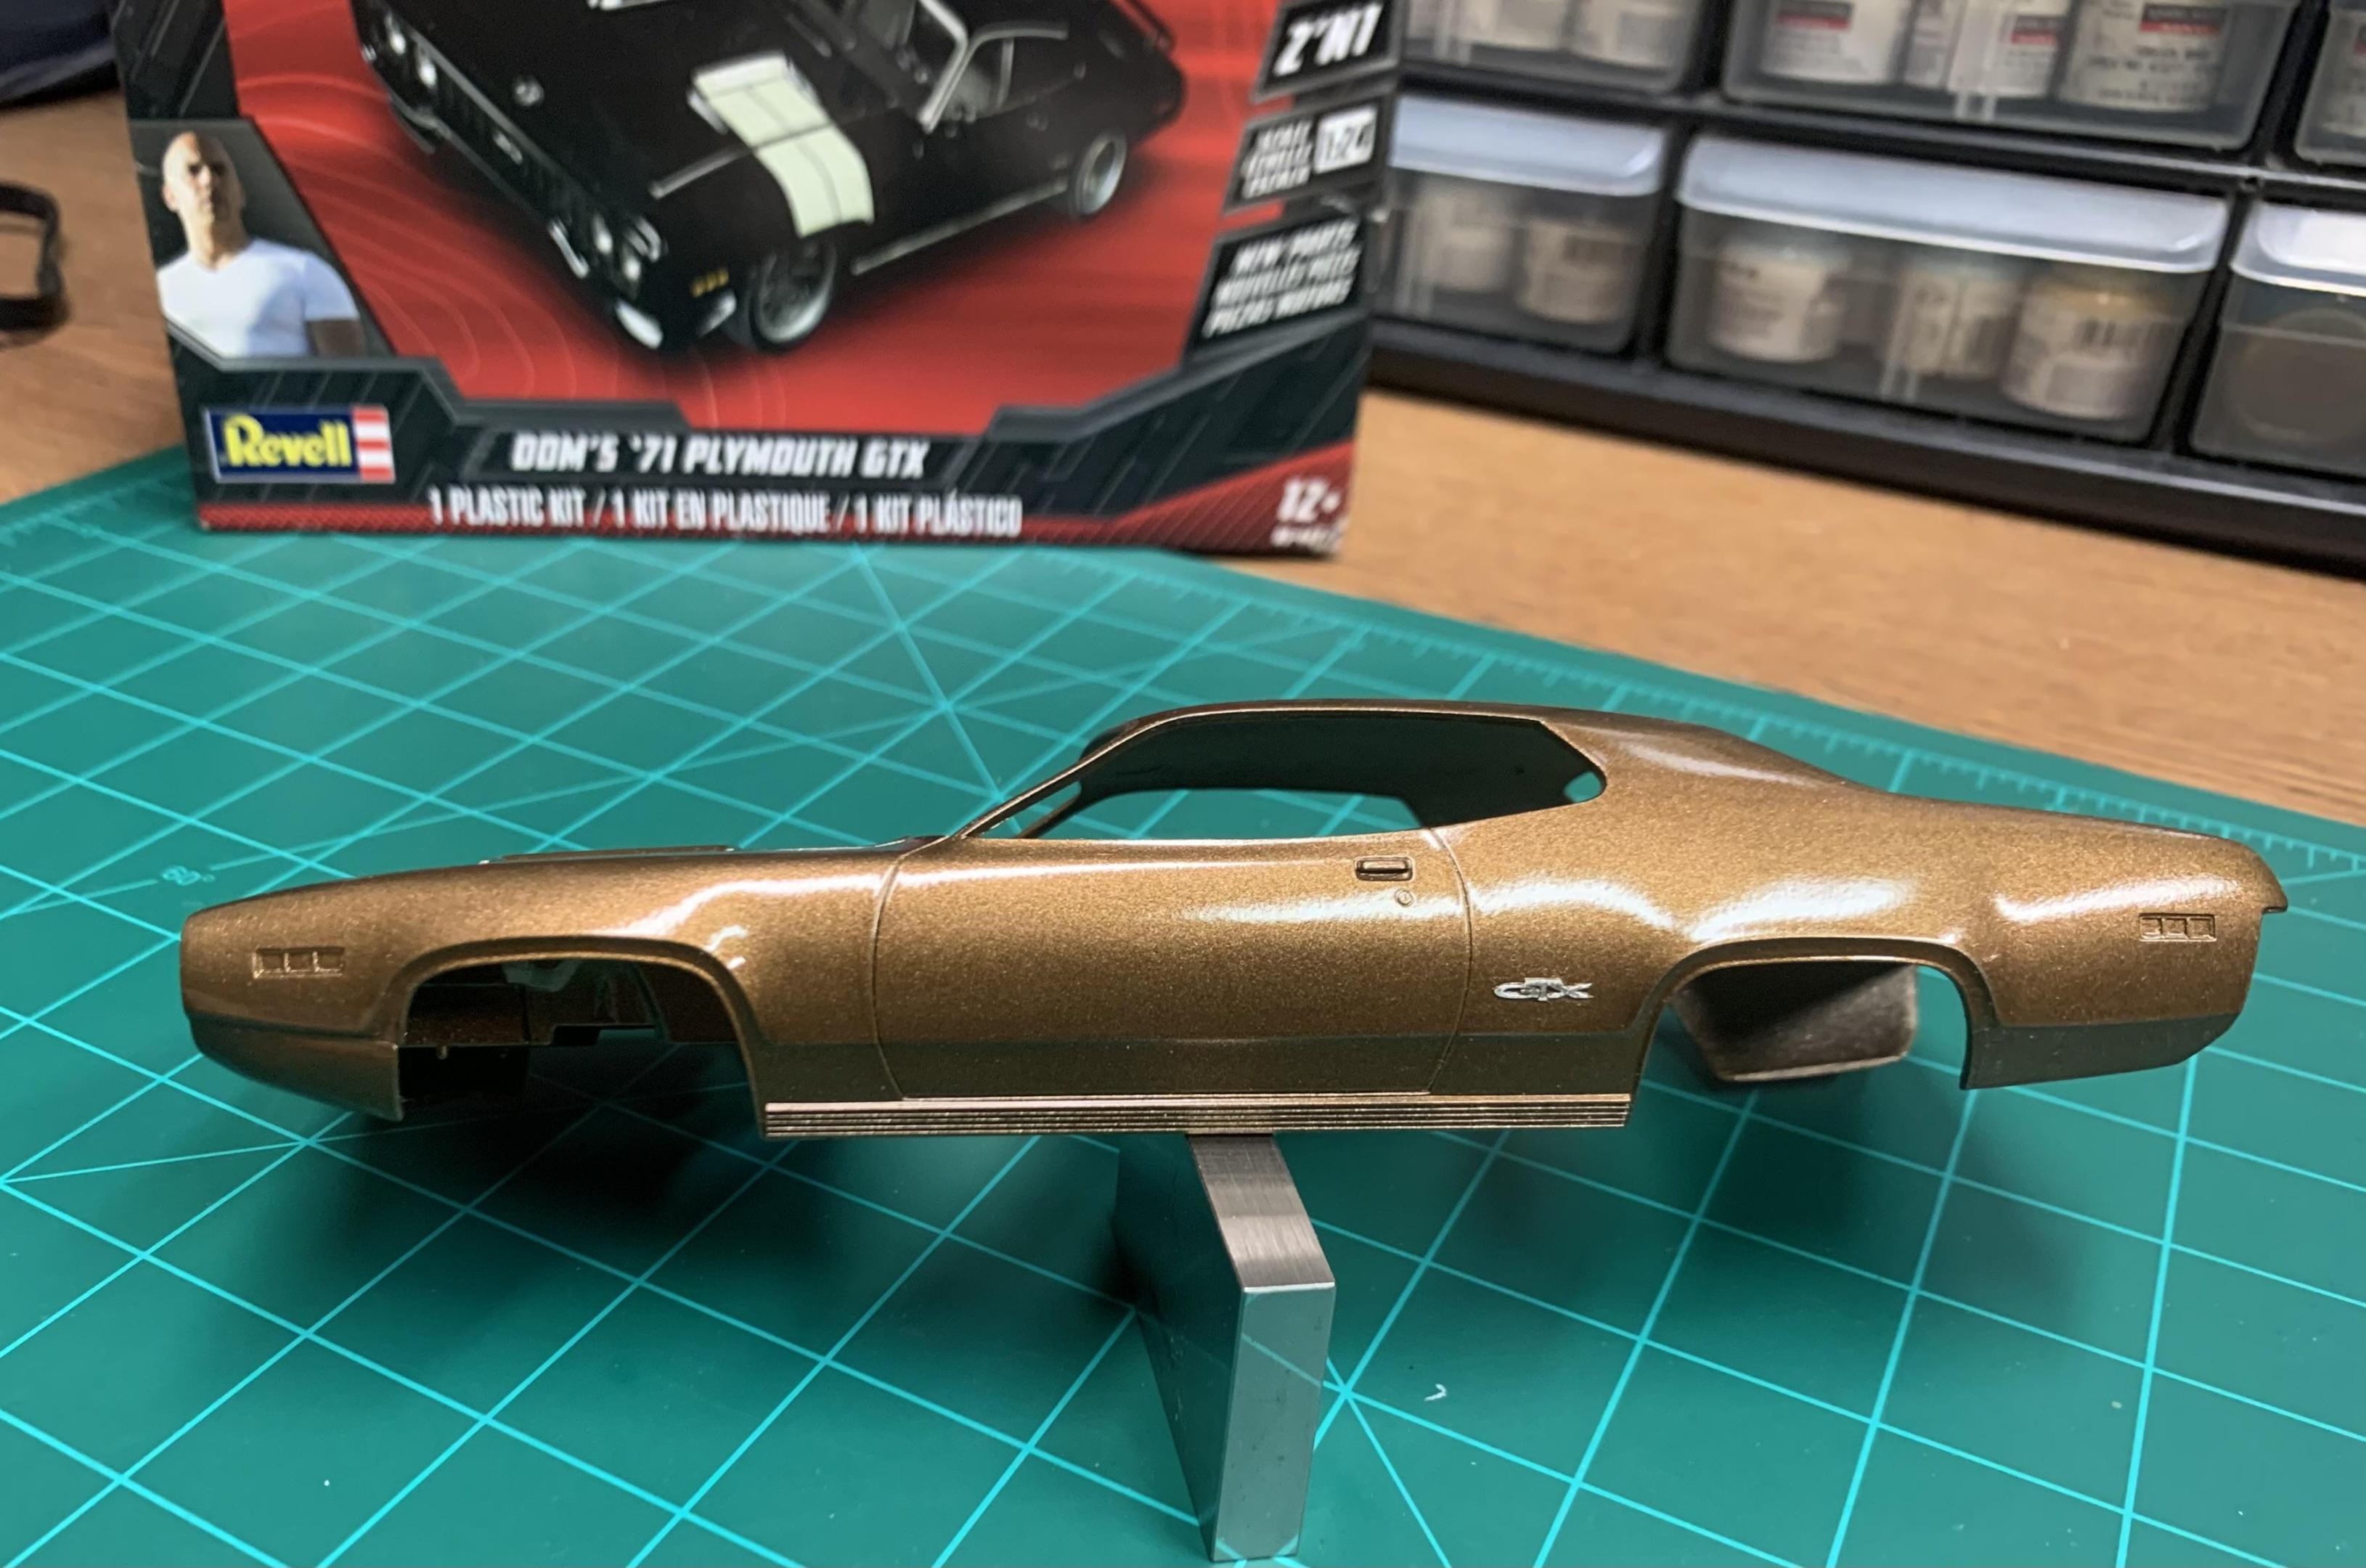 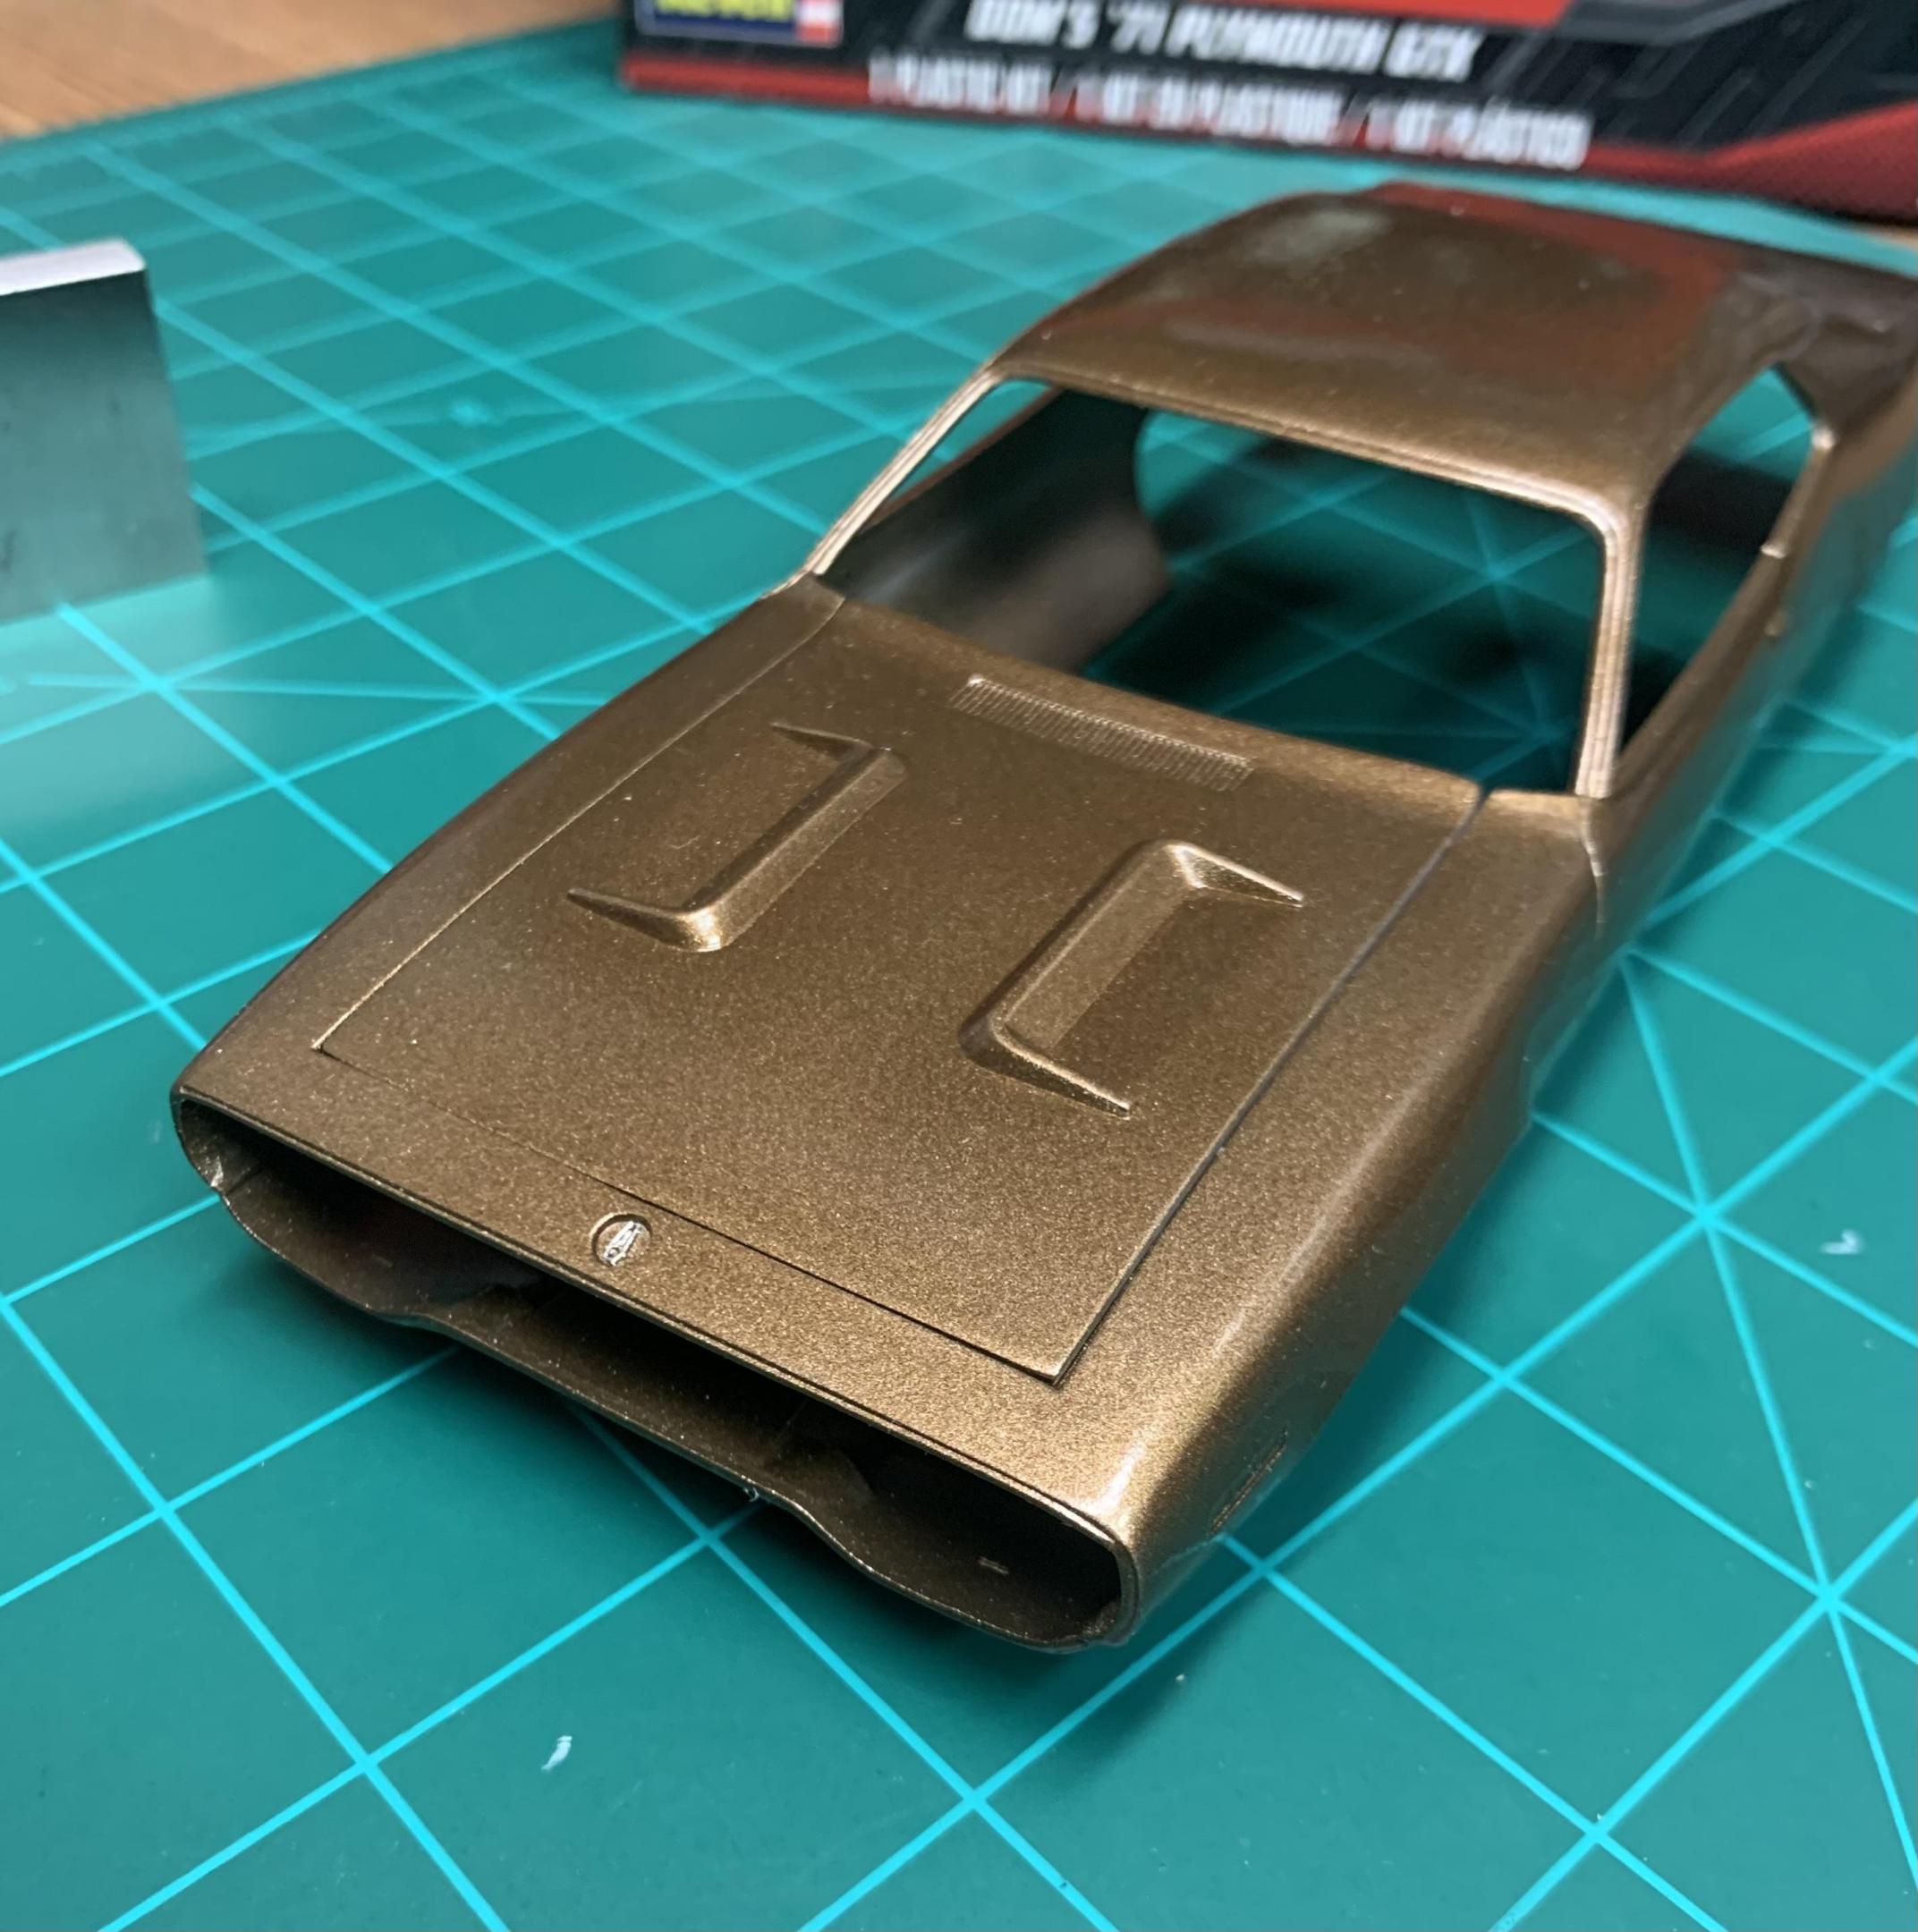 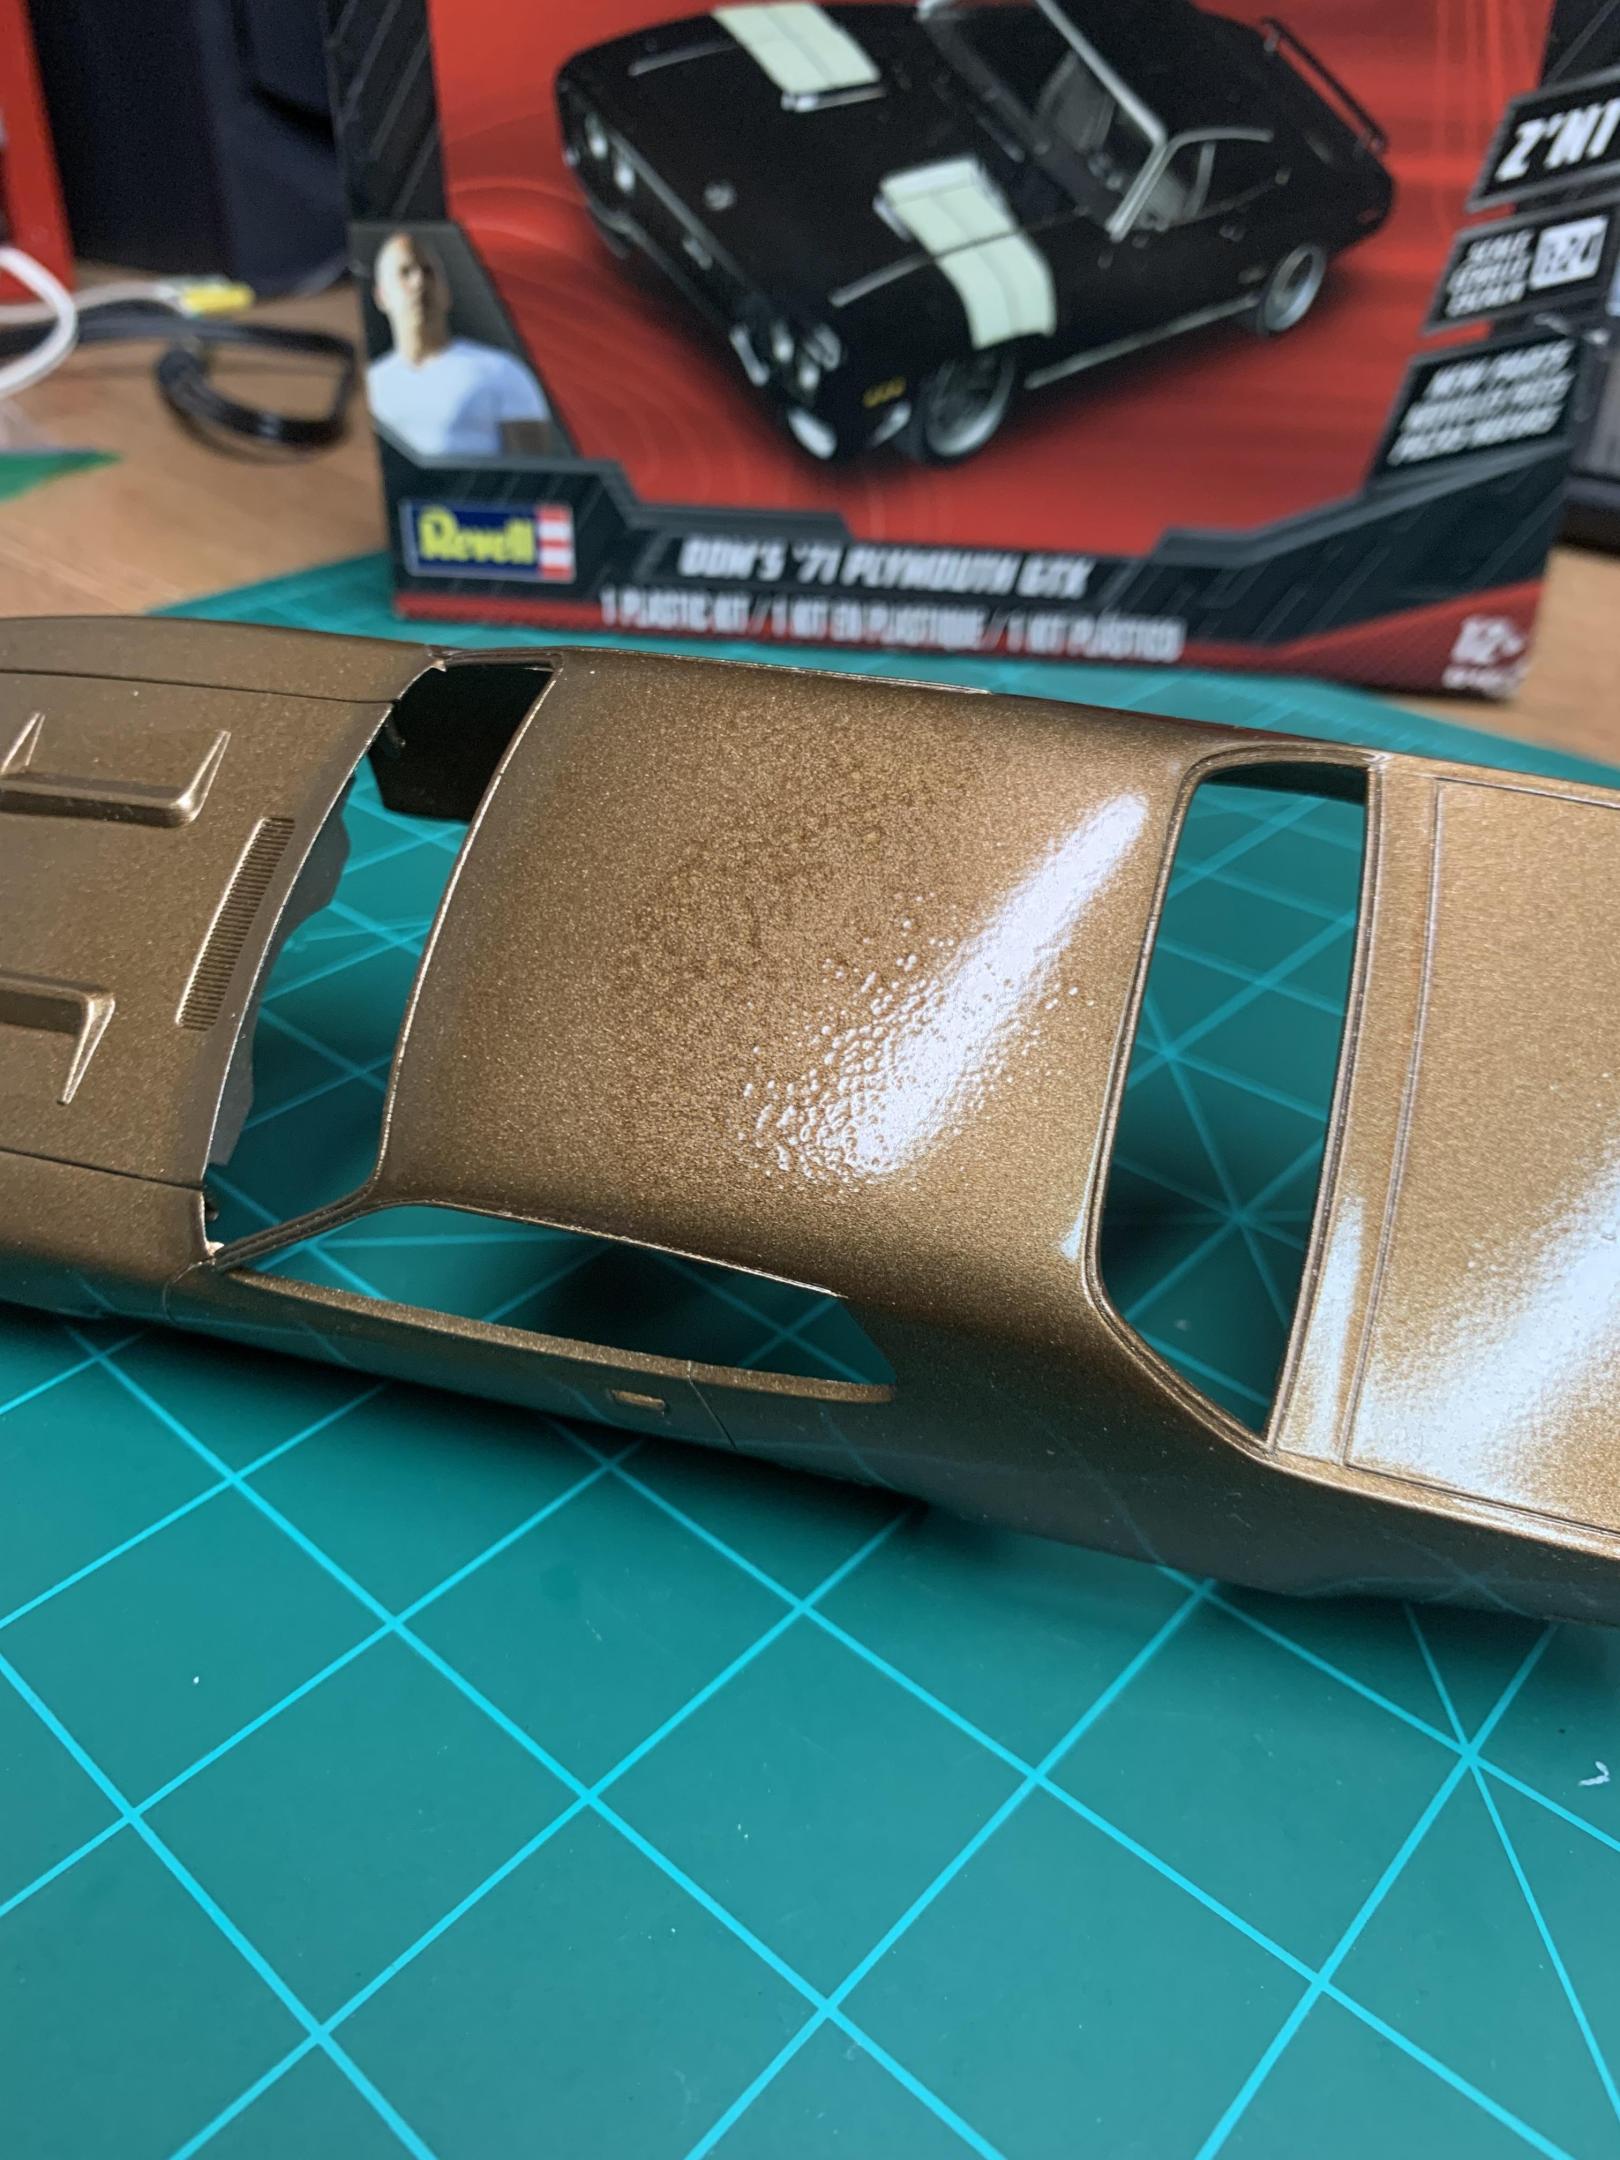 |
|
|
|
Post by kyledehart5 on Jan 2, 2024 13:09:03 GMT -5
Sweet! Can’t wait to see this. That’s a cool color. I hope your wetsanding session goes smoothly and you can avoid a trip to the pond.
|
|
handiabled
Administrator      Apr '23 Showcased Build Awarded
Member since: February 2023
Posts: 4,508 
MSC Staff
|
Post by handiabled on Jan 3, 2024 2:35:13 GMT -5
Watching this one! Hope you can tame the orange peel
|
|
|
|
Post by tcoat on Jan 3, 2024 10:00:45 GMT -5
Just paint the roof black and call it vinyl like 80% of these real cars would have had. Doesn't help with the trunk lid of course.
|
|
atomicholiday
Full Member
  
Member since: September 2023
Posts: 411
Sept 4, 2023 8:25:11 GMT -5
Sept 4, 2023 8:25:11 GMT -5
|
Post by atomicholiday on Jan 4, 2024 15:03:32 GMT -5
Just paint the roof black and call it vinyl like 80% of these real cars would have had. Doesn't help with the trunk lid of course. Good call! It's getting a vinyl roof. I tried wet sanding but the clear coat had done too much damage to the color. So it's going to get stripped. Since I have to strip it anyway, I might as well go for the top too. 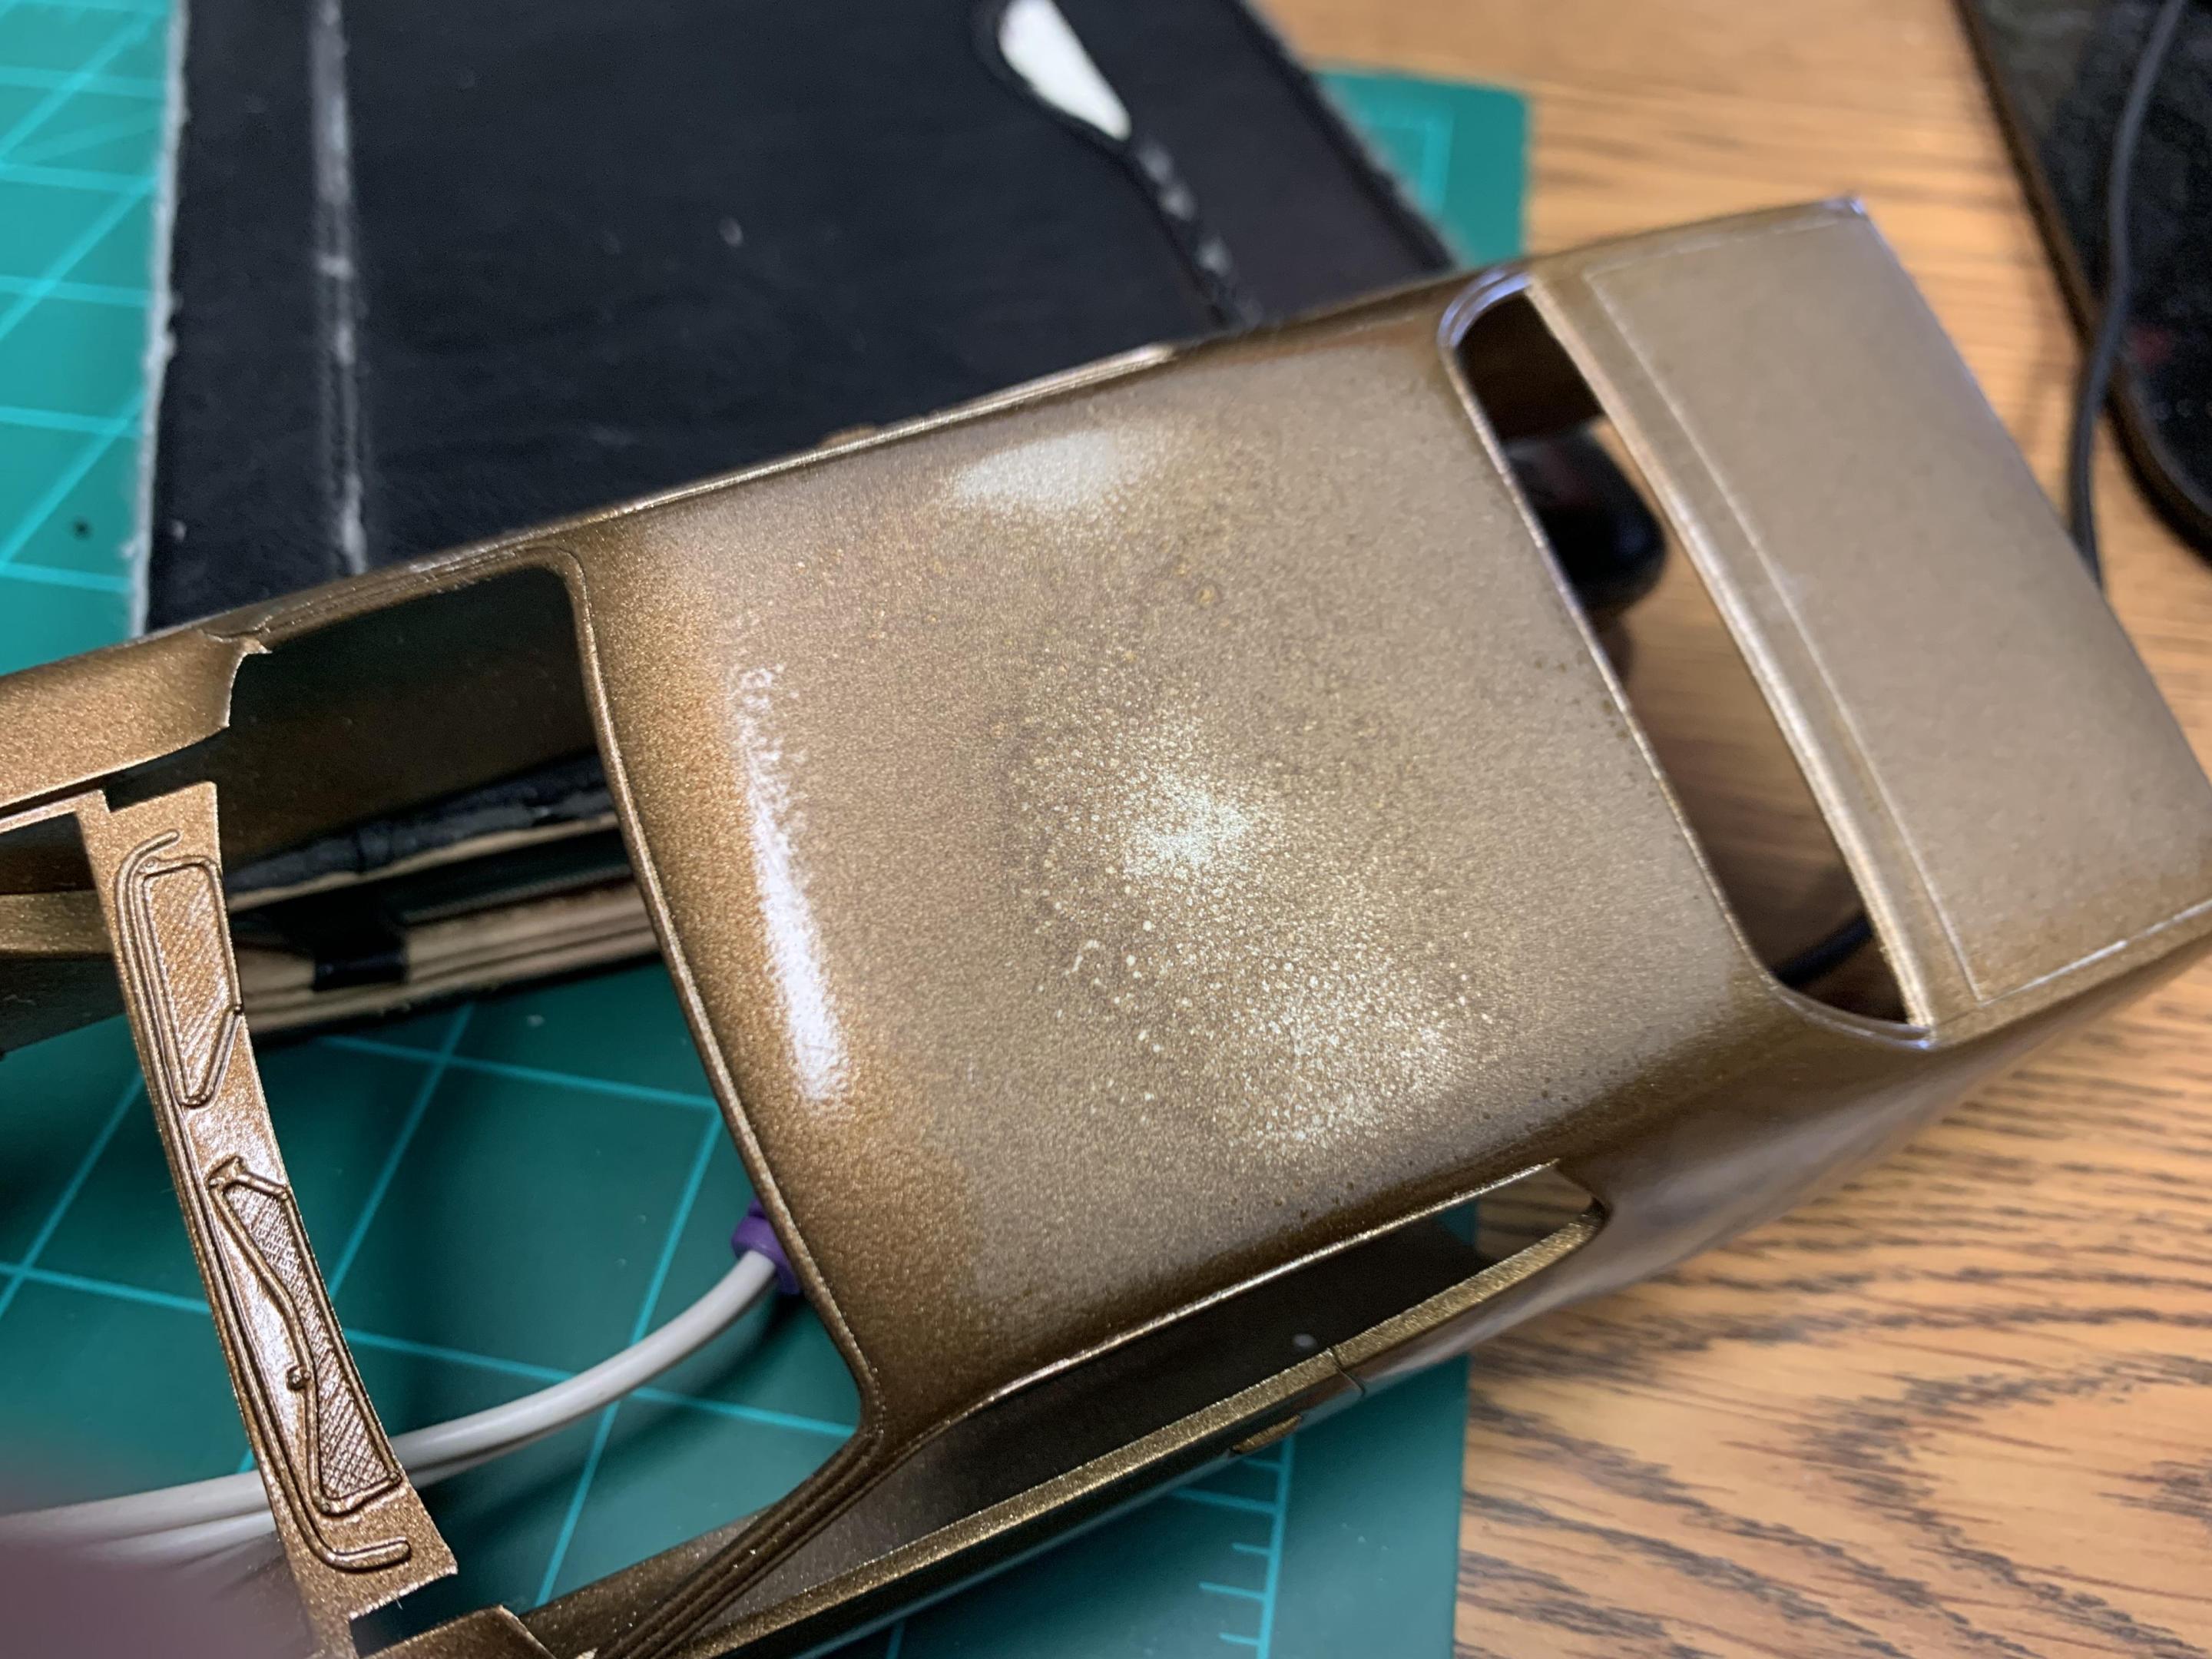 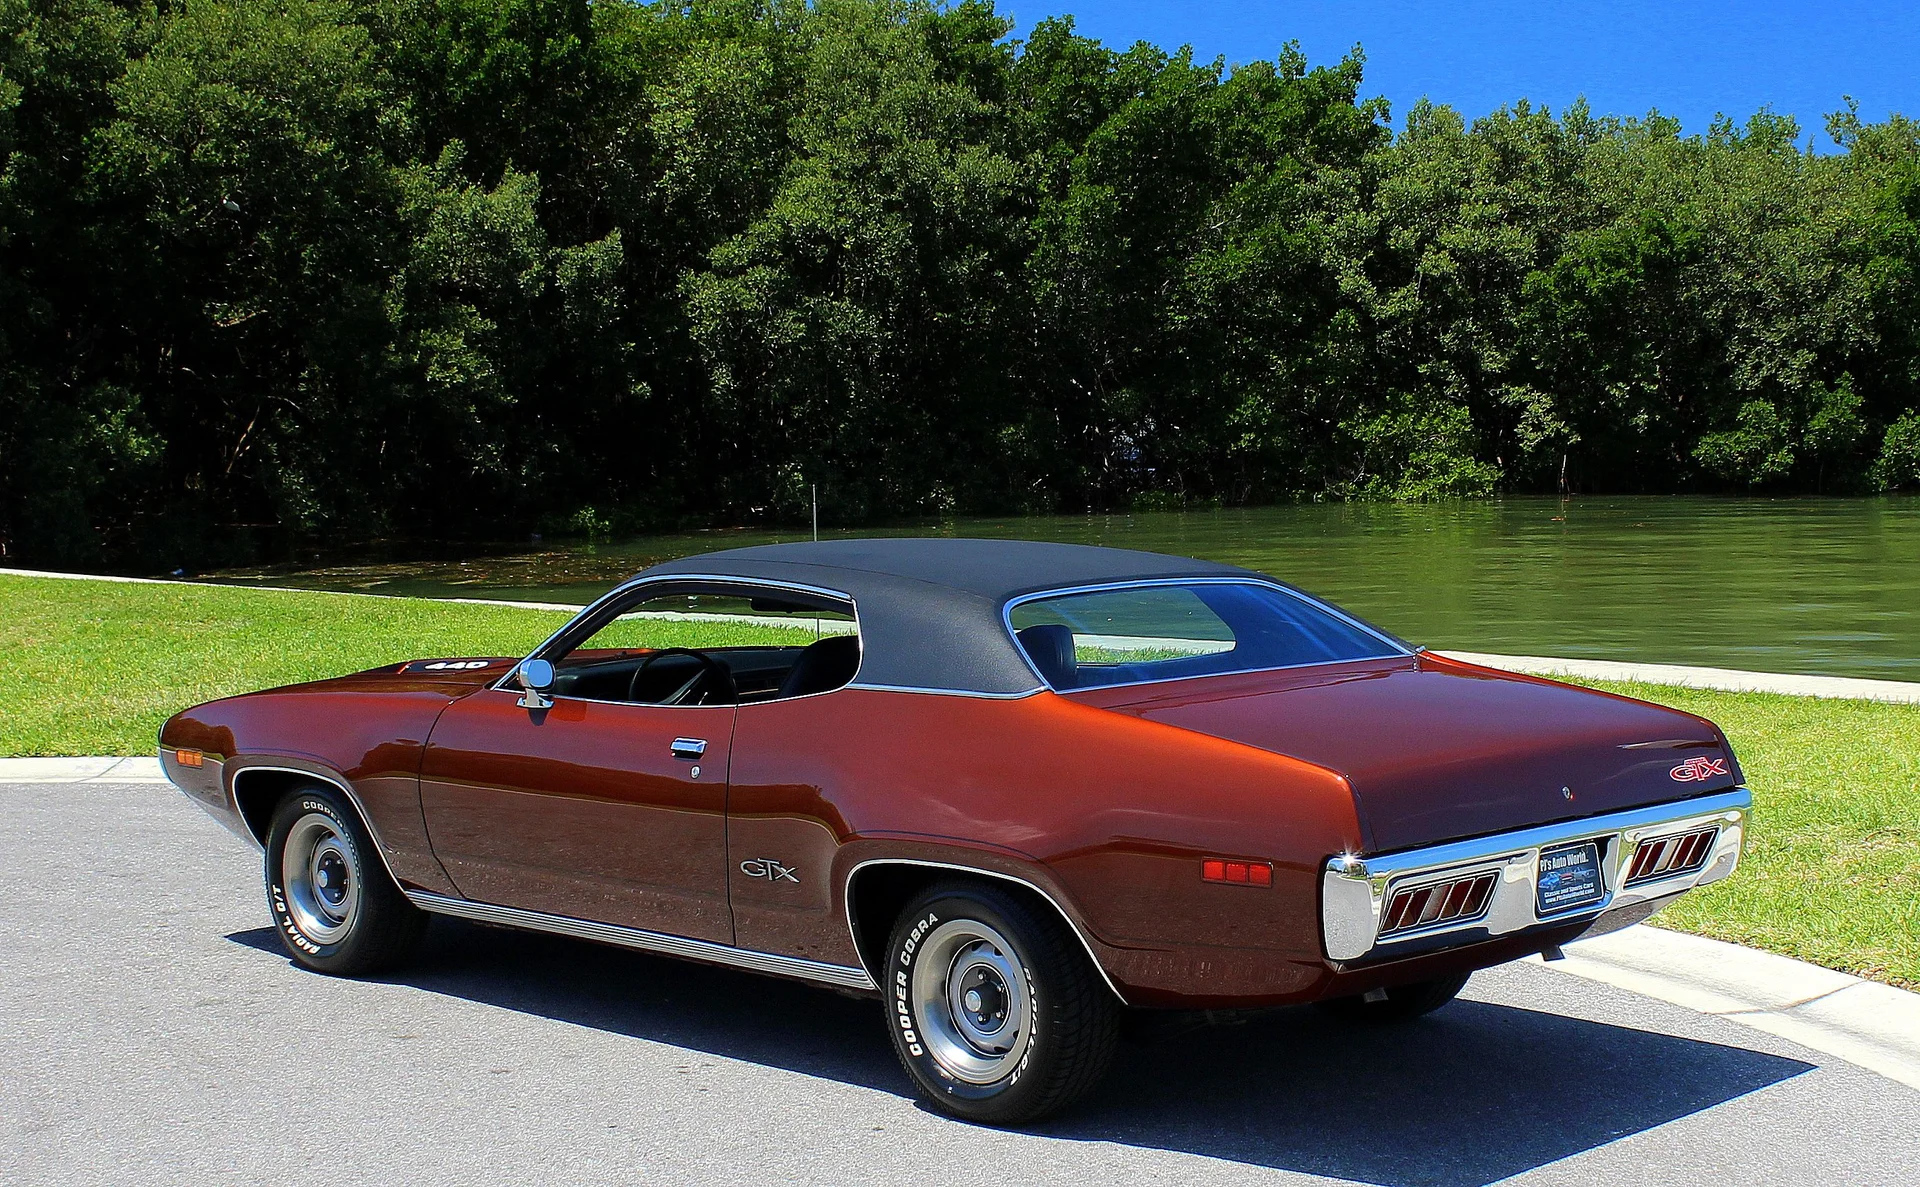 |
|
|
|
Post by kyledehart5 on Jan 4, 2024 22:19:46 GMT -5
Sweet! That will look awesome with the vinyl roof
|
|
atomicholiday
Full Member
  
Member since: September 2023
Posts: 411
Sept 4, 2023 8:25:11 GMT -5
Sept 4, 2023 8:25:11 GMT -5
|
Post by atomicholiday on Jan 5, 2024 15:49:52 GMT -5
Some quick mock ups before it gets stripped. Actually, as I’m thinking of it, I’ll probably fix the ride height before removing paint. This kit comes with two front suspension setups, one being lowered. My first mockup is with the “stock” ride height. Definitely has that tail dragger look. Too much so, actually. So the lowered setup was swapped in. Something still looked off. Comparing to pictures online, I think what really needs to happen is to use the stock front end, and raising the rear until it’s level. One other thing I want to address: the tires are set to far back into the wheel wells compared to the 1:1. Here’s the stock front end- 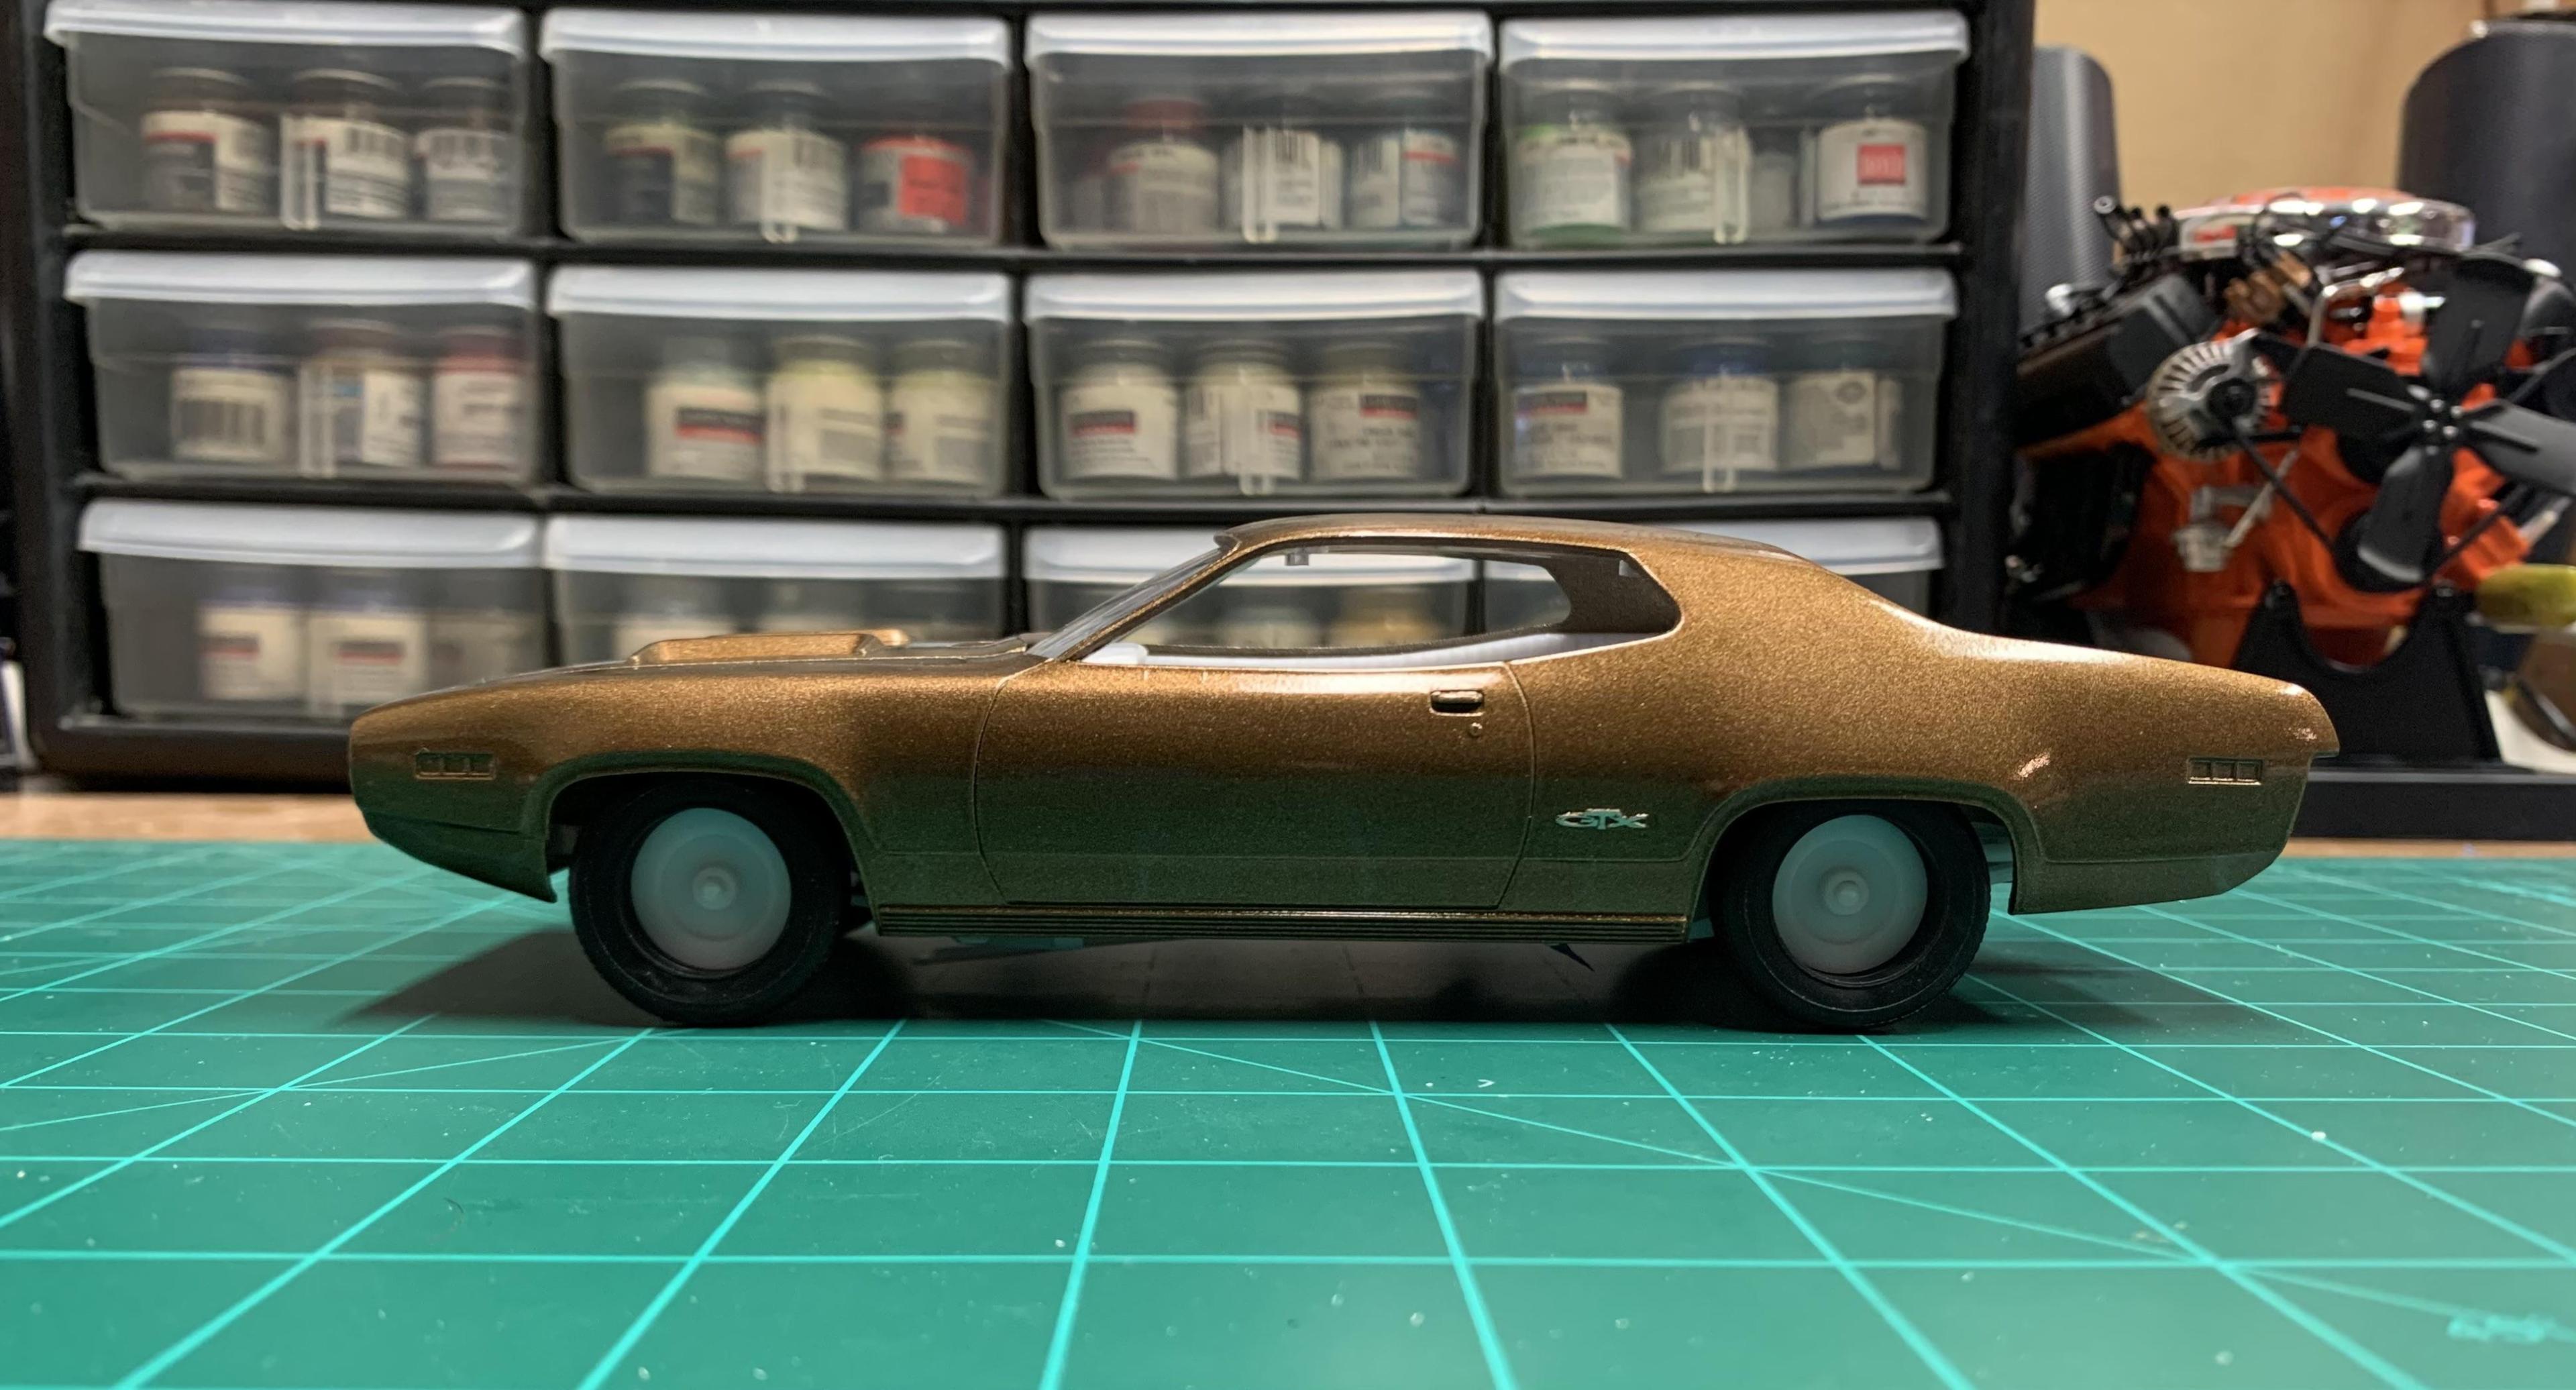 …and here is the lowered setup. 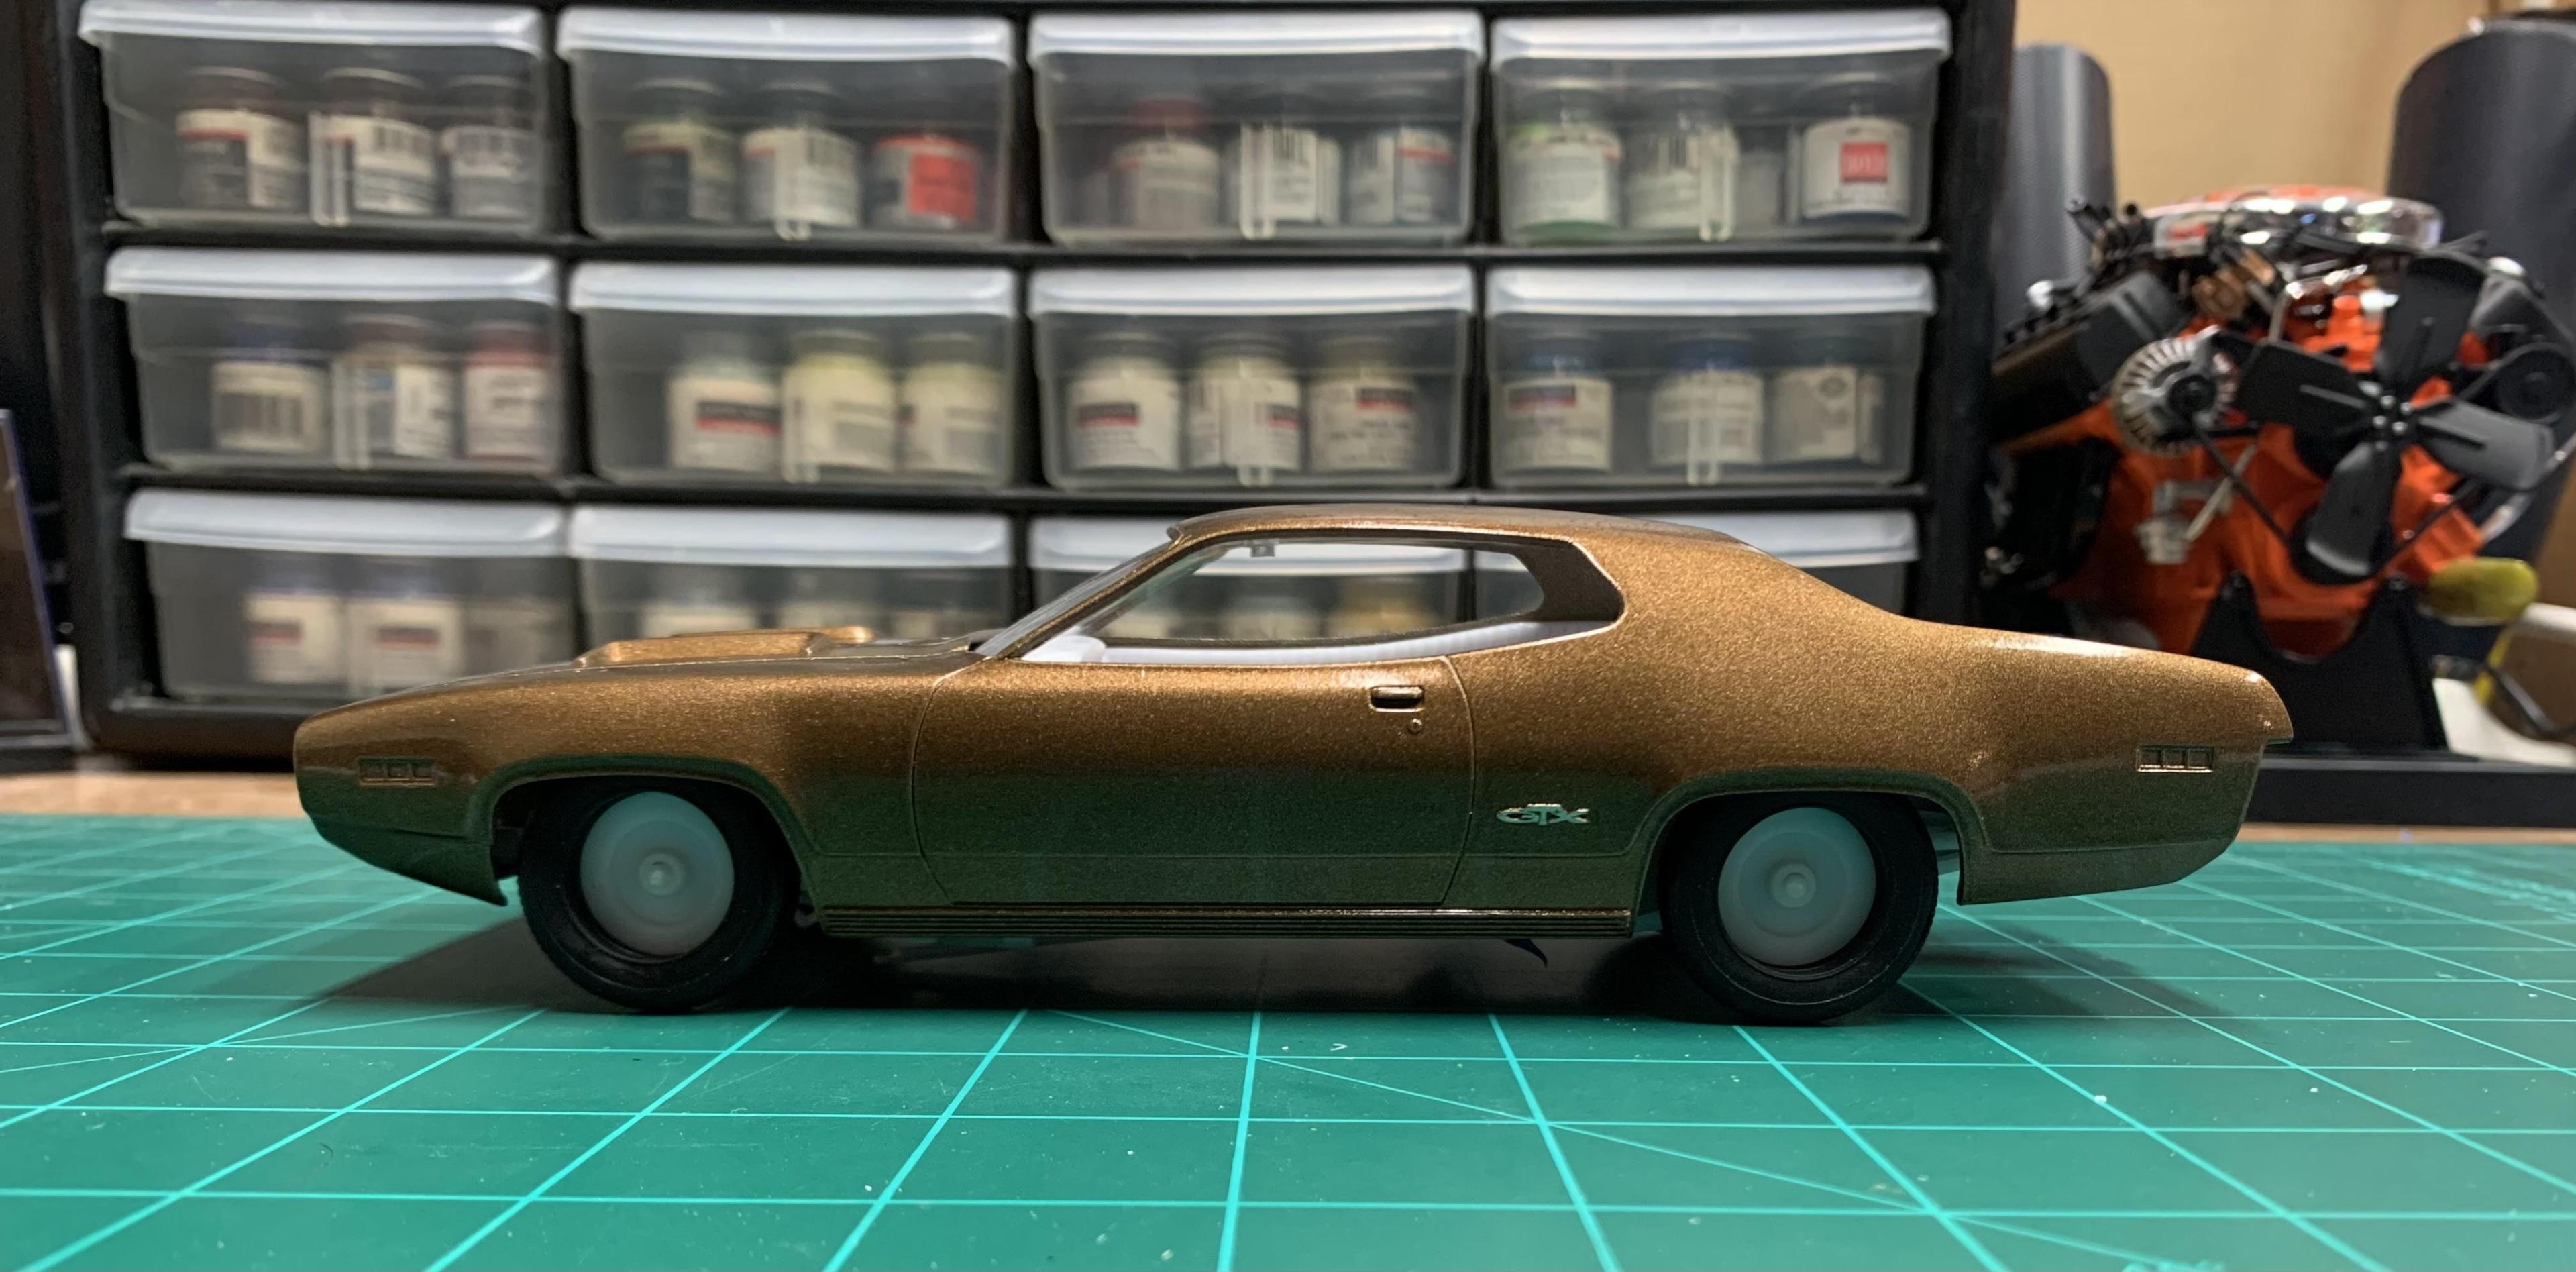 Notice how far back the tires set back into the wheel wells. Then compare the 1:1 pic posted earlier. I’m also considering swapping to a slightly meatier tire. Nothing crazy though. It should still look stock. 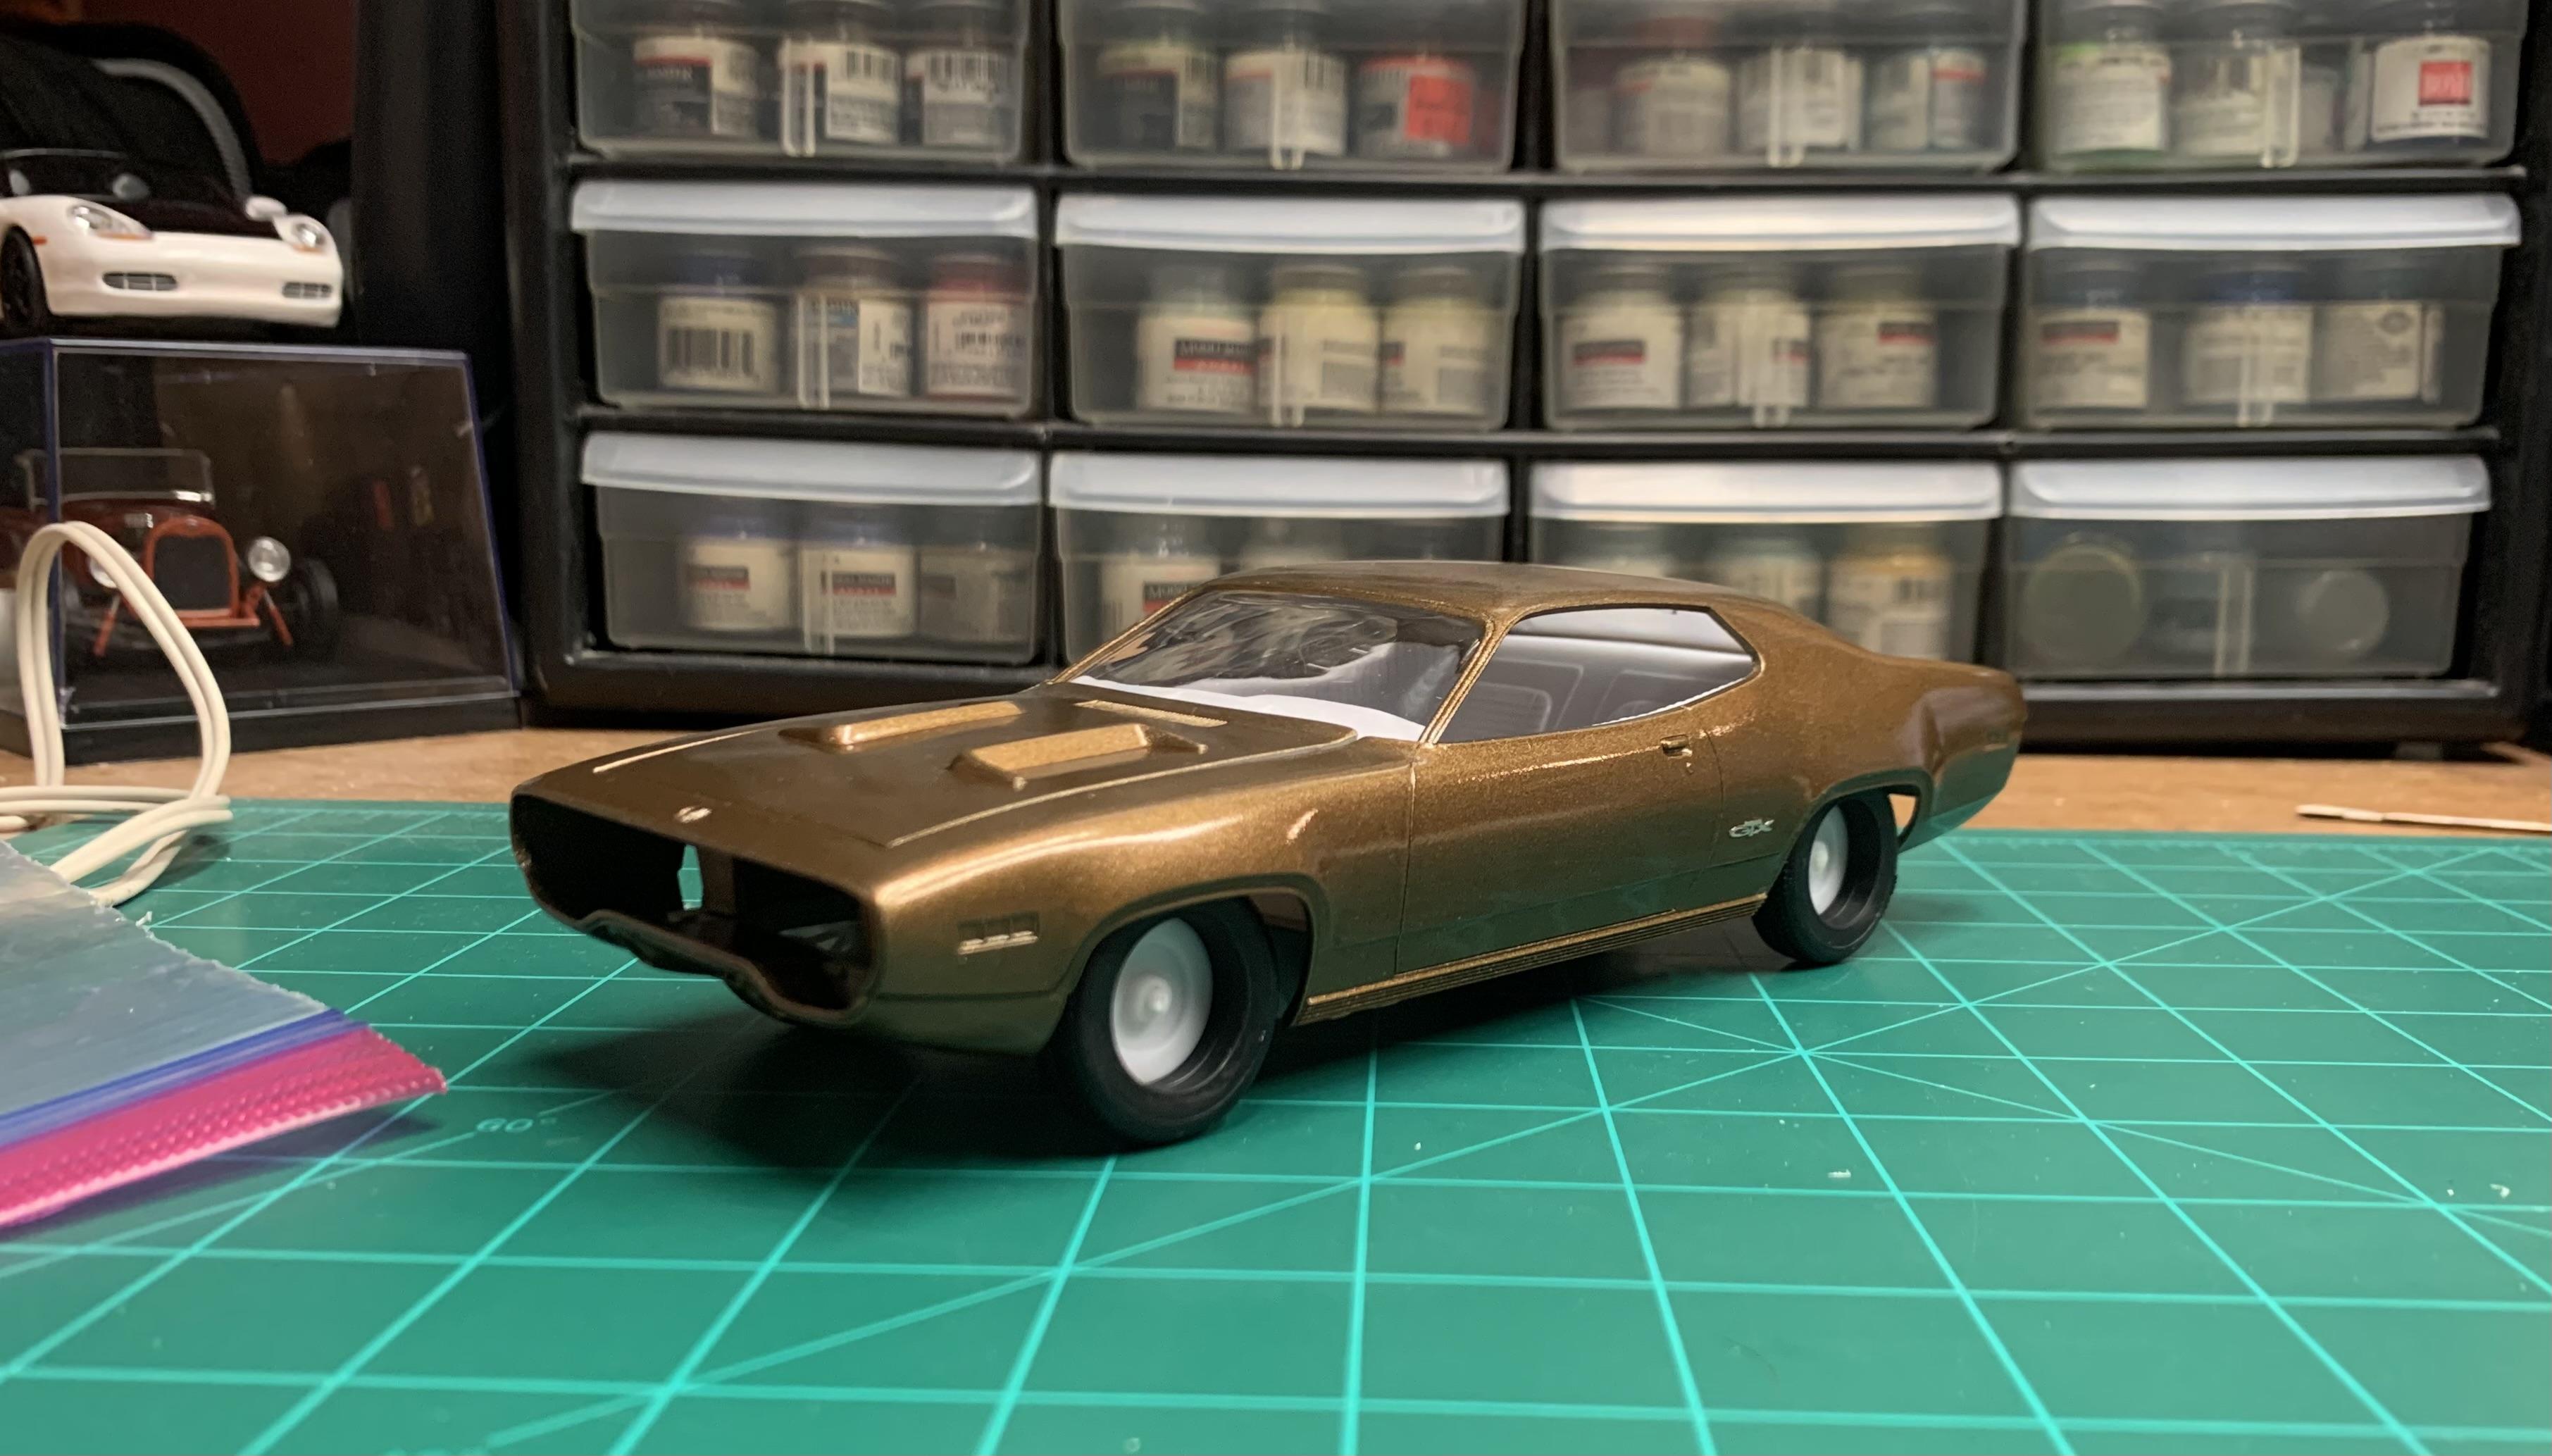 |
|
|
|
Post by kyledehart5 on Jan 5, 2024 17:54:36 GMT -5
That’s a great start. Looks like mocking it up was a good call that way you can get it where it needs to be without having to worry
|
|
atomicholiday
Full Member
  
Member since: September 2023
Posts: 411
Sept 4, 2023 8:25:11 GMT -5
Sept 4, 2023 8:25:11 GMT -5
|
Post by atomicholiday on Jan 5, 2024 22:05:19 GMT -5
That’s a great start. Looks like mocking it up was a good call that way you can get it where it needs to be without having to worry Yup. I mean, the paint is already screwed, so there's no risk of scratching it at this point. |
|
|
|
Post by 406 Silverado on Jan 6, 2024 6:55:54 GMT -5
I saw this one at MCM and I'll be danged if I hadn't commented on it over there either. Sorry about that Jeremy. These cars look GREAT with the tires from the Monogram 66 Mustang GT-350R kit. It's gotta be this kit as I think that the tires were changed sometime after this one. It offers meatier tires in the rear and a tad bit but still streetable tires in the front.  Here's the way my Dodge Challenger T/A looks with those tires. IMO these are the perfect tires for these cars: 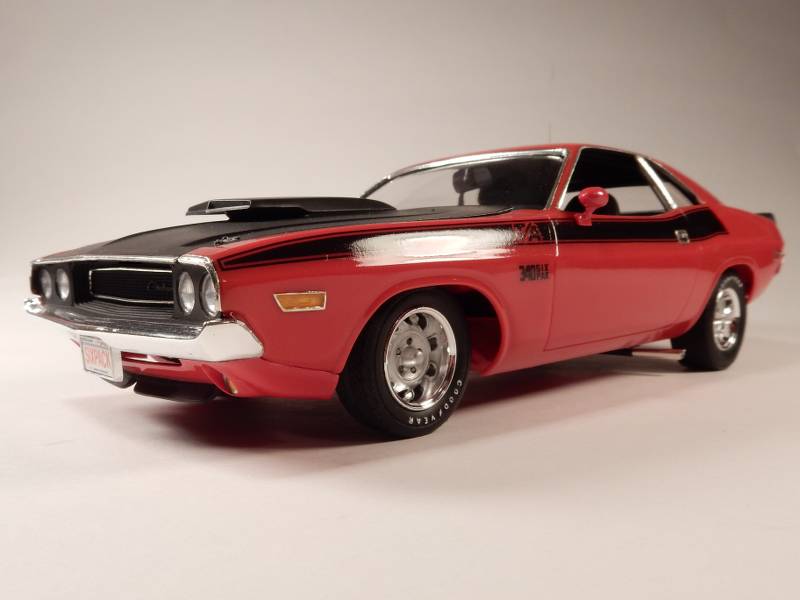 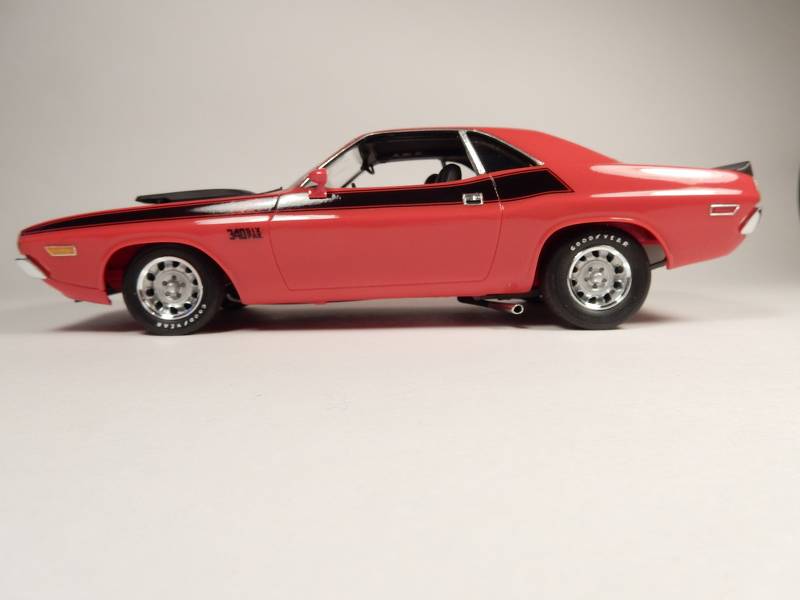 |
|
TJ
Senior Member
    June '23 Showcased Model Awarded
Member since: May 2023
Posts: 2,194
May 14, 2023 18:18:36 GMT -5
May 14, 2023 18:18:36 GMT -5
|
Post by TJ on Jan 6, 2024 7:06:25 GMT -5
That is the same color I'm painting my 64 GTO. Started it for the 2023 GB but didn't get anywhere close to complete
|
|
handiabled
Administrator      Apr '23 Showcased Build Awarded
Member since: February 2023
Posts: 4,508 
MSC Staff
|
Post by handiabled on Jan 6, 2024 12:03:20 GMT -5
If I recall correctly the 1:1 scale GTX with regular stock bias plys on it has the same look sitting deep inside the wheel well. Some meats on the back should look awesome. Sucks about the paint but I'm sure you will nail the next one. looking forward to seeing this with a vinyl roof on it!
|
|
rondriaan
Full Member
   Aug '24 Showcased Build Awarded
Member since: March 2012
Posts: 664
Mar 27, 2012 2:07:40 GMT -5
Mar 27, 2012 2:07:40 GMT -5
|
Post by rondriaan on Jan 6, 2024 16:35:15 GMT -5
I was already afraid that wet sanding would not help on the roof. It was already visible that the underlay was damaged, which was a shame of your work, but you can only learn from your mistakes. I'm still learning every day  Nice model and nice color and I think the lowered version looks nice. |
|
atomicholiday
Full Member
  
Member since: September 2023
Posts: 411
Sept 4, 2023 8:25:11 GMT -5
Sept 4, 2023 8:25:11 GMT -5
|
Post by atomicholiday on Jan 7, 2024 15:23:31 GMT -5
Fixing the ride height and depth of wheels in the wells turned out to be way easier than expected. First issue to tackle was finding tires that looked right to me. Digging through spare parts, I came across a set of old Monogram GoodYear GT Radials that looked perfect. Only problem is the kit supplied rims and wheel backs were too large. Fortunately the Revellogram ‘70 Challenger kit has the tires I wanted and the correct rallye wheels. And to top it off, they mount exactly the same way as the GTX kit wheels. 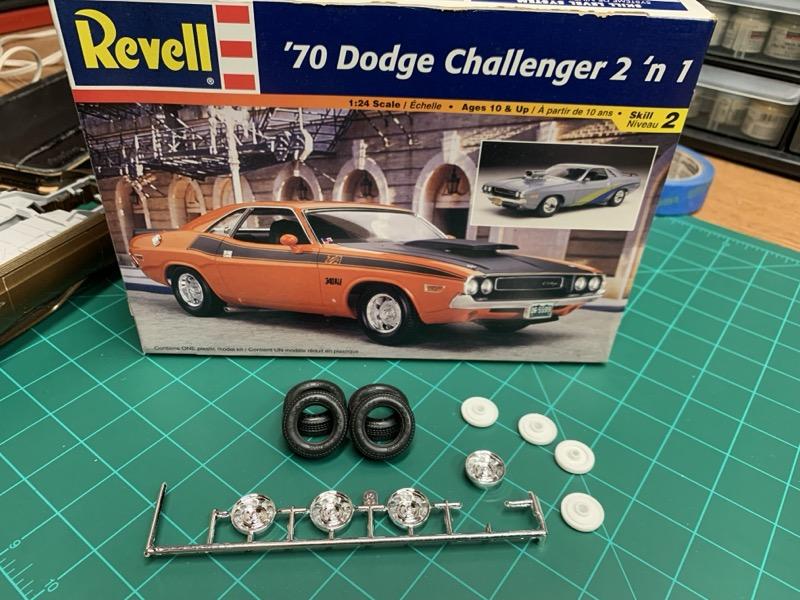 Here’s the Good Year on the left next to the GTX kit tire. 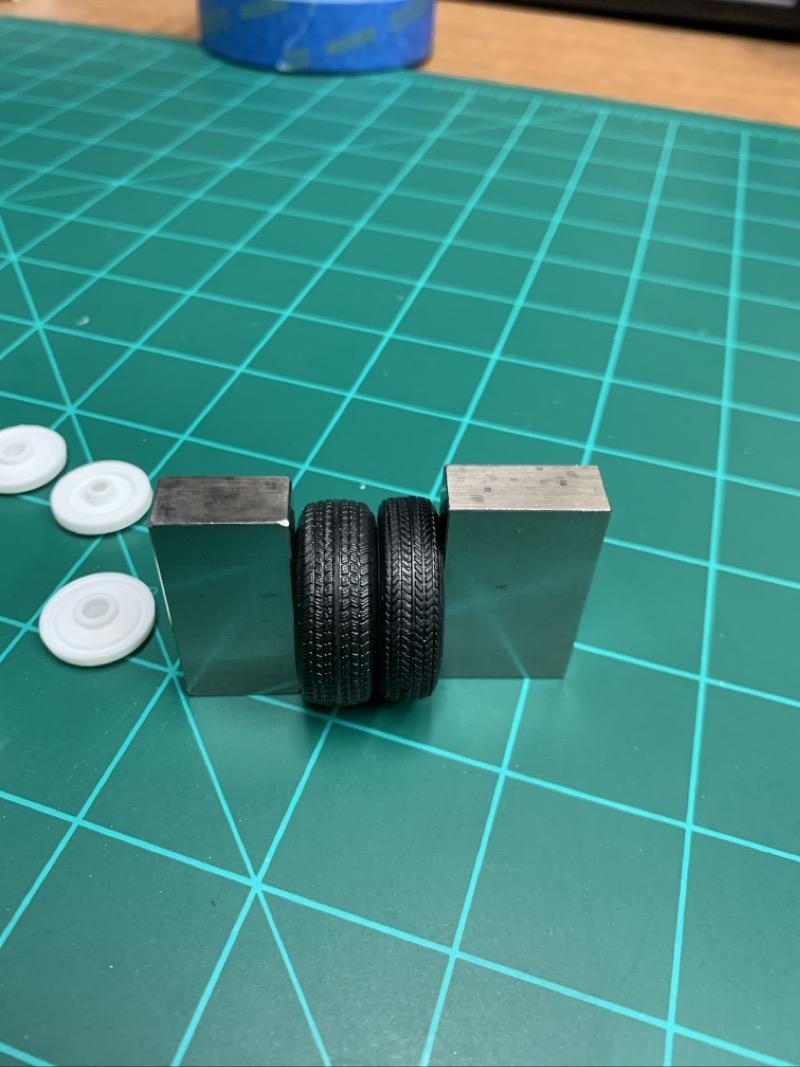 The Good Years are meatier and just wide enough to look more like factory. Problem solved. Next, rear suspension lift blocks were sourced from the Revell ‘68 Firebird kit. Only two will be used, one for each side at the rear. 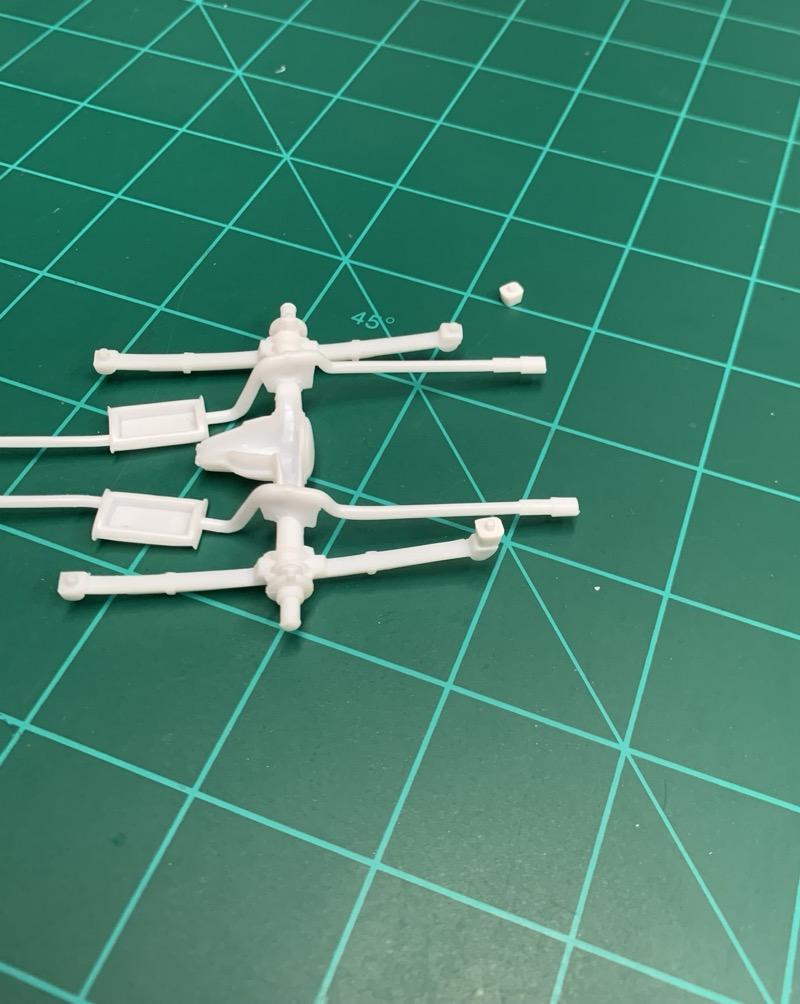 Here’s the mockup with Good Years and lifted rear suspension. 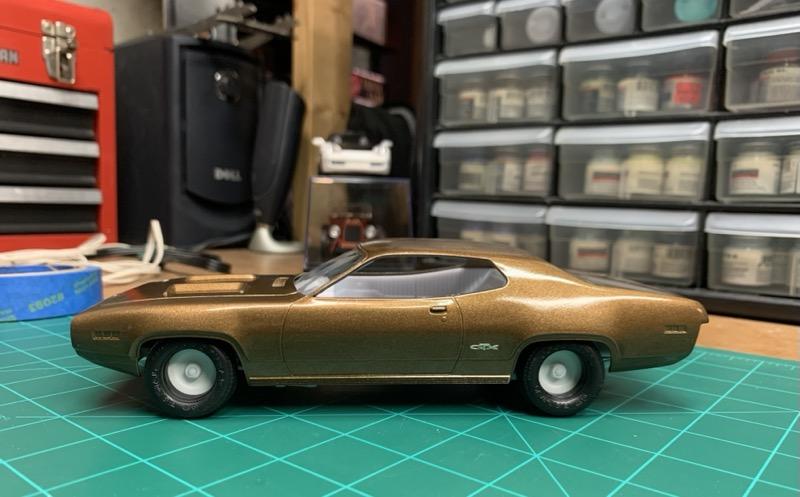 About the tires. I know recent issues have the logos removed. I might dig through the stash and find a set. Then I’d add white letter decals. |
|
|
|
Post by 406 Silverado on Jan 9, 2024 9:12:29 GMT -5
That looks A LOT better already Jeremy!! Looking forward to more on this.
|
|
|
|
Post by tcoat on Jan 9, 2024 9:42:18 GMT -5
If building that as an actual car in the 70's or late 80's I would use the Goodyear's on the rear and the skinnier kit tires on the front.
|
|
handiabled
Administrator      Apr '23 Showcased Build Awarded
Member since: February 2023
Posts: 4,508 
MSC Staff
|
Post by handiabled on Jan 9, 2024 10:04:08 GMT -5
Looks much better with that combo tires and rear end lift
|
|
brandonk
Full Member
   Jan '24 Showcased Model Awarded
Member since: May 2023
Posts: 1,309
May 14, 2023 13:45:45 GMT -5
May 14, 2023 13:45:45 GMT -5
|
Post by brandonk on Jan 9, 2024 10:37:11 GMT -5
Great choice of color for this one. Looking forward to seeing more.
|
|
atomicholiday
Full Member
  
Member since: September 2023
Posts: 411
Sept 4, 2023 8:25:11 GMT -5
Sept 4, 2023 8:25:11 GMT -5
|
Post by atomicholiday on Jan 14, 2024 17:10:39 GMT -5
I’ve decided to try doing spark plug wires for this build. To that end, the kit distributor was reworked. First, a .06” hole was drilled through the entire part. Then a piece of styrene rod of the same size was glued into place halfway in. This was done to give it a more secure mounting area in the engine, which will be drilled to match. Next, the hole for the wires was opened up to .085”. Finally the wires were glued in. I know many people use CA, but to give me more working time, I used two part epoxy. This is the second time I’ve done this, and for some reason, I really struggle to get the wires into the hole. I see why people go with pre-wired distributors. I ended up putting six wires in at the start, and then pushing the remaining wires in one at a time. Hence the epoxy. Here’s the result before paint. 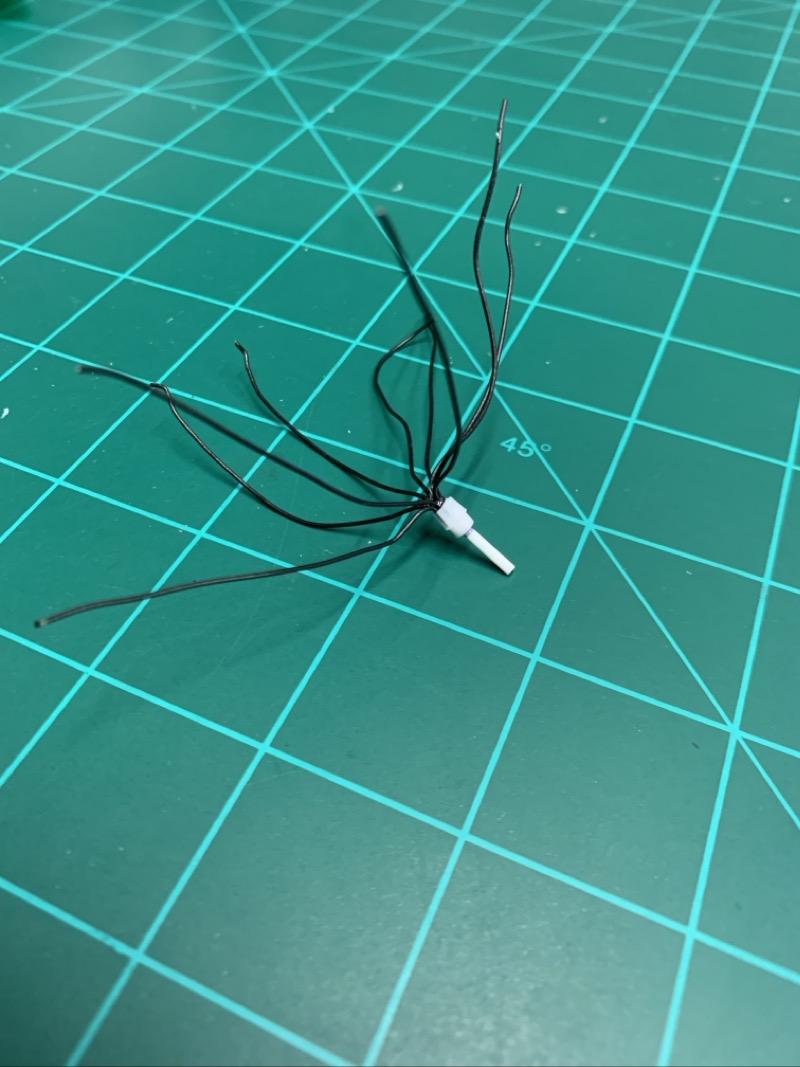 |
|
|
|
Post by kyledehart5 on Jan 14, 2024 17:50:20 GMT -5
I go the prewired route for these very reasons. It is hard to have enough room to drill out 9 holes in a kit distributor and then you have to get all the wires in the holes you've drilled and maybe even boots on as well. The prewired ones save me time and headache. Lol. Great work on elevating the kit piece here.
|
|
atomicholiday
Full Member
  
Member since: September 2023
Posts: 411
Sept 4, 2023 8:25:11 GMT -5
Sept 4, 2023 8:25:11 GMT -5
|
Post by atomicholiday on Jan 14, 2024 19:41:46 GMT -5
I go the prewired route for these very reasons. It is hard to have enough room to drill out 9 holes in a kit distributor and then you have to get all the wires in the holes you've drilled and maybe even boots on as well. The prewired ones save me time and headache. Lol. Great work on elevating the kit piece here. Yeah, I figured I had nothing to lose. If it didn’t work, I’d order one. I can’t imagine doing it on a smaller kit piece though. This one was nerve wracking enough.😁 |
|
atomicholiday
Full Member
  
Member since: September 2023
Posts: 411
Sept 4, 2023 8:25:11 GMT -5
Sept 4, 2023 8:25:11 GMT -5
|
Post by atomicholiday on Jan 15, 2024 10:14:22 GMT -5
Just got these in the mail from Keith Marks and I gotta say, they look awesome! 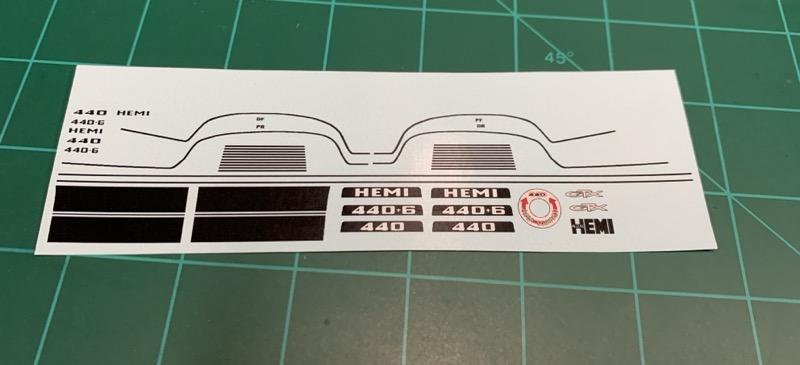 |
|
atomicholiday
Full Member
  
Member since: September 2023
Posts: 411
Sept 4, 2023 8:25:11 GMT -5
Sept 4, 2023 8:25:11 GMT -5
|
Post by atomicholiday on Jan 15, 2024 16:44:55 GMT -5
Distributor is done now. I’m rapidly approaching the point where I need warm weather so I can paint. Might be a while though. Last night was -6F😱 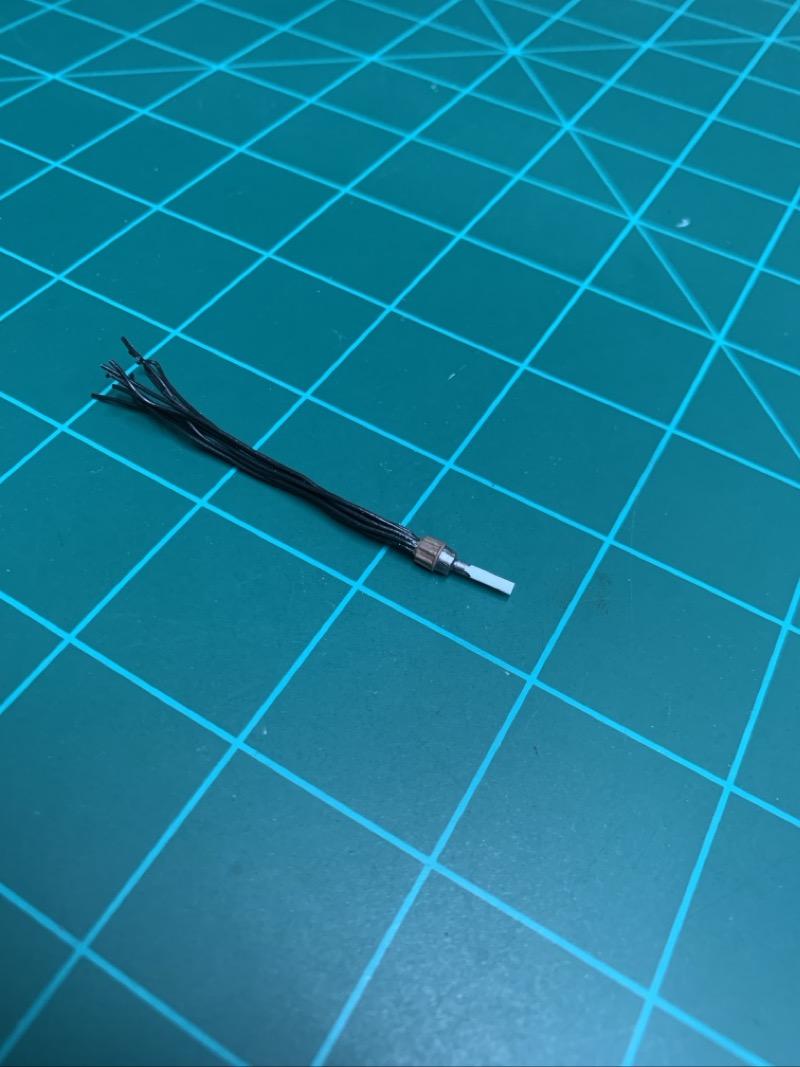 |
|
|
|
Post by kyledehart5 on Jan 15, 2024 23:56:52 GMT -5
Having the same issues with weather 😑Although we had a heatwave compared to you at -1. Maybe I’ll be able to paint sometime before spring. lol.
|
|
|
|
Post by 406 Silverado on Jan 16, 2024 5:06:34 GMT -5
Those cals do look good Jeremy. I've been using MAD prewired distributors for the last few builds and it does indeed take some of the pain out of building engines up. If you haven't used these yet I encourage you to try one. They are great to work with: Morgan Automotive Detail Pre-Wired Distributors |
|
atomicholiday
Full Member
  
Member since: September 2023
Posts: 411
Sept 4, 2023 8:25:11 GMT -5
Sept 4, 2023 8:25:11 GMT -5
|
Post by atomicholiday on Jan 16, 2024 11:45:23 GMT -5
Having the same issues with weather 😑Although we had a heatwave compared to you at -1. Maybe I’ll be able to paint sometime before spring. lol. High for today is supposed to be 8F. Almost tropical!😂 |
|
atomicholiday
Full Member
  
Member since: September 2023
Posts: 411
Sept 4, 2023 8:25:11 GMT -5
Sept 4, 2023 8:25:11 GMT -5
|
Post by atomicholiday on Jan 16, 2024 11:47:31 GMT -5
Those cals do look good Jeremy. I've been using MAD prewired distributors for the last few builds and it does indeed take some of the pain out of building engines up. If you haven't used these yet I encourage you to try one. They are great to work with: Morgan Automotive Detail Pre-Wired DistributorsI’ve been thinking pretty seriously about trying that out. Probably on an upcoming build.👍 |
|
|
|
Post by 406 Silverado on Jan 16, 2024 14:44:44 GMT -5
Those cals do look good Jeremy. I've been using MAD prewired distributors for the last few builds and it does indeed take some of the pain out of building engines up. If you haven't used these yet I encourage you to try one. They are great to work with: Morgan Automotive Detail Pre-Wired DistributorsI’ve been thinking pretty seriously about trying that out. Probably on an upcoming build.👍 You won't regret that decision. They work out very well. |
|
atomicholiday
Full Member
  
Member since: September 2023
Posts: 411
Sept 4, 2023 8:25:11 GMT -5
Sept 4, 2023 8:25:11 GMT -5
|
Post by atomicholiday on Jan 20, 2024 11:46:41 GMT -5
Quick update for this build. I got all the paint stripped finally. Had to do it in two stages. First, a good soaking in 90% iso alcohol to get the lacquer off. But that won’t touch the primer. Originally I’d stop there, but since this kit is getting a vinyl top, I wanted to take it down to bare plastic. So after the lacquer was removed, it got a bath in the purple pond for a while. That will take primer off with no problem. So now we’re back to where it all began, in bare plastic. 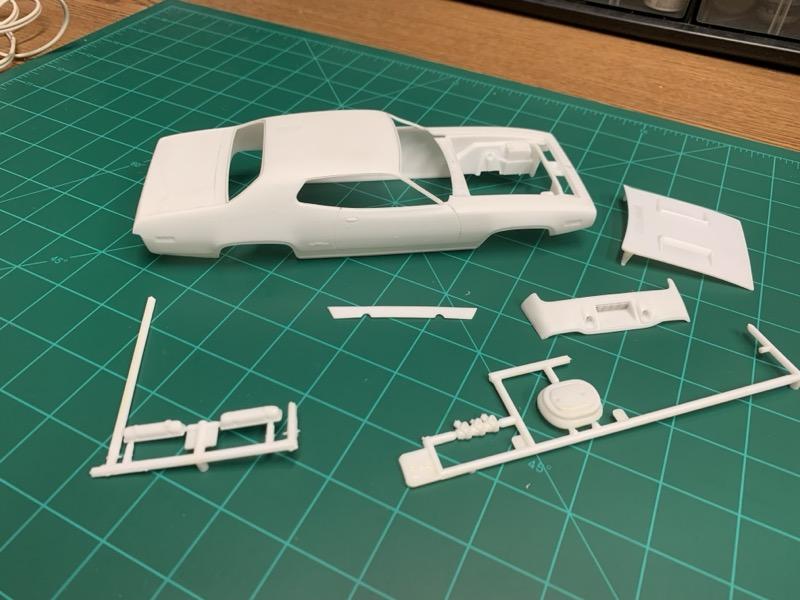 |
|
atomicholiday
Full Member
  
Member since: September 2023
Posts: 411
Sept 4, 2023 8:25:11 GMT -5
Sept 4, 2023 8:25:11 GMT -5
|
Post by atomicholiday on Jan 21, 2024 16:17:50 GMT -5
I decided to try opening up the grills. Never done it before, so why not. I started out with a scrap grill just to see how it would go (not good). My test part started falling apart and splitting. But it was a valuable learning experience. So feeling super confident (cough cough), I started on the lower valance. It was a much simpler piece than my test part, and it went well. So with that experience under my belt, it was time to tackle the main grill. Not an easy job, and my nerves are shot, but I think it turned out pretty decent. Now I need a break…😁 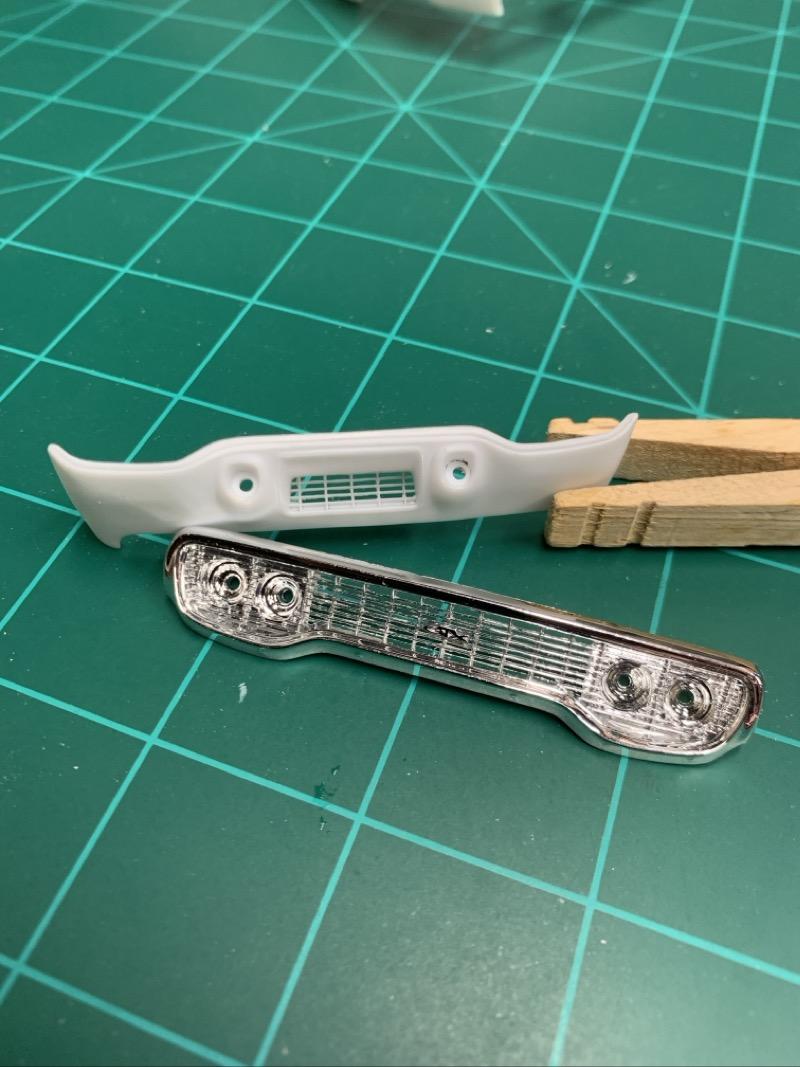 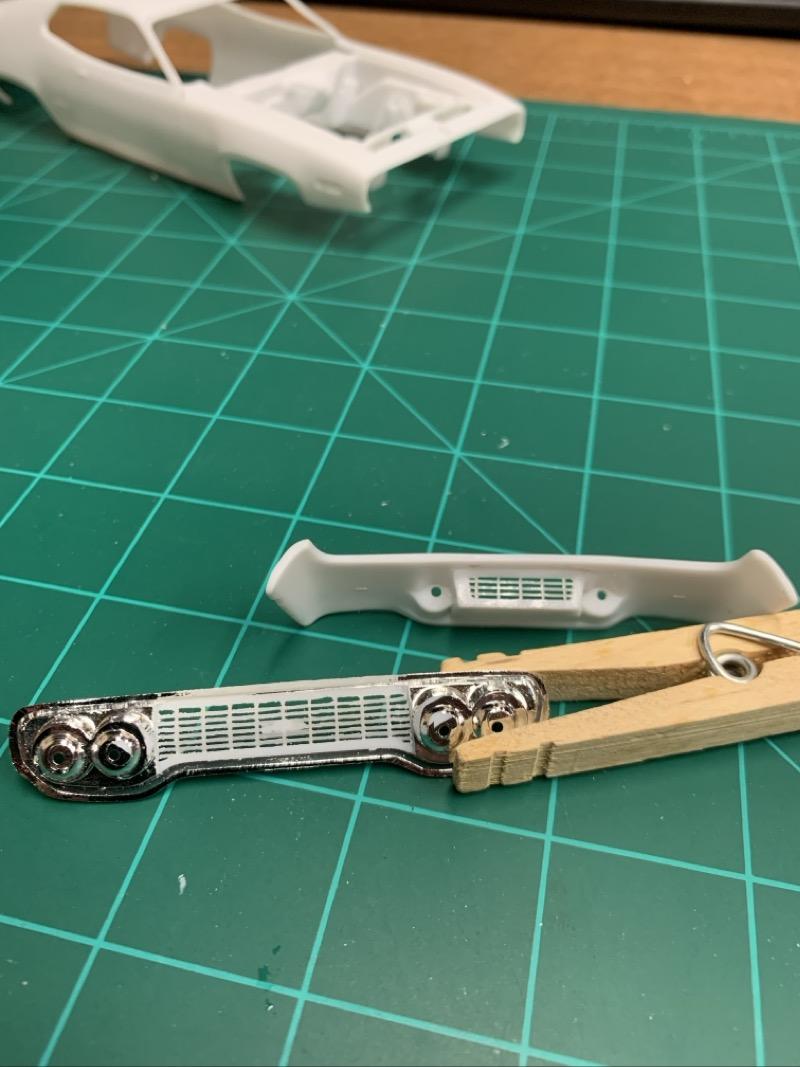 |
|