|
|
Post by kyledehart5 on Aug 21, 2024 15:38:45 GMT -5
Perfect. That engine looks incredible.
|
|
adrian29341
Full Member
   Oct '24 Showcased Model Awarded
Member since: July 2024
Greatest Hobby in the World :)
Posts: 266 
|
Post by adrian29341 on Aug 21, 2024 15:48:38 GMT -5
Fantastic work going on here ... that engine - wow.
|
|
joelw
Full Member
  
Member since: July 2024
Posts: 572 
|
Post by joelw on Aug 21, 2024 19:01:58 GMT -5
Paul,
Holy Smokes!! both the spark plugs and the flue injection looks amazing. 1/12 scale really lends itself to super detailing.
so far this blog trip has been fantastic and worth way more then the cost of admission.
joel
|
|
2whl
Full Member
   August '24 MoM Winner
Member since: September 2023
Posts: 445
Sept 10, 2023 12:21:52 GMT -5
Sept 10, 2023 12:21:52 GMT -5
|
Post by 2whl on Aug 21, 2024 20:14:37 GMT -5
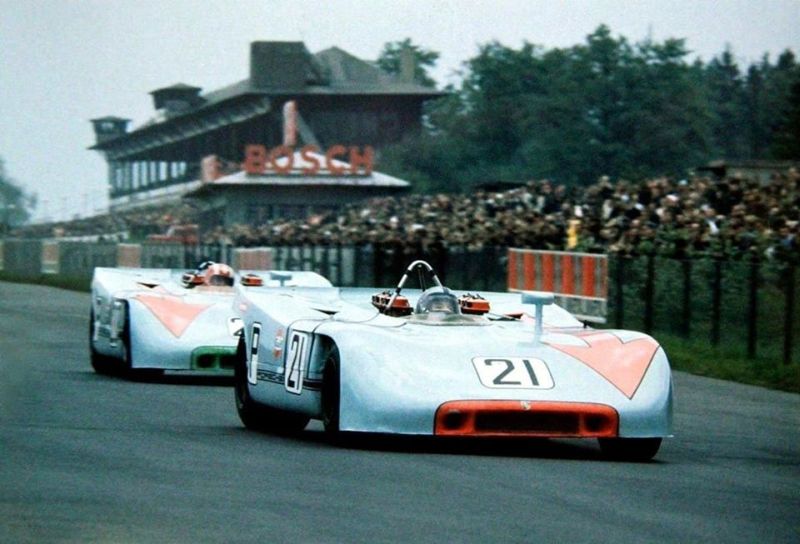 Perfect. That engine looks incredible. Thanks Kyle. Fantastic work going on here ... that engine - wow. Thank you Adrian Paul, Holy Smokes!! both the spark plugs and the flue injection looks amazing. 1/12 scale really lends itself to super detailing. so far this blog trip has been fantastic and worth way more then the cost of admission. joel Thank you very much Joel. Someone was charging admission? I need to get in on that action...LOL Spark wires and fuel lines are routed. 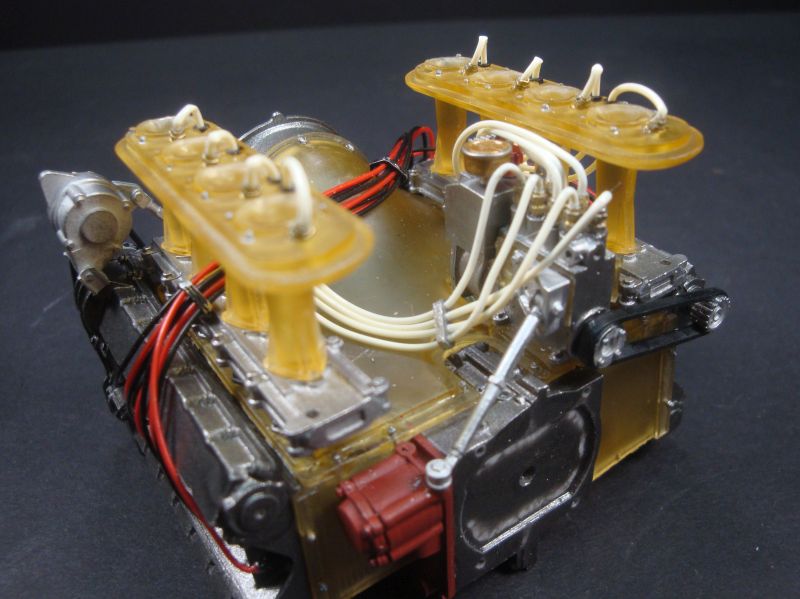 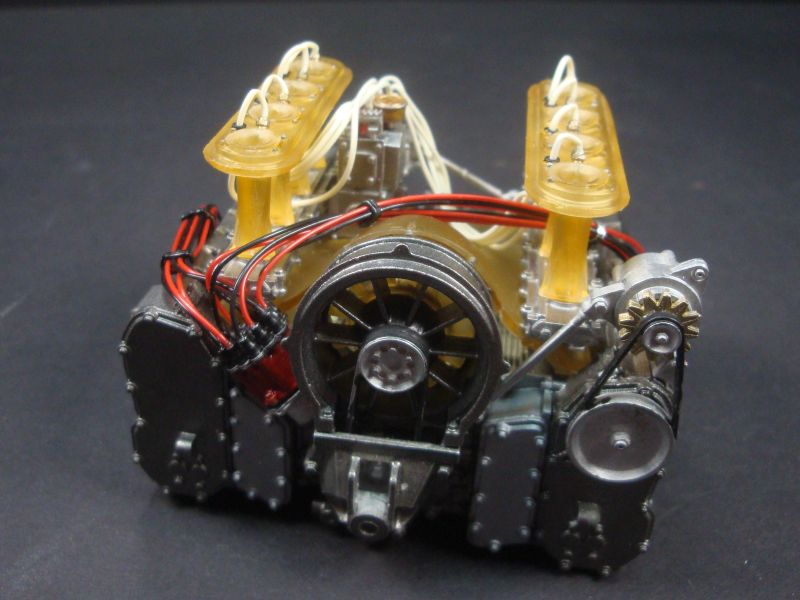 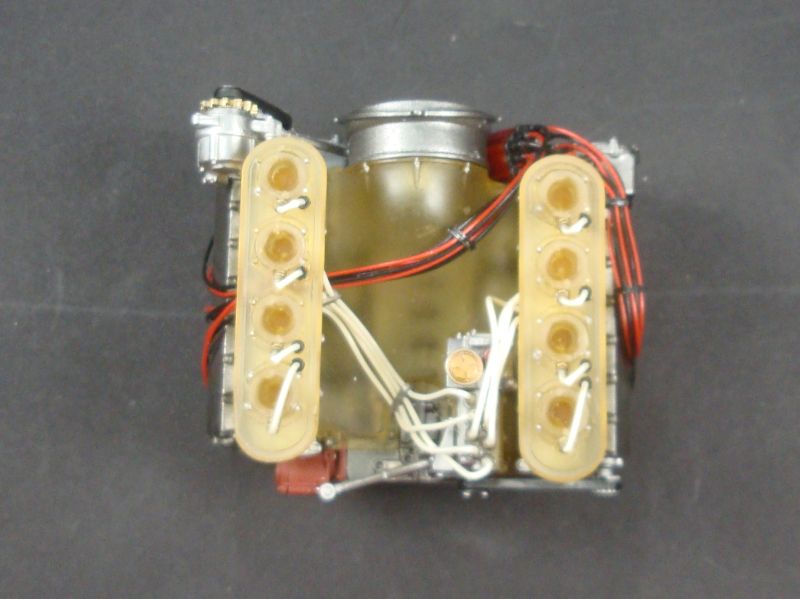 It was now time to paint the chassis. This was 4 years ago, but I believe I painted it in Tamiya AS-12 Bare Metal Silver 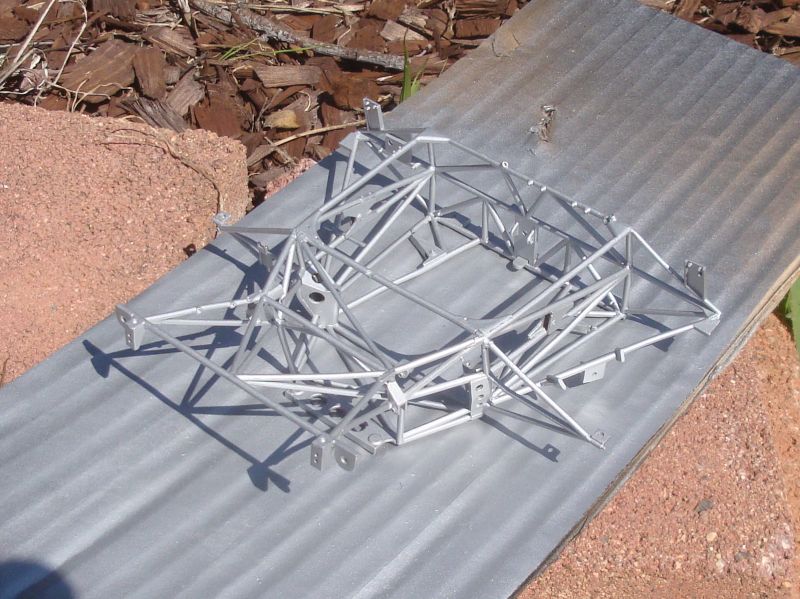 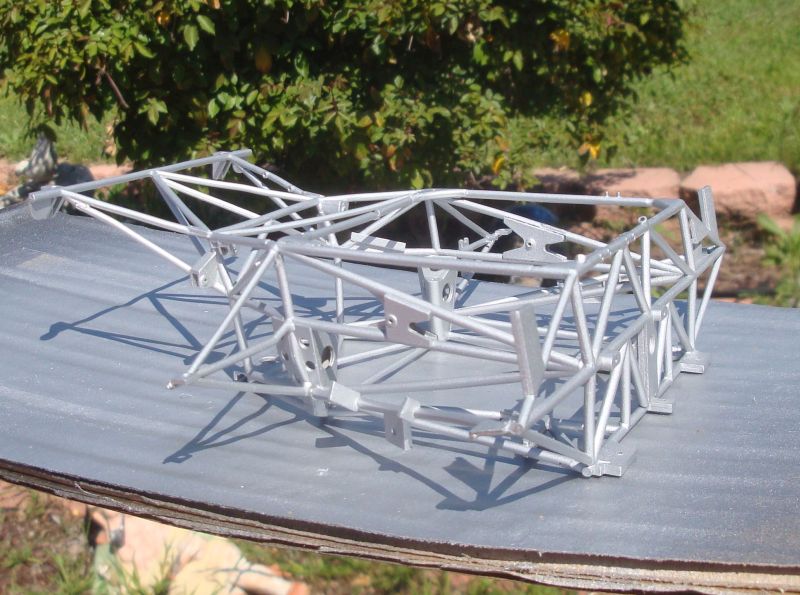 327 |
|
handiabled
Administrator      Apr '23 Showcased Build Awarded
Member since: February 2023
Posts: 4,390  Member is Online
MSC Staff
|
Post by handiabled on Aug 22, 2024 2:30:45 GMT -5
Paul I can literally hear this engine running! What a magnificent job with routing the ignition and fuel lines!
|
|
|
|
Post by kyledehart5 on Aug 22, 2024 6:02:00 GMT -5
Look at that space frame. Wow. And the engine gets better and better
|
|
2whl
Full Member
   August '24 MoM Winner
Member since: September 2023
Posts: 445
Sept 10, 2023 12:21:52 GMT -5
Sept 10, 2023 12:21:52 GMT -5
|
Post by 2whl on Aug 22, 2024 8:07:07 GMT -5
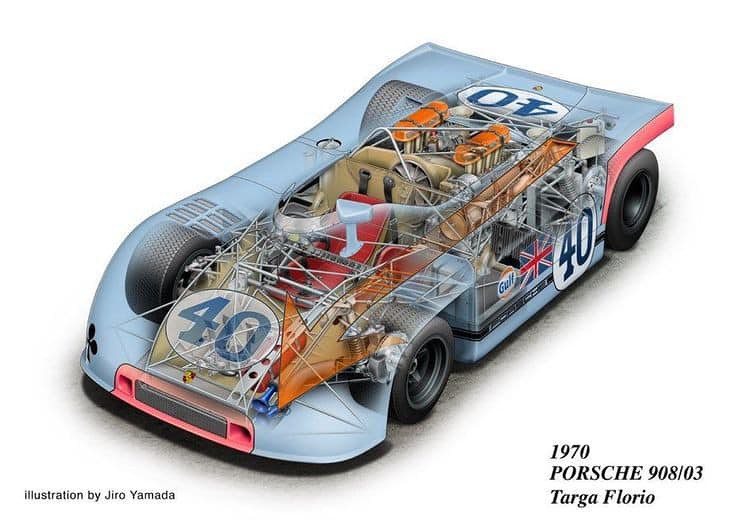 Paul I can literally hear this engine running! What a magnificent job with routing the ignition and fuel lines! Thank you Brent Look at that space frame. Wow. And the engine gets better and better Thanks Kyle Last touches to the engine before it goes into the frame. Throttle cable and linkage. Then the exhaust. 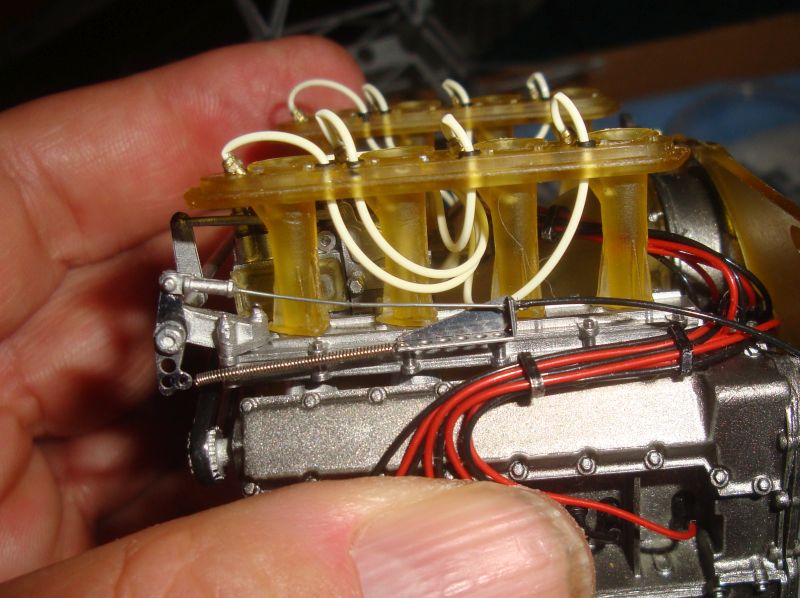 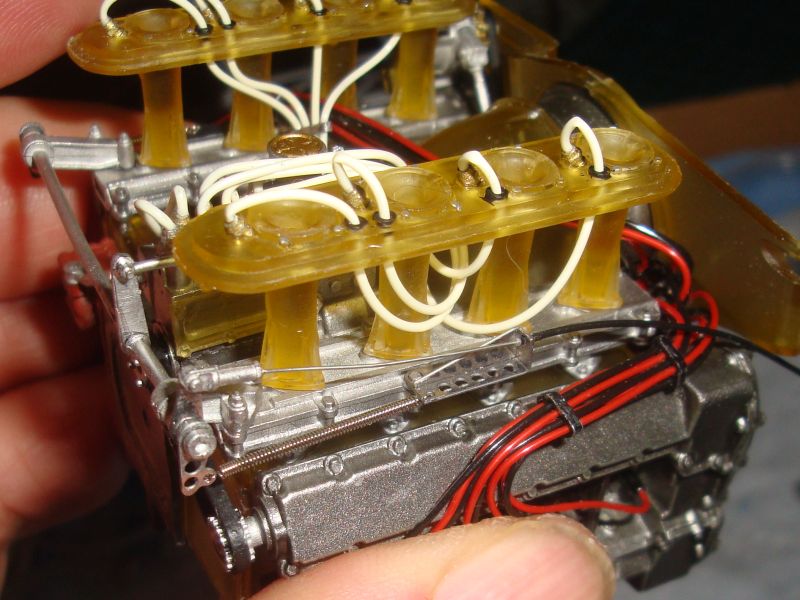 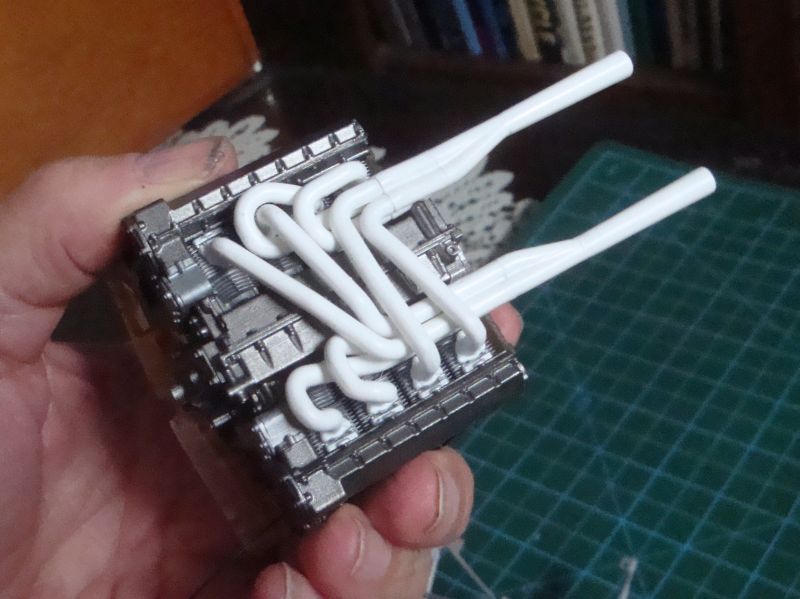 Engine is in !! 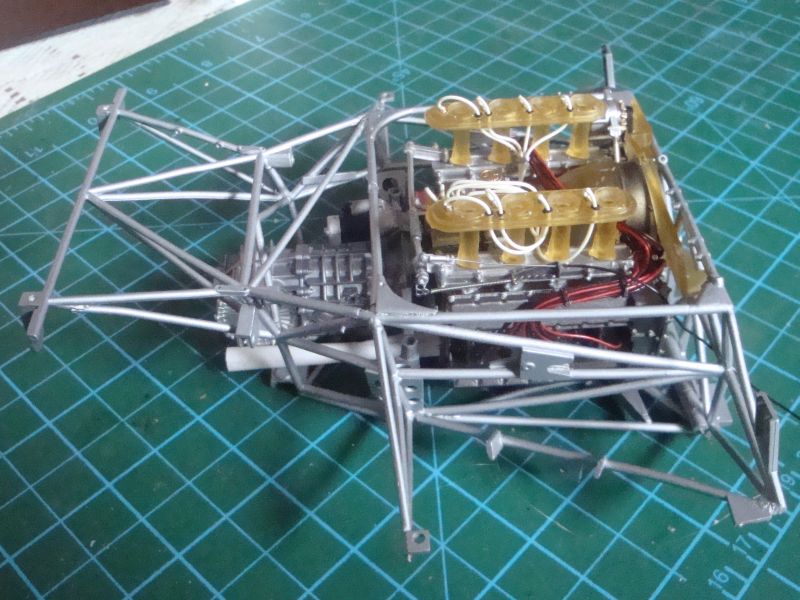 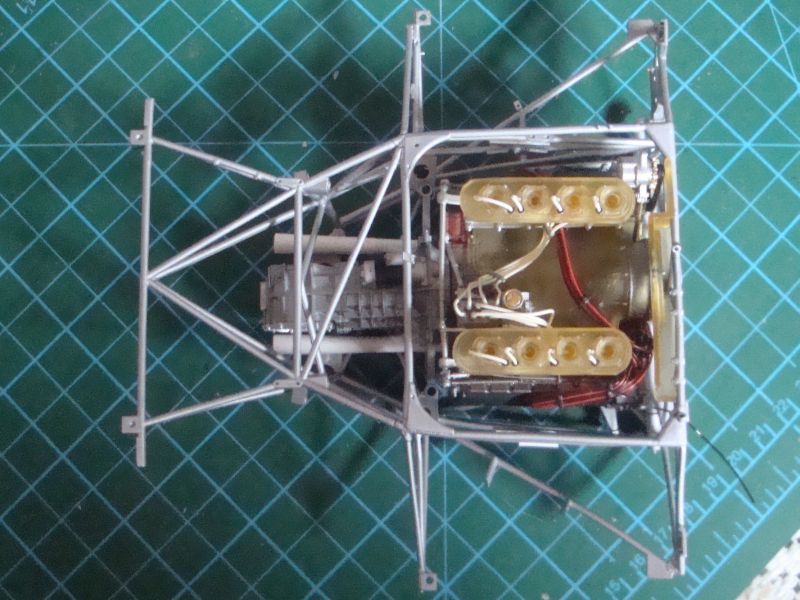 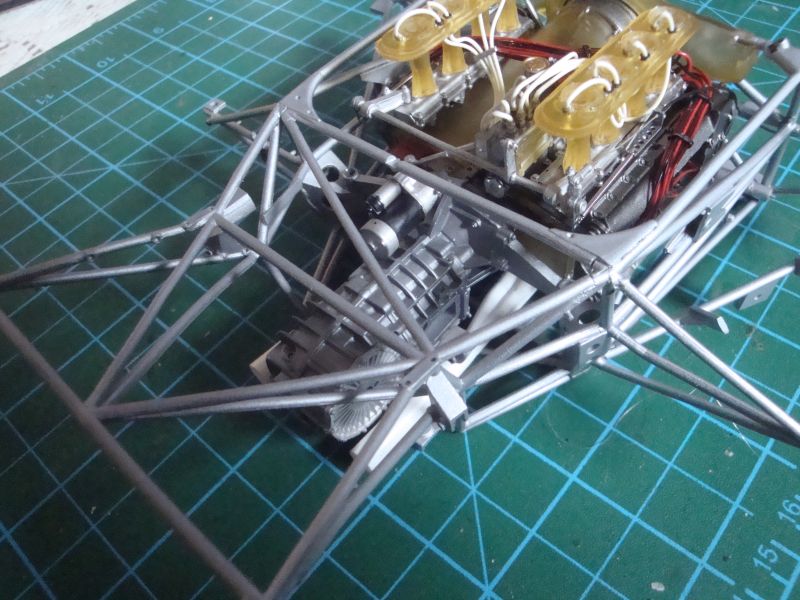 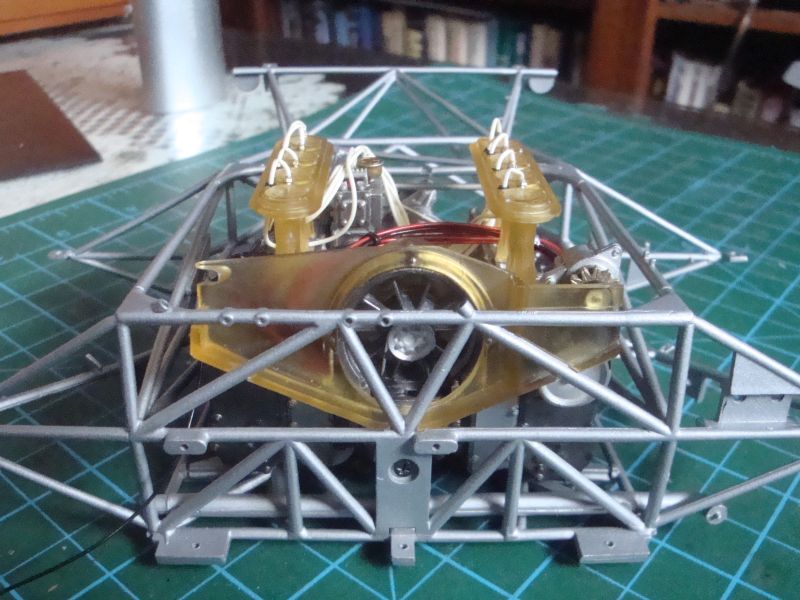 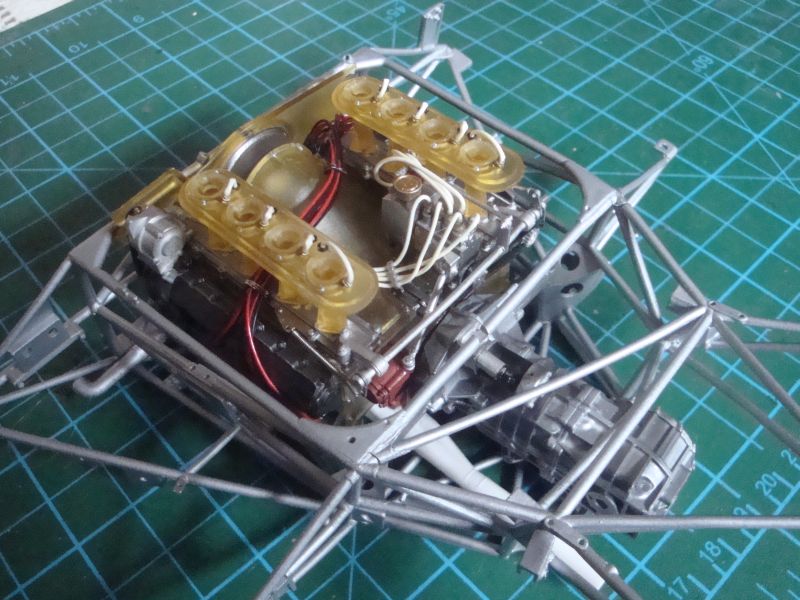 349 |
|
handiabled
Administrator      Apr '23 Showcased Build Awarded
Member since: February 2023
Posts: 4,390  Member is Online
MSC Staff
|
Post by handiabled on Aug 22, 2024 8:28:05 GMT -5
My word that looks brilliant! Is the engine compartment going to be accessible after completed so the detail inside can be viewed?
|
|
joelw
Full Member
  
Member since: July 2024
Posts: 572 
|
Post by joelw on Aug 22, 2024 8:39:30 GMT -5
Paul,
I'm must loving those reference photos almost as much as your detail engine and chassis pictures. And after really looking at your engine and all that super detail especially even the throttle springs, and those rubber gromets for the fuel injector lines so that they don't get cut going through the fiberglass velocity stack assemblies. I'm thinking of actually trying my hand at one of the 1/12 kits I have in my stash but never even opened those boxes. if nothing else I stand a way better shot of seeing what I'm working on with my failing eyesight these days.
joel
|
|
2whl
Full Member
   August '24 MoM Winner
Member since: September 2023
Posts: 445
Sept 10, 2023 12:21:52 GMT -5
Sept 10, 2023 12:21:52 GMT -5
|
Post by 2whl on Aug 22, 2024 13:21:15 GMT -5
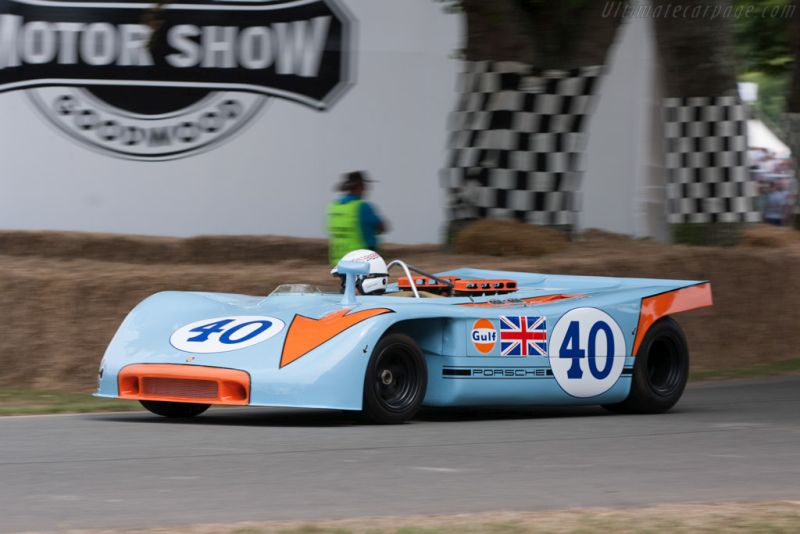 My word that looks brilliant! Is the engine compartment going to be accessible after completed so the detail inside can be viewed? Thanks Brent. Yes, the engine cover and doors are both on hinges. I'll probably not hook up the engine cover hinges so that I can take the cover all the way off. Paul, I'm must loving those reference photos almost as much as your detail engine and chassis pictures. And after really looking at your engine and all that super detail especially even the throttle springs, and those rubber gromets for the fuel injector lines so that they don't get cut going through the fiberglass velocity stack assemblies. I'm thinking of actually trying my hand at one of the 1/12 kits I have in my stash but never even opened those boxes. if nothing else I stand a way better shot of seeing what I'm working on with my failing eyesight these days. joel I'm glad you're enjoying my reference pics, Joel. After paying that high admission cost, you should get something extra for your money.....LOL The front chassis was sprayed with AS-12 also. Then I brush painted the tubes on the floor. Next up was master cylinders and reservoirs. 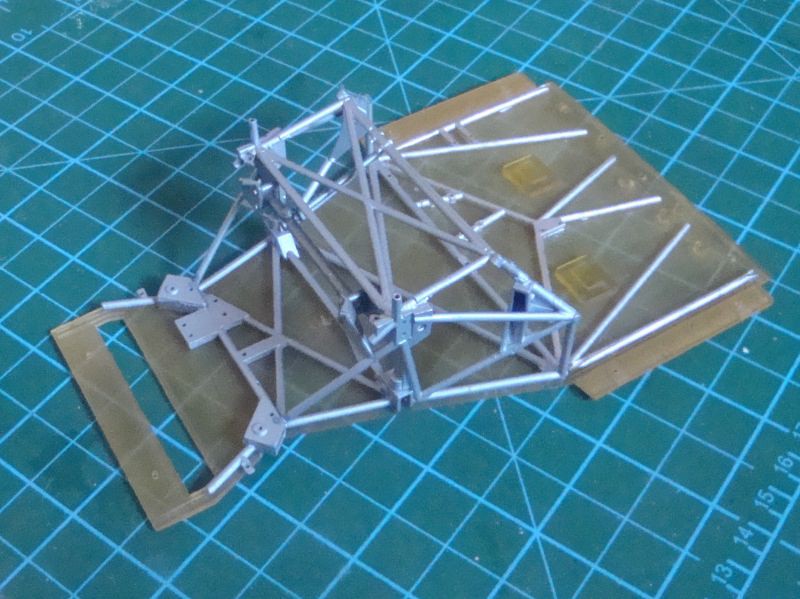 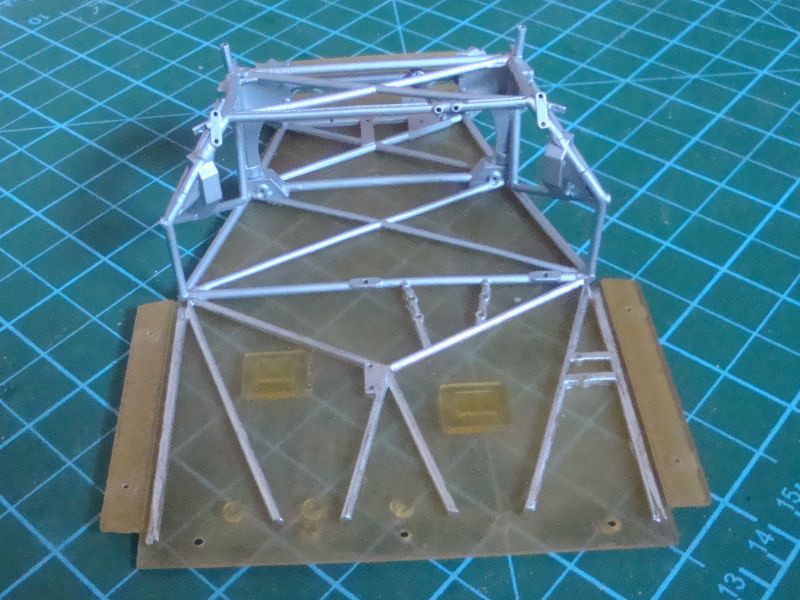 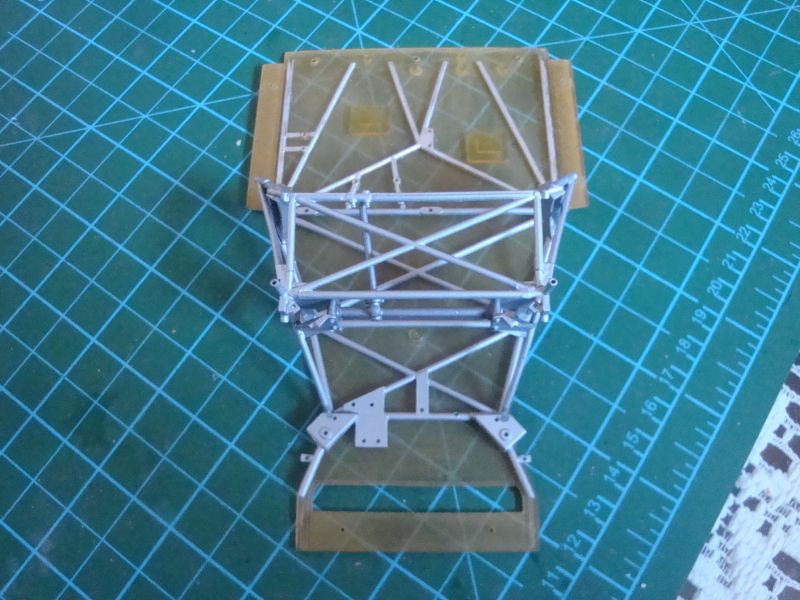 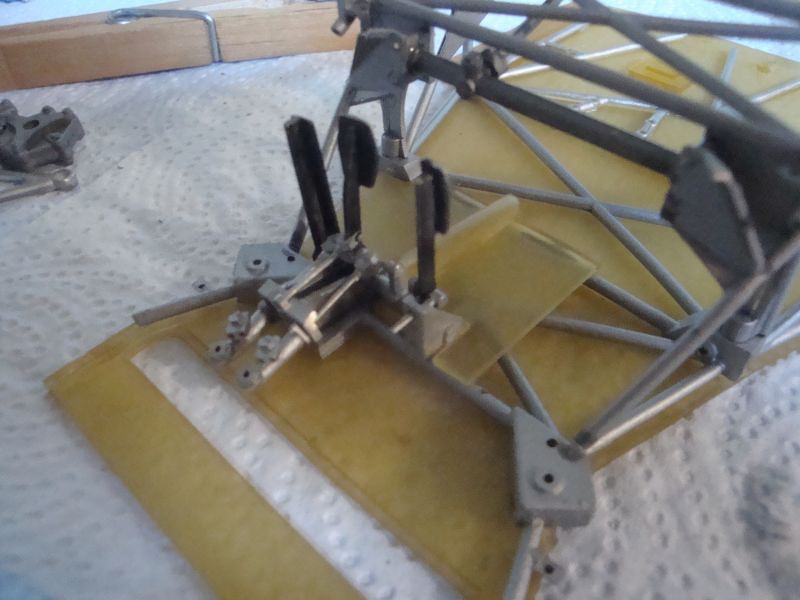 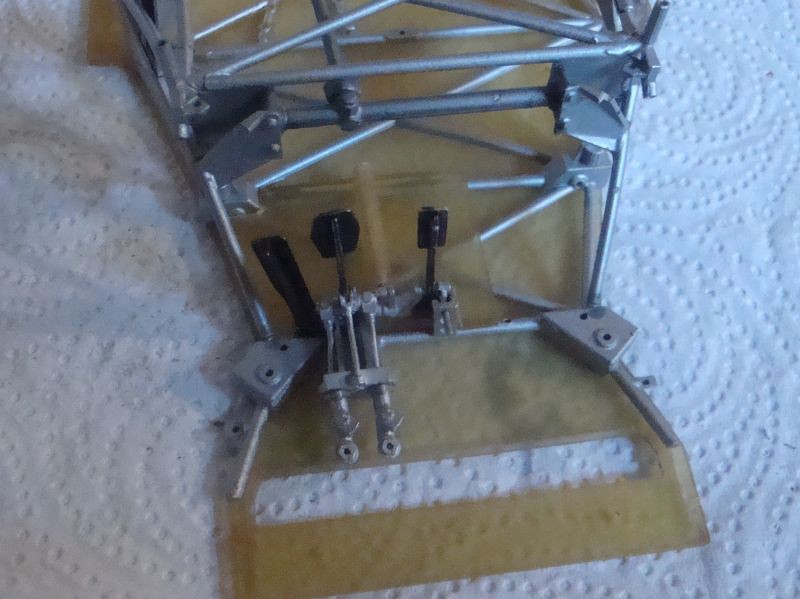 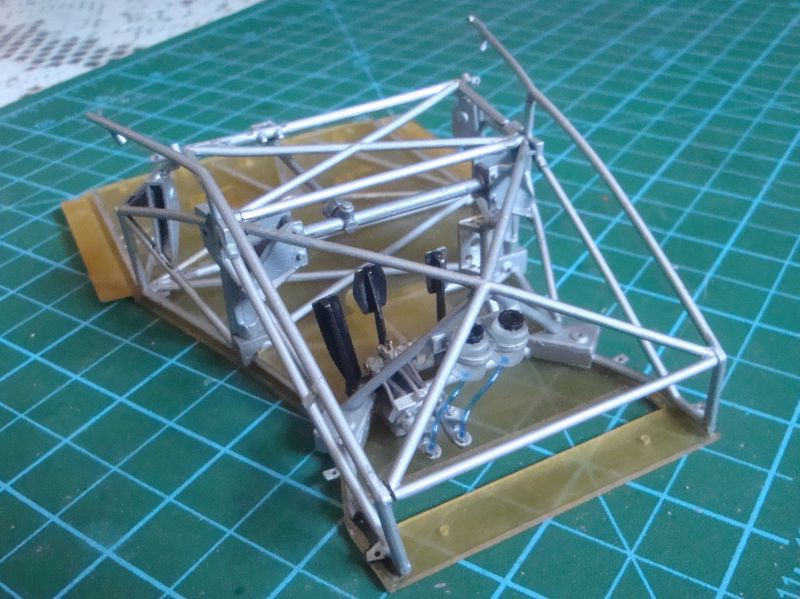 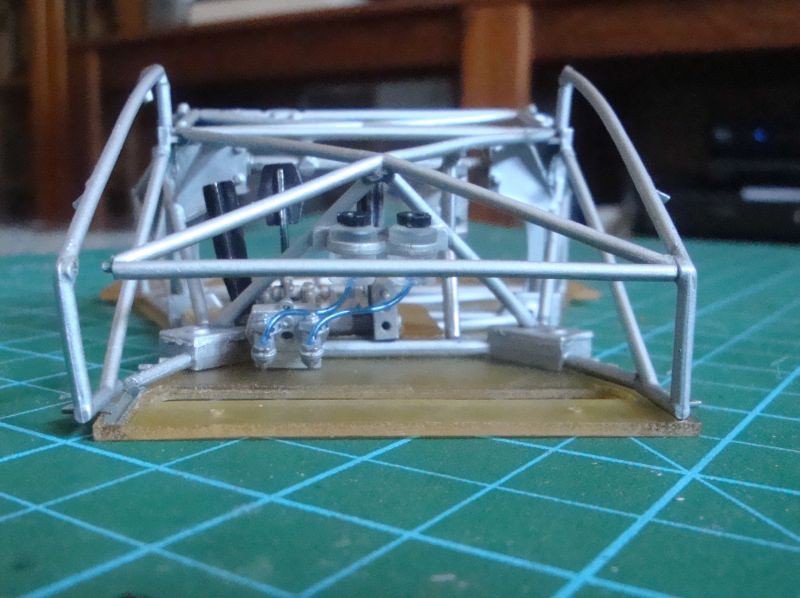 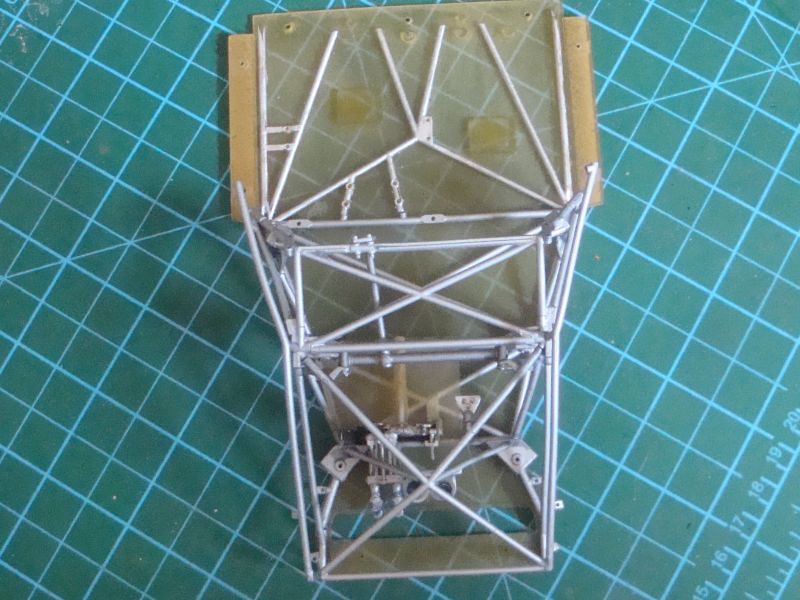 368 |
|
joelw
Full Member
  
Member since: July 2024
Posts: 572 
|
Post by joelw on Aug 22, 2024 15:42:14 GMT -5
Paul,
The price of admission is well worth it.
Nice job hand painting the floor tubes. They look identical to the rest of the front frame that's either a Tamiya rattle can or decanted and air brushed.
joel
|
|
|
|
Post by kyledehart5 on Aug 22, 2024 21:30:20 GMT -5
The wonderful progress continues. That engine in the frame is excellent and some more wonderful exhaust work. Always an interesting thing on these old cars.
|
|
handiabled
Administrator      Apr '23 Showcased Build Awarded
Member since: February 2023
Posts: 4,390  Member is Online
MSC Staff
|
Post by handiabled on Aug 23, 2024 1:57:46 GMT -5
Some more glorious detail with the pedals and master cylinders. Looking back at the see through diagram I noticed the illustration has a couple of horns mounted up front?
|
|
joelw
Full Member
  
Member since: July 2024
Posts: 572 
|
Post by joelw on Aug 23, 2024 6:37:26 GMT -5
Paul,
I was so impressed with how that engine turned out and sitting in the rear tube frame that I actually sent a few pictures of it to my brother whose an outstanding aircraft modeler, and he was also super impressed.
joel
|
|
2whl
Full Member
   August '24 MoM Winner
Member since: September 2023
Posts: 445
Sept 10, 2023 12:21:52 GMT -5
Sept 10, 2023 12:21:52 GMT -5
|
Post by 2whl on Aug 23, 2024 10:33:03 GMT -5
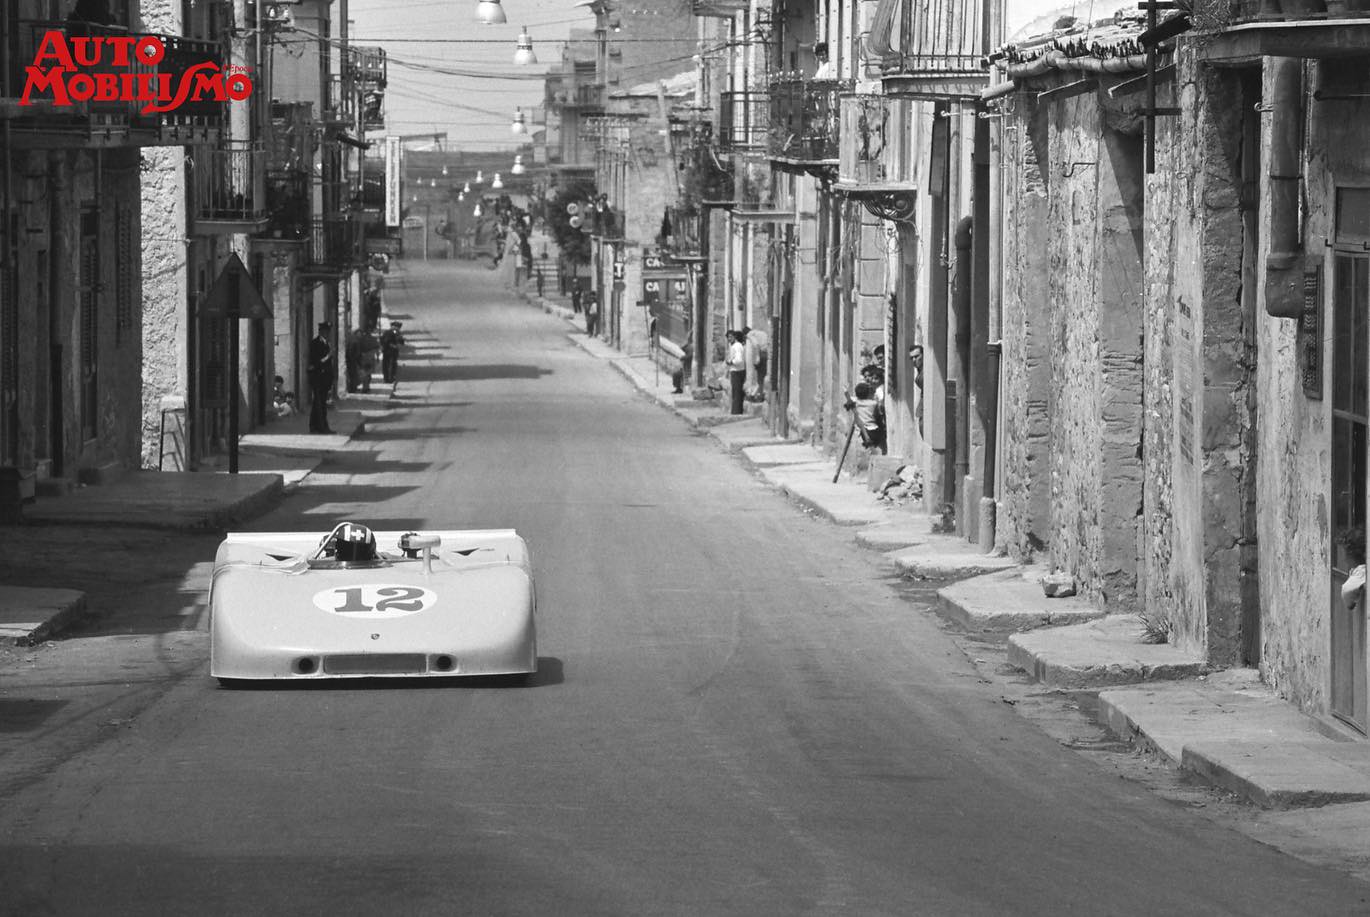 Paul, The price of admission is well worth it. Nice job hand painting the floor tubes. They look identical to the rest of the front frame that's either a Tamiya rattle can or decanted and air brushed. joel Thanks Joel. I actually used the Tamiya X series acrylics for the brush painting. The wonderful progress continues. That engine in the frame is excellent and some more wonderful exhaust work. Always an interesting thing on these old cars. Thanks Kyle Some more glorious detail with the pedals and master cylinders. Looking back at the see through diagram I noticed the illustration has a couple of horns mounted up front? Thanks Brent. Yes, they had horns. In my reference photo, you can see the race went through towns and countryside where there was no course control. I imagine they had to use the horns to warn bystanders of their approach. Paul, I was so impressed with how that engine turned out and sitting in the rear tube frame that I actually sent a few pictures of it to my brother whose an outstanding aircraft modeler, and he was also super impressed. joel Thanks Joel. It's nice to know I can actually impress another genre of modeller. Most of the military modellers around here have a blase attitude about cars. More work on the front end. Oil cooler installed along with it's lines. then a check to make sure the lines would go where they were supposed to. 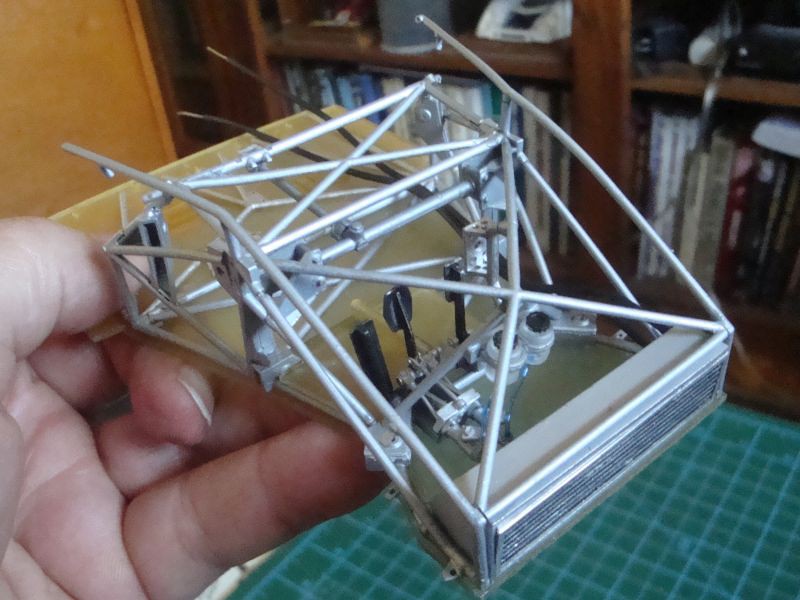 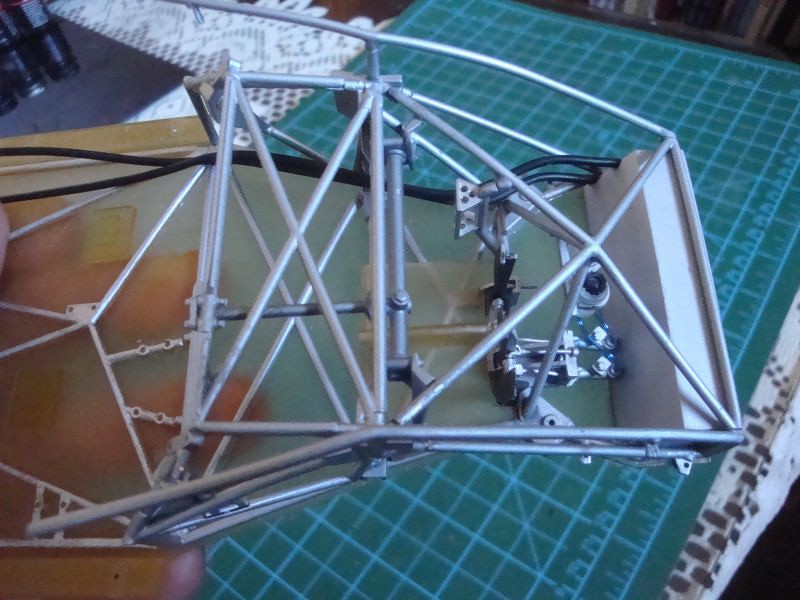 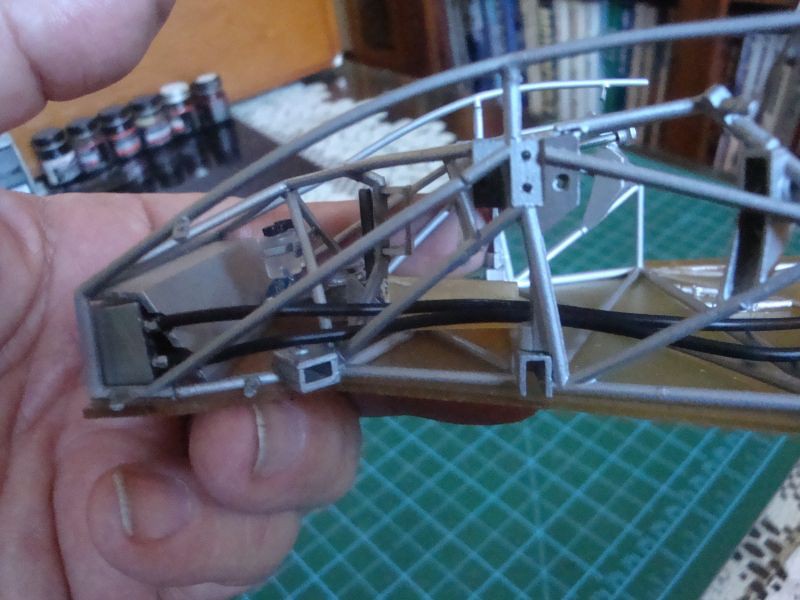 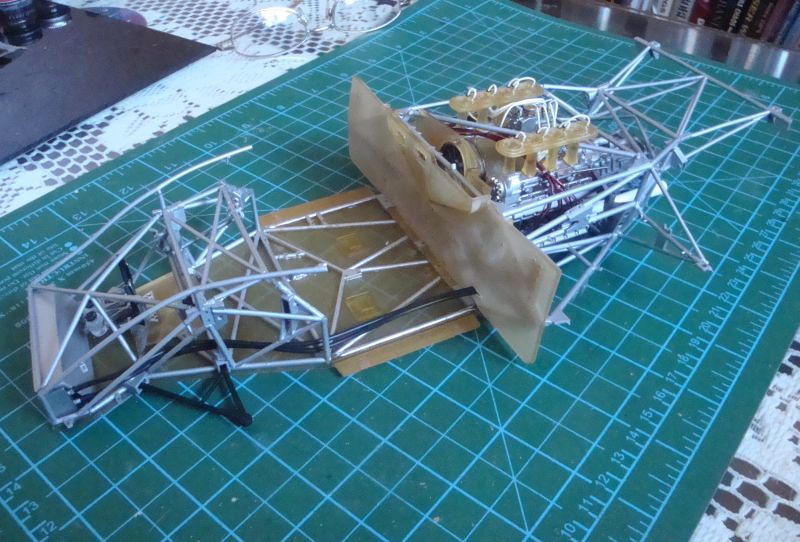 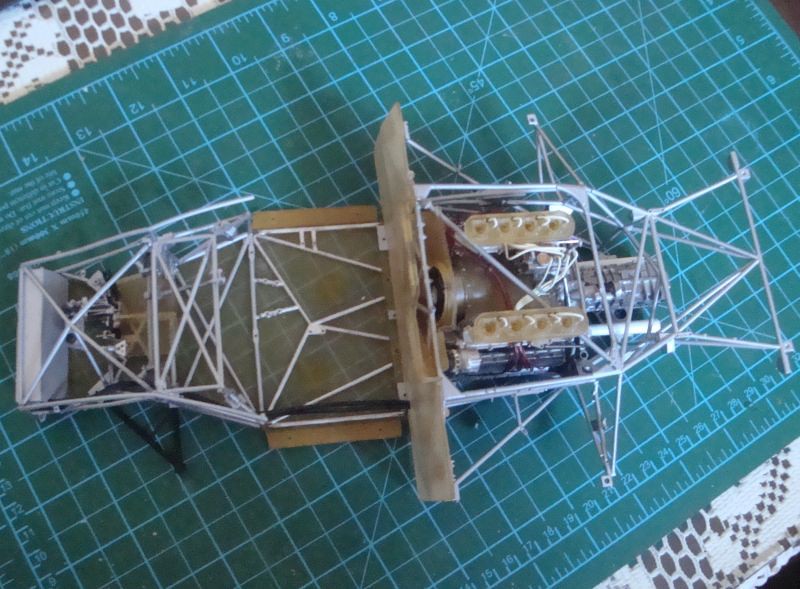 Then the cockpit interior sides were added. Also the front body braces. 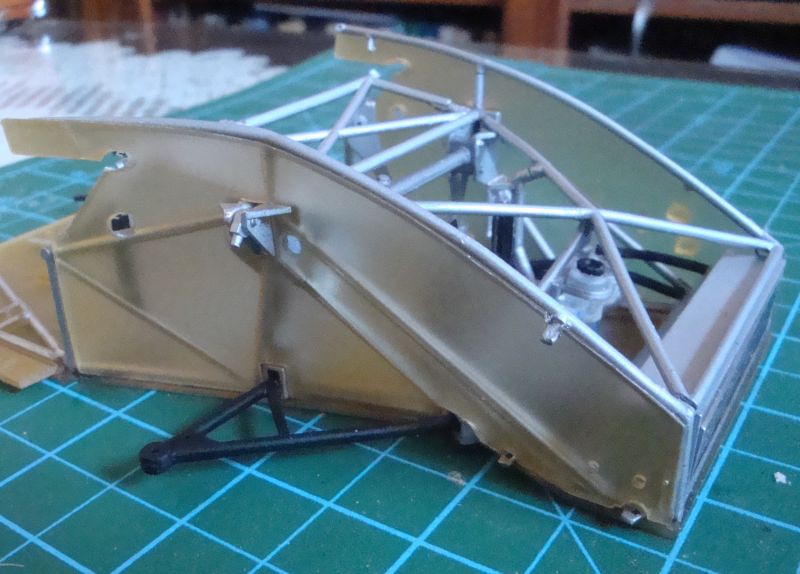 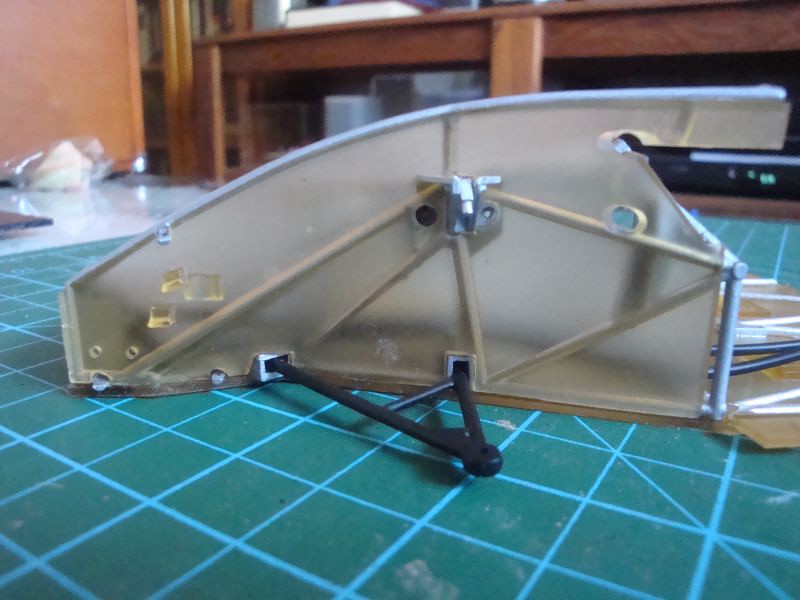 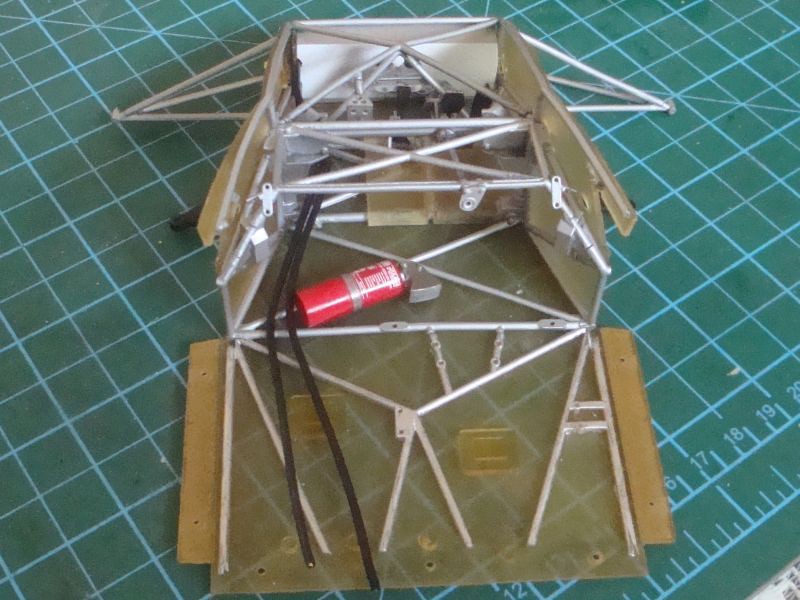 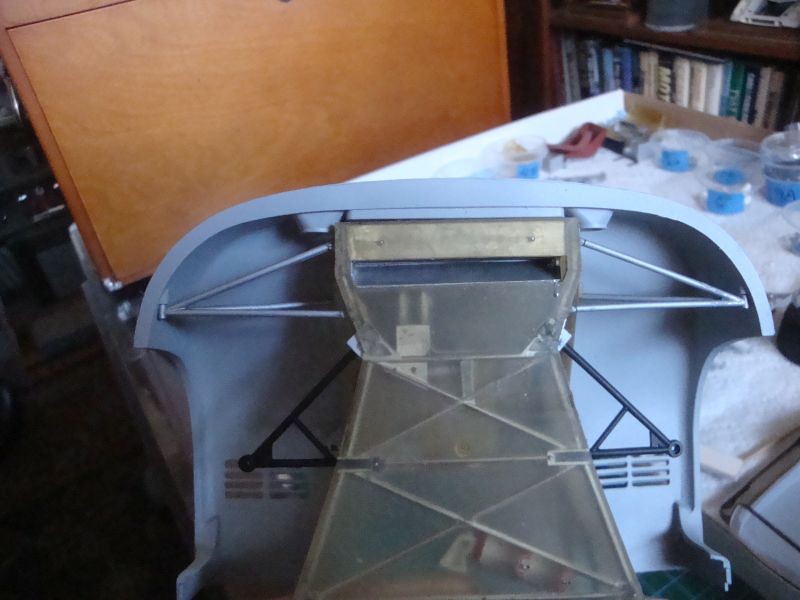 Once that was done, I assembled the front suspension. 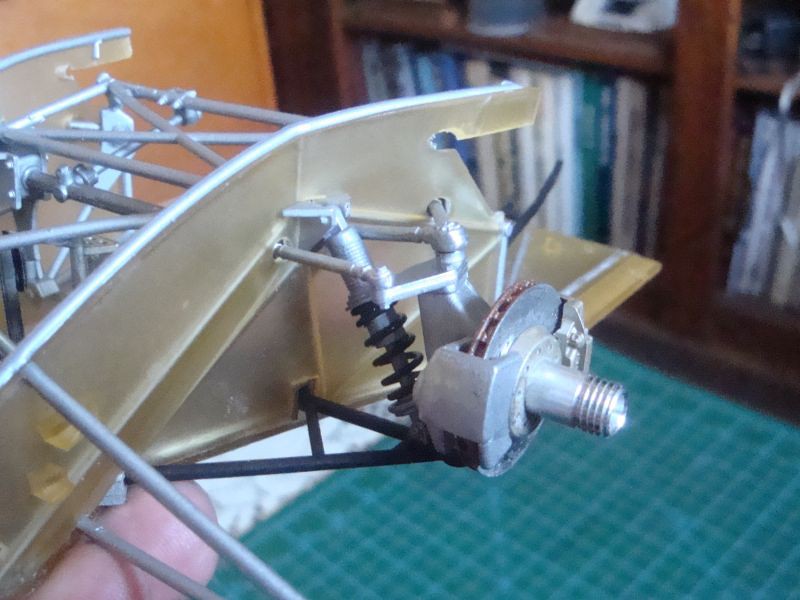 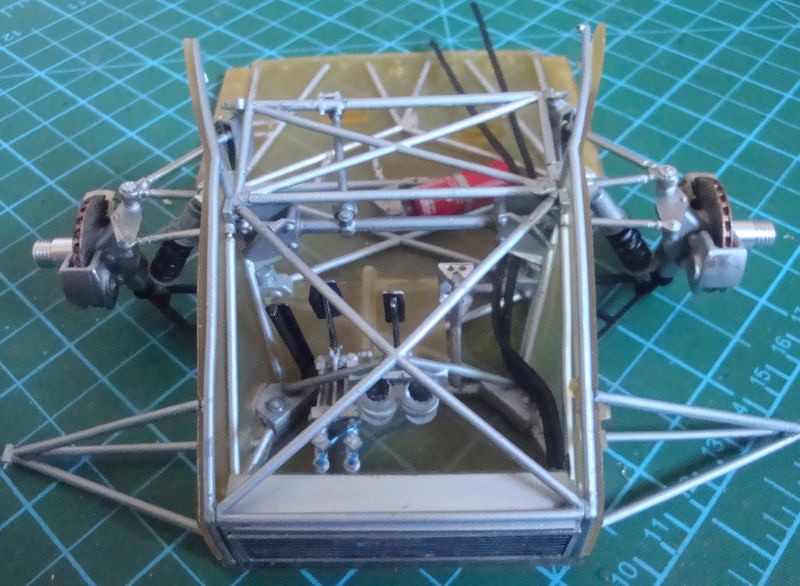 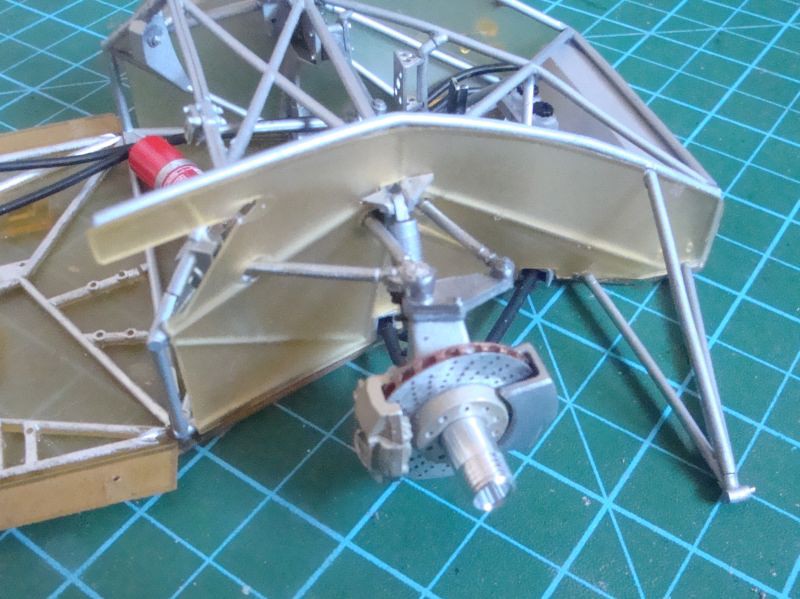 426 |
|
|
|
Post by 406 Silverado on Aug 23, 2024 12:12:39 GMT -5
This whole skeletal work coupled with the engine detail is a masterpiece in itself. Truly impressive work happening here.
|
|
|
|
Post by project510 on Aug 23, 2024 13:33:26 GMT -5
Yea, that is super cool right there. Awesome stuff Paul!
|
|
|
|
Post by kyledehart5 on Aug 23, 2024 15:07:35 GMT -5
Excellent work on the chassis and the front suspension. Looking better and better.
|
|
|
|
Post by keavdog on Aug 23, 2024 17:28:50 GMT -5
Looks great. Curious - what was the material on the real car used for the floor pan/panels? Kinda translucent.
|
|
brandonk
Full Member
   Jan '24 Showcased Model Awarded
Member since: May 2023
Posts: 1,266
May 14, 2023 13:45:45 GMT -5
May 14, 2023 13:45:45 GMT -5
|
Post by brandonk on Aug 23, 2024 18:40:25 GMT -5
This thing is soooooo awesome. AWESOME !!!
|
|
joelw
Full Member
  
Member since: July 2024
Posts: 572 
|
Post by joelw on Aug 24, 2024 10:42:10 GMT -5
Paul,
You're just flying through this build. I'm really surprised that you hand painted the floor tubing, but it's the end results that count, and it looks just perfect.
My brother has built a car or two and realizes just how difficult cars can be especially our finishes. Military Matt finishes are easier, and any variation in tone, over spray, or what not just basically mimics the real aircraft especially after being out in the elements for a while.
The front end tubing and suspension really came together and looks great. I keep on thinking that the guys who actually built them must be true masters at their craft to achieve those constant exceptional results.
joel
|
|
2whl
Full Member
   August '24 MoM Winner
Member since: September 2023
Posts: 445
Sept 10, 2023 12:21:52 GMT -5
Sept 10, 2023 12:21:52 GMT -5
|
Post by 2whl on Aug 24, 2024 11:01:48 GMT -5
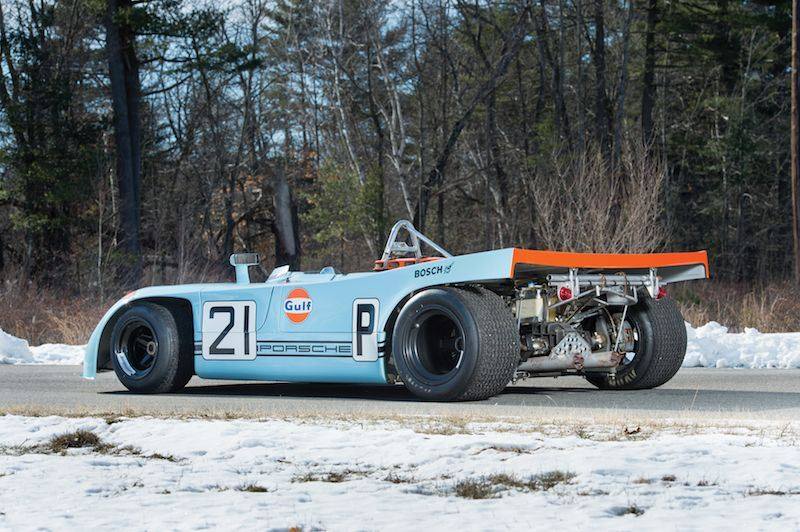 This whole skeletal work coupled with the engine detail is a masterpiece in itself. Truly impressive work happening here. Thank you Joe. Yea, that is super cool right there. Awesome stuff Paul! Thanks James Excellent work on the chassis and the front suspension. Looking better and better. Thanks Kyle. Looks great. Curious - what was the material on the real car used for the floor pan/panels? Kinda translucent. Thanks John. Coming from someone who has done fiberglass lay-ups, I'd say that's what they are. The translucent bit comes because they aren't painted in any way. (adds weight) I would say the intake piece, which has the belts passing through it, is a 7+ layering of fiberglass cloth. Whereas the piece to the left of it is only 3 layers at maximum. With strips of glass layered on the edges. 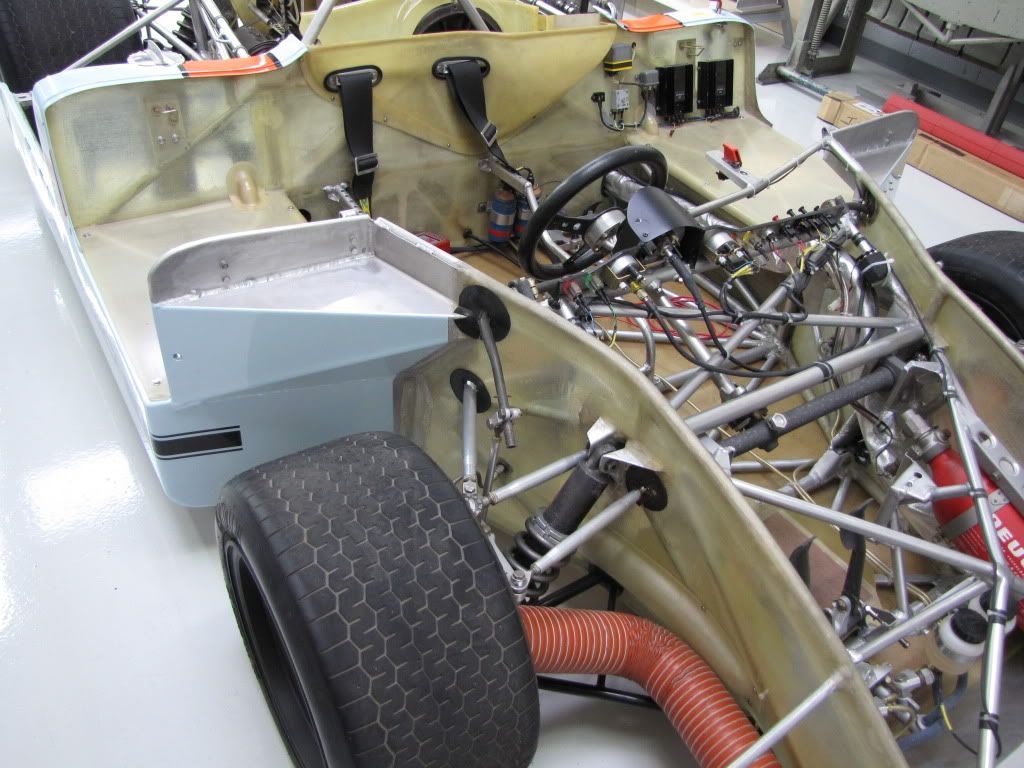 This thing is soooooo awesome. AWESOME !!! Thank you Brandon. Here's a couple of pictures showing how I did the brake rotors. Starting from the left.....the edges were brush painted Tamiya X-34 Metallic Brown, then the surface was painted a dark metallic( Sorry..4 years ago, don't remember which color, next the surface was sanded down to the white metal. And finally with brake hat. 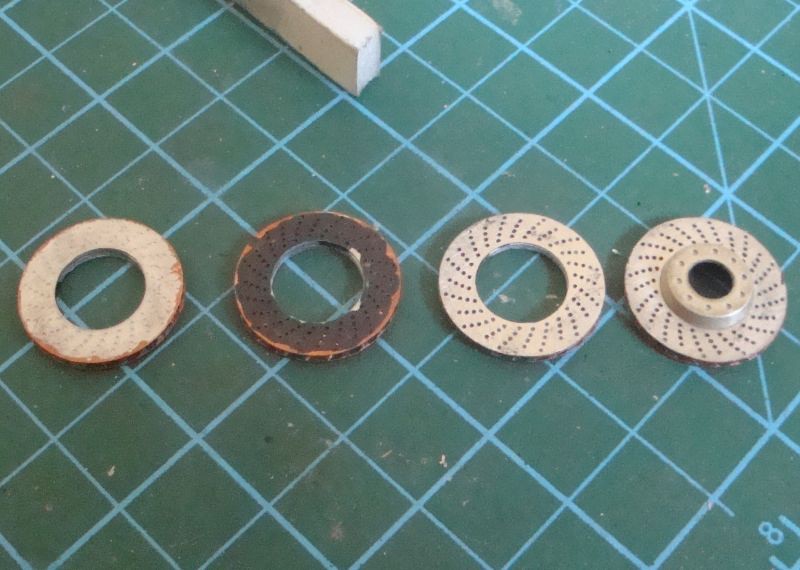 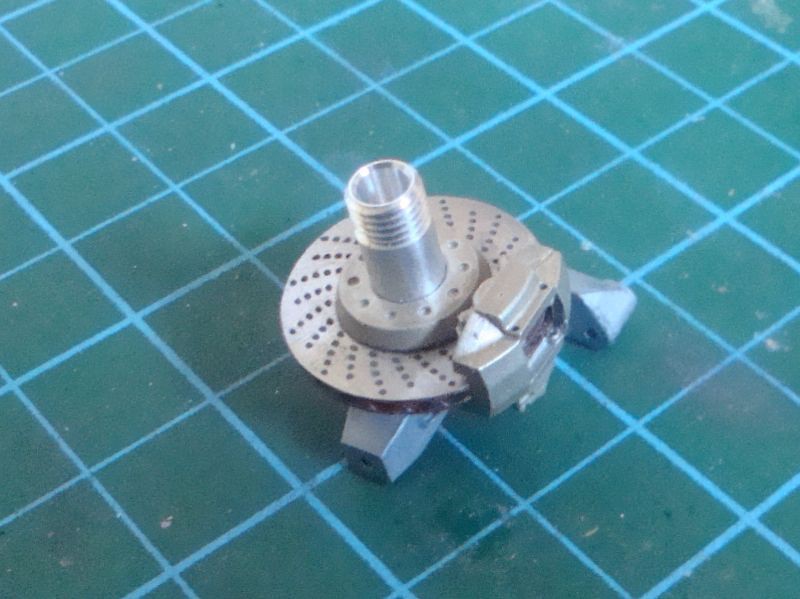 Half shafts. I wish I had nice 3D ones like James has. 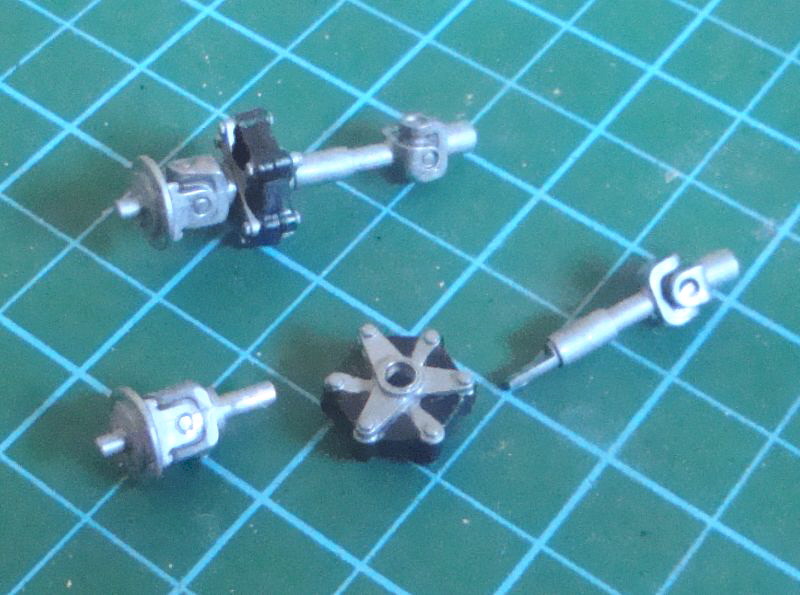 Rear suspension 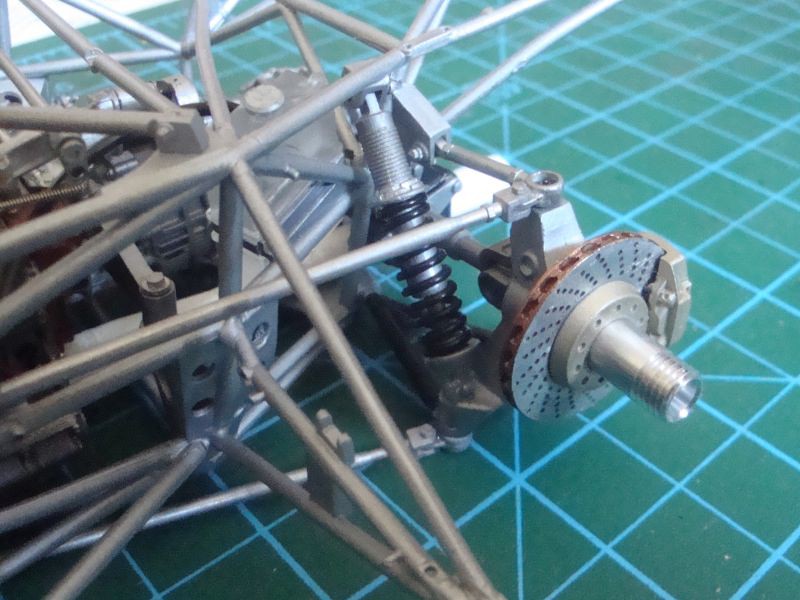 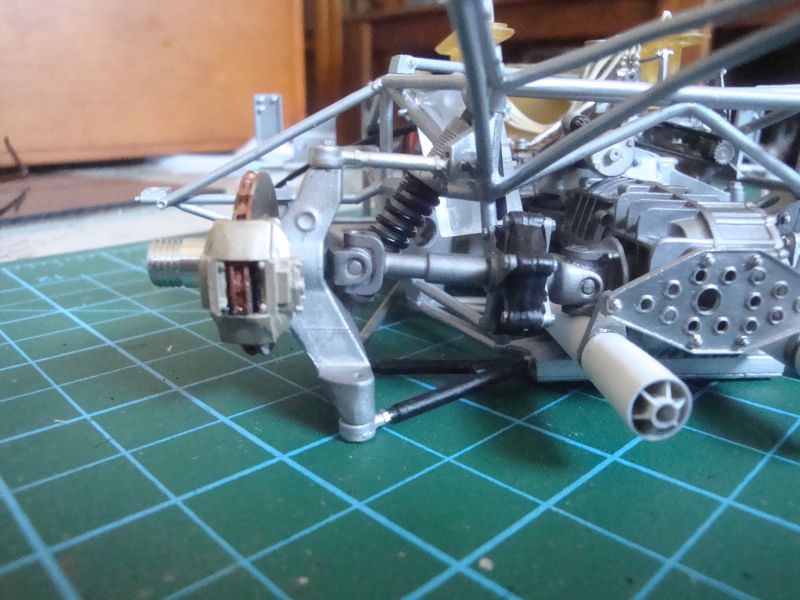 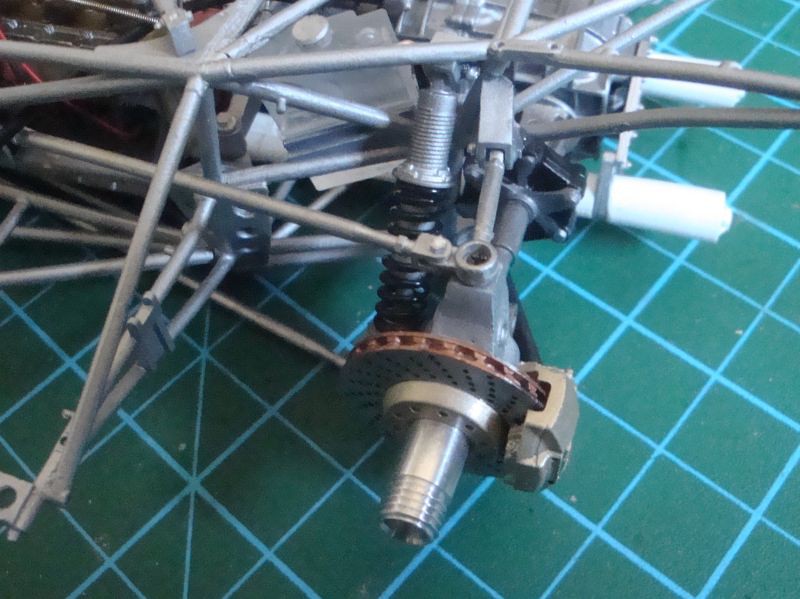 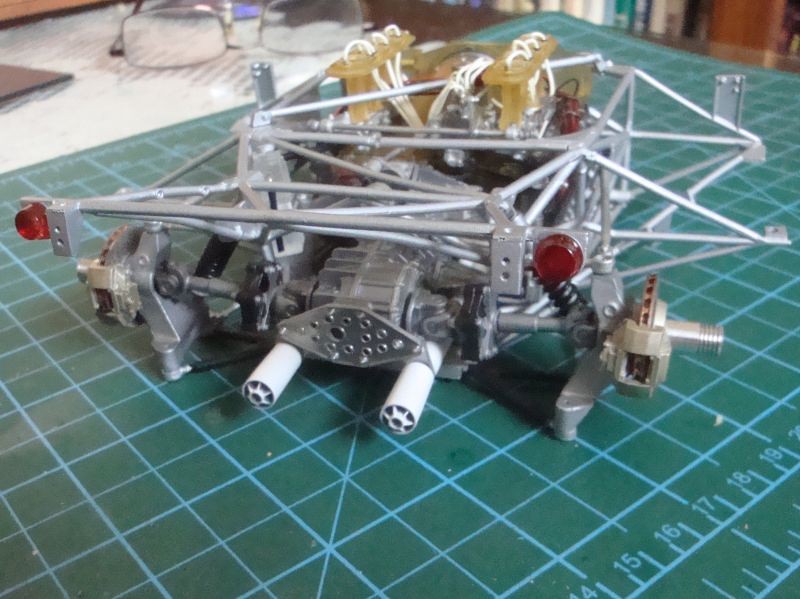 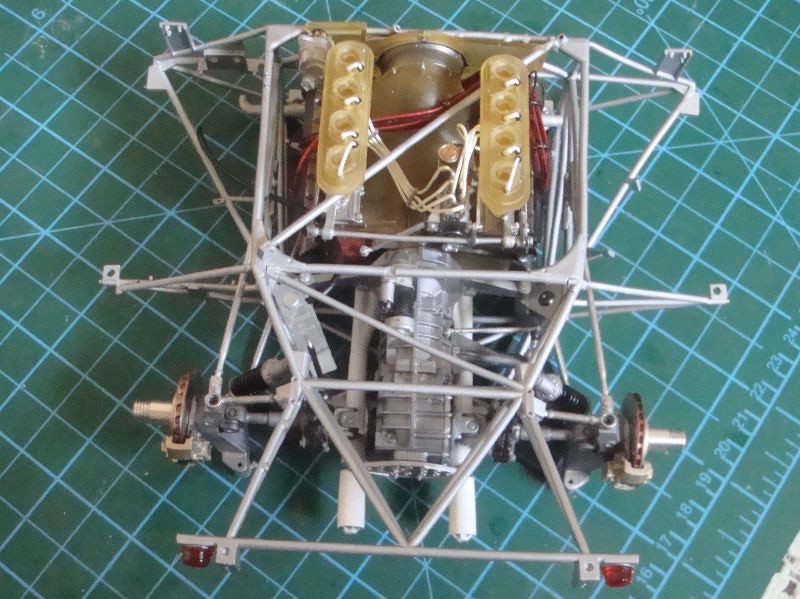 505 |
|
2whl
Full Member
   August '24 MoM Winner
Member since: September 2023
Posts: 445
Sept 10, 2023 12:21:52 GMT -5
Sept 10, 2023 12:21:52 GMT -5
|
Post by 2whl on Aug 24, 2024 11:09:56 GMT -5
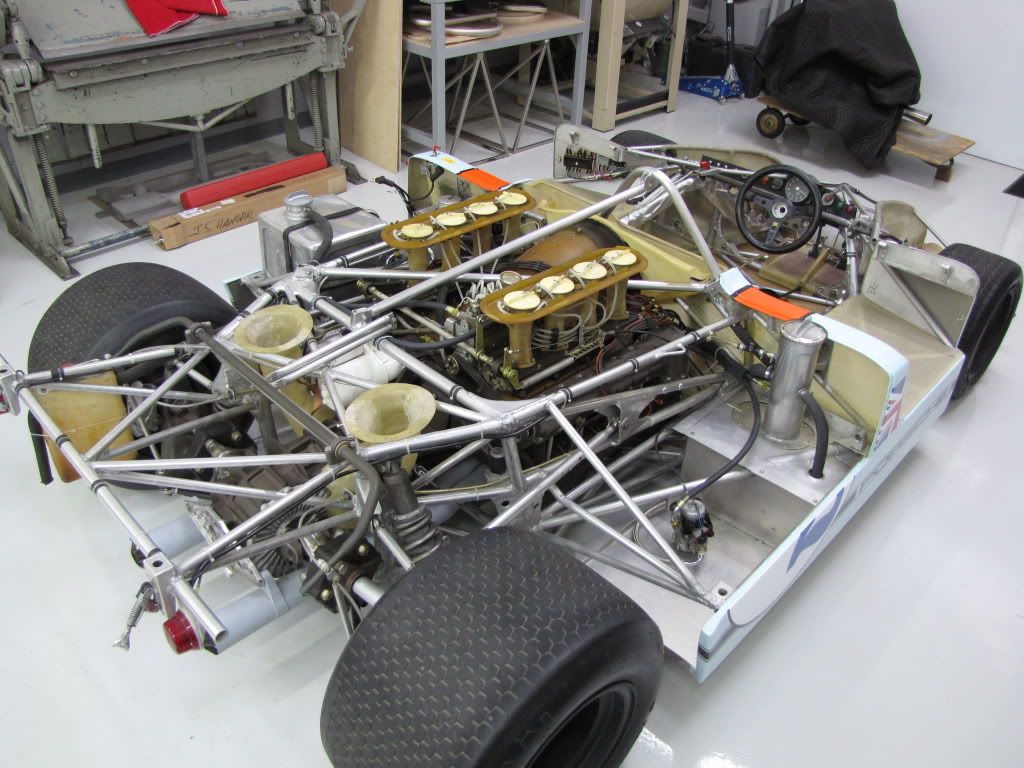 Paul, You're just flying through this build. I'm really surprised that you hand painted the floor tubing, but it's the end results that count, and it looks just perfect. My brother has built a car or two and realizes just how difficult cars can be especially our finishes. Military Matt finishes are easier, and any variation in tone, over spray, or what not just basically mimics the real aircraft especially after being out in the elements for a while. The front end tubing and suspension really came together and looks great. I keep on thinking that the guys who actually built them must be true masters at their craft to achieve those constant exceptional results. joel Thanks Joel. You snuck in here while I was composing my next post. But you still get a reference picture. But I'm not flying that fast. I'm still posting the part of the build I did 4 years ago. I hand painted it because I was too lazy to do all of that masking. Plus I would have to use up a roll of Tamiya tape...LOL I'm almost to the end of the old pictures and I'll have to start working on it again. Then things should slow down to tortoise speed. |
|
|
|
Post by Steve Zuleski on Aug 24, 2024 13:31:04 GMT -5
It's amazing the spider web of bracing going on here, impressive! Good thing ya know what you're doing here, I was lost a few pages back,.....and it's only page two  Looks great, Paul!  |
|
joelw
Full Member
  
Member since: July 2024
Posts: 572 
|
Post by joelw on Aug 24, 2024 16:53:48 GMT -5
Paul,
I keep on forgetting that the start of your blog is like a re-run on TV, but I'm still blown away by the super detail and your skills in achieving them. As for how you do the disc brakes, it's really not much different then how we do a body or any plastic part, except when I kind of skip parts of the process from just being plain lazy.
joel
|
|
rondriaan
Full Member
   Aug '24 Showcased Build Awarded
Member since: March 2012
Posts: 650
Mar 27, 2012 2:07:40 GMT -5
Mar 27, 2012 2:07:40 GMT -5
|
Post by rondriaan on Aug 24, 2024 17:36:45 GMT -5
I missed this one. Good work on that tubular frame and the engine looks good already.
|
|
|
|
Post by kyledehart5 on Aug 25, 2024 4:30:01 GMT -5
Enjoying the updates. You really had a great jump on this 4 years ago!! Those shiny new kits pop up and derail things. 😂
|
|
handiabled
Administrator      Apr '23 Showcased Build Awarded
Member since: February 2023
Posts: 4,390  Member is Online
MSC Staff
|
Post by handiabled on Aug 25, 2024 8:22:44 GMT -5
The entire drivetrain is gorgeous!
|
|
2whl
Full Member
   August '24 MoM Winner
Member since: September 2023
Posts: 445
Sept 10, 2023 12:21:52 GMT -5
Sept 10, 2023 12:21:52 GMT -5
|
Post by 2whl on Aug 25, 2024 9:31:34 GMT -5
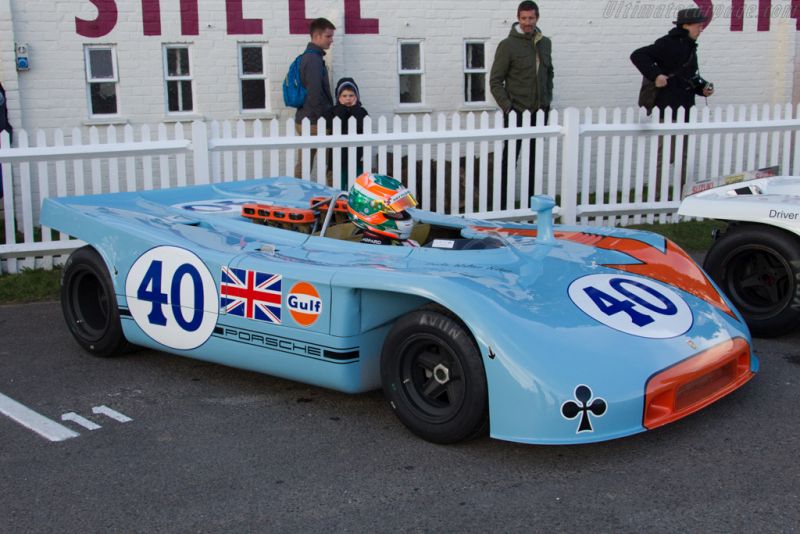 It's amazing the spider web of bracing going on here, impressive! Good thing ya know what you're doing here, I was lost a few pages back,.....and it's only page two  Looks great, Paul!  Thanks Steve. I only appear to know what I'm doing. It's all about smoke and mirrors. Paul, I keep on forgetting that the start of your blog is like a re-run on TV, but I'm still blown away by the super detail and your skills in achieving them. As for how you do the disc brakes, it's really not much different then how we do a body or any plastic part, except when I kind of skip parts of the process from just being plain lazy. joel Thanks Joel. I'm getting close to the end of season 1. I missed this one. Good work on that tubular frame and the engine looks good already. Thanks Ron and welcome to my build. Enjoying the updates. You really had a great jump on this 4 years ago!! Those shiny new kits pop up and derail things. 😂 Thanks Kyle. I had a big jump on it before the new shiny bits distracted me.  The entire drivetrain is gorgeous! Thanks Brent Since the suspension was all finished, I did the wheels and tires. I couldn't resist putting them on for a glamour shot. 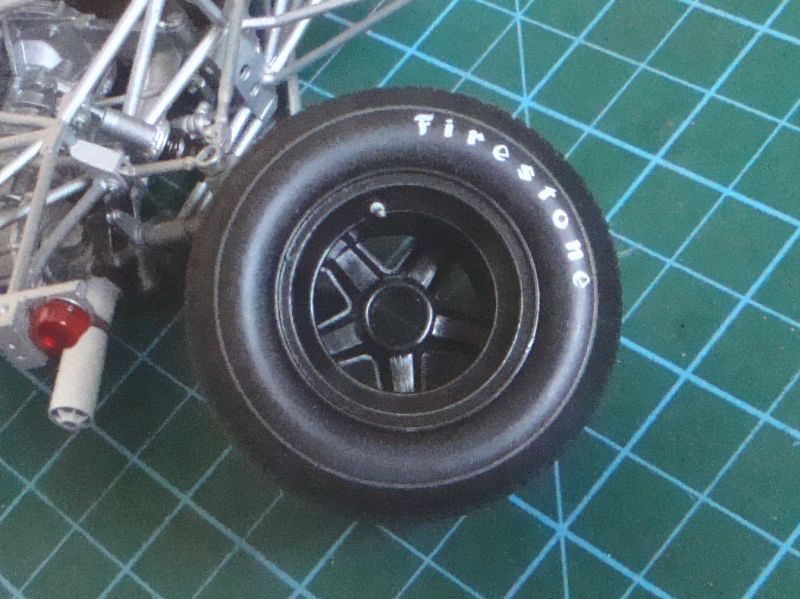 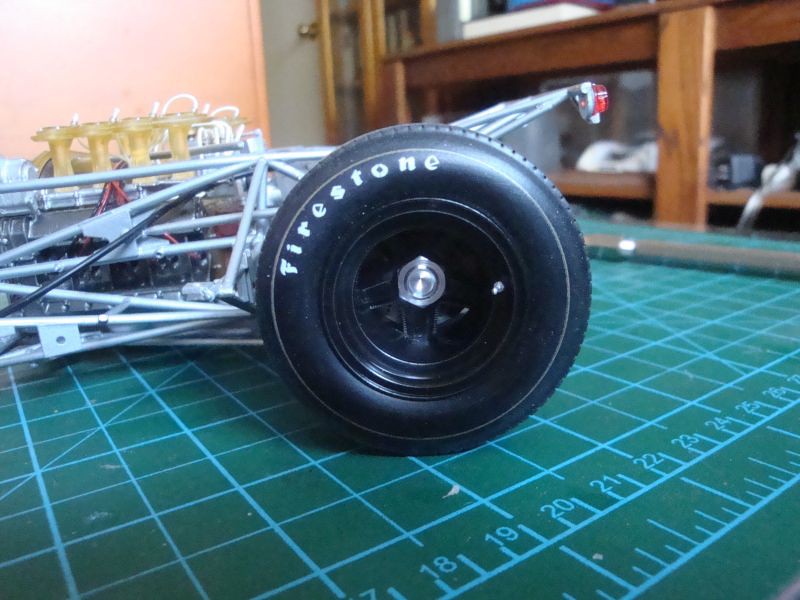 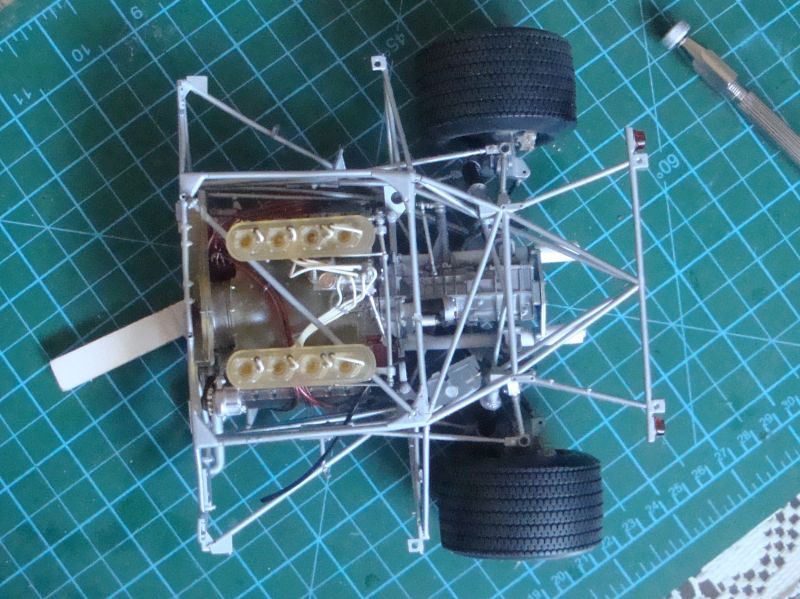 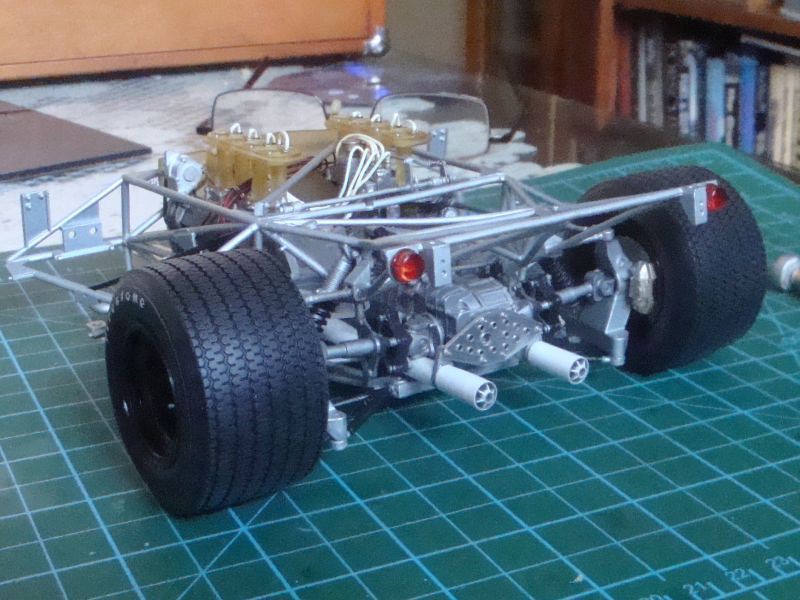 And of course I had to do the fronts and place the two halves together. 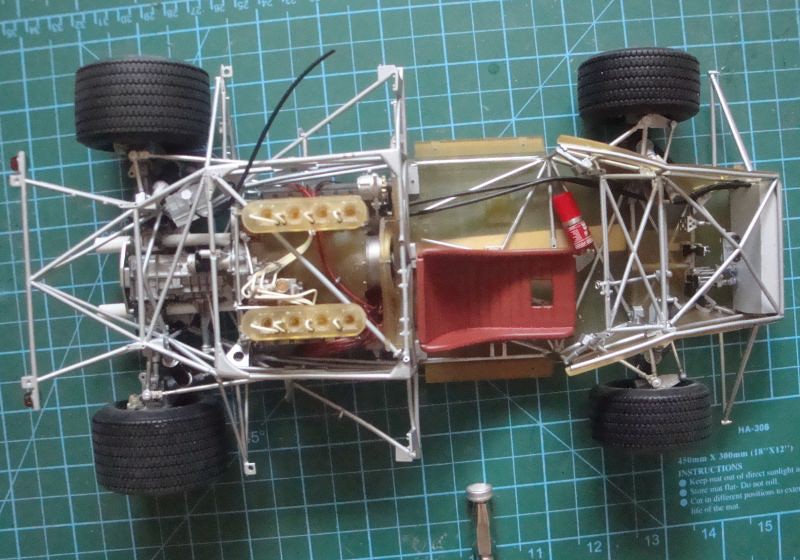 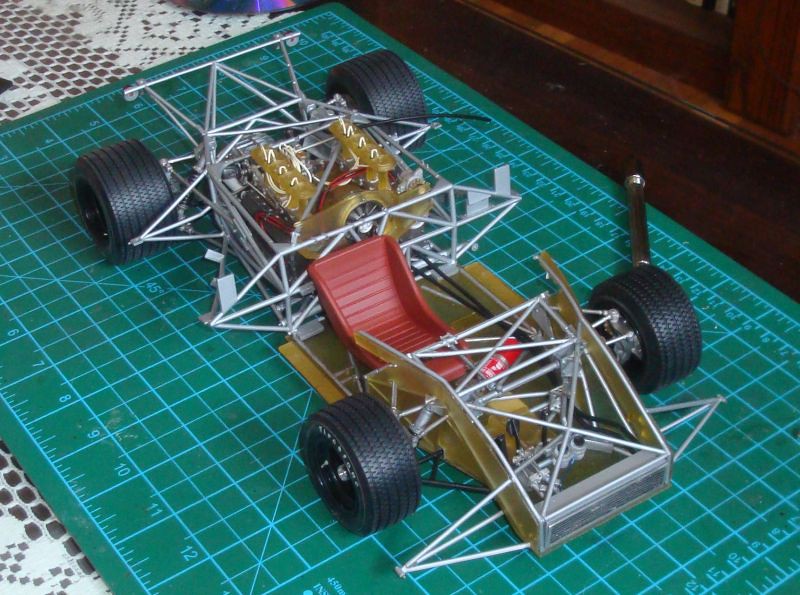 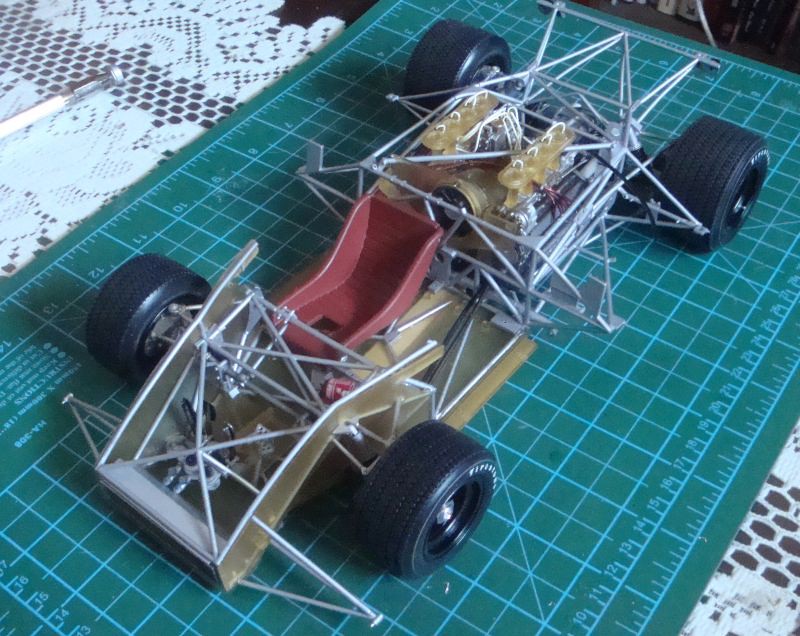 566 |
|
joelw
Full Member
  
Member since: July 2024
Posts: 572 
|
Post by joelw on Aug 25, 2024 10:09:30 GMT -5
Paul,
Very nice job on the tires and wheels.
Nice to see the rear tube frame & engine/trans/suspension tacked to the front as that we finally get a real sense of just what a Porsche bath tub of tubes really looks like. Working on this beast during a race must have been real fun for the pit crew.
joel
|
|