2whl
Full Member
   August '24 MoM Winner
Member since: September 2023
Posts: 445
Sept 10, 2023 12:21:52 GMT -5
Sept 10, 2023 12:21:52 GMT -5
|
Post by 2whl on Aug 17, 2024 13:42:11 GMT -5
|
|
benb
Full Member
  
Member since: July 2024
Posts: 251
Jul 17, 2024 12:07:35 GMT -5
Jul 17, 2024 12:07:35 GMT -5
|
Post by benb on Aug 17, 2024 14:08:27 GMT -5
I'm always in awe of you guys who build these MFH kits. You turn out museum pieces!
Is the company going to continue after the proprietor passed away?
Ben
|
|
2whl
Full Member
   August '24 MoM Winner
Member since: September 2023
Posts: 445
Sept 10, 2023 12:21:52 GMT -5
Sept 10, 2023 12:21:52 GMT -5
|
Post by 2whl on Aug 17, 2024 15:02:00 GMT -5
I'm always in awe of you guys who build these MFH kits. You turn out museum pieces! Is the company going to continue after the proprietor passed away? Ben Thank you Ben The company is continuing under the guidance of Mr. Hiro's wife, Kyoko. It appears from the speed that kits go out of stock, that they are doing quite well. |
|
joelw
Full Member
  
Member since: July 2024
Posts: 572 
|
Post by joelw on Aug 17, 2024 15:20:28 GMT -5
Paul,
You've asked the wrong guy that question. Personally, I would love to see the build from day 1 for several reasons. 1st and foremost is that I learn from and enjoy your builds, and there's no better place to start for my money then at the start. The 2nd reason is that the 908/3 ver A is my all time favorite Porsche 3.0 liter car. Why you might ask. And the reason is simple. I watched Jo Siffert drive the wheels off of one at the 12 hours of Sebring very early 1970s or so (really can't remember the exact year its been so long). Of course he drove the car into the ground and it never finished, but when it was running, I was just glued to the last turn heading onto the pit straight.
joel
|
|
|
|
Post by kyledehart5 on Aug 17, 2024 15:52:41 GMT -5
I agree. Let’s get the full build log experience Paul. You always do such nice work and we can’t deprive ourselves of the excellent progress along the way. Split it up however you want! Can’t wait to see this one. What an awesome subject.
|
|
|
|
Post by project510 on Aug 17, 2024 23:50:51 GMT -5
I agree. Let’s get the full build log experience Paul. You always do such nice work and we can’t deprive ourselves of the excellent progress along the way. Split it up however you want! Can’t wait to see this one. What an awesome subject. |
|
handiabled
Administrator      Apr '23 Showcased Build Awarded
Member since: February 2023
Posts: 4,394  Member is Online
MSC Staff
|
Post by handiabled on Aug 18, 2024 2:39:54 GMT -5
Bookmarked!
|
|
2whl
Full Member
   August '24 MoM Winner
Member since: September 2023
Posts: 445
Sept 10, 2023 12:21:52 GMT -5
Sept 10, 2023 12:21:52 GMT -5
|
Post by 2whl on Aug 18, 2024 12:10:52 GMT -5
 Paul, You've asked the wrong guy that question. Personally, I would love to see the build from day 1 for several reasons. 1st and foremost is that I learn from and enjoy your builds, and there's no better place to start for my money then at the start. The 2nd reason is that the 908/3 ver A is my all time favorite Porsche 3.0 liter car. Why you might ask. And the reason is simple. I watched Jo Siffert drive the wheels off of one at the 12 hours of Sebring very early 1970s or so (really can't remember the exact year its been so long). Of course he drove the car into the ground and it never finished, but when it was running, I was just glued to the last turn heading onto the pit straight. joel I fully expected you to say that Joel. Of course you should know this WIP is from Motorsport Modeling, so it will seem familiar to you. I agree. Let’s get the full build log experience Paul. You always do such nice work and we can’t deprive ourselves of the excellent progress along the way. Split it up however you want! Can’t wait to see this one. What an awesome subject. LOL....and how did I know you would vote to see the full build. I agree. Let’s get the full build log experience Paul. You always do such nice work and we can’t deprive ourselves of the excellent progress along the way. Split it up however you want! Can’t wait to see this one. What an awesome subject. Another affirmative vote. Thanks Brent. And welcome to the journey. Since this build is past half way done, I'll have to split it into several parts. If I were to do it all at once, I would get typing cramps...lol Something I don't think I've shown here before is the prep I do to the resin pieces. I usually soak them in a solution of Polident for at least 8 hours and sometimes overnite.(like when I've forgotten that they're soaking) Then I wash the pieces in warm water and dry them before I give them a dusting of Tamiya primer. 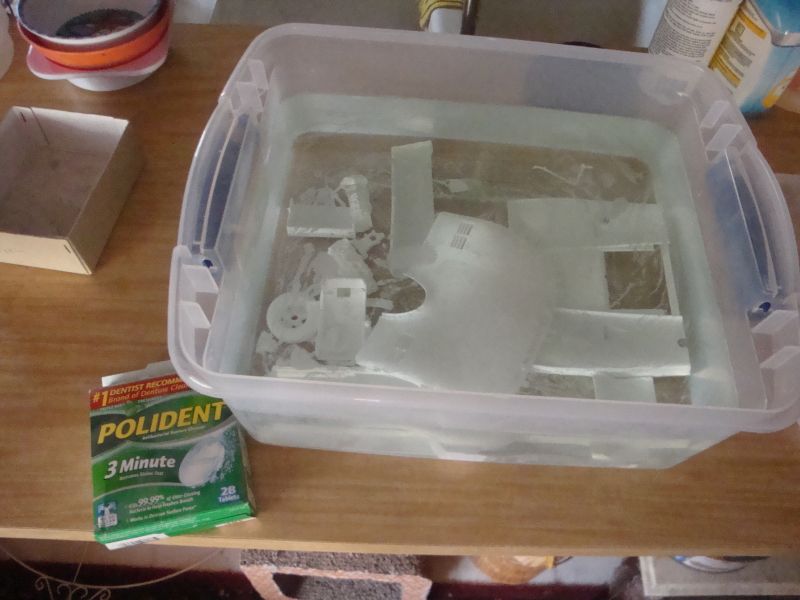 MFH provides a parts layout on their website. I download it and have my printer do it in 11 X 17, which provides a exact size layout so I can identify the parts. 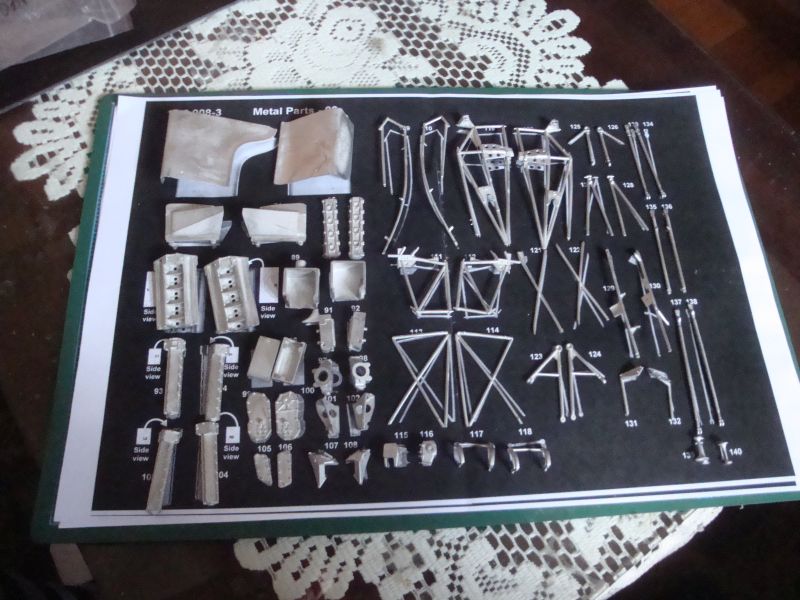 With the parts identified it was time to divide them into parts for the engine, rear frame and front frame. 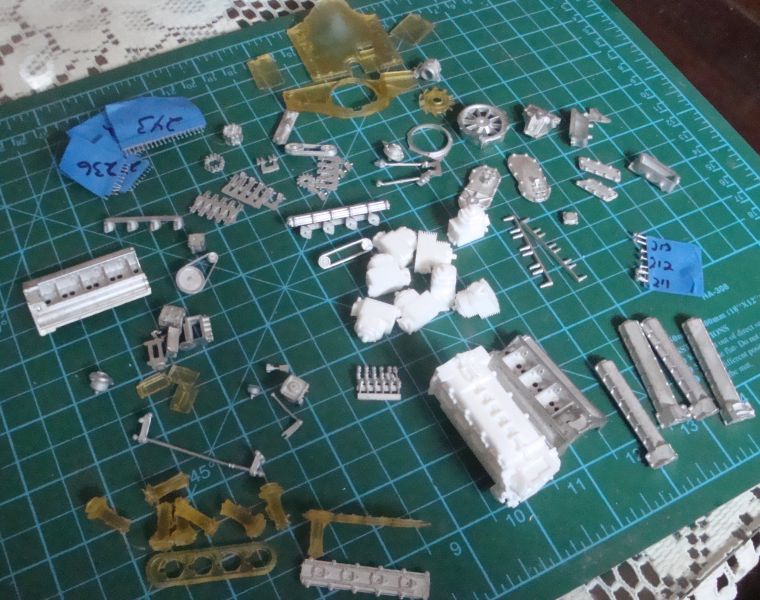 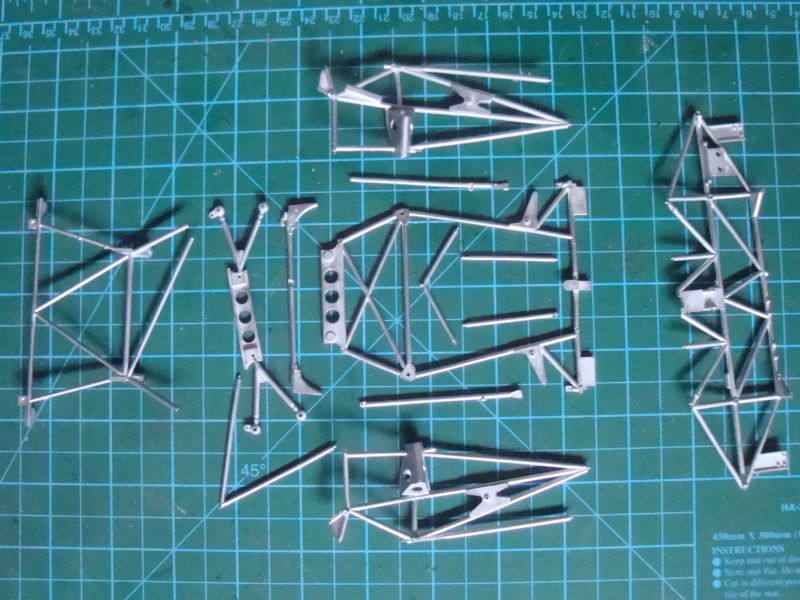 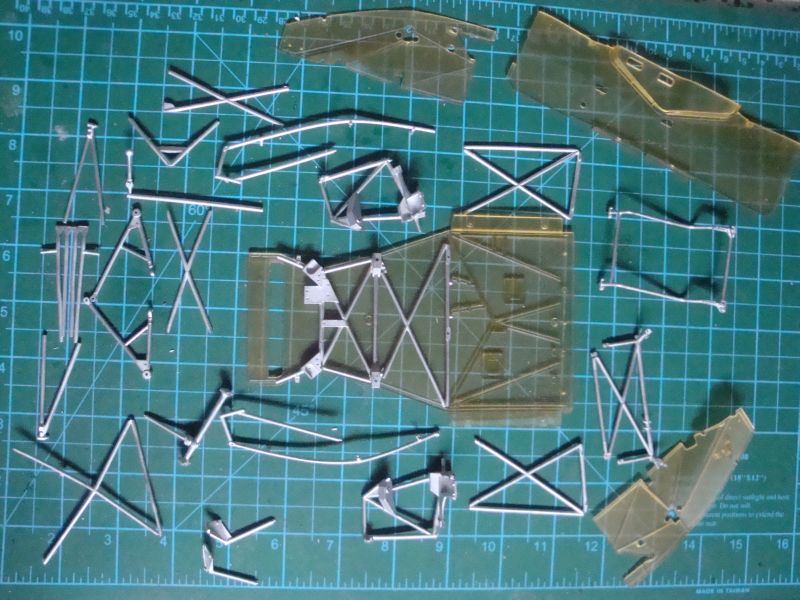 I started assembling the frames one or two pieces at a time using J-B weld 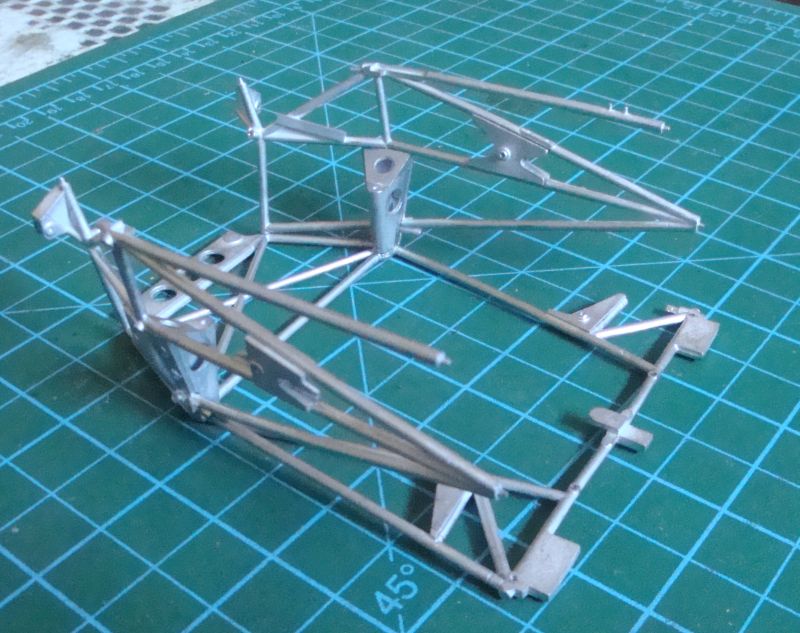 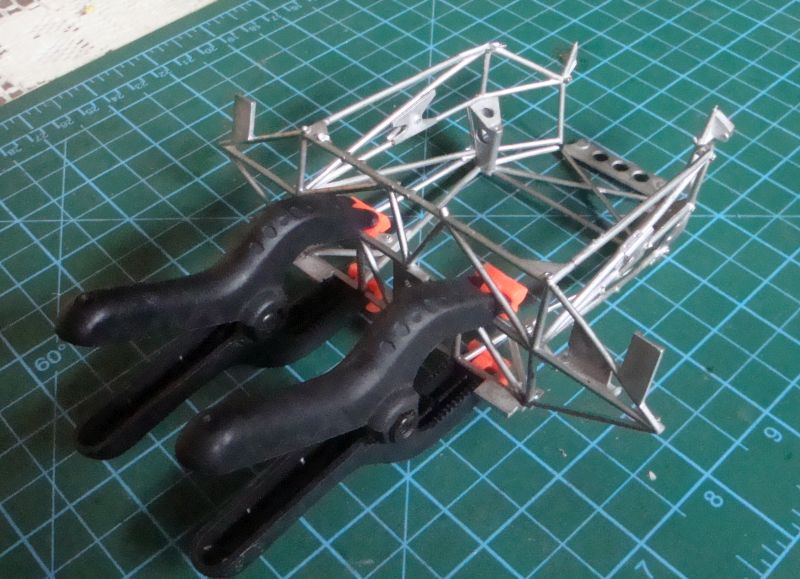 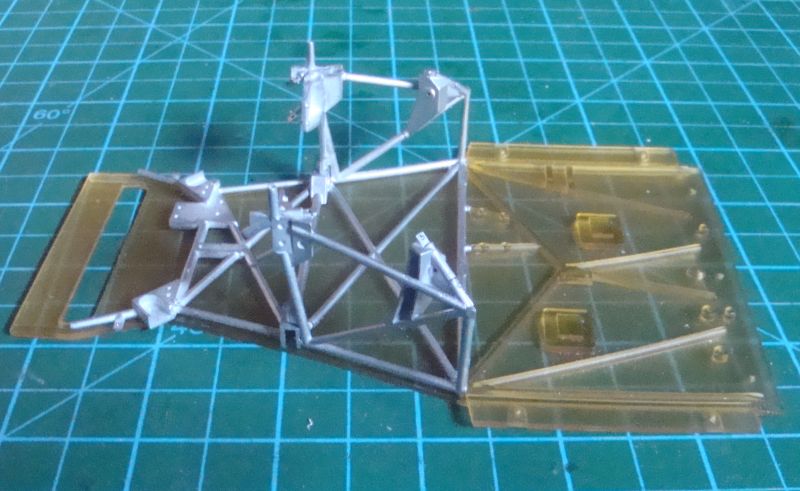 87 |
|
brandonk
Full Member
   Jan '24 Showcased Model Awarded
Member since: May 2023
Posts: 1,266
May 14, 2023 13:45:45 GMT -5
May 14, 2023 13:45:45 GMT -5
|
Post by brandonk on Aug 18, 2024 12:19:42 GMT -5
That is an unusual kit. Super cool subject and great work. Bookmarked.
|
|
|
|
Post by project510 on Aug 18, 2024 12:50:49 GMT -5
This is exactly why its important to post your whole process. I have never heard of, or seen anyone soaking their parts in polident. Can you give us details on why you would do this? Is this just the same as someone washing the plastic parts in dish soap and warm water before getting started?
Thanks, Paul!
|
|
joelw
Full Member
  
Member since: July 2024
Posts: 572 
|
Post by joelw on Aug 18, 2024 13:12:44 GMT -5
Paul,
I see your point, but there's a lot of guys here who hasn't seen the original build blog to date on the old site, and I'd love to re-visit your work all the time.
Interesting that MFH provides that sheet for all the parts. A small touch that's really important for a every once in a while missing piece.
I'm hoping that you're going to do one of the Wyer Blue cars with at least one arrow.
joel
And the Polident solution for degreasing resin parts is brilliant.
I'm hoping that you're going to do the
|
|
|
|
Post by kyledehart5 on Aug 18, 2024 15:01:22 GMT -5
This is exactly why its important to post your whole process. I have never heard of, or seen anyone soaking their parts in polident. Can you give us details on why you would do this? Is this just the same as someone washing the plastic parts in dish soap and warm water before getting started? Thanks, Paul! Chiming in. Essentially it is the same. You have to make sure your resin is clean because paint adhesion will be an issue. And it’s going to have some sort of leftover mold release agent on it (unless it’s printed, of course). Polident is popular and bleche-white whitewall tire cleaner too. |
|
2whl
Full Member
   August '24 MoM Winner
Member since: September 2023
Posts: 445
Sept 10, 2023 12:21:52 GMT -5
Sept 10, 2023 12:21:52 GMT -5
|
Post by 2whl on Aug 18, 2024 20:23:33 GMT -5
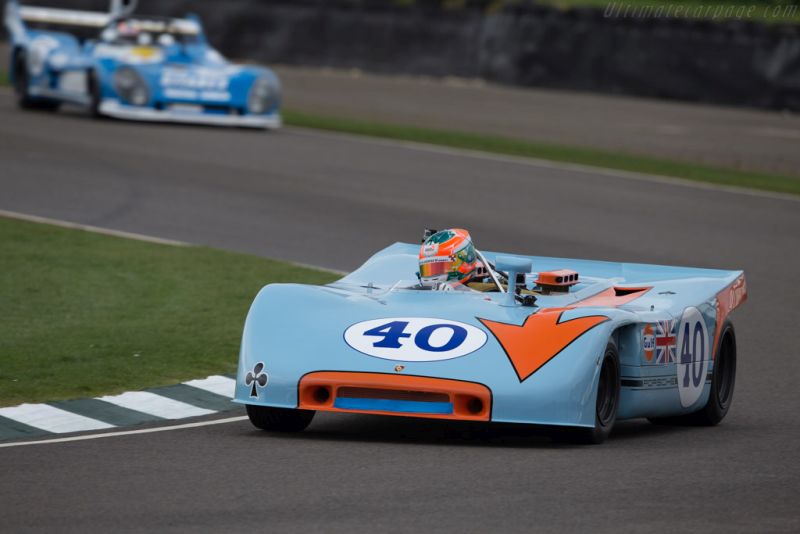
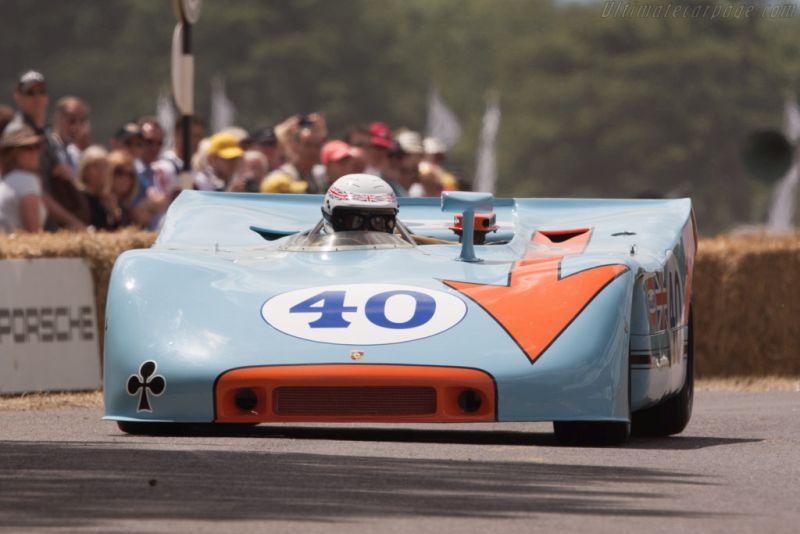
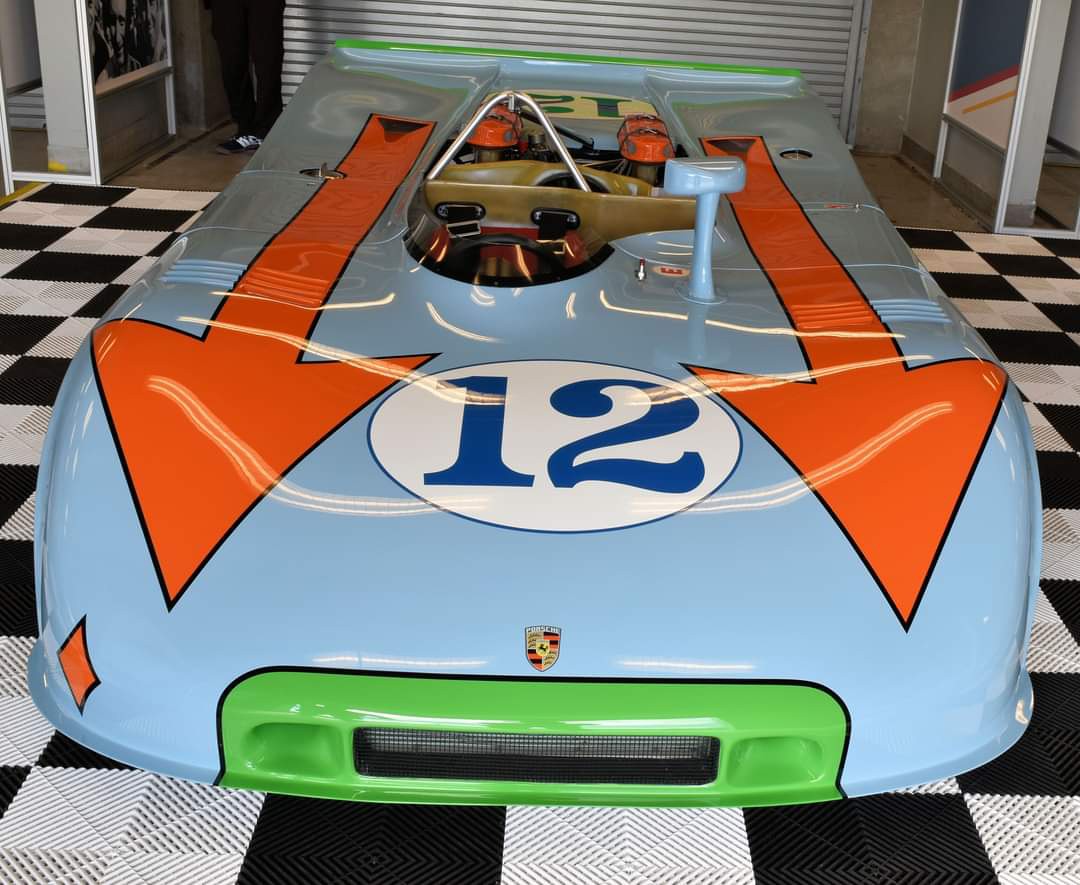 That is an unusual kit. Super cool subject and great work. Bookmarked. Thanks Brandon. I'm glad you came on board . This is exactly why its important to post your whole process. I have never heard of, or seen anyone soaking their parts in polident. Can you give us details on why you would do this? Is this just the same as someone washing the plastic parts in dish soap and warm water before getting started? Thanks, Paul! Kyle has already answered that question, James. It's to get the remaining mold release agent off of the parts. Paul, I see your point, but there's a lot of guys here who hasn't seen the original build blog to date on the old site, and I'd love to re-visit your work all the time. Interesting that MFH provides that sheet for all the parts. A small touch that's really important for a every once in a while missing piece. I'm hoping that you're going to do one of the Wyer Blue cars with at least one arrow. joel And the Polident solution for degreasing resin parts is brilliant. I'm hoping that you're going to do the Thanks Joel. Even though I asked the question if anyone would like to see the whole build, I kinda knew what the answer would be. Those parts lists has saved me a couple of times with not only identifying parts, but with finding out that I was missing a part. And I'll be doing the no. 12 car, like at the top of this post. It won the Targa Florio with Siffert and Redman at the wheel. The basic engine pieces in a mock-up so I can check the fit with other parts of the build. 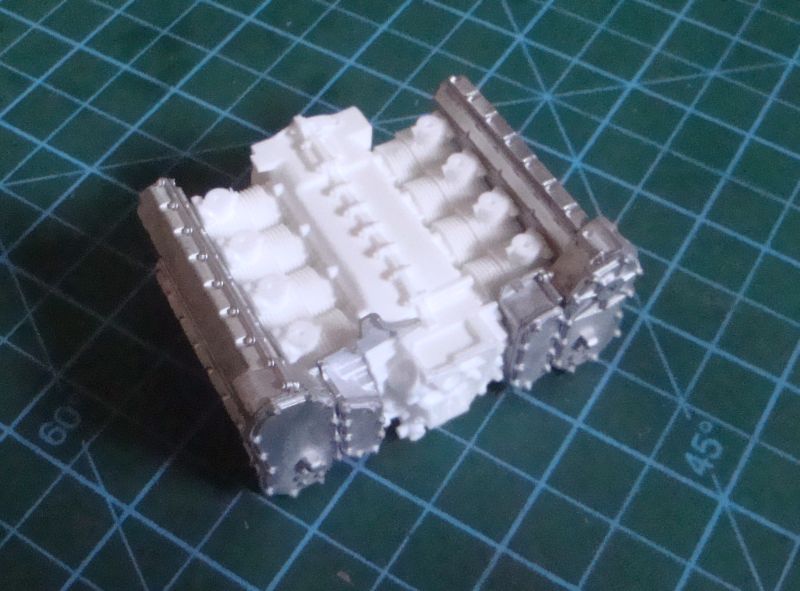 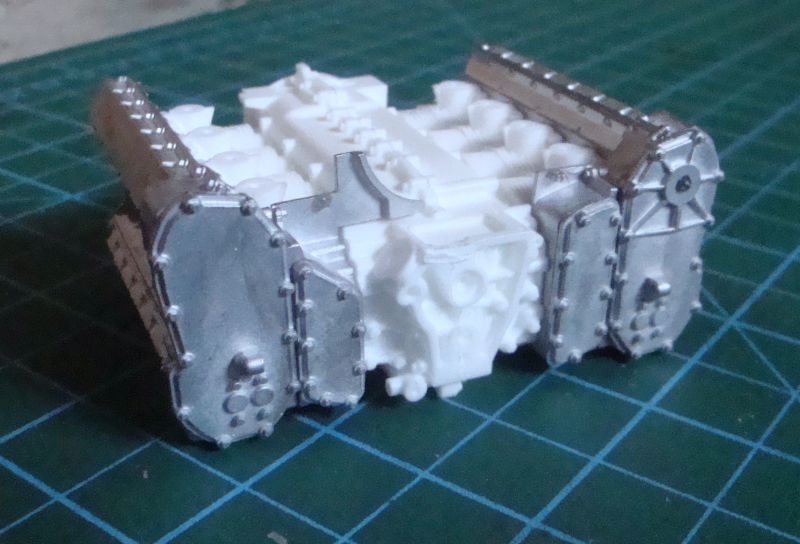 The rear cage was far enough along to check how the trans and mounts were going to fit. 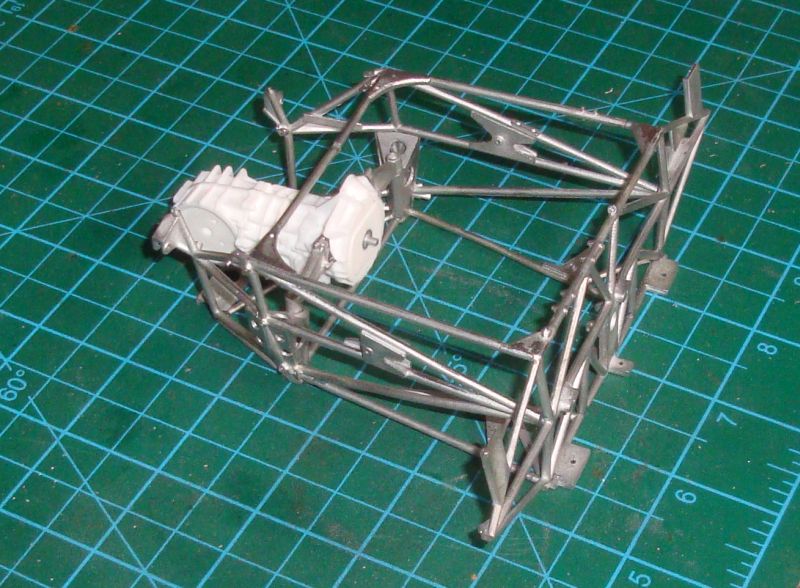 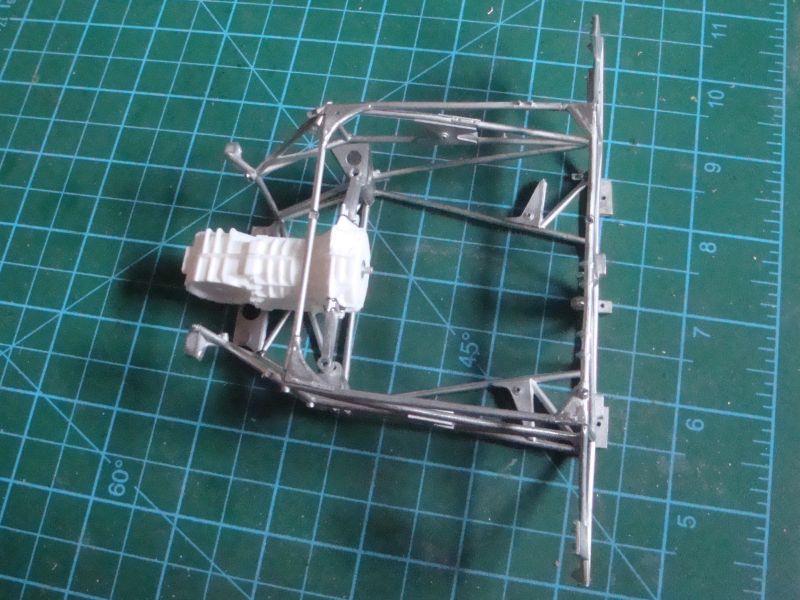 This piece goes from the rear frame to the sidepods. To make sure everything would line up, I assembled the front floor, rear frame, and side pods. Then I epoxied it in the correct alignment. 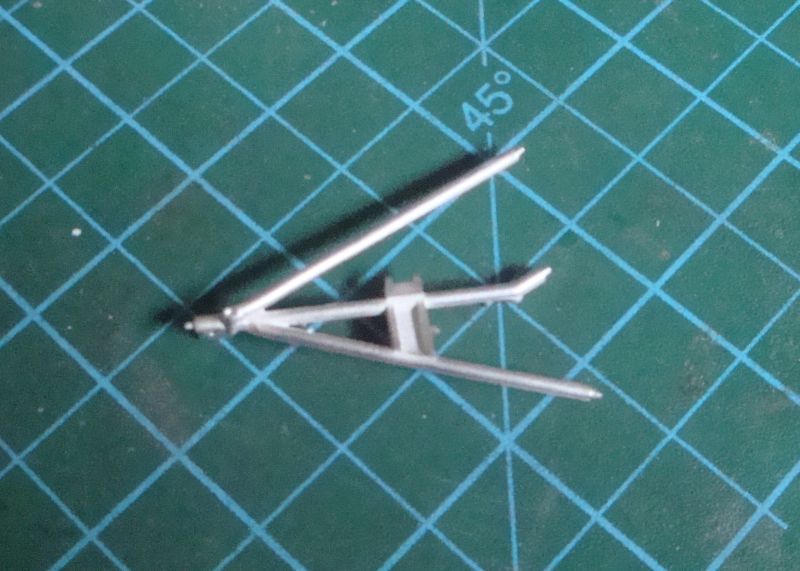 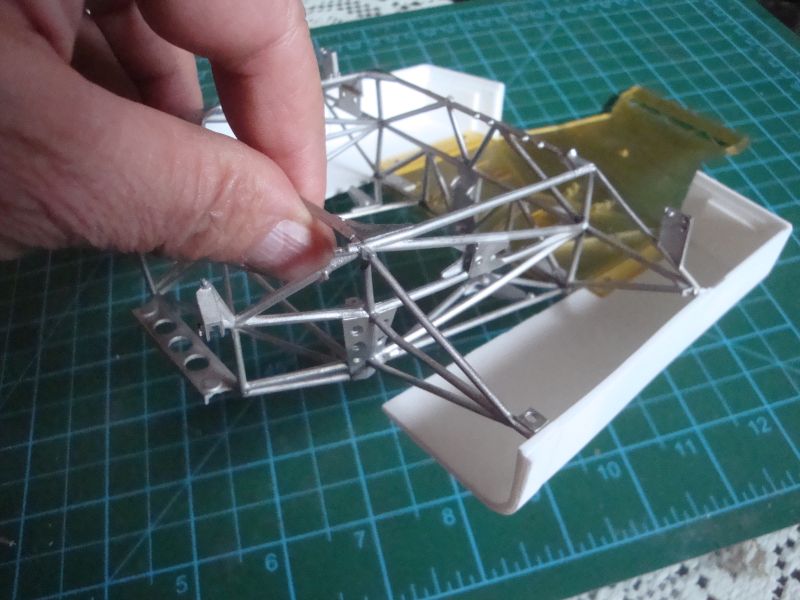 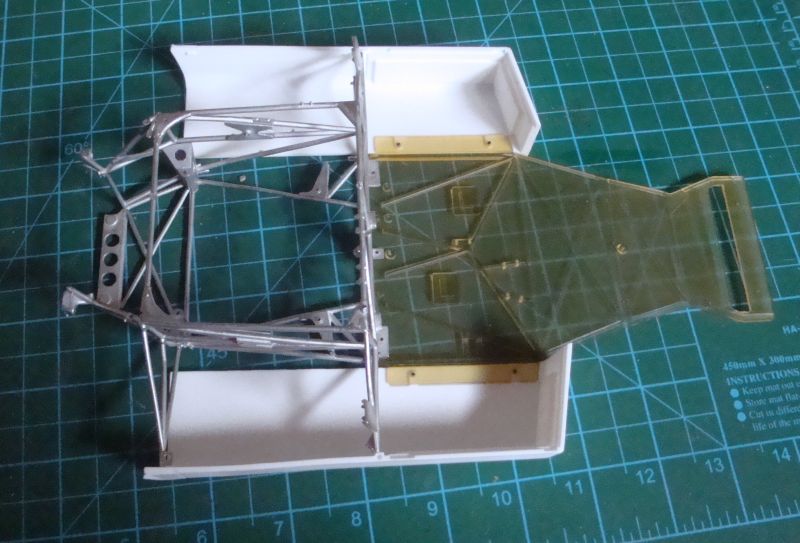 114 |
|
|
|
Post by kyledehart5 on Aug 19, 2024 0:02:51 GMT -5
Oh yeah, You knew everyone would want to see it!! And I’m enjoying it! Great looking livery on this one too.
|
|
handiabled
Administrator      Apr '23 Showcased Build Awarded
Member since: February 2023
Posts: 4,394  Member is Online
MSC Staff
|
Post by handiabled on Aug 19, 2024 2:02:03 GMT -5
With everything being built around the precise tubular framework it reminds me of the Zoukei-Mura HO-229 I built a few years ago.
|
|
joelw
Full Member
  
Member since: July 2024
Posts: 572 
|
Post by joelw on Aug 19, 2024 10:18:19 GMT -5
Paul,
I'm thrilled that you're going to be doing the #12 car as that's my favorite all time scheme. Not to mention that the co-drivers are Siffert and Redman.
Your method of temp assembly of parts to make sure that the chassis tubing is glued in perfectly is a lesson I should really learn as it would have saved the day for me many times when I just assumed, and I honestly shouldn't have done so, making way more work for myself then would have been necessary if I followed your build method.
And one thing I really never mention and take for granted is your excellent close up photography. No shadows, more then enough depth of field for sharpness, and enough pictures to tell the whole story as it unfolds.
Expecting to loose our electric, internet, and cable as we got nearly 12 inches of rain last night and our block is now a ft plus lake. No town workers available as we've taken more water then even after a Hurricane. Homes have just collapsed as roads and hills gave way. More rain due this afternoon. All our utility lines are in ground and the cover to our section is floating across my front lawn, so it's all under water at this point.
joel
|
|
|
|
Post by keavdog on Aug 19, 2024 10:25:08 GMT -5
Wow that chassis! I imagine alignment must be a challenge - you're getting it done for sure.
|
|
|
|
Post by Steve Zuleski on Aug 19, 2024 10:59:04 GMT -5
I didn't think it would be very long until the next one fired up, woof, you move fast! And that denture clean, what a trip, who'da thunk it?
Pretty impressive already, Paul. Ruck On, Bby!
|
|
2whl
Full Member
   August '24 MoM Winner
Member since: September 2023
Posts: 445
Sept 10, 2023 12:21:52 GMT -5
Sept 10, 2023 12:21:52 GMT -5
|
Post by 2whl on Aug 19, 2024 11:28:32 GMT -5
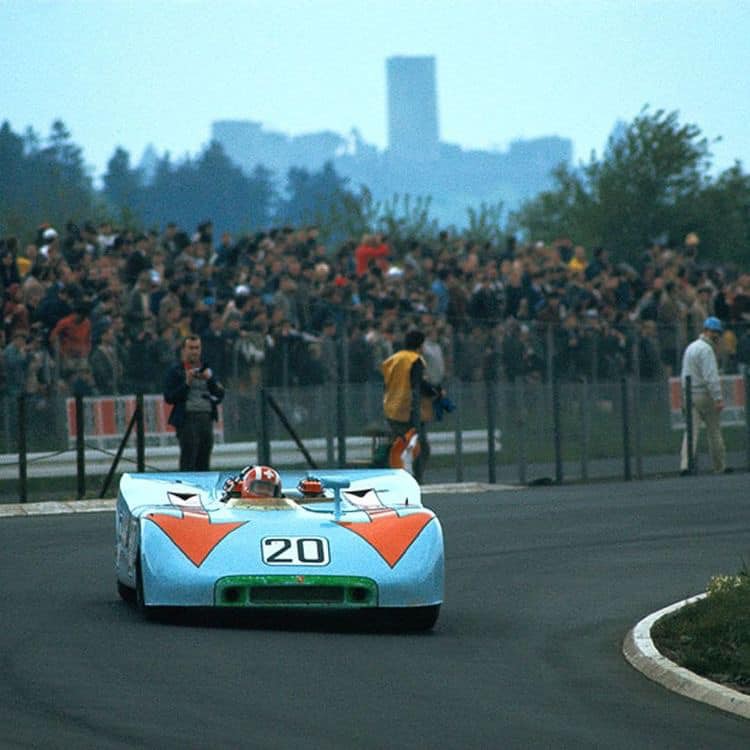 Oh yeah, You knew everyone would want to see it!! And I’m enjoying it! Great looking livery on this one too. Thanks Kyle With everything being built around the precise tubular framework it reminds me of the Zoukei-Mura HO-229 I built a few years ago. Thanks Brent. I looked up that build. What a fantastic job you did on it. And I see what you mean about the framework. Paul, I'm thrilled that you're going to be doing the #12 car as that's my favorite all time scheme. Not to mention that the co-drivers are Siffert and Redman. Your method of temp assembly of parts to make sure that the chassis tubing is glued in perfectly is a lesson I should really learn as it would have saved the day for me many times when I just assumed, and I honestly shouldn't have done so, making way more work for myself then would have been necessary if I followed your build method. And one thing I really never mention and take for granted is your excellent close up photography. No shadows, more then enough depth of field for sharpness, and enough pictures to tell the whole story as it unfolds. Expecting to loose our electric, internet, and cable as we got nearly 12 inches of rain last night and our block is now a ft plus lake. No town workers available as we've taken more water then even after a Hurricane. Homes have just collapsed as roads and hills gave way. More rain due this afternoon. All our utility lines are in ground and the cover to our section is floating across my front lawn, so it's all under water at this point. joel Thanks Joel. Siffert and Redman is the reason I choose this livery. I've learned with MFH kits to temp assemble the major components before adding details or painting. That way I can correct anything without destroying the small details. And one plus about build in white metal is that if something is wrong, you can just drop it in a bath of acetone and all the parts are back to a disassembled kit again. Thanks for the kudos on my photography. My first internet forum experience was with a forum that was VERY strict on picture composition. No cluttered backgrounds, proper lighting and focus. So it gave me good habits which I have continued with to this day. They also were strict about punctuation and spelling. I hope the rain doesn't impact you too much and everything dries up quickly Wow that chassis! I imagine alignment must be a challenge - you're getting it done for sure. Thanks John. I've learned to keep a sharp eye on how everything goes together so I don't have any problems down the line. As you'll see on this update, I keep putting things together to check the alignment. I didn't think it would be very long until the next one fired up, woof, you move fast! And that denture clean, what a trip, who'da thunk it? Pretty impressive already, Paul. Ruck On, Bby! Thanks Steve. I learned the denture trick from another MFH builder. Prior to that, I was dunking my resin in Bleche-White. Rear framework is pretty much done. Then I assembled the major pieces once again to check the fit. I was mostly concerned about the rear kick-up of the chassis being to high and the bodywork not fitting right. But all was good. Of course, then I couldn't resist putting the rest of the bodywork on for a glamour shot. 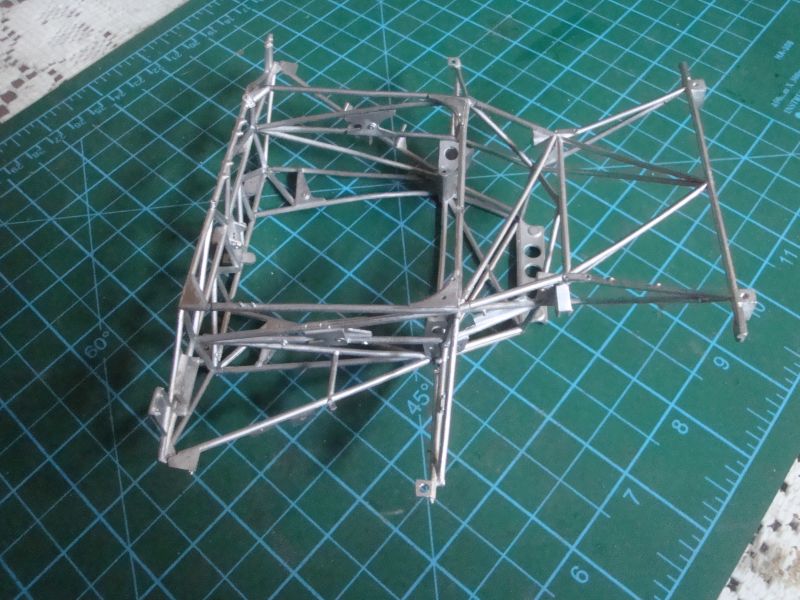 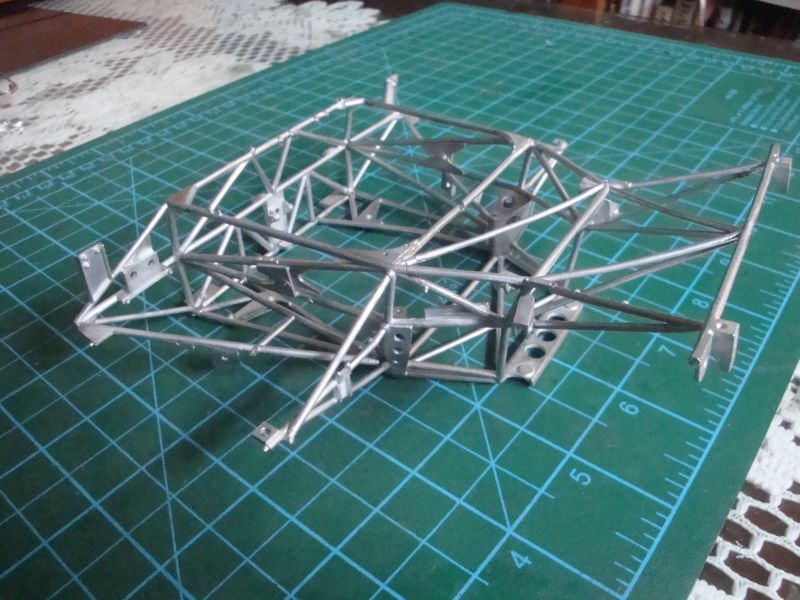 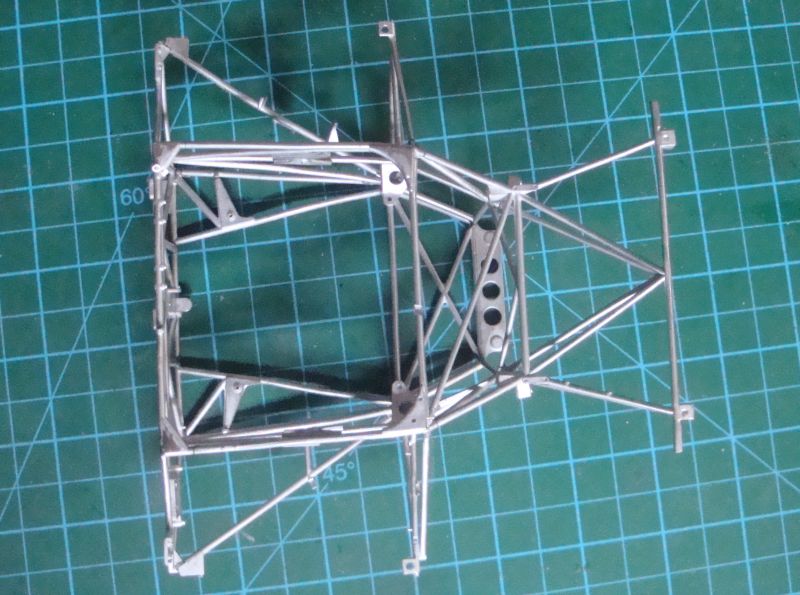 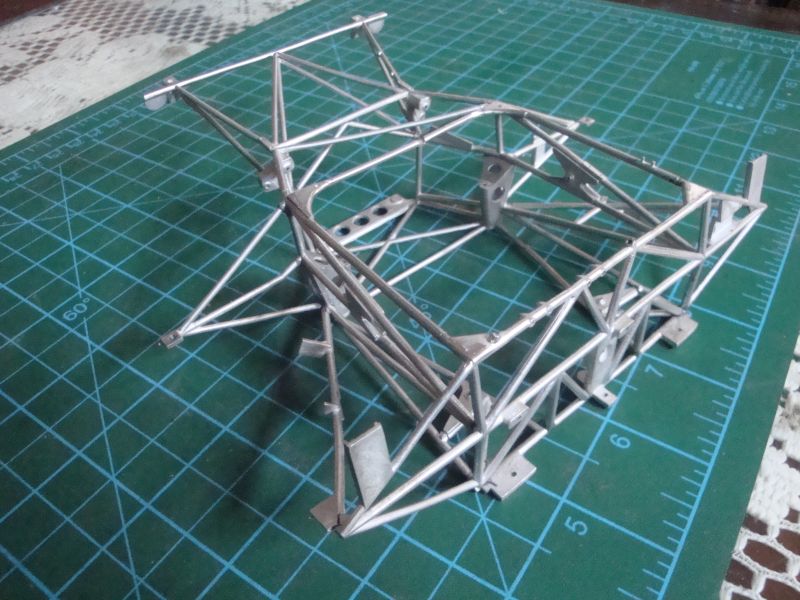 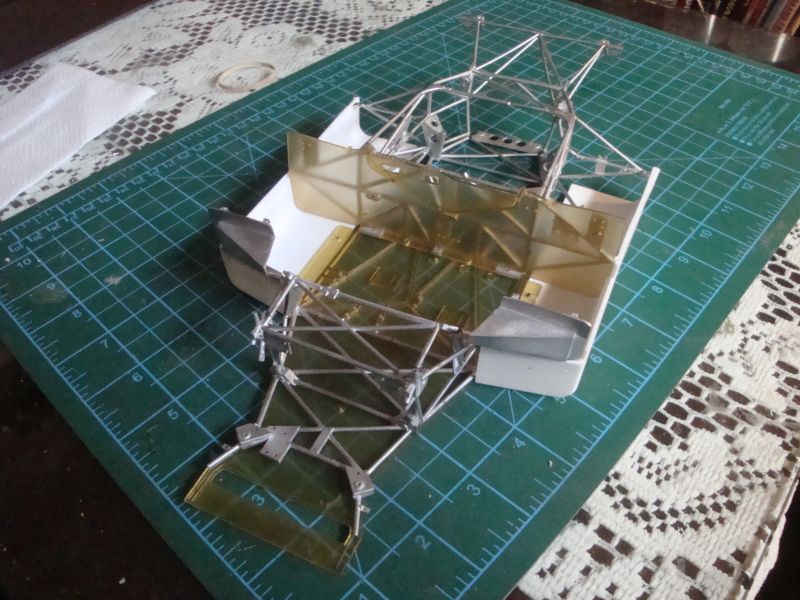 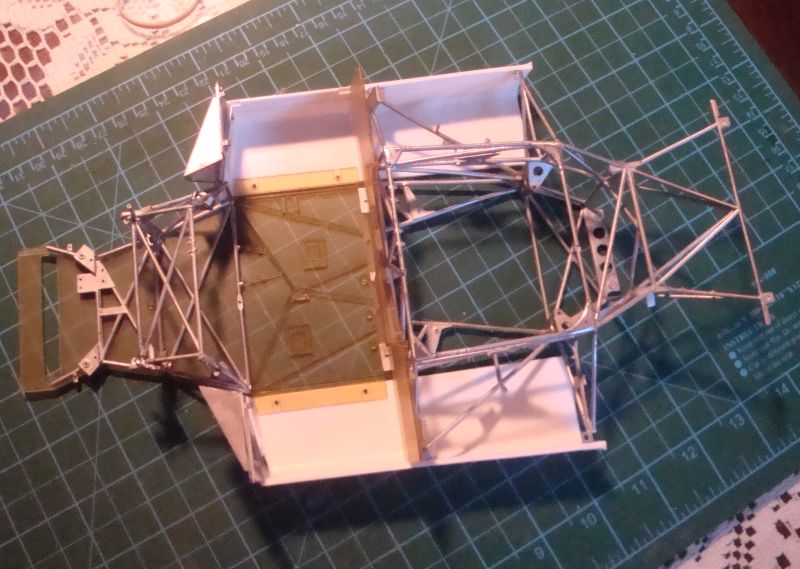 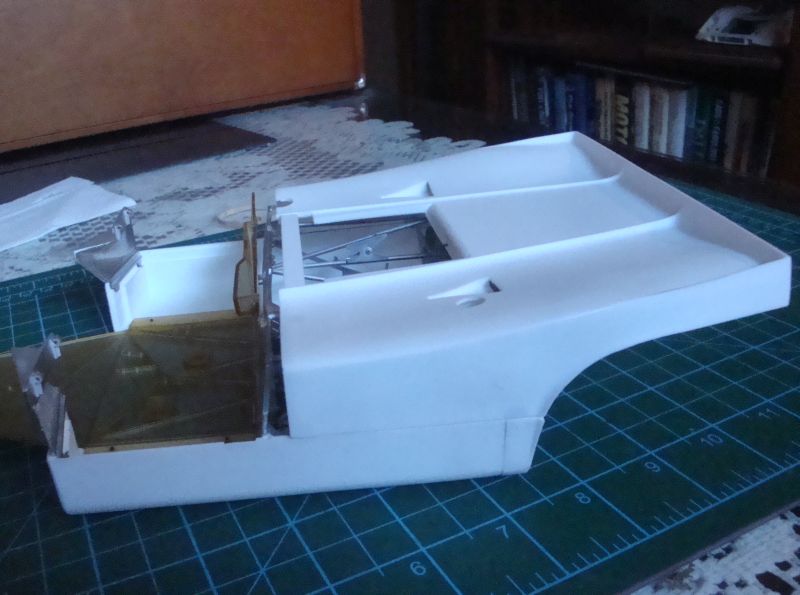 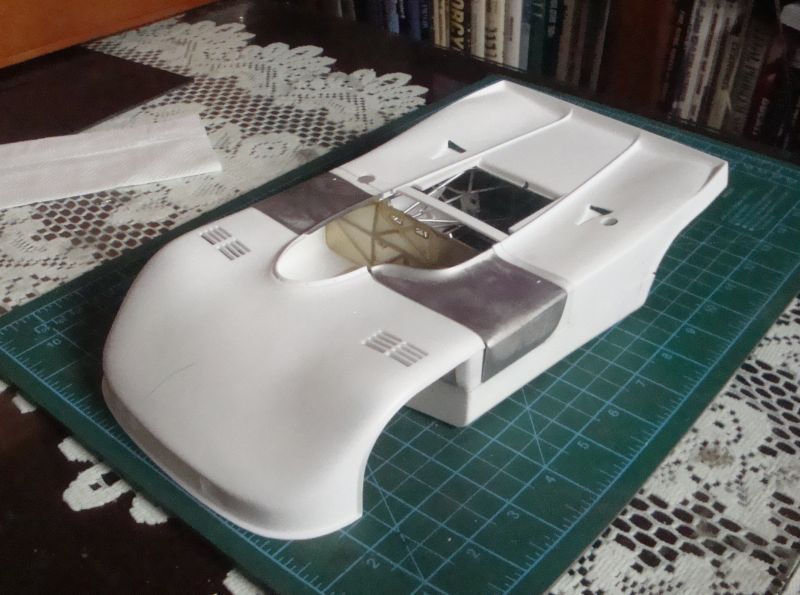 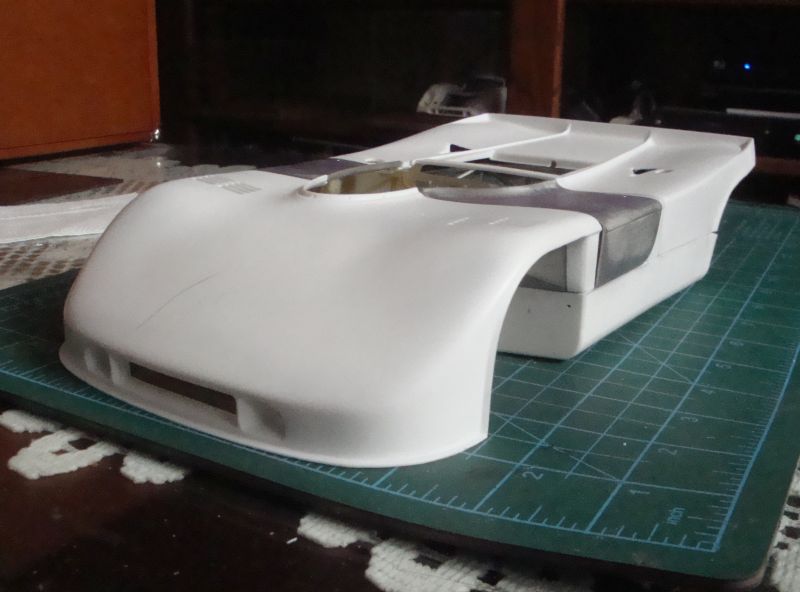 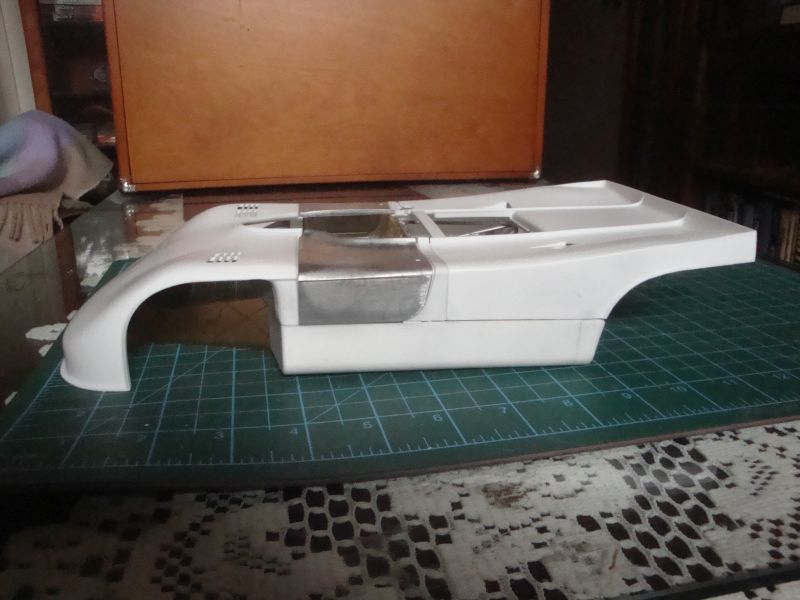 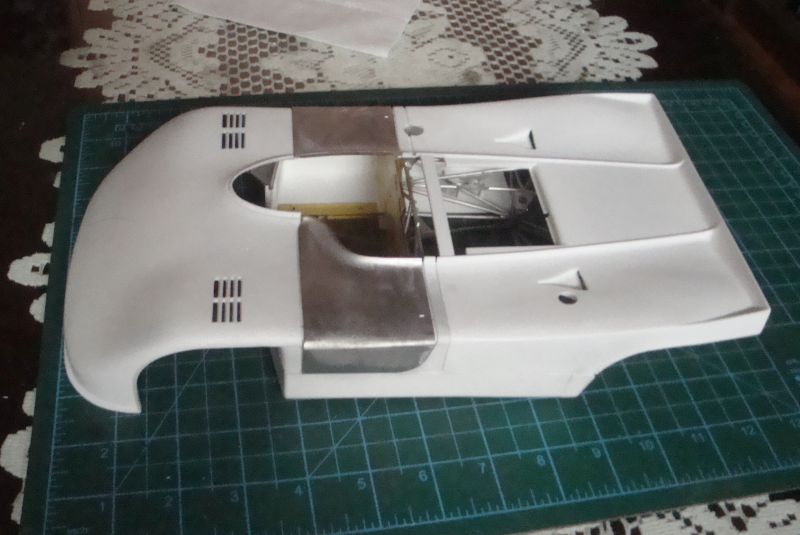 173 |
|
|
|
Post by 406 Silverado on Aug 19, 2024 11:54:49 GMT -5
Now this ............is a detailed out kit right OOB and you're doing a great job with it so far Paul. Coming together quite nicely indeed.
|
|
joelw
Full Member
  
Member since: July 2024
Posts: 572 
|
Post by joelw on Aug 19, 2024 12:27:04 GMT -5
Paul,
Tfhe test fit of the body over the full chassis looks absolutely perfect. if by some chance the new Retina surgeon has a vaccine to just stop my Retina disease as I can barely see to model now, I'll look for the MFH 1/24 scale kit as a reward for a eye victory.
joel
|
|
|
|
Post by kyledehart5 on Aug 19, 2024 17:45:42 GMT -5
Outstanding!! The body work looks excellent. It’s looking great.
|
|
2whl
Full Member
   August '24 MoM Winner
Member since: September 2023
Posts: 445
Sept 10, 2023 12:21:52 GMT -5
Sept 10, 2023 12:21:52 GMT -5
|
Post by 2whl on Aug 19, 2024 19:33:43 GMT -5
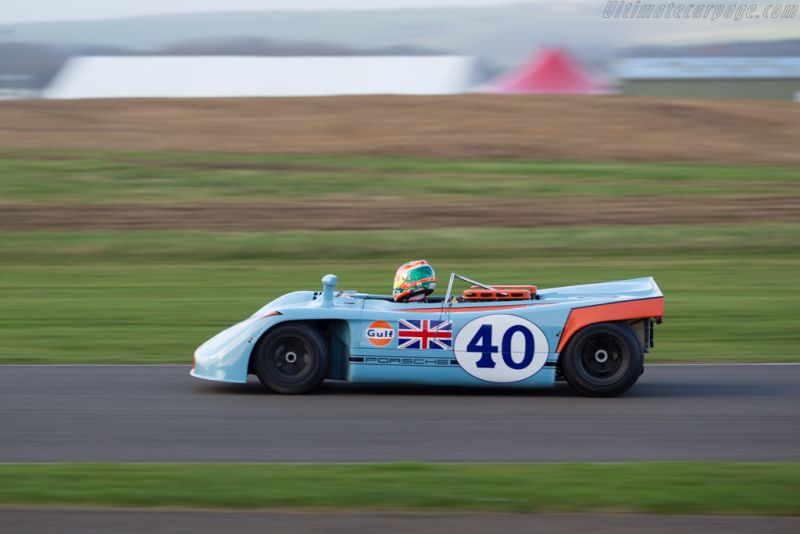 Now this ............is a detailed out kit right OOB and you're doing a great job with it so far Paul. Coming together quite nicely indeed. Thanks Joe. Paul, Tfhe test fit of the body over the full chassis looks absolutely perfect. if by some chance the new Retina surgeon has a vaccine to just stop my Retina disease as I can barely see to model now, I'll look for the MFH 1/24 scale kit as a reward for a eye victory. joel Thanks Joel. I hope your doctor can help you. Outstanding!! The body work looks excellent. It’s looking great. Thank you Kyle The exhaust consisted of 8 pipes for the cylinders and 2 collectors. I used the engine mock-up to get them all straight. Then I checked the fit of the rear brace. After that was done, a check in the chassis was in order. 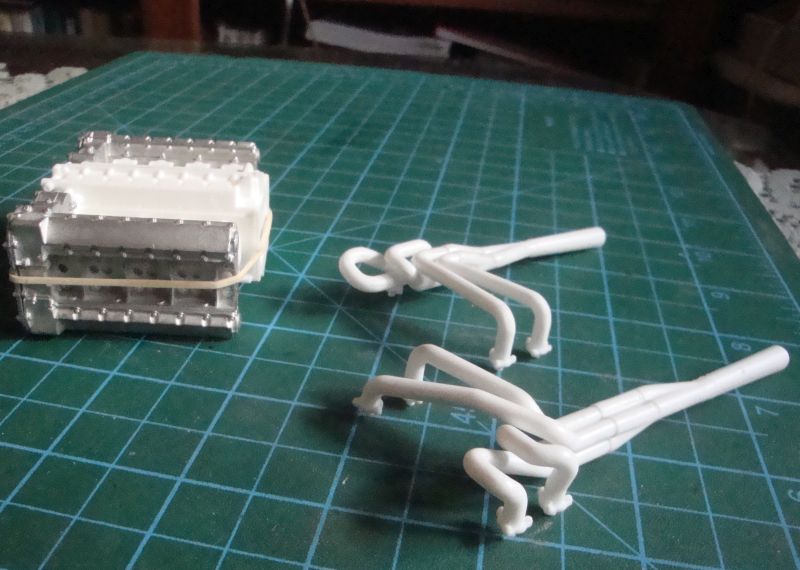 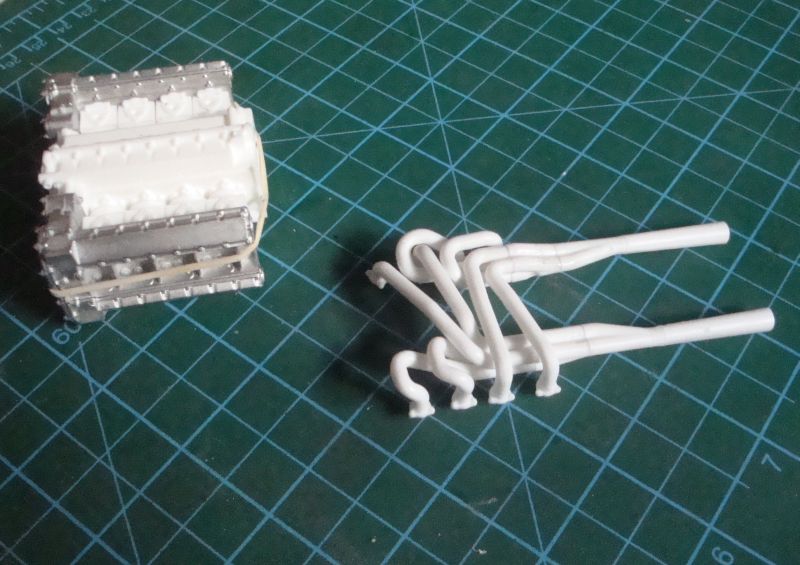 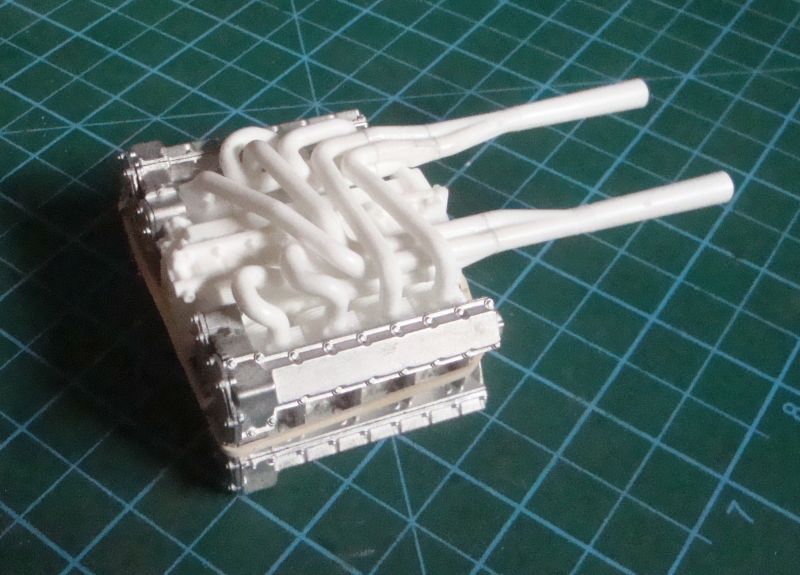 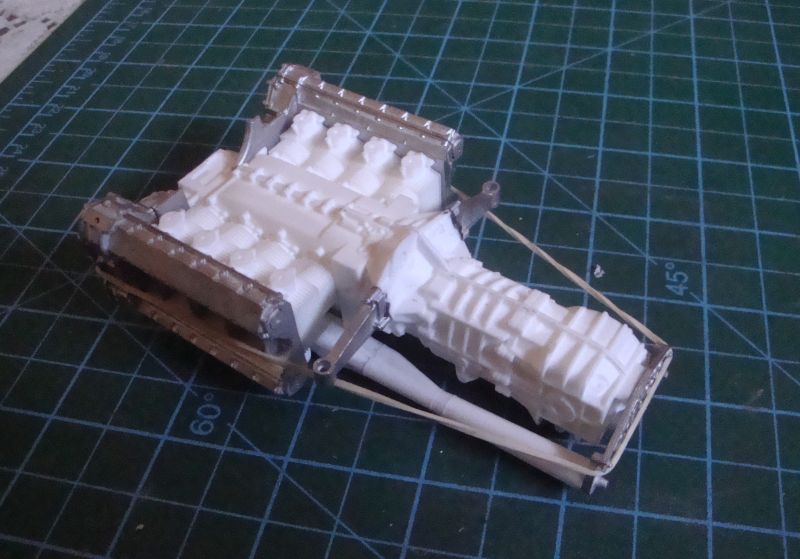 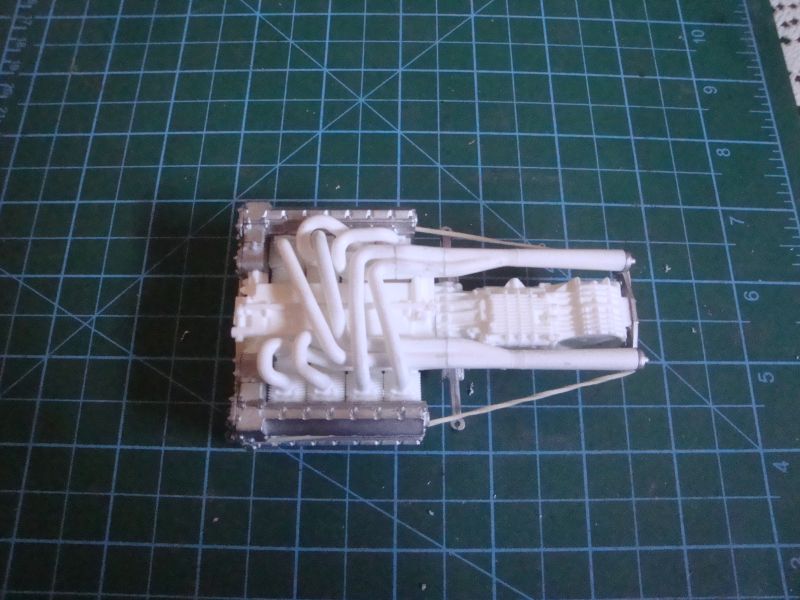 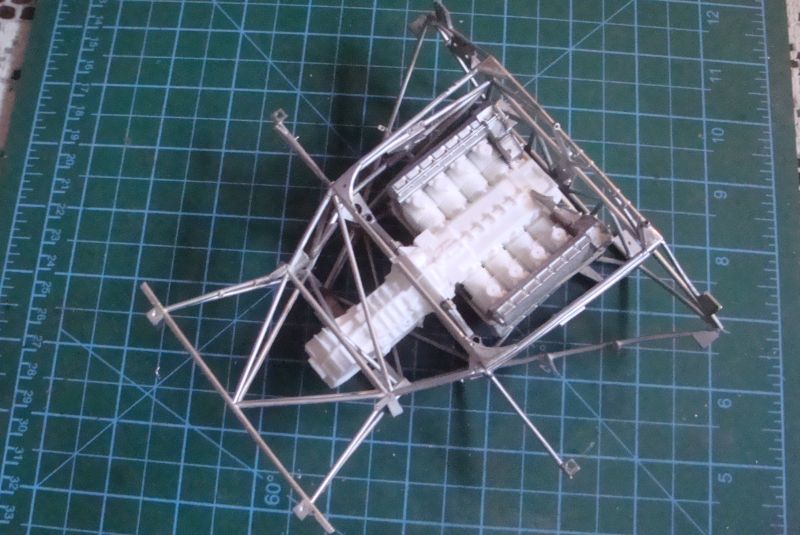 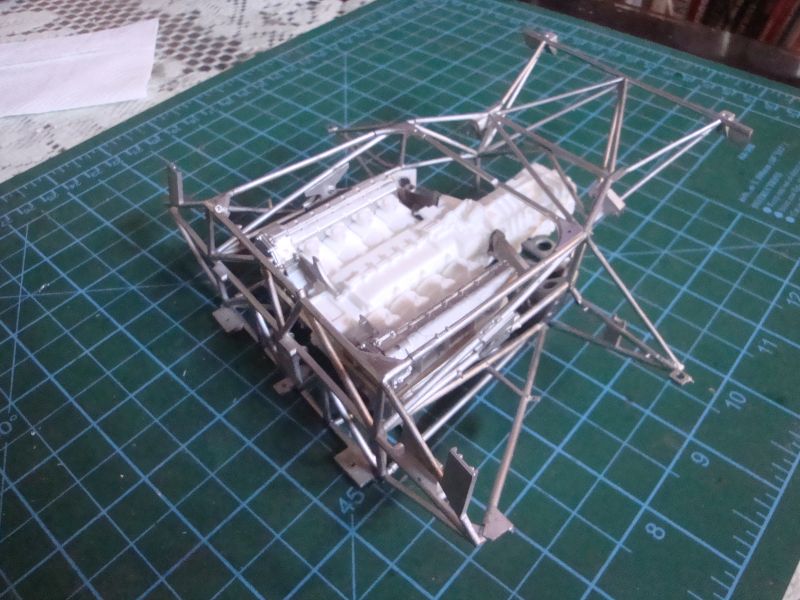 Now that I know the engine and trans are going to go into the chassis without problems, it was time to give the engine some color. I also started adding pieces to it. 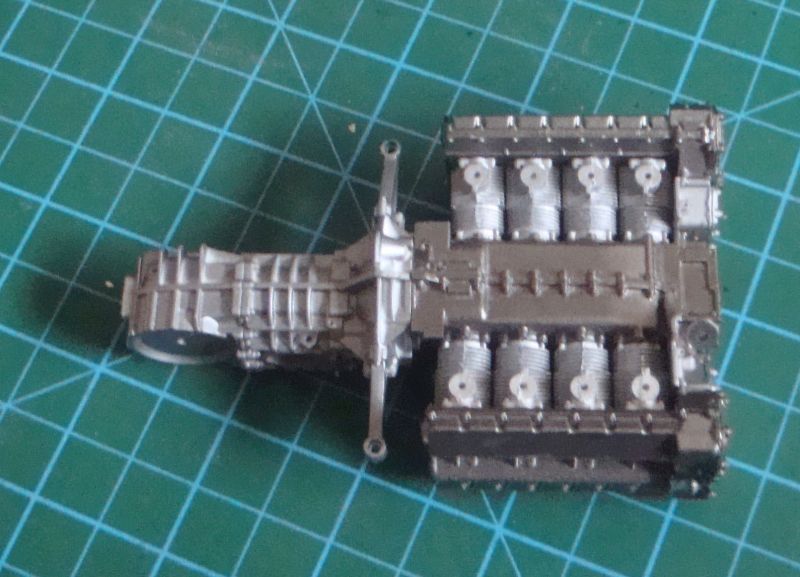 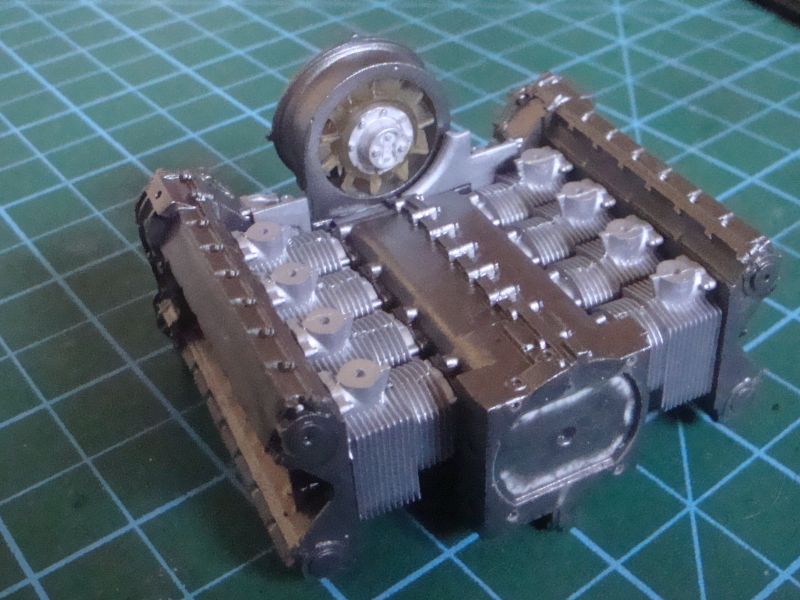 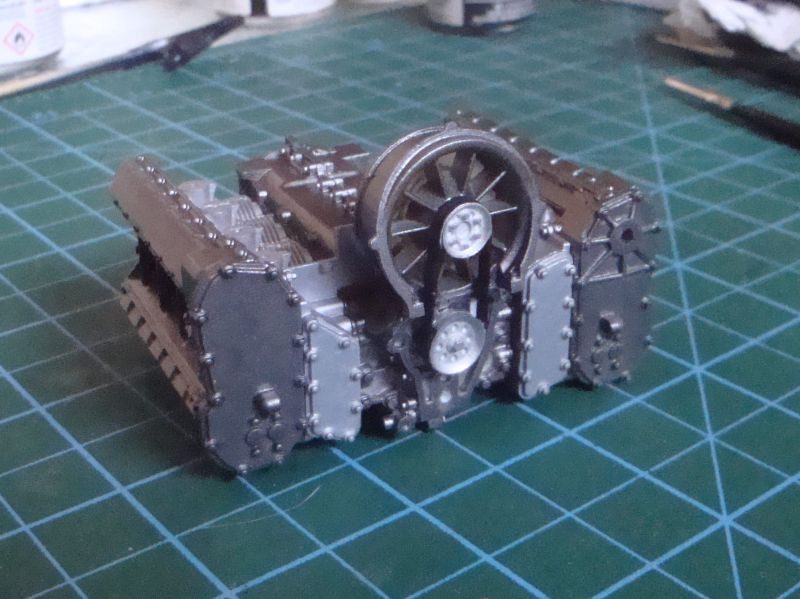 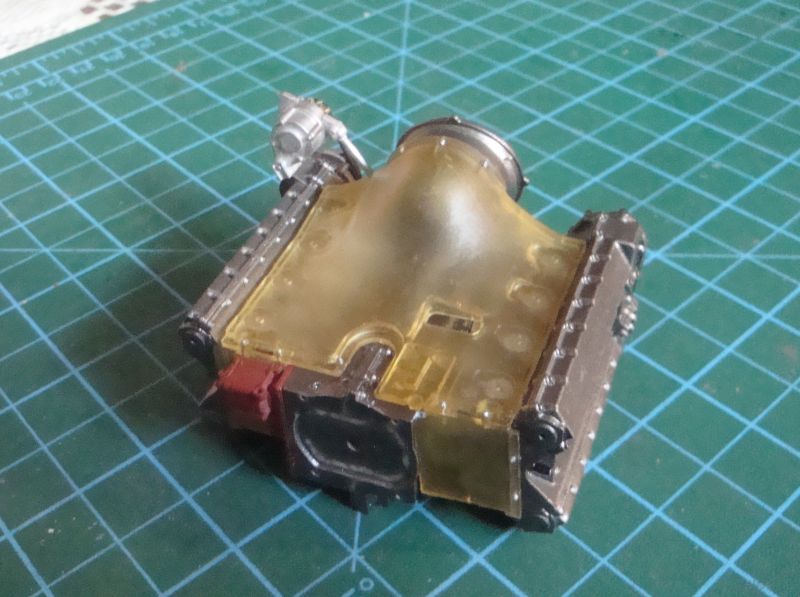 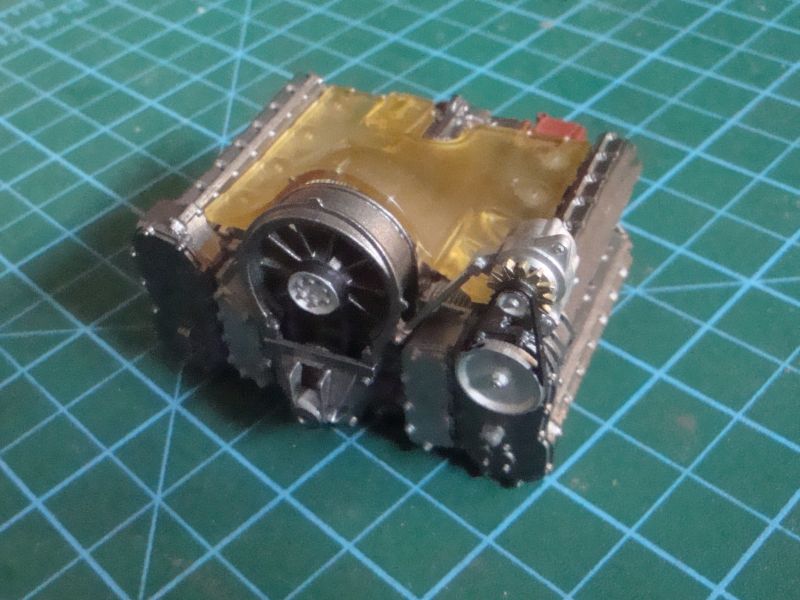 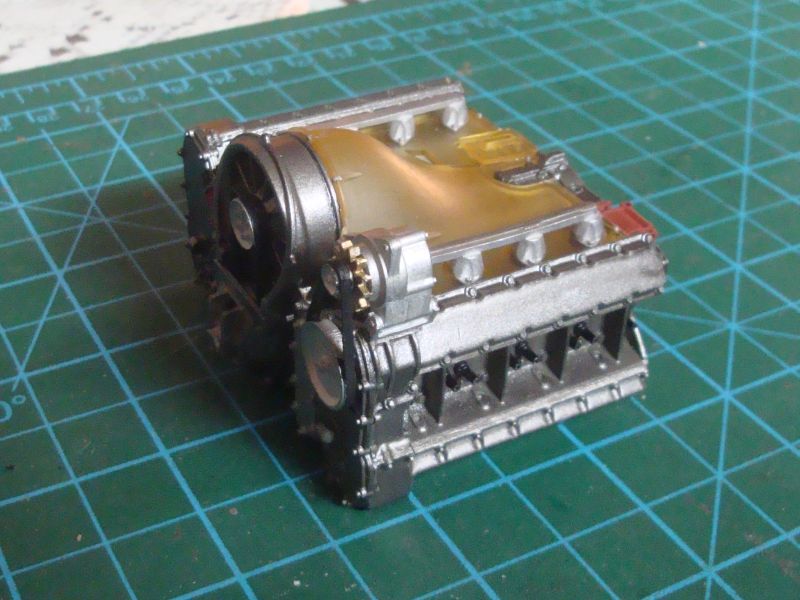 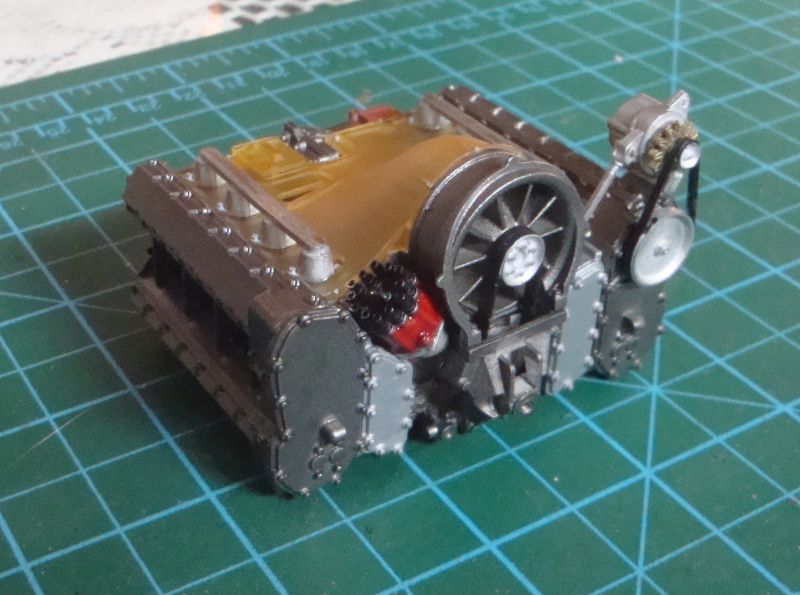 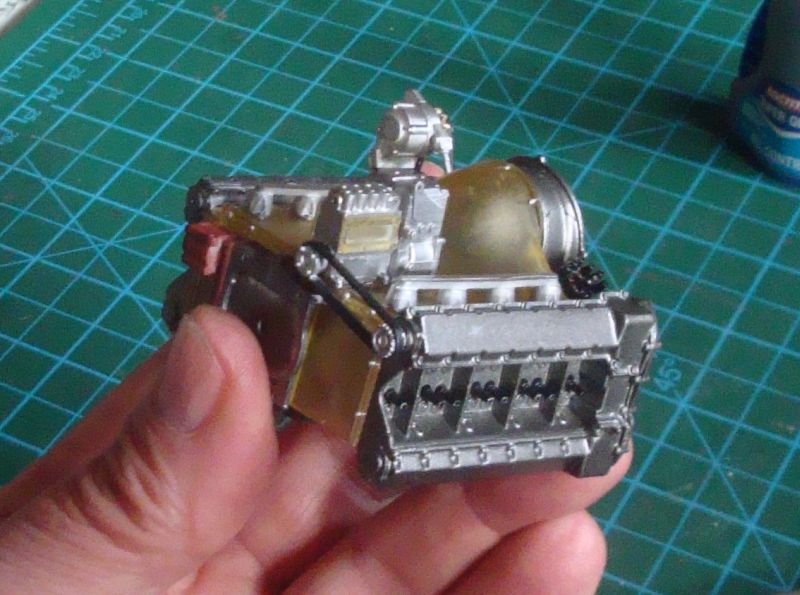 213 |
|
|
|
Post by kyledehart5 on Aug 19, 2024 20:08:53 GMT -5
Another great looking set of pipes there. Engine is coming together now. Looking outstanding and I always love a big Porsche fan.
|
|
joelw
Full Member
  
Member since: July 2024
Posts: 572 
|
Post by joelw on Aug 20, 2024 7:00:59 GMT -5
Paul,
One thing that caught my eye with respect to the full chassis fitted into the bottom body pan is that basically the front and rear tube frames are completely separate except for the few tubes on the bottom of the body pan. It's amazing that the designers & engineers could still keep the overall tube frame stiff enough to not have excess twist from both the torque of the engine under load and the gravitational forces going through fast corners.
The various shades of Metallics really make the main engine parts standout, and of course the classic fan hump just screams PORSCHE.
Joel
|
|
handiabled
Administrator      Apr '23 Showcased Build Awarded
Member since: February 2023
Posts: 4,394  Member is Online
MSC Staff
|
Post by handiabled on Aug 20, 2024 8:26:29 GMT -5
Iconic engine coming together! The fitment of everything looks to be spot on!
|
|
2whl
Full Member
   August '24 MoM Winner
Member since: September 2023
Posts: 445
Sept 10, 2023 12:21:52 GMT -5
Sept 10, 2023 12:21:52 GMT -5
|
Post by 2whl on Aug 20, 2024 11:01:13 GMT -5
 Another great looking set of pipes there. Engine is coming together now. Looking outstanding and I always love a big Porsche fan. Thanks Kyle. Paul, One thing that caught my eye with respect to the full chassis fitted into the bottom body pan is that basically the front and rear tube frames are completely separate except for the few tubes on the bottom of the body pan. It's amazing that the designers & engineers could still keep the overall tube frame stiff enough to not have excess twist from both the torque of the engine under load and the gravitational forces going through fast corners. The various shades of Metallics really make the main engine parts standout, and of course the classic fan hump just screams PORSCHE. Joel Thank you Joel. I don't know if the colors are right. I just wanted a contrast. It looks like the only thing connecting the front and back is the box of tubes that go around the driver. I would think changing tube diameter and wall thickness would help with the twist. 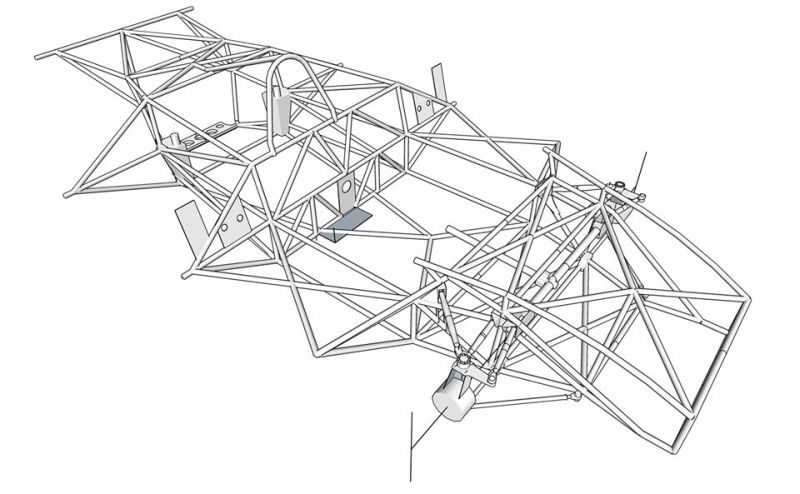 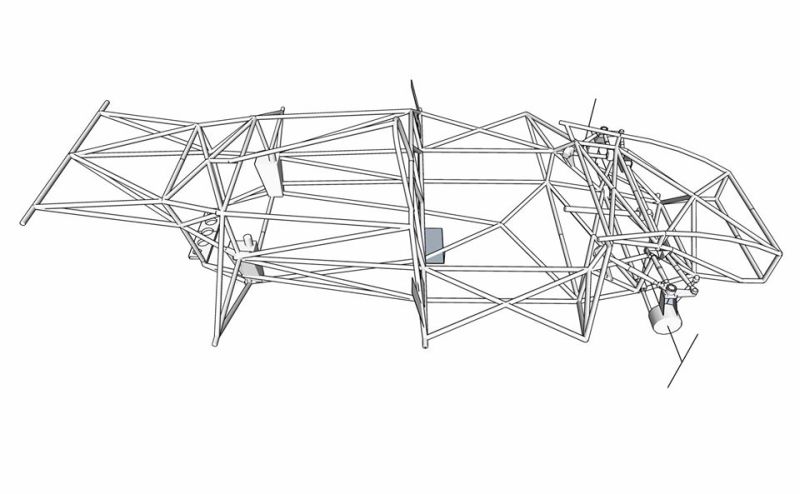 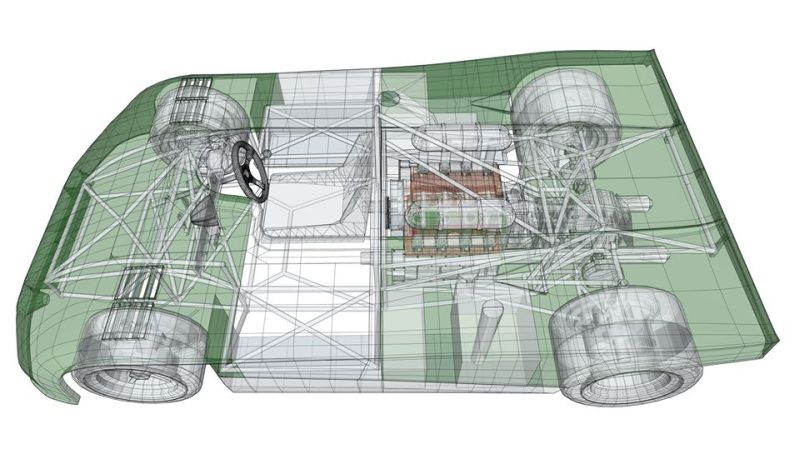 Iconic engine coming together! The fitment of everything looks to be spot on! Thanks Brent. This engine is a 8 cylinder with dual plugs. But MFH only supplied a distributor with 12 leads. So I added two wires to the wire holder, but only for the spark plugs. Then I passed the six wires to that side over them. I'm guessing they used the distributor master from the 917, which needs 12 leads. 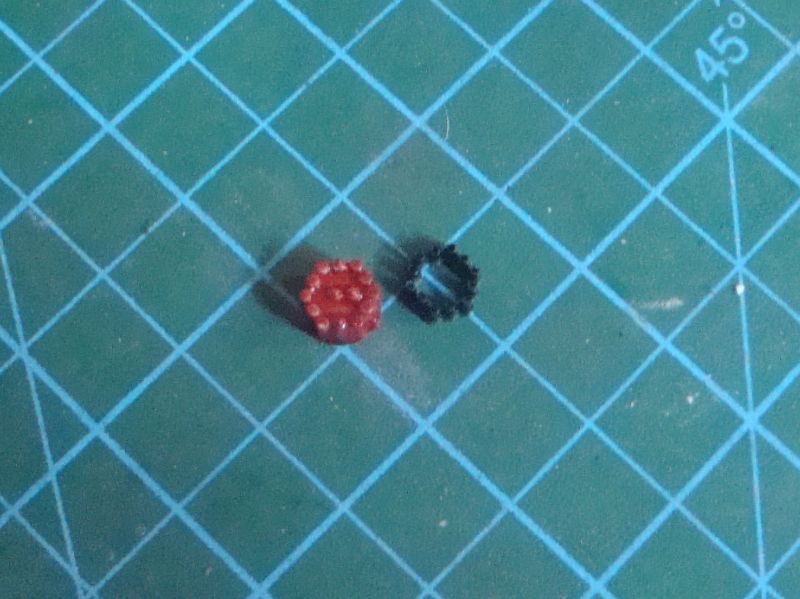 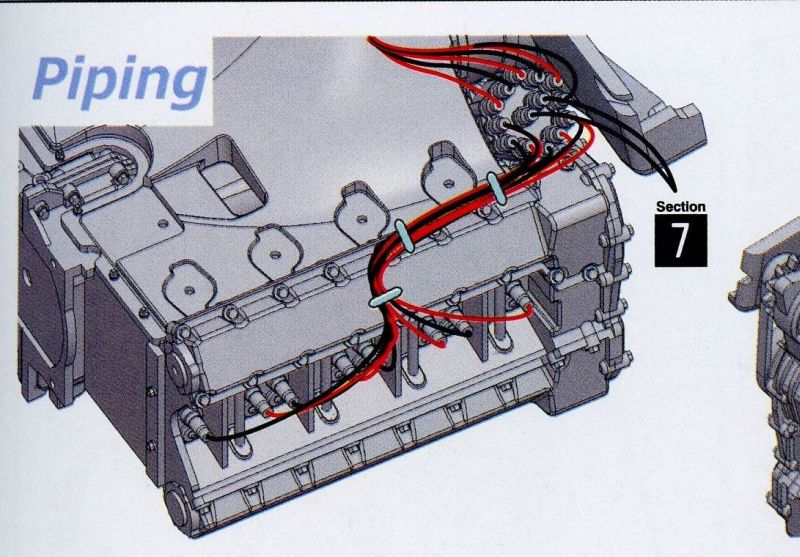 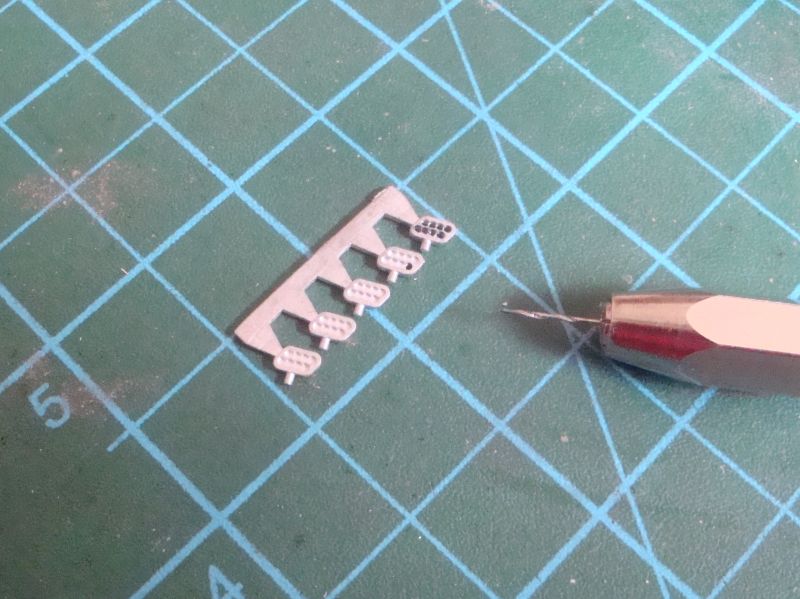 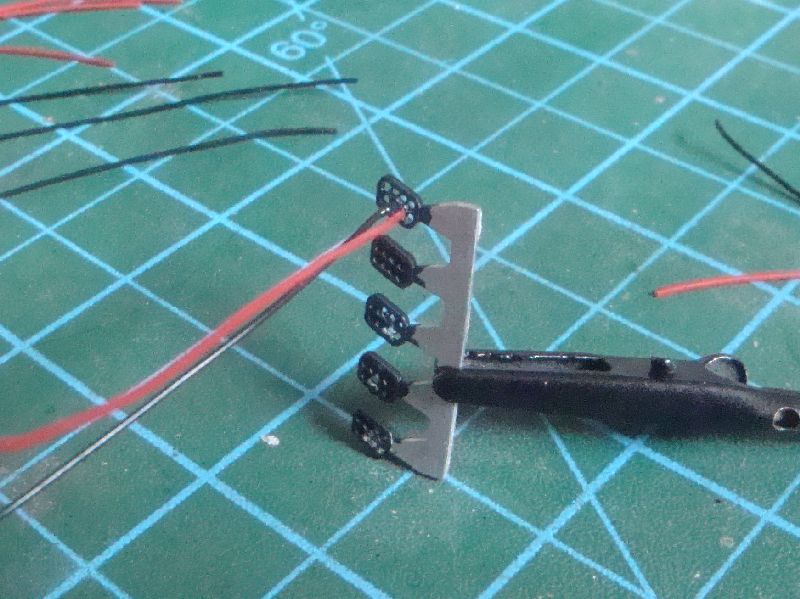 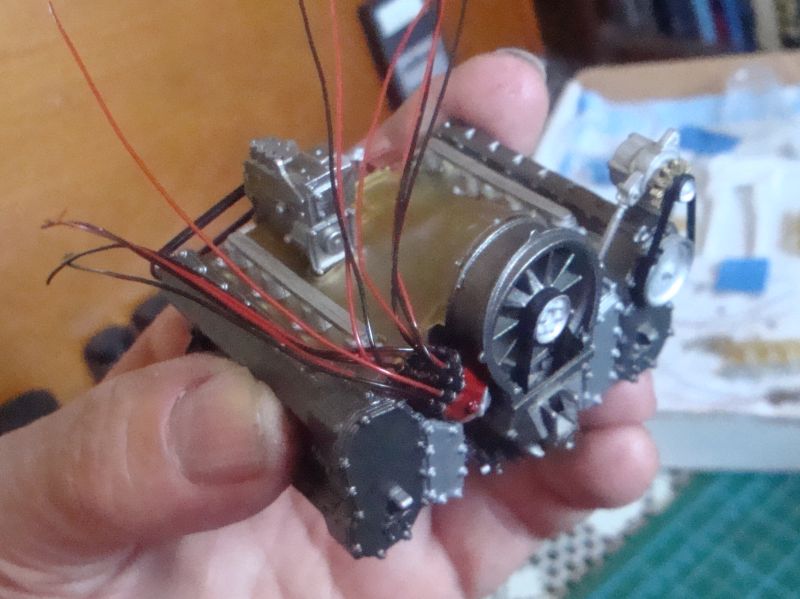 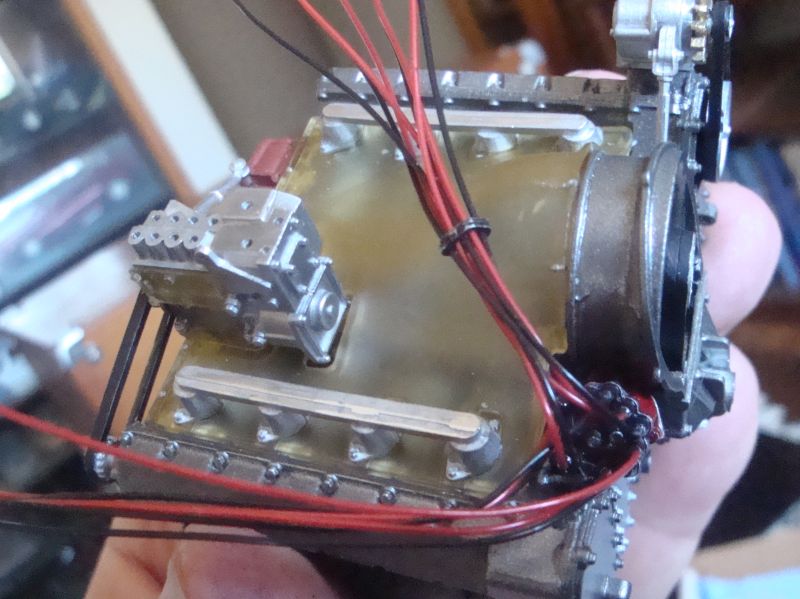 254 |
|
joelw
Full Member
  
Member since: July 2024
Posts: 572 
|
Post by joelw on Aug 20, 2024 11:58:04 GMT -5
Paul,
Great job in correcting the wrong dist. cap and adding the missing plug wires. Drilling out those wire looms even with the indentation surely was a challenging task.
joel
|
|
|
|
Post by kyledehart5 on Aug 20, 2024 15:42:18 GMT -5
Interesting. And great work getting that straightened out so you could get everything wired up. It looks the part now.
|
|
2whl
Full Member
   August '24 MoM Winner
Member since: September 2023
Posts: 445
Sept 10, 2023 12:21:52 GMT -5
Sept 10, 2023 12:21:52 GMT -5
|
Post by 2whl on Aug 21, 2024 10:19:34 GMT -5
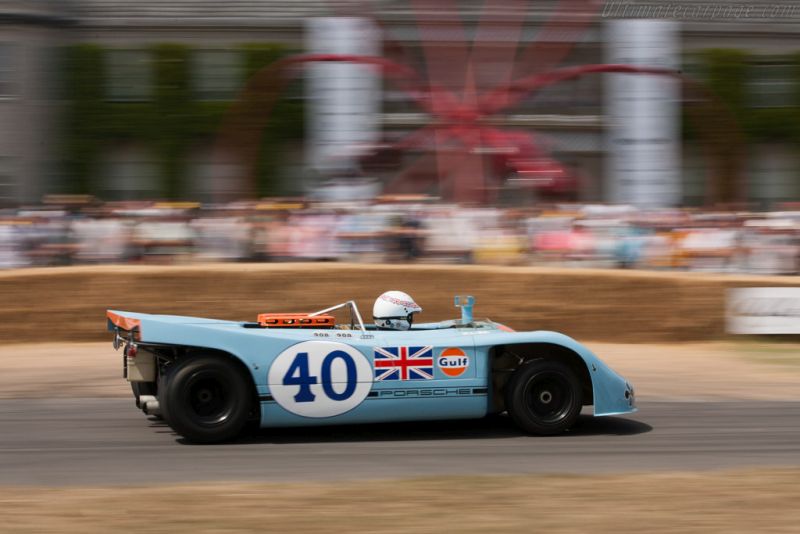 Paul, Great job in correcting the wrong dist. cap and adding the missing plug wires. Drilling out those wire looms even with the indentation surely was a challenging task. joel Thanks Joel. Interesting. And great work getting that straightened out so you could get everything wired up. It looks the part now. Thanks Kyle. With the ignition sorted out, it was time to get to the fuel system. 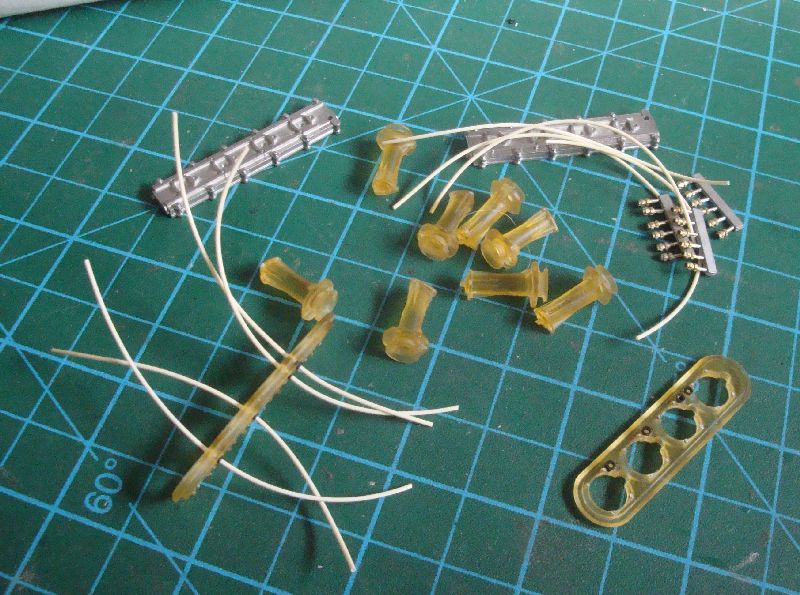 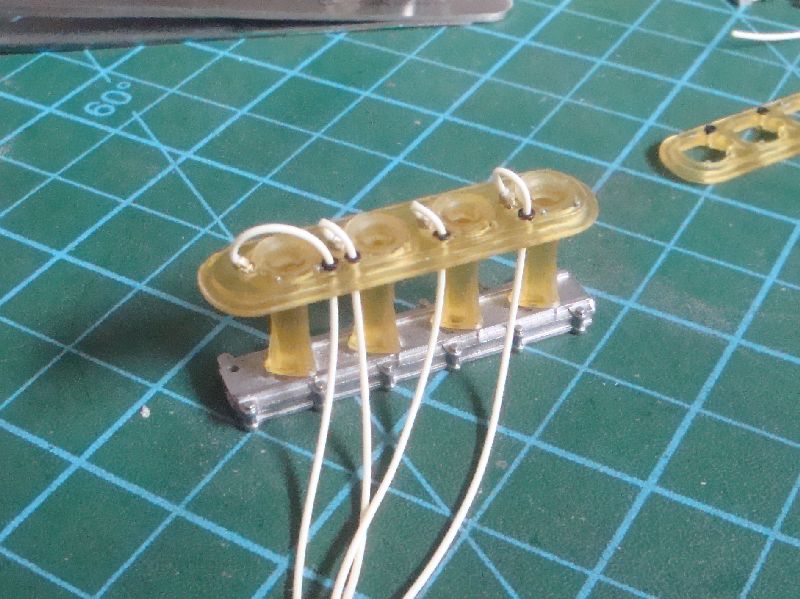 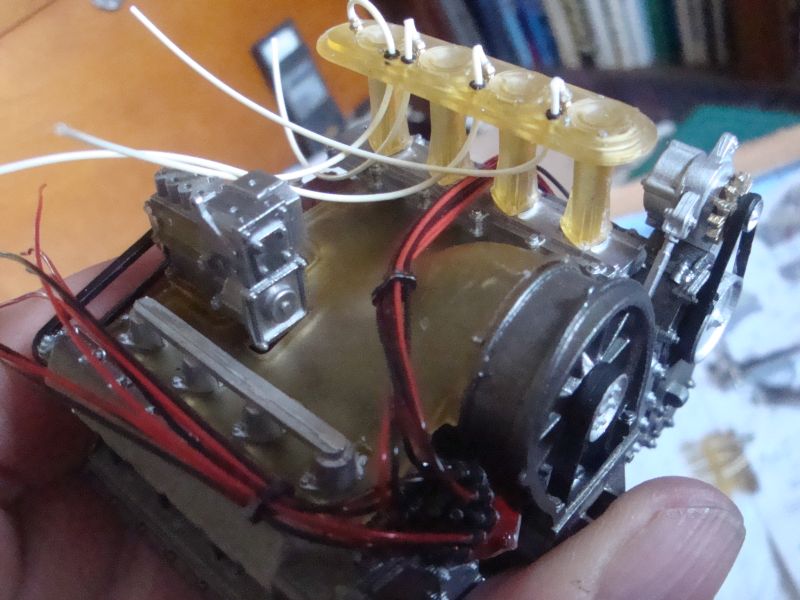 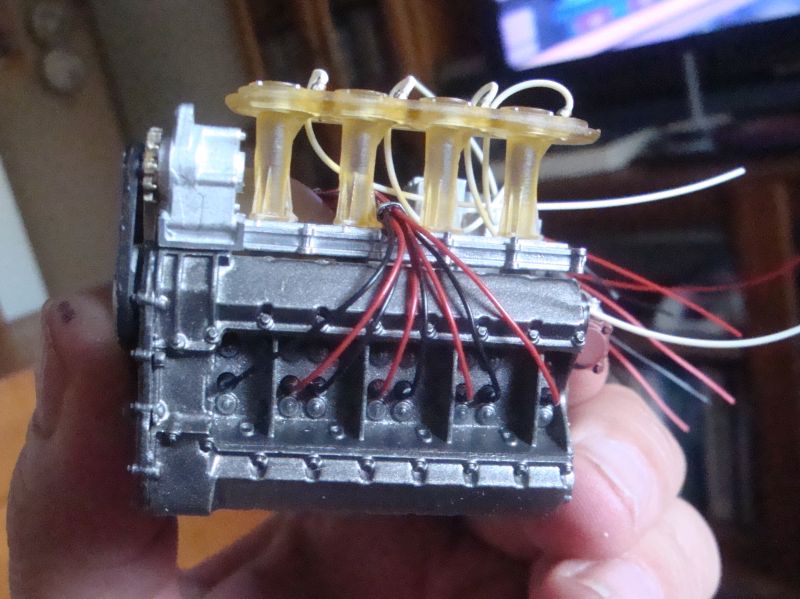 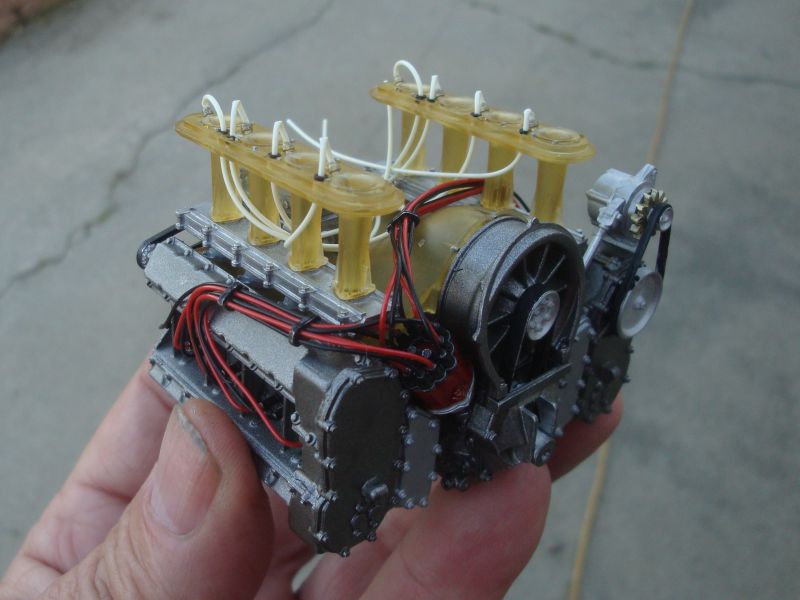 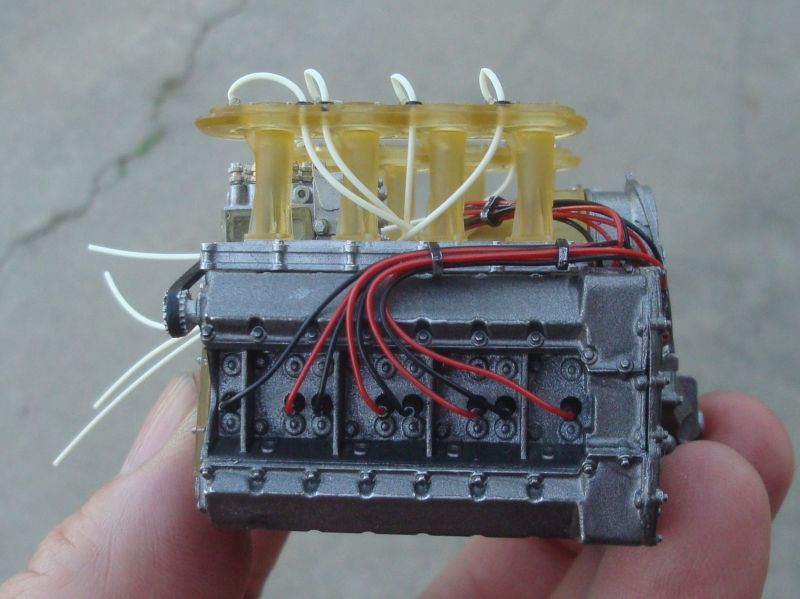 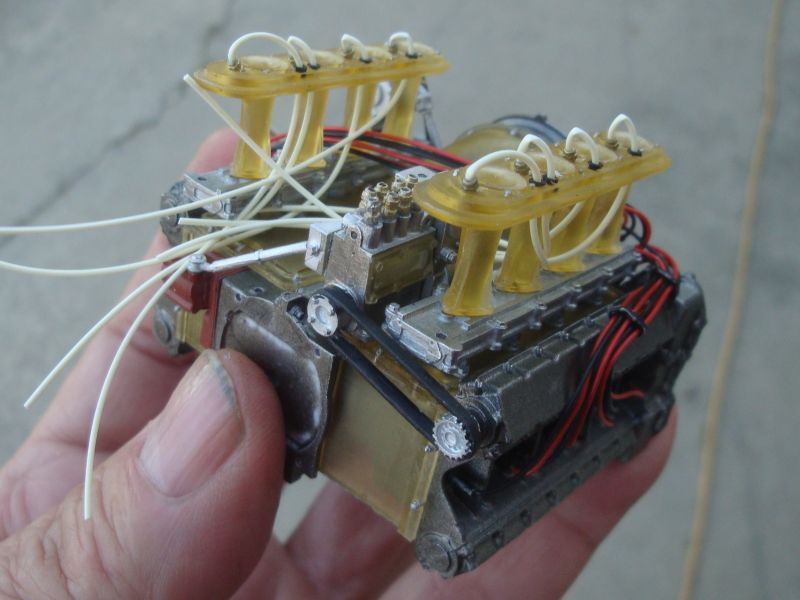 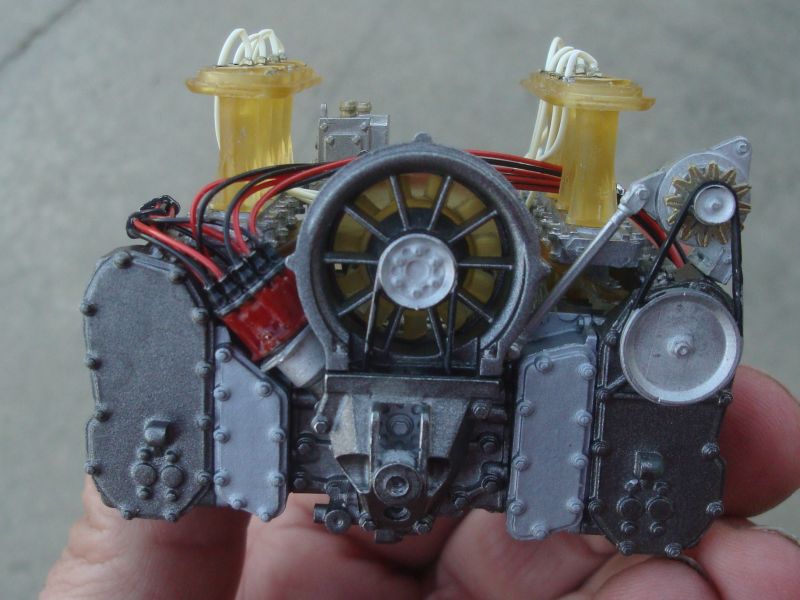 293 |
|