|
|
Post by kyledehart5 on Aug 25, 2024 17:17:57 GMT -5
Wonderful. I do love a nice set of wheels and tires. These look awesome. A nice mock-up teaser.
|
|
buddho
Forum Moderator     
Member since: February 2019
Posts: 1,287 
MSC Staff
|
Post by buddho on Aug 25, 2024 18:52:31 GMT -5
So impressive....wowsas!
|
|
benb
Full Member
  
Member since: July 2024
Posts: 251
Jul 17, 2024 12:07:35 GMT -5
Jul 17, 2024 12:07:35 GMT -5
|
Post by benb on Aug 25, 2024 19:45:27 GMT -5
Wow! This is absolutely amazing. Both the complexity and detail of the kit and your skills at putting it together. I’m really enjoying your progress!
Ben
|
|
2whl
Full Member
   August '24 MoM Winner
Member since: September 2023
Posts: 445
Sept 10, 2023 12:21:52 GMT -5
Sept 10, 2023 12:21:52 GMT -5
|
Post by 2whl on Aug 26, 2024 11:09:54 GMT -5
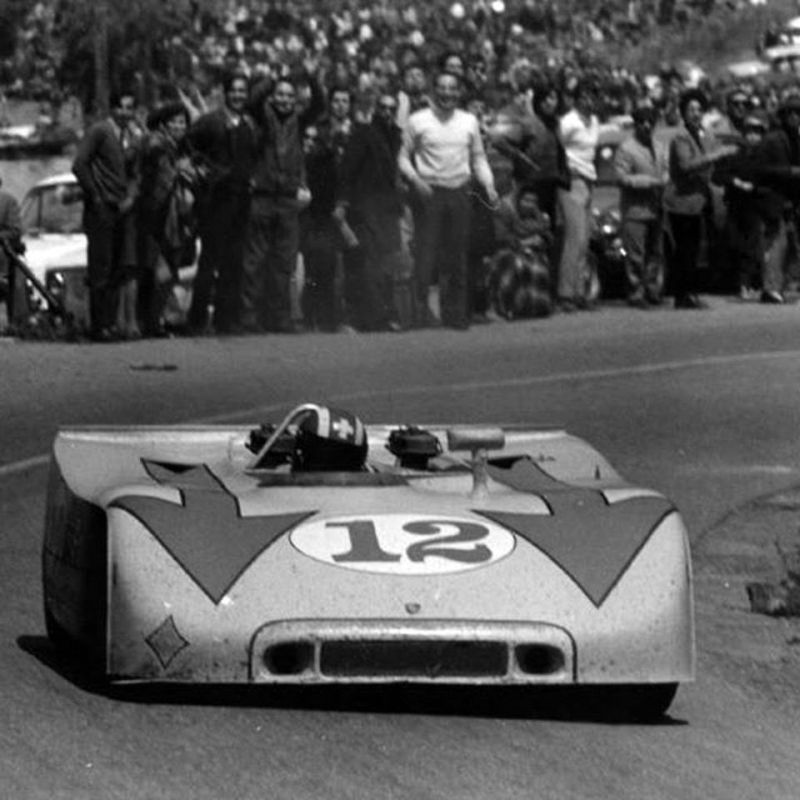 Paul, Very nice job on the tires and wheels. Nice to see the rear tube frame & engine/trans/suspension tacked to the front as that we finally get a real sense of just what a Porsche bath tub of tubes really looks like. Working on this beast during a race must have been real fun for the pit crew. joel Thanks Joel. With those two parts joined it makes the car look like an overgrown go-cart. It must have been a thrill to drive. Wonderful. I do love a nice set of wheels and tires. These look awesome. A nice mock-up teaser. Thank you Kyle Thanks Dan Wow! This is absolutely amazing. Both the complexity and detail of the kit and your skills at putting it together. I’m really enjoying your progress! Ben Thank you Ben. A couple of more details added. Front brake hoses and the oil tank. 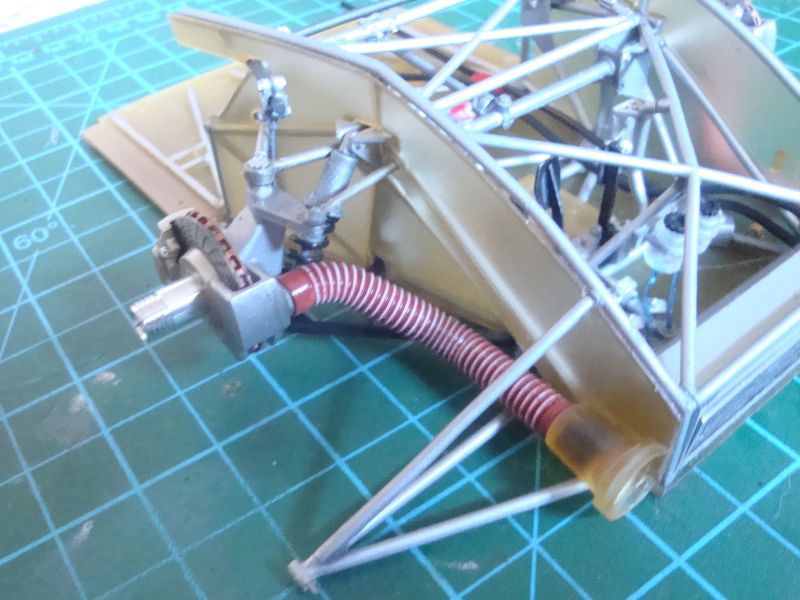 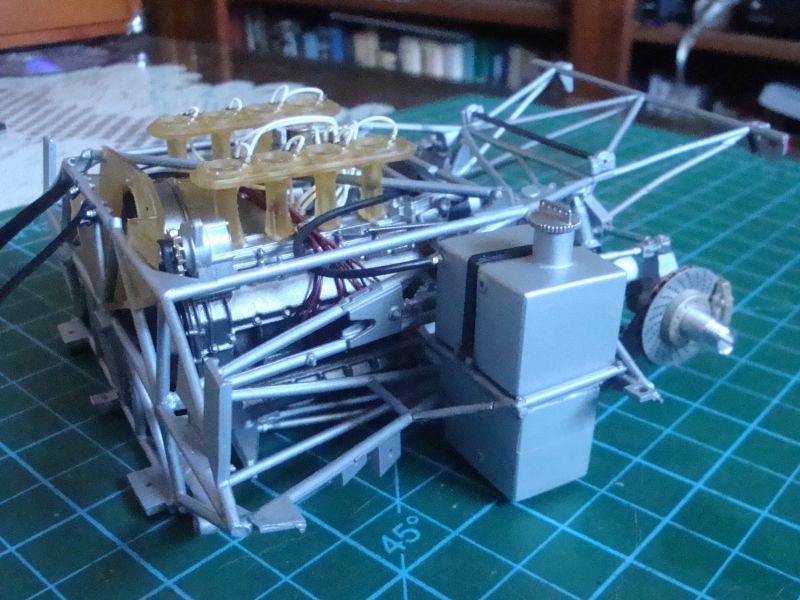 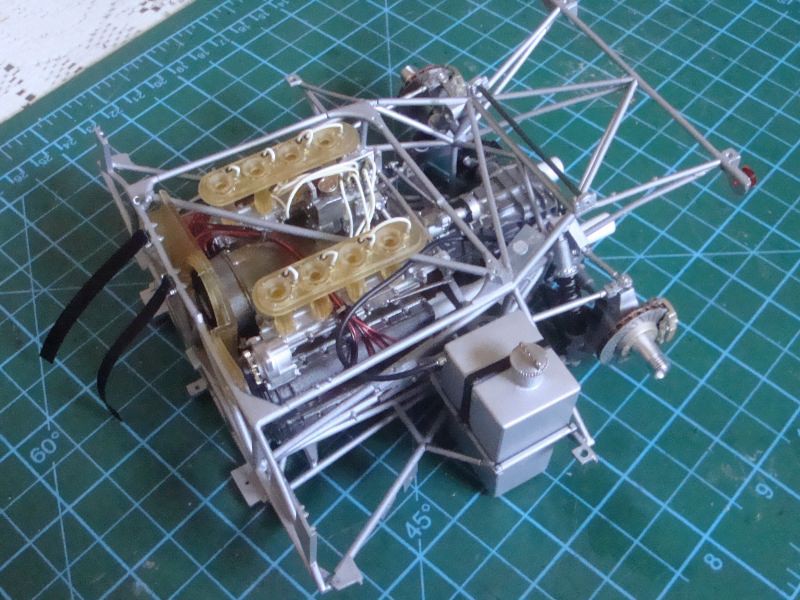 Getting the body work ready for paint. MFH calls for these parts to be joined later, but I wanted to eliminate the seam. So I joined them and filled in the seam. 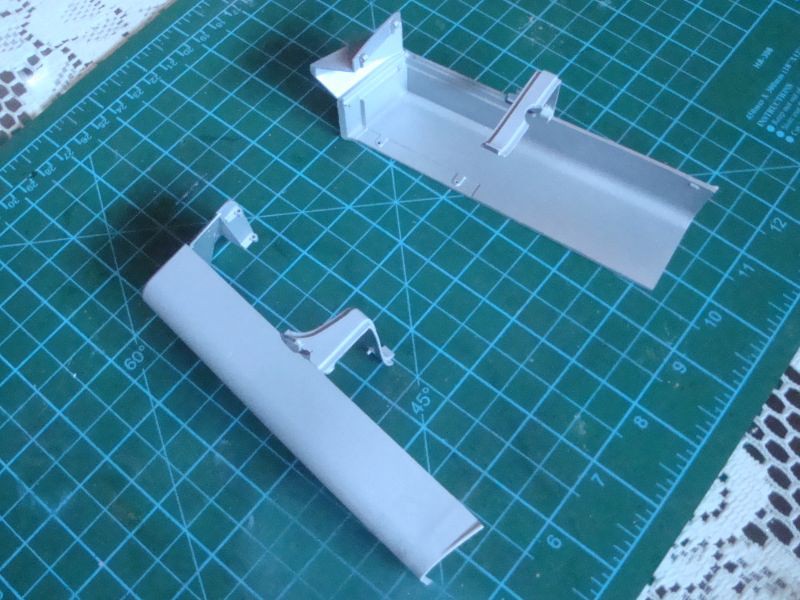 This is the last post with pictures from the past. The date on the bodywork in these pictures is 10/2/2020. I used an enamel I found at Home Depot for the light blue. Since it was enamel, I chose to put the bodywork aside in a dustproof case while the paint cured. Then other kits got my attention and the build sat in the case till now. 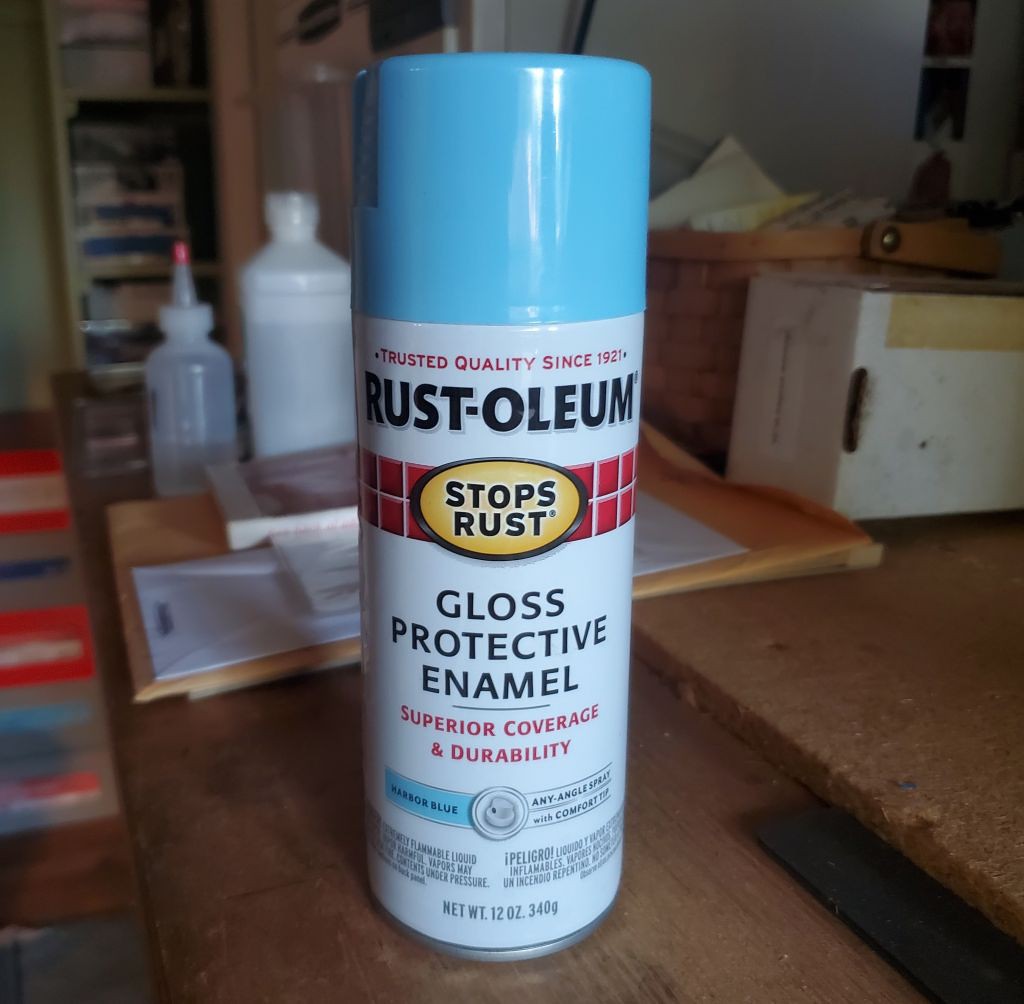 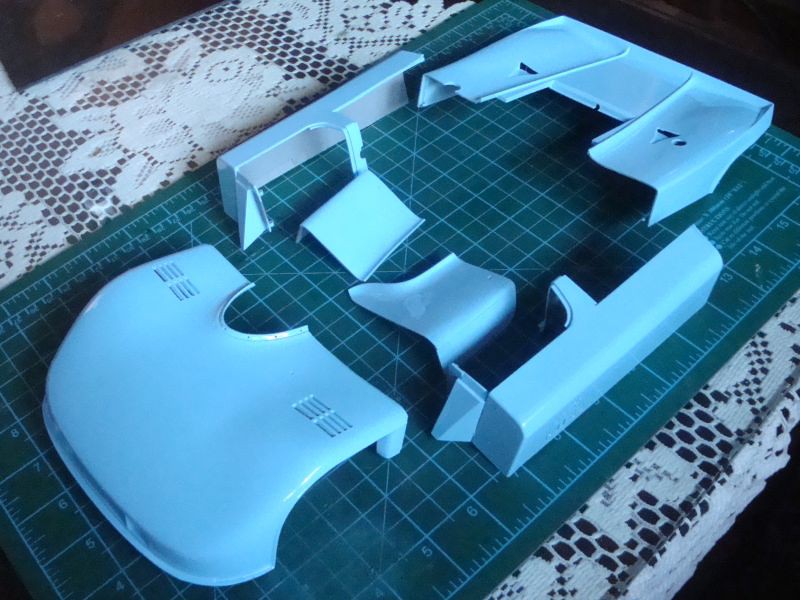 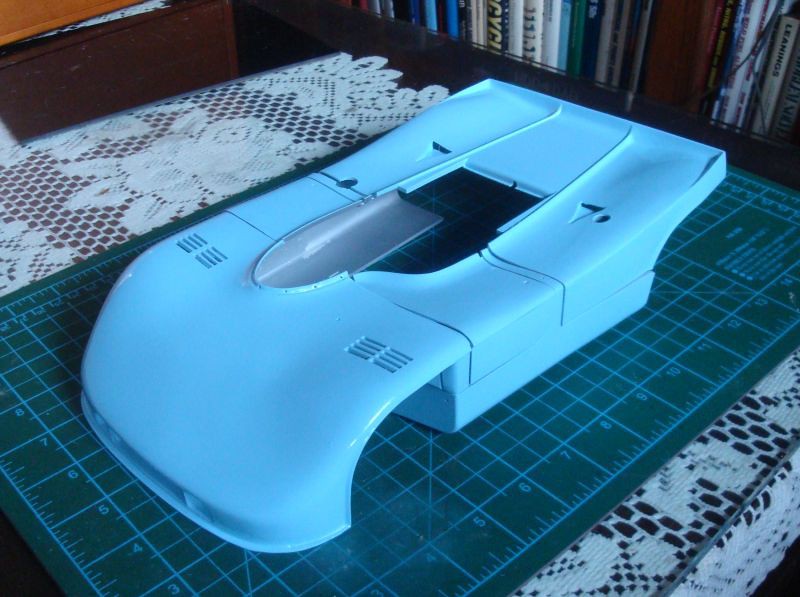 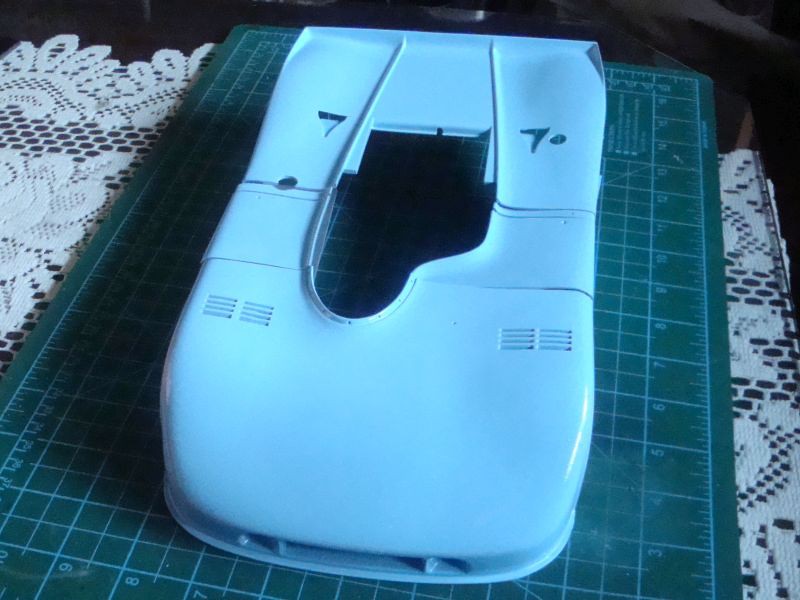 640 |
|
|
|
Post by Steve Zuleski on Aug 26, 2024 13:36:30 GMT -5
Well, since I can't perform an in-depth inspection of the paint works, coming from a rattle can that looks mighty fine from here. That color looks dead on to me.
|
|
rondriaan
Full Member
   Aug '24 Showcased Build Awarded
Member since: March 2012
Posts: 650
Mar 27, 2012 2:07:40 GMT -5
Mar 27, 2012 2:07:40 GMT -5
|
Post by rondriaan on Aug 26, 2024 16:06:52 GMT -5
Ratle cans can also give a verry good result. Like the color (is it a boy?  looking forward for the rest of the work. |
|
joelw
Full Member
  
Member since: July 2024
Posts: 572 
|
Post by joelw on Aug 26, 2024 20:11:51 GMT -5
Paul,
I just love that picture of Siffert driving the #12. The guy was truly an "animal" and pushed those little 3.0 liter cars way past their limit especially when they ran in an endurance race like Sebring.
I'm finding it not only hard to believe that you can consistently produce those super mile deep gloss finishes with a Tamiya rattle can, but this time with a Rustoleum one, is for me a very humbling experience.
joel
|
|
|
|
Post by kyledehart5 on Aug 27, 2024 5:53:05 GMT -5
I do love a nice rattle can finish. Some of my finest work has come from a spray can. Of course, I only started with the airbrush a year or so ago so the numbers are skewed. lol. Beautiful blue and a great choice. Plenty of time for it to setup in the time since you painted it too. 😂. Loving this build from the past.
|
|
handiabled
Administrator      Apr '23 Showcased Build Awarded
Member since: February 2023
Posts: 4,396  Member is Online
MSC Staff
|
Post by handiabled on Aug 27, 2024 9:10:35 GMT -5
This is coming together fantastic! It looks like you nailed the color perfectly.
|
|
brandonk
Full Member
   Jan '24 Showcased Model Awarded
Member since: May 2023
Posts: 1,266
May 14, 2023 13:45:45 GMT -5
May 14, 2023 13:45:45 GMT -5
|
Post by brandonk on Aug 27, 2024 9:18:44 GMT -5
Excellent paint finish and the color looks Gulf spot on.
|
|
2whl
Full Member
   August '24 MoM Winner
Member since: September 2023
Posts: 445
Sept 10, 2023 12:21:52 GMT -5
Sept 10, 2023 12:21:52 GMT -5
|
Post by 2whl on Aug 27, 2024 10:31:07 GMT -5
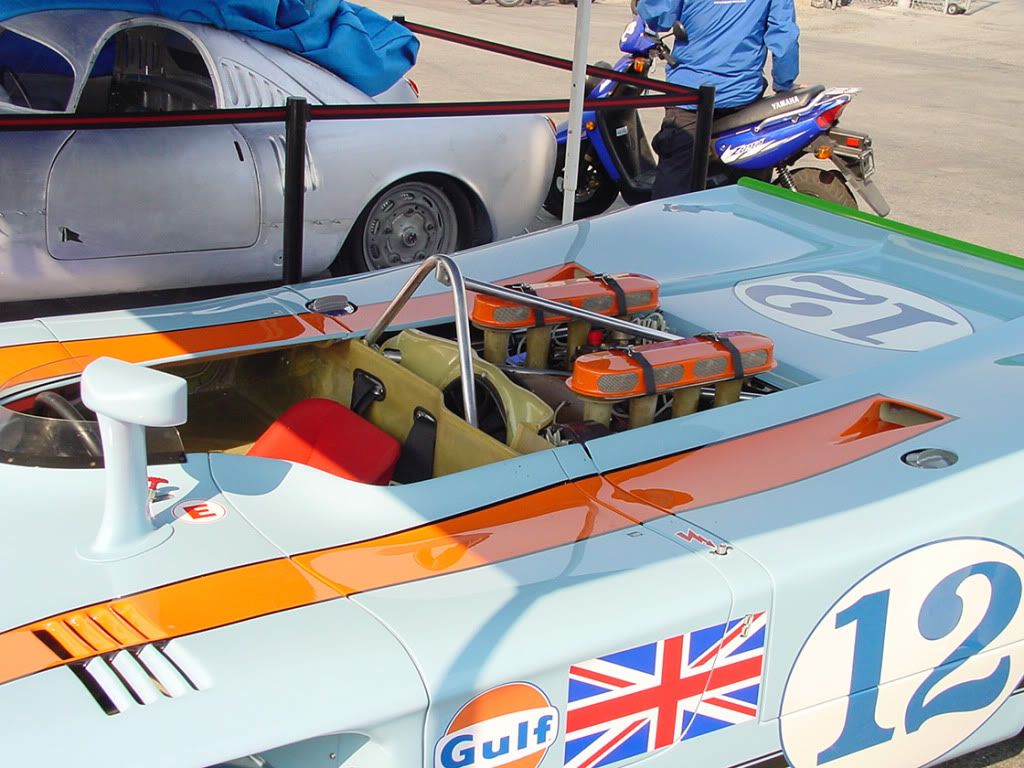 Well, since I can't perform an in-depth inspection of the paint works, coming from a rattle can that looks mighty fine from here. That color looks dead on to me. Thank you Steve. And you're welcome to come down and check it out in person.  Ratle cans can also give a verry good result. Like the color (is it a boy?  looking forward for the rest of the work. Thanks Ron. Rattle cans have been my go-to for years.  Paul, I just love that picture of Siffert driving the #12. The guy was truly an "animal" and pushed those little 3.0 liter cars way past their limit especially when they ran in an endurance race like Sebring. I'm finding it not only hard to believe that you can consistently produce those super mile deep gloss finishes with a Tamiya rattle can, but this time with a Rustoleum one, is for me a very humbling experience. joel Thanks Joel. be it Tamiya, Testor's, or Rustoleum.....a rattle can is just a rattle can. I do love a nice rattle can finish. Some of my finest work has come from a spray can. Of course, I only started with the airbrush a year or so ago so the numbers are skewed. lol. Beautiful blue and a great choice. Plenty of time for it to setup in the time since you painted it too. 😂. Loving this build from the past. Thanks Kyle. I remember during the first of those 4 years, lifting off the cover and being able to smell the paint. This is coming together fantastic! It looks like you nailed the color perfectly. Thanks Brent. A rivet counter would think it's a shade off, but I think it's perfect also. Excellent paint finish and the color looks Gulf spot on. Thanks Brandon. I was browsing through Home Depot one day and when I saw the color I knew it would work for the Gulf blue. I'll have to mix the orange out of something. I started this build log on Saturday and on Sunday(8/18) the decal process was started. There are decals for the vents where the orange stripe crosses over them. So I had to do those first. On the front vents, I did them one at a time, waiting about 12 hours for the decal to set. 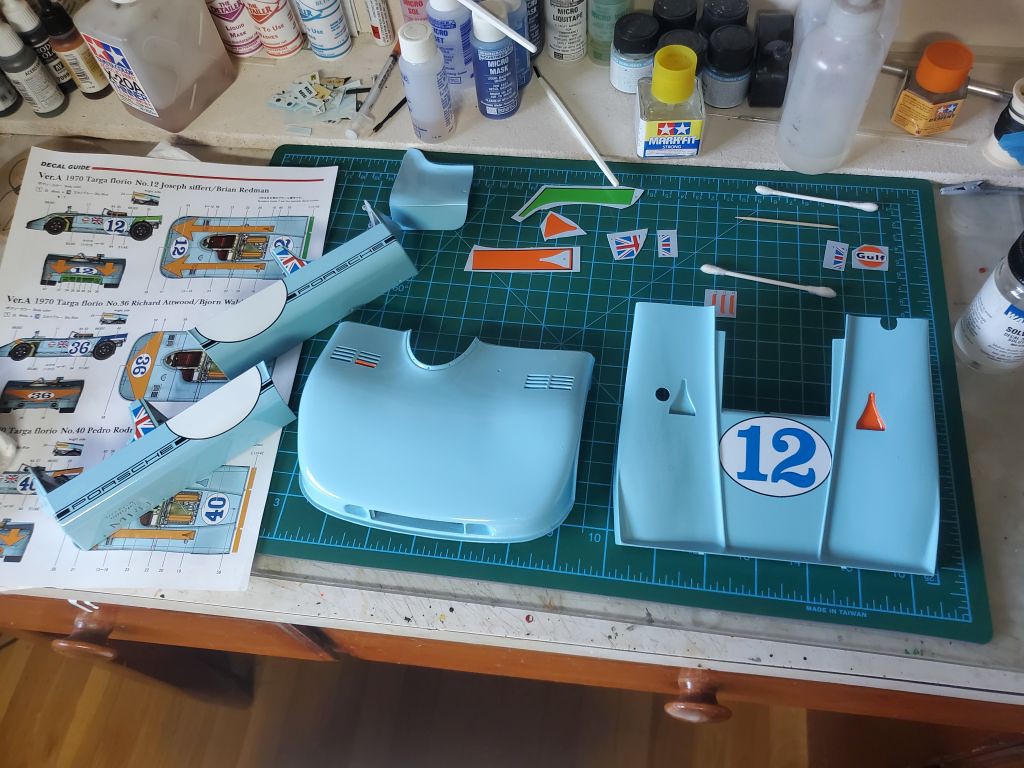 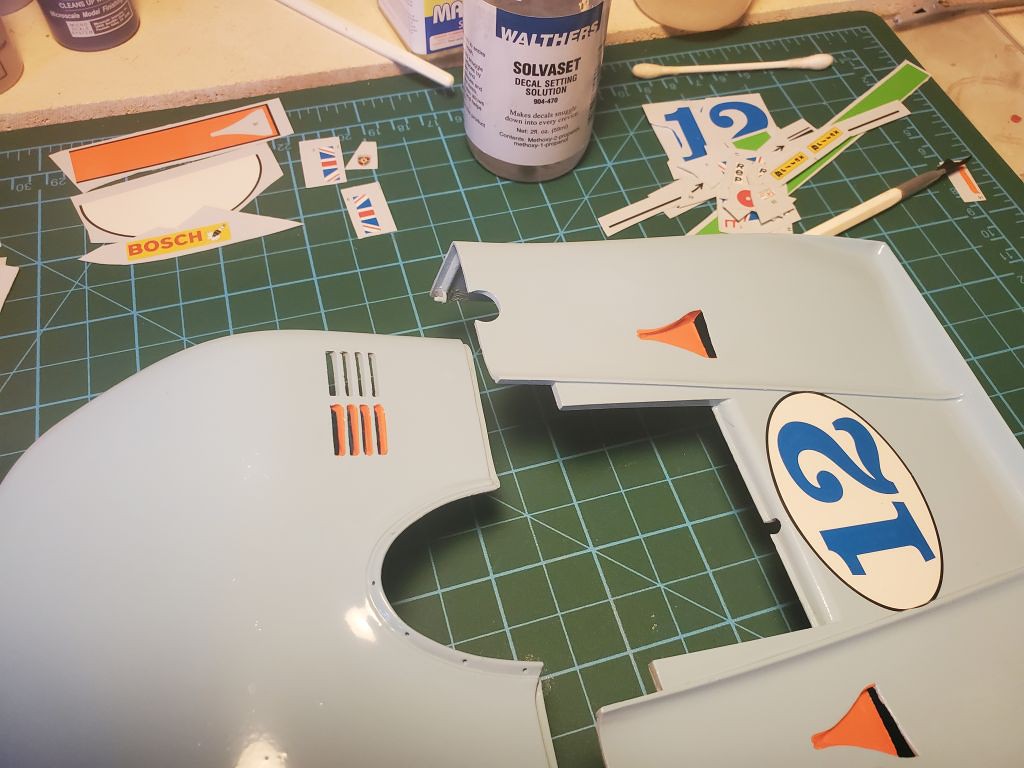 Once that was done, I taped the body together from the underside and lined up the stripes. I started at the back. Did the front next and then filled in the rest. 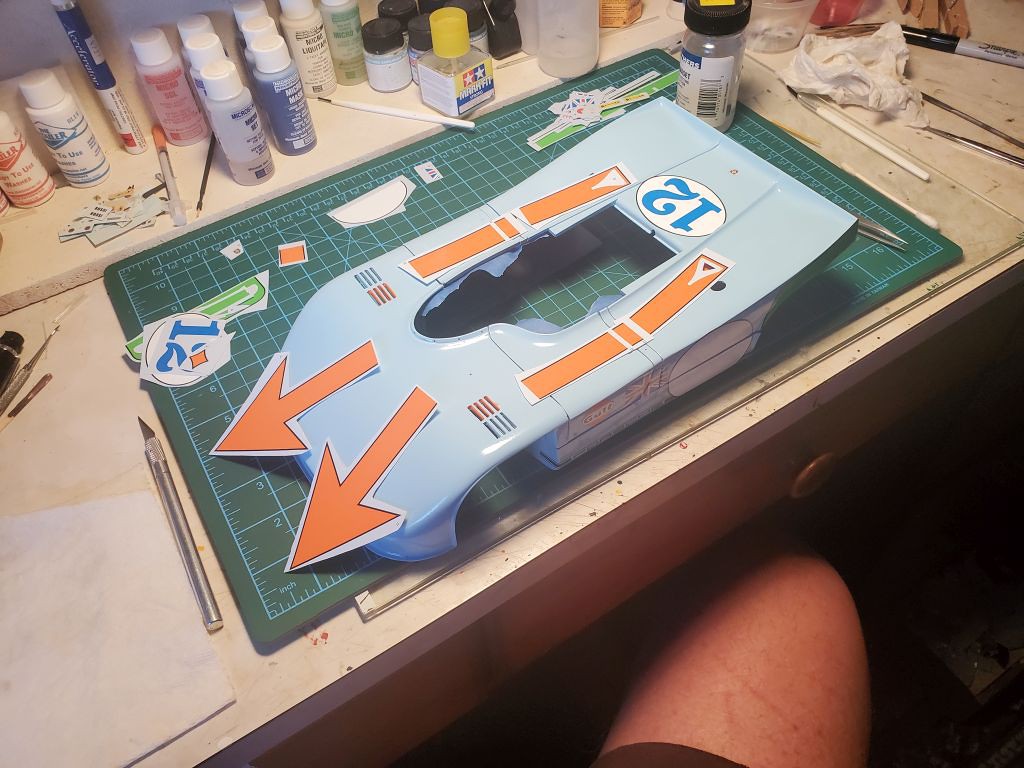 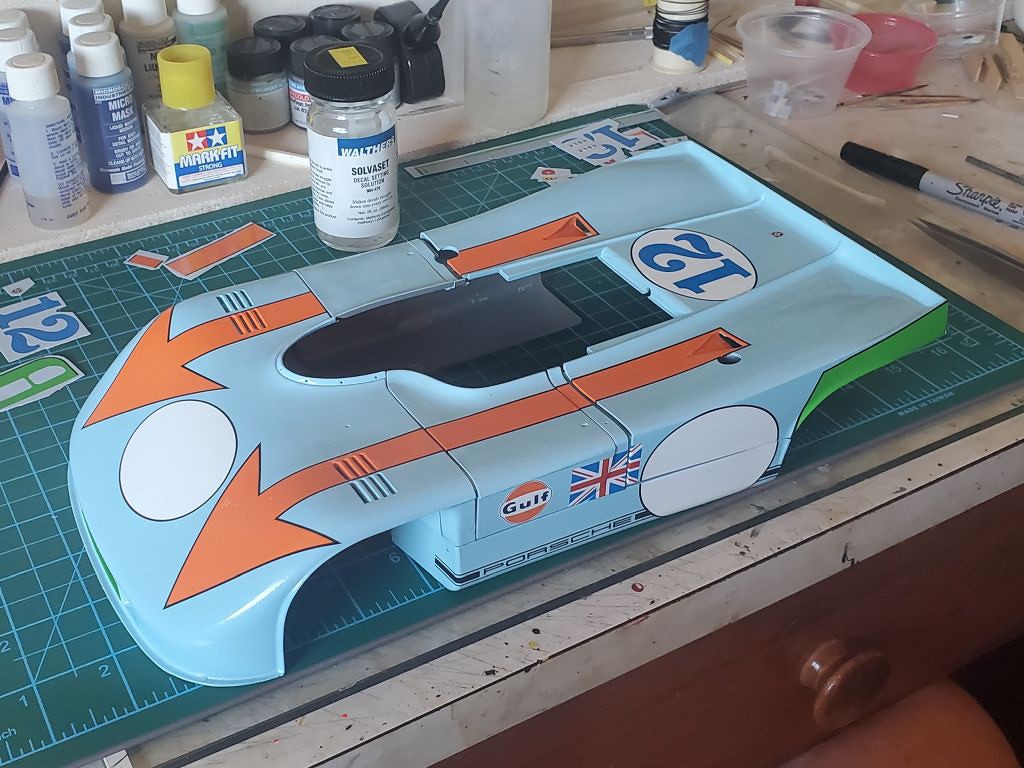 I just got the last couple of decals on yesterday. 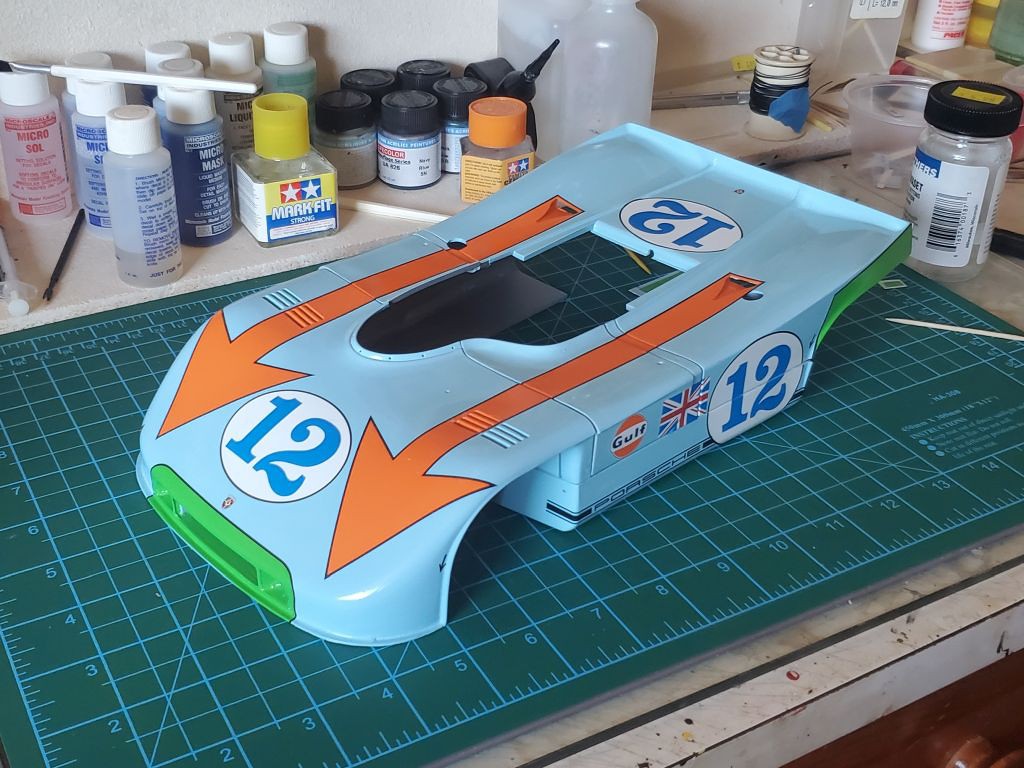 734 |
|
chrissmith
Full Member
   Sept '24 Showcased Model Awarded
Member since: March 2024
Posts: 131
Mar 2, 2024 11:02:56 GMT -5
Mar 2, 2024 11:02:56 GMT -5
|
Post by chrissmith on Aug 27, 2024 13:25:38 GMT -5
Pretty darn nice! Looks excellent, can’t wait to see it on the chassis
|
|
joelw
Full Member
  
Member since: July 2024
Posts: 572 
|
Post by joelw on Aug 27, 2024 15:47:43 GMT -5
Chris,
The decaling is coming out P-E-R-F-E-C-T-L-Y. But I do have one question regarding the front wheel vents where the arrow goes directly over it. Picture #1 shows or so I think it does the slanted parts of the vents in Orange but the body itself is still Blue. A few pictures later the full vent is Orange with the Arrow going right over it. I'm thinking that the decals in 1/12 scale have individual pieces for each slanted section, and then a decal that goes over the vent?
joel
|
|
|
|
2whl
Full Member
   August '24 MoM Winner
Member since: September 2023
Posts: 445
Sept 10, 2023 12:21:52 GMT -5
Sept 10, 2023 12:21:52 GMT -5
|
Post by 2whl on Aug 27, 2024 16:58:29 GMT -5
Pretty darn nice! Looks excellent, can’t wait to see it on the chassis Thanks Chris. Chris, The decaling is coming out P-E-R-F-E-C-T-L-Y. But I do have one question regarding the front wheel vents where the arrow goes directly over it. Picture #1 shows or so I think it does the slanted parts of the vents in Orange but the body itself is still Blue. A few pictures later the full vent is Orange with the Arrow going right over it. I'm thinking that the decals in 1/12 scale have individual pieces for each slanted section, and then a decal that goes over the vent? joel Thanks Joel. And you guessed it. Each slanted section was a decal. Then the big arrow went over it. Once that had set up, I carefully slotted the decal over the vents and used Solvaset to help open up the vents. Excellent job with the decals on this bad boy my friend ... such iconic colors and you nailed the
positioning and they look painted on .. nicely done  Thank you very much Adrian. |
|
joelw
Full Member
  
Member since: July 2024
Posts: 572 
|
Post by joelw on Aug 27, 2024 18:47:38 GMT -5
Paul,
Thanks for the decal info. It's always the end results that count, and those vents look perfect.
joel
|
|
handiabled
Administrator      Apr '23 Showcased Build Awarded
Member since: February 2023
Posts: 4,396  Member is Online
MSC Staff
|
Post by handiabled on Aug 28, 2024 1:51:09 GMT -5
For all the complex curves and angles and alignments you had to apply the decals on they all look absolutely perfect!!  |
|
|
|
Post by kyledehart5 on Aug 28, 2024 2:40:14 GMT -5
What a beauty. Your decal work is exceptional. The body looks fantastic.
|
|
|
|
2whl
Full Member
   August '24 MoM Winner
Member since: September 2023
Posts: 445
Sept 10, 2023 12:21:52 GMT -5
Sept 10, 2023 12:21:52 GMT -5
|
Post by 2whl on Sept 2, 2024 14:36:27 GMT -5
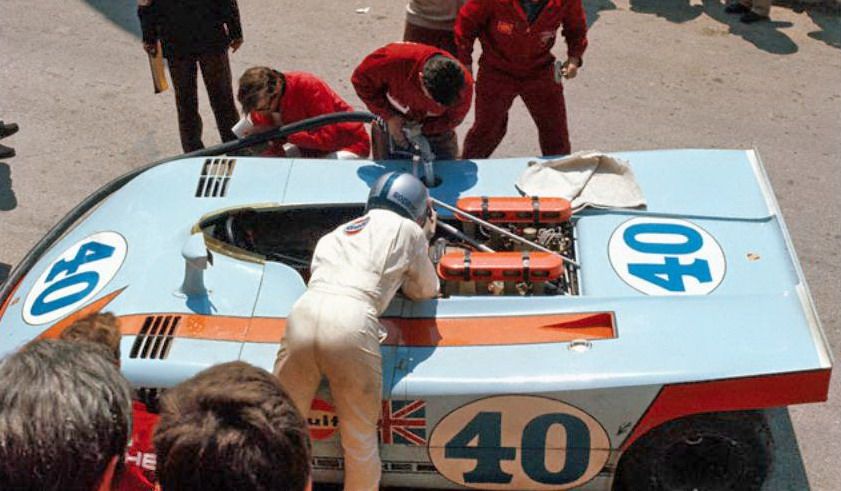
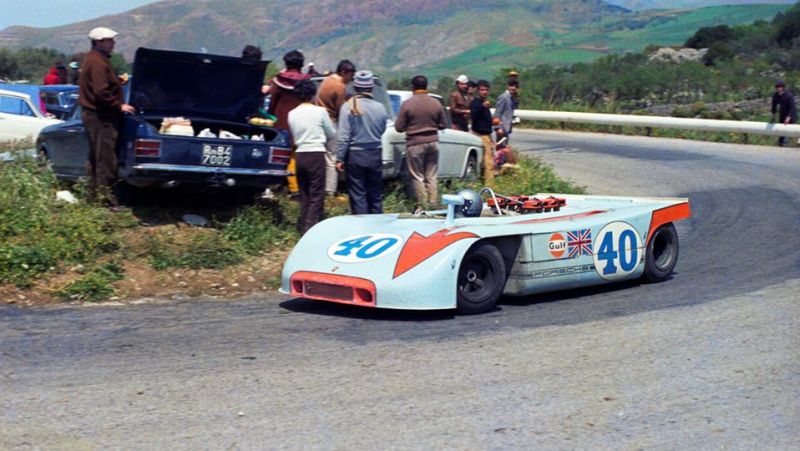 For all the complex curves and angles and alignments you had to apply the decals on they all look absolutely perfect!!  Thank you Brent What a beauty. Your decal work is exceptional. The body looks fantastic. Thanks Kyle. I just discovered this thread and I'm completely blown away by the incredible work on display here!  It's so great and the detail is amazing, and on a favorite race car of mine! 😁 Here's one of my favorite race photos of all; Brian Redman in the 908 at the Nürburgring, 1970, all four wheels above ground: It's so great and the detail is amazing, and on a favorite race car of mine! 😁 Here's one of my favorite race photos of all; Brian Redman in the 908 at the Nürburgring, 1970, all four wheels above ground: Thanks Gary. The next step was a very nervous one for me. The front attaches to the rear only at the lower edge of the front floor. The resulting assembly was very flexy and I could see something getting broken. So I got out a piece of the styrofoam I use for painting sticks, and used it to set the chassis on until it felt more solid. Once the side pods went on, it felt better. 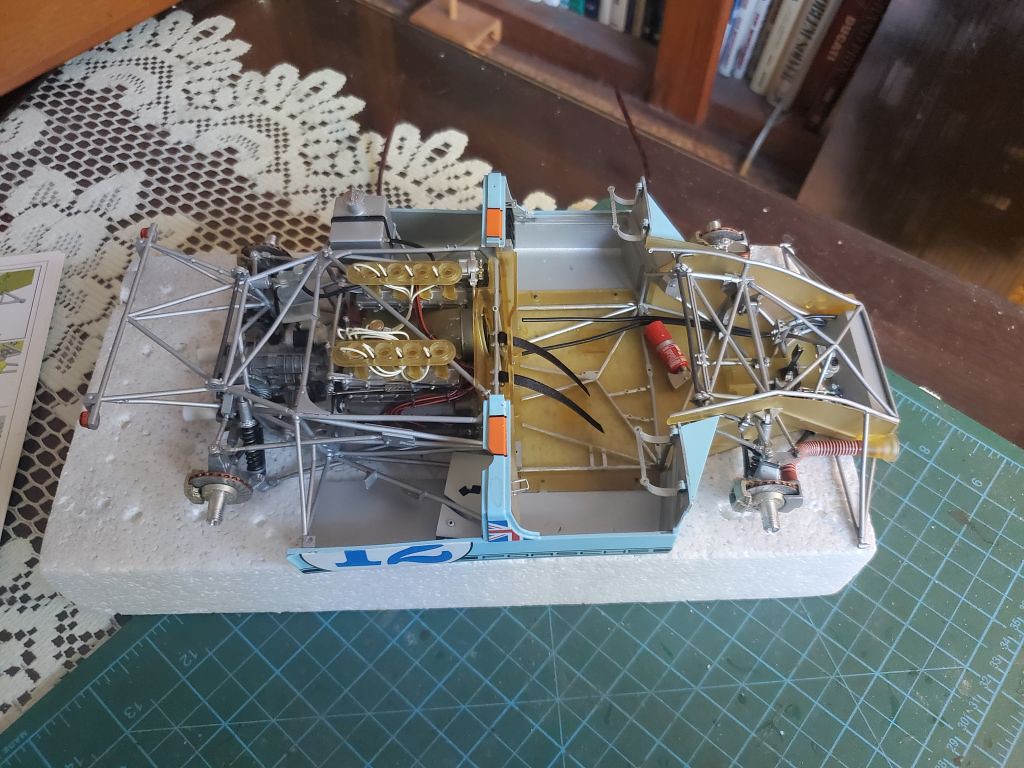 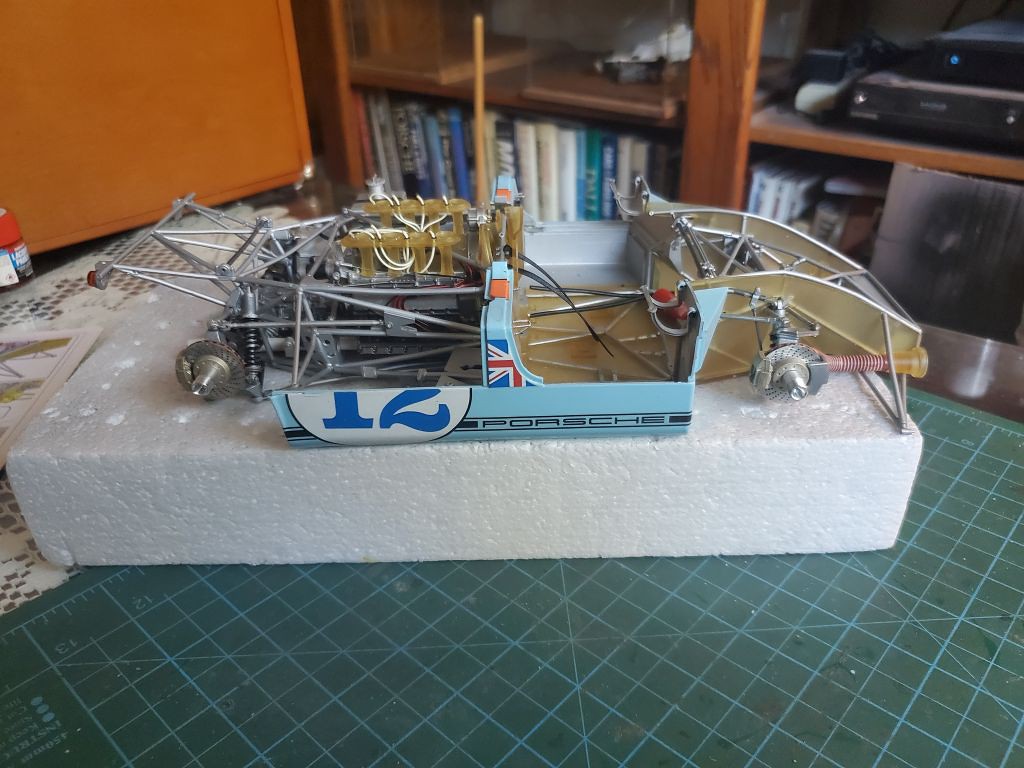 Then I found out that the hole for the filler to the oil tank was too small. I carefully enlarged the hole from the bottom so I wouldn't flake the decal. Then I used a round file to finish off the hole. The rear deck now fits like it should. 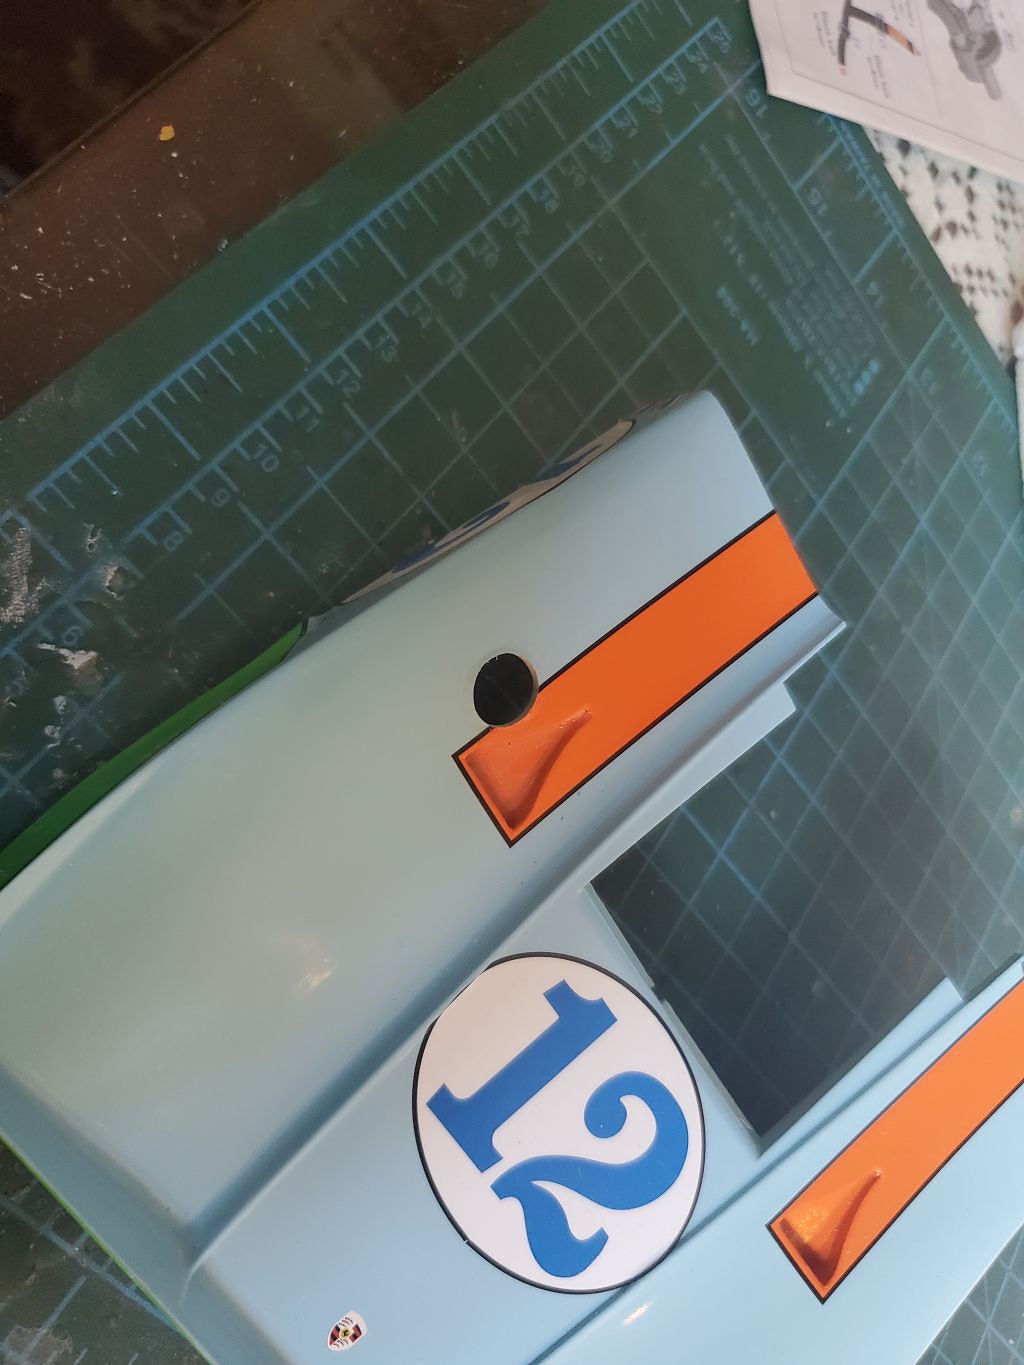 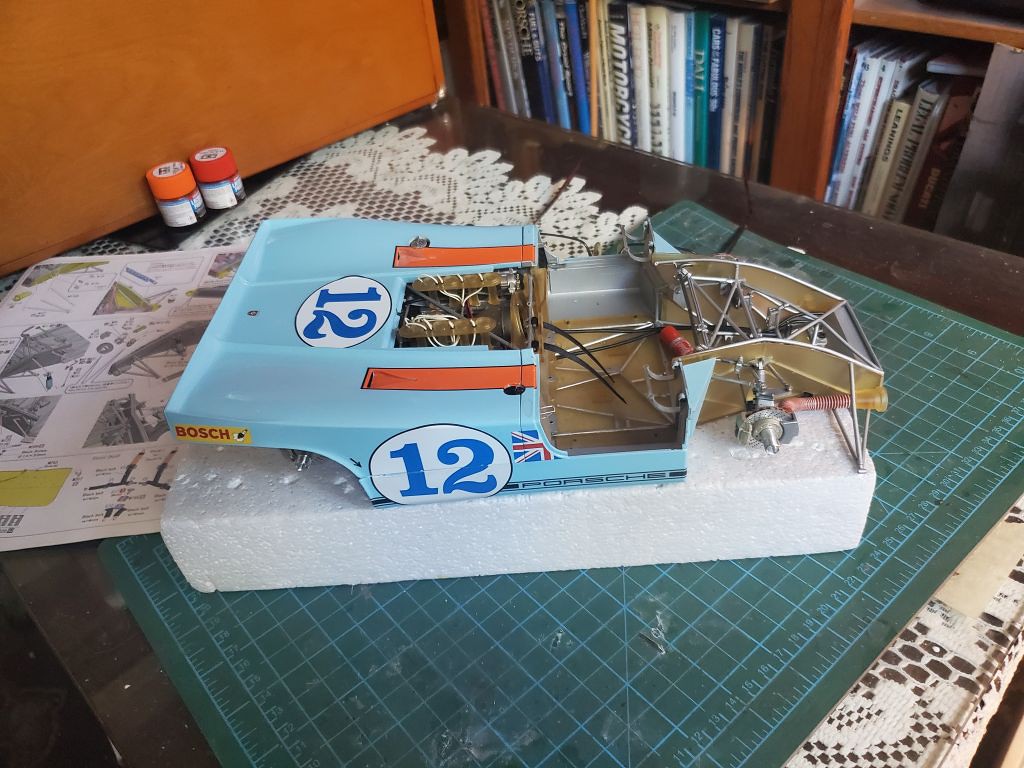 Since I had the deck lid in place, I put the front on and added the doors. 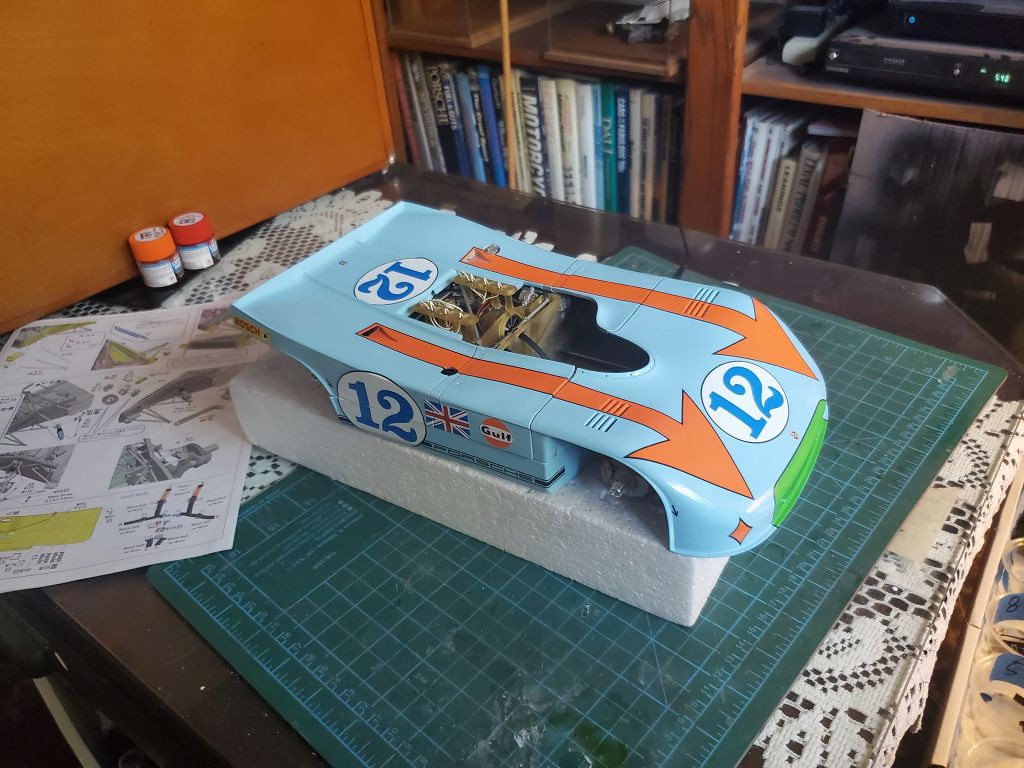 I have a question for those following this build. When I painted the bodywork, I forgot to paint the mirror. So I got out the paint I had mixed up for the wheels to the Ferrari 158 and tried it out on the mirror. I can't decide if it's too dark or not. from some angles it looks good. then when I look again, I think it's too dark. Thoughts? 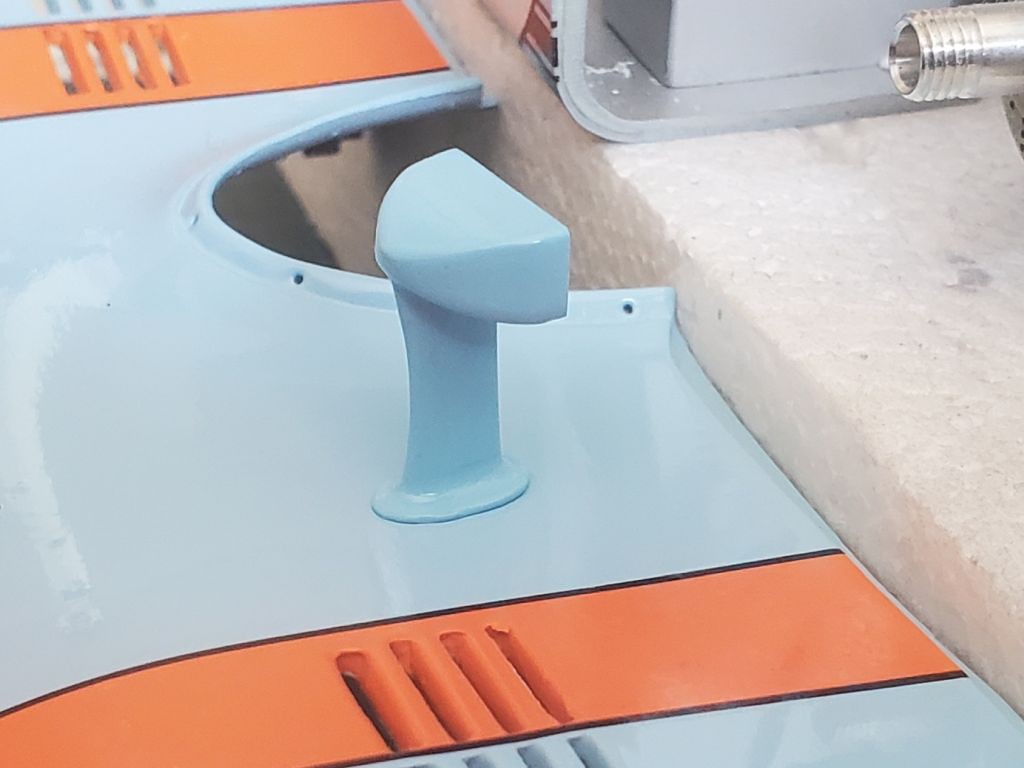 908 |
|
rondriaan
Full Member
   Aug '24 Showcased Build Awarded
Member since: March 2012
Posts: 650
Mar 27, 2012 2:07:40 GMT -5
Mar 27, 2012 2:07:40 GMT -5
|
Post by rondriaan on Sept 2, 2024 15:49:25 GMT -5
Did you use the same primer as the body for the mirror? Maybe used a new spray can there are several things that can affect the color.
Nice advances to the model
|
|
joelw
Full Member
  
Member since: July 2024
Posts: 572 
|
Post by joelw on Sept 2, 2024 16:42:12 GMT -5
Paul,
With my limited eyesight the mirror just about matches the body work, so it's a go for me. I went back and looked a few of your posted pictures of real 908s. some of the mirrors look dead on, and some don't. The odds of every mirror being painted at the same time as the car it ends up on is pretty slim, plus I'm sure that replacement mirrors were needed all the time.
I was kind of surprised that the front and rear sections are only joined along the bottom edge of the front section. With the side pods if stiffened up enough, but is that how the real car sections are joined? The body flex would have been unreal to say the least.
Nice job on enlarging the hole for the gas cap. The decal still looks perfect.
joel
|
|
|
|
Post by Steve Zuleski on Sept 2, 2024 18:44:16 GMT -5
It's a very minute tad darker, but won't be noticeable, imo. Great job on the hole too, btw.
|
|
bakster
Full Member
  
Member since: August 2024
Posts: 194
Aug 6, 2024 10:05:09 GMT -5
Aug 6, 2024 10:05:09 GMT -5
|
Post by bakster on Sept 2, 2024 19:08:46 GMT -5
Looks awesome…
|
|
|
|
Post by kyledehart5 on Sept 2, 2024 21:30:24 GMT -5
Another fantastic update. Great idea setting it flat on the styrofoam. That seems to have worked nicely. And an awesome job working around the hole size issue. As for your mirror I think you’re at the very least close enough. It’s hard for me to tell the difference at all. Plus, it’s a race car. Replacement mirror is bound to happen at some point. I think it’s all coming together great!
|
|
|
|
Post by project510 on Sept 2, 2024 21:34:33 GMT -5
Man, what an amazing kit. This might be my favorite so far out all your builds. Excellent job on the livery. This is going to look fantastic on display.
|
|
handiabled
Administrator      Apr '23 Showcased Build Awarded
Member since: February 2023
Posts: 4,396  Member is Online
MSC Staff
|
Post by handiabled on Sept 3, 2024 8:57:36 GMT -5
Simply outstanding with the body on! The mirror might be a tad darker? I guess it boils down to if your happy with it. It certainly looks darn close to me.
|
|
2whl
Full Member
   August '24 MoM Winner
Member since: September 2023
Posts: 445
Sept 10, 2023 12:21:52 GMT -5
Sept 10, 2023 12:21:52 GMT -5
|
Post by 2whl on Sept 3, 2024 11:41:49 GMT -5
 Did you use the same primer as the body for the mirror? Maybe used a new spray can there are several things that can affect the color. Nice advances to the model Ron, I used the same primer. But the color on the body is Rustoleum enamel, while the mirror is Tamiya LP. Paul, With my limited eyesight the mirror just about matches the body work, so it's a go for me. I went back and looked a few of your posted pictures of real 908s. some of the mirrors look dead on, and some don't. The odds of every mirror being painted at the same time as the car it ends up on is pretty slim, plus I'm sure that replacement mirrors were needed all the time. I was kind of surprised that the front and rear sections are only joined along the bottom edge of the front section. With the side pods if stiffened up enough, but is that how the real car sections are joined? The body flex would have been unreal to say the least. Nice job on enlarging the hole for the gas cap. The decal still looks perfect. joel Joel, here is a computer rendering of the chassis. You can see the tubes around the driver's area. In the next picture is the kit parts I am fitting up before I glue them in. It's only the kit that was joined at the bottom only. The side pods did stiffen it up a bit. And It seems once I have the parts in the side pods glued in, it should stiffen it even more. 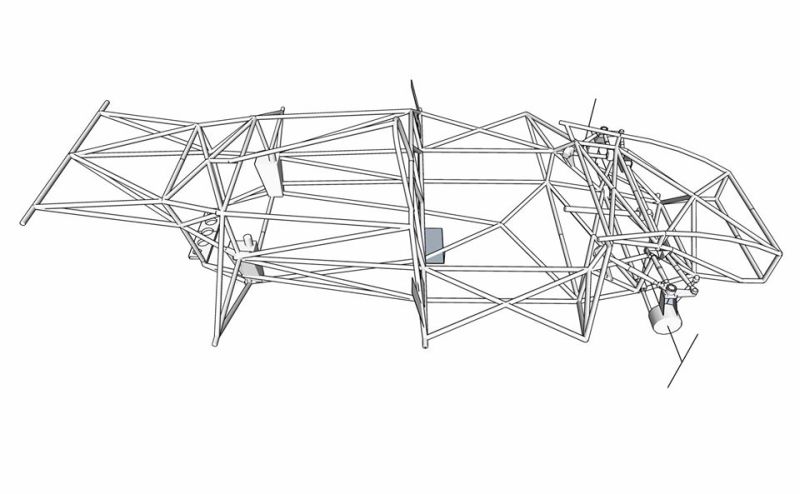 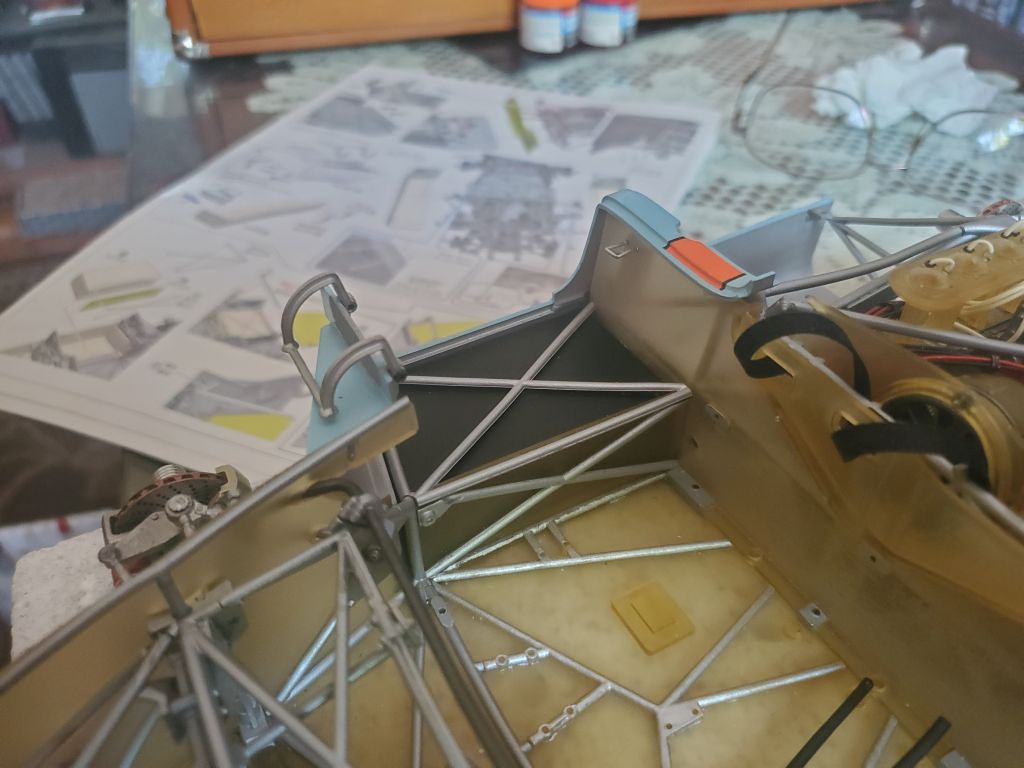 It's a very minute tad darker, but won't be noticeable, imo. Great job on the hole too, btw. Thanks Steve. Thats' what I thought. It's just a tad darker. Thank you Steve Another fantastic update. Great idea setting it flat on the styrofoam. That seems to have worked nicely. And an awesome job working around the hole size issue. As for your mirror I think you’re at the very least close enough. It’s hard for me to tell the difference at all. Plus, it’s a race car. Replacement mirror is bound to happen at some point. I think it’s all coming together great! Thanks Kyle. When I bolted the floor on without the side pods, I knew I would have to do something to stabilize the assembly. Man, what an amazing kit. This might be my favorite so far out all your builds. Excellent job on the livery. This is going to look fantastic on display. Thanks James. This is one of my favorite race cars. Probably because it looks like an absolute blast to drive. LOL I can only dream... Simply outstanding with the body on! The mirror might be a tad darker? I guess it boils down to if your happy with it. It certainly looks darn close to me. Thanks Brent. When I first sprayed the mirror, I put it aside to dry. Then I checked on it after 3-4 hours, figuring it was hardened up. But when I took it off of the paint stick, I left a fingerprint impression in the paint. I decided to leave it over-nite, then sand it smooth the next day. Then I would shoot another coat of light blue. And since I thought it was too dark, I added some more white to my custom mix. But when I got back to it, the fingerprint had smoothed out. Now it's just a choice between leaving it or shooting a lighter coat. 1017 |
|
joelw
Full Member
  
Member since: July 2024
Posts: 572 
|
Post by joelw on Sept 3, 2024 13:04:06 GMT -5
Paul,
Now it makes more sense that the bottom only joining is the kit and not the real car.
joel
|
|
|
|
Post by 406 Silverado on Sept 3, 2024 14:40:48 GMT -5
For one, those decals that you applied one at a time over the vents is just nuts!!  Secondly the amount of detail work that has gone into this thing is pretty dang amazing as is your efforts in keeping everything together in the assembly process. As far as the mirrors go, it looks a little off but certainly not to the point that it's a deal breaker. This is one heckuva build Paul and your work / efforts on this are to be commended in every way. |
|