|
|
Post by deafpanzer on Feb 7, 2013 22:32:17 GMT -5
Holy cow! Nice WW!!! It definitely saw a lot of battle for sure...
|
|
|
|
Post by 406 Silverado on Feb 7, 2013 22:44:48 GMT -5
Nice work Oli. Good to see you trying new things. Looks like your getting the hang of this chipping thang.
|
|
|
|
Post by bbd468 on Feb 7, 2013 22:46:31 GMT -5
Hey Oliver, Fantastic job buddy...thats a fine WW ya done. Maybe ill try my hand at it someday soon!  Gary |
|
noll
Full Member
  
Member since: August 2012
Posts: 522
Aug 28, 2012 9:40:11 GMT -5
Aug 28, 2012 9:40:11 GMT -5
|
Post by noll on Feb 8, 2013 17:20:36 GMT -5
Thanks everyone for your comments and support  . I've now added a heavy dot filter for "grime". Pics: 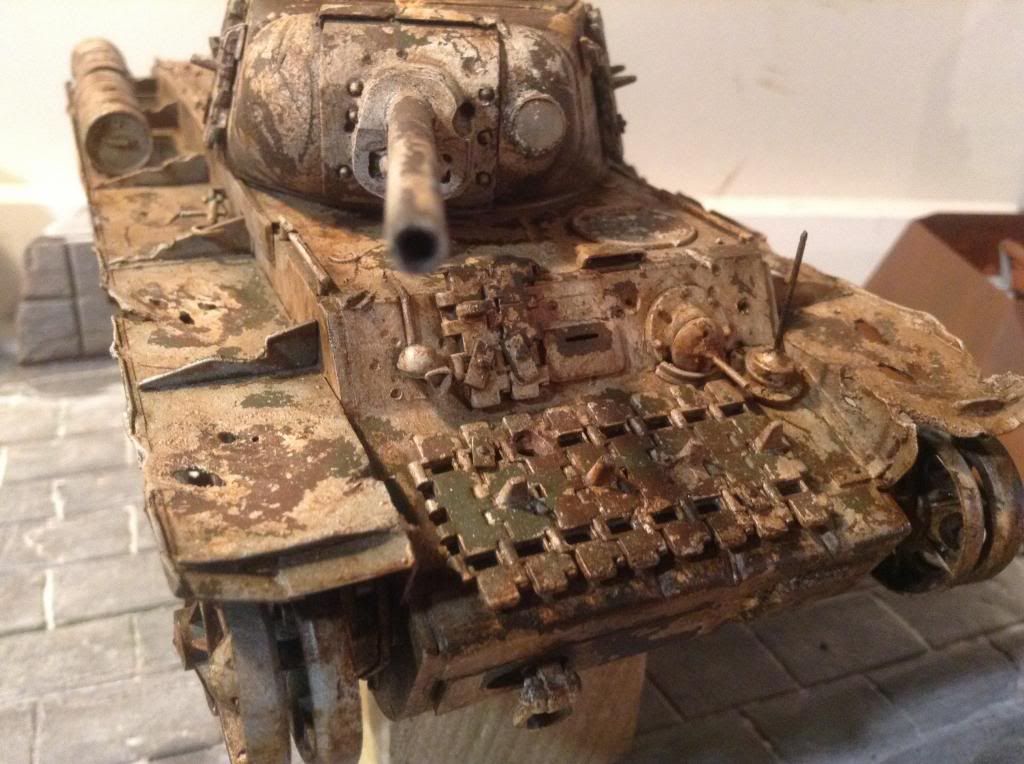 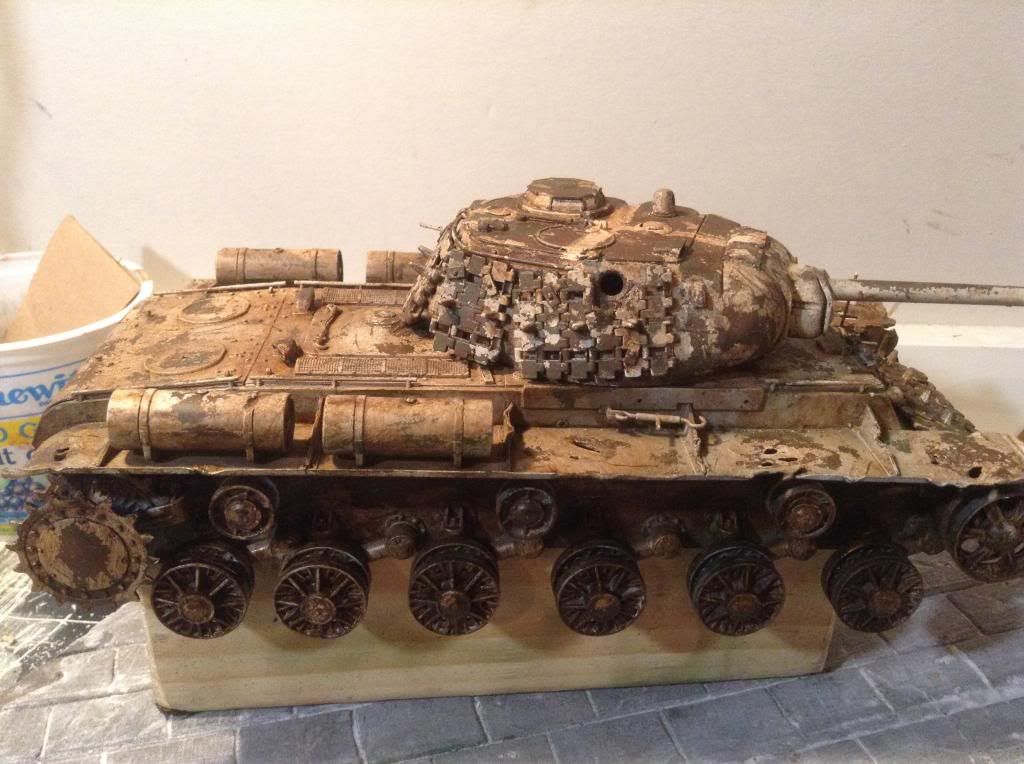 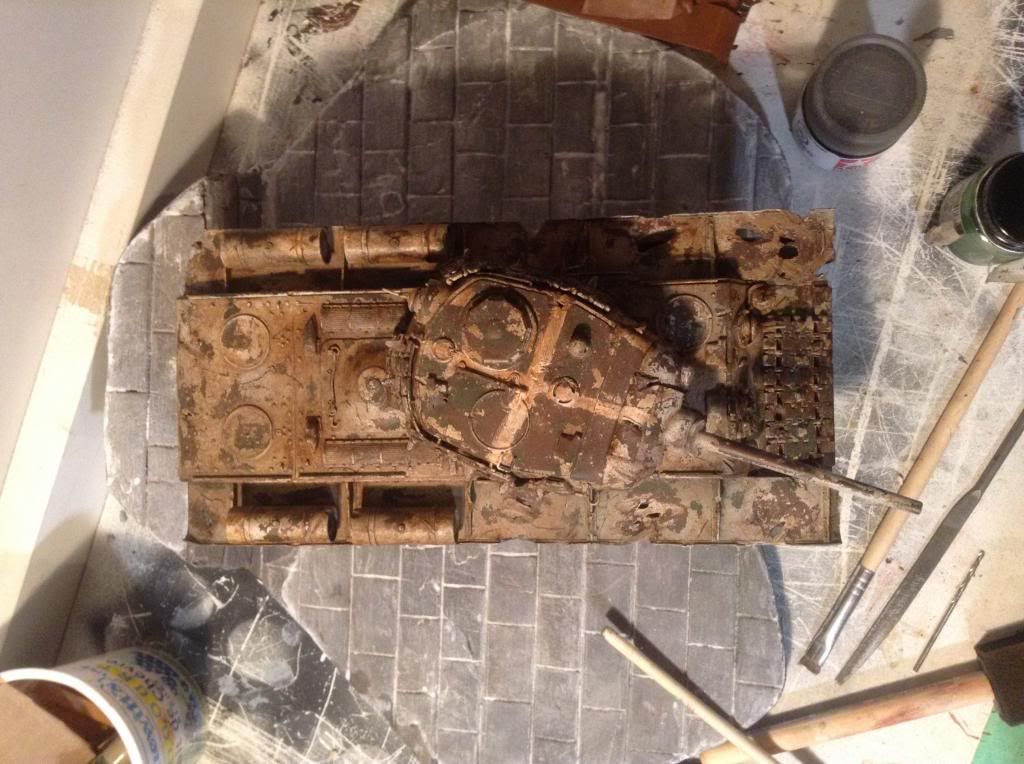 Also added a dirty wash to the tracks: 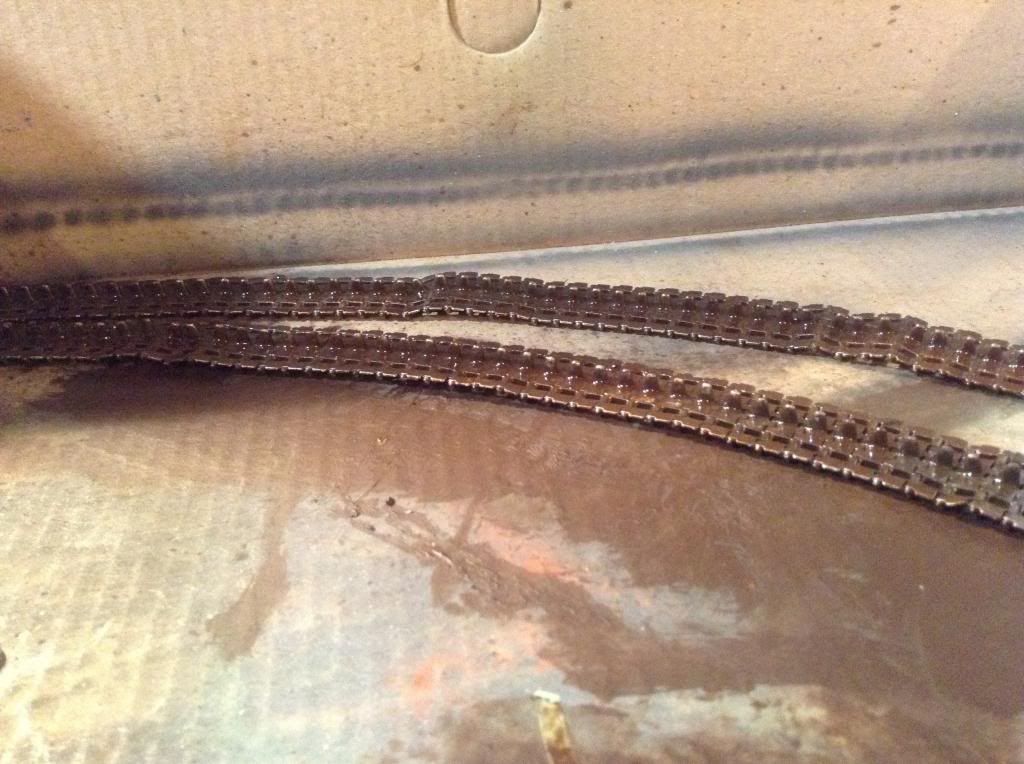 Thanks for looking! |
|
noll
Full Member
  
Member since: August 2012
Posts: 522
Aug 28, 2012 9:40:11 GMT -5
Aug 28, 2012 9:40:11 GMT -5
|
Post by noll on Feb 9, 2013 16:56:09 GMT -5
Thanks, dicky  . I think I've finished the tank (can't think of anything else to add). Next up is the base - I will need to weather it to the same griminess as the tank. Pics of KV-1S: 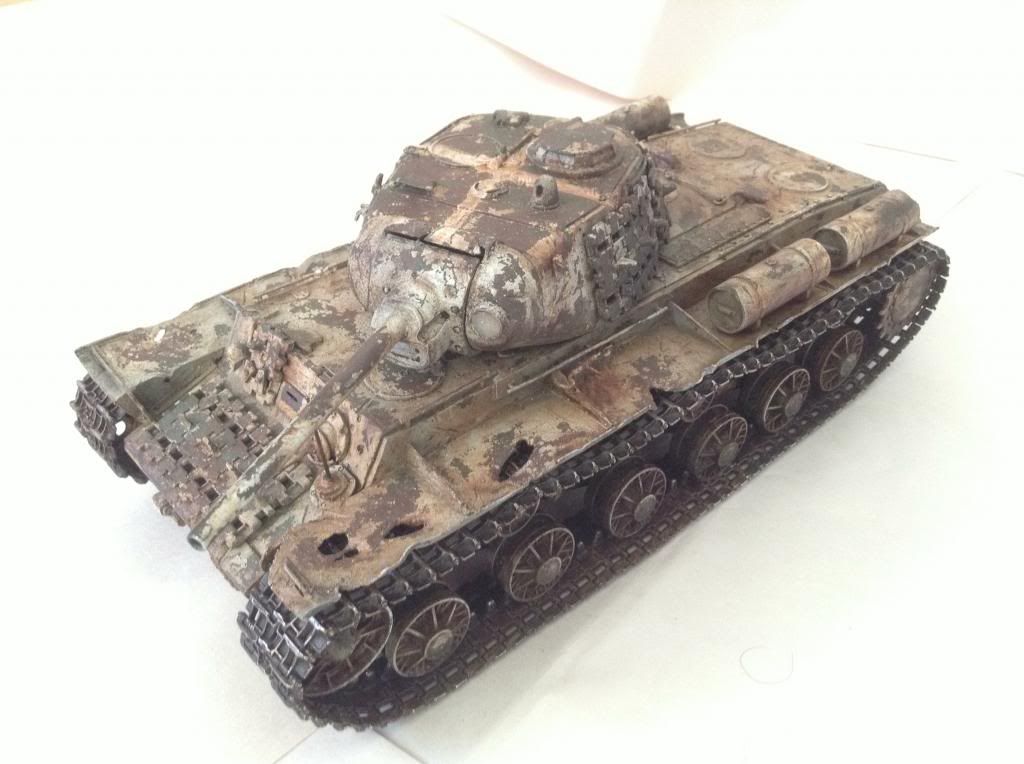 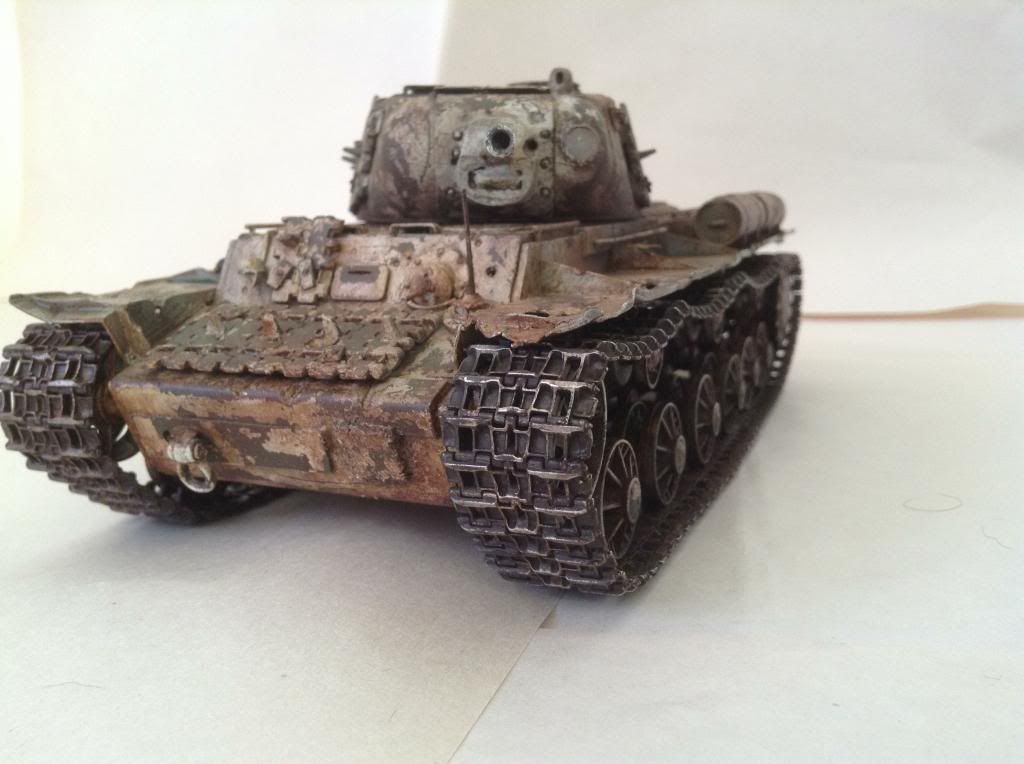 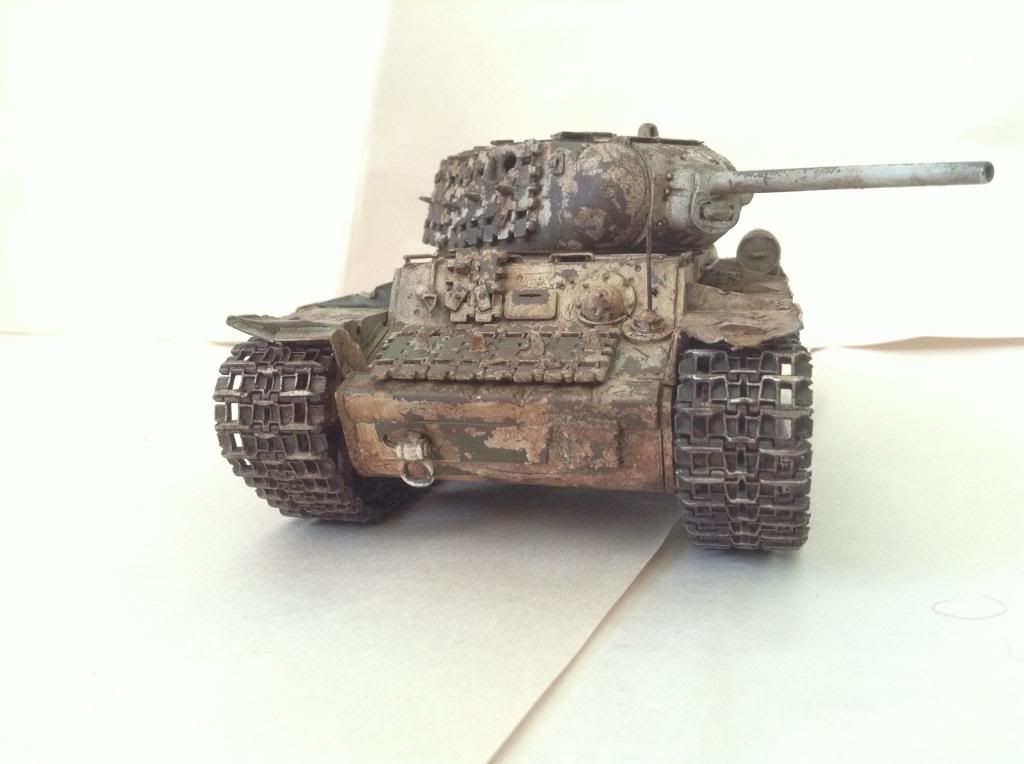 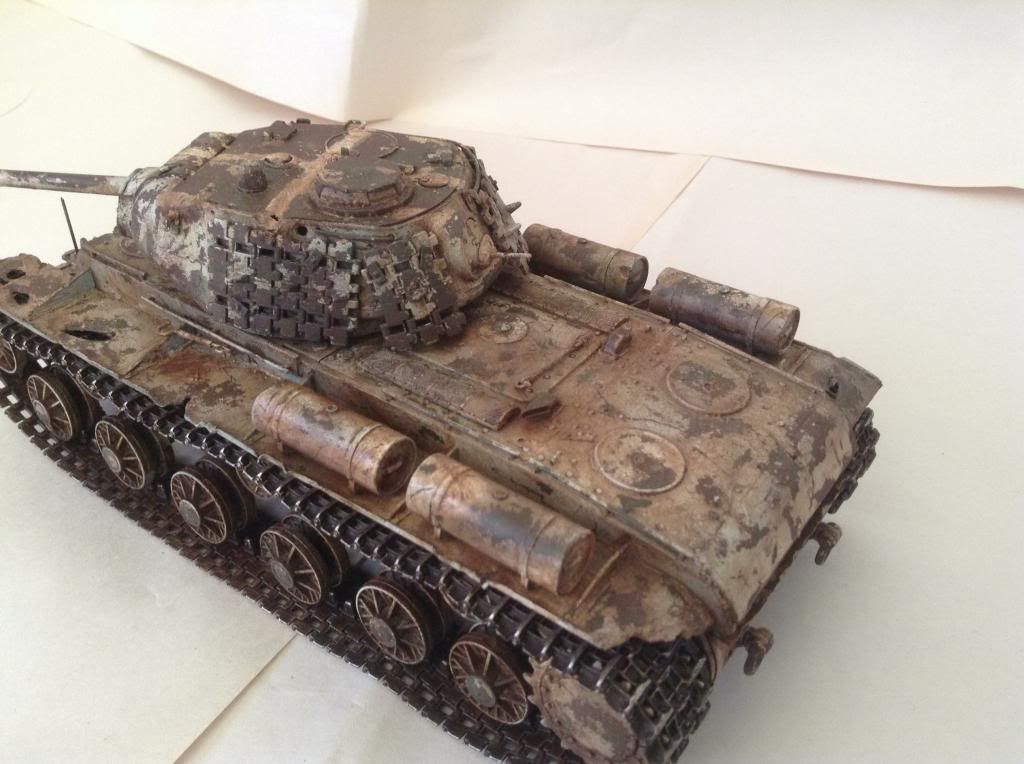 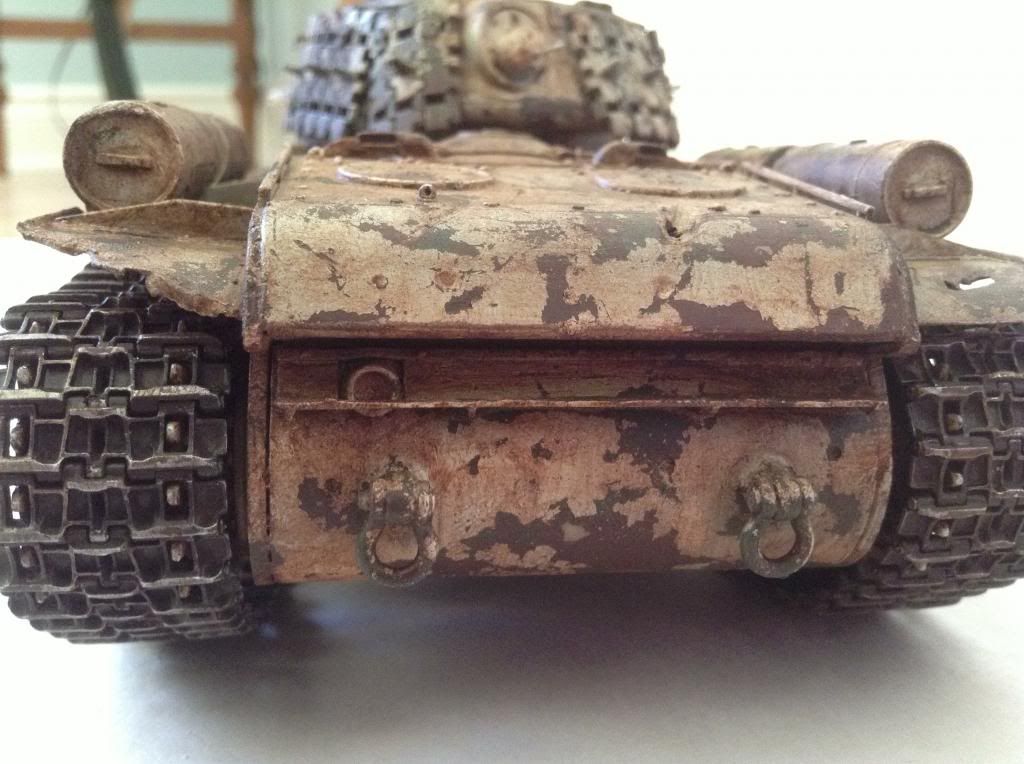 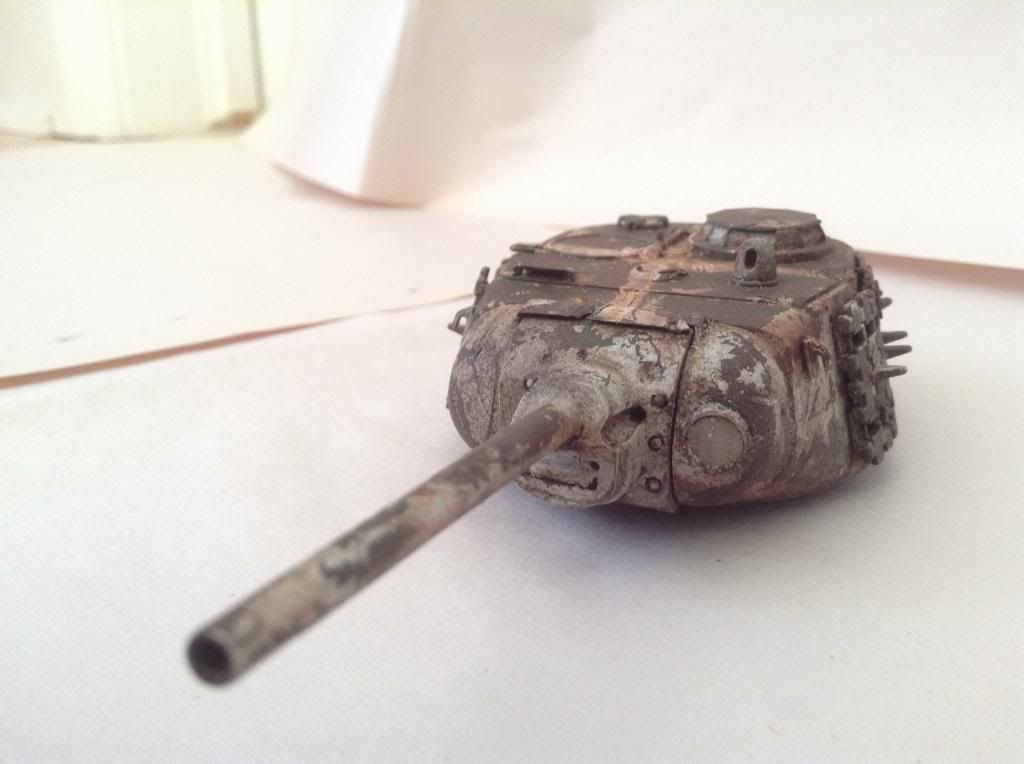 As always, thanks for looking! |
|
|
|
Post by bullardino on Feb 9, 2013 17:07:22 GMT -5
Very nice, noll  |
|
noll
Full Member
  
Member since: August 2012
Posts: 522
Aug 28, 2012 9:40:11 GMT -5
Aug 28, 2012 9:40:11 GMT -5
|
Post by noll on Feb 9, 2013 17:07:33 GMT -5
Thanks  . Heck yeah I'm happy about it LOL. I think that I can safely say that it's the most bad@ss thing I've ever made. Next up is the base - if i only do 1/2 as well as I did on the tank, I'll be satisfied. Thanks for your comments and support  . -Oliver |
|
|
|
Post by 406 Silverado on Feb 9, 2013 17:48:12 GMT -5
Excellent work Oli. You've gained some experience and learned new skills with this one. That means the next one will be even better.
|
|
noll
Full Member
  
Member since: August 2012
Posts: 522
Aug 28, 2012 9:40:11 GMT -5
Aug 28, 2012 9:40:11 GMT -5
|
Post by noll on Feb 9, 2013 19:24:38 GMT -5
Thanks rob  . I've learned a lot for sure - hopefully I can now apply the techniques etc to the base and other models effectively. My photography isn't quite as crappy now as before, so that's a nice bonus  . -Oliver |
|
|
|
Post by deafpanzer on Feb 9, 2013 20:08:06 GMT -5
Superb build! It has to be your best so far... you are only 14 or 15 years old? When you are as old and ugly like us you will be a star...
|
|
noll
Full Member
  
Member since: August 2012
Posts: 522
Aug 28, 2012 9:40:11 GMT -5
Aug 28, 2012 9:40:11 GMT -5
|
Post by noll on Feb 10, 2013 22:43:57 GMT -5
Thanks Andy  . I certainly hope that I'll get better. Not so sure about the "old and ugly" part though LOL  ) I've now started on the dio portion, and have made the basic groundwork as well as a roadsign. Pics: 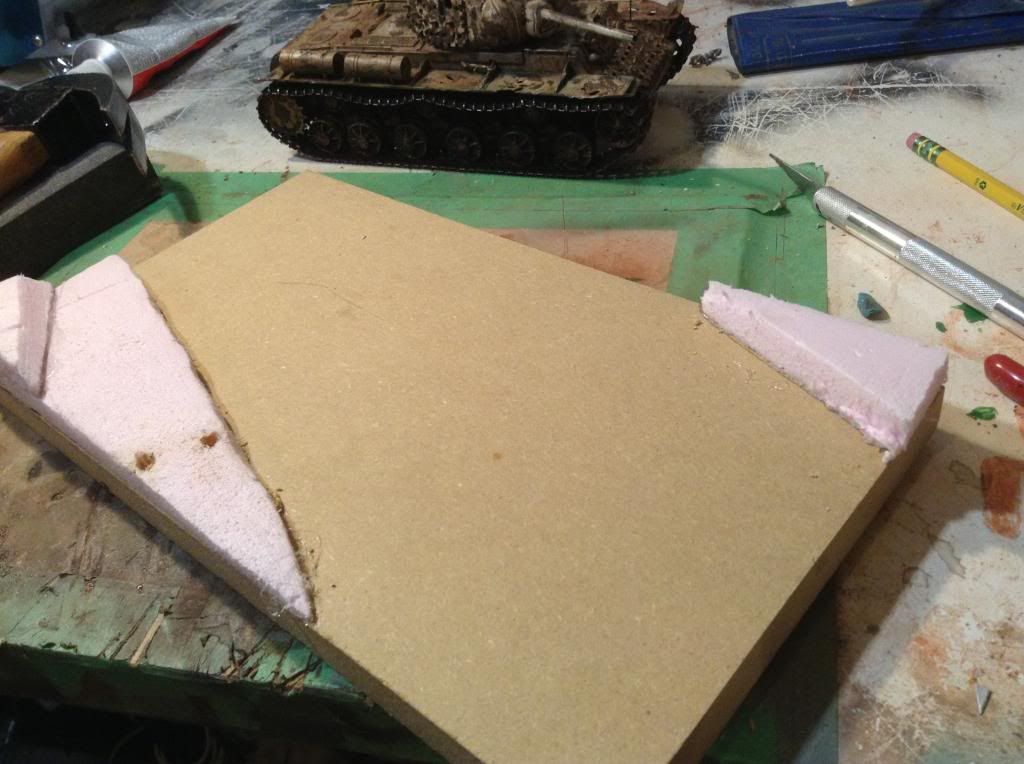 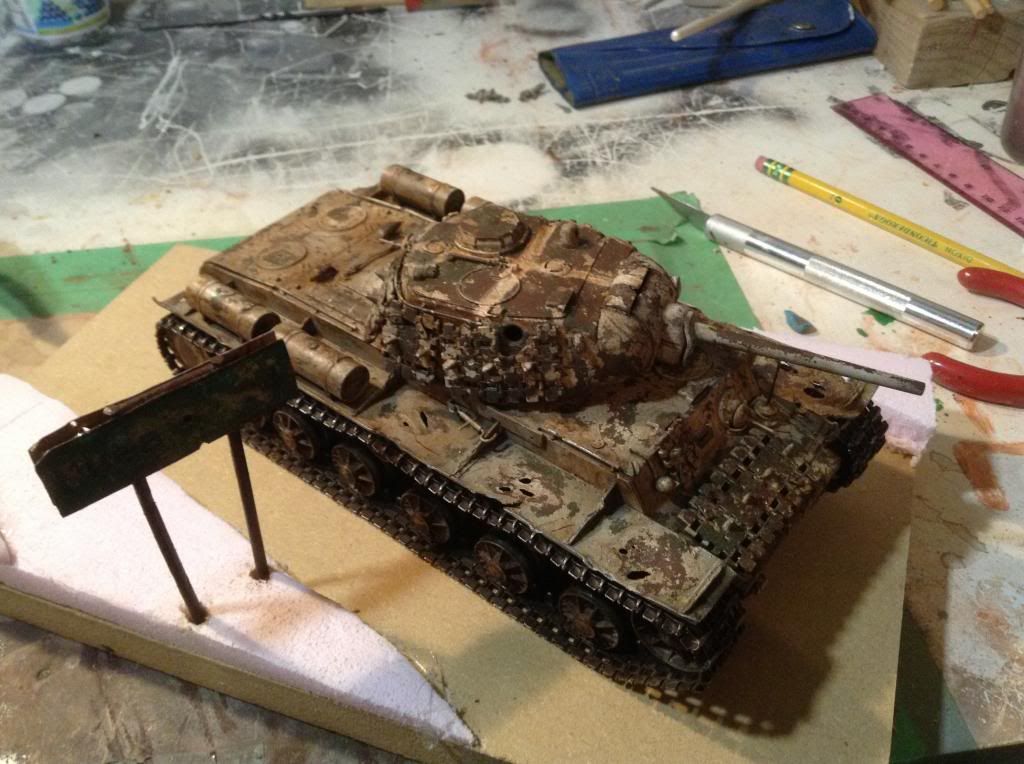 The sign: 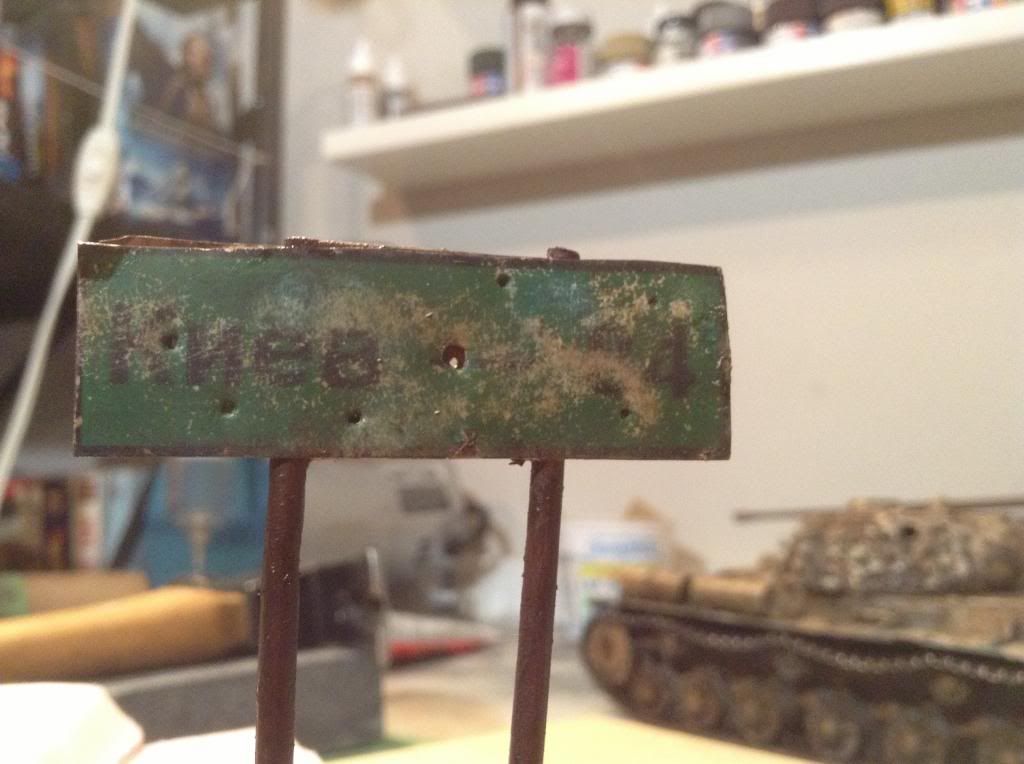 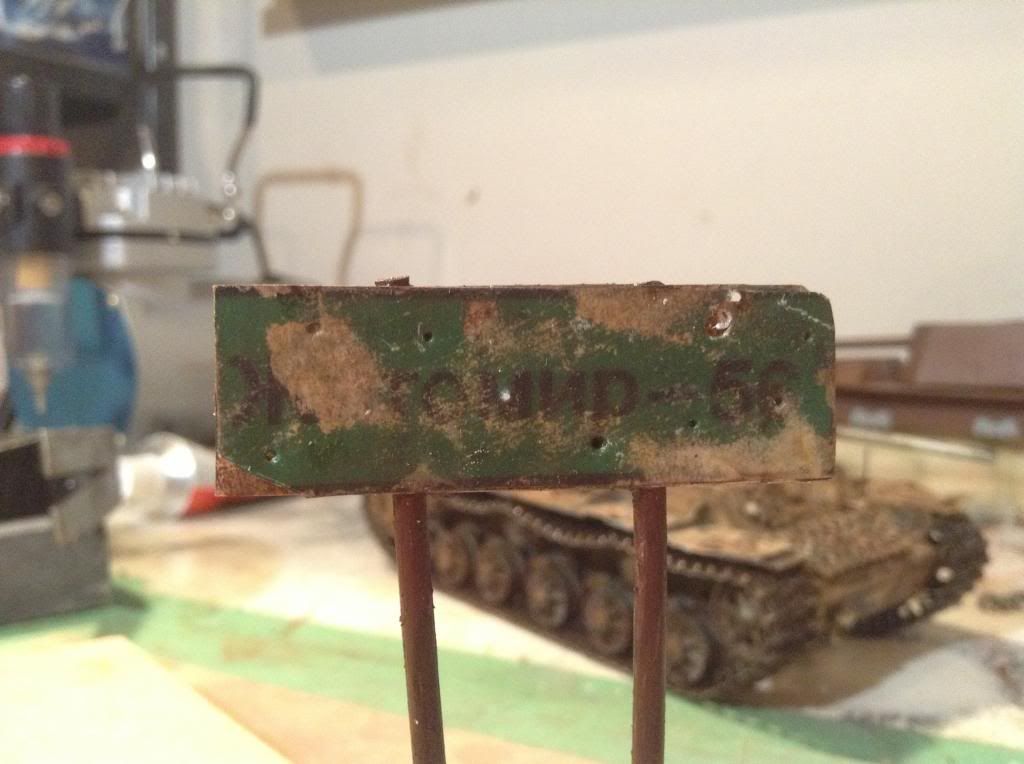 Thanks for looking! -Oliver |
|
|
|
Post by TRM on Feb 10, 2013 22:46:46 GMT -5
Superb build! It has to be your best so far... you are only 14 or 15 years old? When you are as old and ugly like us you will be a star... Don't worry Oliver, he is not that ugly....as long as he keeps the mask on!!  Great job Ollie! Base is off to a great start!! Love the sign, nice touch!!! |
|
|
|
Post by deafpanzer on Feb 11, 2013 0:26:45 GMT -5
Agree with Todd, the other old but not too ugly, about your sign... great work!!! I have to ask a kid... how did you make that sign?!?!? Looks pretty good!!!
|
|
Deleted
Member since: January 1970
Posts: 0
Nov 24, 2024 6:50:47 GMT -5
Nov 24, 2024 6:50:47 GMT -5
|
Post by Deleted on Feb 11, 2013 3:14:24 GMT -5
Great build Oliver, the chipping and weathering are looking real cool  Dio is going to be a great addition to the collection buddy  |
|
noll
Full Member
  
Member since: August 2012
Posts: 522
Aug 28, 2012 9:40:11 GMT -5
Aug 28, 2012 9:40:11 GMT -5
|
Post by noll on Feb 11, 2013 10:06:22 GMT -5
@ TRM - Thanks! I'm happy about how the sign turned out too  . @ Andy - Thanks as well  . For the sign, I cut up an aluminum pop can into a flat strip. I then made up some signs in paint.net (used Google translate for Russian), printed them off, super-glued them to the can, and cut them out. Next, I rubbed them down with sandpaper to expose the metal in places, then gave them a wash of artists oils. I'll post pics below. @ Steve and Space - It's getting there, thanks  Despite my day starting out as a bit of a FUBAR (went to go to school>couldn't find shoes>bus didn't come> got to school, but is closed due to weather>go home), I got some modeling in. I have now added the plaster and painted the sign-poles green: 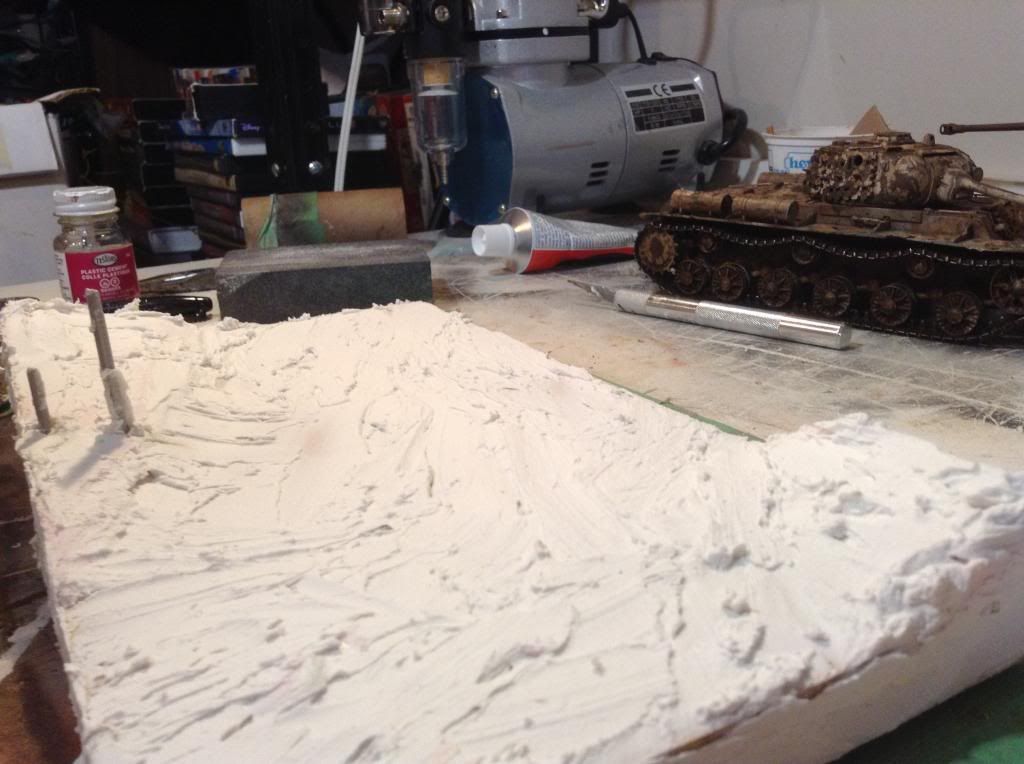 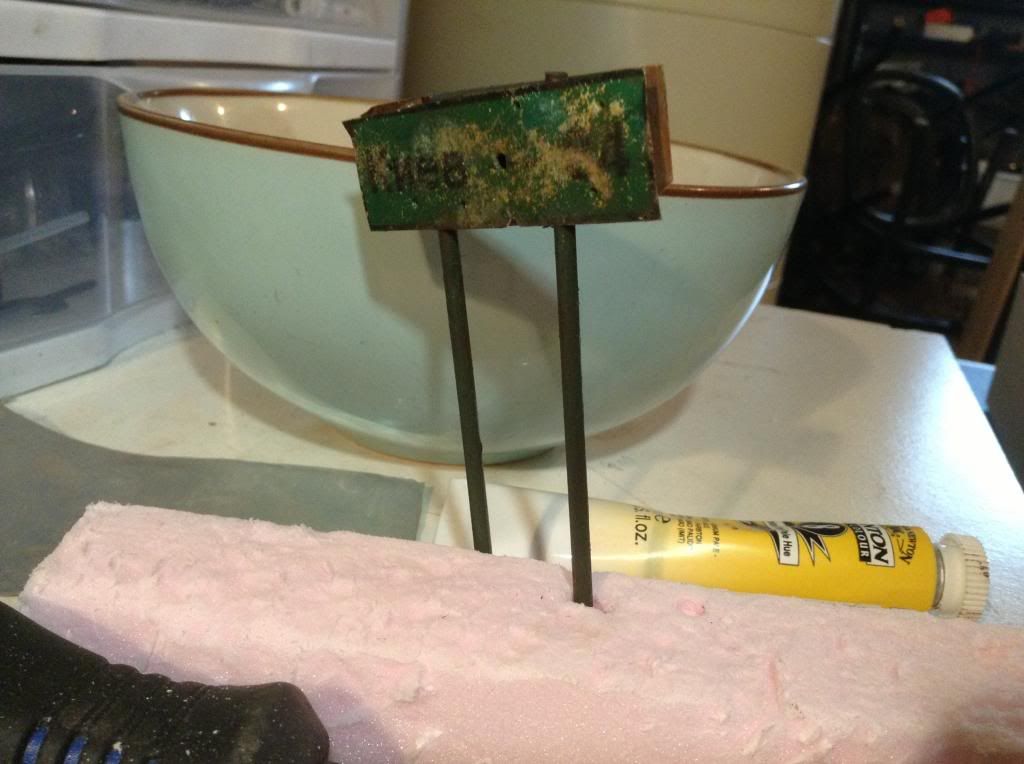 And the dio will be set somewhere between Kiev and Zhytomir; 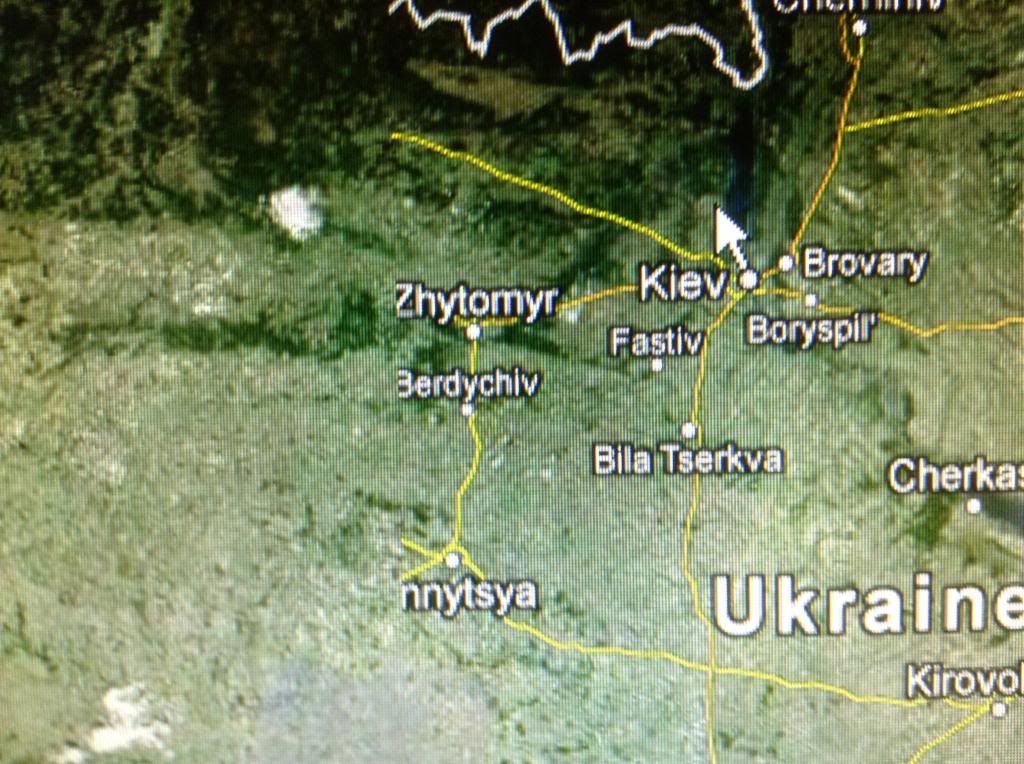 The signs, before printing: 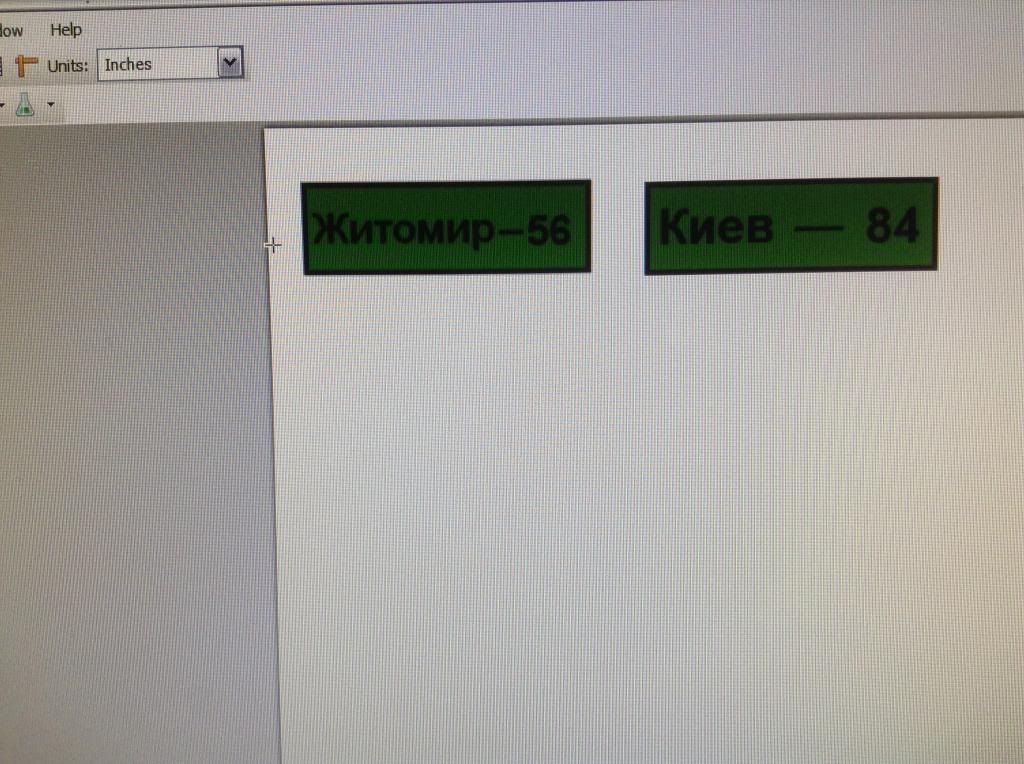 Thanks for looking! -Oliver
|
|
|
|
Post by deafpanzer on Feb 11, 2013 10:34:40 GMT -5
EXCELLENT TIP!!! Thanks a bunch!!! Always learning something here...
|
|
noll
Full Member
  
Member since: August 2012
Posts: 522
Aug 28, 2012 9:40:11 GMT -5
Aug 28, 2012 9:40:11 GMT -5
|
Post by noll on Feb 11, 2013 15:29:04 GMT -5
Hope I helped, Andy  . I have started to sand the plaster. the only bit i need to do well is the road, is it's concrete, while the rest will be covered by dirt, etc. Pics: 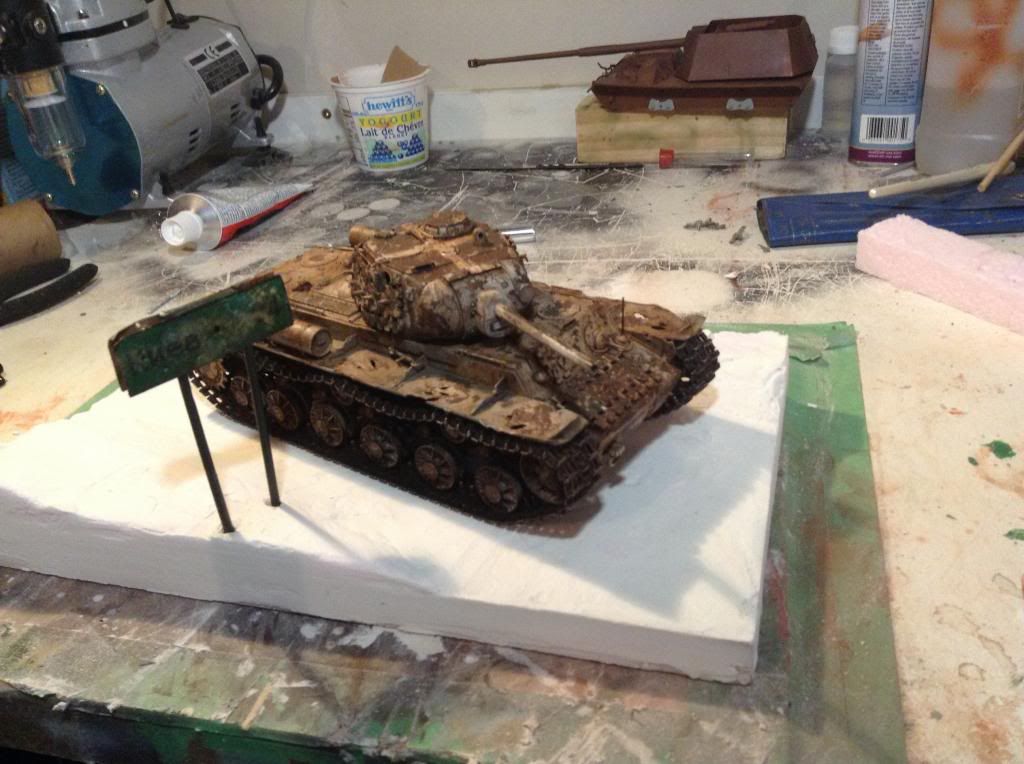 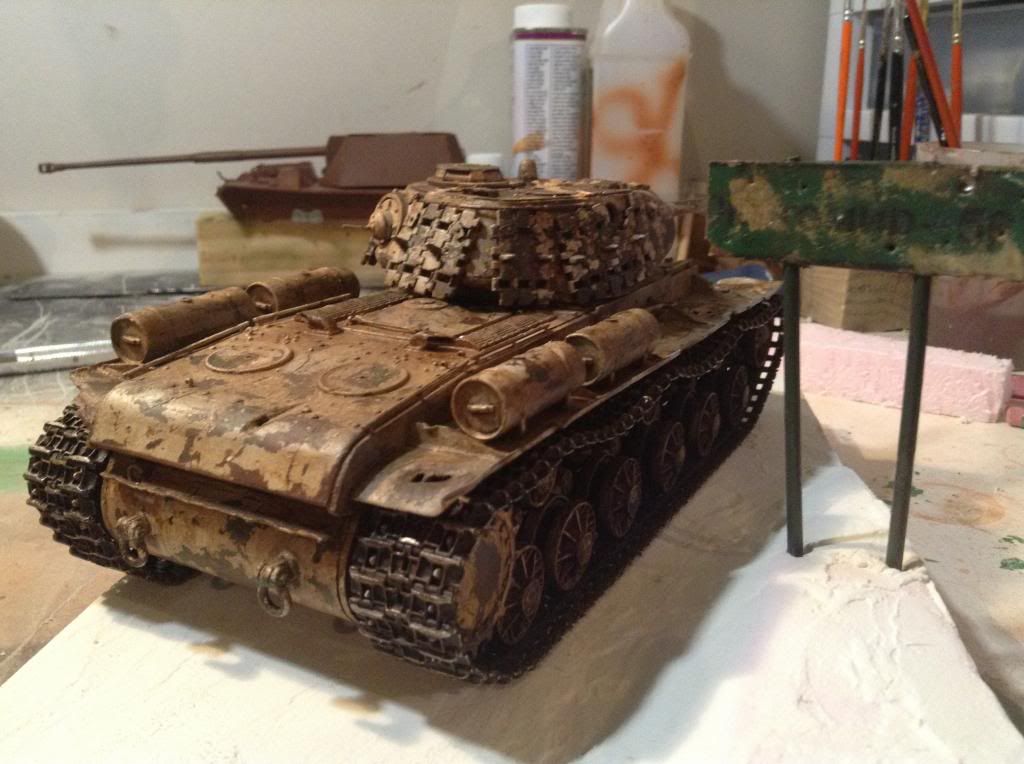 Sorry for the blurry pics. |
|
|
|
Post by Leon on Feb 11, 2013 16:43:40 GMT -5
Oliver you have done an outstanding job being as young as you sre.
|
|
noll
Full Member
  
Member since: August 2012
Posts: 522
Aug 28, 2012 9:40:11 GMT -5
Aug 28, 2012 9:40:11 GMT -5
|
Post by noll on Feb 13, 2013 11:15:08 GMT -5
Thanks, LEON  . Would anyone know of any good ways to make asphalt/concrete? Just sanding the plaster and paining it dosen't seem to be working verywell (in terms of realizm). I'm currenly thinking about grinding up some gravel into dust/tiny rocks with a sledge hammer, and then gluing that on, but I'm opEn to other suggestions  . thanks, Oliver |
|
noll
Full Member
  
Member since: August 2012
Posts: 522
Aug 28, 2012 9:40:11 GMT -5
Aug 28, 2012 9:40:11 GMT -5
|
Post by noll on Feb 13, 2013 17:34:38 GMT -5
I just added another layer of plaster (need to get some more now!) to fill in the holes and raise the whole road up a bit. The paint is there as I was testing how good it would/or wouldn't look. 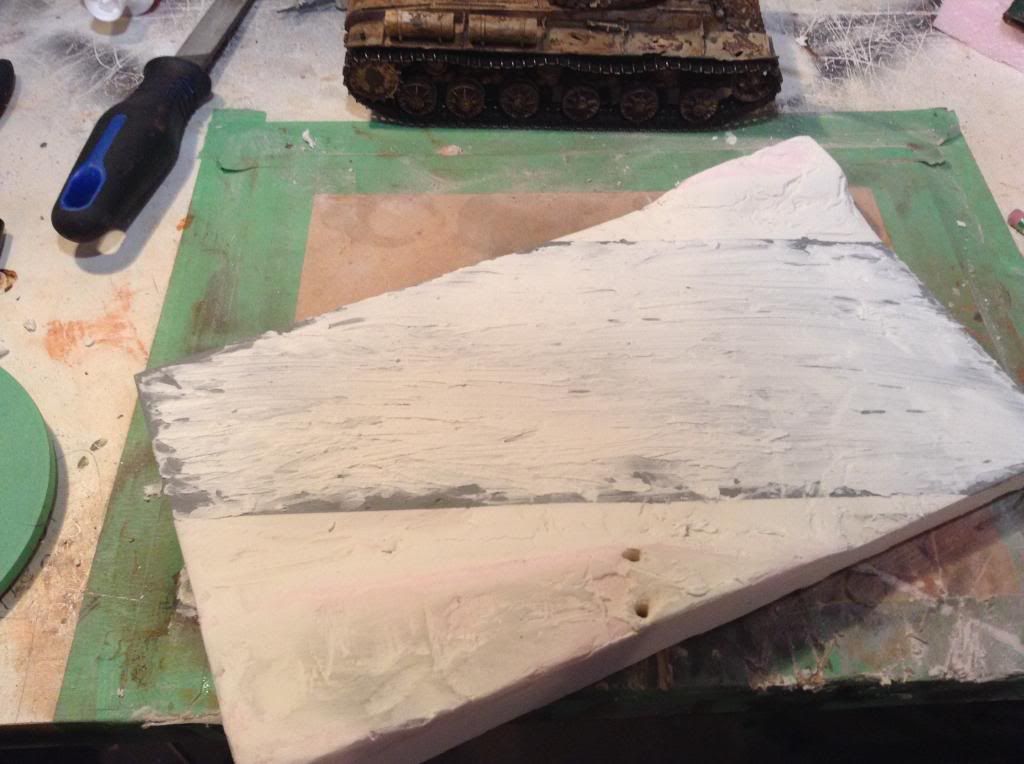 After its been dried and sanded, I will be weathering the road - any tips on that? -Oliver |
|
noll
Full Member
  
Member since: August 2012
Posts: 522
Aug 28, 2012 9:40:11 GMT -5
Aug 28, 2012 9:40:11 GMT -5
|
Post by noll on Feb 13, 2013 18:31:32 GMT -5
Alright, I've now added a basecoat of brown to even out everything and to prevent any white showing through the dirt I will add. Pics: 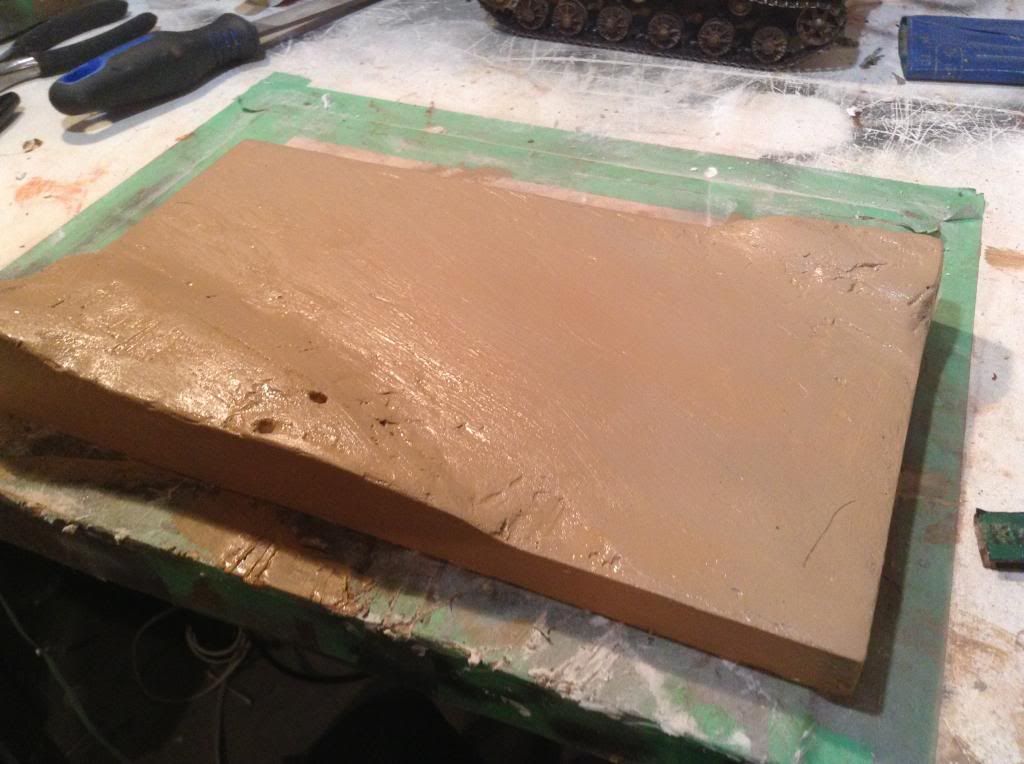 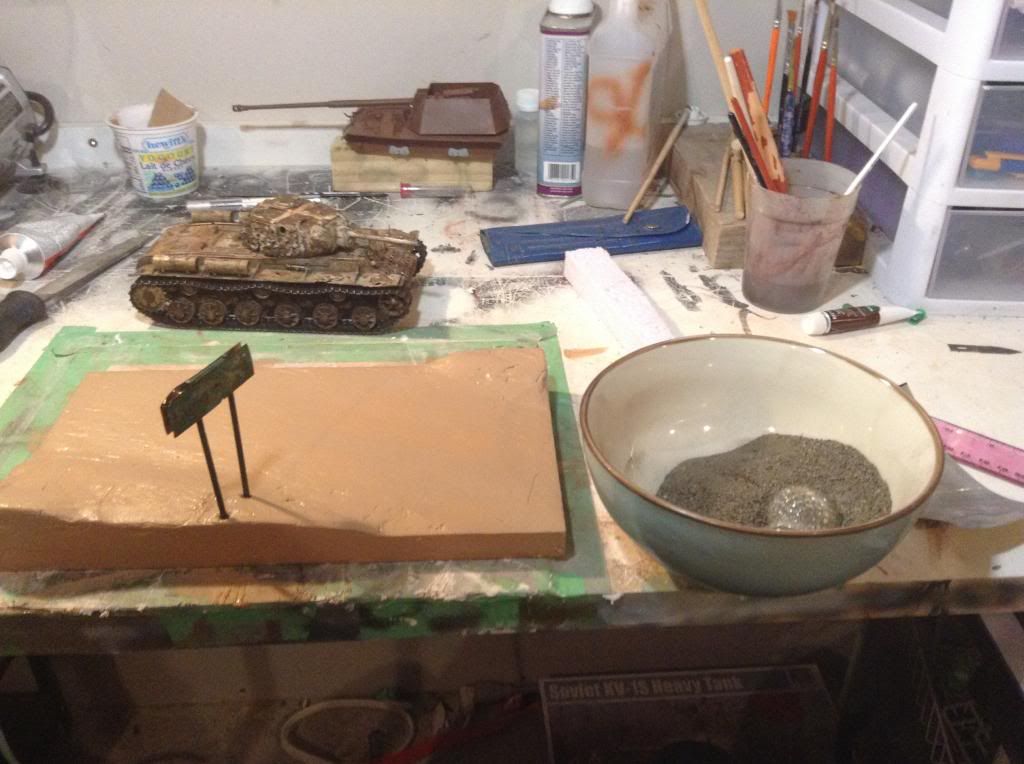 Thanks for looking! |
|
|
|
Post by deafpanzer on Feb 13, 2013 20:29:20 GMT -5
Base looks real good!!!
|
|
noll
Full Member
  
Member since: August 2012
Posts: 522
Aug 28, 2012 9:40:11 GMT -5
Aug 28, 2012 9:40:11 GMT -5
|
Post by noll on Feb 14, 2013 23:11:03 GMT -5
Thanks! Alright, I made the road and started weathering it - would anyone have any suggestions of what I could do to it? I also found and weathered a "tree". Pics: 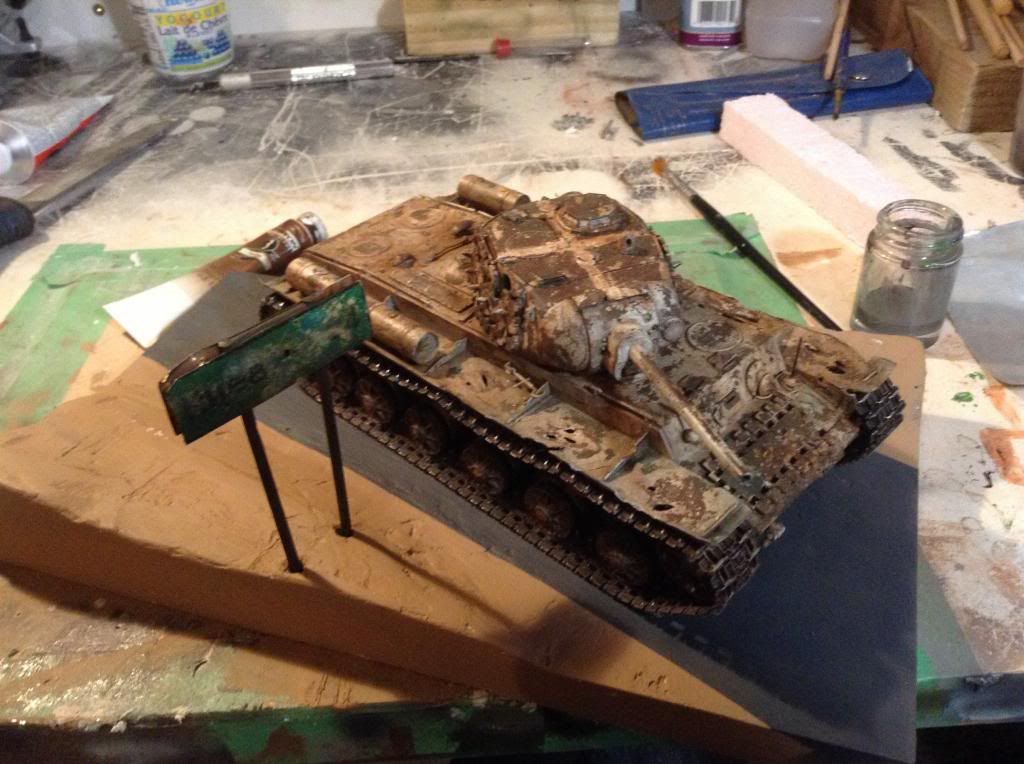 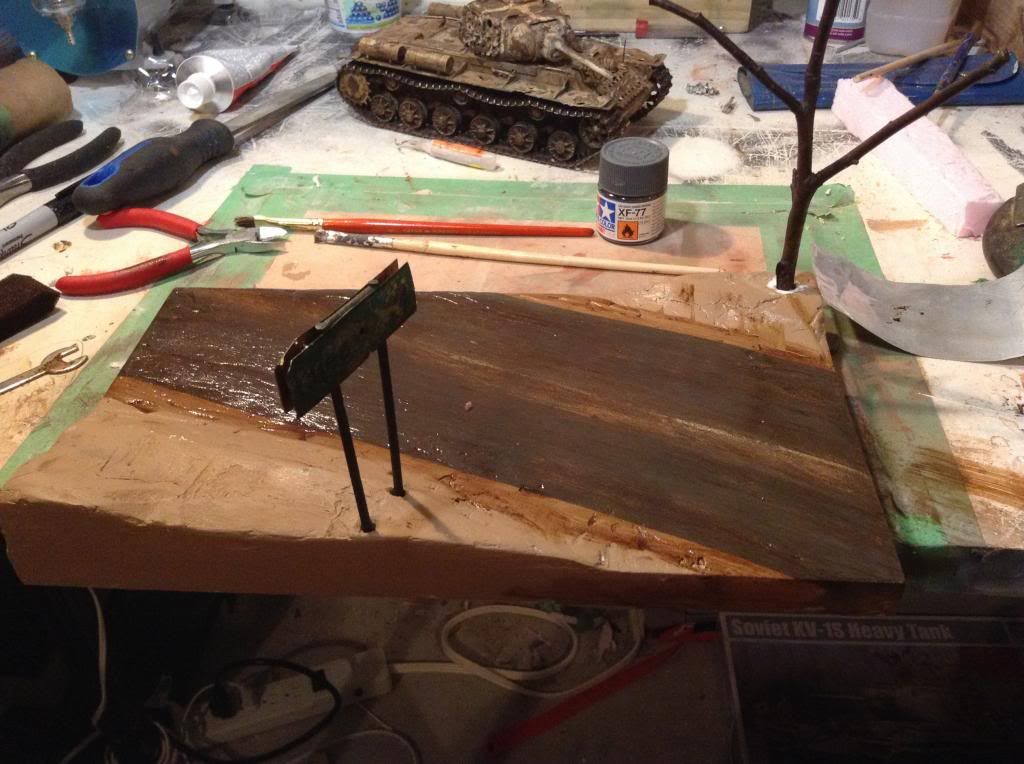 Next, I will be adding dirt to the banks. Any suggestions,etc are appreciated! -0liver |
|
|
|
Post by bbd468 on Feb 14, 2013 23:21:16 GMT -5
Hey Oliver, Great base work fella! I really like what you got going here buddy. That KV is gonna look sweet settin on it. Im a bit of a base makin rookie so im watchin you to learn.  Gary |
|
|
|
Post by TRM on Feb 15, 2013 6:23:08 GMT -5
Looking great Oliver!!
On applying the dirt...You can use regular old dirt if you like. Just want to find some fine grained or sifted dirt. Some white glue mixed with water and the dirt mixture should do the trick. If you have any earth tone pigments you can add these as well to give more or change the color. I will mix some common dirt with a small amount of plaster and water too sometimes. The plaster will lighten the dirt. But you can use any effects after it dries including the AB an paint to change the colors . It's about adding texture to the ground.
|
|
noll
Full Member
  
Member since: August 2012
Posts: 522
Aug 28, 2012 9:40:11 GMT -5
Aug 28, 2012 9:40:11 GMT -5
|
Post by noll on Feb 16, 2013 12:28:22 GMT -5
Thanks, Guys  . I'll try to reply properly to your posts latger - have to leave for work in a sec. I've added dirt to the base: 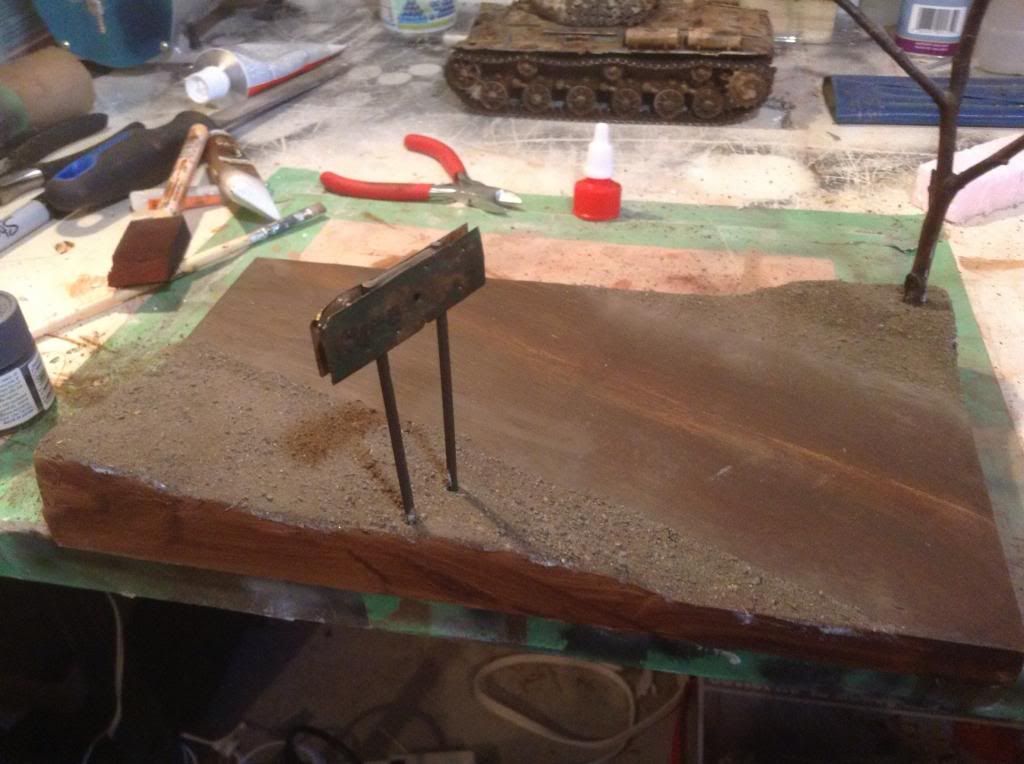 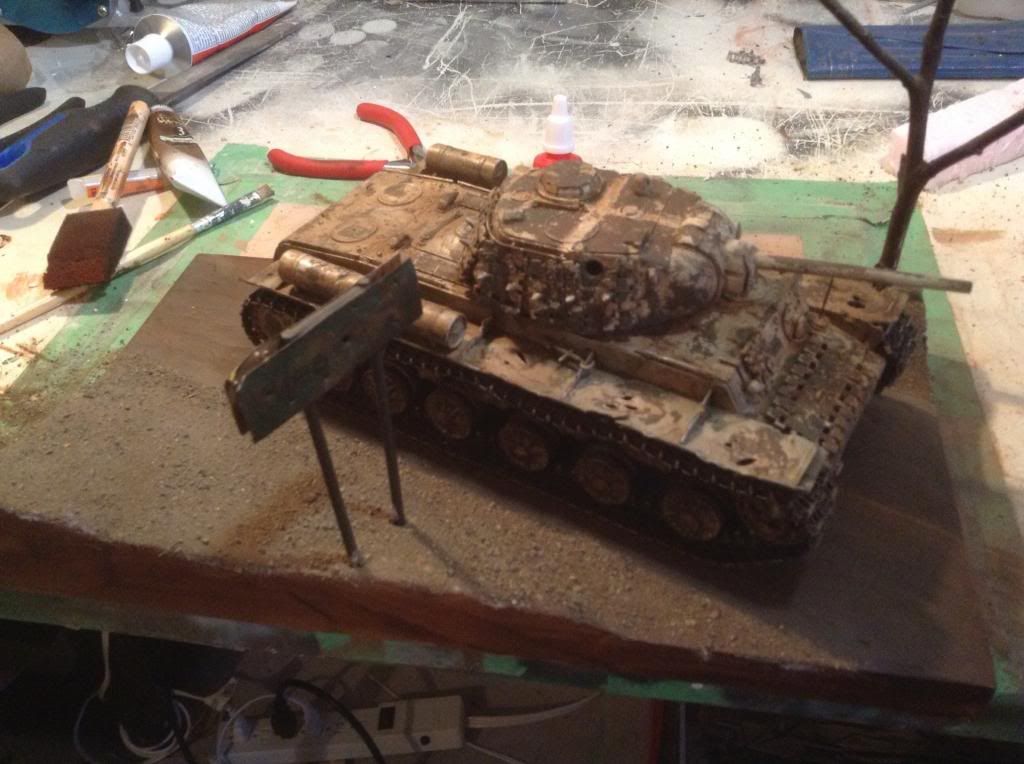 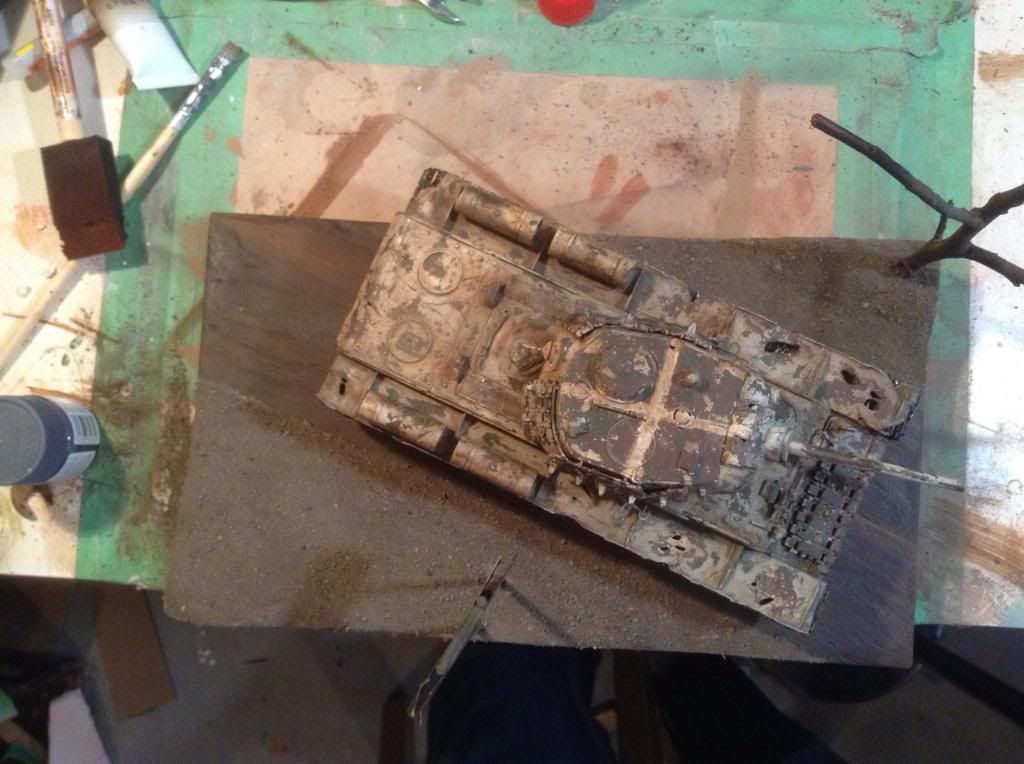 Thanks for looking! -Oliver |
|
Deleted
Member since: January 1970
Posts: 0
Nov 24, 2024 6:50:47 GMT -5
Nov 24, 2024 6:50:47 GMT -5
|
Post by Deleted on Feb 16, 2013 13:29:45 GMT -5
Dio is coming on real well Oliver  , For hegding I use rubberized horse hair, from a model railway shop, with scatter 'leaves' stuck in place with PVA glue, I think you call it Gaitor Glue over there , For hegding I use rubberized horse hair, from a model railway shop, with scatter 'leaves' stuck in place with PVA glue, I think you call it Gaitor Glue over there  , can look very good if painted in. , can look very good if painted in. |
|
noll
Full Member
  
Member since: August 2012
Posts: 522
Aug 28, 2012 9:40:11 GMT -5
Aug 28, 2012 9:40:11 GMT -5
|
Post by noll on Feb 17, 2013 17:26:38 GMT -5
Thanks, steve  . I don't think that i will end up doing hedges in this specific dio, but it will certainally be useful in another one. I just chopped up some moss to see how good "grass" it would make. I'm pretty happy with it, and will probably glue it on soon. Hopefully, it won't go brown - it shouldn't though, as it had already been sitting around for 5-6 months then i took it out of a bag today. Pics: 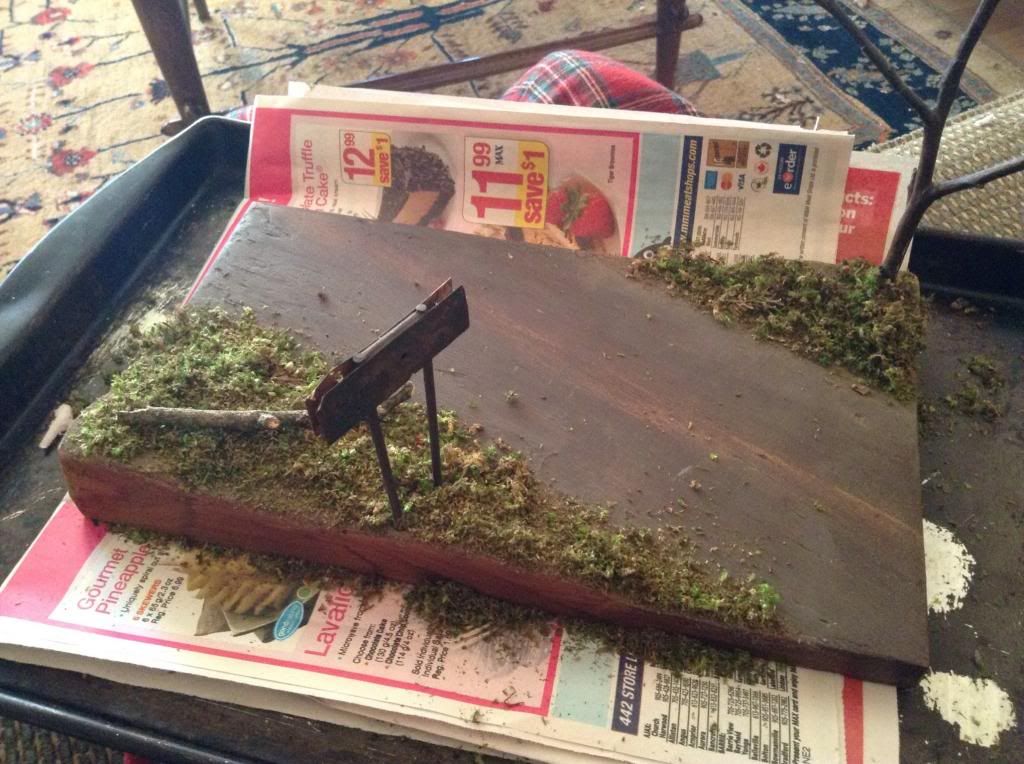 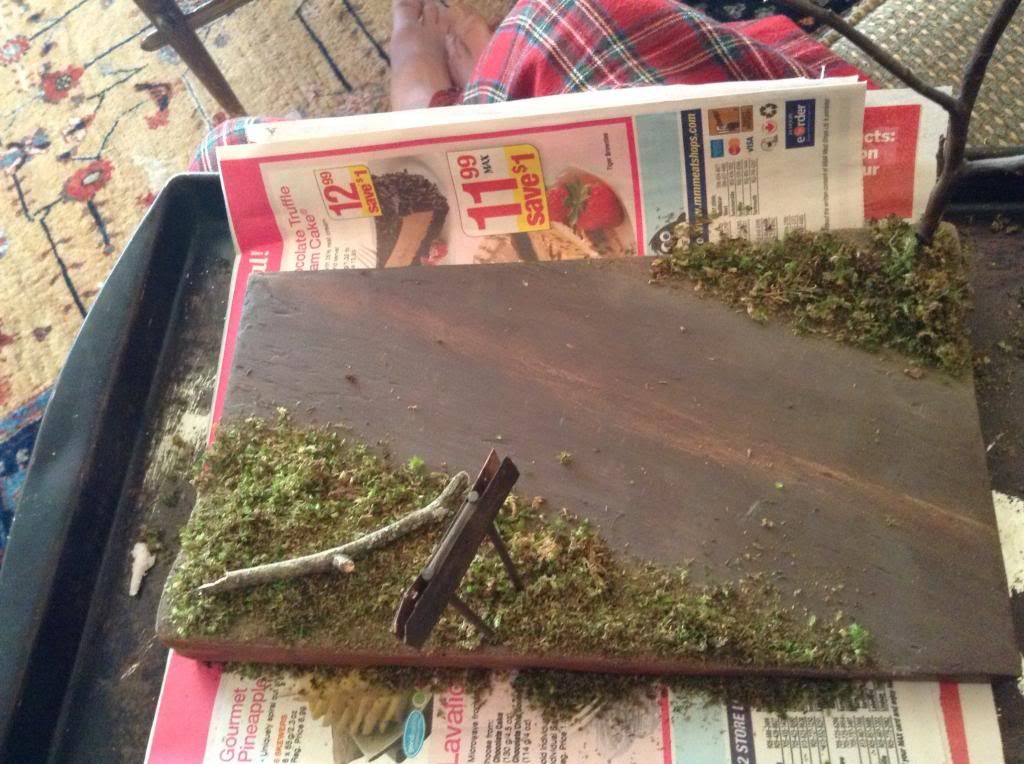 I also think that I'll make the tree be an old stump to better fit the time of year - I'm crap at trees with leaves, and it's unlikely that one wouldn't have any in spring/summer. As always, thanks for looking! -Oliver EDIT: The moss is not glued down in the pics - I just sprinkled it on as a proof of concept, hence the messiness  . |
|
|
|
Post by Leon on Feb 17, 2013 18:46:07 GMT -5
Oliver that looks great.Fine job over all.
|
|
noll
Full Member
  
Member since: August 2012
Posts: 522
Aug 28, 2012 9:40:11 GMT -5
Aug 28, 2012 9:40:11 GMT -5
|
Post by noll on Feb 17, 2013 19:03:07 GMT -5
Thanks, LEON  . It's getting there  . I just properly glued the grass, etc on: 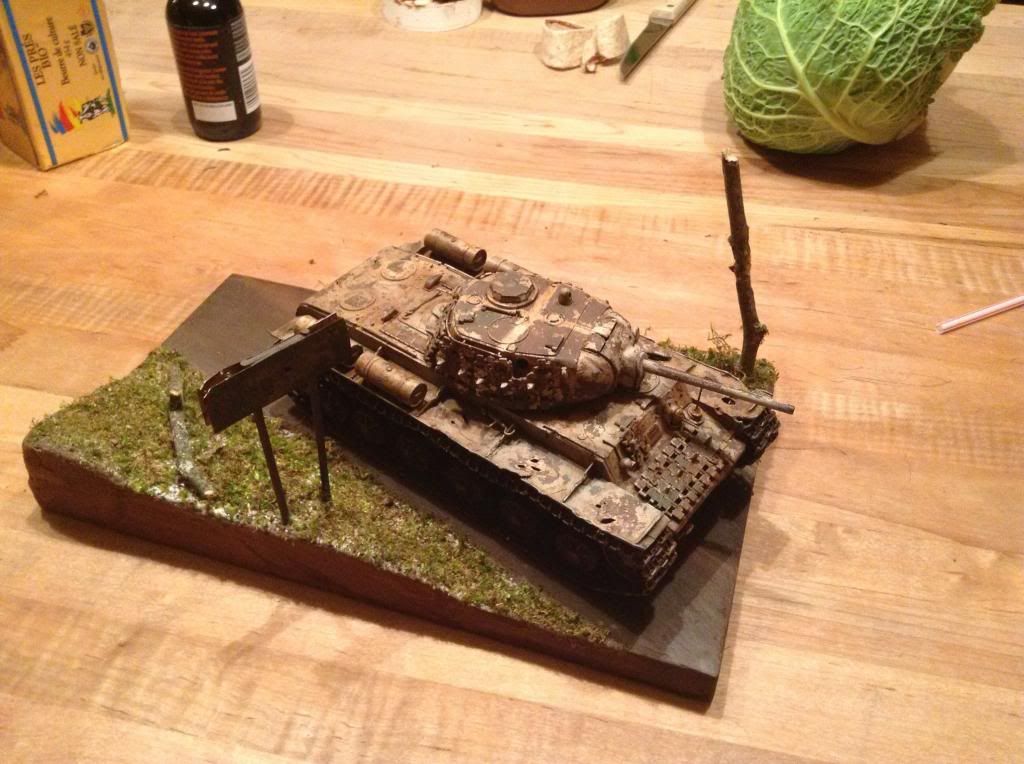 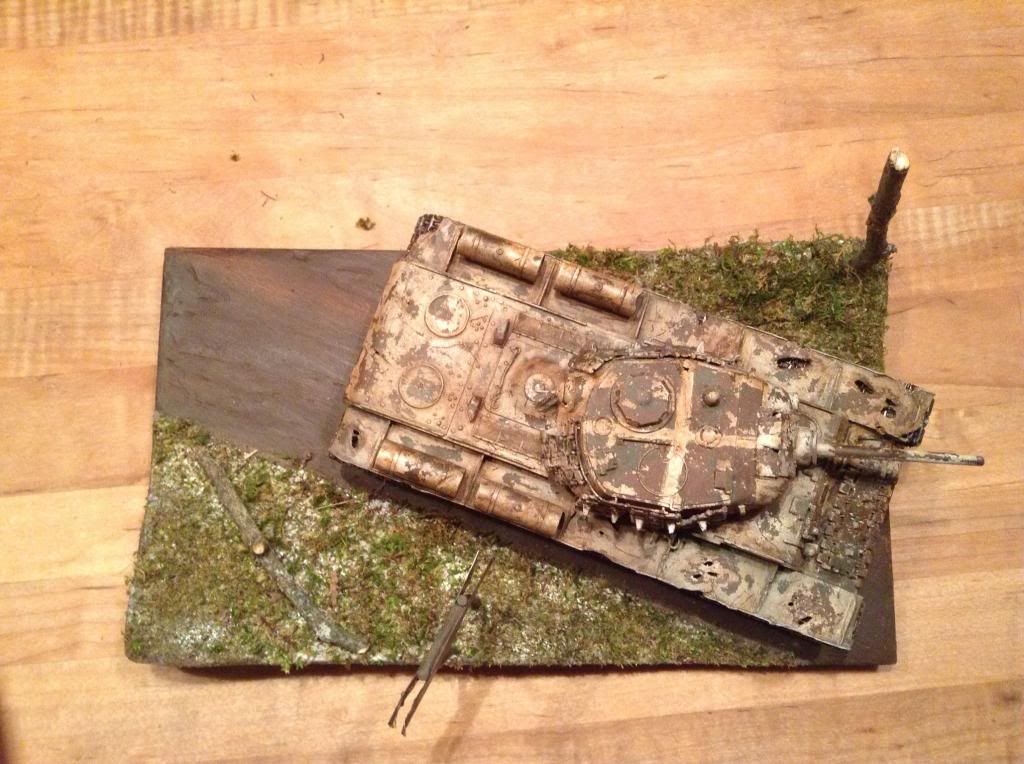 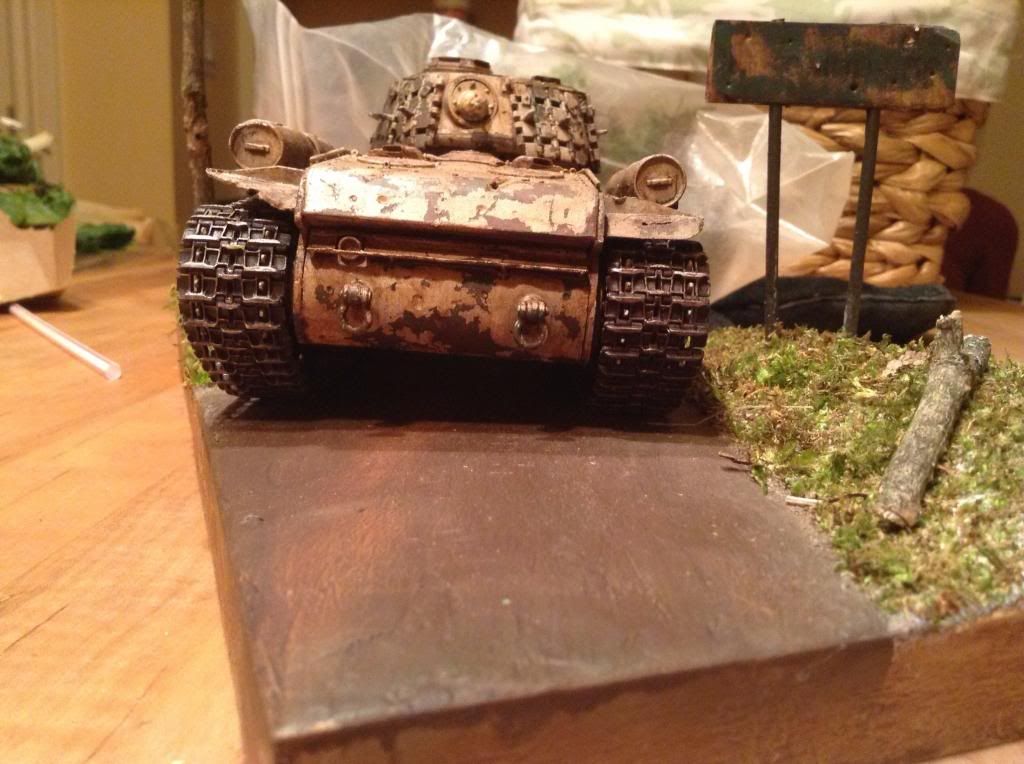 Next, I will add black paint to the sides, and... well, I'm not sure what I will do after that - any suggestions? -Oliver |
|