|
|
Post by bullardino on Jun 10, 2013 15:07:45 GMT -5
Great job, Russ  I'm afraid that Ceebee is right... |
|
|
|
Post by rbaer on Jun 10, 2013 15:23:09 GMT -5
Oops! P-Bucket's been jacked up lately.....
Five tries now and I can't get the pic of the left rear to work. Is there any wonder one of my Photobucket albums is called "effin' p-bucket"?
|
|
|
|
Post by wbill76 on Jun 10, 2013 19:52:47 GMT -5
PB troubles aside, looks (and sounds!) like some great progress there Russ.  |
|
|
|
Post by rbaer on Jun 11, 2013 10:55:39 GMT -5
Thanks, Bill. Nuts and bolts, nuts and bolts.
Got the right pic in, but P-bucket's still wonky.
|
|
|
|
Post by 406 Silverado on Jun 11, 2013 11:05:33 GMT -5
That's some serious reworking there Russ, very nice work so far.
|
|
|
|
Post by rbaer on Jun 11, 2013 12:50:53 GMT -5
Thanks, Rob. I figure about the time I get this one pretty close, AFC Club will do a suprise release of theirs; so if and when that actually happens, the whole world will have me to thanks for a current, new-tool M60.
That, and I have about three of these, and the Italeri kits in the stash.
Yeah, that's it, sure, sure.
|
|
|
|
Post by rbaer on Jun 11, 2013 16:55:24 GMT -5
Yep, that's the way it works, right? And I'm pretty good about picking something to spend enormous energy on, only to have it become redundant, superseded or otherwise obsoleted. But I'm having fun!
|
|
|
|
Post by Leon on Jun 11, 2013 17:23:44 GMT -5
Making some great progress Russ.Looking good.   |
|
|
|
Post by rbaer on Jun 11, 2013 17:58:15 GMT -5
Thanks, Leon. I've got a couple of hours bench time tonight, trying to decide what to do with it......
|
|
iking.
Full Member
  
Member since: November 2012
Posts: 244
Nov 22, 2012 3:24:55 GMT -5
Nov 22, 2012 3:24:55 GMT -5
|
Post by iking. on Jun 12, 2013 2:15:46 GMT -5
very nice!  im not sure about the varieties of the MAgach but this looks good!  cheers! iking |
|
|
|
Post by rbaer on Jun 12, 2013 17:37:42 GMT -5
Thanks, iking. The Magach 6-MEM is based on the M60 slick, or A-nothing, and is the functional equivalent of the 6B, with the shrouded main gun, higher horsepower engine, more powerful generator and other goodies. I got a little bit of work done on the front of the hull this morning, some ERA and light guards. All the kits of the Magach6s get these guards wrong, so I'm doing them in soft wire. I still need to do the braces, but the main loop is done and on. I'm using the reactive armor from the Italeri kit I had in the stash. It's not as well defined as Academy's but I have the Italeri kit here.....  Back to work.... |
|
|
|
Post by bbd468 on Jun 12, 2013 17:39:40 GMT -5
Hello Russ, Man, you got her lookin fine! Great job on the headlight guards Russ, you nailed em!  |
|
|
|
Post by rbaer on Jun 12, 2013 18:32:09 GMT -5
Thanks guys. I don't remember where I found this stuff, it's about .060" and very easy to work with, and I'm about out of it....
|
|
|
|
Post by Leon on Jun 12, 2013 19:00:10 GMT -5
Agree with the guys on the wire work Russ.Looks really good.  |
|
|
|
Post by rbaer on Jun 13, 2013 14:02:50 GMT -5
Thank you Leon.
I'm getting pretty close to feeling ready to tackle the turret, maybe next week.....
|
|
|
|
Post by rbaer on Jun 20, 2013 19:51:11 GMT -5
Argh.... I nutted up and started soldering the turret basket pieces and promptly ruined a couple of pieces with too much heat. Dang it, but the pieces were really thin, probably too thin. So I used the remaining good parts to trace out patterns on plastic and off I went. I also got some of the ERA blocks on to give me a location point for the right side of the basket. One of the ERA blocks is from an Italeri kit since I broke that one when removing the pour stub. Good thing I have a stash.... 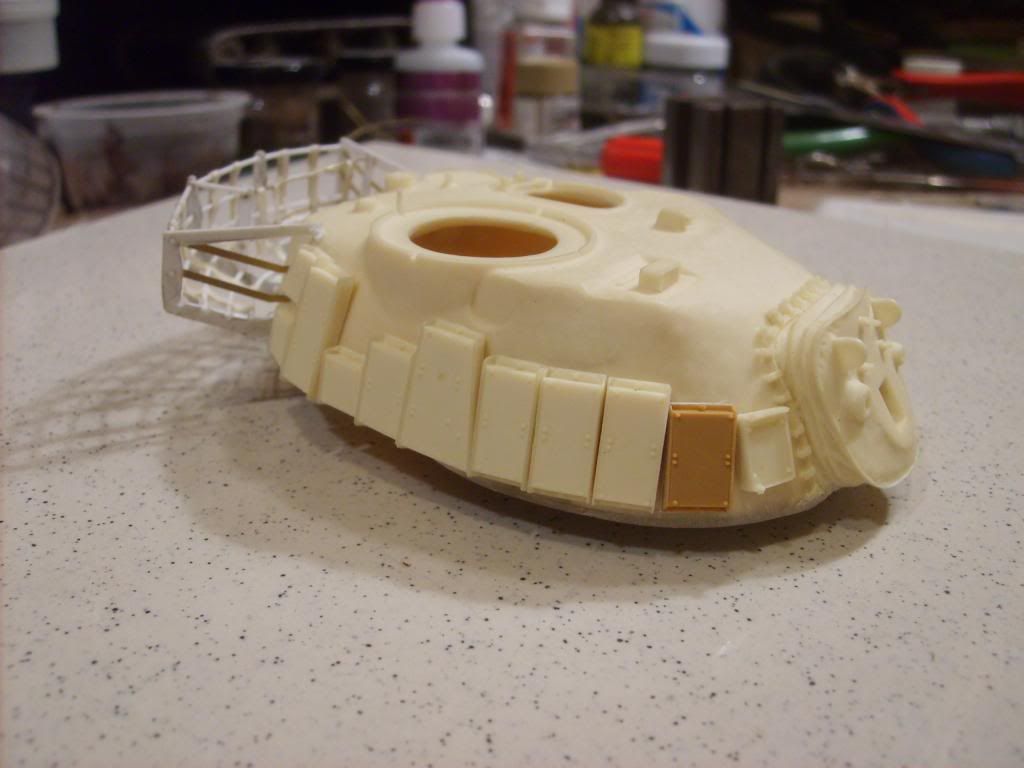 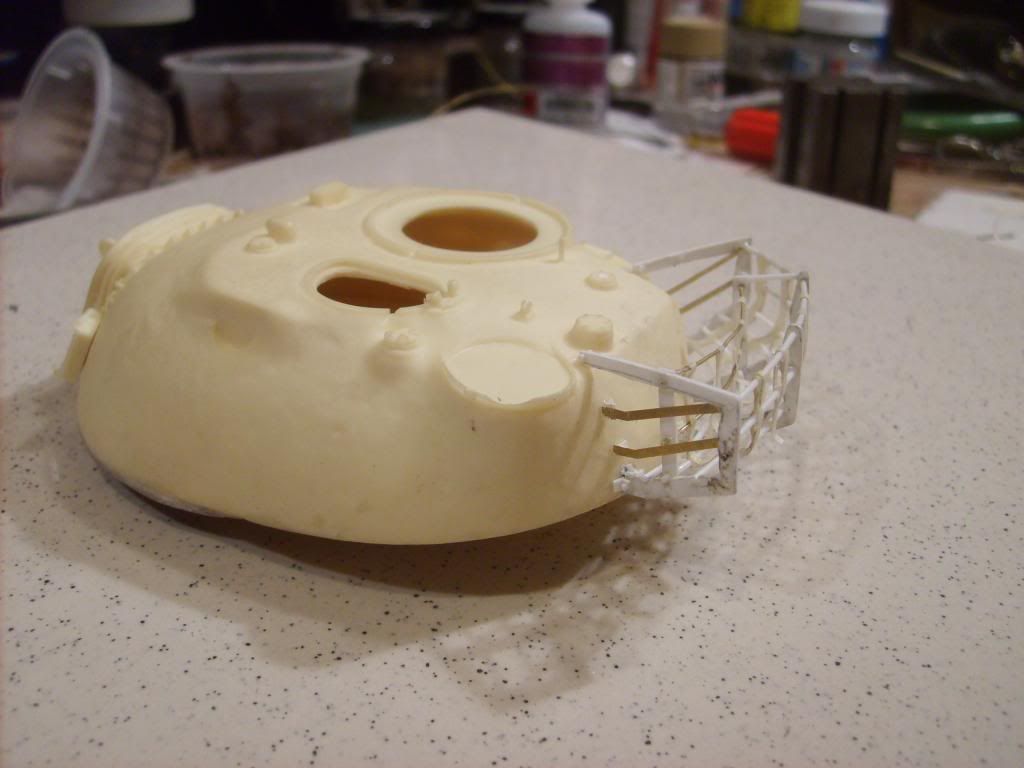 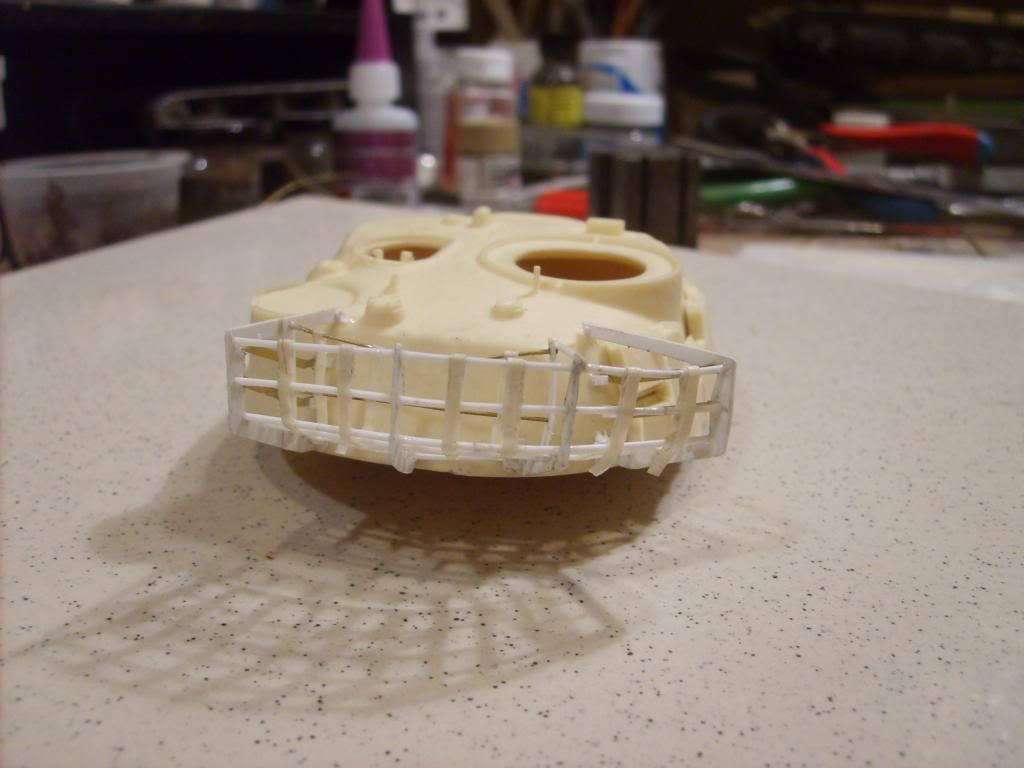 I've got some cleanup to do, and I went ahead and wrapped the stowage straps in their "stowed" positions, but I may cover this thing up anyway. |
|
|
|
Post by wbill76 on Jun 20, 2013 20:02:57 GMT -5
Always good to have a stash/spares bin to fall back on eh Russ!  Nice work on the replacement basket, Dicky will be drooling all over it for sure given the amount of white stuff there.  |
|
|
|
Post by Leon on Jun 20, 2013 20:29:40 GMT -5
Nice work on the stowage baskets Russ.  |
|
|
|
Post by rbaer on Jun 21, 2013 10:31:37 GMT -5
Bill, Leon, thanks! I had to ask myself: WWDD? I scratched a basket for a-6Gal I did last year, and it actually came out quite nicely. I ended up covering it up with 2-part putty "canvas", almost reluctantly. I have another Legends turret-only -6Gal coversion in the stash, and it has the major pieces for an uncovered basket, so there may be one in my future....
I know the basket is warped a bit, but the real thing wasn't terribly sturdy, so I'll probably hang a couple of spare roadwheels on it to supply a reason for the "damage". Yeah, that's it.
I'm still finding that the Legends pieces are very nicely cast, with sharp detail. Some pieces, however, are so fragile as to be unusable for a former blacksmith like myself. We'll see.
|
|
|
|
Post by bbd468 on Jun 21, 2013 10:34:17 GMT -5
Hey Russ, sweet job on the basket fella! I know that was a tough one huh. Turret is nice as well.  |
|
|
|
Post by rbaer on Jun 21, 2013 13:55:57 GMT -5
Thanks, Gary.
I've got to clean up by bench before I do any more, lots of resin dust. Yech.
|
|
|
|
Post by bullardino on Jun 24, 2013 4:27:49 GMT -5
Excellent progress, Russ  |
|
|
|
Post by rbaer on Jun 25, 2013 10:44:06 GMT -5
Luigi, Dicky, thanks. Like I said, WWDD? So I had a few hours yesterday, and got moving on the hull again, which is now pretty much got all the basics in. I found the glacis ERA blocks, but elected to stay with the Italeri items already on, since they're virtually the same parts. Light guards are finished, and most of the brass is on as well. Wheels are a combination of Tamiya and Italeri, to allow the use of the poly caps. Unfortunately most of the resin small parts for the turret are under-poured, warped or broken, so I'll be raiding the same Italeri kit for lots of pieces, and scratching the rest. Pics so far: 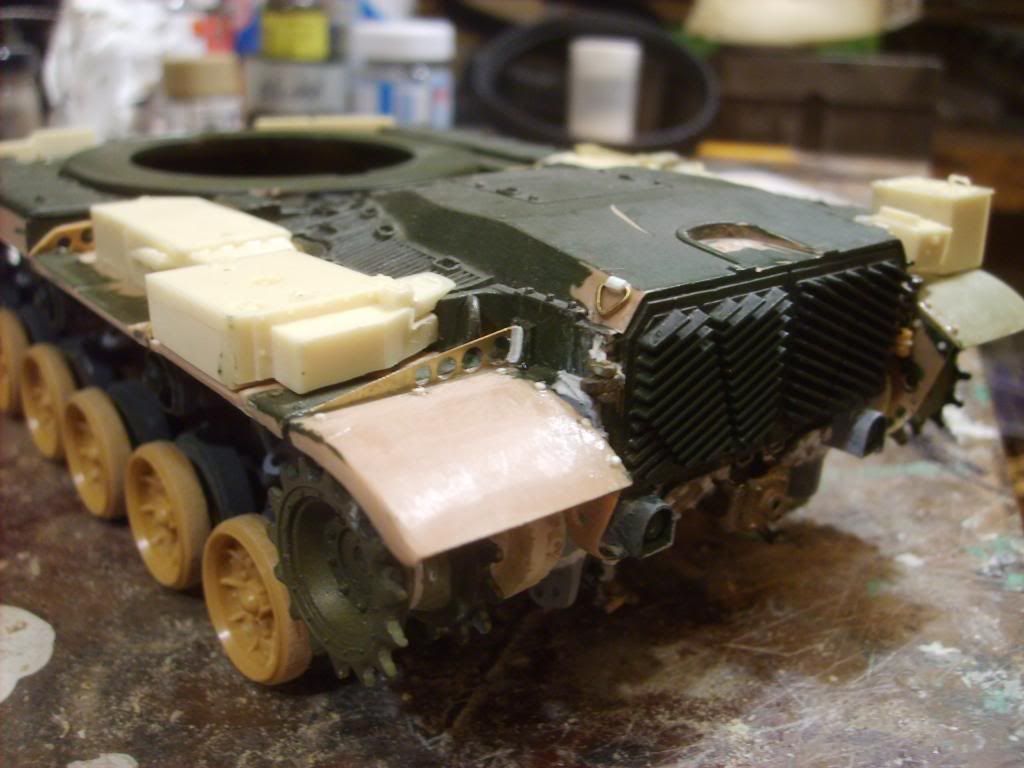 Left rear of the hull, not really very interesting. 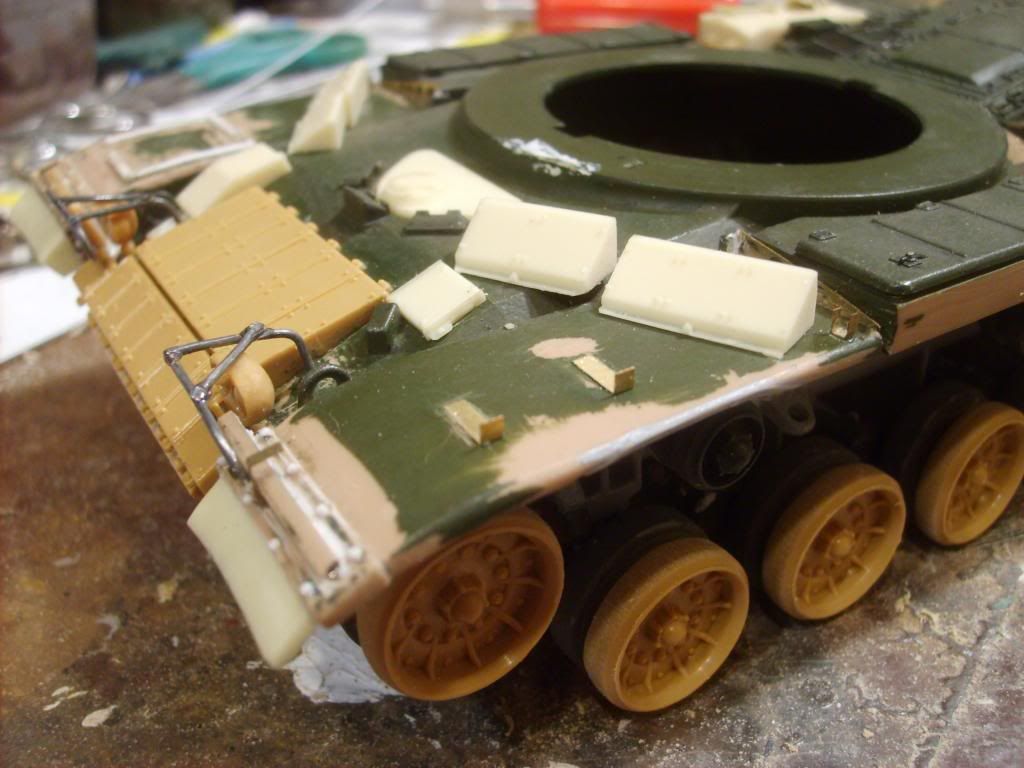 Left front.  Rt front. I kind of like the headlight guards. The mount for the crew tent on the rt front fender was pretty featureless etch, so I used thin plastic strip and some bolt heads instead. Fender braces are both Legends etch and Italeri plastic, with the racing holes opened up and thinned overall, since the Legends kit supplied three pieces each for the braces either side of the air cleaners. I alos wanted something more substantial here, since the IDF armored filter boxes are heavy, and it stands to reason the supports on either side of them would be fairly stout. I have tweaked the various parts of the fenders a bit also, just ot show some use/abuse. The following pics shows the tweaked fenders and heavier braces. 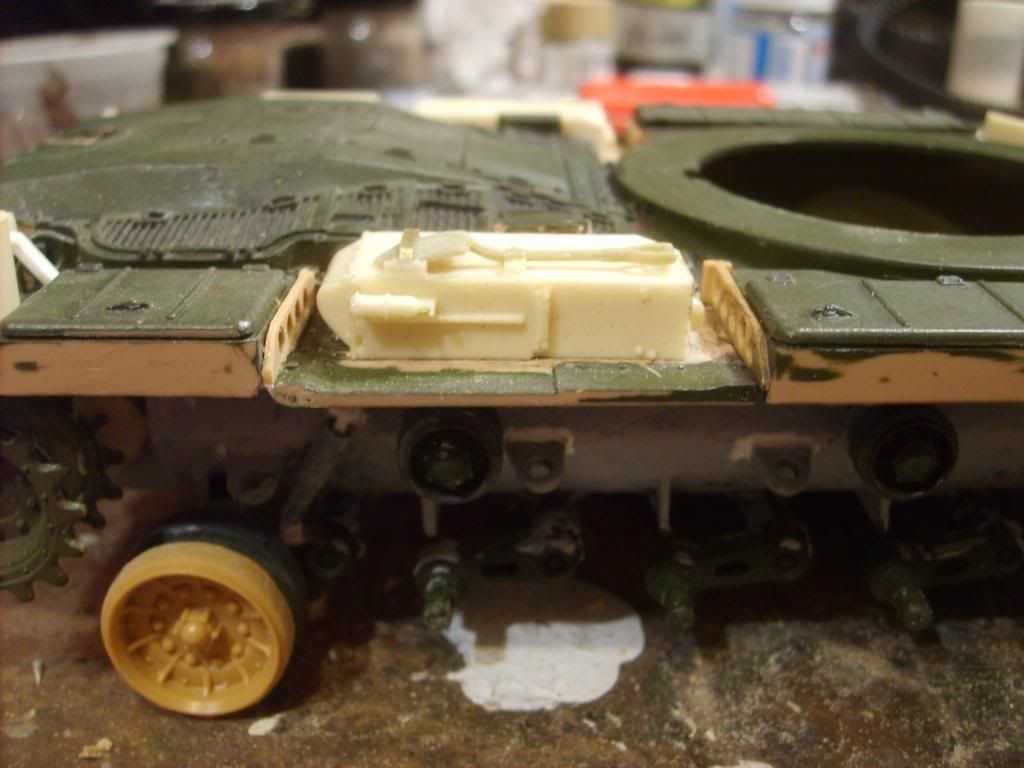 |
|
|
|
Post by bullardino on Jun 25, 2013 11:57:09 GMT -5
Thumbs up, Russ. Poor Italeri kit, it will be nothing more than a organ donor  |
|
|
|
Post by rbaer on Jun 25, 2013 15:06:55 GMT -5
Thanks guys. I've got the Friuls mostly made up, hope to get a test-fitting soon.
Luigi, oddly enough, the Italeri/Esci/AMT boxings of the various M60Awhatevers are pretty cheap, so I'm pretty liberal about using them for parts. Oddly enough, the Revell M60A3 is pretty pricey in comparison, dunno why since it's no better. Academy's and Tamiya's versions are pretty cheap too, but the work required to fix the huge holes in the hull around the final drives takes a little wind out of my sails.
|
|
|
|
Post by Leon on Jun 25, 2013 16:23:39 GMT -5
Superb work Russ  .Waiting to see how she looks with the tracks on and a coat of primer.  |
|
|
|
Post by wbill76 on Jun 25, 2013 17:57:49 GMT -5
Making good progress Russ, those light guards look fabulous.
|
|
Deleted
Member since: January 1970
Posts: 0
Dec 2, 2024 3:05:24 GMT -5
Dec 2, 2024 3:05:24 GMT -5
|
Post by Deleted on Jun 26, 2013 1:55:35 GMT -5
nice conversion work
|
|
|
|
Post by rbaer on Jun 26, 2013 15:57:15 GMT -5
Gents, thanks all! I looked closely at the Legends gun tube today, and decided that no matter how nicely done it is, I don't even want to try and straighten it, only to have it warp in the display case in a couple of weeks. So, back to the Italeri kit and and old Academy M48 parts kit. I used the bellows at the base of the gun tube from the M48 and the Italeri shrouded barrel. Lots of cleanup there, but it'll work. I have a piece of brass tube through the bellows into the mantlet, to keep everything straight. Also, the barrel is primered, but I still have a couple of seams to make go away. Slightly visible is the travel lock for the main gun as well. I had to use some MrSurfacer on the bellows, both to fill a gap around the mantlet cover and to give some texture. 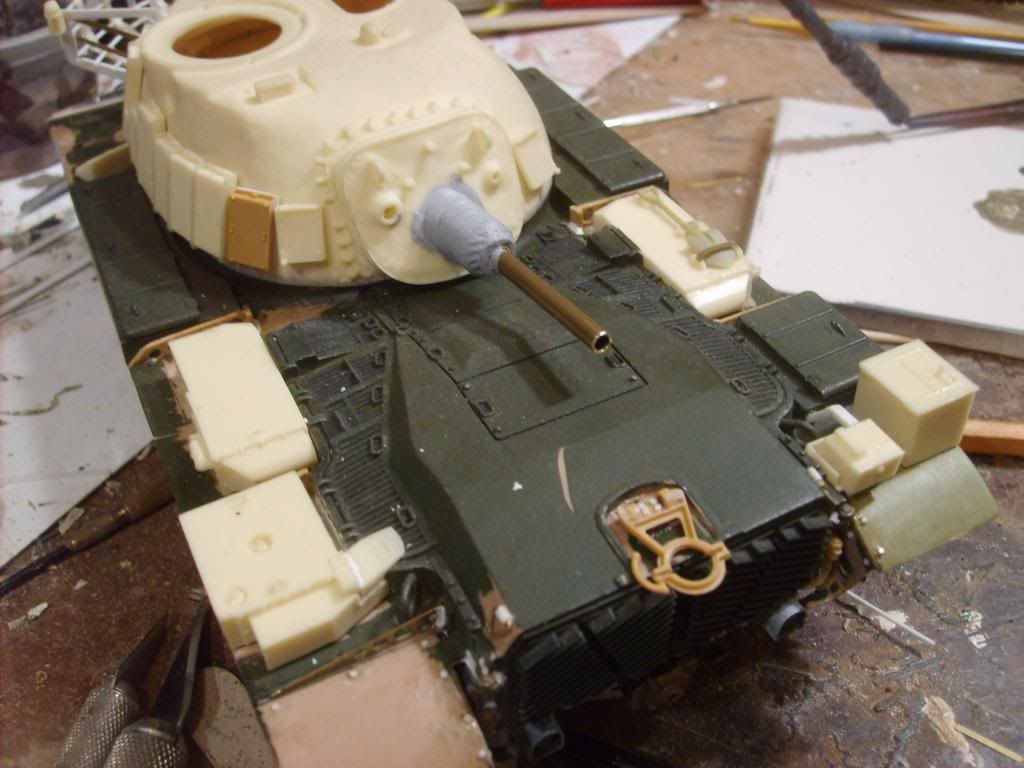 I need to start on the tow cables and then the rest of the turret details (O joy) |
|
|
|
Post by rbaer on Jun 26, 2013 18:50:07 GMT -5
Cool yer jets, there, Dicky, it'll happen.  I actually I thought I was moving along pretty good on this one, but I'm slow like Forrest Gump sometimes. |
|