|
|
Post by Teabone on Jul 11, 2013 23:00:11 GMT -5
Pics of the rear cross-member which serves to hold the main frame together the smaller part is the front cross-member.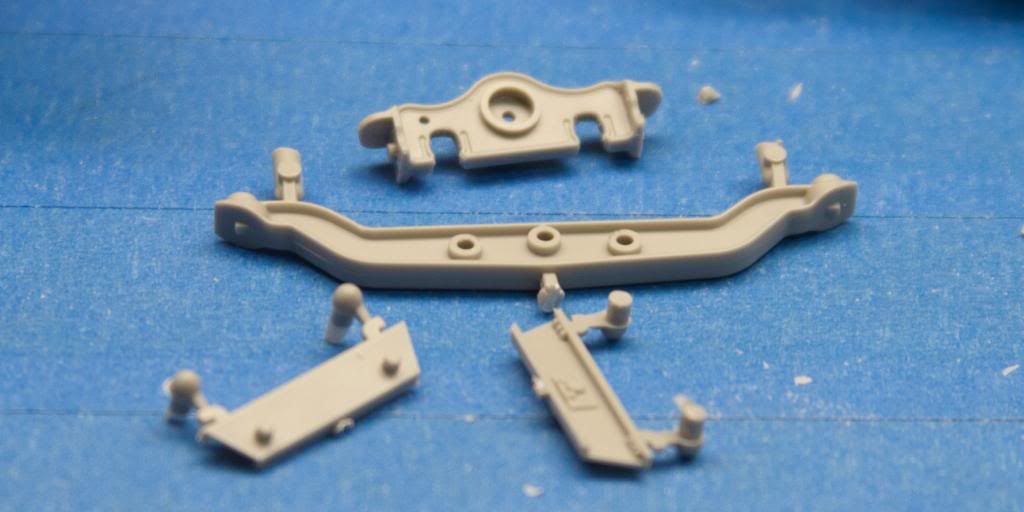
Front tow hook and rear draw bar parts.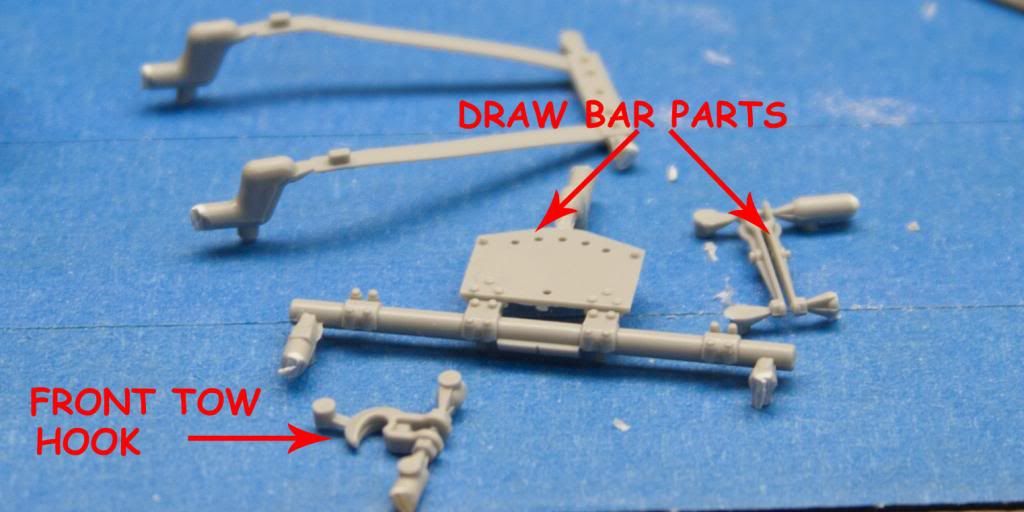 Final drives, rear sprockets and cover for the back of the transmission with a well cast tiny handle on it. Final drives, rear sprockets and cover for the back of the transmission with a well cast tiny handle on it.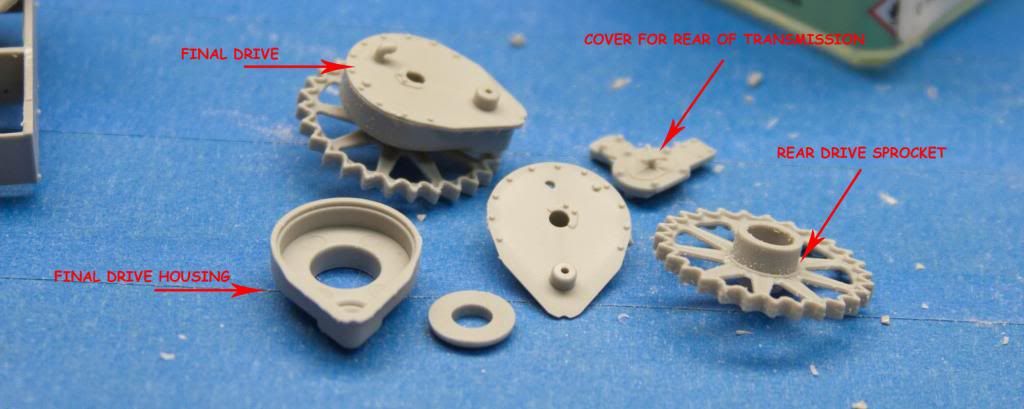
|
|
|
|
Post by Teabone on Jul 12, 2013 19:16:57 GMT -5
I used to think that I was the only one who was impressed with Trumpy, I had started with Tamiya and AFV but when I found trumpy I realized where I should have started.
Thanks for the encouraging words I will keep on going, the resin motor has been fun and has some nice detail to it. I have been plumbing fuel lines today and should have some more pics of it in a couple of days before I pull an Andy and disappear for a couple of weeks.
Bones
|
|
|
|
Post by wbill76 on Jul 12, 2013 20:46:06 GMT -5
That is some impressive detail for sure Bones, don't envy you the task of working on that wiring for the engine but am confident you'll tackle it just fine.  |
|
|
|
Post by Teabone on Jul 12, 2013 22:04:52 GMT -5
WildBill76
All I can say is so far so good lets hope it continues, I got the 4 fuel lines through the tiny holes and set in the injector pump only pulling the tiny piece holding them off the engine once. It is one of those jobs that one does slowly with patience, I worry that my aged tube of CA will run out before I get done then I will have to stop and age another tube. Usually the tubes do not last this long but since I stopped use the Zapper stuff could be they can last longer.
Bones
|
|
|
|
Post by Teabone on Jul 12, 2013 22:25:27 GMT -5
Last 3 pics of my Stalinezt build so I better get the card out of the Camera and process some more.
Here we are getting into some of the small stuff we all love so much, note the casting on those neat little handles, nothing you would see 5 years ago.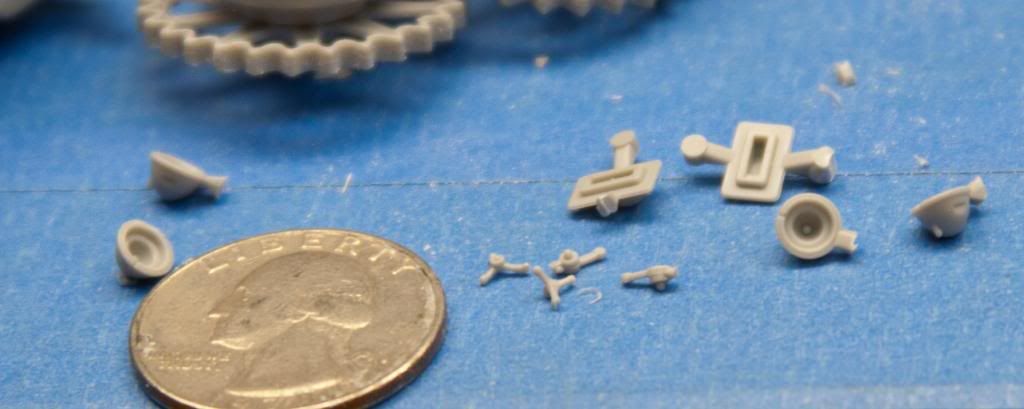 The head and backup rear lights, I drilled them for wire when they are set, they will get MV138 lenses when complete again check out the cleanness of the molding. The head and backup rear lights, I drilled them for wire when they are set, they will get MV138 lenses when complete again check out the cleanness of the molding.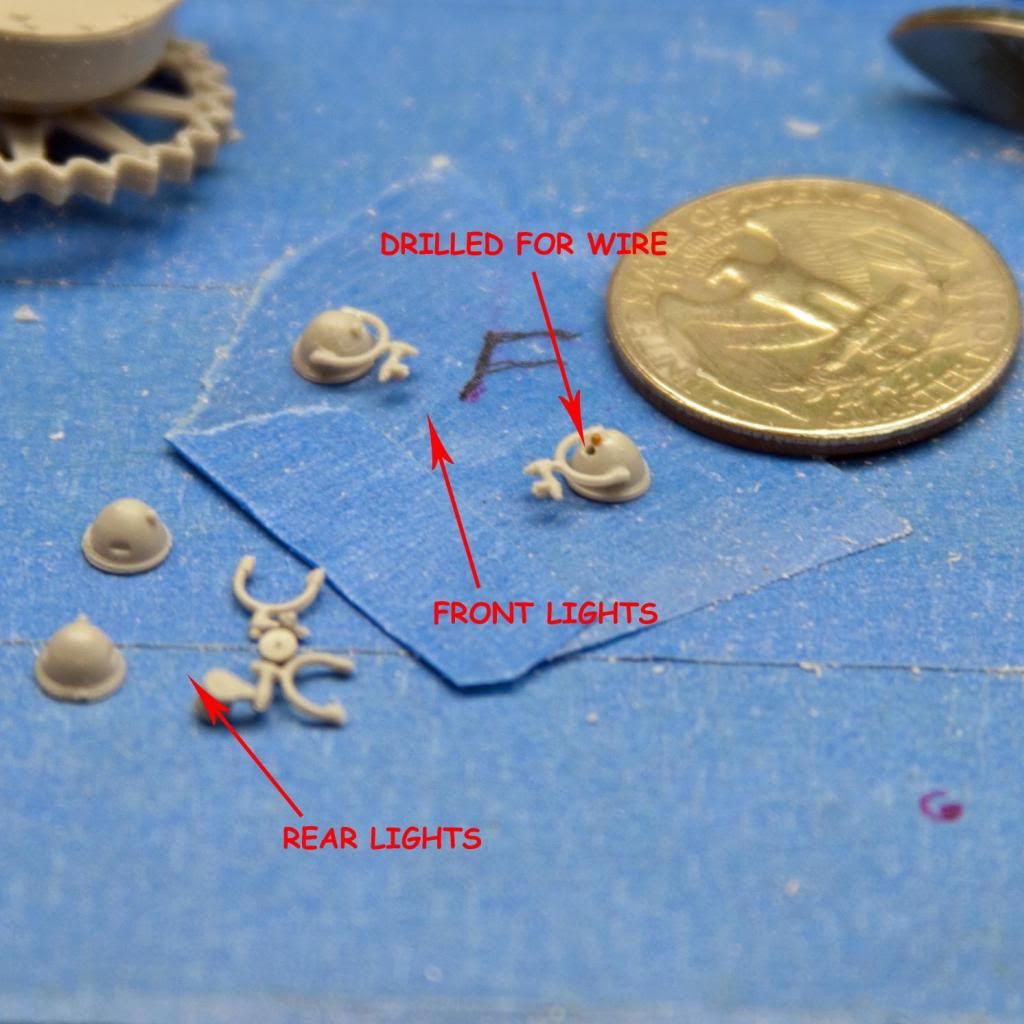 And here is what I thought were the smallest fiddly parts that I had ever done but when I get to the LZ engine I will show the all-time smallest part. For the Trumpy kit the earlier washers and the fuel tank brackets shown here are the only OOB PE parts for this build. And here is what I thought were the smallest fiddly parts that I had ever done but when I get to the LZ engine I will show the all-time smallest part. For the Trumpy kit the earlier washers and the fuel tank brackets shown here are the only OOB PE parts for this build.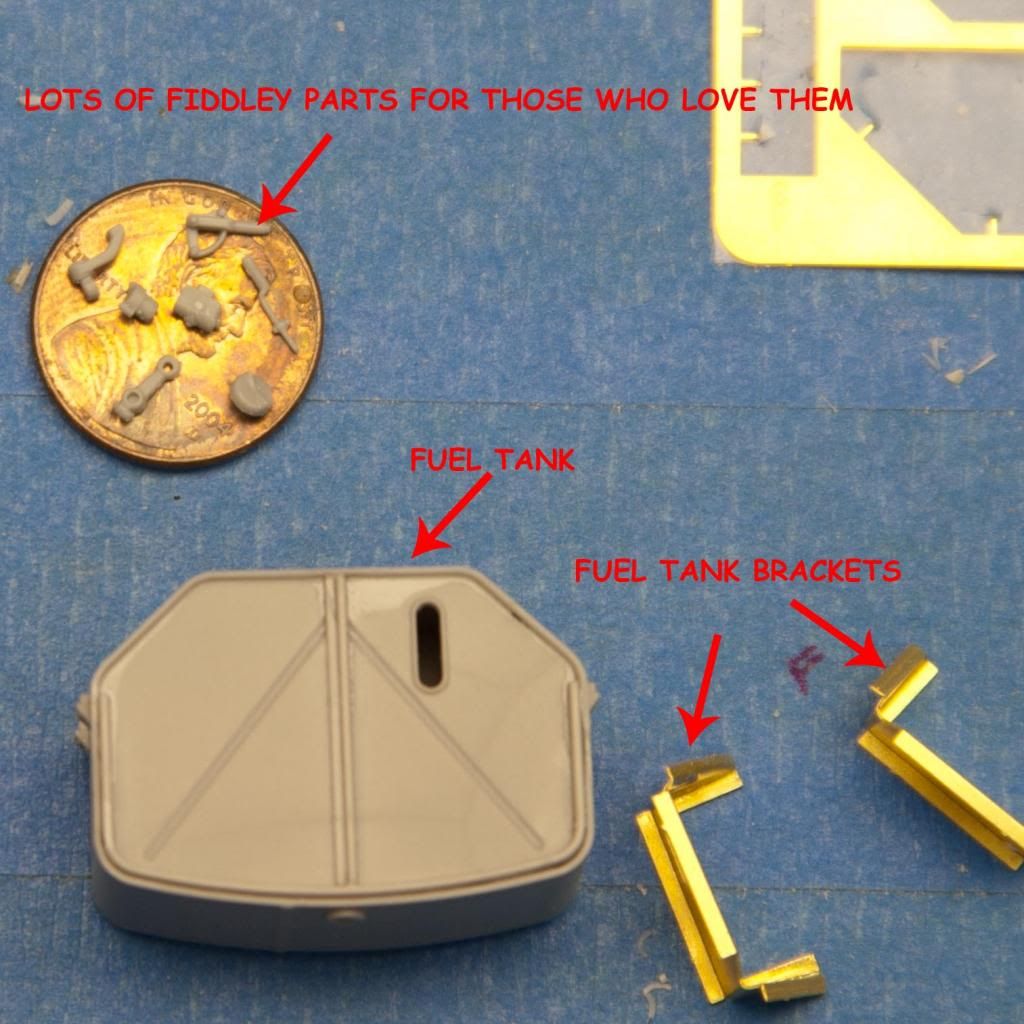
|
|
pt109
Full Member
  
Member since: April 2013
Stop staring at me! heheheh
Posts: 491 
|
Post by pt109 on Jul 13, 2013 12:16:58 GMT -5
Another nice one Bones, I remember not too long ago reading a nice blog of this kit on another site, was very impressive to say the least!
Paul
|
|
|
|
Post by Teabone on Jul 13, 2013 14:02:56 GMT -5
Paul
It is a very good kit and LZ Models makes conversions for several conversions of this kit.
Bones
|
|
Deleted
Member since: January 1970
Posts: 0
Nov 28, 2024 5:42:56 GMT -5
Nov 28, 2024 5:42:56 GMT -5
|
Post by Deleted on Jul 13, 2013 14:19:11 GMT -5
Awesome Bones!
|
|
|
|
Post by wbill76 on Jul 13, 2013 20:29:28 GMT -5
Good thing we have Optivisors! More outstanding detail there Bones.
|
|
|
|
Post by Teabone on Jul 13, 2013 23:19:00 GMT -5
The Awesome Bros & WildBill76
This is a very good kit and somewhat easy to make it look good, thanks for the encouragement I love it. Today I was going to process some piccies for tonight but my wife had some other ideas for the morning and I had to pack up some models for the show so I was too busy but I did chuck the above OOB PE Fuel Tank Brackets which were very thick and even annealed did not give me good sharp corners. I made the brackets using styrene which I will show soon, this may be an example of an added complication where a styrene part would have been just fine.
Bones
|
|
|
|
Post by deafpanzer on Jul 15, 2013 22:54:33 GMT -5
Either you are AWESOME or you have lost your mind!!! Seven pieces no bigger than the penny. WOW! You are the man!
|
|
|
|
Post by Teabone on Jul 15, 2013 23:08:52 GMT -5
Andy
I just went crazy but am finding I can after a fashion deal with those after some practice with the fiddly things. Can't make any yet but I can place them.
Bones
|
|
|
|
Post by bullardino on Jul 16, 2013 4:33:48 GMT -5
OMG, that's an awesomw kit. And you're doing a splendid job on it  |
|
johnt
Full Member
   Feb 2012 MoM and 2012 Model of the Year Winner
Member since: November 2011
Posts: 1,174
Nov 15, 2011 5:38:32 GMT -5
Nov 15, 2011 5:38:32 GMT -5
|
Post by johnt on Jul 16, 2013 8:28:36 GMT -5
Hi Bones, I have to agree this is a nice kit! I hope to build another sometime, maybe with the CAT 60 conversion from LZ Models.
Great progress so far mate!
Cheers
JT
|
|
|
|
Post by Teabone on Jul 16, 2013 13:08:33 GMT -5
Luigi & JohnT
Thanks for your interest and comments, I have to say it is a nice kit and LZ's kit is very good as resin kits go, highly recommended.
Bones
|
|
thug626
Senior Member
   
Member since: January 2013
Posts: 2,035
Jan 15, 2013 13:05:28 GMT -5
Jan 15, 2013 13:05:28 GMT -5
|
Post by thug626 on Jul 17, 2013 15:50:26 GMT -5
Greetings Bones, Lots of wee fiddley parts....I love wee fiddley parts.  This is looking good! Dave |
|
|
|
Post by Teabone on Jul 31, 2013 17:03:25 GMT -5
Thug
I like em too.
Bones
|
|
Deleted
Member since: January 1970
Posts: 0
Nov 28, 2024 5:42:56 GMT -5
Nov 28, 2024 5:42:56 GMT -5
|
Post by Deleted on Jul 31, 2013 17:33:48 GMT -5
Can't wait to see more of this great build!
|
|
|
|
Post by Leon on Jul 31, 2013 18:27:37 GMT -5
Awesome work Bones  ,know all about those wee fiddly parts.  |
|
|
|
Post by Teabone on Jul 31, 2013 22:29:55 GMT -5
Leon & Dogfish
Thanks for looking and your notes of appreciation of the work. I just returned from two weeks away and am trying yo kick start the build again which has not been as easy as I thought it would.
Bones
|
|
|
|
Post by Teabone on Aug 10, 2013 22:28:06 GMT -5
The engine kit comes without any fuel line details though it does suggest that it would be neat to do. I have started with some brass wire for the engine fuel line from the injector pump to the injectors. These lines are held in place by a very small wire loom which has to be drilled out to allow the wires to be placed smoothly.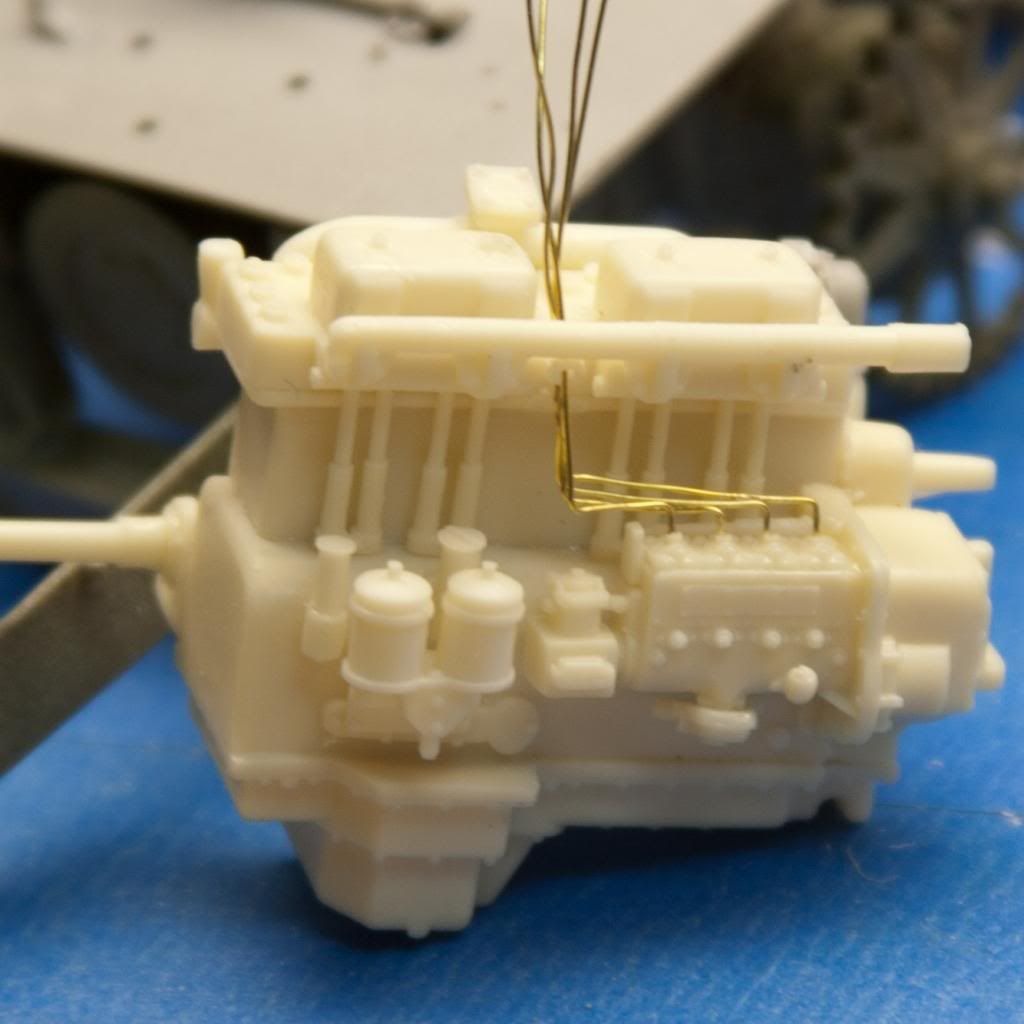 Below is the loom ready to mount, holes drilled shown on a quarter. Below is the loom ready to mount, holes drilled shown on a quarter.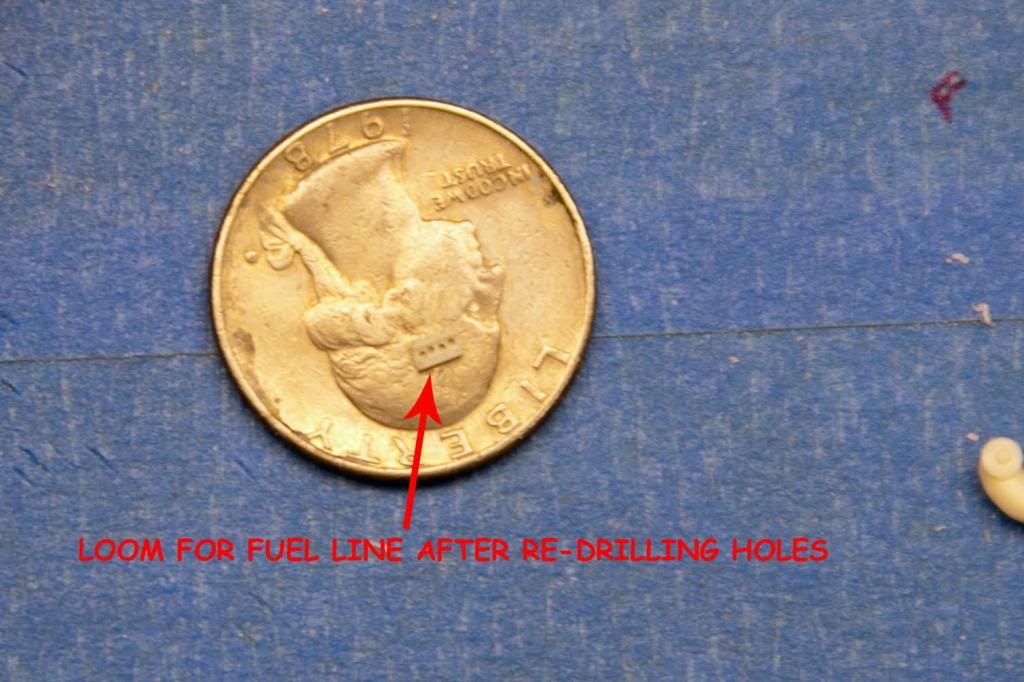 Below is the loom in my fat fingers still connected to the casting block. Below is the loom in my fat fingers still connected to the casting block.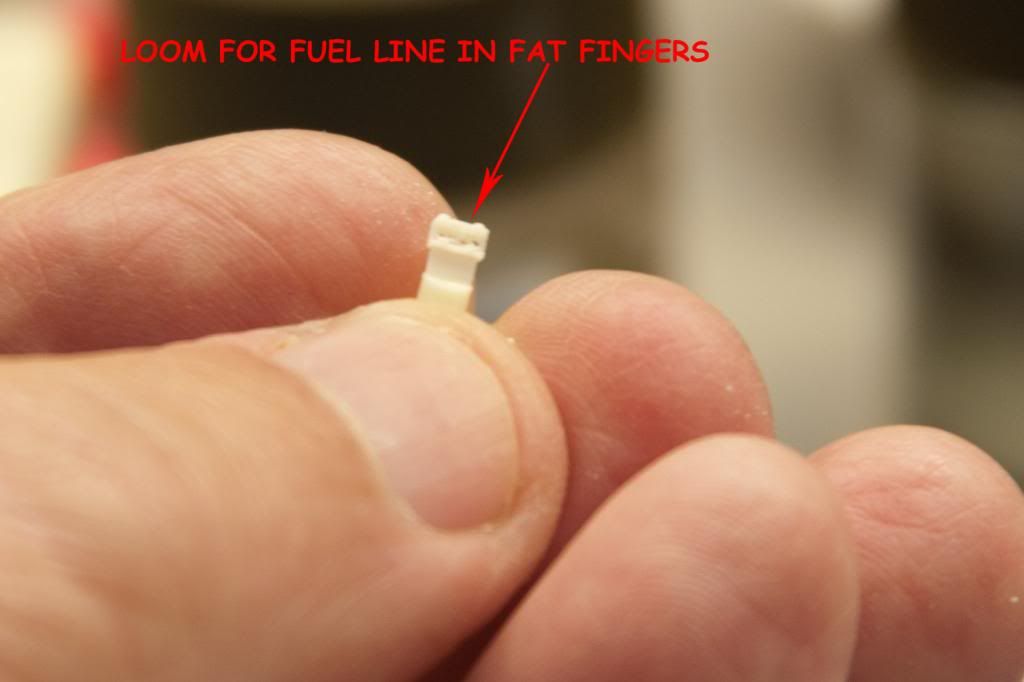 |
|
|
|
Post by Teabone on Aug 10, 2013 22:38:31 GMT -5
The Stalinetz seat with Kleenex texture material glued on using Elmer's white glue thing ever so slightly with water.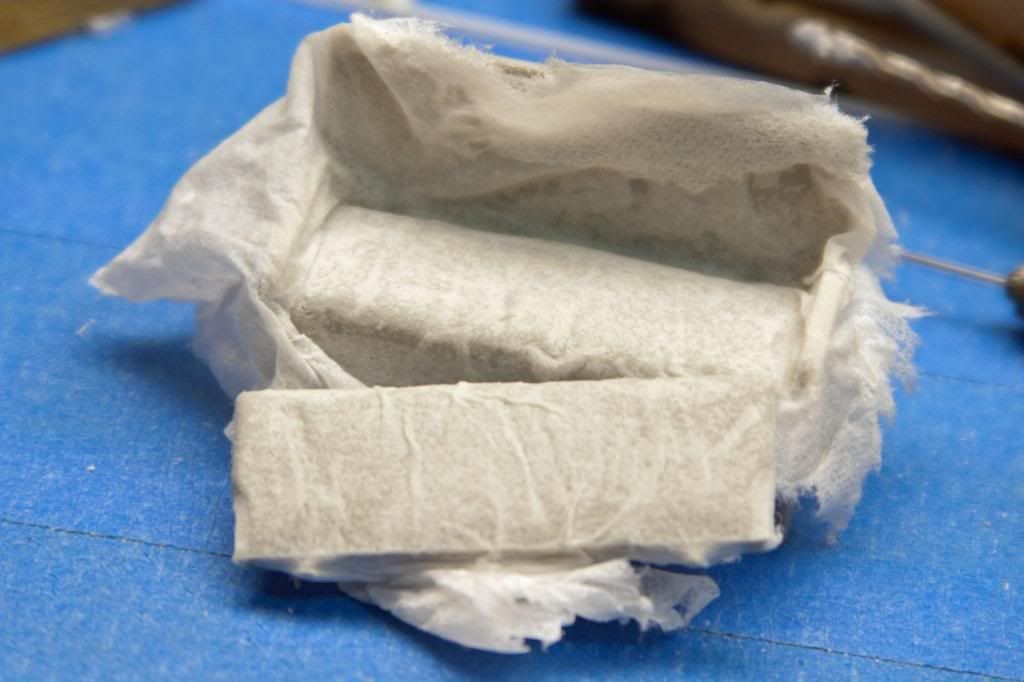
Seat roughed out, needs a trim strip and some more clean up work, the engine air cleaner is in front of it.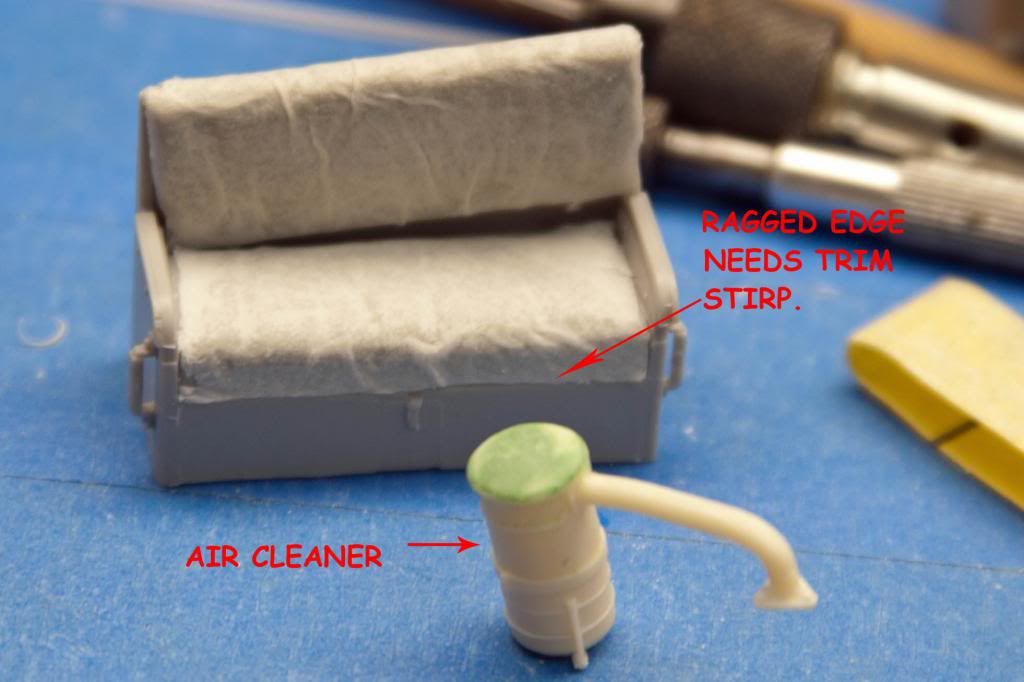
|
|
|
|
Post by armorguy on Aug 11, 2013 2:13:27 GMT -5
Mighty project ! This is a must have ! Nicely detailed, original subject too. Seats will look the part ! Have fun Leon.
Best regards ! Guy.
|
|
|
|
Post by Teabone on Aug 11, 2013 13:02:26 GMT -5
Mighty project ! This is a must have ! Nicely detailed, original subject too. Seats will look the part ! Have fun Leon. Best regards ! Guy.
The engine is a very good kit and will look very good if done right, the Trumpy of course is good with a few improvements for feel. You will want to assemble the engine with caution for part placement, there is no spare room at all the built kit fits very very tight.
Bones |
|
|
|
Post by Teabone on Aug 11, 2013 15:47:35 GMT -5
Engine Colors (Help???)
I painted the engine the same color as the exterior was going to be and then it hit me that I don't know for sure what color the engine was. Searching the net I find an example in a Russian museum that was most likely used in farming that is grey. I saw on another web site where someone saw one being pulled from a swamp and it had a green exterior and he suspected the engine was green also but was not absolutely sure. Then there is "Engines of the Red Army" site which shows the exterior green and the engine a darkish grey. Lacking any other authority on the color tomorrow we re-paint a grey color.
|
|
johnt
Full Member
   Feb 2012 MoM and 2012 Model of the Year Winner
Member since: November 2011
Posts: 1,174
Nov 15, 2011 5:38:32 GMT -5
Nov 15, 2011 5:38:32 GMT -5
|
Post by johnt on Aug 11, 2013 16:24:52 GMT -5
Hi Bones, I finished ones of these last year and I can only tell you what I did and why; it is by no means very authoritive.
WWII vintage photos are black and white but you will find some existing machines in grey. I also found a video on the net in color, showing an old machine being pulled from a bog. It was obviously pretty dirty but I thought it was partly green and partly grey.
So I made the assumption that machines left the factory in grey for civil use, but some might have been painted after in green and pressed into military service. It's just an assumption, all I have to go on is that video and some guess work.
So I assumed the engine covers were in place during the repaint and so I left the engine and various parts grey, but most of the exterior green. It made for an interesting variation in color, and after posting photos all over the net including Missing lynx no one has queried my choice of color.
I've seen most other models of the tractor with green motors, no one seems to be concerned about it one way or another. Anyway I hope that helps, I say go with what you think.
Cheers
JT
|
|
|
|
Post by wbill76 on Aug 11, 2013 16:33:54 GMT -5
I love your photo captions Bones...fat fingers indeed! Nice work on the fuel lines and seats, will look the part once painted for sure!
|
|
|
|
Post by Teabone on Aug 11, 2013 17:00:17 GMT -5
JohnT
Your thought on the possibility of the engine covers being on when re-painted is logical. My experience with Soviet vehicles has been there is no standard that is absolute, they expedited everywhere and you can see all kinds of small variations along with some big ones. Color seems to be the least of their problems during the way and they used what was handy or in some cases no paint at all. Thanks for your input it really goes along with my thinking and I might just put the sides on when I paint it and let the over spray got where it goes just like a field paint job.
The "Engines of the Red Army" appears to be a Russian site so I'm giving them the benefit of the doubt in knowing what the color should be, it is at the link below.
www.o5m6.de/s-65_open.html
Bones
|
|
|
|
Post by bullardino on Aug 13, 2013 4:30:53 GMT -5
Very nice progress, Bones.
I agree with you and JT, the engines were most probably painted with the colour they had ready. So I wouldn't be surprised to find evidences of various shades of green, light blue or other colours used on tanks and planes.
I'm also rather sure that the harsh climate and the heavy duty usage they went through left very little of the original colour, overlaying it with new layers of paint, grease, dents, scratches, leaks and everything a tractor had to suffer on the eastern front.
|
|
pt109
Full Member
  
Member since: April 2013
Stop staring at me! heheheh
Posts: 491 
|
Post by pt109 on Aug 19, 2013 0:14:59 GMT -5
JohnT
Your thought on the possibility of the engine covers being on when re-painted is logical. My experience with Soviet vehicles has been there is no standard that is absolute, they expedited everywhere and you can see all kinds of small variations along with some big ones. Color seems to be the least of their problems during the way and they used what was handy or in some cases no paint at all. Thanks for your input it really goes along with my thinking and I might just put the sides on when I paint it and let the over spray got where it goes just like a field paint job.
The "Engines of the Red Army" appears to be a Russian site so I'm giving them the benefit of the doubt in knowing what the color should be, it is at the link below.
www.o5m6.de/s-65_open.html
Bones
Bones, I say go with what seems logical to you and who cares if it's 100% correct? Like what's been already posted....no hard and fast absolutes in Russian methodology. You can hide it under weathering anyway.... Just don't paint it the exact same green as the exterior and you're okay...   PS I think the site is actually a German site...by the de extension, a nice site BTW. |
|