|
|
Post by Teabone on Sept 14, 2013 22:38:03 GMT -5
Like a bad penny I am back, kind of fell out with some painting disasters combined my shaky hands not wanting to participate like they should. After MUCH thought and dragging of my big feet I decided that this needed to be finished in some fashion and to move on to something I can handle better thus avoiding a shelf queen.
Bones
The kit comes with some PE parts that fit under the fuel tank to brace and support the tank in order to avoid unneeded CA glue use I decided to make my own supports with part shown in white styrene in this photo.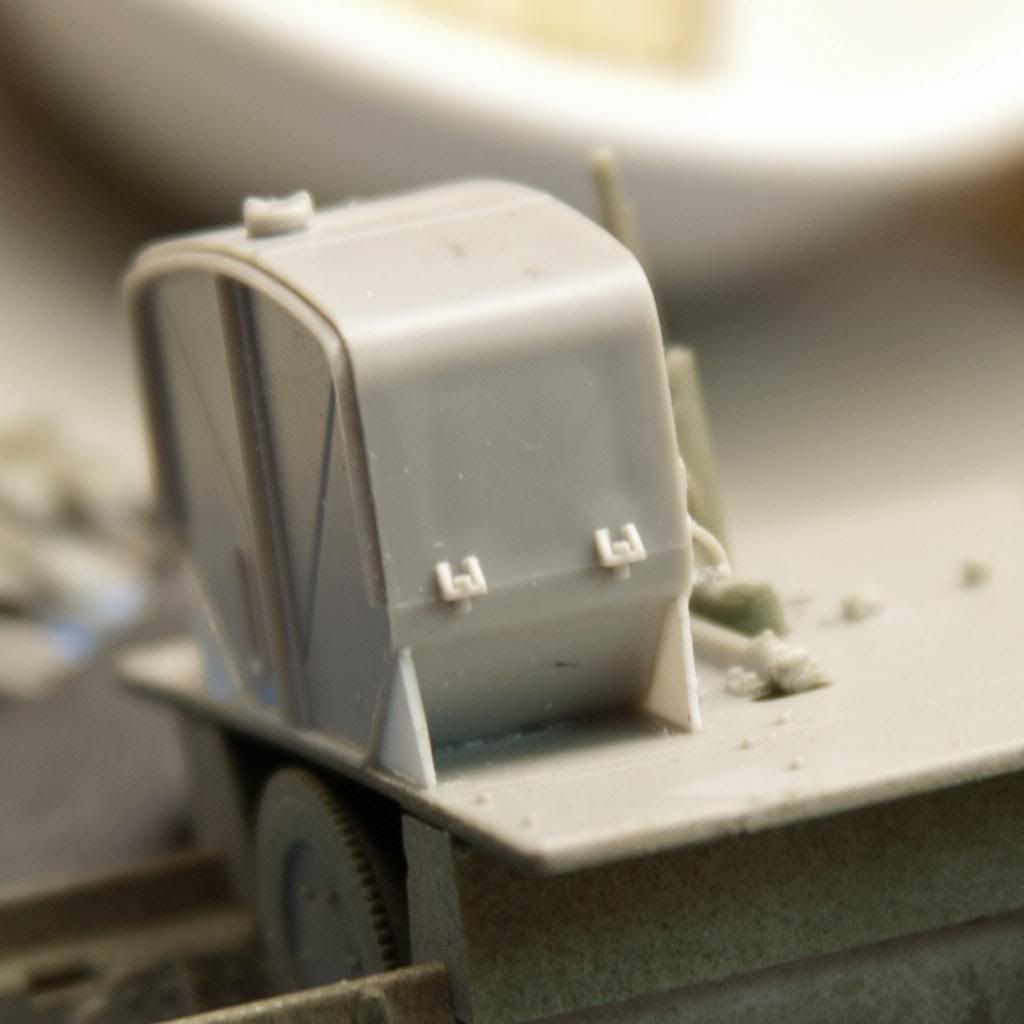
Here the part is almost complete, the part on the photo right side is complete, the one on the left needs to be glued. 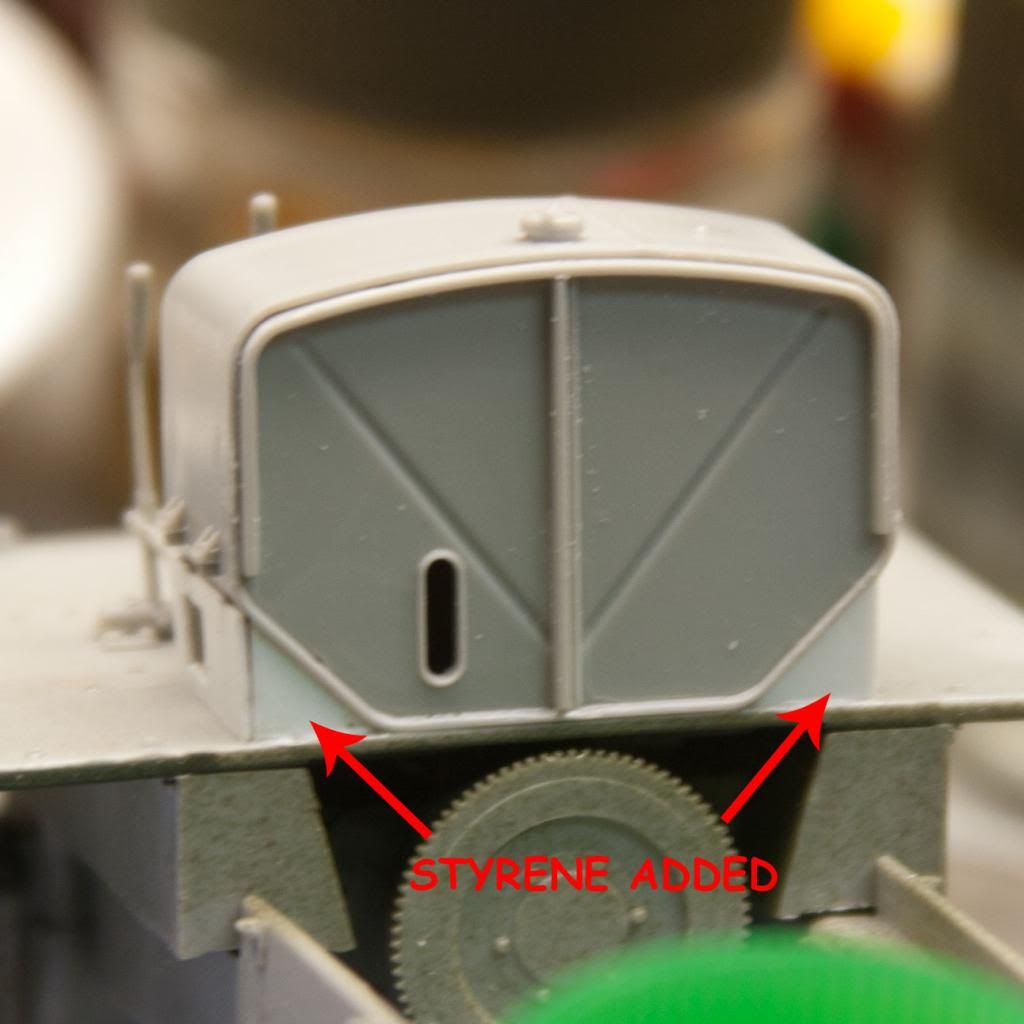
Wire loom for fuel lines and some other added plumbing.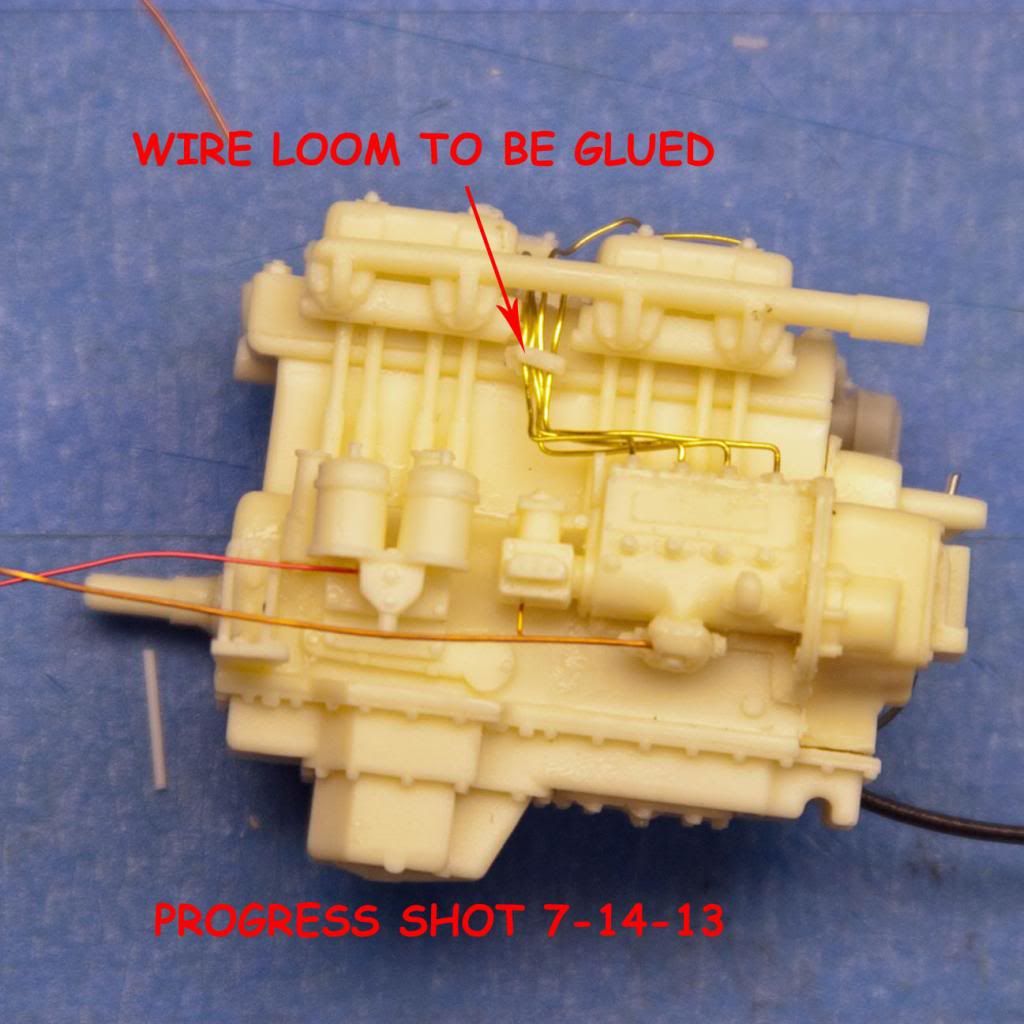 Left side of the engine ready for paint. This is a very nice kit by LZ and I would highly recommend it to anyone building the Trumpy Stalinetz. Left side of the engine ready for paint. This is a very nice kit by LZ and I would highly recommend it to anyone building the Trumpy Stalinetz.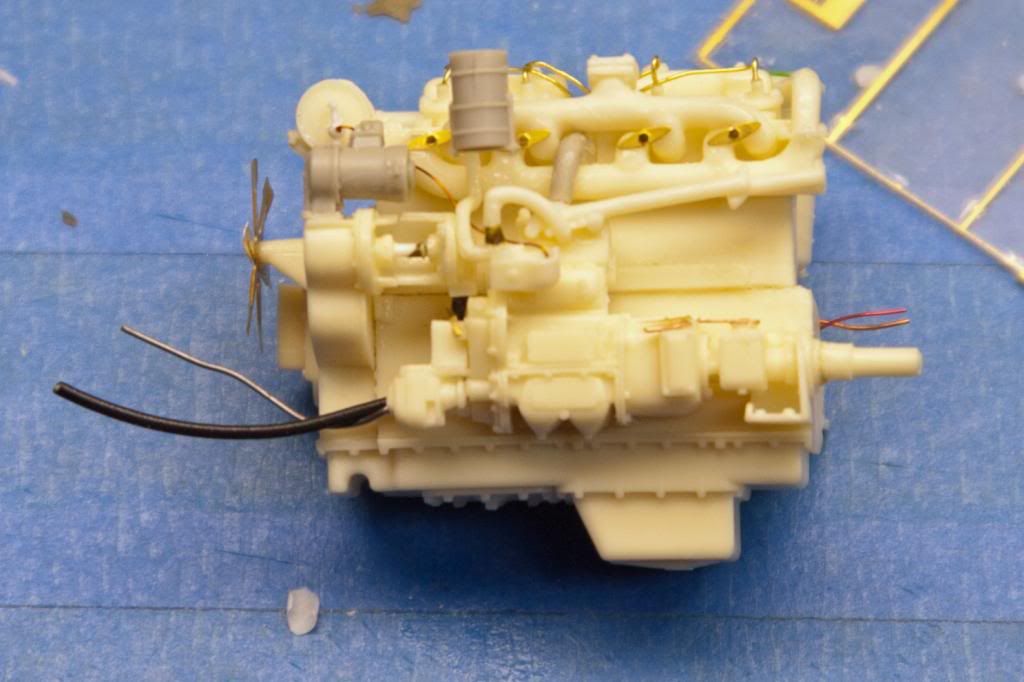
I used the kit radiator housing rather than the resin one by LZ the reason for the resin replacement is the words in raised lettering on the sides of the housing was misspelled on the Trumpy housing. Upon looking at the two I could see that the detail of the shroud and the radiator it self was much better using the Trumpy part and as Todd and Andy Fonin are probably the only ones how can read it I would go for the detail. The PE grill comes with the kit.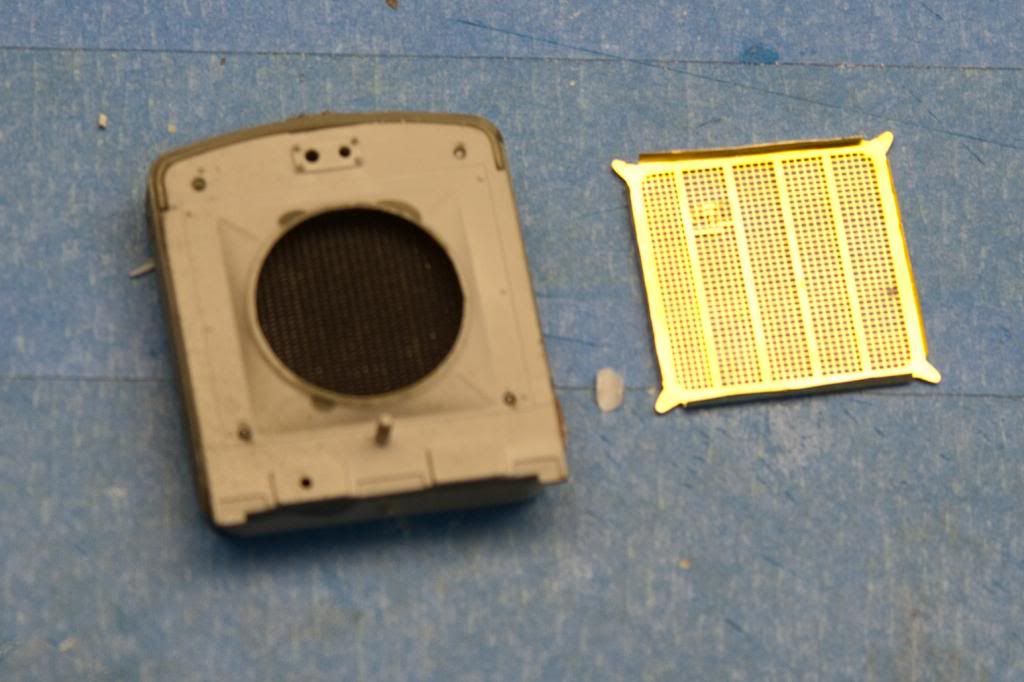 Front view Front view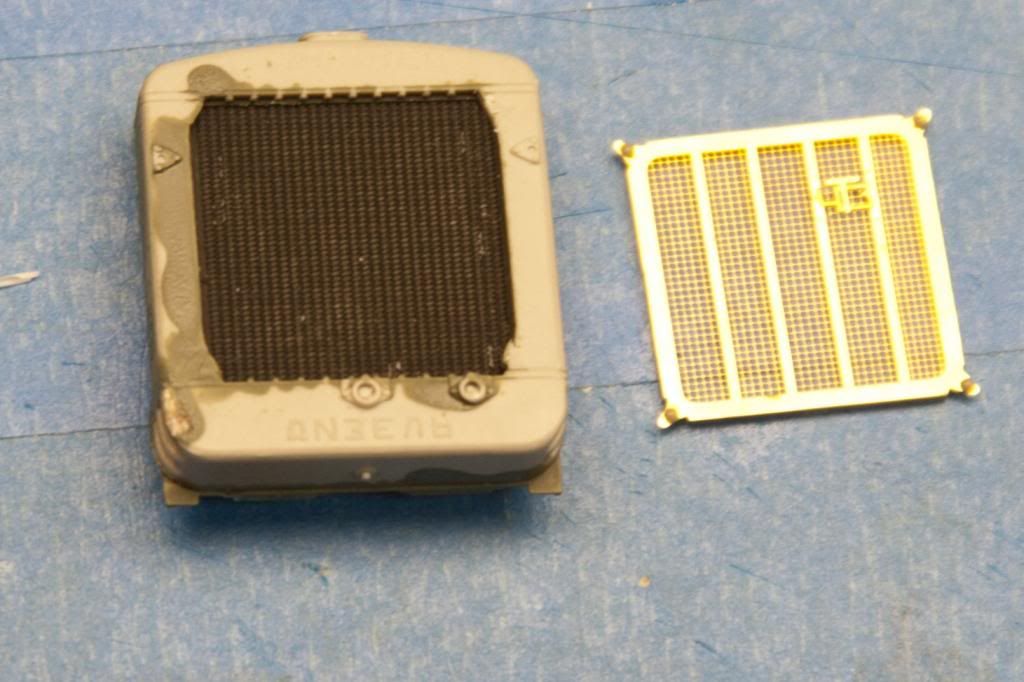 Grill work in place with AM rivet heads ot round headed bolts at the corners. Grill work in place with AM rivet heads ot round headed bolts at the corners.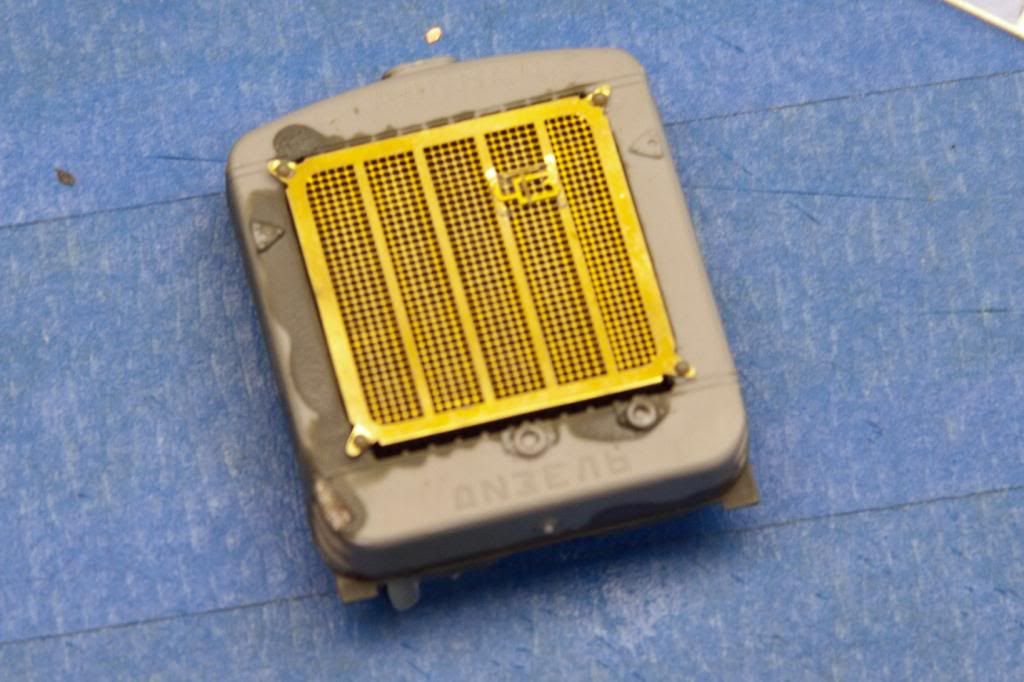
Operators seat which needs a little more finish effort of the front metal panel which is still a little rough.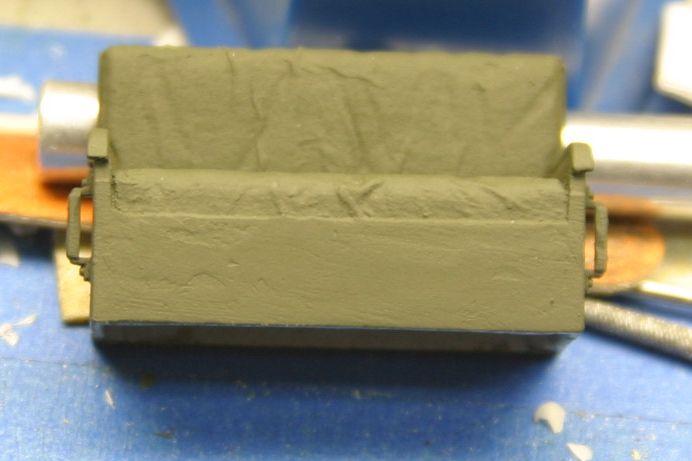
|
|
|
|
Post by TRM on Sept 14, 2013 22:40:43 GMT -5
Nothing wrong with keeping the hands moving!! Sweet looking lump there!! That is going to look mighty fine once under some color!! Love the grill work too!!! Keep it rolling!!
|
|
|
|
Post by Teabone on Sept 14, 2013 23:16:34 GMT -5
Todd
Thank you for stopping by, I can always count on your for some nice positive reinforcement and lately I need as much as I can get.
Bones
|
|
|
|
Post by deafpanzer on Sept 14, 2013 23:49:51 GMT -5
GREAT UPDATE!!! PE looks awesome... can't wait to see more I am serious.
|
|
|
|
Post by bullardino on Sept 15, 2013 4:44:32 GMT -5
It's great to see progress on this one, I really like the outcome Bones  |
|
|
|
Post by wbill76 on Sept 15, 2013 10:50:45 GMT -5
Nice to see you getting back around to this one Bones! Nice progress on that engine and radiator.
|
|
|
|
Post by Teabone on Sept 15, 2013 13:30:50 GMT -5
Andy, Luigi and WildBill
Nice to see some of my favorite people following along, this sure makes a great build tough I might not really do it justice. In any event Ill do my best and keep plugging along, these tracks may slow me down a little depending on how fiddly the assembly gets. Thanks for stopping by.     
Bones
|
|
|
|
Post by Teabone on Sept 15, 2013 13:37:05 GMT -5
Here is an example of how I keep breaking those fine little parts during the assembly of larger parts.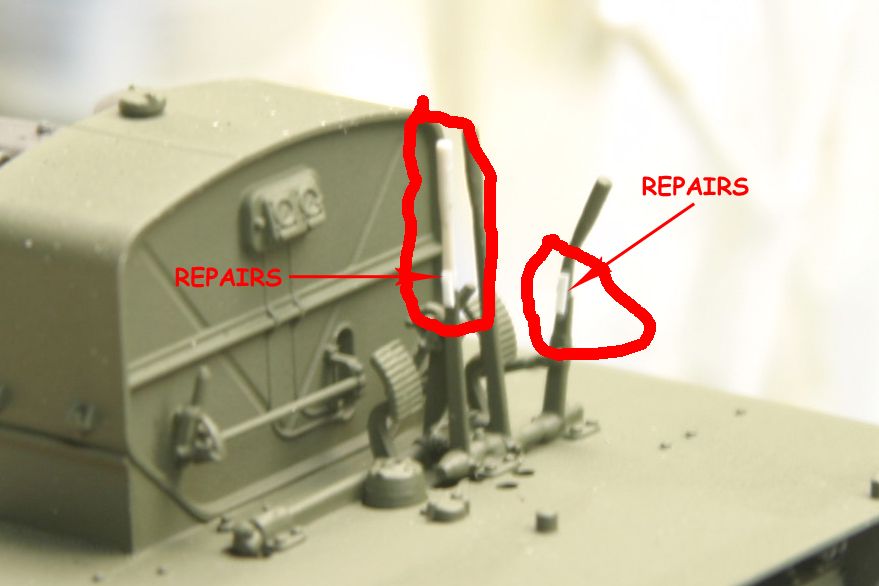
Fiddly track parts that need tedious clean up but look like they will make an outstanding example when finished.
|
|
|
|
Post by Teabone on Sept 15, 2013 13:45:44 GMT -5
Nemo
Thank you for looking in on this project it has been an education and I have always maintained that is good even if it is learning ones limitations. It seems like the kit makers often select the oddest part to make a PE part for, often something that styrene would be much better for. I wouldn't want to accuse them of just throwing in some PE to impress the modeler and not to improve the build but ...........
Bones
|
|
|
|
Post by bullardino on Sept 15, 2013 14:59:38 GMT -5
All those fiddly bits are a real PITA, I know it from my little russian tractor...
|
|
|
|
Post by Teabone on Sept 15, 2013 15:52:56 GMT -5
Luigi
But they can really make your model look great so its kind of a love hate thing. When you want a complex part of a model to be in fine detail it almost has the be fiddly.
Bones
|
|
|
|
Post by bullardino on Sept 15, 2013 15:55:09 GMT -5
After the slide moulding technology has become more and more common, fiddly bits are getting smaller than my eye can bear...
|
|
ogrejohn
Full Member
   Oct '23 Showcased Model Awarded
Member since: June 2012
Go away or I shall taunt you a second time!
Posts: 1,302
Jun 1, 2012 17:33:59 GMT -5
Jun 1, 2012 17:33:59 GMT -5
|
Post by ogrejohn on Sept 15, 2013 16:28:22 GMT -5
Fine looking work there Bones! Those tracks do look tedious and fiddly but awesome detail!
|
|
|
|
Post by Teabone on Sept 15, 2013 16:36:20 GMT -5
Luigi
So far with 1/35 scale things have been doable but the are getting down to the point at which you have to wonder how much smaller can the get. Thisning back to the Italeri and the old Airfix ones I think I appreciate this new stuff better.
Bones.
|
|
|
|
Post by Teabone on Sept 15, 2013 16:38:47 GMT -5
ogrejohn
You are right but after building a resin D7 Caterpillar Tractor with the resin tracks these are a work of art. Thank for looking and commenting.
Bones
|
|
|
|
Post by deafpanzer on Sept 15, 2013 21:12:10 GMT -5
Looking forward to see how tracks come out... glad I am not alone. Fragile pieces and my fat fingers rarely get along... I wonder why.
|
|
|
|
Post by Teabone on Sept 15, 2013 22:08:06 GMT -5
Looking forward to see how tracks come out... glad I am not alone. Fragile pieces and my fat fingers rarely get along... I wonder why. 
Bones
|
|
|
|
Post by Teabone on Sept 15, 2013 22:55:40 GMT -5
|
|
|
|
Post by deafpanzer on Sept 15, 2013 23:32:42 GMT -5
Looks like you will be in for FUN doing the tracks! Good luck... if you can deal with PE then this will be a breeze for you.
|
|
|
|
Post by Teabone on Sept 15, 2013 23:36:15 GMT -5
Yea I can see now it is a matter of getting the rhythm of the assembly and just going for it after the lengthy clean up.
Bones
|
|
|
|
Post by bullardino on Sept 16, 2013 0:43:01 GMT -5
Long and boring task... That's a part that I don't like, but it has a great impact on the overall result.
|
|
|
|
Post by Teabone on Sept 16, 2013 12:48:05 GMT -5
Luigi
You are right but for me it is still ahead of painting.
Bones
|
|
|
|
Post by wbill76 on Sept 16, 2013 16:25:18 GMT -5
Only one way to tackle tracks like that, one link at a time until they are done! Hang in there Bones, will be worth it in the end.
|
|
|
|
Post by Teabone on Sept 16, 2013 16:47:20 GMT -5
WildBill
Thanks for the encouragement I have found a better way of building them which I will post when I get to it. 
Bones
|
|
|
|
Post by Teabone on Oct 12, 2013 23:35:03 GMT -5
Here we are back looking at the tracks which when all the smoke cleared really went together quite easily once I ignored everything else that I found.
By taking the first part being a combination of a track link and pin and gluing it to the shoe and letting it set up firm the next shoe with its same part on iy can be slid up to the first shoe and the Second Part (track link) can be with a wiggle or two slid so the pins go in the shoe holes and snapped together and then just a very light drop of Tamiya ET can be applied to the show face where the two pins are sticking through. By gluing the First Part to the shoe and letting it set no glue will get on the moving parts. The only two places you want glue is on the pins that are in the holes on the track shoes which gives you workable tracks. Once I worked this out I was able to glue up a complete set (after the First Part was set on all the shoes) in about 15 minutes.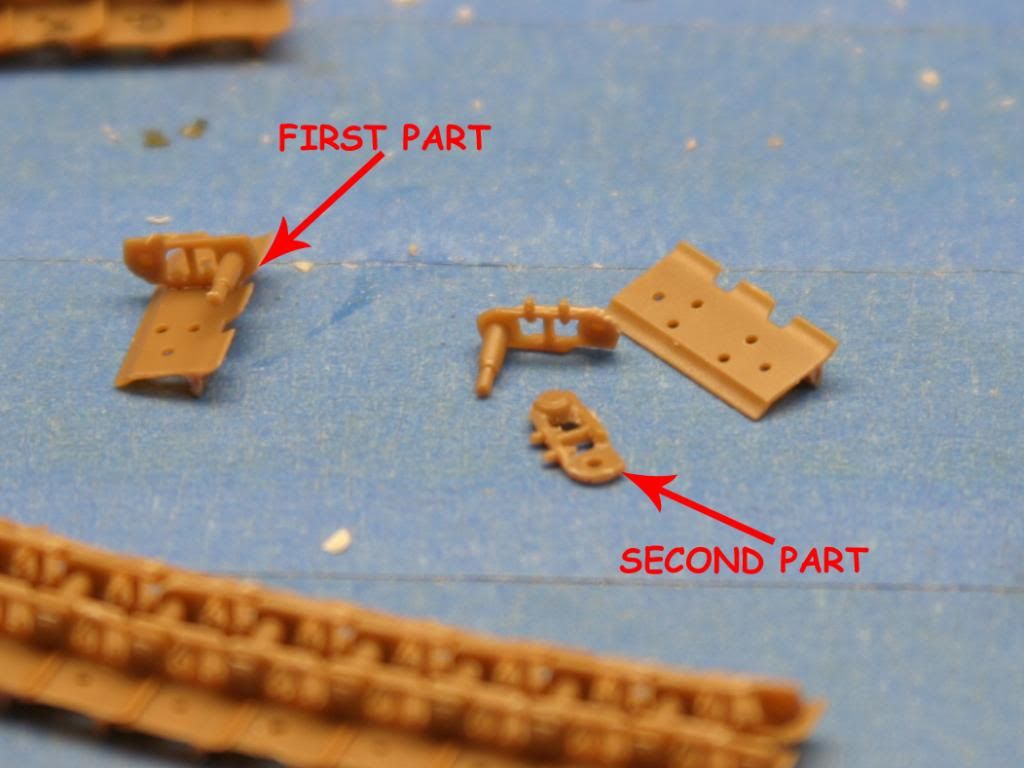
Here we have both sets complete and painted black primer, some joints look miss aligned but the whole set is flexible and can be straightened as you wish. I did discover after I painted the set with the color "Steel" that the tracks should be flexed once the paint has set sufficiently to handle with out hurting the surface. If you apply this paint with an air brush this may not be needed but I brushed mine.
|
|
|
|
Post by wbill76 on Oct 13, 2013 20:24:44 GMT -5
Tracks are looking good Bones! Glad you figured out the secret handshake on how to get them together.  |
|
|
|
Post by Teabone on Oct 13, 2013 22:50:05 GMT -5
WildBill
Thanks for looking, it does help to know the handshake for sure.
Bones
|
|
shawngehling
Reviews member     review staff
Member since: March 2012
Posts: 339
Mar 1, 2012 20:08:28 GMT -5
Mar 1, 2012 20:08:28 GMT -5
|
Post by shawngehling on Oct 21, 2013 20:37:42 GMT -5
Nice,
I have this kit but don't know when I'll get around to working on it?
Great stuff.
|
|
|
|
Post by Teabone on Oct 22, 2013 17:38:40 GMT -5
Shawn
It is a very good kit and I'm sure you will like it.
Bones
|
|
|
|
Post by tonylee-Rest In Peace on Oct 22, 2013 18:45:56 GMT -5
Lookin good but will it run like a Deere?  Tony lee  |
|