|
|
Post by deafpanzer on Dec 11, 2013 20:33:14 GMT -5
That pic of two sitting next to each other... great pic!!! Didn't really realize how huge it was... great work!
|
|
losboz
Full Member
  
Member since: September 2013
Posts: 322 
|
Post by losboz on Dec 12, 2013 16:03:23 GMT -5
It is a biggy Andy  I have come up trumps and FINALLY  managed to track down the only (as far as extensive research can ascertain !) resin wheels which are modeled on the original solid tyres that were on the vehicle dragged out of the Pilica River in Poland. The restored vehicle received pneumatic tyres and for some strange reason Trumpeter followed suit    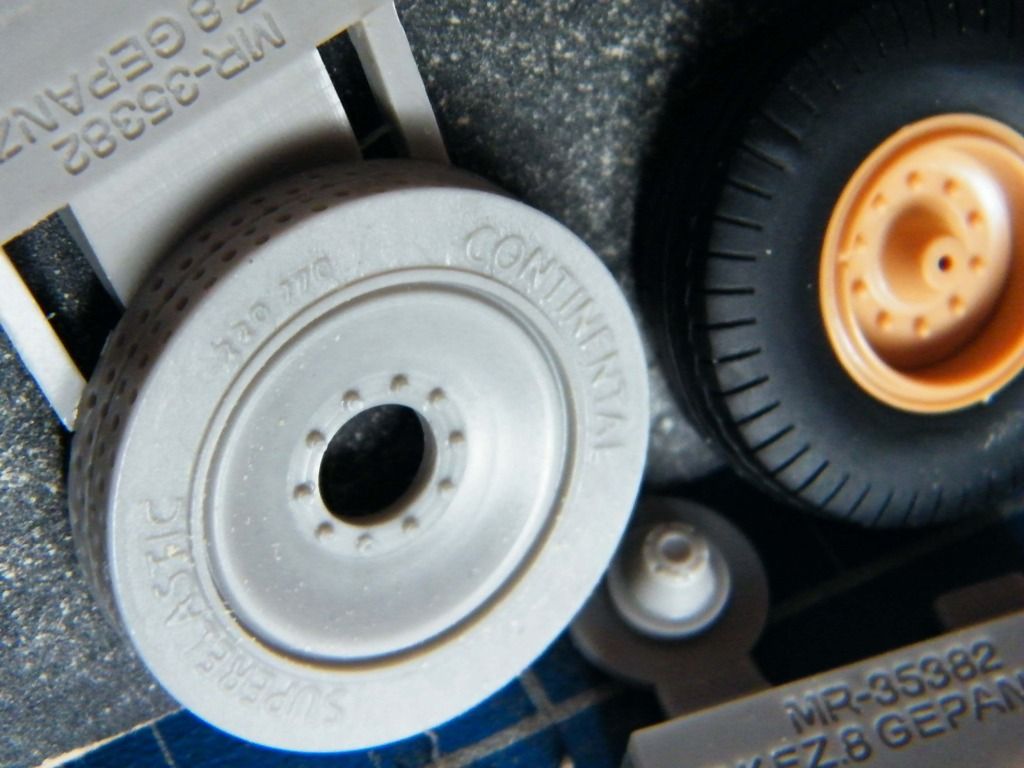 Modellbau replica resin wheels ( I followed a direct link from an other modelling site blog for the wheels to Moddelbau and it states 'item out of stock' !) HOWEVER if you stick the item code No MR-35382 in their search bar it then pops up as available. I purchased them today and already had several automated messages and the most recent stated it had been dispatched so it has to have been in stock.........don't it  . They also do a resin portion of the interior www.mrmodellbau.com/_shop/product_info.php?products_id=75 but it only appears to be the cockpit area but it does add the cab roof riveted bracing struts which are omitted in the kit. Bit late for that now anyway ! Modellbau DB10 solid 'Continental Elastic' tyres 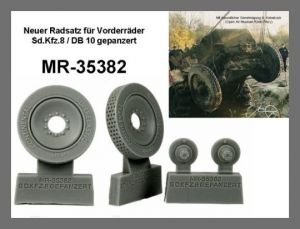 So a little purchase flurry had me snapping a few little gems just for this build. Along with the wheels I figured as the extinguisher was now going to blend in I would need some colour in the interior so: Reality in Scale - France posters, maps and pin up girls  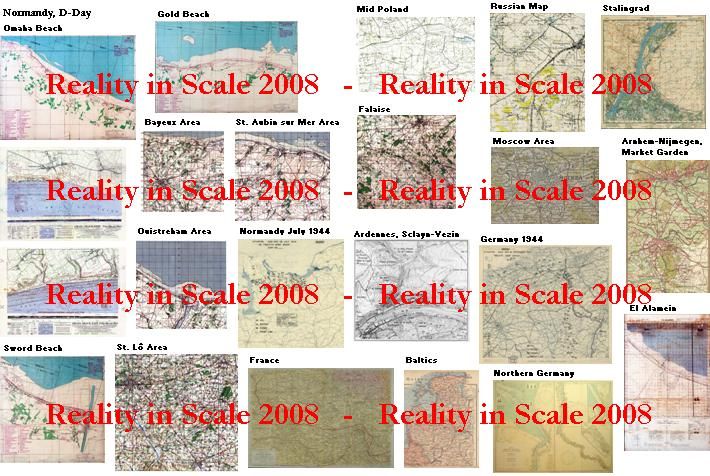  Off to finish that engine and engine bay  Los |
|
Deleted
Member since: January 1970
Posts: 0
Nov 22, 2024 9:38:40 GMT -5
Nov 22, 2024 9:38:40 GMT -5
|
Post by Deleted on Dec 12, 2013 16:57:20 GMT -5
Great blog of an unusual vehicle  Never heard of it but I don't think I'm alone there  Looks bud cool though  |
|
Deleted
Member since: January 1970
Posts: 0
Nov 22, 2024 9:38:40 GMT -5
Nov 22, 2024 9:38:40 GMT -5
|
Post by Deleted on Dec 12, 2013 21:55:04 GMT -5
Great find Los .
Bet that will be exciting when they arrive .
|
|
macmcconnell.
Full Member
  
Member since: December 2011
Posts: 1,238
Dec 11, 2011 12:07:33 GMT -5
Dec 11, 2011 12:07:33 GMT -5
|
Post by macmcconnell. on Dec 13, 2013 2:42:55 GMT -5
Great blog unfolding Loz
Mac
|
|
Deleted
Member since: January 1970
Posts: 0
Nov 22, 2024 9:38:40 GMT -5
Nov 22, 2024 9:38:40 GMT -5
|
Post by Deleted on Dec 13, 2013 8:12:45 GMT -5
Great find about those front wheels, I saved the pictures
Eddy
|
|
Deleted
Member since: January 1970
Posts: 0
Nov 22, 2024 9:38:40 GMT -5
Nov 22, 2024 9:38:40 GMT -5
|
Post by Deleted on Dec 13, 2013 9:57:15 GMT -5
nice goodies, those wheels are strange, where they solid rubber on the real thing? with them in place it will look more authentic
|
|
|
|
Post by Deano on Dec 13, 2013 11:46:49 GMT -5
Great work on this HT buddy ..... really like yer 251 btw  |
|
|
|
Post by Tobi on Dec 14, 2013 5:14:58 GMT -5
Really nice build so far, and your 251 is looking great also, Los! I have to confess, your thread made me buy this kit plus an 88 from Dragon. I will try to utilize some resin wheels made for the Sd.Anh.116 on it. Judging from this picture, there seems to be no problem with sticking to pneus also on this monster. 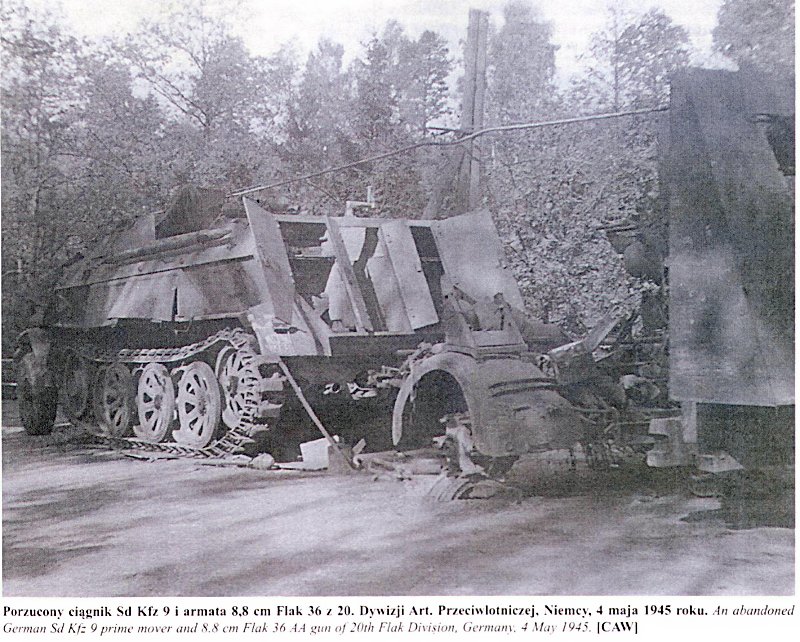 Cheers, Tobi |
|
Deleted
Member since: January 1970
Posts: 0
Nov 22, 2024 9:38:40 GMT -5
Nov 22, 2024 9:38:40 GMT -5
|
Post by Deleted on Dec 14, 2013 17:35:39 GMT -5
Good ref pic there Tobi .Thing is i have a couple of those Dragon 88's also and one of them sure would look good behind this .  |
|
losboz
Full Member
  
Member since: September 2013
Posts: 322 
|
Post by losboz on Dec 23, 2013 13:05:46 GMT -5
First of all MERRY CHRISTMAS and a healthy, productive and prosperous new yearI finally got a few evenings at the bench this week and the AM resin wheels arrived  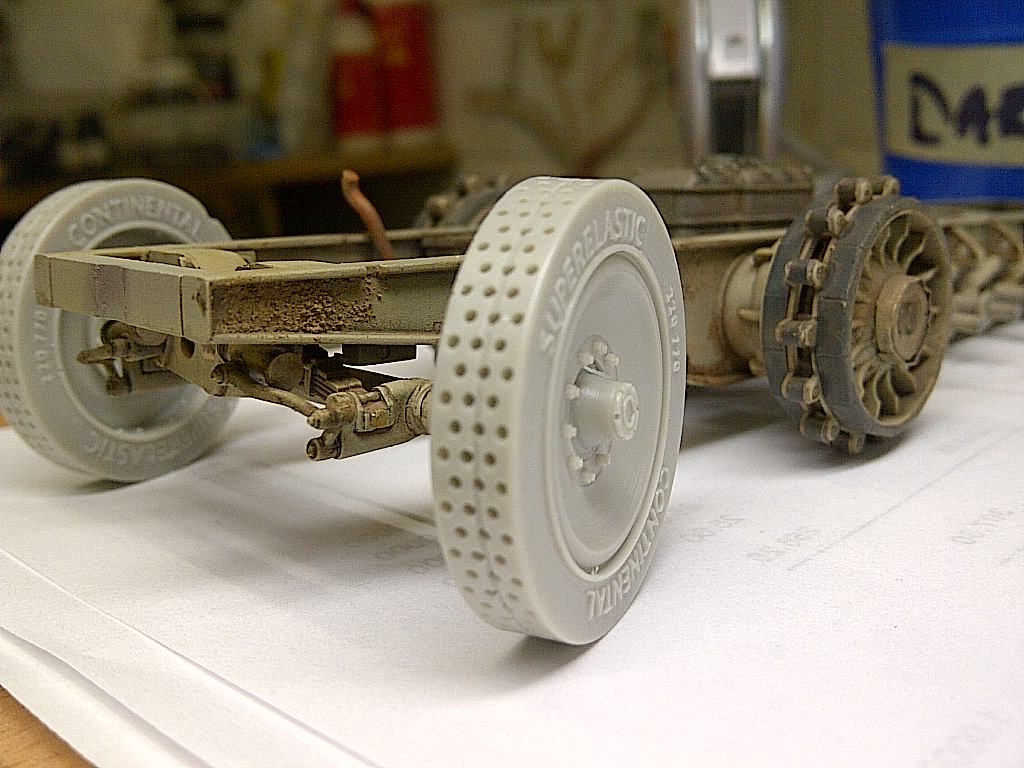 Nice sharp detail but not sure if that central seam should be there so will have to do some ref pic checking ! Had a go at weathering the chassis a la Mike Rinaldi Tank Art stylee. Dry pigments applied followed by a fixer. I was a bit worried that an application of Tamiya's thinner as a fixer could potentially ruin all the previous paintwork but it wasn't this that was the issue. In fact this process and I didn't get along at all !  I assumed capillary action would have had the fixer spread across the pigments but it just didn't and I wasn't going to soak the model in thinners for it to do so ! I tried again applying the pigments dry but this time used Mig turps as a fixer. The results were more pleasing  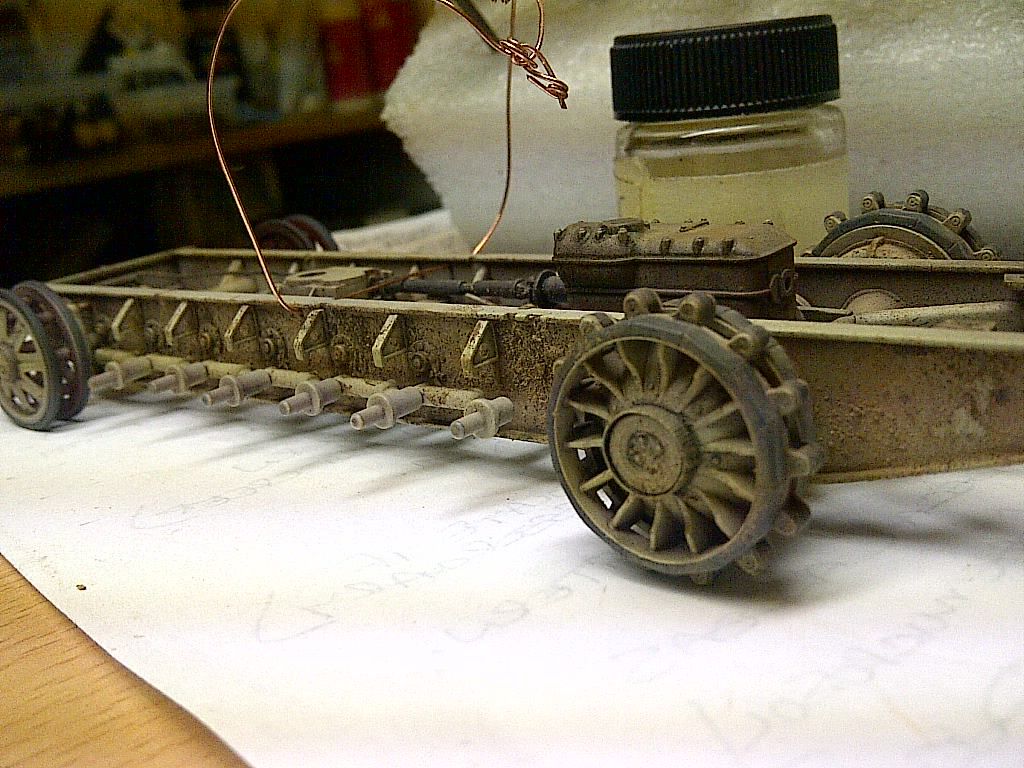 I used an old paintbrush and flicked various darker stains of mixed oils. The wheels received the same treatment 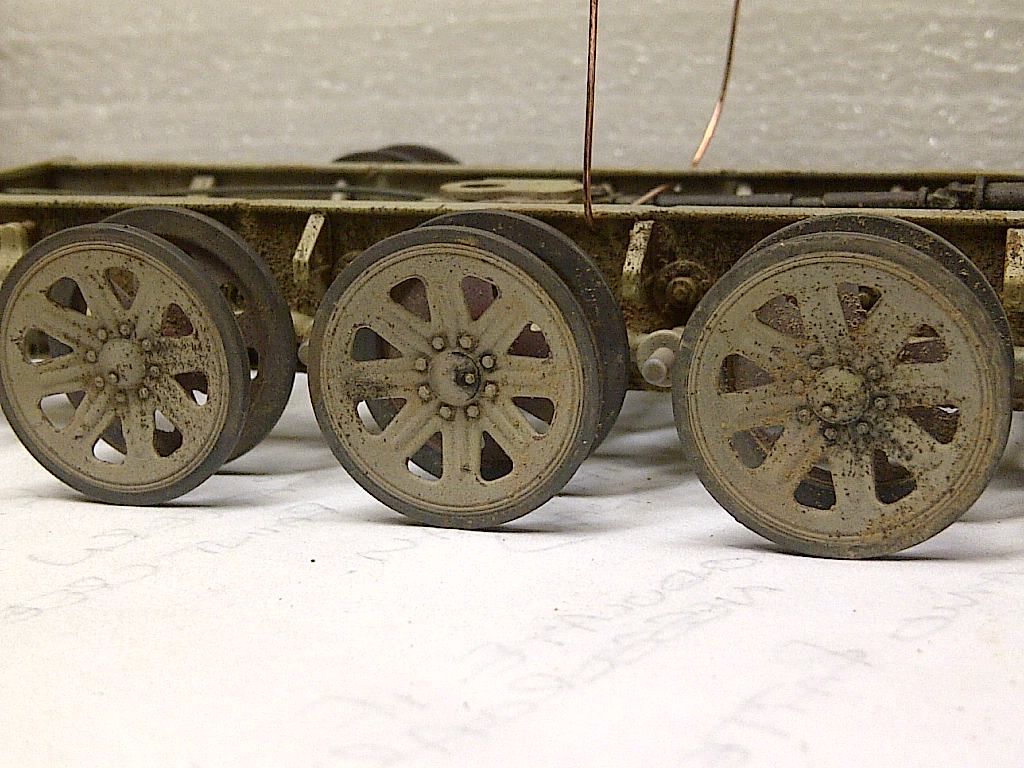 I didn't want to go too heavy with the pigments on the wheels as I liked the look of the paintwork on them so I am still undecided on whether I like this 'look' yet. I am going to finish the tracks, mount them and then decide   I also had a little time to add a few little details to the engine. It still requires more paint and will finish it once I know whether it needs a radiator fitting. Once I know whats visible through the one drivers side engine hatch I can determine how much detail needs adding but that will have to wait until the upper and lower hull are attached ![]() 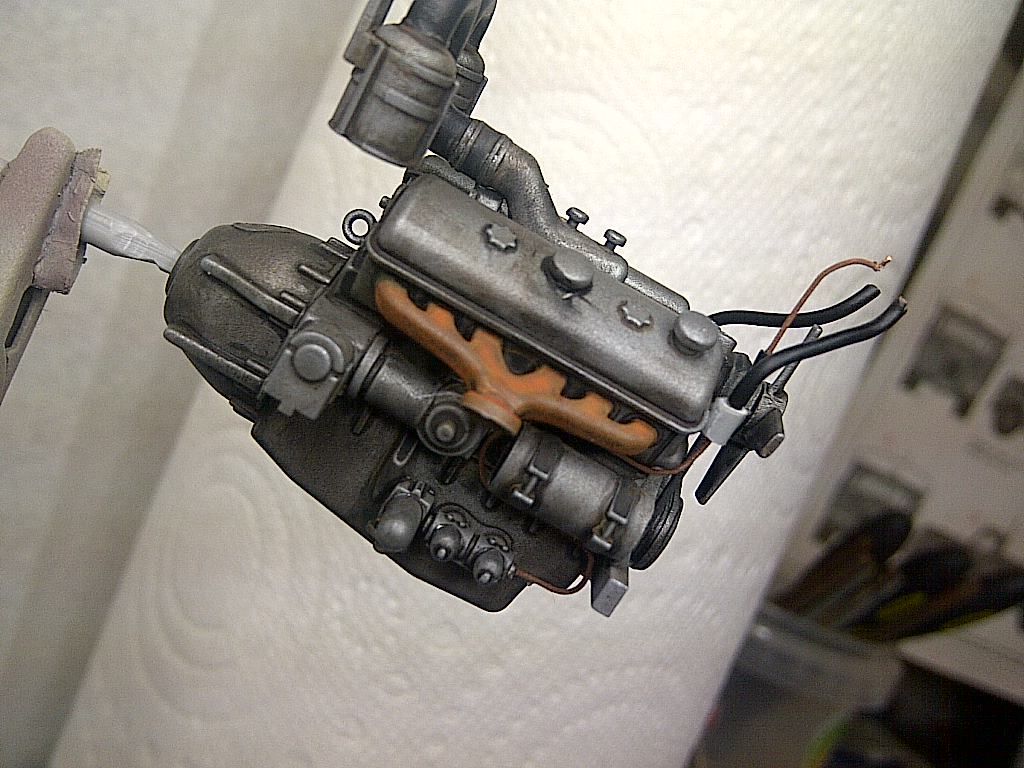 Enjoy the festive break fellas  |
|
|
|
Post by wbill76 on Dec 24, 2013 20:48:52 GMT -5
Merry Christmas Los! Nice progress on the HT...weathering and engine are looking good from here.
|
|
Deleted
Member since: January 1970
Posts: 0
Nov 22, 2024 9:38:40 GMT -5
Nov 22, 2024 9:38:40 GMT -5
|
Post by Deleted on Dec 24, 2013 20:53:39 GMT -5
Beautiful!
Merry Christmas!
G
|
|
Deleted
Member since: January 1970
Posts: 0
Nov 22, 2024 9:38:40 GMT -5
Nov 22, 2024 9:38:40 GMT -5
|
Post by Deleted on Dec 26, 2013 3:50:03 GMT -5
Coming along very well Los . Weathering is looking very well done . I agree bout getting the pigments to stay stuck . Seems the best things is to keep the hands off  . Like your wire idea . |
|
|
|
Post by Deano on Dec 26, 2013 9:20:10 GMT -5
Splendid work Los, really coming alive now buddy !
|
|
Deleted
Member since: January 1970
Posts: 0
Nov 22, 2024 9:38:40 GMT -5
Nov 22, 2024 9:38:40 GMT -5
|
Post by Deleted on Dec 27, 2013 13:02:48 GMT -5
really nice weathering there looks great
|
|
macmcconnell.
Full Member
  
Member since: December 2011
Posts: 1,238
Dec 11, 2011 12:07:33 GMT -5
Dec 11, 2011 12:07:33 GMT -5
|
Post by macmcconnell. on Dec 27, 2013 16:34:42 GMT -5
Very nice work Loz some fine detail work and not over the top cant wait to see more
Mac
|
|
losboz
Full Member
  
Member since: September 2013
Posts: 322 
|
Post by losboz on Dec 30, 2013 12:03:03 GMT -5
Lookin' absolutely superb Loz - am I right in thinking the body work is still 'basic' and unprimed? Are you doing all this weathering as access will be impeded following attachment of the hull or is this yer usual MO fella? Hi Dicky Yep hull upper and lower exterior not even in primer yet ! I figured seeing as the chassis to lower hull fit is just a drop in affair the only handling after that would be the track control arm to steering box linkage assembly and as the wheels are fixed the steering arm would just sit under the fenders hidden from view. I also intended to leave the chassis and hull un-glued so as to show off the chassis. With this thinking I spent a little more time on the chassis than first intended and realise that the weathering on the lower hull would be a little more demanding in getting it to match up after but ......................... that was before my monumental build cock up emerged    Ive only gone and positioned the suspension arms in the wrong ferkin order on the near side. The three suspension arms for the double wheel set up are shorter to facilitate the extra width and Trumpy supply two different arms for each side. I managed to get one side correct but somehow fecked up the other side ! Each arm has the same two locating pegs So, how to deal with it. Do I try and remove some plastic on the longer arms in situ without disturbing the pigments and then try and line up the wheels to the sprocket and idler or just bite the bullet and remove all six arms and hope I can get them to sit straight again after re attaching  I am so pi**ed off with myself over this that the normal alcohol consumption over the festive break has increased and is now clouding my judgement in how to remedy this ferk up Any advice would be most welcome |
|
Deleted
Member since: January 1970
Posts: 0
Nov 22, 2024 9:38:40 GMT -5
Nov 22, 2024 9:38:40 GMT -5
|
Post by Deleted on Dec 30, 2013 12:58:50 GMT -5
oh bugger! thats a shame mate, I would try shortening in situ personally, you only need a saw for that I expect. Much safer than trying to remove the arms if they are glued in solid
|
|
losboz
Full Member
  
Member since: September 2013
Posts: 322 
|
Post by losboz on Dec 30, 2013 16:05:04 GMT -5
Hi Pete Had a look at me options and decided to cut the ends off behind the lips on the three long arms, remove 2cm of shaft off, drill and pin them and re-attach. Lining them up shouldn't be too much of an issue as I will mark the shorter arms using the long ones for placement before I get the saw out ! Wish me luck  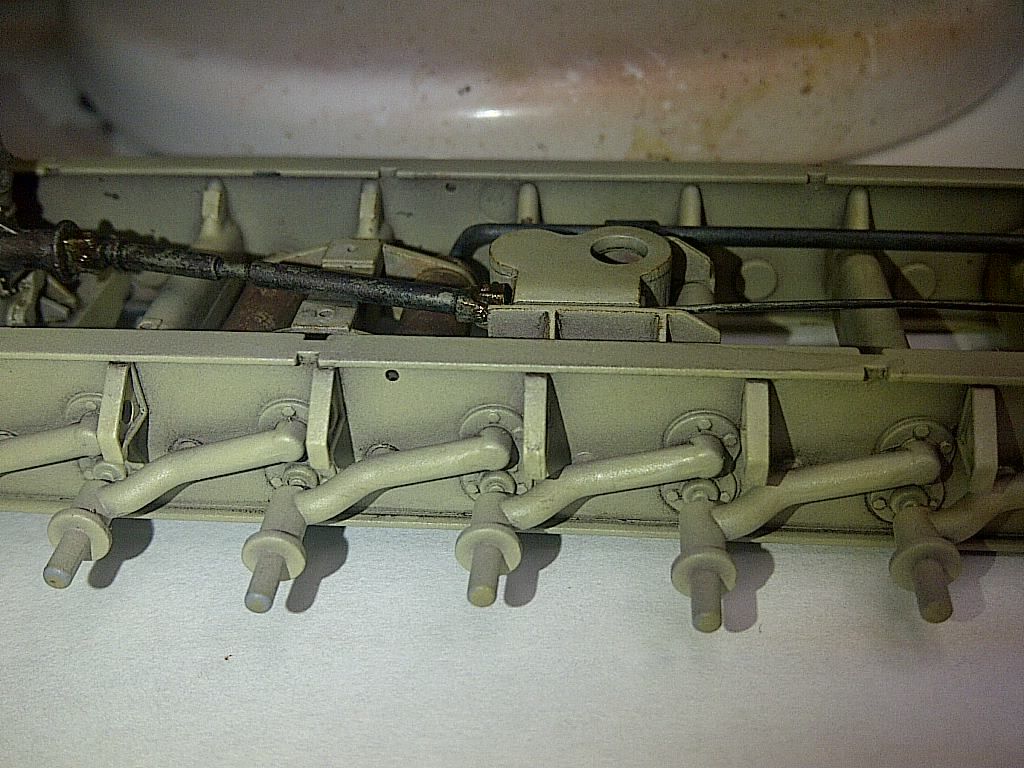 Right that's it, Im going in  |
|
|
|
Post by deafpanzer on Dec 30, 2013 18:31:00 GMT -5
Catching up here... fantastic work on the wheels!
|
|
Deleted
Member since: January 1970
Posts: 0
Nov 22, 2024 9:38:40 GMT -5
Nov 22, 2024 9:38:40 GMT -5
|
Post by Deleted on Dec 30, 2013 19:28:18 GMT -5
Los , good luck !
|
|
losboz
Full Member
  
Member since: September 2013
Posts: 322 
|
Post by losboz on Dec 30, 2013 20:28:55 GMT -5
Cheers guys That was a hairy few hours at the bench but mission accomplished  I marked the larger arm connection point on the shorter arms and utilised a pipette and cut sleeves as spacers  I then went about slicing the longer arms with a red hot blade. The cut off section was then filed/sanded back and re-attached to the arm. All wheels were then attached but I have only glued the inner connected wheels for now and left them on the tracks to dry overnight. I can see I shortened the longer arms a tad too much but the connected wheel set determines the spacing so there's room to get these lined up no problem The correctly built side 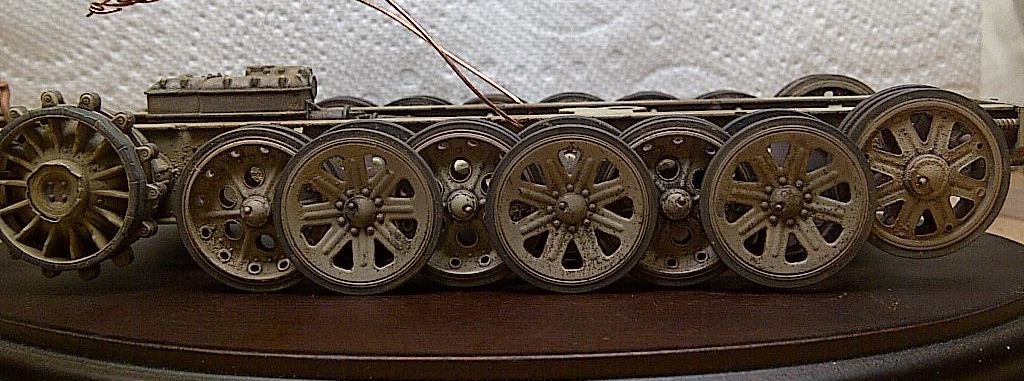 And the repaired side 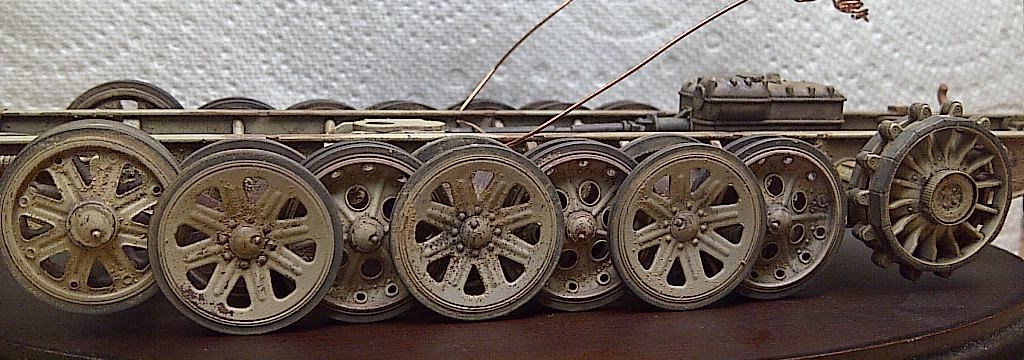 Time for a small triple  |
|
Deleted
Member since: January 1970
Posts: 0
Nov 22, 2024 9:38:40 GMT -5
Nov 22, 2024 9:38:40 GMT -5
|
Post by Deleted on Dec 30, 2013 22:30:11 GMT -5
Well the repairs look spot on Los . Must of been a bit scary sticking a red hot blade in there amongst all of that ready to melt plastic .A good steady hand you must have .  |
|
macmcconnell.
Full Member
  
Member since: December 2011
Posts: 1,238
Dec 11, 2011 12:07:33 GMT -5
Dec 11, 2011 12:07:33 GMT -5
|
Post by macmcconnell. on Dec 31, 2013 3:16:06 GMT -5
Dicky was spot on Loz with the advice , I too have made those sort of errors often trying to get it right then destroying the kit in the process, great to see you got it sorted after that first rate paint job always good to end the year on a high.
Rgs Mac
|
|
losboz
Full Member
  
Member since: September 2013
Posts: 322 
|
Post by losboz on Dec 31, 2013 5:05:38 GMT -5
Thanks guys Carl Yep, was a bit anxious about taking a scalpel to it and the more I thought about it the more I worried so I just got stuck in and went for it. Back on track now and the tracks are due for some paint today  Mac Mac Indeed, Dicky was spot on. Over ambitious and lesson learned  Happy New Year fellas |
|
Hinksy
Full Member
  
Member since: June 2012
THE ENGLISH LIONHEART - HINKSY!
Posts: 1,016
Jun 22, 2012 16:46:21 GMT -5
Jun 22, 2012 16:46:21 GMT -5
|
Post by Hinksy on Dec 31, 2013 10:31:35 GMT -5
Well saved there Loz! Fair play to you as I sometimes have such a short temper I end up throwing builds against a wall - this year I'll be walking away for a breather if anything like this happens to me! It's not so bad if it's in assembly stage but when you realise you've made a big mistake after you've got paint and weathering effects on her that it feels SO much worse  Good job! Ben  |
|
|
|
Post by Deano on Dec 31, 2013 10:35:04 GMT -5
Good save Los , knew you would get it sorted  onwards and upwards! |
|
losboz
Full Member
  
Member since: September 2013
Posts: 322 
|
Post by losboz on Dec 31, 2013 13:35:40 GMT -5
Cheers guys Yep, back on track with the errrrrrrrrrrrrrm...........tracks  Got some primer on them today as well as the AM resin wheels (central seam as per earlier post is indeed authentic  You can see it in my earlier resto pics) Time for a liquid lunch followed by a couple more beers I reckon    See ya all next year |
|
Deleted
Member since: January 1970
Posts: 0
Nov 22, 2024 9:38:40 GMT -5
Nov 22, 2024 9:38:40 GMT -5
|
Post by Deleted on Jan 1, 2014 1:17:50 GMT -5
Phew!! great save old chap, onwards and upwards!
|
|