Foenetik
Full Member
   November '24 Showcased Model Awarded
Member since: March 2014
Posts: 609 
|
Post by Foenetik on Sept 1, 2014 20:16:45 GMT -5
amazing detail work. its coming along so well. great scratch work. was certainly worth the effort. its great to see you have more time to model now so i can follow along your great builds.
|
|
Gordon Ferguson
Junior Member
 
Member since: April 2012
Posts: 85
Apr 3, 2012 10:22:22 GMT -5
Apr 3, 2012 10:22:22 GMT -5
|
Post by Gordon Ferguson on Sept 2, 2014 6:55:24 GMT -5
It's real pleasure to watch this build process, lovely neat work producing a replica to be proud of ......... Not sure if I would have the patience for this , but it is tempting to have a go
|
|
|
|
Post by wbill76 on Sept 2, 2014 15:42:16 GMT -5
Thanks Tony! Definitely enjoying the increased model bench time and glad you get the chance to follow along as well.  Gordon Gordon, thanks for the comments as well! This is only my 2nd ship model and in many respects it's no different than building any other type of model...just more to it in terms of size/parts is all. Give it a whirl sometime, you may be pleasantly surprised by it! I know I was when I did my first one a few months back.  |
|
|
|
Post by wbill76 on Sept 4, 2014 19:05:59 GMT -5
|
|
|
|
Post by 406 Silverado on Sept 4, 2014 19:18:30 GMT -5
Just getting caught up Bill. Some fantastic PE work brother. The masts look better than the kit parts. I know if it was me, I would have knocked them off at least a dozen times already..lol
|
|
|
|
Post by wbill76 on Sept 4, 2014 20:03:26 GMT -5
Thanks Rob! The masts haven't yet been permanently attached...they are waiting for paint and then final install. I've been waiting to add them until the ultimate latest possible moment for just the reason you specify.  |
|
|
|
Post by deafpanzer on Sept 4, 2014 20:30:23 GMT -5
Looks like I really need to learn about soldering before I do mine... can see that it really helps you with those tiny thin impossible antennas!!! Looking great my friend!
|
|
|
|
Post by Leon on Sept 5, 2014 3:30:59 GMT -5
Second mast is looking good Bill.
|
|
|
|
Post by TRM on Sept 5, 2014 8:59:15 GMT -5
Some really solid work there Bill!! I love the masts!! Very nice and they won't bend for the rigging!!
|
|
|
|
Post by wbill76 on Sept 5, 2014 11:50:06 GMT -5
Andy, replacing the kit-supplied masts is a must if you intend to do any kind of rigging work with them. Otherwise you run the risk of them snapping or, at the very least, deforming, under the tension/weight of the rigging itself. Even though the E-Z line is extremely light weight, it still adds up when you start loading up the masts with the multiple lines. Soldering seems scary but it's actually pretty easy to do with just a little practice as long as you've got the right equipment. I hardly ever solder...but getting those masts together only took a few minutes with the right advance preparation.  Leon Leon, Todd, thanks as always! 
|
|
|
|
Post by wing_nut on Sept 5, 2014 15:51:38 GMT -5
Bill, when you mentioned the Dreadnought in the Snipe post I knew I had to go look for it. And brother am I ever glad I did. I usually look at the last page to see the most up to date pics but I went back to the beginning and read 'em all. "WOW" just about covers it.
|
|
|
|
Post by wbill76 on Sept 5, 2014 16:22:09 GMT -5
Dave, thanks for the comments and glad to hear this will be of help to you with the Zvezda kit. That Pontos set includes a lot of stuff, hat's off to you for deciding to take that on for sure.  Marc Marc, glad to have you onboard! It's been quite the project for sure. More to come here in a sec... 
|
|
|
|
Post by wbill76 on Sept 5, 2014 16:22:26 GMT -5
More progress on the masts front to follow-up from yesterday. First order of business was adding in the tall posts, parts D7, that Trumpeter has you add in Step 43. These need to go in before the rigging though so I added them now especially as they interact with two of the 'starfish' points. Roof for the platform was also added so it could be painted as a single unit for easier handling. 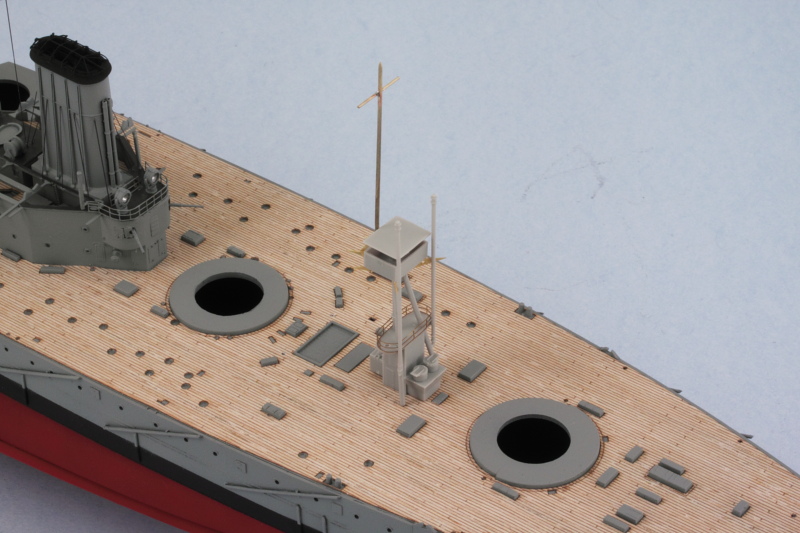 The main mast got some final details as well in the form of the Eduard set. These rigging lines would be pretty tough to add using just the EZ Line given their curved shape and interaction with the other signal flag lines to be added. Since these are PE, I added them now so that the CA would have a metal-to-metal attachment point. Roof of the fire direction platform was also assembled 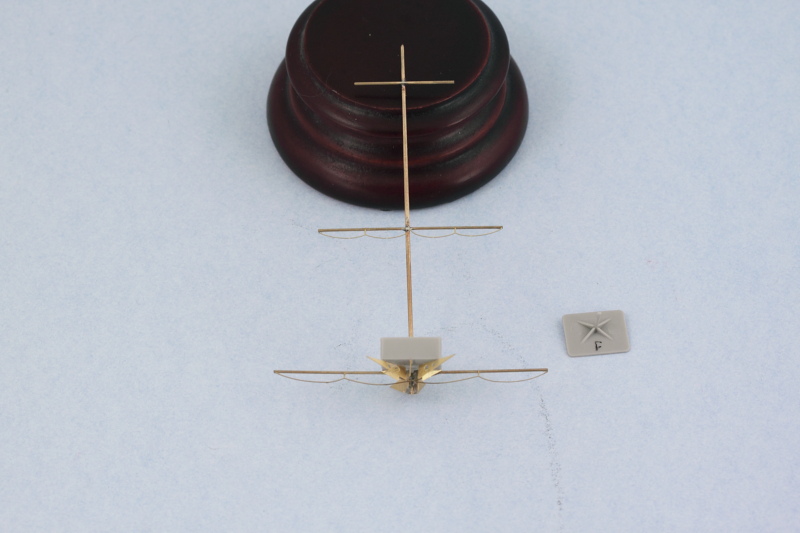 Out came the airbrush again and, with the help of some locking tweezers, both sets of masts were painted. 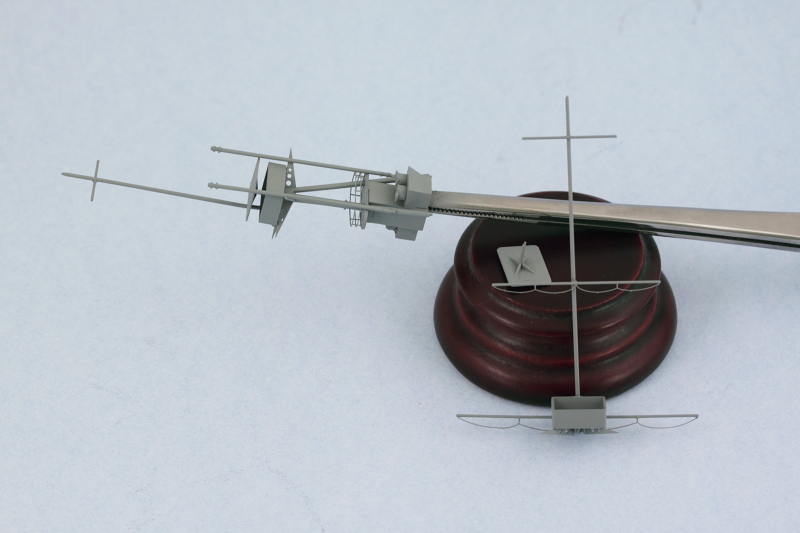 While hard to spot in the following pic, I used some MM non-buffing Metalizer Gunmetal to detail the curved rigging lines. Then the main mast was installed permanently atop the tripod and the roof added. I had to lightly sand the back edge of the roof so it would sit at the proper height/angle in relation to the mast as a minor adjustment. 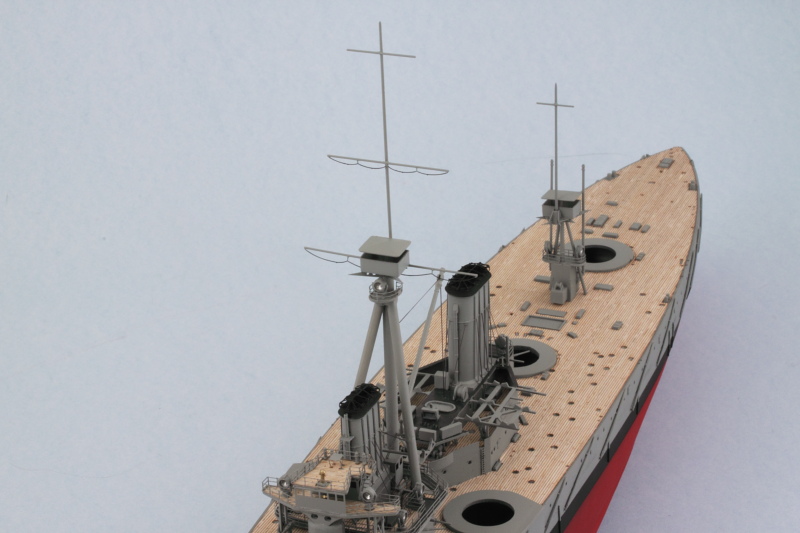 The rear mast element received its pair of search lights and was also permanently installed. I used regular glue for the base of the platform elements and some gap-filling CA for the tripod legs that install into the deck. 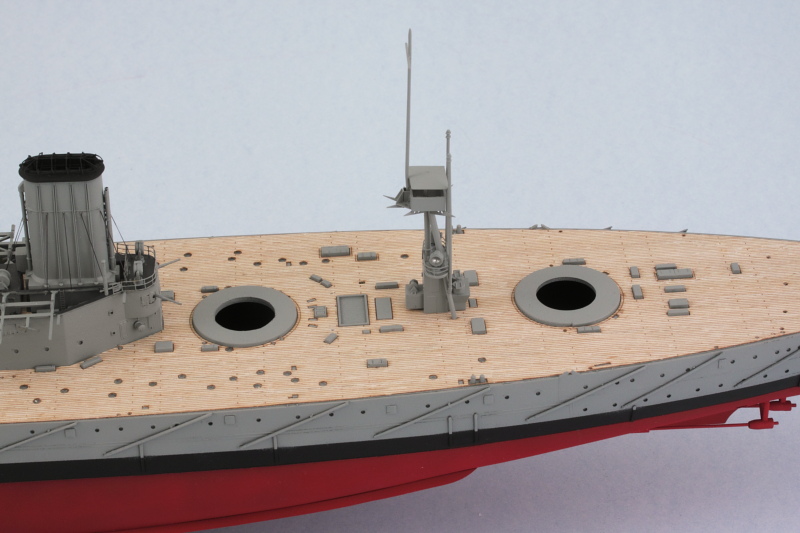 All of that will get the chance to set up nice and solid overnight before I start adding the rigging. Due to the tight spaces involved, some decisions will have to be made on just which lines to add or leave out as I don't think there's quite enough room, particularly with the rear mast, to add all the lines that the Kagero 3D book and blueprints show as being used but I'll do my best under the circumstances. |
|
|
|
Post by Leon on Sept 5, 2014 17:44:32 GMT -5
Bill,the mast look great installed  .Good luck with the rigging,you can do it.  |
|
|
|
Post by wbill76 on Sept 5, 2014 17:48:17 GMT -5
Thanks Leon! Just have to be sure not to paint myself into a corner in the process!  |
|
DeafStuG
Full Member
  
Member since: May 2013
..
Posts: 1,283 
|
Post by DeafStuG on Sept 5, 2014 20:39:31 GMT -5
The masts looks good.
|
|
|
|
Post by deafpanzer on Sept 5, 2014 21:25:55 GMT -5
Masts are looking real good!!!!
|
|
|
|
Post by wbill76 on Sept 6, 2014 8:41:28 GMT -5
Thanks Andy and Jeremy! Today begins the 'rigging challenge' where I try to figure out how to avoid tying myself into knots while maneuvering tiny lines around with a pair of tweezers, the Optivisor, and that most dangerous of all materials, CA glue!  |
|
|
|
Post by wbill76 on Sept 6, 2014 17:41:05 GMT -5
Spent a great deal of time working on the rigging today and was really impressed with the EZ Line, it truly lives up to its name in this particular application! After some careful study of the Kagero 3D close-ups and the rigging diagrams in the scale blueprints, I started in on the fore mast first. All of the interior rigging and bracing lines were done first and I generally worked my way from bottom to top one side at a time so I could get things as close to symmetrical as possible. 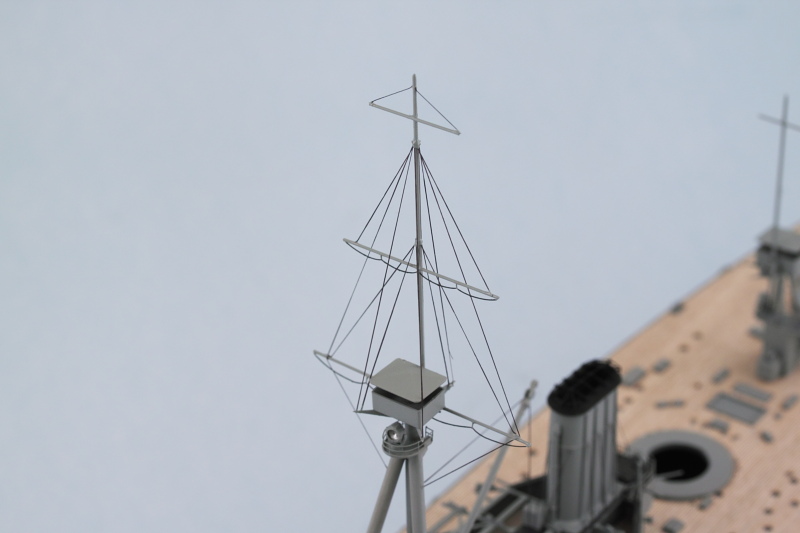 Then the real fun began in terms of running the signal flag lines. I decided to run them as single lines only instead of doubling them up as the space is pretty crowded even with the single only. The connection points I had installed earlier proved very handy still as it made life a lot easier for attaching the bases of the lines and avoiding any tangling in the process. For these I started with the lowest cross arm first and worked from the innermost out to the ends, one side at a time, until I had the 6 lines done. Rinse and repeat for the 2nd cross arm. 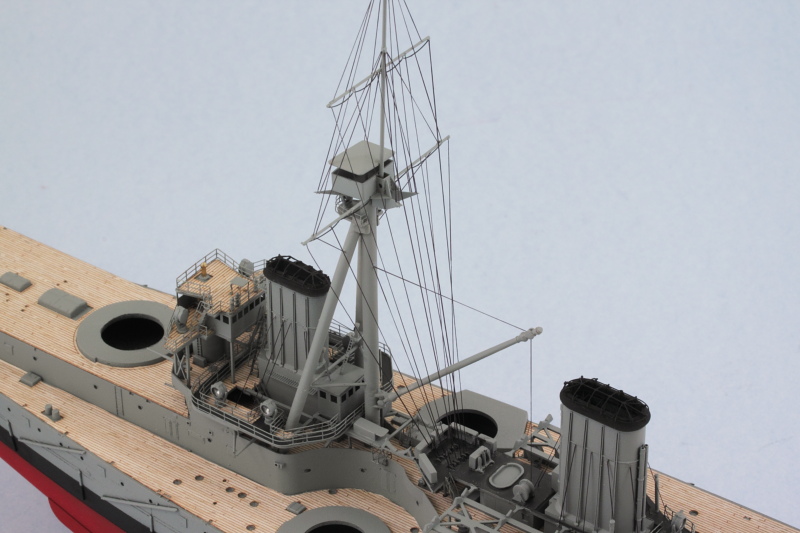 For the rear mast, the space tolerances are smaller but I followed basically the same pattern as on the main mast. I was able to get all the lines in place around the 'starfish' with a little patience and care. The rigging is now about 95% complete. While I won't be trying to recreate the cage-style aerials, I will run single representative aerial lines between the two masts and to the jack staff once it's installed but I'm deliberately holding off on doing that until I get the rest of the hull details done to avoid any snagging/complications in that process. 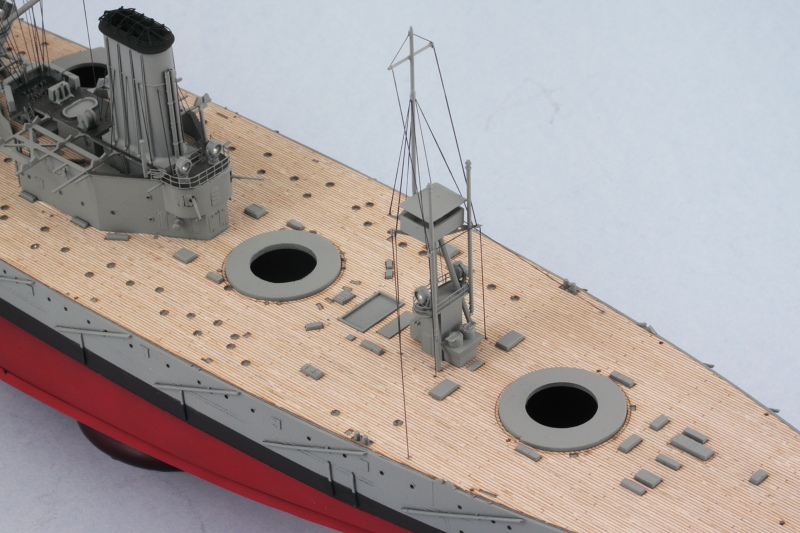 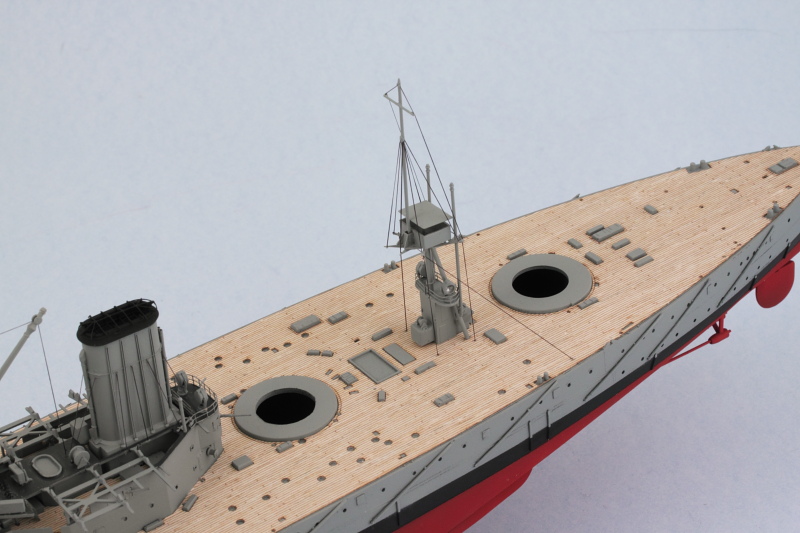 Rounding out the day's activity, I added the railing and optical range finder to the spotting platform and then installed it in place on the boat deck. The Trumpeter railing set included a piece that was just perfect as-is for my needs but these railings are more flimsy than the Eduard railings and will deform at the slightest opportunity, so shaping it into the correct oval shape was an exercise in patience for sure. Last but not least the remaining four coal derricks were painted and installed. For some reason, Trumpeter left out of the kit the horizontal derrick arms that should be at the front...I think they planned to include them since they had notches in the legs of the tripod where they should connect to...but no parts provided on any of the sprues in the kit. I had filled those notches earlier after trying to figure out why they were there...and now that little mystery is solved I think. 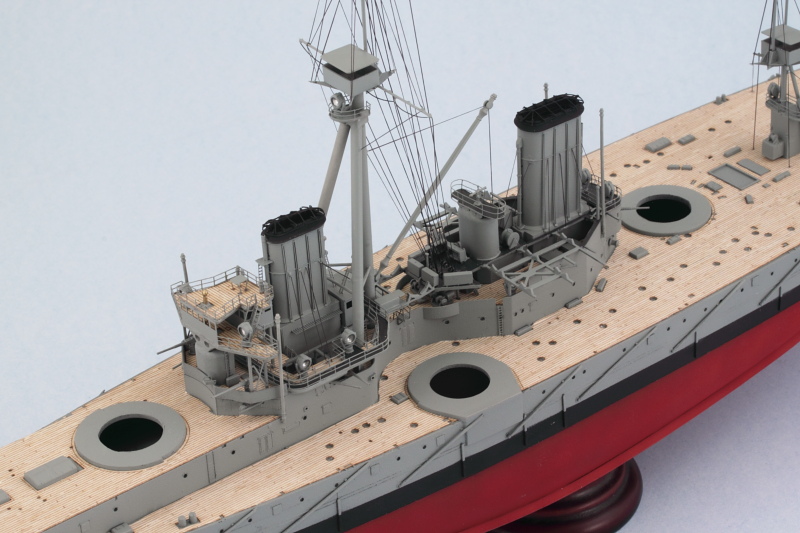 Next up will be the repetitive joy of installing 50+ PE coal scuttle covers on the deck and starting to add in more of the remaining details there now that the rigging is largely out of the way. |
|
|
|
Post by Leon on Sept 6, 2014 18:36:56 GMT -5
WOW!!!!  Awesome work on the rigging Bill.You did an excellent job.   |
|
DeafStuG
Full Member
  
Member since: May 2013
..
Posts: 1,283 
|
Post by DeafStuG on Sept 6, 2014 18:55:00 GMT -5
Nice add on with the masts detail..
|
|
|
|
Post by wbill76 on Sept 6, 2014 19:52:53 GMT -5
Thanks Leon! First time I've ever done full rigging on a ship of any kind.  Jeremy Jeremy, glad you like it!  |
|
Foenetik
Full Member
   November '24 Showcased Model Awarded
Member since: March 2014
Posts: 609 
|
Post by Foenetik on Sept 6, 2014 21:12:07 GMT -5
wow. crazy detailed work. well done
|
|
|
|
Post by TRM on Sept 6, 2014 21:25:45 GMT -5
SOme kick-a$$ rigging there Bill!! Looks fantastic!!
|
|
WigWag Workshop
Reviews member    
Member since: May 2012
"Keep The Glue On The Styrene"
Posts: 720
May 22, 2012 7:25:45 GMT -5
May 22, 2012 7:25:45 GMT -5
|
Post by WigWag Workshop on Sept 7, 2014 8:48:50 GMT -5
Simply BLOWIN' Away! By this build!! I am getting a ton of inspiration, for my upcoming Russian Battlecruiser Build!
-Steven
|
|
|
|
Post by wbill76 on Sept 7, 2014 9:38:13 GMT -5
Thanks Tony! Todd, not bad for a first timer, eh?  Steven Steven, glad to have you on board and to hear it's inspiring you for your own floaty effort! |
|
|
|
Post by wbill76 on Sept 7, 2014 14:01:44 GMT -5
Today's update focuses on one of those less-glamorous aspects...dealing with lots of tiny parts in a repetitive process, but one that does add some nice detail to the deck when complete. Due to the Dreadnought's compartmentalized design for vertical access to areas of the ship vs. the usual horizontal water-tight door type of access, there are a ton of coaling scuttle points scattered all over the ship. 56 in total on the main deck plus another 4 on the super deck. Fortunately, the Wood Hunter set includes a nice PE fret with 60 of these designed specifically to fit the openings provided in the wood deck. A while back in one of my previous airbrushing sessions I took advantage of having the AB loaded up and applied some of the hull gray so it could sit and cure for a nice long while before I got around to installing them. 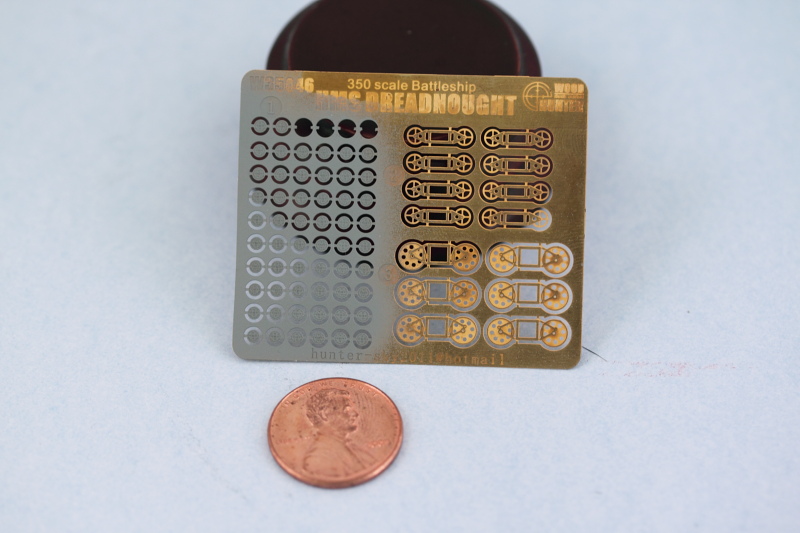 Working one at a time, I used Gator Grip glue applied with a toothpick point into the openings and a 2nd toothpick (important not to mix them up!) moistened with spit to pick up and place the cover in position. Careful pressure with the point of a toothpick pressed it into place. Rinse and repeat 56 times and you have all the ports in place after a couple of hours, 28 on either side of the deck. 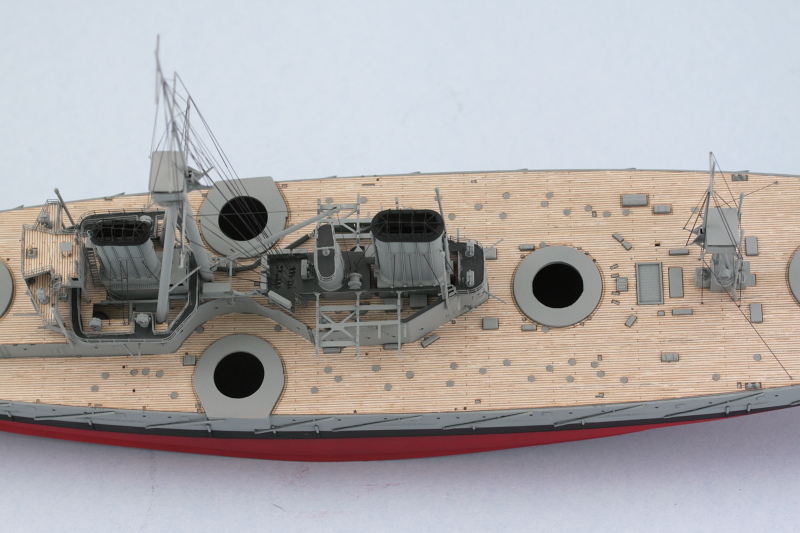 Still more work to come in the detail department as I work on all the little odds and ends. That's all for now, have to get ready to watch the Niners-Cowboys football game to kick off the 2014 season here in a bit. |
|
|
|
Post by deafpanzer on Sept 7, 2014 22:24:48 GMT -5
Man! Crazy but loving it! Congrats to 49ers... time for Romo to retire and let one of the cheerleaders take his place.
|
|
|
|
Post by wbill76 on Sept 8, 2014 12:22:10 GMT -5
Thanks Andy! Was probably one of the most bizarre first halfs I've ever seen...3 possessions, 3 interceptions. Not complaining on my end though, sure made life easier right out of the gate to start the season off!  |
|
DeafStuG
Full Member
  
Member since: May 2013
..
Posts: 1,283 
|
Post by DeafStuG on Sept 8, 2014 19:34:37 GMT -5
P.E. - looks good Quality by Manufacturer.
|
|