Foenetik
Full Member
   November '24 Showcased Model Awarded
Member since: March 2014
Posts: 609 
|
Post by Foenetik on Sept 16, 2014 0:10:21 GMT -5
steve does excellent work. those look great!
|
|
|
|
Post by bullardino on Sept 16, 2014 0:43:55 GMT -5
Great progress, Bill  And, of course, another great casting job from Steve  |
|
|
|
Post by wbill76 on Sept 16, 2014 11:58:48 GMT -5
Excellent work on this, Bill! You'll never convince anyone that you're not an old hand at ship building!  It's a real shame about the stand. It looks like they used a stand from a different kit, but forgot to size the plaque accordingly. Personally, as fine as the model looks, I'd have to hit a sign shop and have new plaques made that would fit the stand's inletted area. On a side note, speaking of the plaque, I have to wonder what someone was thinking when they made the font for the scale larger than the one used for the name. That's just plain silly! Thanks Bob! As far as the stand goes, your theory is probably a good one. Considering the stand is on its own separate generic sprue while the actual kit nameplate was on a specific parts sprue, I wouldn't bet against it!  Once the ship is on the stand it's not that big of a deal as the brass plaque is what draws the attention as it sits out from the stand at an angle. I'm building this for a buddy of mine and asked him what his preference was regarding the stand (gave him the choice of wood base with brass filials vs. the kit stand) and he wanted the kit one. As for the font...I'm sure that had to do with the space available...personally it would've been fine by me if they had left the scale off entirely!  Anthony Anthony, Lui, and Tony, appreciate the kind words as well! Steve did an excellent job on these for sure, great turnaround time on them as well. |
|
|
|
Post by wbill76 on Sept 16, 2014 17:14:41 GMT -5
Today's efforts focused on getting the remaining boats finished and installed. First up, each of the cutters needed rudders, so I scratch-built some using sheet styrene and one of the left over rudders on the PE fret as a sketch stencil. 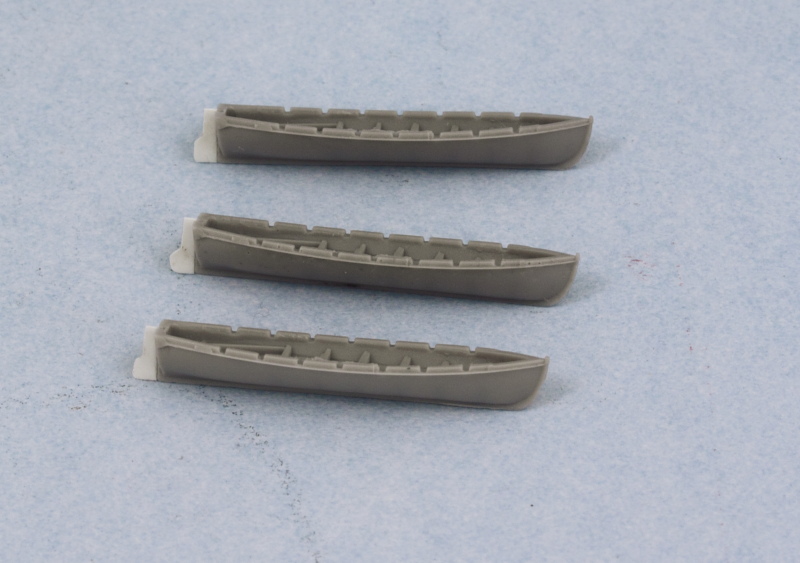 Then it was time to paint them. Same drill as with the other boats, hull gray color by airbrush, then hand detailing for their interiors and trim. The middle deck cutter got the 4th whaleboat added for its 'short stack' configuration. 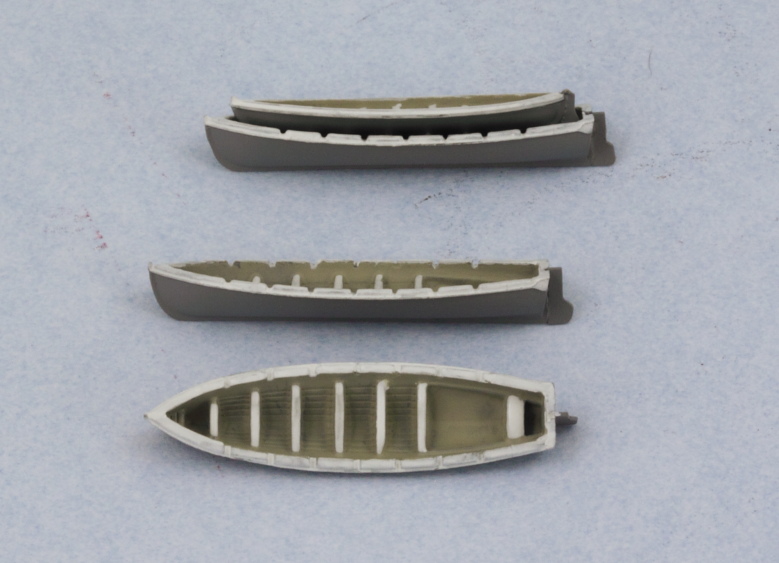 Then the real fun began in installing the two for the davits. Originally I was going to try to replicate the canvas holding straps that help hold the boat in place but trying to accomplish that proved problematic due to the fragility of the davit parts. I ended up using lengths of EZ line to suspend them from the davit pulleys along with some strategic CA glue applied to the sterns to keep them from swaying in the breeze. 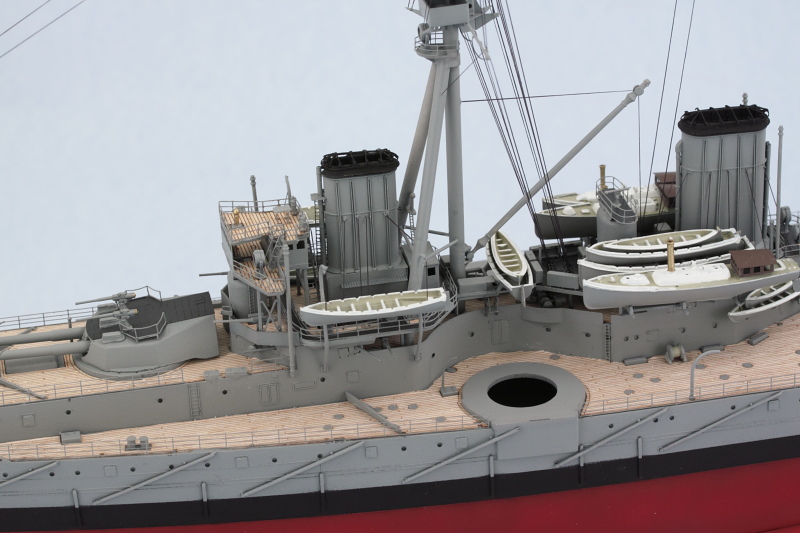 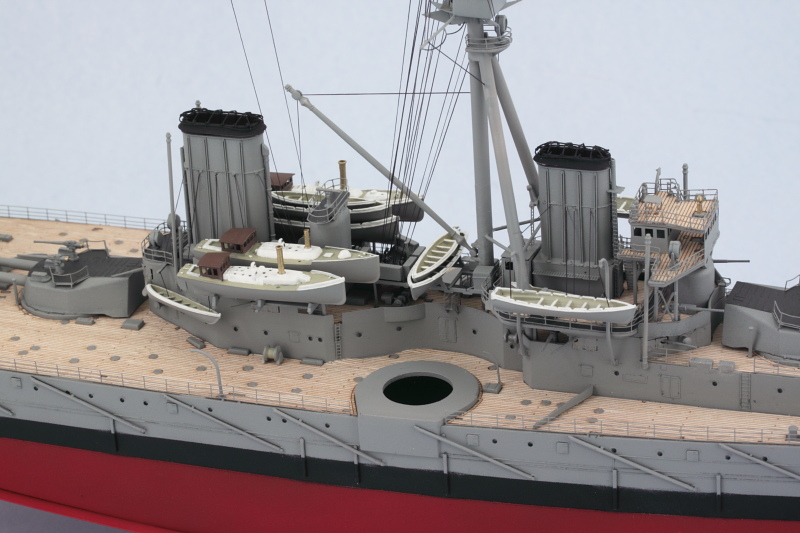 With all the boats in place, the wing turrets were permanently installed as well to round things out for the day. 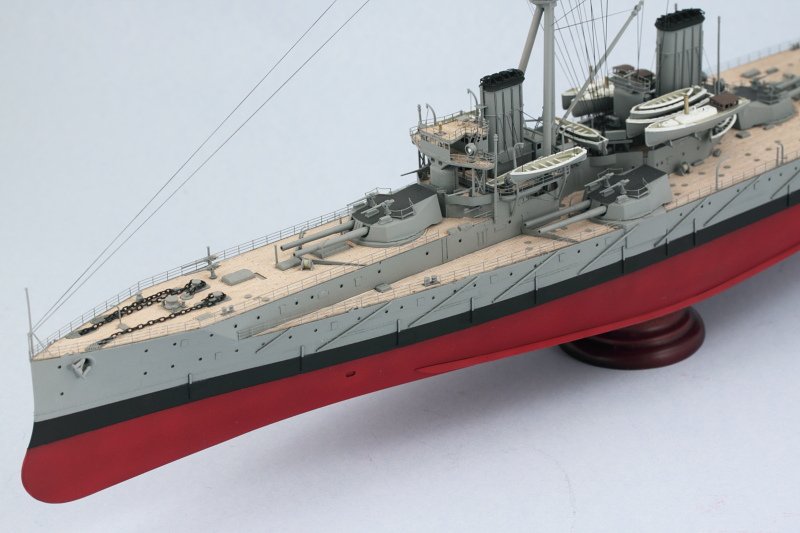 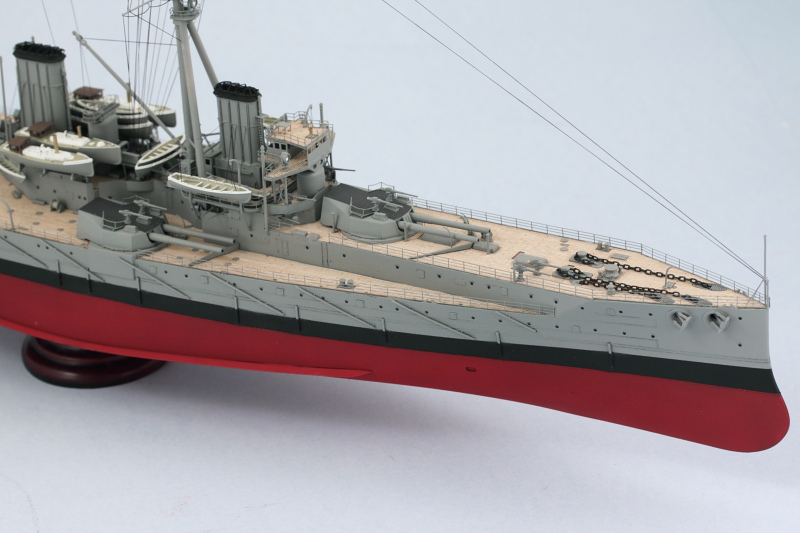 Just a couple of small details left to do before I seal it up with some Future and add some weathering to the main hull. |
|
|
|
Post by Leon on Sept 16, 2014 17:46:52 GMT -5
Excellent work on the boats and railings Bill  .Looking really great all decked out.  |
|
bbrowniii
Full Member
  
Member since: March 2012
If you are not part of the solution, you are part of the precipitate.
Posts: 1,238
Mar 25, 2012 22:08:04 GMT -5
Mar 25, 2012 22:08:04 GMT -5
|
Post by bbrowniii on Sept 16, 2014 18:44:45 GMT -5
Super Bill. Just super.
|
|
|
|
Post by wbill76 on Sept 16, 2014 19:54:30 GMT -5
Thanks Leon! The added boats really make a difference IMHO. Boyd, thanks as well!  |
|
Deleted
Member since: January 1970
Posts: 0
Nov 22, 2024 19:24:34 GMT -5
Nov 22, 2024 19:24:34 GMT -5
|
Post by Deleted on Sept 16, 2014 20:07:45 GMT -5
Better and better Bill !
|
|
|
|
Post by bullardino on Sept 17, 2014 3:28:01 GMT -5
Wow, seet job Bill, thumbs up.
|
|
|
|
Post by wing_nut on Sept 17, 2014 8:05:27 GMT -5
Damn son! My-T-Fine.
|
|
|
|
Post by wbill76 on Sept 17, 2014 12:57:44 GMT -5
Thanks Carl, Lui, and Marc! Appreciate the comments and support as always.  |
|
|
|
Post by wbill76 on Sept 17, 2014 15:33:22 GMT -5
Took care of the last remaining details today to wrap up the construction phase. Trumpeter provides the leadman's platforms on either side of the hulls as simple 'planks' of PE, so I added to their detail level by cutting down some left over railings from the Eduard sets and adding them to the 'plank'. This also meant carefully cutting some gaps in the railings I installed yesterday, that was done using some fine pointed Tamiya sprue cutters. It's a small detail but one that I could address and enhance with the materials available. I also decided to leave the gangways off as those are only appropriate in a 'docked' scenario and I prefer to show Dreadnought as if she were at sea and ready for action. 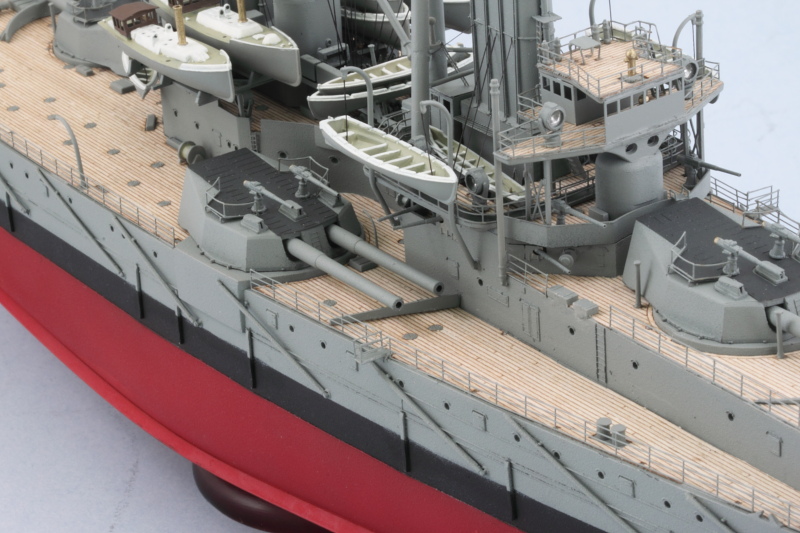 A small start to the weathering involved applying some black artist pastel to the tripod mast where coal soot from the fore funnel would accumulate. It was one of the notorious features of this design that stack gasses often caused problems with the unfortunate gunnery officer stationed in the fire direction platform depending on which way the wind was blowing. Definitely wouldn't envy him for sure! 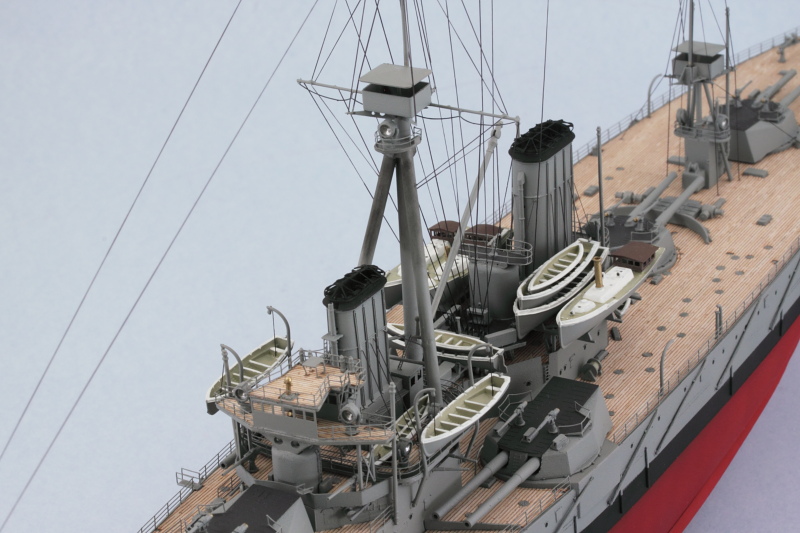 Also applied the Future coat and am letting that set overnight so it can be nice and cured before starting in on the hull weathering. |
|
Deleted
Member since: January 1970
Posts: 0
Nov 22, 2024 19:24:34 GMT -5
Nov 22, 2024 19:24:34 GMT -5
|
Post by Deleted on Sept 17, 2014 16:12:54 GMT -5
Ahhh , you have done your research very well Bill ! She's getting better and better !
Your explanation of the soot on the fore mast reminds me of being on the fantail when the boilers mates decided to blow stacks (we burned oil and it built up soot in the exhaust stacks ) .....chunks of soot on everyone while we was watching a movie (that was in the days of the reel to reel projector ) on the open missile/helo deck !ARRRRGH !!!
|
|
|
|
Post by Leon on Sept 17, 2014 16:14:00 GMT -5
Nice added detail with the platforms and the soot on the mast looks great.  |
|
|
|
Post by wbill76 on Sept 17, 2014 19:50:24 GMT -5
Thanks Carl! I bet that made the engine gang REALLY popular with the rest of the crew!  These coal burners must've been fun to be around. Pure carbon in a fine dust/soot form plus the other side effects of the burning process (sulfur dioxide, carbon monoxide, etc.) were definitely pre-OSHA days!  Thanks as well Leon! Today was one of those hurry-up-and-wait days but tomorrow should see some good progress if all goes to plan. |
|
Deleted
Member since: January 1970
Posts: 0
Nov 22, 2024 19:24:34 GMT -5
Nov 22, 2024 19:24:34 GMT -5
|
Post by Deleted on Sept 17, 2014 22:27:28 GMT -5
Pretty ship Bill .  |
|
|
|
Post by bullardino on Sept 18, 2014 2:06:40 GMT -5
Wow, what a bunch of great details  |
|
|
|
Post by TRM on Sept 18, 2014 6:24:30 GMT -5
Exceptional work on this Bill!! Outstanding eye to detail! Well rigged boat right there!!! Cross that finish line brotha!!!
|
|
|
|
Post by wbill76 on Sept 18, 2014 12:11:14 GMT -5
Thanks Carl and Lui! T, doing my best to get this one done, almost there!  |
|
|
|
Post by wbill76 on Sept 18, 2014 17:37:12 GMT -5
Continued on with the weathering process in a big way today so lots of pics in this update! First up I applied an overall wash of roughly 90/10 paint/thinner using Model Master Panzer Schwarzgrau as it's a nice dark gray but not too overpowering. The wash was added to the boot stripe and light gray areas only. This allowed it to do double duty as both a filter and a wash to tie those two colors together. 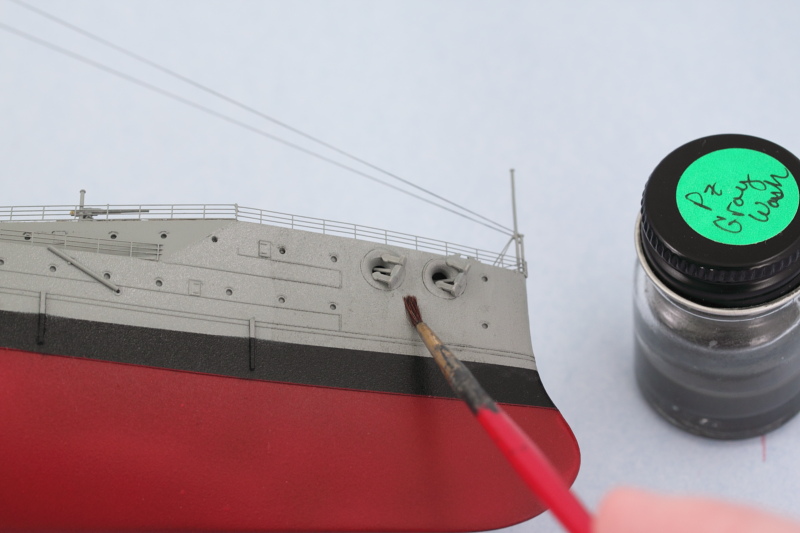 Then using some clean thinner and various brushes, I adjusted the wash and used it to get the raised detail on the hull and various places to 'pop' a bit more. In some key areas, more of the Panzer Gray was added as a pin wash with a 10/0 pointed brush as needed to produce the desired result. 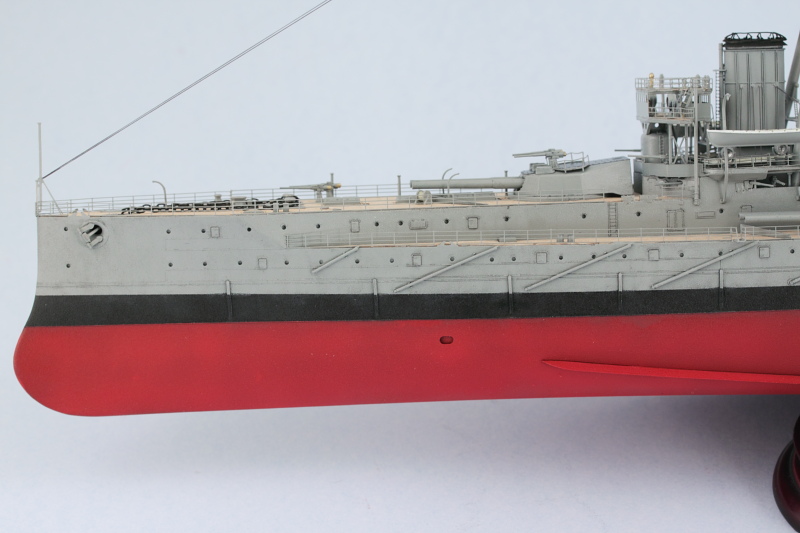 For the hull red areas, I applied a 90/10 paint/thinner wash of MM enamel Burnt Umber. 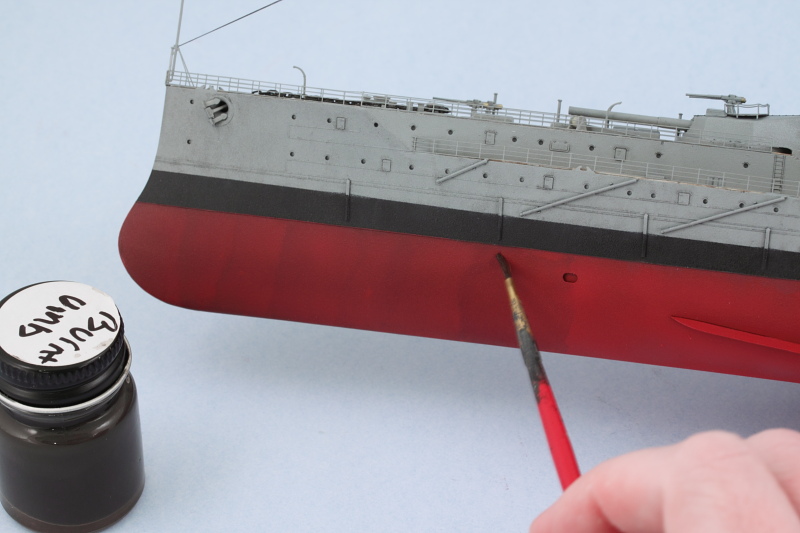 Because the lower hull has complex curves as well as such a large area, I used the wash as a start point and then made additional adjustments/removal using a square tip blender brush lightly dampened with thinner. This approach allows for some nice streaking effects as well as removing the 'tide' marks that are inevitable when applying a wash over such a large area. 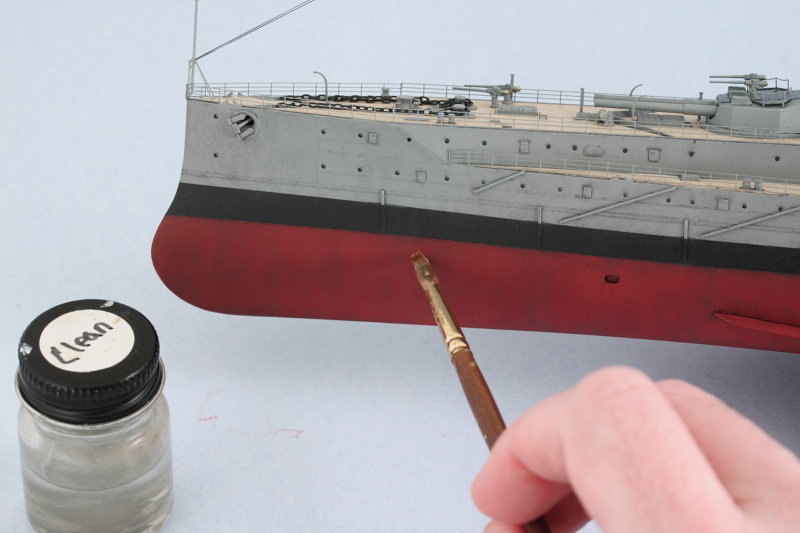 It's a little tough to capture the full effect adequately but the combination of the different weathering adds a good bit of depth to the overall finish. Some residual shine is still present from the protective Future coat and will be dealt with once I'm happy with how everything looks and am ready to seal it all together with a dull coat application. 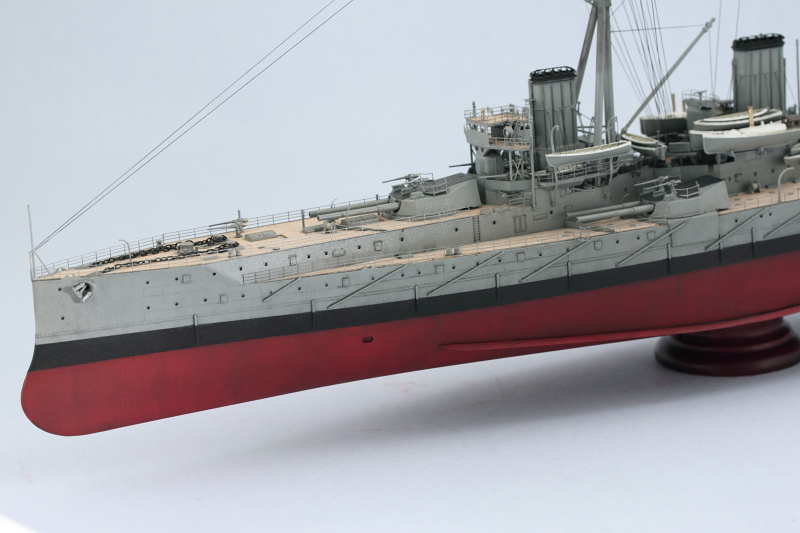 The 18-inch long hull is a challenge to photograph, but here's how the big girl stands as of now. 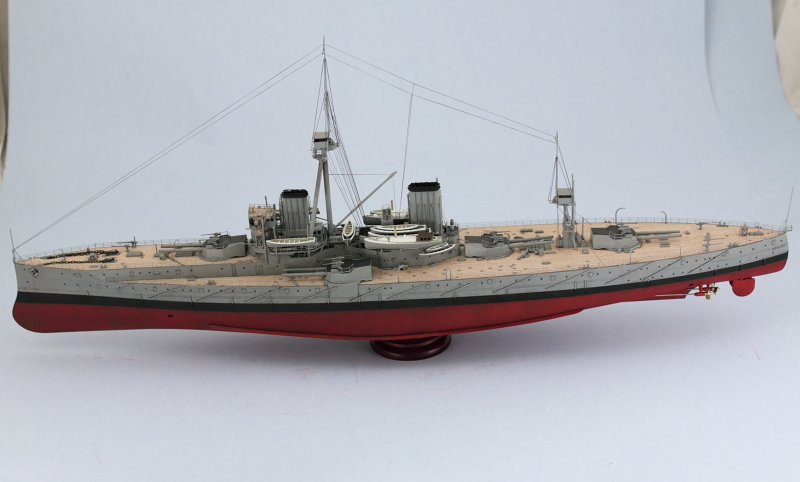 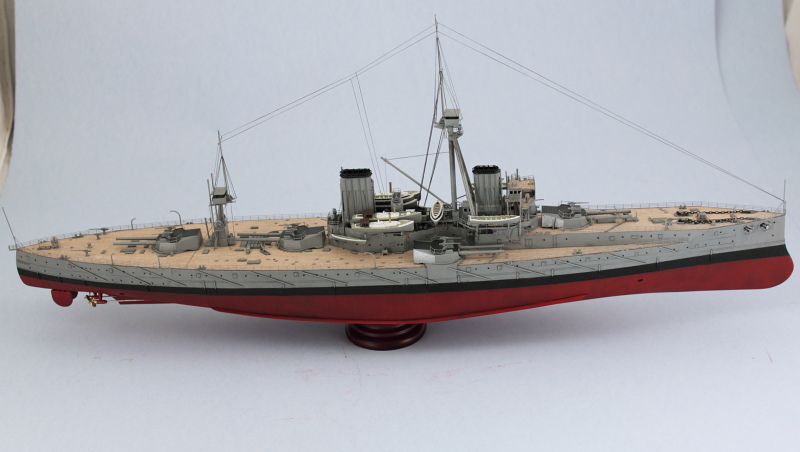 I also did some wash weathering on the 'brass' plaque for the stand. The metalizer finish was sealed with a coat of Future and then a wash of MM enamel Gunmetal applied over it to age the finish and provide some depth to the lettering. I used a thinner-dampened q-tip to 'polish' away most of the wash and then used fine point brushes to adjust it further. A coat of Model Master Gloss lacquer in the spray can sealed it together and restores some of the 'shine' to the brass. Another one of those hard-to-capture effects in person but looks pretty good in person, especially once the ship is on place on top of the stand. 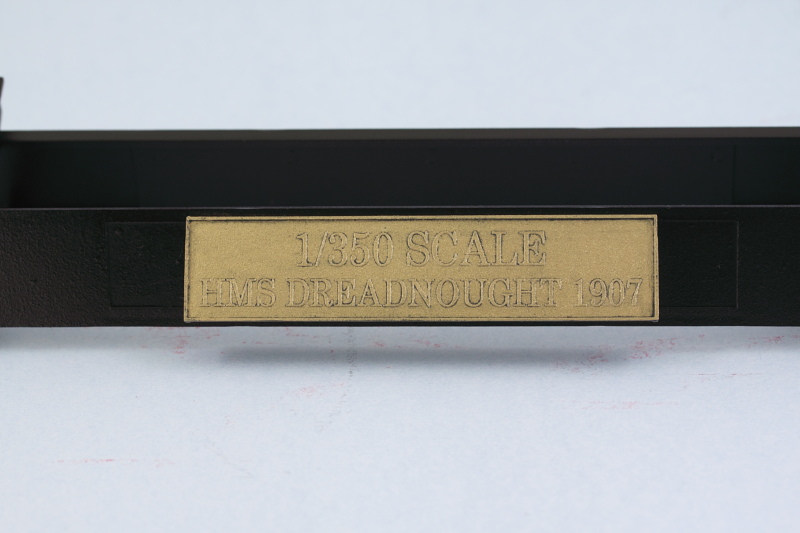 I'll let this sit overnight so I can look it over with 'fresh eyes' tomorrow to see if I need to make any further adjustments. Almost done! |
|
|
|
Post by Leon on Sept 18, 2014 17:46:07 GMT -5
WOW Bill!!!!! Outstanding work on the weathering  .The details really pop out now.   |
|
|
|
Post by wbill76 on Sept 18, 2014 19:49:50 GMT -5
Thanks Leon! Should be able to pull her into the dock tomorrow for sure.  |
|
Foenetik
Full Member
   November '24 Showcased Model Awarded
Member since: March 2014
Posts: 609 
|
Post by Foenetik on Sept 18, 2014 20:33:00 GMT -5
absolutely amazing job all around. only have one complaint. that freakin sign is driving me nuts how its not the same size as the recess. AHHHHHHHHHHHHHHHHHHHHHHHHHHHHHHHHHHHH. other than that, superb modeling sir.
|
|
|
|
Post by bbd468 on Sept 18, 2014 22:18:15 GMT -5
Bill, absolutely stunning my man!!!!!!  |
|
Deleted
Member since: January 1970
Posts: 0
Nov 22, 2024 19:24:34 GMT -5
Nov 22, 2024 19:24:34 GMT -5
|
Post by Deleted on Sept 18, 2014 22:27:11 GMT -5
Big difference with the washes Bill . Make all of the details pop out . Always like your weathering .
|
|
|
|
Post by wbill76 on Sept 19, 2014 11:04:36 GMT -5
Tony, I hear you there man, but at least it's symmetrical on either side! Once the ship is on the stand it all looks like it 'belongs' in that regard. Glad you like how it's turned out! Gary, thanks Mr. McBoggs!  Carl Carl, I agree with you there, Trumpeter did a great job with the raised detail on this lady. Washes help bring it all out and allow it to 'pop' like it should! Thanks for the comments as well my friend! 
|
|
|
|
Post by wbill76 on Sept 19, 2014 16:13:25 GMT -5
|
|
|
|
Post by Leon on Sept 19, 2014 18:52:11 GMT -5
BRAVO Bill!!!! You did a magnificent job and everything ties together nicely.   |
|
|
|
Post by wbill76 on Sept 19, 2014 19:08:35 GMT -5
Thanks Leon! Sure was a lot of fun building her that's for sure.  |
|
bbrowniii
Full Member
  
Member since: March 2012
If you are not part of the solution, you are part of the precipitate.
Posts: 1,238
Mar 25, 2012 22:08:04 GMT -5
Mar 25, 2012 22:08:04 GMT -5
|
Post by bbrowniii on Sept 19, 2014 20:15:12 GMT -5
Beautiful build.... Love it Bill.
|
|