|
|
Post by rbaer on Aug 20, 2014 10:33:31 GMT -5
Pershing, that is. I'm doing this for a GB on FSM, and because I think this thing is just cool. The gun tube is almost as long as the 105 in the M51, which is impressive. Plus, I like the nose-down attitude and the giant recuperator springs on top of the turret. So I picked up the HB "super" kit last year, and have another Tamiya kit in the stash (probably bought at the same show) plus Eduard's brass set for the HB Super P. Also in the mix is a set of Friuls. Mix well, bake at 350 for two hours. Not. So I started the other day with the HB lower hull, complete with working swing arms and plastic torsion bars. Hmmm.... I also decided to use the Tamiya road wheels due to their sharper detail, although the HB parts are not bad. Some of those will end up as spares (maybe) on the two Tamiya M26's I have almost finished. *[Note to aftermarket: some nice M26/M46/M47 spare, no hub road wheels would be cool]* The HB kit comes with an engine, engine compartment and interior bulkheads, but all the flat parts are riddled with large ejection pin marks, so I will be closing up the engine compartment on this one and saving the engine and radiators for posterity. The HB drive sprockets are not correct for the Super, and the Friuls don't fit well on them, so I'll either be using the Tamiya parts as-is or scaring up some outer rings from the Sherman parts in stock, have to see what I have handy. Also, both HB and MrT. have molded the final drive inners with the later production reinforcement on them, so I have removed those and filled the resulting gaps with 2-part putty, Aves to be exact. So far: 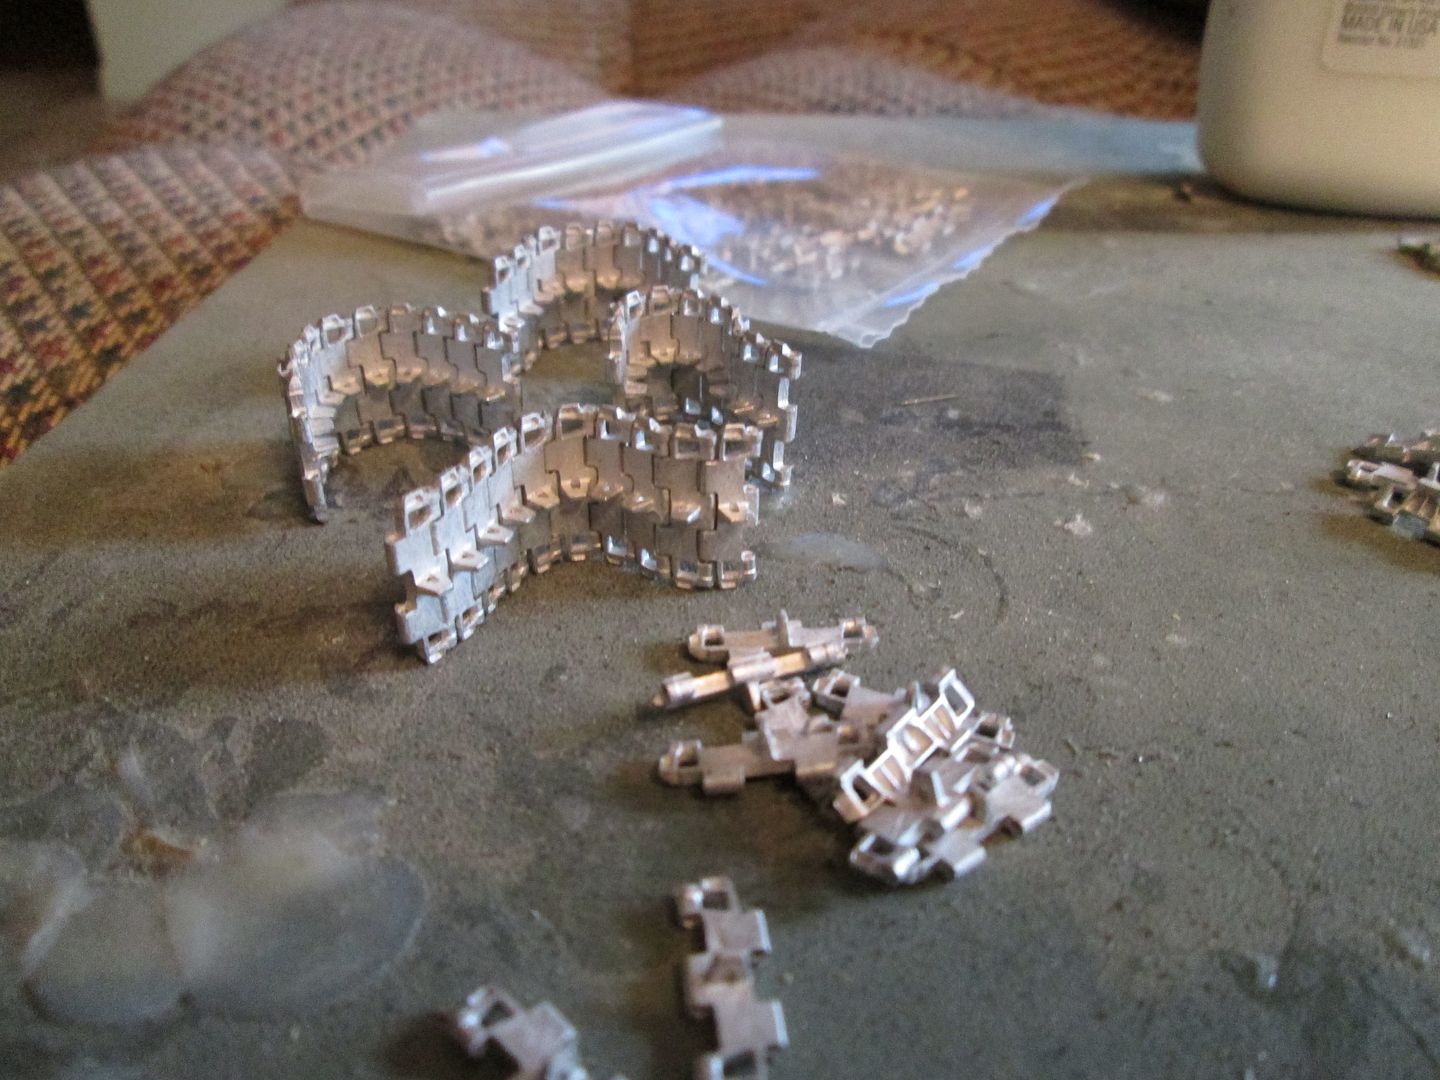 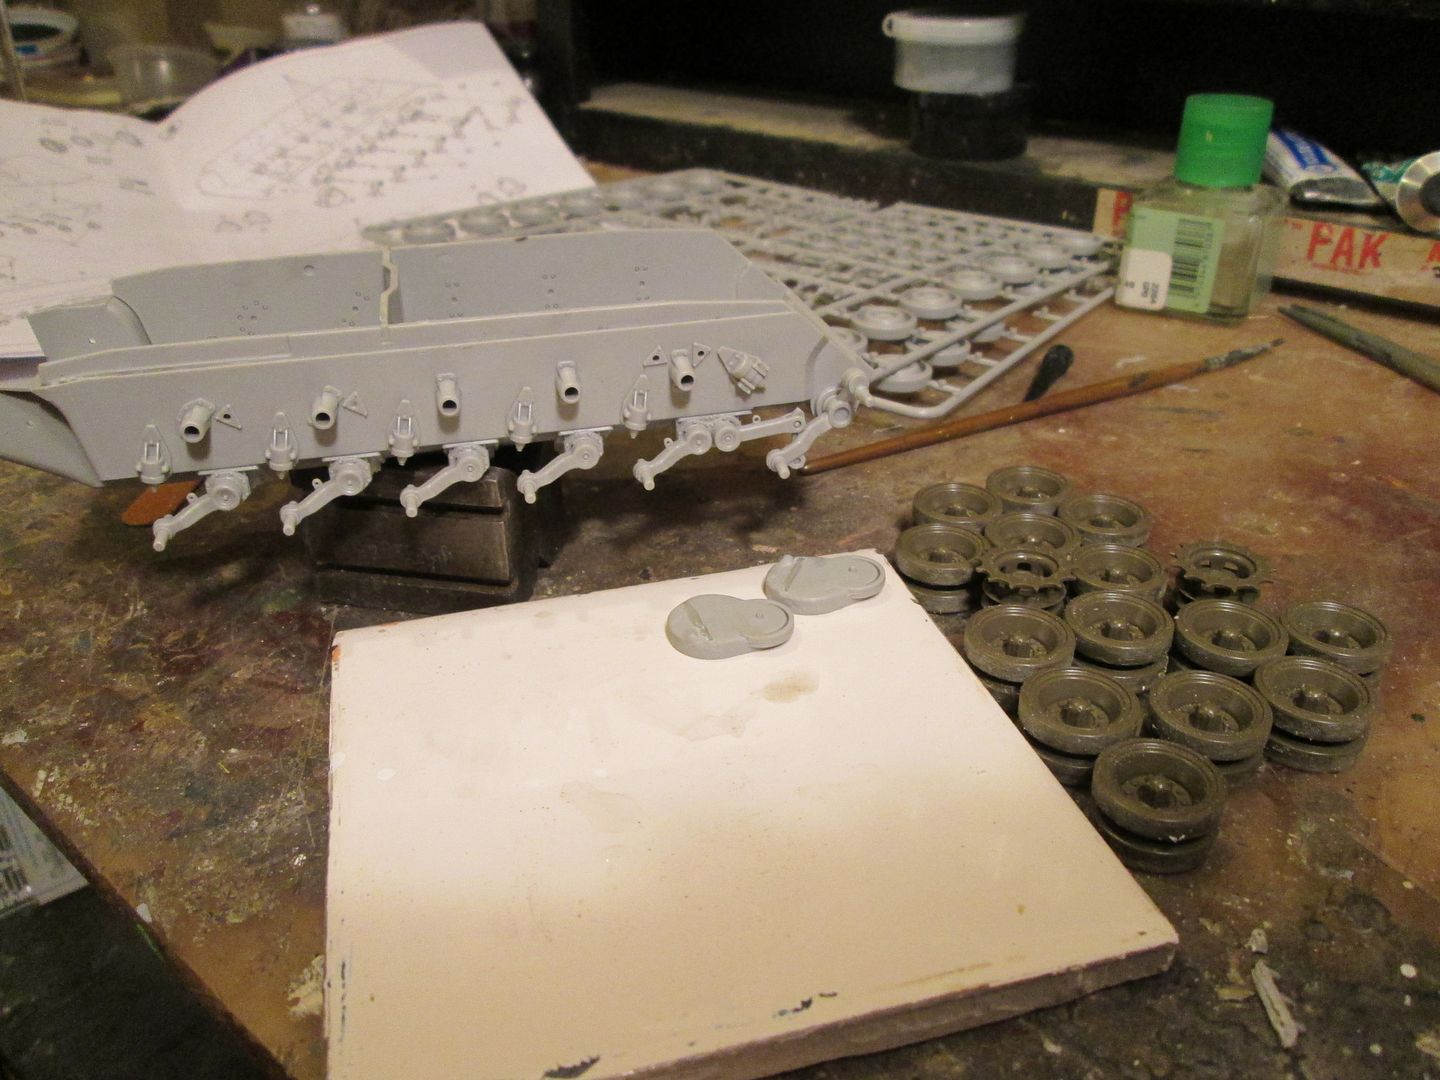 I'm going to get the Friuls assembled, install them on and set the ride height before I close up the hull. My thinking is that by gluing only the first and last swing arms, I can leave the mid units free so the suspension can conform to whatever base this one goes on. I did this with one of the Tamiya P's and it works nicely. Something else about this kit: the included turret is correct for the T26E1 the Super was built from, hint, hint. I'm pretty sure HB also did the correct narrower fenders too, since the -E1 originally used a narrower track. More later compadres. |
|
|
|
Post by deafpanzer on Aug 20, 2014 10:46:45 GMT -5
Love them Friuls... wish they are not that expensive!!!
|
|
|
|
Post by rbaer on Aug 20, 2014 11:25:08 GMT -5
Yeah, they're pricey, but I build so slowly that it works out okay for me, budget-wise. I did but a set of SpadeAce for the M579, and they're really nice and about half the price of Friuls, but I generally only buy Friuls at shows anyway, so I rarely pay full pop for them.
|
|
|
|
Post by Tojo72 on Aug 20, 2014 11:25:37 GMT -5
Nice start Russ, looks like a good one
Sent from my SM-N900V using proboards
|
|
|
|
Post by TRM on Aug 20, 2014 12:33:48 GMT -5
Great beginnings Russ!! Looking forward to the progress on this one!!
|
|
|
|
Post by rbaer on Aug 20, 2014 13:10:17 GMT -5
Anthony, T: thanks. I've wanted to do a Super for a while now, kind of unusual for a US tank. After seeing one on Missing-Lynx a little while ago, I got stoked.
|
|
|
|
Post by dupes on Aug 20, 2014 14:27:15 GMT -5
Spade Ace - how do they compare to the Friuls quality-wise?
|
|
|
|
Post by rbaer on Aug 20, 2014 16:35:33 GMT -5
The one set of SpadeAce I bought was great, crisp, all the holes were all the way through, the runs were straight when assembled, and there were a dozen or so extra links with about five short-shots.
I thought they compared favorably with "good" Friuls, like the T-55 set (ATL-01), the Pershing set I'm doing now and have done once before, or any of the KV sets. The Friuls I bought for the M-18 Hellcat I have in the stash were bad enough that I shelved the kit, but all of the Merkava sets I've used have been well molded (cast?) but assemble with enough curvature in a flat run I have to "persuade" them straight before I put them on, same thing with the T-72 tracks I did a while ago.
|
|
|
|
Post by Leon on Aug 20, 2014 16:43:50 GMT -5
Off to a good start Russ.Have to agree with Andy on the Friuls.  |
|
|
|
Post by rbaer on Aug 20, 2014 17:22:50 GMT -5
Thanks!
And yeah, I agree they're pricey, but until somebody local starts carrying SpadeAce, I'll still use them when I can, cuz sometimes they just can't be beat.
|
|
|
|
Post by wbill76 on Aug 20, 2014 18:19:56 GMT -5
Should be a fun one Russ, looking forward to more on this baby.
|
|
|
|
Post by dupes on Aug 20, 2014 18:28:52 GMT -5
Are the Spade Ace only available from overseas?
|
|
|
|
Post by rbaer on Aug 21, 2014 10:47:55 GMT -5
Are the Spade Ace only available from overseas? As far as I know now, yes. The guys at King's Hobbies in Austin were trying to find or become a distributor for them, last time I was there and talking to them. I used to buy Friuls from them, both at the store when we were in town, and at IPMS shows in the DFW area, but they're no longer stocking Friuls because of the ...... COST! Imagine that. So, progress from last night and this morning: I got the final drives textured and assembled, then mounted, only to find out that my combination of Tamiya sprocket and HB final drive caused a spacing issue. Off with the gray, on with the green. Talk about interchangeable parts. Before: 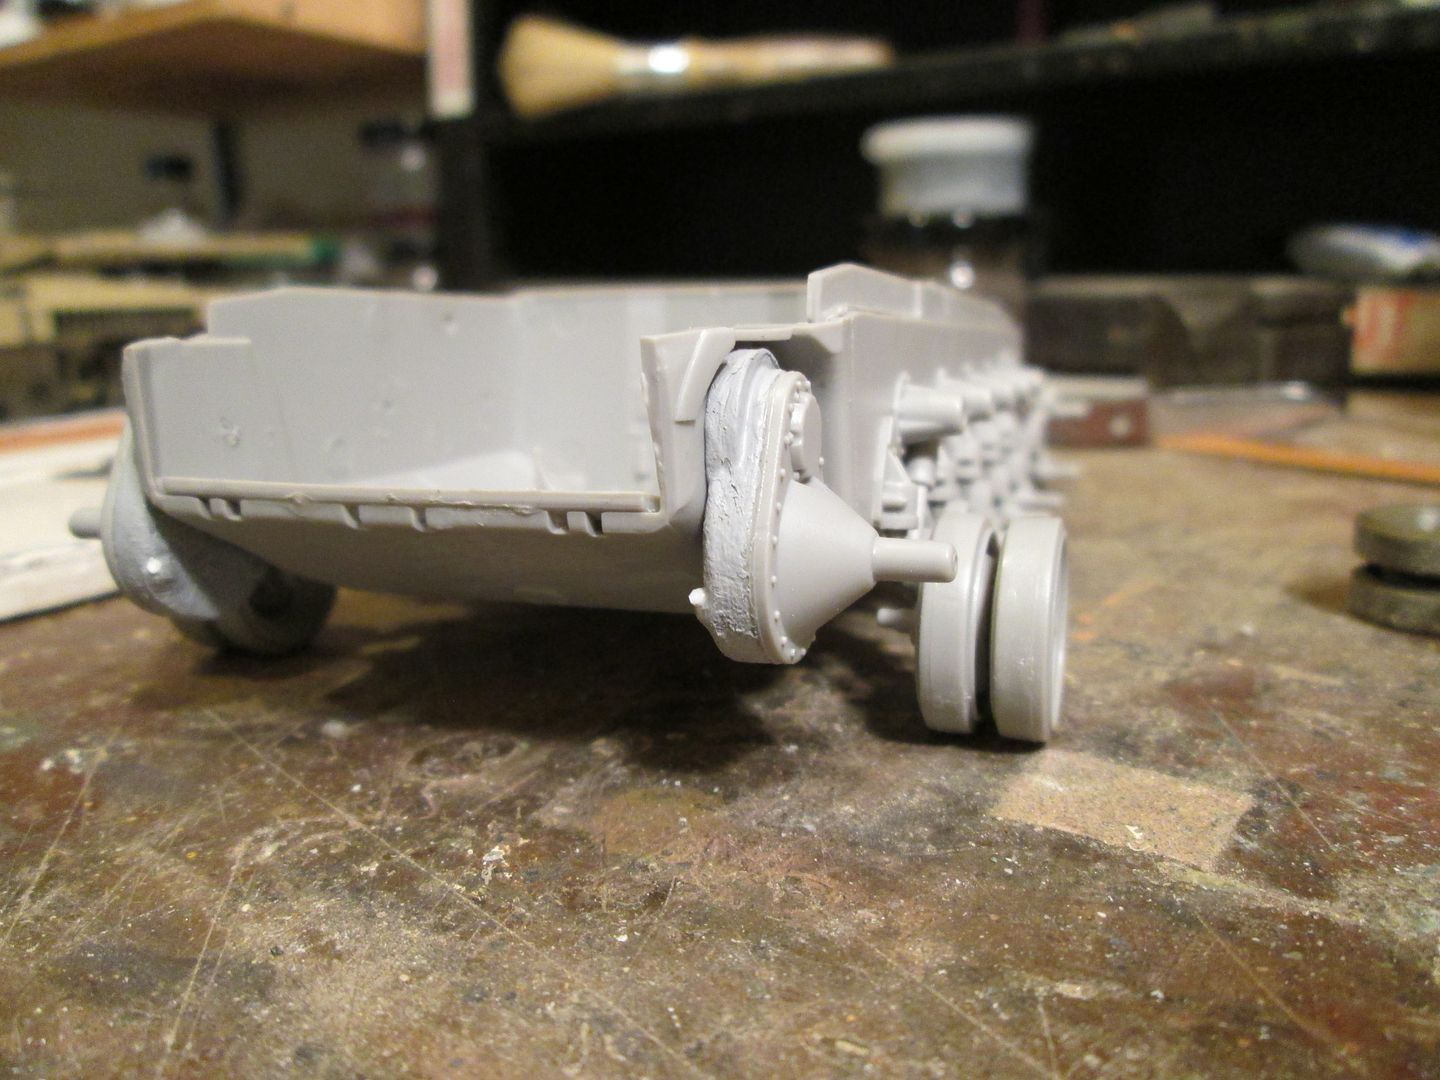 After: 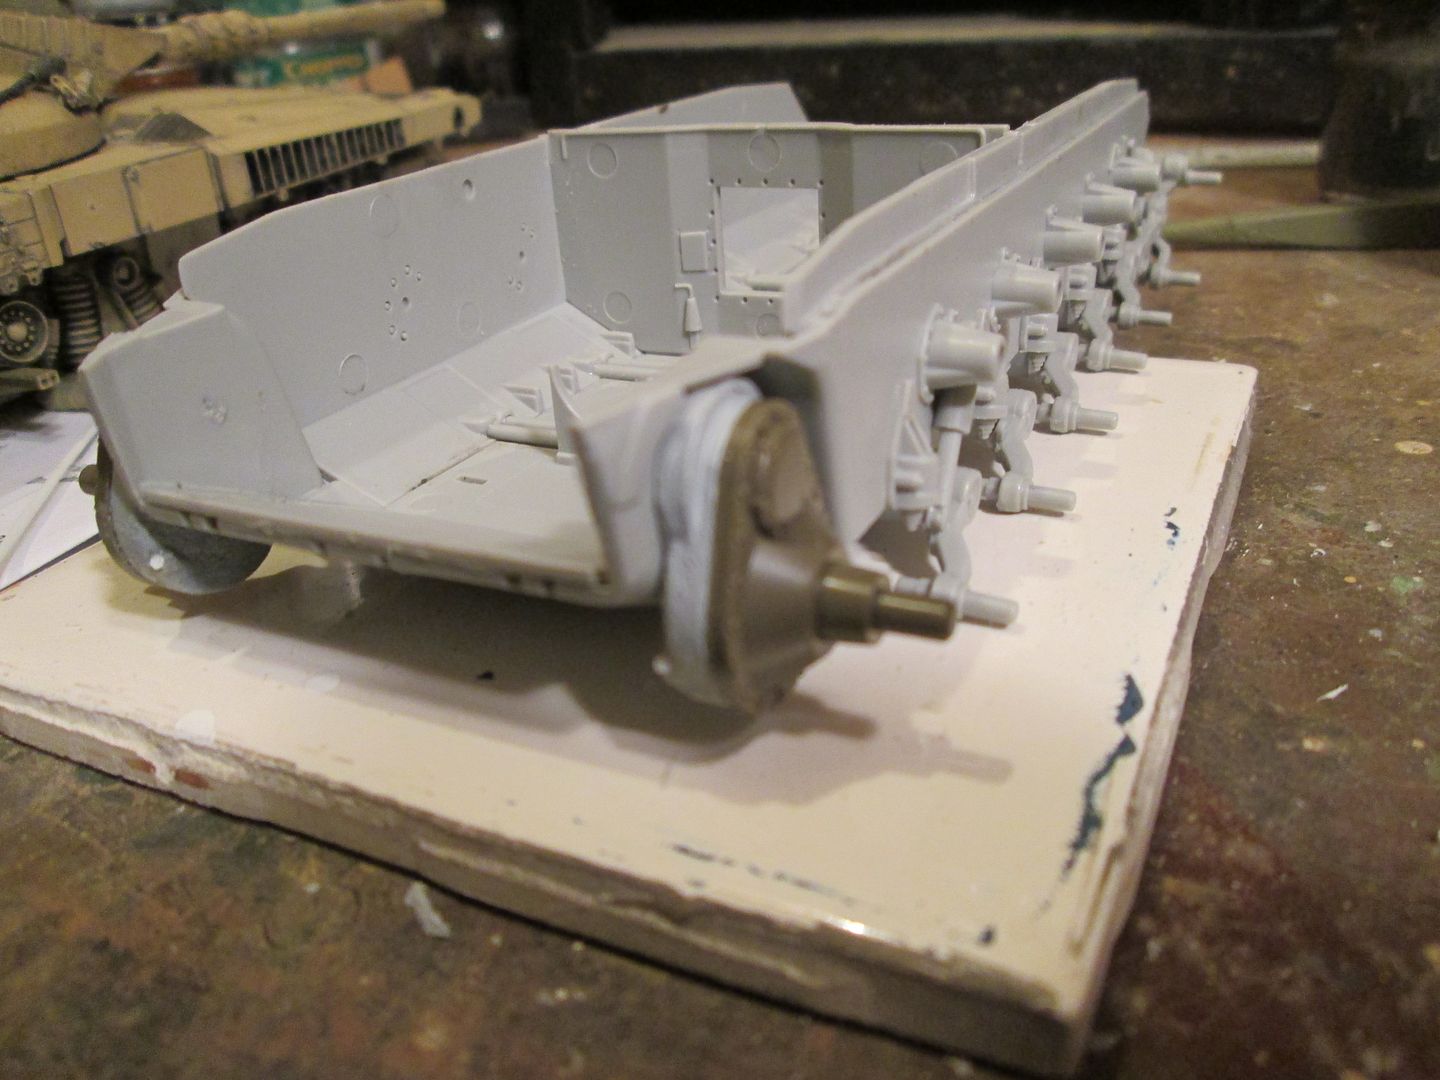 And ready to set ride height: 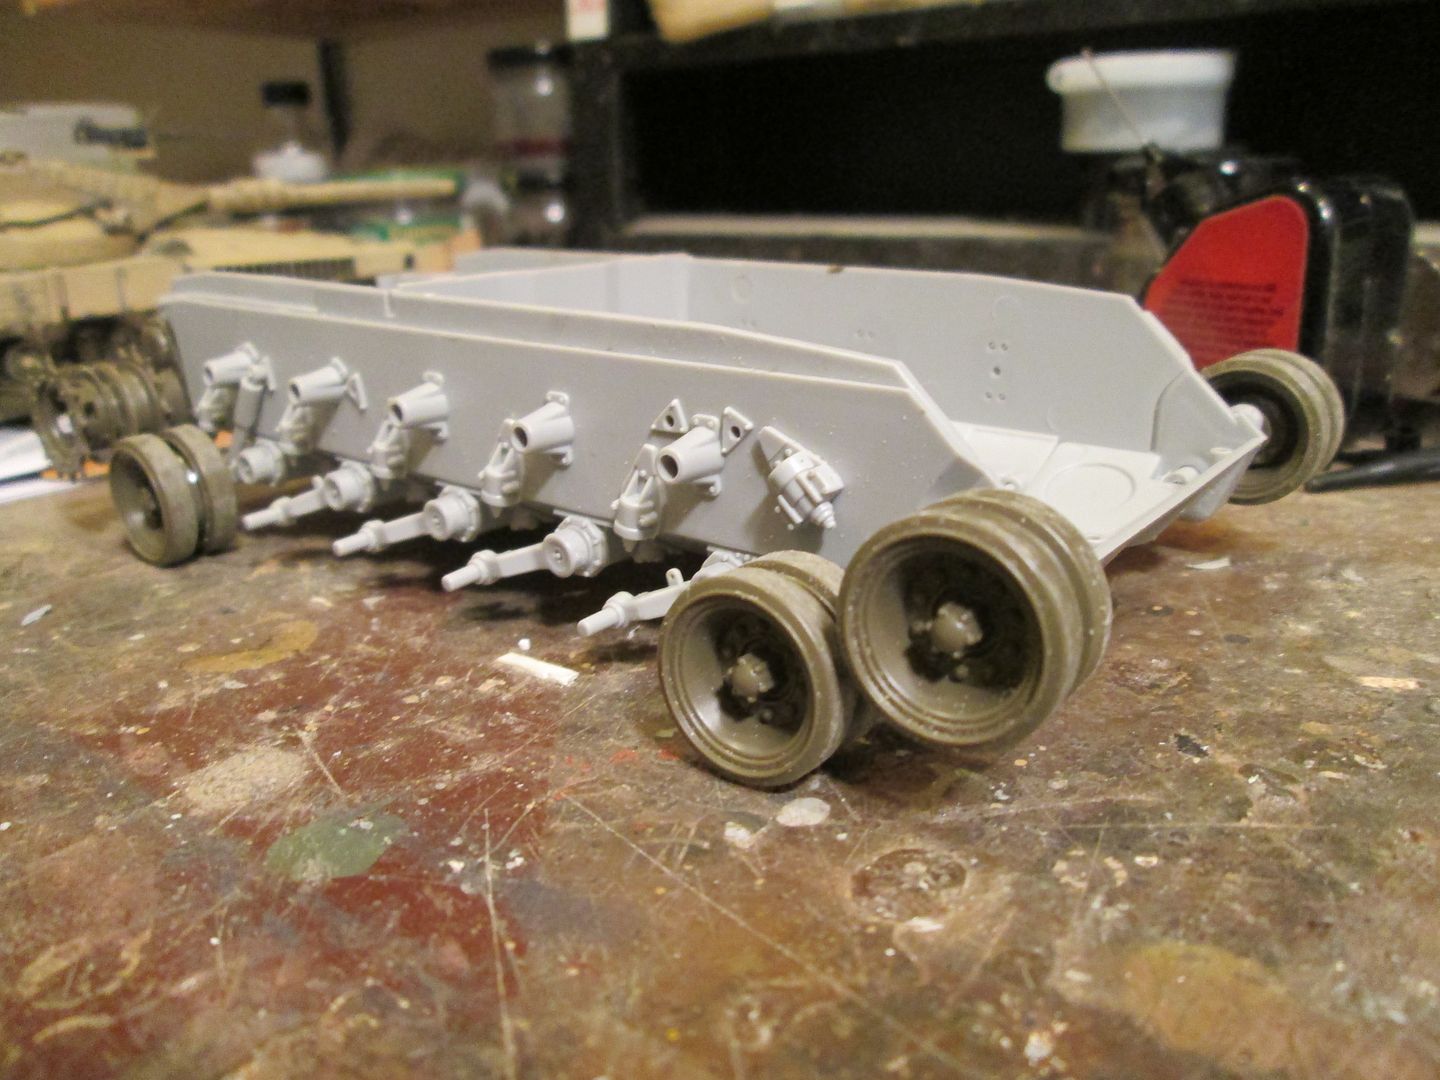 I had initially planned to build up the suspension, install the tracks and then fix the front and rear swing arms in place, but the HB suspension is way too fragile for that, so I'm going to simply set the nose-down attitude, or "rake" as we used to say back in the day, with just the front and rear wheels mounted, then put the rest of the suspension together. BTW, the two-piece shocks are pretty fiddly, and the uppers need the hole that receives the shaft cleaned up for them to be "workable". Well harumph. Here's a shot of the HB wheels (gray) and the Tamiya wheels (green) showing the slightly thicker rim of the HB wheel. Otherwise they're almost identical, with the exception of Mr.T's wheels having poly caps, a very good thing in my mind. Oddly enough, the Tamiya poly caps could almost be used in the HB wheels. Weird. 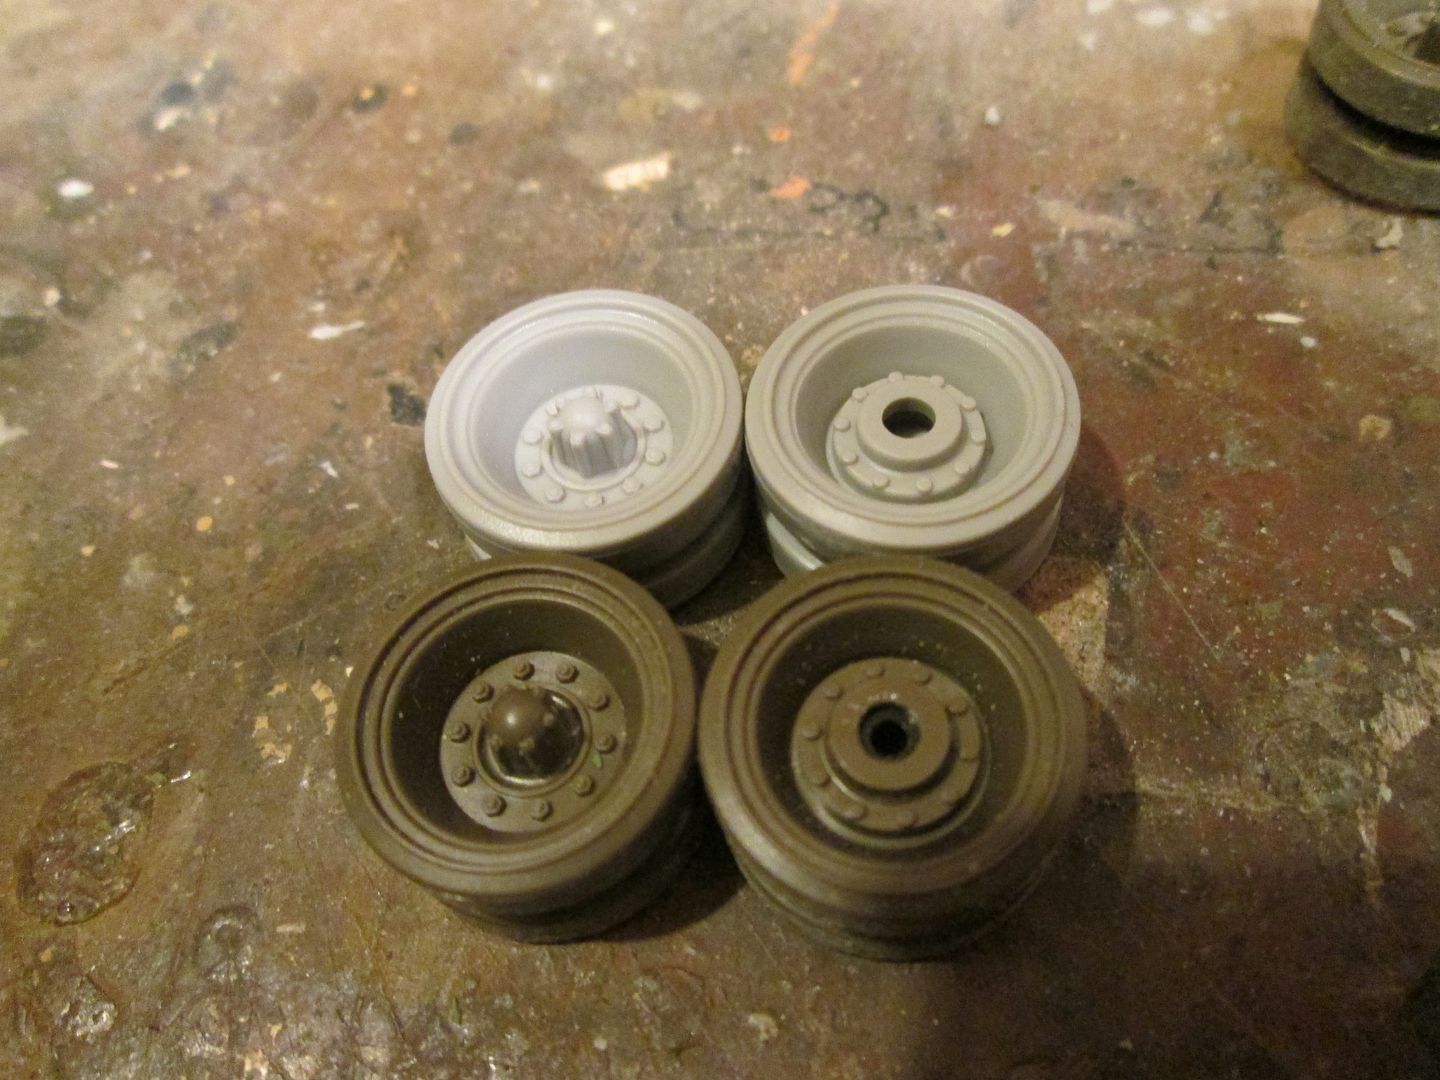 And while I've got my wonky p-bucket up, another comparison shot of the drive sprockets: 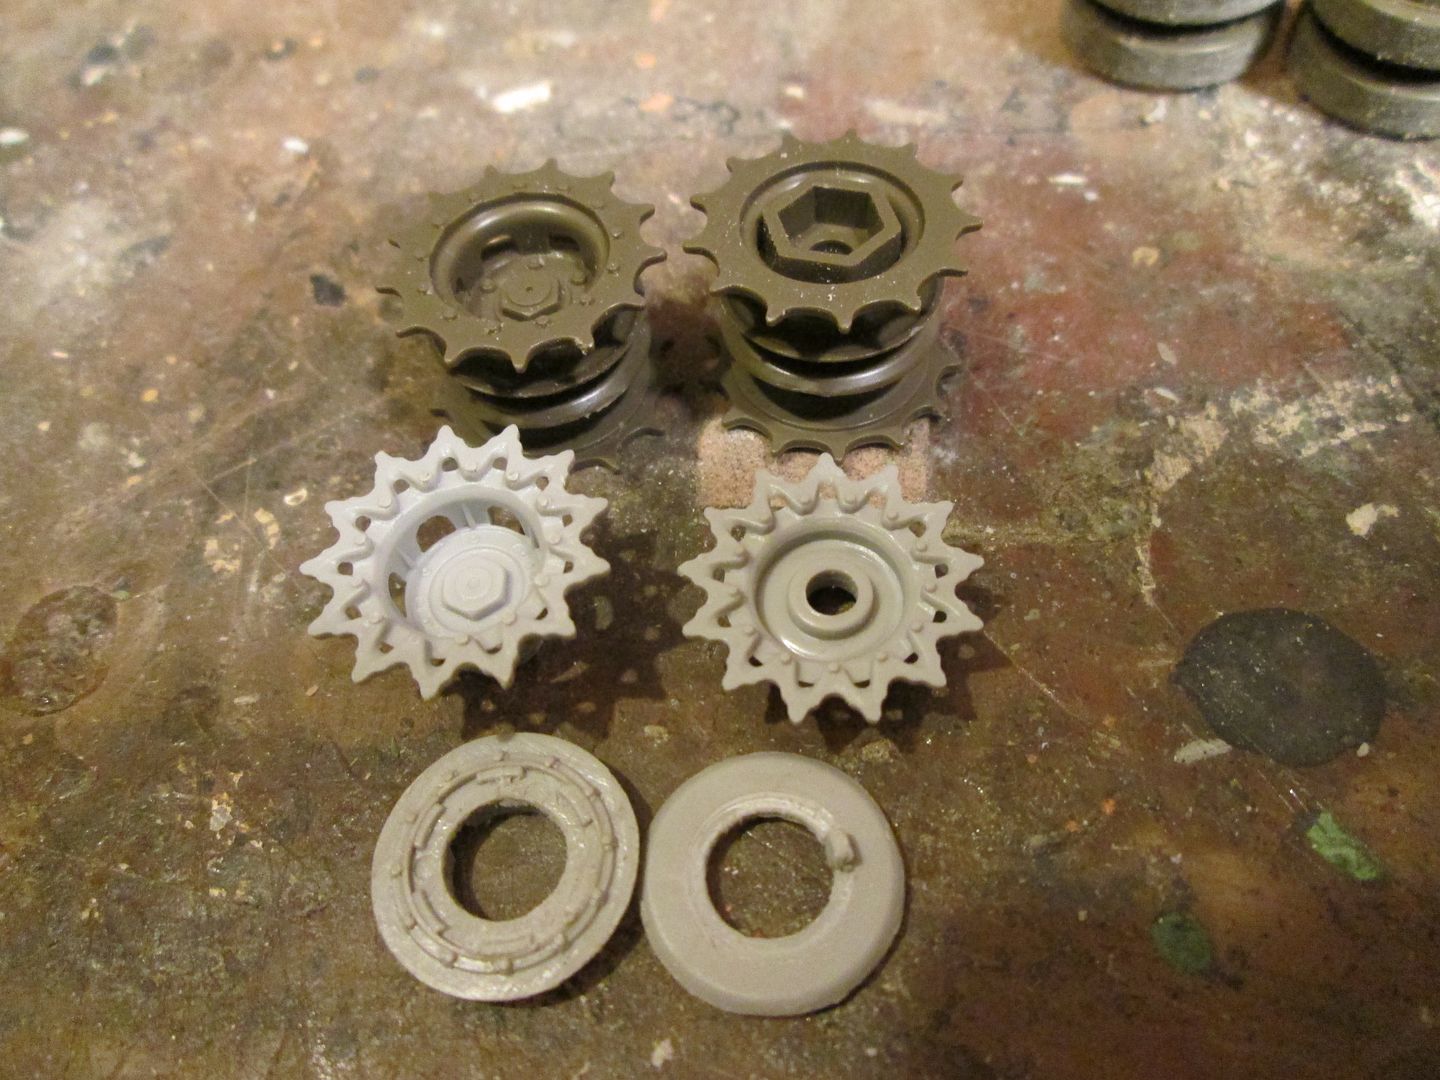 The HB parts have very nice detail, but rather poor fit... of course Mr.T's just jump together. I have a feeling there may be quite a few green parts finding their way onto this build, and it's also time to put another Tamiya M-26's in the stash. I like them, and I feel a need coming on to do a Marine tank from Korea. I also need to see if any AM shops do a barrel for the Super..... |
|
|
|
Post by deafpanzer on Aug 21, 2014 11:50:33 GMT -5
I am definitely interested to find out if US distributor sells Spade Ace tracks too. Wheels looking sharp... keep it coming buddy!
|
|
|
|
Post by wbill76 on Aug 21, 2014 12:45:17 GMT -5
Wouldn't be a Russ build without some mix-match going on with the parts. Looking good so far...we should start a pool on the green/gray % of parts utilization before it's all said and done.  |
|
|
|
Post by rbaer on Aug 21, 2014 14:02:14 GMT -5
Andy, I'm also interested, although the one set I ordered from HobbyEasy came pretty quickly, and the shipping was pretty cheap, considering. Bill, I just can't help myself.  And, thanks! |
|
pantherf..-Email Not Valid
Full Member
  
Member since: July 2013
"Best Job I've Ever Had"
Posts: 1,253 
|
Post by pantherf..-Email Not Valid on Aug 21, 2014 14:38:04 GMT -5
VERY cool Russ, nice start! A good project too! I don't think Friuls are expensive. It just depends on how far you are willing to go to make the build stand out. It all goes along with PE, resin updates, decals and what special weathering is used. I know it all adds up but gives it that special POP when it's needed!  Jeff |
|
|
|
Post by rbaer on Aug 21, 2014 17:33:53 GMT -5
Ed Zachary!
|
|
|
|
Post by dupes on Aug 21, 2014 18:08:21 GMT -5
I am definitely interested to find out if US distributor sells Spade Ace tracks too. Wheels looking sharp... keep it coming buddy! Ditto - I'd be on those too. |
|
|
|
Post by Leon on Aug 21, 2014 19:30:07 GMT -5
Nice recovery on the final drives Russ.
|
|
|
|
Post by rbaer on Aug 22, 2014 10:27:54 GMT -5
Thanks, Leon. Well, I got to thinking about how I'm going to display this one, and I kind of like it's looks before the extra armor was added to the mantlet, so that means either right after it was delivered in Europe or before it was shipped, and I thought about the brief description of the Super in Belton Cooper's book "Death Traps".... which gave me the idea of putting it in the 3rd AD's repair facility, where the extra armor was added. It'll give me an opportunity to display the M4A3/76 I just finished with it, too. So since I really liked the look of the HB sprockets, I thought, "I'll just make them work with the Friuls". Well, I smashed one trying to get it to fit the Friuls, but the other came out fine, lesson learned, so I have this: 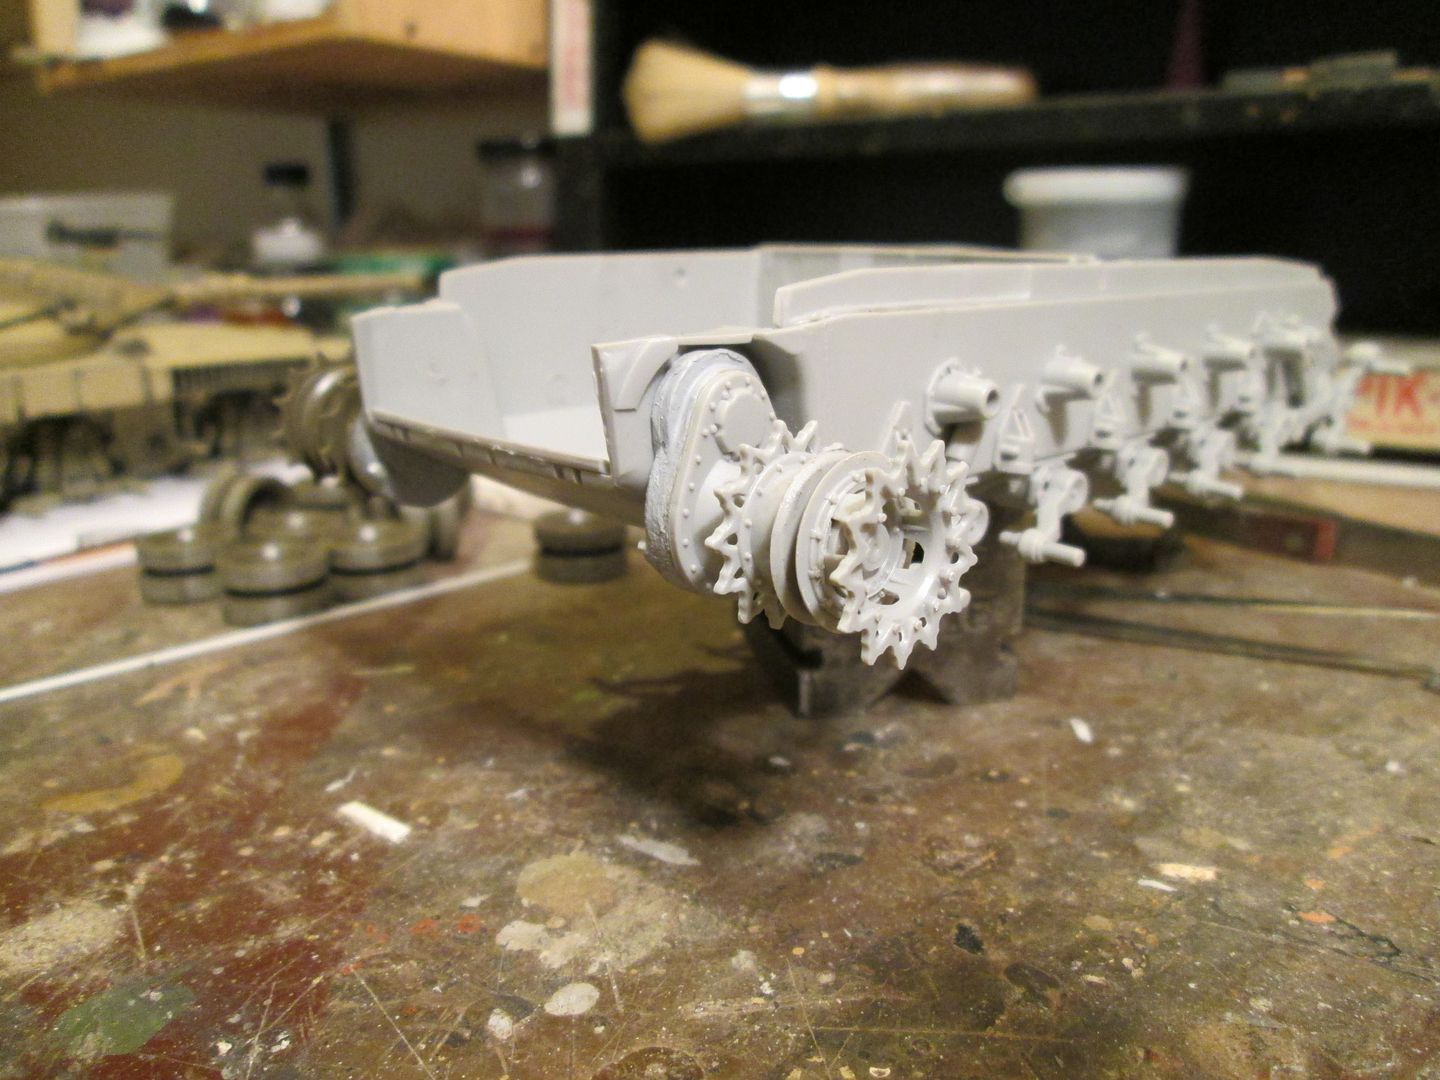 I think I'll have a couple of figs looking at it and a couple of new sprocket rings on the ground, ready to go on. I've got one very nice Warriors fig of a US tanker with a 30 cal over his shoulder, just looking at something, and he would make a very good on-looker to whatever is happening, especially if I place him so that he looks like part of the Sherman crew that's fixed and on the way out. Yeah, that's it..... yeah, yeah. |
|
WigWag Workshop
Reviews member    
Member since: May 2012
"Keep The Glue On The Styrene"
Posts: 720
May 22, 2012 7:25:45 GMT -5
May 22, 2012 7:25:45 GMT -5
|
Post by WigWag Workshop on Aug 22, 2014 16:50:58 GMT -5
I will be watching and following along. On another note, I hope one day, I will be able to afford/justify the purchase of some Friuls Tracks. One of my favorite things about the hobby, is the (what some folks call) tedious work, has it's really relaxing and satisfying.
-Steven
|
|
|
|
Post by rbaer on Aug 23, 2014 14:45:49 GMT -5
Very satisfying, until the AMS sets in.....
|
|
|
|
Post by wbill76 on Aug 23, 2014 19:15:04 GMT -5
Sounds like you've got it all worked out there Russ, looking forward to seeing it all come to life.  |
|
|
|
Post by rbaer on Aug 25, 2014 10:31:17 GMT -5
Sounds like you've got it all worked out there Russ, looking forward to seeing it all come to life.  Aw heck, Bill, I change my mind every day. Now I'm thinking about trying to modify an Italeri or DML spare ring and put it on one side.... I haven't had any modeling time in a while and my mind is the only thing active right at the moment. This could be the onset of another AMS episode, hope not. Good news is that the decals for my Merkava should (hopefully) be here soon, come on Red Frog Hobbies, and I can finish it. That'll help. |
|
|
|
Post by rbaer on Sept 10, 2014 15:31:03 GMT -5
Wow, I am lagging..... I've actually gotten some "work" done on this one, and may get some more in soon, whee! Suspension height and attitude is set, Friuls put together but runs not closed, waiting to actually do a "final fit", since the short side will work fine with the 83 links I have in a run now, but the "long side" may need 84. No worries.... Also begun is the lower rear hull, attached the rear plate, lots of MrSurfacer to blend in the seam, and then I added the weld that HB and Tamiya missed and I also have missed on the last two I've done, may have to be back and add them since I have AMS so bad these days. Anyway, pics: 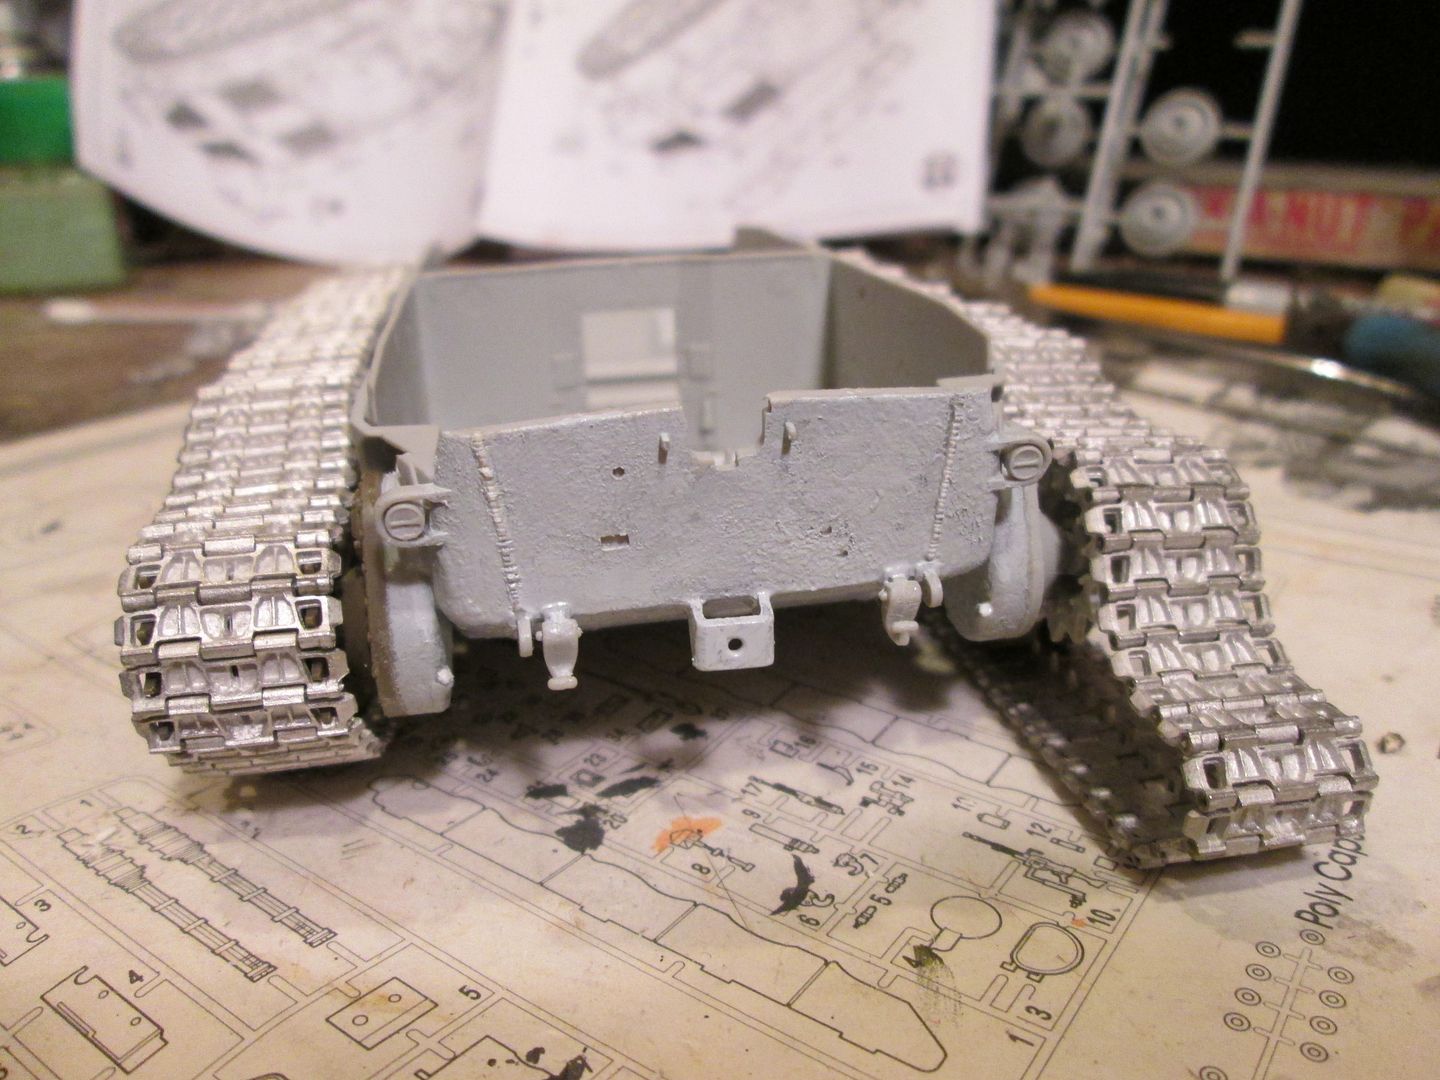 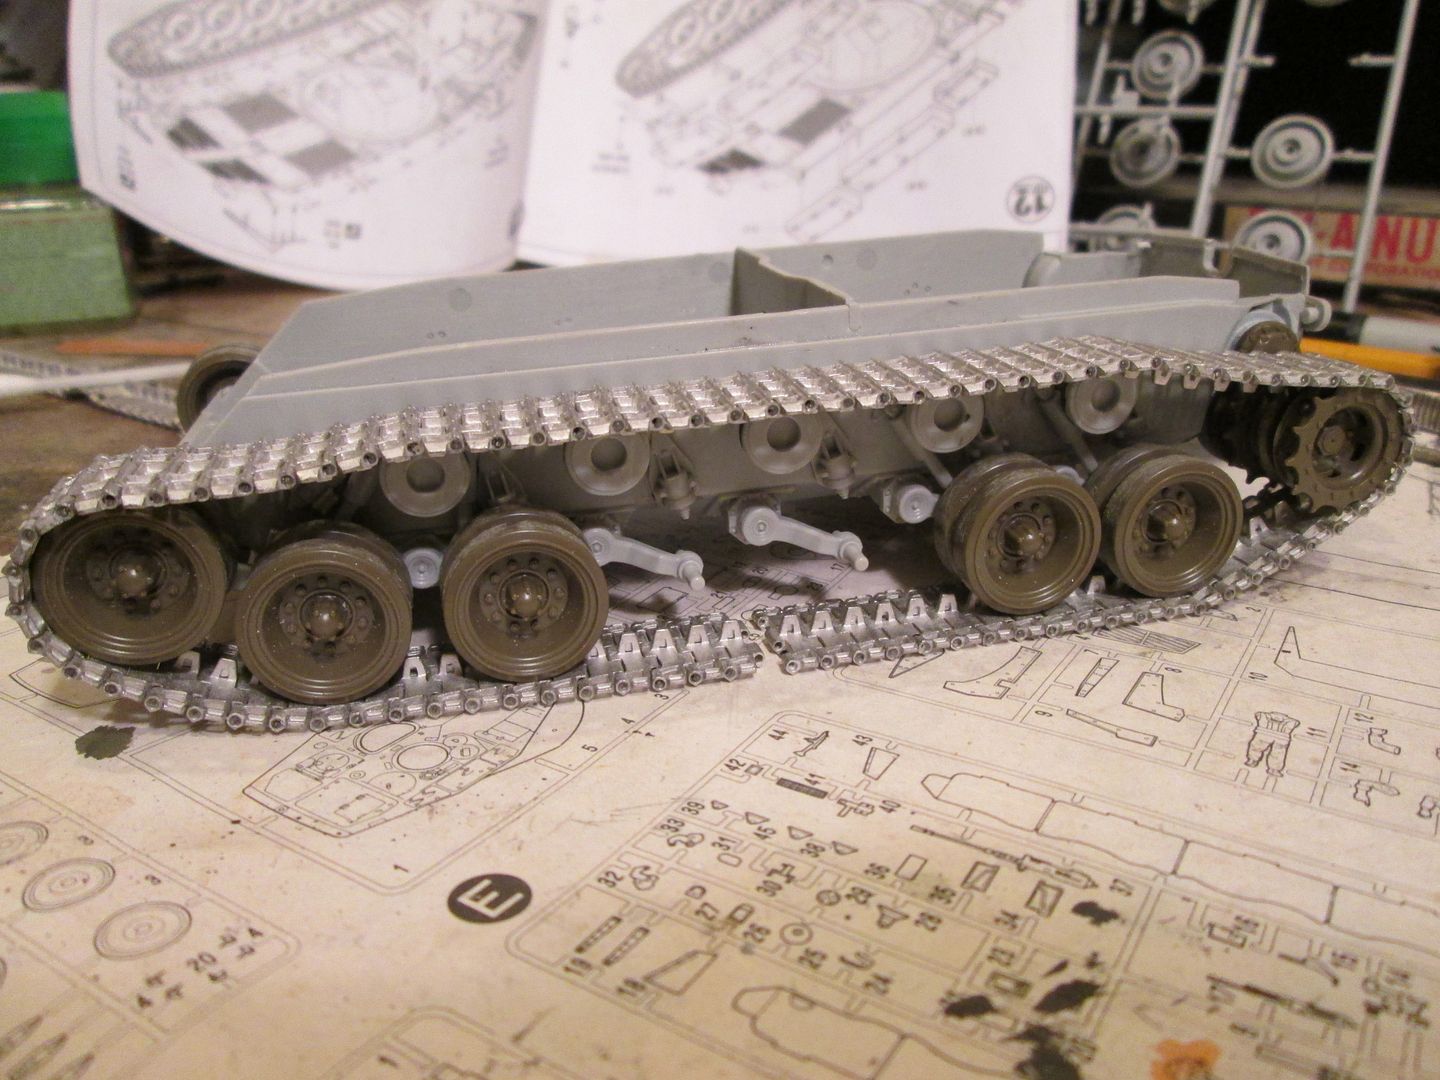 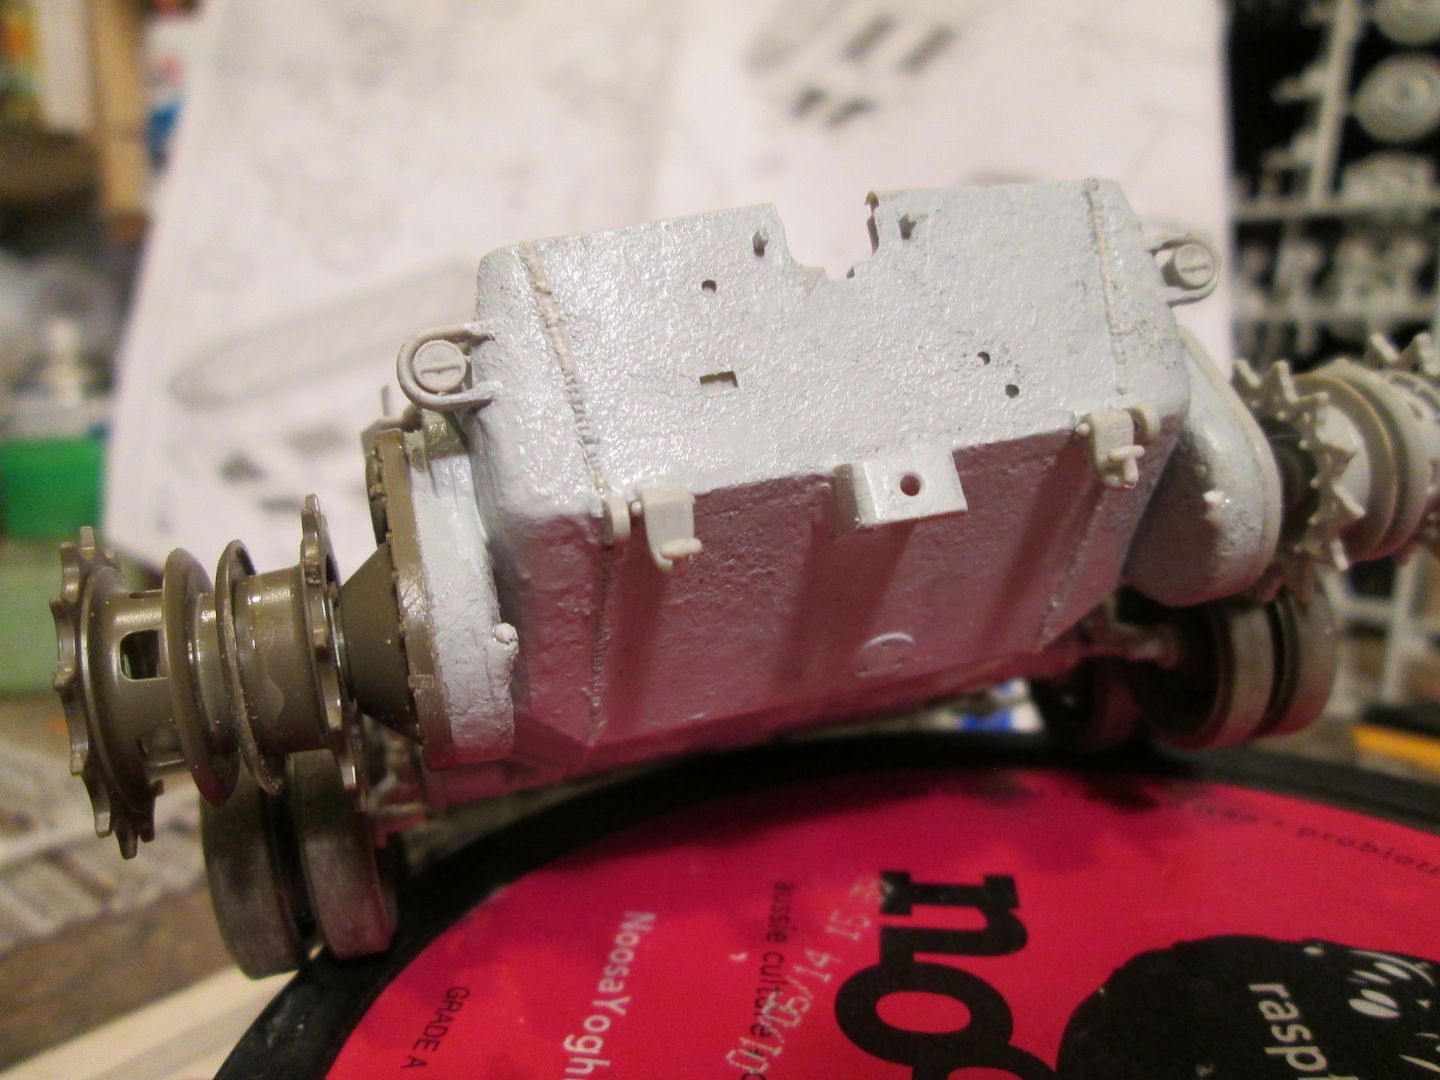 And just for grins, a pic of the most recent one, still in progress actually, that I ended up having a nose-down rake to as well, not sure how I did that.... 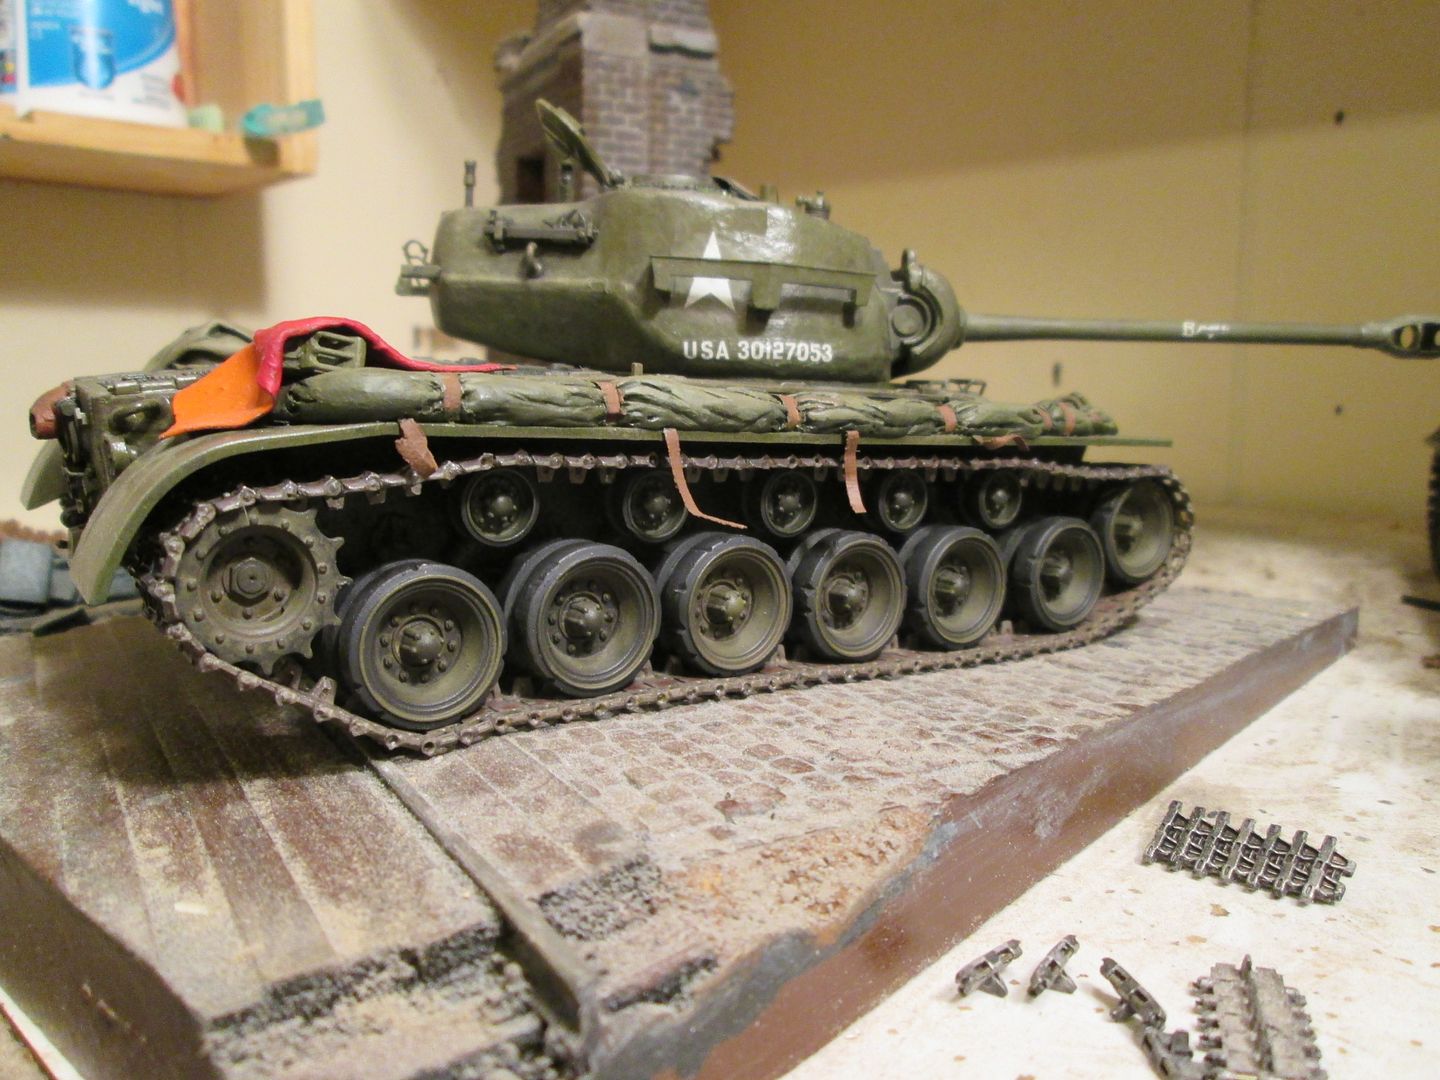 This one may end up being one of those "1946" thingies, not sure yet. Anyway, I'm enjoying this HB kit, makes me think of older Dragon stuff: real nice detail, touch-and-go fit. |
|
|
|
Post by deafpanzer on Sept 10, 2014 15:34:21 GMT -5
Love them Friul tracks... looking real good! Often my tanks didn't use same number of links... one time it was even off by two link. Crazy, huh?
|
|
|
|
Post by rbaer on Sept 10, 2014 16:14:44 GMT -5
Love them Friul tracks... looking real good! Often my tanks didn't use same number of links... one time it was even off by two link. Crazy, huh? Not so crazy, really. The M60 Magachs I do that use Merk tracks always use more on one side that the other, common enough when a torsion bar suspension means the front road wheel on one side is further forward than the other. Pretty sure the painted M26 above has one more link on one side that the other, can't recall for sure but it would surprise me if it didn't.... Come to think of it, my Magach that's in the dio with the fitters' rig also has one more link on one side that the other, and it has T142 tracks from AFV Club. Squat Erat Demonstratum.  |
|
|
|
Post by bullardino on Sept 11, 2014 1:50:59 GMT -5
Another one I had missed, but the title sidetracked me  Great start Russ  |
|
|
|
Post by rbaer on Sept 11, 2014 10:37:06 GMT -5
Thanks, Lui. I've been reading too many build articles in MMI, seems like they're pun-crazed over there..... Well, it was a girls night in the pool last night, last one for a while probably, so off the the cave I went. I'm pretty sure I'll be needing more Aves and MrSurfacer when this one is done, but onward. I joined the hull pieces last night, after installing the hull MG mount and making a box to prevent daylight being seen under the hull blower vents, and had to blend in the rear hull corners and glacis to side joins. Also filled and sanded were a dozen big ejector pin marks under the fenders. Gaak! The nfor kicks, I decided to take the "broken" HB sprocket and see if I could make it look like the real deal. Using Vallejo putty, I filled the holes in the drive teeth, shaped their inside circumferences with the shank of a drill bit, let it dry and sanded. I then applied a coat of green enamel, and after it dried, sanded again to ck- I like it, but the Vallejo is too soft to stand up to weathering, so I took the "good" HB sprocket and started the process using Aves instead of Vallejo. I think it'll work, more later. Also added was the inside layer of glacis add-on armor, and welds. I'll have to fill the back-side of the outer layer before it goes on, and any of the turret atmor as well, since it's all molded "hollow". Nifty. After the hull parts were blended and dry, I applied a light stippling of MrSurfacer to all cast parts, and the lower sides as well, to give to weathering something to stick to later. Pics, cuz without pics, it didn't happen: 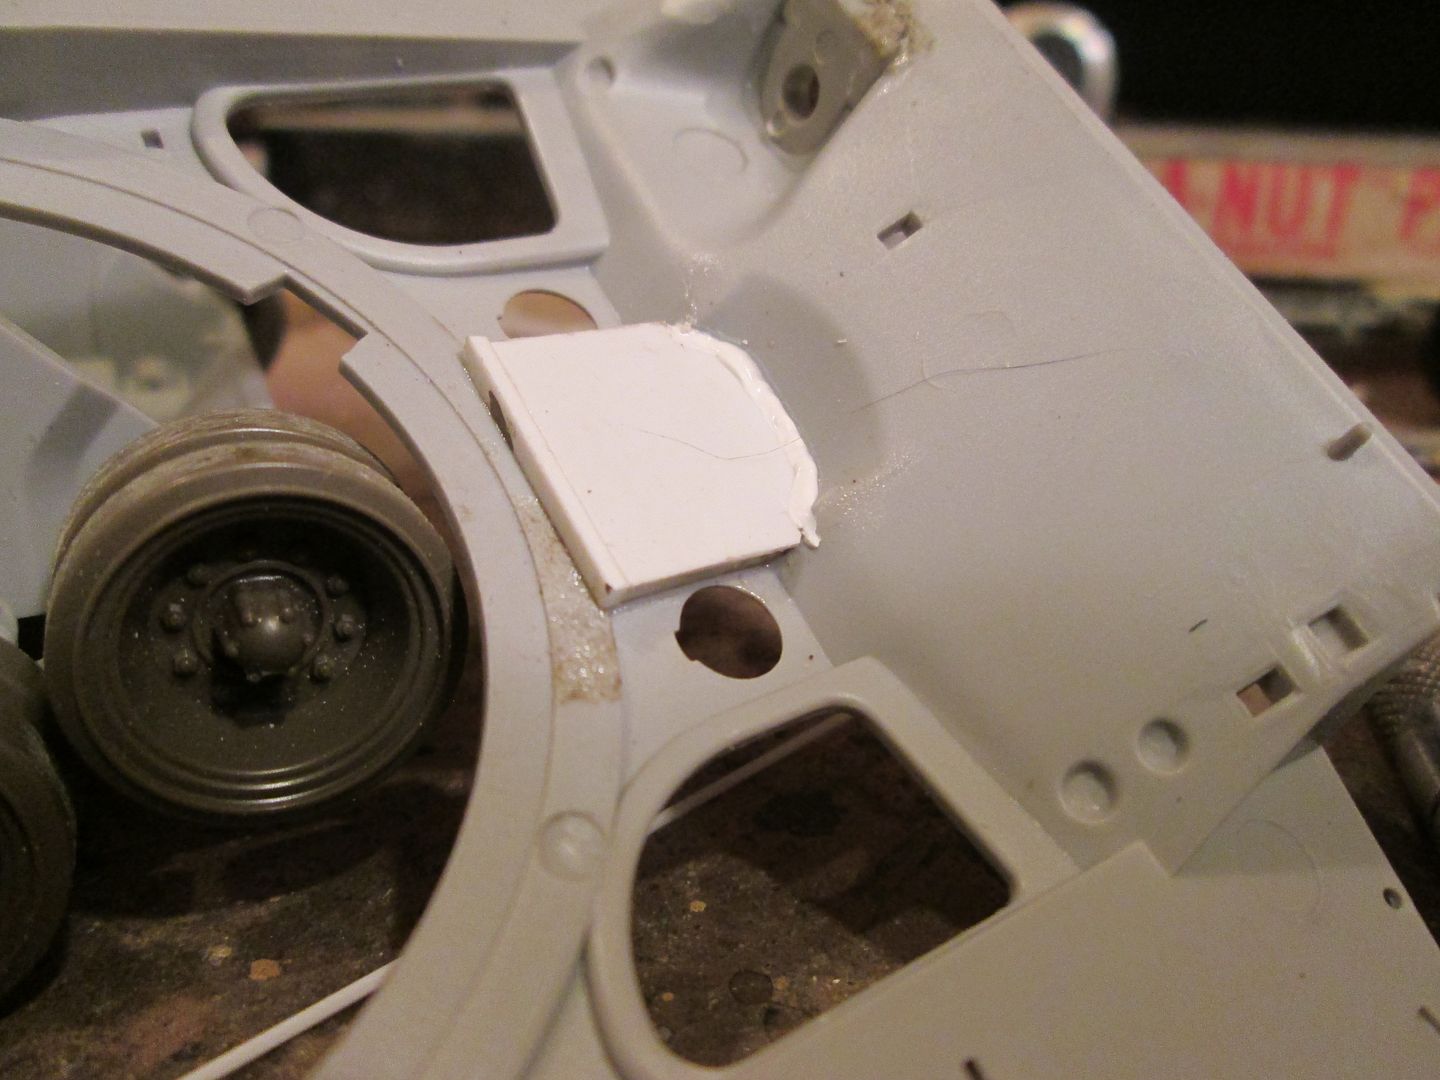 Above, inner hull showing "blower box" 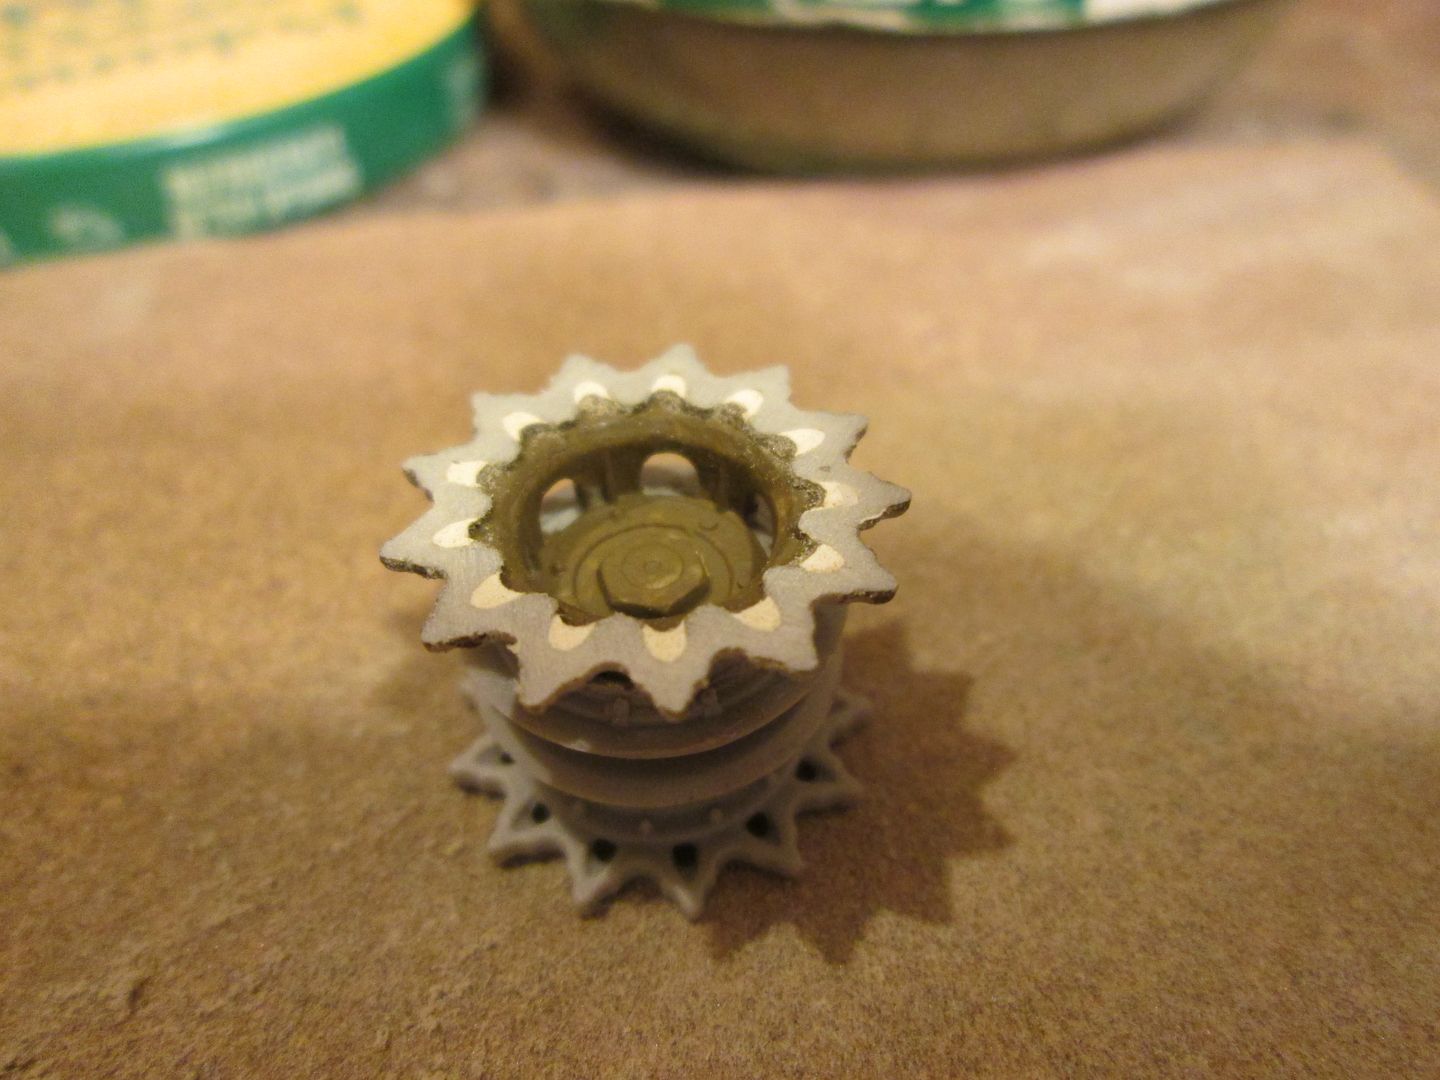 ^ Sprocket experiment 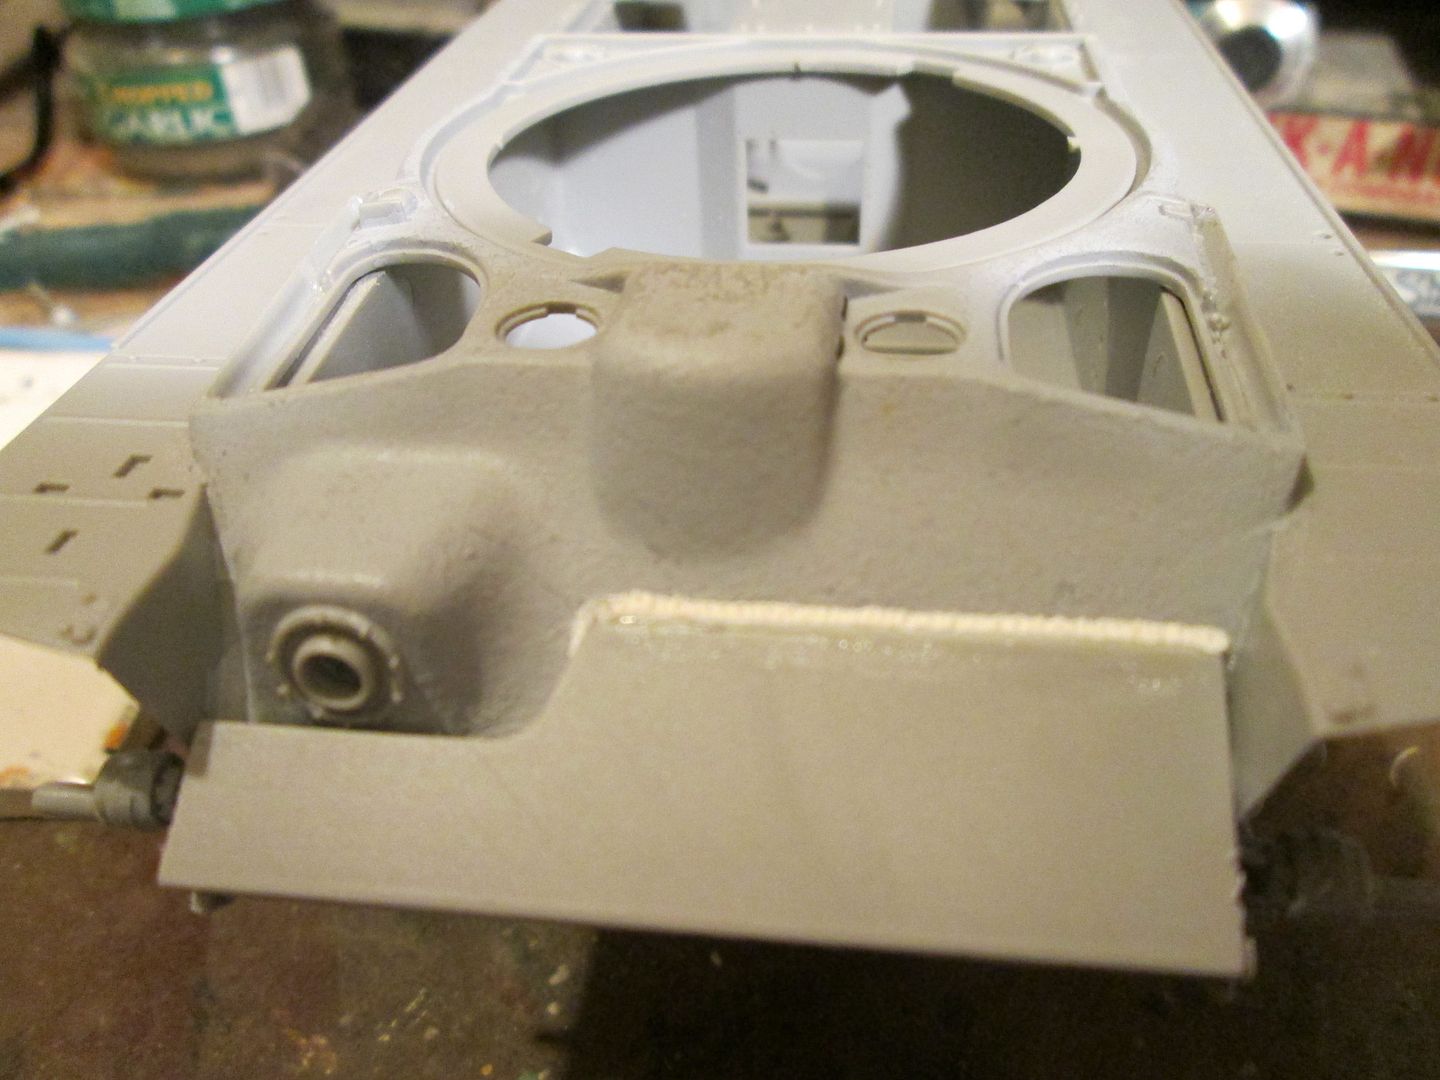 ^ First layer of heaviness 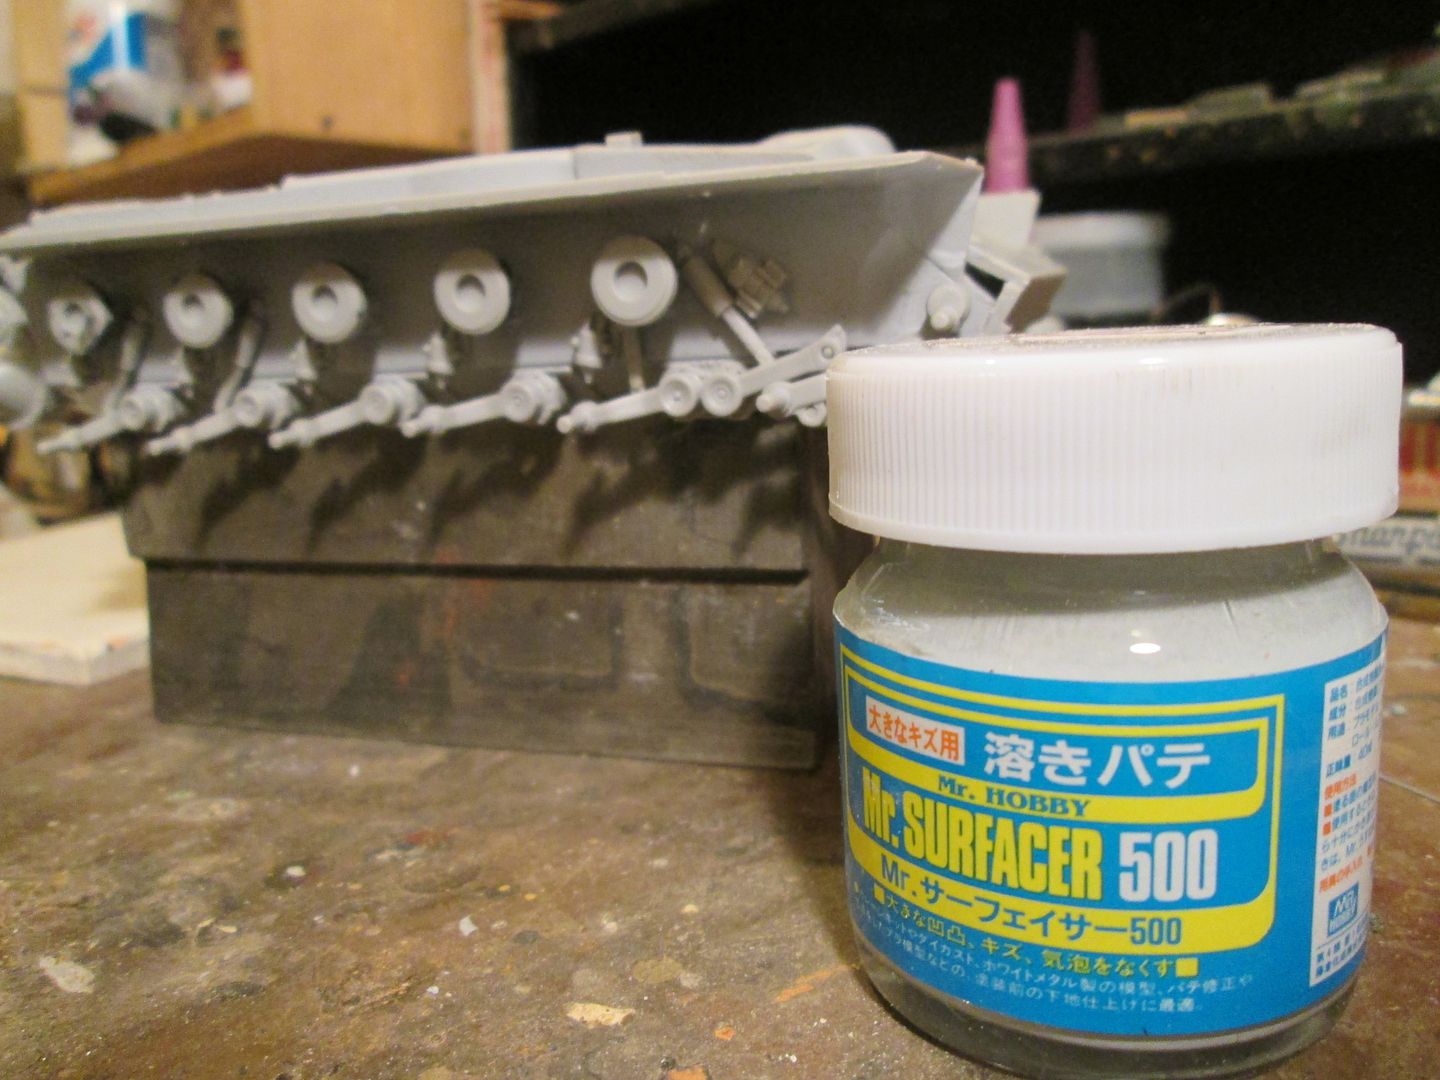 The hull and my buddy. Hasta luego. |
|


