multicam
Senior Member

Member since: January 2012
Nate
Posts: 2,039
Jan 10, 2012 14:35:41 GMT -5
Jan 10, 2012 14:35:41 GMT -5
|
Post by multicam on Apr 7, 2013 18:05:23 GMT -5
Allright guys, I figured it was time to get this back out and finish it up. I started it back in December, hurried through the build and didn't take many pics, just to get to the painting:) but I ended up stalling out on the box tracks:(. But I picked up some Friul tracks at a show, and with them and some newfound inspiration... here we go. First, the box shot. It's Dragon kit 6205 from 2004. Pretty good kit that went together without any problems and fit tightly. Other than the tracks that I didn't feel like fighting:)  Next, some old pics, to let you know where we're starting from. I'm gonna go back to primer on this after the recent additions.   Some upgrades An Aber barrel...very cool rifling in the front of this one.  And the Friul tracks...my first set...I should have never done it...  with dress pins instead of the accompanying wire  A test fit before paint to check for correct length/sag.  This morning, i shot them with primer.  a little closer  Also prepped all the extra track pieces and cable that will be stowed on the fenders later.  And this afternoon I got the base coat on. A few thin layers of Tamiya flat brown. Gonna do some oil and AK washes later or tomorrow.  The reason I should have never done it is because now I'm gonna ONLY buy these expensive tracks. OMG they are amazing to work with and I think they look great! Also removed the kit barrel, I couldn't get rid of the seam. Thankfully, I pulled it off without too much damage.   Then added the Aber metal barrel. Looks good, me thinks.  The kit also has a small photo etch fret, that initially I was just gonna throw in the spares bin but, I thought since I splurged on AM for this why not, right?  After two hours of gluing, cursing, re-gluing, cursing some more, I finally got this side's straps done. They strap down what look like track additions for traction? I read somewhere that the T-34 was prone to sinking in the mud and snow.  I gave up for today and will finish these up another day;( They turned out ok though, it's just that CA glue and I just don't get along very well.  So that's where we stand for now. I'm thinking about doing a base with cobblestones and a fountain for this one. I can't wait to paint and weather it! Let's hear what you think:) |
|
Deleted
Member since: January 1970
Posts: 0
May 14, 2024 11:04:52 GMT -5
May 14, 2024 11:04:52 GMT -5
|
Post by Deleted on Apr 7, 2013 18:24:34 GMT -5
Looking real good!
The Aber barrel was a good choice.
G
|
|
|
|
Post by TRM on Apr 7, 2013 18:42:26 GMT -5
Hey Nate!! Looks sweet and a nice save from the shelf!! Just tossing it out there, check the length on your tracks, looks like two to 3 links too many.    Just a couple of examples for the majority I seen. The last one even has too road wheels not even touching and its not sagged if you can believe that!! T-34 is sure to pull a couple of enthusiasts out of the woodwork!! LOL!!! Keep it coming!! |
|
ironhand6
Full Member

Member since: March 2013
Posts: 280 
|
Post by ironhand6 on Apr 7, 2013 19:38:32 GMT -5
now thats a nice t34. i actually have that kit and was thinking about pulling it out.hmmm....methinks you may have started somrthing!
|
|
|
|
Post by wbill76 on Apr 7, 2013 19:48:31 GMT -5
Nice to see this one come back to the front of the build line Nate! Now that you've used workable tracks, there's no going back.  I'm with T, you may want to tighten up the runs a bit more vs. the sag you have now unless you're planning to show a knocked-out/disabled vehicle that's lost integrity in its torsion bars. Replacement barrel is a nice touch as well! |
|
multicam
Senior Member
Member since: January 2012
Nate
Posts: 2,039
Jan 10, 2012 14:35:41 GMT -5
Jan 10, 2012 14:35:41 GMT -5
|
Post by multicam on Apr 7, 2013 21:08:24 GMT -5
Thanks for the comments, fellas!
G: Thanks, sir. Agreed, the fancy barrel looks exponentially better. I'm just scared how going all out on this model may affect my wallet on future builds. LOL
Topher: thanks for the pics man. In terms of track sag, yeah, prolly gonna tighten it up. This also has that adjustable front wheel that was at the back position in the pics, so with that forward it'll tighten up about 1/2 inch or so all told. May still need to eliminate some links.
Clint: You definitely should get it out. Start a blog buddy! What's your current WIP? Jump on in man.
Hickock: I think you're right about the workable tracks, man they're sweet and so easy to work with in comparison to the other. See above about sag:) Cheers buddy.
|
|
|
|
Post by deafpanzer on Apr 7, 2013 21:45:38 GMT -5
Oh no you have fallen into the Friuls tracks trap!!! I know... can be so addictive that I want all builds to use 'em but I am not sure if I can afford spending $40-$50 for each. Your tracks look great and the whole build is looking very fine!!! Huge improvement in barrel department too... |
|
multicam
Senior Member
Member since: January 2012
Nate
Posts: 2,039
Jan 10, 2012 14:35:41 GMT -5
Jan 10, 2012 14:35:41 GMT -5
|
Post by multicam on Apr 8, 2013 18:04:03 GMT -5
I hear ya on being able to afford them. I'd almost rather buy another kit for that! They are amazing though and arguably worth the money if that's the route a builder chooses to go. Thanks for the kind comments;)
|
|
|
|
Post by Leon on Apr 8, 2013 18:28:49 GMT -5
Nice work all around Nate.Looking good.
|
|
dupes
Head Moderator  Jan '16 MoM Winner
Member since: March 2012
Need to build 80 kits per year until I'm 100 to deplete my stash. Maybe I should sell a couple.
Posts: 7,020
Member is Online
MSC Staff
|
Post by dupes on Apr 8, 2013 18:45:15 GMT -5
Looks great! I applaud you for being able to dive back into a build AND start making improvements. By the time I get to the painted stage, it's "press on" regardless of what I forgot.
|
|
multicam
Senior Member
Member since: January 2012
Nate
Posts: 2,039
Jan 10, 2012 14:35:41 GMT -5
Jan 10, 2012 14:35:41 GMT -5
|
Post by multicam on Apr 8, 2013 19:26:37 GMT -5
Thanks Dupes. That is usually the way I am too, but I have 4 shelf queens now including this one and I just gotta get some finished before I crack any more boxes open, otherwise I think it may effect the ole mojo;)
|
|
stevereid
Full Member
Member since: November 2011
Posts: 556
Nov 16, 2011 16:17:33 GMT -5
Nov 16, 2011 16:17:33 GMT -5
|
Post by stevereid on Apr 8, 2013 19:43:02 GMT -5
Nate- I love T-34's and I am glad to see this one return! Where did you get that cool track assembly jig? Steve |
|
multicam
Senior Member
Member since: January 2012
Nate
Posts: 2,039
Jan 10, 2012 14:35:41 GMT -5
Jan 10, 2012 14:35:41 GMT -5
|
Post by multicam on Apr 8, 2013 20:56:49 GMT -5
Hey Steve. Nice to have you along. I won the jig in the raffle at the IPMS Roscoe Turner show in Indy a couple weeks ago. 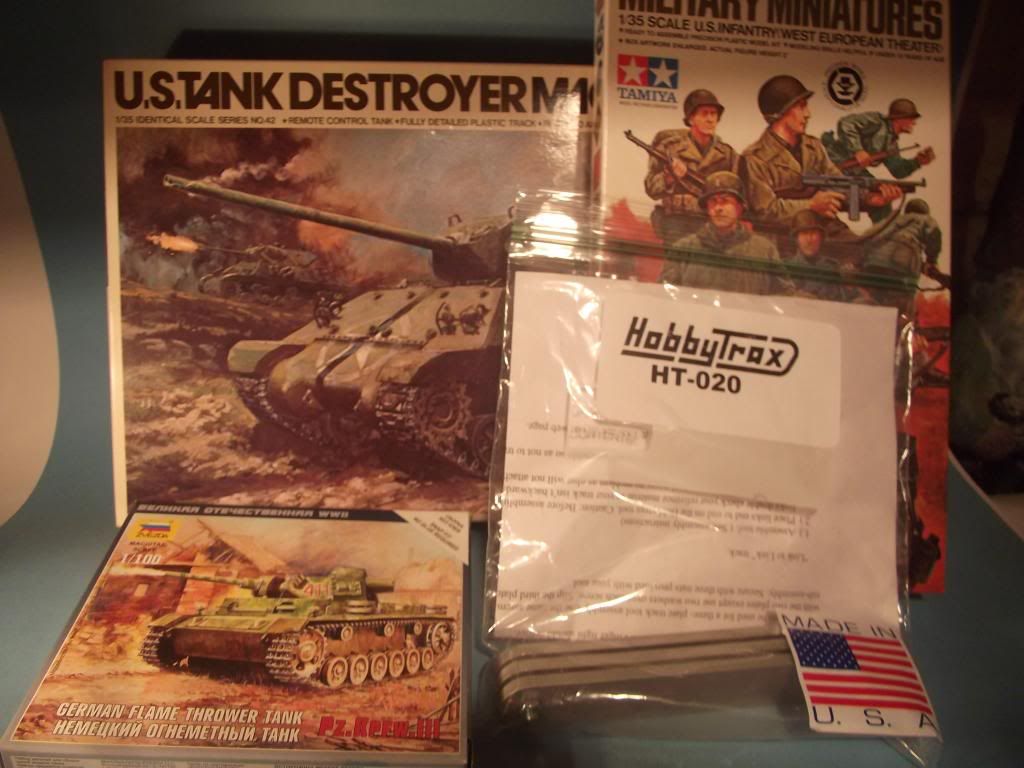 The company is called Hobbytrax and they had a table set up at the show they're out of Plymouth, Indiana. They sell kit specific sizes for many different tanks/HT etc. I think this was either a generic version, an early model or 1/48 or something, cuz it's a little small but it works great and is fully adjustable:) You may want to invest in one for the T-34 at least. They were selling the kit specific ones at the show for $20. site ... hobbytrax.net P.S. What do you call those track link thingies on the fenders of my T-34 above? Dragon kit doesn't have words in the instructions and I haven't been able to locate the info elsewhere? |
|
Deleted
Member since: January 1970
Posts: 0
May 14, 2024 11:04:52 GMT -5
May 14, 2024 11:04:52 GMT -5
|
Post by Deleted on Apr 8, 2013 23:58:54 GMT -5
Love them Fruils, easy to get addicted.
IPMS Roscoe Turner is one of the best. I really miss their show as it's too far for me to get there now unless I fly.
G
|
|
|
|
Post by bullardino on Apr 9, 2013 9:33:30 GMT -5
Uh,uh, I tawt I taw a puddy t-34...
|
|
stevereid
Full Member
Member since: November 2011
Posts: 556
Nov 16, 2011 16:17:33 GMT -5
Nov 16, 2011 16:17:33 GMT -5
|
Post by stevereid on Apr 9, 2013 16:44:58 GMT -5
What do you call those track link thingies on the fenders of my T-34 above? Dragon kit doesn't have words in the instructions and I haven't been able to locate the info elsewhere? Multicam- I believe you are talking about the ice cleats. Not easy to find a good pic with the ice cleats fitted- but if you match those up with the holes in the alternating track links they should line up. |
|
multicam
Senior Member
Member since: January 2012
Nate
Posts: 2,039
Jan 10, 2012 14:35:41 GMT -5
Jan 10, 2012 14:35:41 GMT -5
|
Post by multicam on Apr 9, 2013 20:41:23 GMT -5
Luigi: You did...You did...! LOL. So you guys know Looney Tunes in Italy, huh? Nice:)
|
|
|
|
Post by bbd468 on Apr 9, 2013 22:09:02 GMT -5
Hiya Nate! Sorry im late to the party bro....count me in! Great build fella, i love the early T-34/76's
Gary
|
|
|
|
Post by armorguy on Apr 10, 2013 14:34:48 GMT -5
Nice build so far Nate ! I like the T34 too but I never built one...time to get inspired !
|
|
|
|
Post by bullardino on Apr 10, 2013 15:57:01 GMT -5
Nice build so far Nate ! I like the T34 too but I never built one...time to get inspired ! What are you waiting for?  |
|
pt109
Full Member
Member since: April 2013
Stop staring at me! heheheh
Posts: 491
|
Post by pt109 on Apr 17, 2013 20:38:01 GMT -5
A very nice kit...nicely detailed but not crazy about the color instructions.
I have a Verlinden interior for it.
Paul
|
|
|
|
Post by tonylee on Apr 17, 2013 20:56:15 GMT -5
Bring it on up Cam,i've got your back. Tony lee |
|
multicam
Senior Member
Member since: January 2012
Nate
Posts: 2,039
Jan 10, 2012 14:35:41 GMT -5
Jan 10, 2012 14:35:41 GMT -5
|
Post by multicam on Apr 17, 2013 21:05:09 GMT -5
Gary: Welcome aboard! Always glad to have you along. Guy: When the time is right, you're sure to do one. That's the way it should be for this lovely hobby:) Paul: It is a great kit. Thanks for hanging round! Quick update fellas! All prepped and ready for a re-paint!  We've got paint! Back to primer with this one. I primed this one originally I primed this one with vallejo acrylic primer. Color was great, strength was crap! Sorry, Vallejo... I've loved all your paints until this:( Back to the tried and true spray can grey:)   You can also see in the pic, I also rigged up a system for holding/handling a tank while I paint it. Seems to work good so far. What you can't see is that it screws on/off the turntable I use to paint on. I figure it'll be secure and handy to work with. We shall see. I'll prolly start painting this bad boy tomorrow night, as the wife will be away all evening. Gonna go for some stylistic CM. We'll see what I can achieve and how far I'm willing to go. Thanks for checking in and all comments welcome! Cheers |
|
|
|
Post by deafpanzer on Apr 17, 2013 22:44:46 GMT -5
Sorry to hear about Vallejo primer but do appreciate your warning! Your little tank looks great primed... now get it painted!!! Watch out for storms... wondering if you had to put up with them like we did last night here in Indiana?
|
|
|
|
Post by bullardino on Apr 18, 2013 1:28:42 GMT -5
Great job  I found that vallejo primers work well if you let them cure for at least 24 hrs.... |
|
ironhand6
Full Member
Member since: March 2013
Posts: 280
|
Post by ironhand6 on Apr 18, 2013 11:02:27 GMT -5
Great save bud, what color are you going to use for the russian green? im curious how to do the color modulation, so ill watch closely and take notes! yeh andy from watching the radar last night i think multicam got hammered right along with us  |
|
|
|
Post by bbd468 on Apr 18, 2013 11:12:41 GMT -5
Hello Nate, Man, i feel ya on the Vallejo Primer.  As much as i love their Paint, their Primer is the worst ive ever used....had a terrible time with it. Ive never tried their colored primers but the Grey was S***!!! Thats my experience with it anyways. I hope ya got it all sorted and we get to see some paint soon! Looking forward to it.  Gary |
|
|
|
Post by TRM on Apr 18, 2013 16:38:54 GMT -5
Nice work Nate!! Looking forward to the CM!!! The Vallejo primer and paints are latex based acrylic I believe. We have all experienced the rubbery dried paint at the top of a latex paint can...pretty much the same thing. When they cure they are nice but until then....  I will use as of recent, the AK Primers as these are true acrylic or back to the rattle cans for the most part. Keep up the great work!!! |
|
|
|
Post by Leon on Apr 18, 2013 18:07:33 GMT -5
Looking great in primer Nate,now on to the real color. |
|
multicam
Senior Member
Member since: January 2012
Nate
Posts: 2,039
Jan 10, 2012 14:35:41 GMT -5
Jan 10, 2012 14:35:41 GMT -5
|
Post by multicam on Apr 19, 2013 23:08:01 GMT -5
Andy: Yeah, it rained and rained and rained and I think it may still be raining:(. Had to change my route to work this morning due to flood/road closures. Yikes! On with the paint then... Luigi: Thanks buddy. Clint: Hammered indeed! and not in a good way;) see below on the paint and CM:) Gary: Yep, I'm thankful I just bought the little three dollar bottle;) I did like the color of the russian green primer though:( T: yep, like most of us, change is scary and the new type of paint just didn't do it for me! Glad I tried it though. Dicky: Glad to have you aboard, Nemo! Leon: Let the colorification commence! Here we go with color fellas. Sorry, really wanted to update and get this done last night but had a killer headache and laid around instead:( But felt better today and was very productive! Ironhand6 was wondering about Color Modulation, so I'm gonna do a simple SBS for his and others sake. (by no means am I an expert). I kept it simple and just did three tones this time. Base coat is Vallejo Russian Green 894. Some people would start with a darker(just add a couple drops of black/dark brown to the green) shade of this for yep shading. I like to keep it light because I think the washes and oil filters tend to darken the corners enough for me.    Next step... I use the same green lightened with buff (about 70/30) and thinned down with water (just experiment until it sprays through your AB nicely) and then highlight. The secret here is go easy and spray very thin layers while gently moving your AB over the specific area you want to lighten. Usually you lighten the high points (the sticky outie bits;) like the crew doors and areas where it would naturally fade from the sun like the center of large panels and the top, sun exposed area. I also like to highlight some of the curves of the turret with vertical sprays that sort of draw the eye to that portion of the model. I also highlight the top corners of the model, for instance where the front and rear armor plates join each side.    Lastly, I lightened the same paint mixture again by adding the same 70/30 mix of green/buff but I also add a few drops of white to lighten it even more. The key at this stage is to really be careful not to overdo it. You could ruin your layering effect if you do too much. The idea is to get a gradual blend of color that doesn't have distinct lines but blends together. Here I hit the highest points again, sparingly and highlight anything that I want to be more prominent.     The whole idea of the CM technique is to accentuate and deemphasize certain parts of the model to create more dimensionality for the viewer. You have a lot of artistic freedom with this and you could manipulate the way the model appears to be lit with this technique as well. Hope this helps those that haven't tried Color Modulation. You can also purchase Modulation paint sets that have the different shades (usually around 5 colors) from dark to very light for specific theaters of operation, nationalities, etc. I find it just as easy and a heck of a lot cheaper to mix my own colors. Then I can buy more kits and goodies:) Next step will chipping and decals and then it'll be oil filters and washes, then I'll hit it with an AK wash or two. Can't wait to weather this one. Thanks for looking and let me know what you think. Cheers. Nate |
|


 I'm with T, you may want to tighten up the runs a bit more vs. the sag you have now unless you're planning to show a knocked-out/disabled vehicle that's lost integrity in its torsion bars. Replacement barrel is a nice touch as well!


 As much as i love their Paint, their Primer is the worst ive ever used....had a terrible time with it. Ive never tried their colored primers but the Grey was S***!!! Thats my experience with it anyways. I hope ya got it all sorted and we get to see some paint soon! Looking forward to it.
  I will use as of recent, the AK Primers as these are true acrylic or back to the rattle cans for the most part. Keep up the great work!!!


