|
|
Post by deafpanzer on Jan 20, 2014 1:18:04 GMT -5
Looking good! Bet you had too much fun getting rid of the seam on the gas tank....
Sorry about the 49ers... I liked both teams but I really wanted 49ers to win.
|
|
|
|
Post by bullardino on Jan 20, 2014 10:29:35 GMT -5
OK, I must pull down those book and start reading them again.  Funny how I can easily forget everything I know... Great job, btw, Bill. I really love it. |
|
|
|
Post by dupes on Jan 20, 2014 10:36:56 GMT -5
What the frank...? Bill, what the hell are you building???  |
|
|
|
Post by wbill76 on Jan 20, 2014 10:54:00 GMT -5
Andy, seam on the gas tank was a tough one...curved surface and all made it more of a challenge than usual. Thanks for the condolences on the Niners loss, but it was a hard-fought game that could've broken either way IMHO, definitely looking forward to the SB in a couple of weeks! Lui, you're not alone, I've forgotten things that I've forgotten, never mind what I already knew!  Thanks for following along.  Marc Marc, I think they call it an aero-what's-it, but I'm not sure...keep looking around for the tracks and turret.  It's all CB's fault, note to self, never make a bet with a short Englishman again! 
|
|
|
|
Post by dupes on Jan 20, 2014 11:06:09 GMT -5
Ahhh, an aero-what's-it. Sounds about right!  |
|
Deleted
Member since: January 1970
Posts: 0
Nov 25, 2024 12:40:44 GMT -5
Nov 25, 2024 12:40:44 GMT -5
|
Post by Deleted on Jan 20, 2014 14:45:23 GMT -5
Andy, seam on the gas tank was a tough one...curved surface and all made it more of a challenge than usual. Thanks for the condolences on the Niners loss, but it was a hard-fought game that could've broken either way IMHO, definitely looking forward to the SB in a couple of weeks! Lui, you're not alone, I've forgotten things that I've forgotten, never mind what I already knew!  Thanks for following along.  Marc Marc, I think they call it an aero-what's-it, but I'm not sure...keep looking around for the tracks and turret.  It's all CB's fault, note to self, never make a bet with a short Englishman again!  Bill,you will never really know how much that 'ickle' bet got my Mojo kicking,even with the time I had off sick,I don't think I'd have got that UHU finished without the bet.  ....And only Dicky REALLY knows how much building I got done in that same period!  Great progress on this bird so far mate  ....Doesn't look like you're too far from throwing paint around,eh? |
|
|
|
Post by wbill76 on Jan 20, 2014 15:10:27 GMT -5
Dicky, sounds like the normal situation, no worries there!  Thanks as always for dropping by and offering your support even if it does require a clean-up rag.  CB CB, I'm happy to have helped kick-start that UHU project for sure, I'm enjoying this 'little' project and paint has indeed begun to fly today, more on that later though. 
|
|
|
|
Post by wbill76 on Jan 20, 2014 17:07:25 GMT -5
Due to the Martin Luther King, Jr. holiday, here's a bit of a bonus update! The last little details needing to be taken care of involved the door to the pilot's storage compartment and the armored headrest. The compartment door is taken care of in Step 11 and installs after the fuselage is joined, so getting ready for paint beforehand saves some time later on. The headrest is dealt with in Step 12 along with the rest of the canopy details. Although not pictured in the shot below, I began the prep work on the canopy parts as well by dipping them in Future and setting them off to the side to dry/cure before they are masked and painted later on. 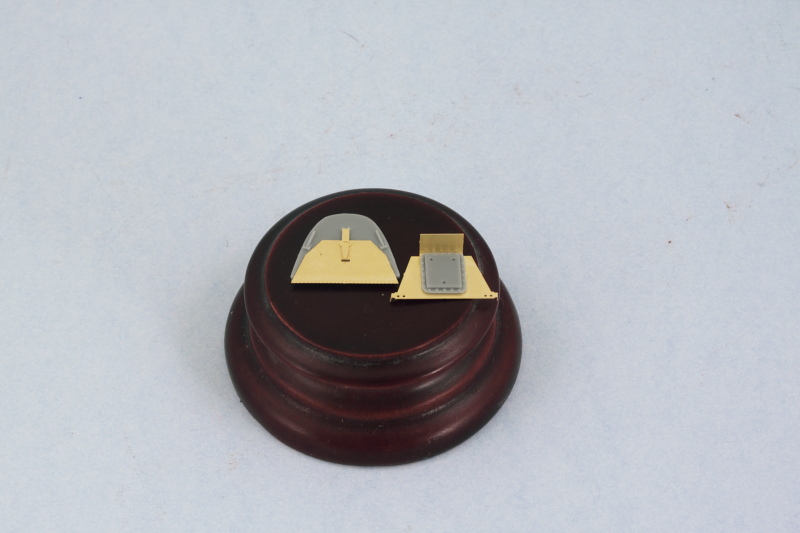 Then it was time to have some fun with the airbrush. Flat white and RLM 70 did the trick for the propeller blades and spinner. After the paint had dried, they were joined together and the cannon opening detailed with MM non-buffing Metalizer Gunmetal and a light dry-brushing of Steel. 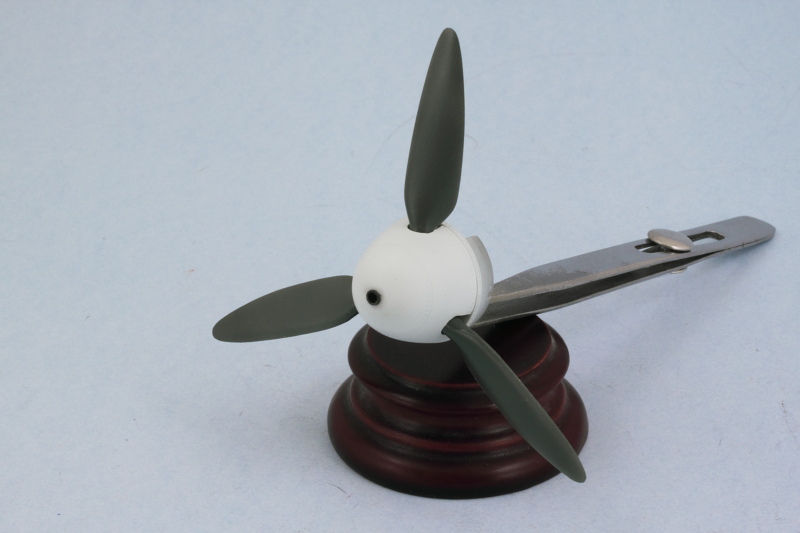 Wheel wells, landing gear struts, and gear doors got a dose of RLM 02 while the wheel hubs were done in Flat Black. 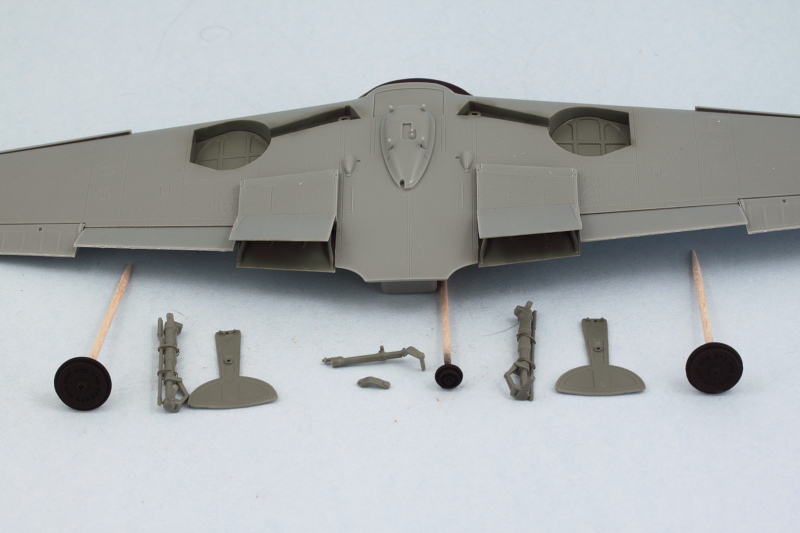 Rounding things out, the cockpit elements received their RLM 66 finish in anticipation of further detail work to come. 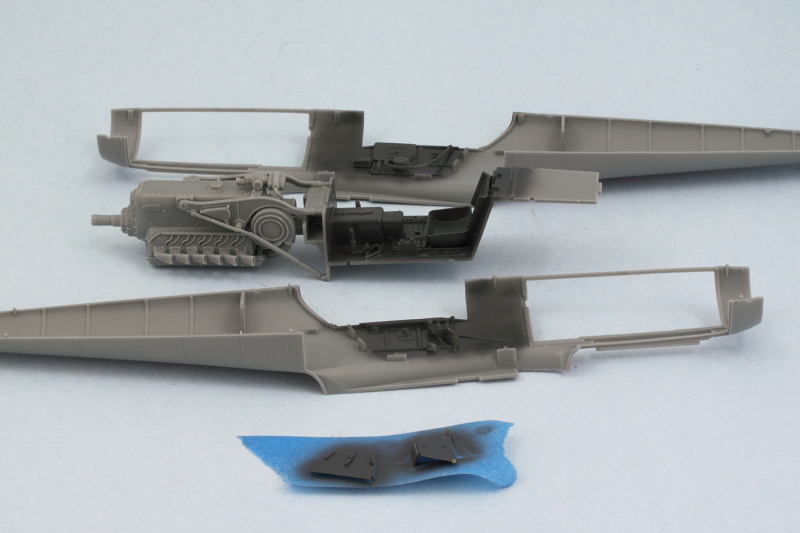 Paint has finally flown on this bird!  |
|
|
|
Post by wbill76 on Jan 20, 2014 17:34:53 GMT -5
Wooohoooo!!!! Some parts are different colours to the other parts - I love it when parts start to appear not the same as other parts of an originally similar hue  Me too! That kit-styrene gray was starting to get boring.  |
|
|
|
Post by wing_nut on Jan 20, 2014 18:47:34 GMT -5
Ahhhhh... PAINT!
I am at about the same paint stage as you Bill. And it's all coming back to me now that I am building a normal size airplane. Lots of color changes on the AB for aircraft Let's see on this open you and I have... RLM 02, 04, 66, 78 and 79 (with some back and froth on those) and balcks and grays and what ever for little nubbies of one color of another.
I need a small favor. Your engine has the pipe along the side with the ignition wiring molded on. Mine does not. And My Googling skill are lacking cuz I can find a very clear pic of these 2 pipes to see where the connect at the back. Can you snap some pics of both side of your engine for me please?
|
|
|
|
Post by wbill76 on Jan 20, 2014 20:11:27 GMT -5
Ahhhhh... PAINT! I am at about the same paint stage as you Bill. And it's all coming back to me now that I am building a normal size airplane. Lots of color changes on the AB for aircraft Let's see on this open you and I have... RLM 02, 04, 66, 78 and 79 (with some back and froth on those) and balcks and grays and what ever for little nubbies of one color of another. I need a small favor. Your engine has the pipe along the side with the ignition wiring molded on. Mine does not. And My Googling skill are lacking cuz I can find a very clear pic of these 2 pipes to see where the connect at the back. Can you snap some pics of both side of your engine for me please? No kidding Marc, half the time was spent just switching between colors today!  Here you go on the engine, HTH! 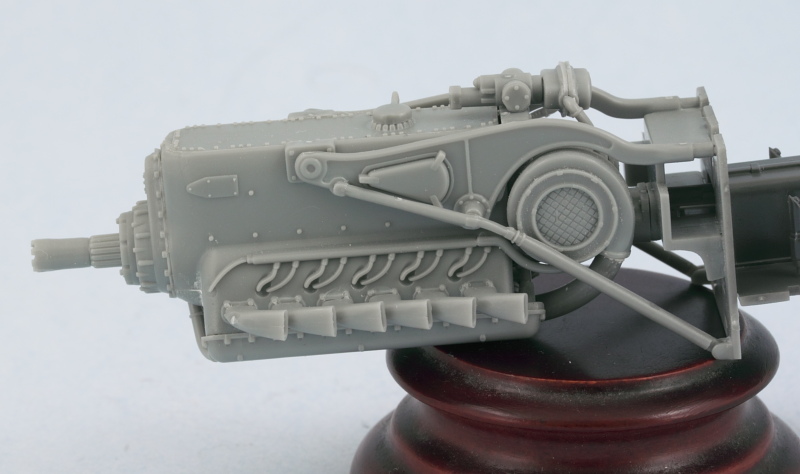 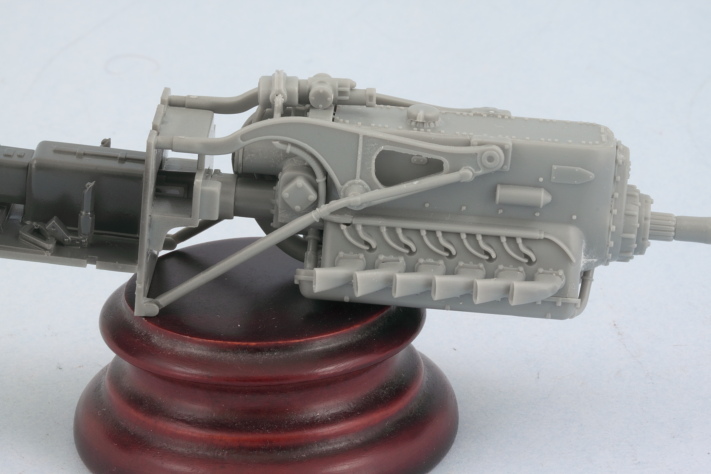 |
|
|
|
Post by bbd468 on Jan 20, 2014 20:14:28 GMT -5
Looks excellent brother Bill! Detail is really crisp on this kit, engine is very nice!  |
|
|
|
Post by wbill76 on Jan 20, 2014 20:33:28 GMT -5
Looks excellent brother Bill! Detail is really crisp on this kit, engine is very nice!  Thanks Gary! I was tempted, very tempted, to leave one of the side panels 'up' on the engine but ultimately decided against it for simplicity sake. No denying that Trumpeter provided a lot of detail for sure in the parts even if it's not 100% all there. |
|
|
|
Post by bullardino on Jan 21, 2014 2:24:04 GMT -5
Very nice progress, Bill. The RLM 02 tone looks great, it's one of the hardest tones to find. I suppose it's your usual make of paints.
|
|
Tojo72
Forum Moderator      Sept '24 Showcased Model Awarded
Member since: November 2012
Posts: 5,326
Member is Online
MSC Staff
|
Post by Tojo72 on Jan 21, 2014 9:04:18 GMT -5
Good progress Bill,looks good.
|
|
|
|
Post by wing_nut on Jan 21, 2014 10:09:04 GMT -5
Thanks Bill.. it does.
|
|
|
|
Post by wbill76 on Jan 21, 2014 12:12:38 GMT -5
Luigi, thanks as always! All the colors I'm using are in the Testors Model Master or Model Master II enamel line-up. Not sure if they have them all in their acrylic line as well but they tend to have the most popular ones in both so wouldn't surprise me if they did.  I've had to make a slight adjustment working with them, I'm used to all the paints being flat!  Anthony Anthony, thank you sir, slowly but surely!  Marc Marc, my pleasure, looking forward to seeing what you do with it. 
|
|
|
|
Post by deafpanzer on Jan 21, 2014 15:55:47 GMT -5
Nose and propeller looks GREAT!!! I love it when you post a bonus update... thank you MLK!
|
|
|
|
Post by wbill76 on Jan 21, 2014 17:57:11 GMT -5
My pleasure Andy!  |
|
|
|
Post by wbill76 on Jan 25, 2014 21:44:12 GMT -5
Made a lot of progress over the last few days working on the cockpit details a little bit at a time and then doing a lot of major assembly work today. First up, the pit details. I used the kit-supplied PE for the pilot's harness and detailed all the various buttons and knobs to provide some color. The rudder pedals that were done previously also got installed and then the instrument panel was put into its permanent position. I used the fuselage halves held together with rubber bands to ensure the IP and gun mounts were at the right angle as the attachment points to the engine firewall bulkhead aren't that deep or strong. 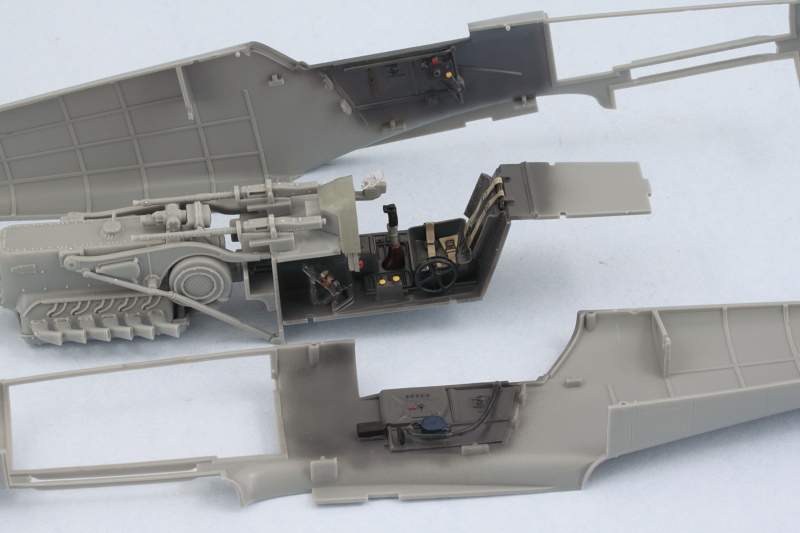 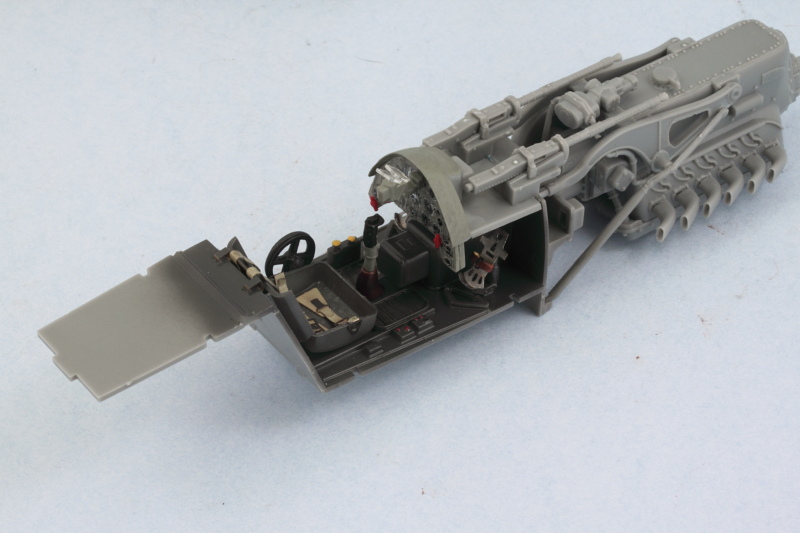  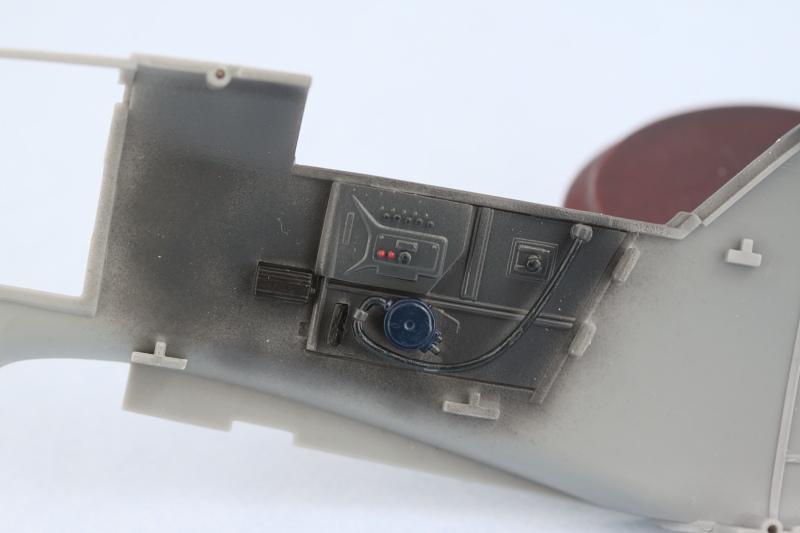 Then the moment of truth arrived, it was time to join the fuselage halves together. I added the tail wheel to the right side first and let that glue set up a little bit before joining the halves. Strategic use of rubber bands and smooth jaw clamps helped get a good join all around. I used a combination of liquid glue and regular glue as well on the different areas. 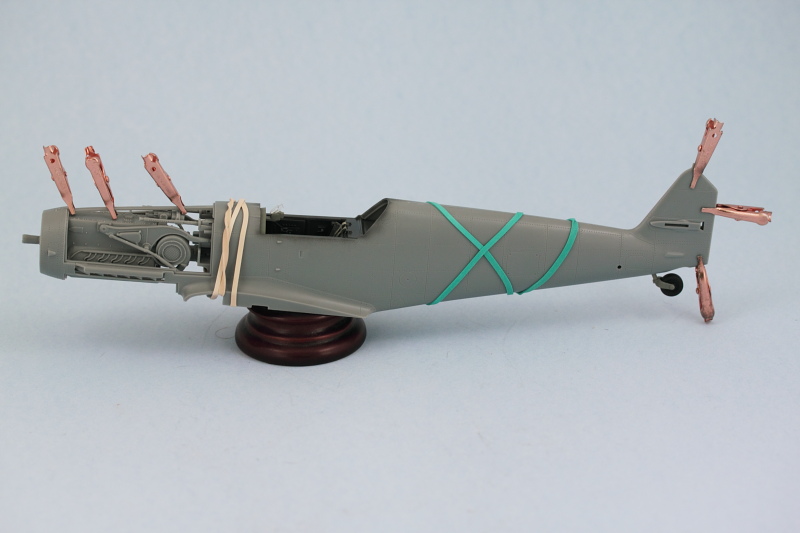 After about an hour for the glue to set, the clamps and bands were removed, the join was lightly sanded where needed, and then a very light pass of liquid glue applied over the sanded areas to remove the dust and fine scratches prior to painting. Then the real fun began with the engine cowls. The fit on these is generally good but both sides required careful use of finger pressure and liquid glue to get everything to line up properly and take the right shape. For the right hand cowl, I had to remove the middle portion of the lower engine mount, part L3 installed in Step 3, as it was keeping the cowl from fitting properly. Not sure if I introduced that issue or if it's a dimension flaw in the kit, but a quick snip with the sprue cutters removed the offending section easily enough. 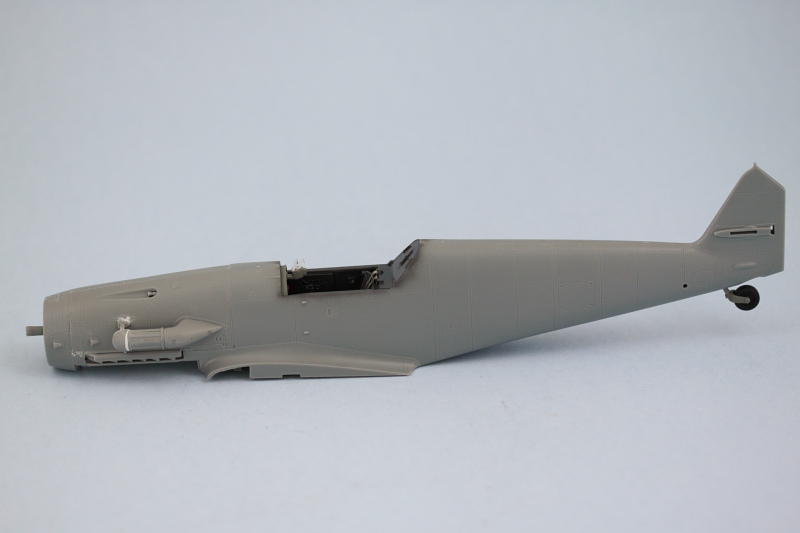 Next up was the wing installation. I knew from previous dry-fits that this was going to be more of a challenge to get a good join at the wing roots so was prepared for that. I had to use finger pressure and lift up on the wing undersides to get the top sides to mate up properly and close the gap, so for a good 15 minutes I sat at my bench and waited as there was no other way using either clamps or bands to get the correct tension on them to close it up. After the glue had caught enough to hold the right angles, I used small amounts of putty at the front of the joins on both sides to fill a small gap that couldn't be closed up otherwise. The gap on the left wing extended about 5mm in from the edge while the right wing was about 3x longer, just a function of the way the different sides came together. 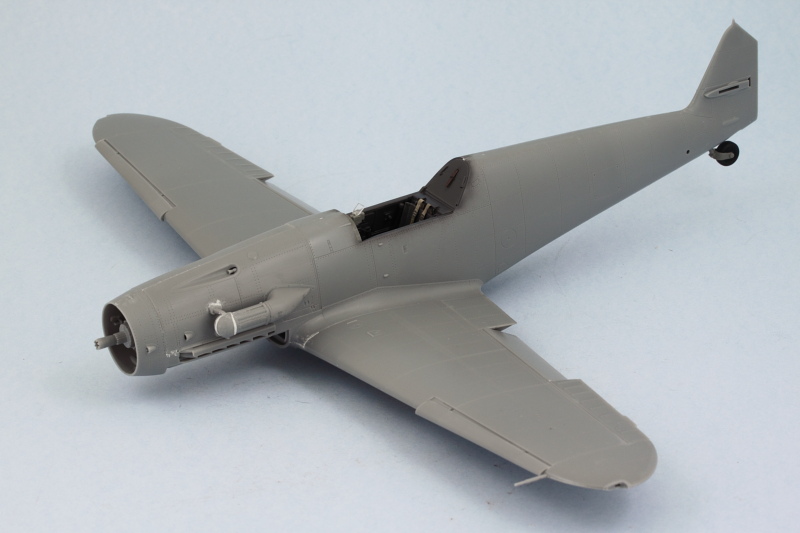 Last but not least, I dry fit the main landing gear struts so I could check to ensure everything was sitting level and installed the horizontal stabilizers at the rear. The rudder is dry-fit only just to make sure everything was playing nice back there. 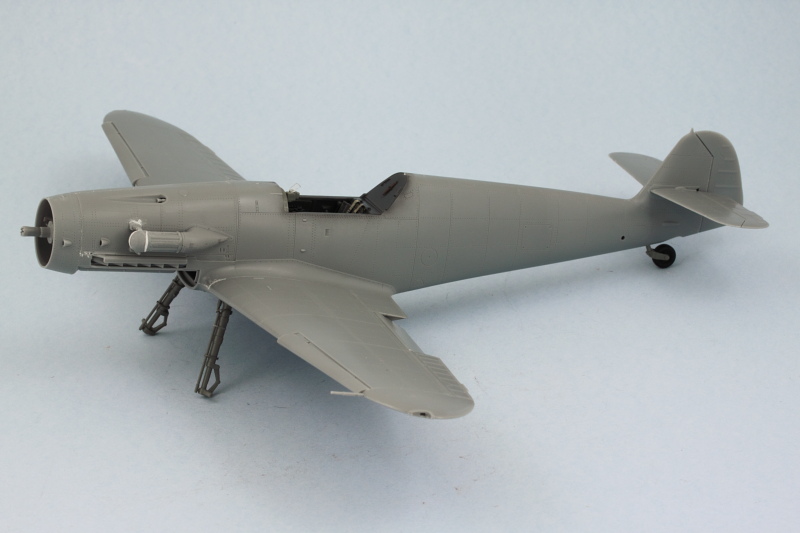 Tomorrow will see major paint work start in on the fuselage if everything goes according to plan. |
|
bigjohn
Reviews member    
Member since: December 2011
John Hale
Posts: 3,438
Dec 21, 2011 2:17:45 GMT -5
Dec 21, 2011 2:17:45 GMT -5
|
Post by bigjohn on Jan 25, 2014 22:26:53 GMT -5
Starting to look like something now Bill. great progress!
|
|
|
|
Post by bbd468 on Jan 25, 2014 22:31:23 GMT -5
Comin along nicely Brother Bill, cockpit looks very nice.  |
|
|
|
Post by Leon on Jan 26, 2014 0:04:16 GMT -5
Nice work all around Bill,really taking shape now  .I do have one question.What is the purpose of dipping the canopy in Future?  |
|
Deleted
Member since: January 1970
Posts: 0
Nov 25, 2024 12:40:44 GMT -5
Nov 25, 2024 12:40:44 GMT -5
|
Post by Deleted on Jan 26, 2014 6:10:09 GMT -5
Bill,some tidy work and good detailing going on here mate! I likee!!  Leon,the reason for dipping the canopy in the Future, is just so that it gives it a more 'scale' thinness(?)ie realistic appearance.  (On some canopies this isn't necessary) |
|
|
|
Post by wbill76 on Jan 26, 2014 10:47:01 GMT -5
BJ, and Gary, thanks as always gents! Leon, just to add a bit to what CB said, it also provides a 'goof' barrier when painting in the event that the masking bleeds under or suffers other mishaps and allows for that paint to be (carefully) removed if necessary. It also helps avoid finger prints or scratches marring the canopy in the process of handling. CB, thank you kindly sir! After all it's your fault this build is even taking place... 
|
|
|
|
Post by Leon on Jan 26, 2014 10:55:02 GMT -5
Cee Bee,Bill thanks for the info on the dipping in future ;)Noted for when i do a wingy.  |
|
|
|
Post by wbill76 on Jan 26, 2014 13:51:39 GMT -5
It's a trick I read about many moons ago Leon, happy to 'pay it forward'!
|
|
|
|
Post by bullardino on Jan 26, 2014 15:40:00 GMT -5
And also allows the use of CA glue on the canopy to attach PE. Wonderful job Bill, another gorgeous addition to your collection  |
|
|
|
Post by wbill76 on Jan 26, 2014 17:34:49 GMT -5
Thanks Luigi! You're right about the use of CA, Future prevents it from fogging due to the out-gassing as it cures.  I've been continuing my battle with it today...lots of little things have prevented painting but I'll have another update here shortly. |
|
|
|
Post by wbill76 on Jan 26, 2014 18:39:01 GMT -5
Everything went according to plan today except I didn't get to paint. That's because the remaining 'little' items ended up taking up the full session today to square away. The first area that consumed a lot of time was the canopy. The three clear parts had been previously dipped in Future but left on little sprue 'handles' to make it easier to work with them. Those handles were removed today and the small details added where needed in the different elements of the canopy. 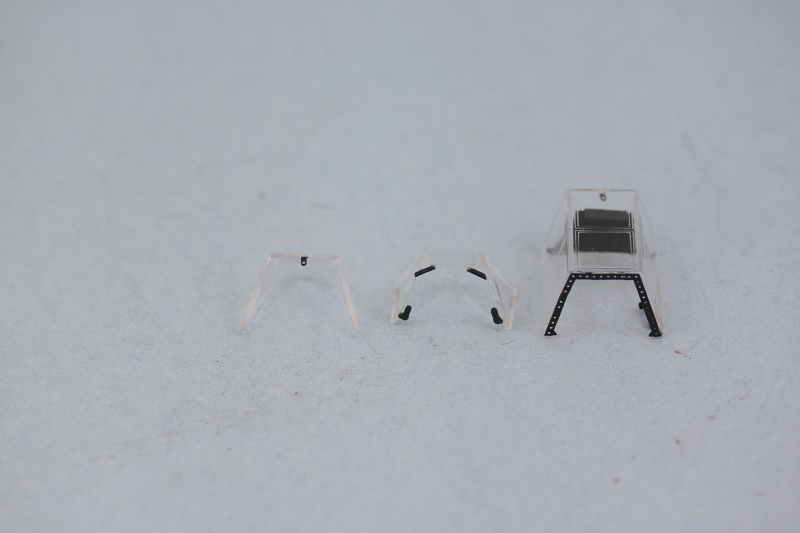 In hindsight, I probably should've waited to do this until after I had applied the Eduard masks as a couple parts broke loose while handling them during that process, but they were easily reattached. I had been toying with the idea of posing the canopy open but decided against that due to the complexities it would present in the paint and finish stages. This led to some small issues popping up in terms of the overall fit of the three pieces together and their alignment with the fuselage. The fit is ok but not perfect and while the three pieces fit tightly together, the fit of the front piece and the rear piece to the fuselage required some help after they were installed in the form of sanding and putty in different places. The other remaining detail to take care of was the bottom engine cowl panel. I had planned to paint it separately but after doing some test fits I realized it was going to need the same finger pressure/squeezing/coaxing attention with liquid glue that the top panels needed. Trying to do that with painted areas is a recipe for disaster so I went ahead and installed it in place, using some small amounts of putty on the underside to fill small gaps at the wing roots where it matches up with the wing sections. When it comes time to install the prop and spinner, I'm going to have to apply some tension to get the engine and drive-shaft to move into the correct alignment so that the spinner sits correctly in relation to the fuselage...but that will have to be done after painting as I need to be able to get at the areas around the exhausts for their detailing and also the masking demarcation for the blue/tan separation. I may just clip off the drive-shaft and attach the spinner directly, have to see which one is the easiest to do under the circumstances. Last but not least, I installed the main antenna mast, the smaller lower fuselage antenna, and the aileron counter-weights to get this ready to paint. 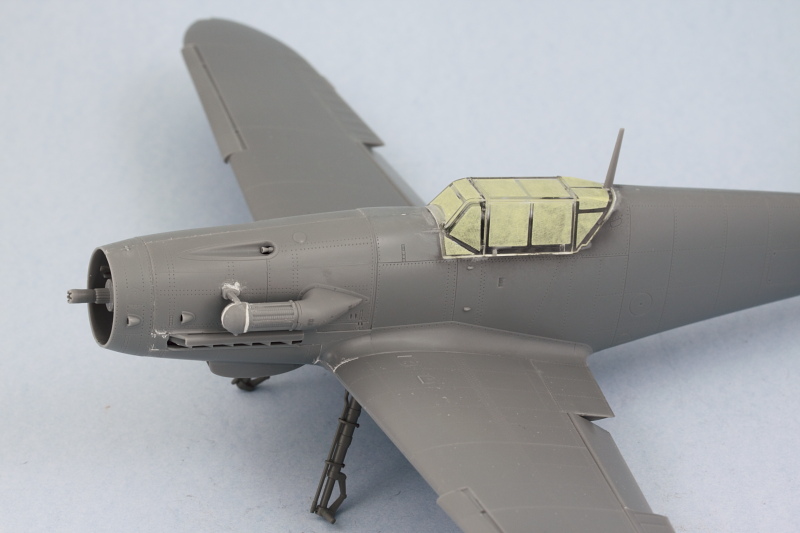 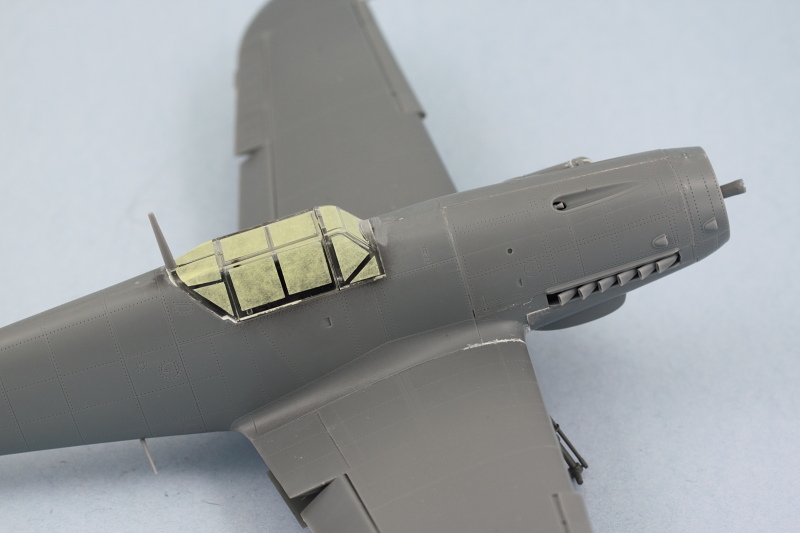 |
|