|
|
Post by wing_nut on Feb 25, 2014 9:05:35 GMT -5
|
|
|
|
Post by JimD on Feb 25, 2014 10:56:29 GMT -5
Bill, if you are just trying to highlight panel lines I'd recommend grabbing some Flory Wash. I use oil washes when I do armor, and they do work on planes, obviously, but I really like the nature of the Flory stuff. If you apply it over gloss you can pretty much wipe it completely off...leaving it only in panel lines. If you do it over a flat base then it will leave some pretty good staining too...depending on the look your going for determines what sort of base coat you'd use.
The best thing about it is that it's quick...and unlike oil you can leave it on a week and it will still rinse off. Just an idea if you plan to do a few aircraft.
|
|
|
|
Post by wbill76 on Feb 25, 2014 13:38:57 GMT -5
Thanks Marcel! Glad you like the results so far. Dupes, I see your point. The enamel wash does dry fairly quickly vs. say an oil wash or something similar like the Flory, so using the clean thinner approach is really the only way to do it with what I've got on hand to produce the result I'm after. Adding dish detergent to an enamel-based wash would definitely have some interesting results...probably not the desired ones however!  Marc Marc, the use of ground up pastels is an interesting one and not something I would've considered ordinarily, but it looks like it produces a good result! This is the only AC I have planned for anytime soon...and it's only because of a bet with CB, so it may be another decade before I build another, hard to say. As for proposals, you better be quick or Andy will beat you to it!  Jimmy Jimmy, appreciate the added info on the Flory stuff. This particular kit doesn't have panel lines in the traditional sense (although there are a few places that are true lines), the rivet lines are just that, individual rivet holes, and how Trumpeter molded them on the different surfaces has presented different challenges in terms of picking them out. The depth of the holes and their angle varies a bit on the fuselage vs. the wings for example. So far I've been successful in picking them out, just have the underside left to do now. I'm using a gloss coat (very rarely do I apply washes on flat surfaces unless I want a 'blooming' effect) with the Future and everything's flowing as usual on that and it's doing its job in protecting the undercoats from the thinner, so it's all good. As I mentioned above, it's likely to be a long time before I do another AC but will keep it the Flory product in mind for the future if things change!  |
|
|
|
Post by dupes on Feb 25, 2014 13:59:11 GMT -5
Yeah, that Flory / Promodeler stuff is nice - pretty much a pre-mixed sludge wash.
|
|
|
|
Post by ceresvesta. on Feb 25, 2014 14:01:06 GMT -5
Mighty good looking modeling here my friends! I am taking notes!!
|
|
|
|
Post by wbill76 on Feb 25, 2014 18:55:46 GMT -5
Thanks Phil! Hope you can learn from my experience...rule #1, never make a bet with CB!  |
|
|
|
Post by wbill76 on Feb 26, 2014 20:37:12 GMT -5
I've been sneaking in more time on the 109 in small doses as I continue to weather the rivets and panel lines, made for an easier process to complete the rest of the wing, fuselage, and underside surfaces remaining. Definitely glad to have this stage over with!   |
|
|
|
Post by bbd468 on Feb 26, 2014 20:41:06 GMT -5
GOOD GAWD!!! Thats looks amazing brother Bill, Impressive indeed!  |
|
|
|
Post by wbill76 on Feb 26, 2014 20:44:34 GMT -5
Thanks brother Gary! I'm still seeing spots from staring at all those rivets.  |
|
|
|
Post by Leon on Feb 26, 2014 20:59:33 GMT -5
Ditto what Gary said Bill,awesome looking results.   |
|
|
|
Post by wbill76 on Feb 26, 2014 21:27:02 GMT -5
Thanks Leon! Approaching the moment of truth when I find out if the Eduard masks did their job as advertised or not!  |
|
|
|
Post by deafpanzer on Feb 26, 2014 21:29:36 GMT -5
BEAUTIFUL! It will be a perfect 109th wife for me...
|
|
sabre
Full Member
  
Member since: September 2013
Posts: 414 
|
Post by sabre on Feb 26, 2014 21:32:18 GMT -5
Lovely work on the Hans Joachin Marseille's ME Bf-109 F-4 Trop, you've done an understanding job on the panel lines wbill76.
Some times it pays not to cut corners and judging by the result you have achieved on this Bf-109 all your hard work has really paid off for you mate.
I can't wait to see this infamous No.14 unmasked.
|
|
|
|
Post by wbill76 on Feb 26, 2014 21:39:28 GMT -5
Andy, watch out for wing_nut, he's already got his proposal rehearsed and has been spotted pricing out diamond rings!  Sabre Sabre, thanks very much for the kind words! Tomorrow will be the day of destiny after I let this sit overnight and give it another look over before sealing it with the flat coat.
|
|
|
|
Post by JimD on Feb 27, 2014 0:05:48 GMT -5
Stunning work, sir. I think part of me is glad you don't intend to do more wingy things...it will be a lot easier to not have to live up to this quality all the time when I post my builds  |
|
|
|
Post by wbill76 on Feb 27, 2014 12:22:07 GMT -5
Stunning work, sir. I think part of me is glad you don't intend to do more wingy things...it will be a lot easier to not have to live up to this quality all the time when I post my builds  Thanks Jimmy! No worries there, I'm definitely itching to get back to building something with tracks and road wheels.  |
|
|
|
Post by ceresvesta. on Feb 27, 2014 12:52:00 GMT -5
GOOD GAWD!!! Thats looks amazing brother Bill, Impressive indeed!  Garry! Stop stealing my lines!   Brother Gary is speaking the truth Bill  word!! word!! |
|
|
|
Post by wing_nut on Feb 27, 2014 13:05:40 GMT -5
Do you, wing_nut, take 109F-4 as you lawfully wedded model?
I do.
Do you, 109F-4, take wing_nut, as you lawfully wedded modeler?
Jawhol.
I now pronounce you... Modeler and Model. You may take the model and makes ZOOMING noises around your room.
|
|
|
|
Post by ceresvesta. on Feb 27, 2014 13:07:18 GMT -5
That would make an awesome wedding picture book  |
|
|
|
Post by wbill76 on Feb 27, 2014 14:48:36 GMT -5
Do you, wing_nut, take 109F-4 as you lawfully wedded model?I do. Do you, 109F-4, take wing_nut, as you lawfully wedded modeler?Jawhol. I now pronounce you... Modeler and Model. You may take the model and makes ZOOMING noises around your room. Awww...what a lovely couple!  Better than ending up with fire-crackers strapped to the undersides!  Phil Phil, glad to have you supporting Brother Gary!  |
|
|
|
Post by bullardino on Feb 27, 2014 16:51:10 GMT -5
Lovely result Bill. Don't forget to add the exhaust stains  |
|
|
|
Post by wbill76 on Feb 27, 2014 16:57:22 GMT -5
Lovely result Bill. Don't forget to add the exhaust stains  Thanks Lui! Those were added already in an earlier stage using black artist pastels.  Took the masks off today and am just touching up a couple of spots and adding the final details...so almost done with her!  |
|
|
|
Post by deafpanzer on Feb 27, 2014 17:04:43 GMT -5
Why is Bill's 109 hiding in my basement? And she is in her bridal dress... I think she ran away from a wedding. What should I do with her?  Bill, hurry you can manage to finish it and add it to MoM to make everybody life more "interesting". (devil laughter) |
|
|
|
Post by bullardino on Feb 27, 2014 17:05:10 GMT -5
 This pic shows why I thought you already had to add them  |
|
|
|
Post by wbill76 on Feb 27, 2014 17:10:25 GMT -5
Andy, be careful, Marc knows where you live!  Lui Lui, I've got that same reference pic but when I looked at the originals and other photos of #14, a lot of what shows up in that colorized version is shadow and not actual exhaust/soot accumulation IMHO. I did add some exhaust staining up to the edge of the access panel area as that seems about right but didn't pull it any further back other than using the pin washes to also bring out the line/rivet detail at the wing root join.
|
|
|
|
Post by wbill76 on Feb 27, 2014 18:33:49 GMT -5
Thanks Dicky! I thought you would be pleased, after all it's a Trumpeter kit...and we all know how you feel about that!  |
|
Deleted
Member since: January 1970
Posts: 0
Nov 25, 2024 15:21:46 GMT -5
Nov 25, 2024 15:21:46 GMT -5
|
Post by Deleted on Feb 27, 2014 19:00:51 GMT -5
|
|
|
|
Post by wbill76 on Feb 27, 2014 19:25:45 GMT -5
Ha! Nice try there Mr. CB!  Just for you, the closing bow.  The moment of truth finally arrived today. After a few minor adjustments to the previous rivet/panel lines, everything was sealed with a coat of Testors Lusterless Flat in the spray can. Then the Eduard masks were carefully removed on the canopy. They did their job pretty well, just a few small areas needed touch up here and there.  Then it was on to some of the remaining details. I used some Mig Gulf War Sand pigments on the landing gear because, well, you can't have a DAK subject without some dust, right? I also installed the wingtip navigation lights using Tamiya Clear Red inside the base of the clear piece for the left wing and Clear Green for the right wing. After the clear parts were installed, I brushed some Future over them to give them a nice clear look.  Last but not least, the main antenna mast and the smaller side antenna were finally installed and painted to match the rest of the aircraft. The small angled antenna in particular is in a tough spot, very easy to knock it off during handling (the voice of experience, I'm very lucky not to have lost it at least half a dozen times!).  That's all she wrote on this one! All done now. 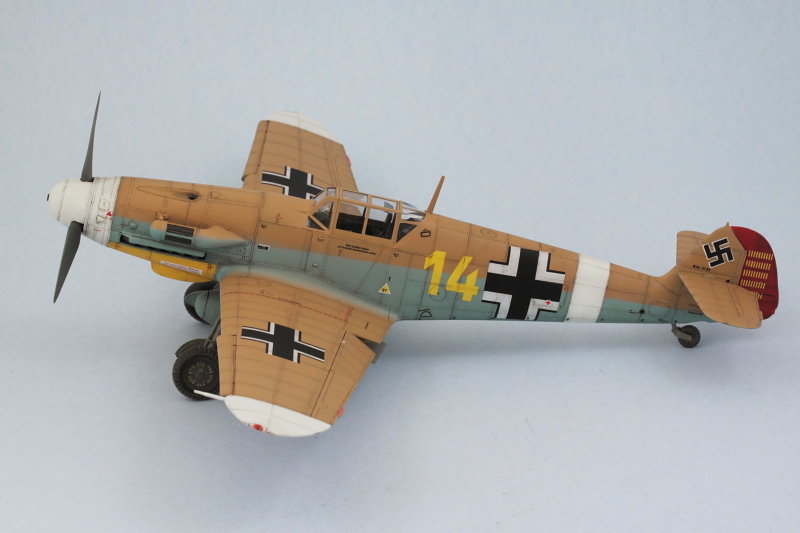 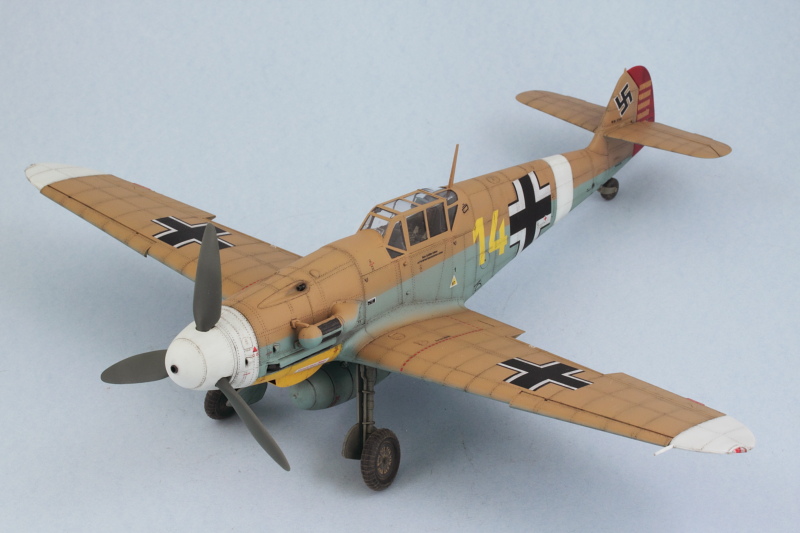 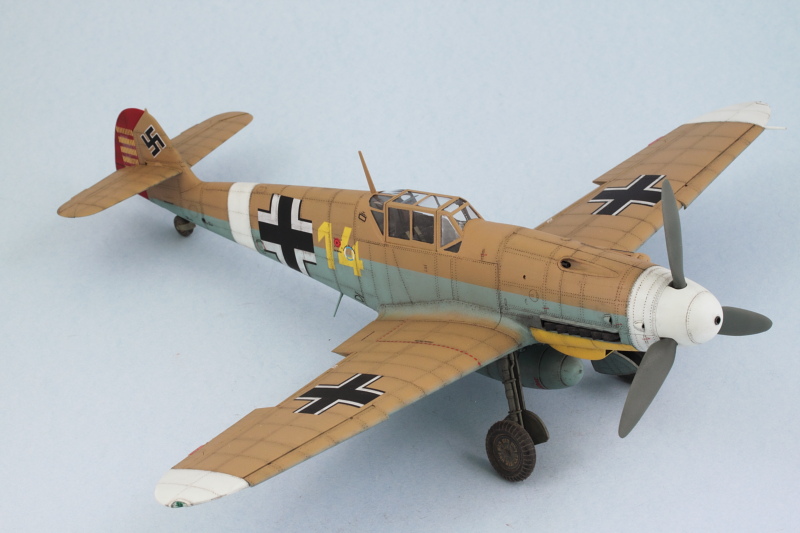 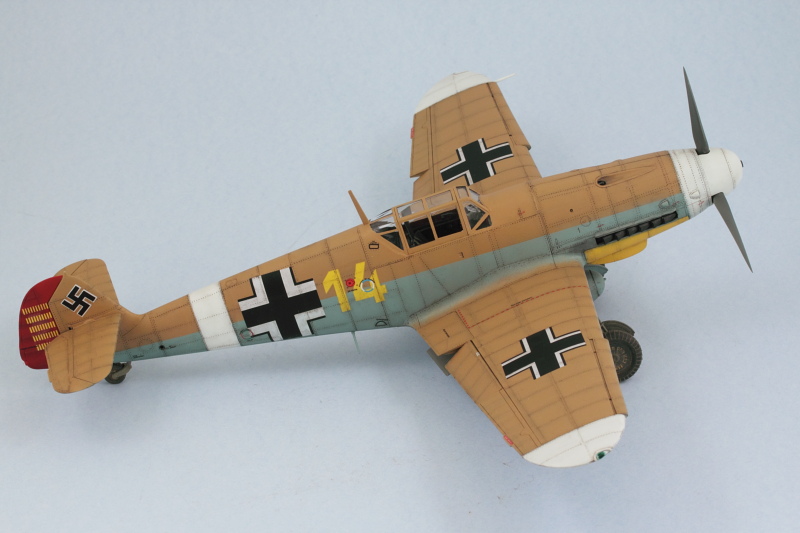 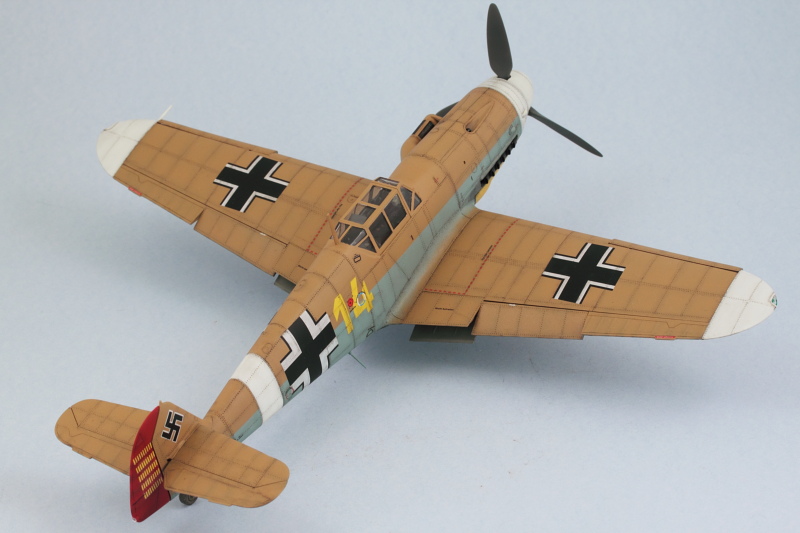  |
|
|
|
Post by fightnjoe on Feb 27, 2014 19:40:22 GMT -5
my jaw hurts.
looks incredible bill.
joe
|
|
|
|
Post by wbill76 on Feb 27, 2014 20:37:16 GMT -5
Thanks Joe! Just don't send me the dentist bill...  |
|